Overview
This guide will go over perks, enemies, controls, terminology, and weapons in detail. It also gives the reader a few hints, tricks, tips, and tactics you can employ on the battlefield to help bring you and your team to victory.So if you want a couple pointers, or if you’re new to the game, or whatever other reason you may have to want to start yourself off on the path to getting good, give this guide a try.Shoutout to steamfirst.com for being so kind as to put this guide on their site!http://www.steamfirst.com/an-in-depth-guide-to-killing-floor/
Something to remember
This guide was written with the beginner to hard difficulties in mind. If being able to play well on suicidal and hell on earth is your goal, this guide will only help so much.
Terms and Controls to Know
Some of these keys and terms may be incredibly obvious to you, but some people are casual new to shooters or multiplayer in general.
For more terms, check the comments section for Remulzan’s lists.
General Terms:
Zed = A specimen, such as a clot, bloat, or gorefast
Z.E.D = A weapon, dont confuse the two
SC = Scrake
FP = Fleshpound
Patty / Pat / Kevin = Patriarch
“Go demo” = “You should switch your perk to the demolitions expert”
Dosh / Quid = Money
Pipe(s) = Pipe Bombs
Sharp = Sharpshooter
Bers, Zerker, Zerk = Berserker Perk
SS = Support Specialist Perk
Straight Rush = Rushing a patriarch so that he can’t run away to heal
Demo = Demolitions Expert Perk
Weapon Terms:
Schneidzekk (Vector) (Zek)
Flare Revolver (Fr) (Flare)
Katana (Kat)
Claymore (Cm)
Buzzsaw Bow (Bbow)
EBRM14 (M14)
Crossbow (Xbow)
Lever Action Rifle (Lar)
Ak 47 (Ak)
SCARMK17 (Scar)
FN-FAL (Fal)
Commands (by default):
W = Move forward
A = Move left
S = Move backwards
D = Right
Space Bar = Jump
= Drop your currently held weapon for somebody else to use
Q = Heal yourself with your syringe
B = Drop 50 quid / euros / whatever for someone else to use
F = Take out a weapon that has a flashlight on it and automatically turn the flashlight on
V = Voice Commands
R = Reload
Y = Type in a message and send it to your team
G = Throw Grenade
C = Toggle Crouch
Clicking the mouse wheel = Alt-Fire
Left Click = Fire / Shoot / Hit
Right Clicking = Look down the sights of a weapon
Caps Lock = Hold in to use voice chat
1 = Switch to melee weapon
2 = Switch to handgun
3 = Switch to tier-3 weapon
4 = Switch to tier-4 weapon
5 = Switch to Medical Syringe / Welder
Scrolling the mouse wheel = Another way to select your weapons and tools
Perks
In Killing Floor, you have the option to choose a perk in-between waves, which are basically specializations / classes. For example, Someone who has the demolitions perk selected deals more damage with their explosives, and enjoys discounts on demo weapons. not obvious at all
To level these perks up, you have to complete certain objectives related to that perk. For example, Medics need to heal people to rank up. (Keep in mind that you don’t have to get all of the requirements for a perk rank up in one game.)
I’ll give you a summary of what each perk does, as well as give you a few tips to help you be successful on the battlefield with each perk.
Note: All perks get discounts on their related weapons
Field Medic: Team doctor. Your medical syringe recharges faster and heals more. Heal anyone and everyone, and dont be afraid to use your mediguns’ rechargeable alt-fire (Healing darts). Keep the weaker zeds at bay, and use your healing grenade to heal your entire team quickly. Gains extremely protective armor at rank 6; scrakes and fleshpounds deal pitiful amounts of damage while the armor lasts.
Tip: Use the medigun darts to heal players, and use the syringe to heal yourself.
Tip: On the final wave, you can switch to field medic (if it’s rank 5 or 6) and buy a crossbow to deal quite a bit of damage to the patriarch. Doing this gives you Medium-High DPS and the best armor in game, which can make you credit to team.
Common Courtesy: If you see a teammate being targeted by a fleshpound / scrake, try to take the hits for them. Your armor is stronger and cheaper, and your team will thank you for it. Just don’t f*ck up and take unnecessary hits.
Support Specialist: Shotgun Expert. Support Specialists get extra carrying weight, which allows them to carry many weapons. Support Specialists also enjoy extra grenade capacity and damage. NOTE: While they do get welding bonuses, this doesn’t mean you should weld every damn door you come across. Supports on low difficulties can deal with nearly any zed with anywhere from little to moderate effort. Try to get the AA12 as soon as possible to deal with bigger zeds. Hunting shotguns one-shot scrakes at later perk levels on low difficulties.
Tip: The AA12 has two settings; Fully automatic, and semi-automatic. Never use full auto. Instead use semi-auto and click as many times as needed. This helps with both the gun’s recoil and ammo conservation.
Tip: Grenades can blow down welded doors quickly, so don’t hesitate to use one or two if you need to gtfo.
Tip: Try throwing a clusterf*ck of grenades at fleshpounds, and then finish them off with your shotty.
Sharpshooter: xXxPr0Sn1p3rxXx of the team. Can take out any zed with minimal effort (Up to hard difficulty, after which they start to have trouble with Fleshpounds.) Arguably one of the most powerful perks. It takes 1-2 headshots with a crossbow as a sharpshooter to kill just about any specimen up until suicidal and hell on earth modes.
Tip: Keep a crossbow or M14 in your loadout in later waves to deal with Scrakes and Fleshpounds. And for the love of god, don’t waste bolts on single clots like a plebeian.
Myth: “The anti-material rifle (M99 AMR) is the best weapon to fight the patriarch with.” The crossbow deals more DPS, is cheaper, and weighs less. The M14 deals even more DPS and is even lighter than the crossbow. In short, the M99 is utter crap.
Common Courtesy: If you see a sharpshooter trying to line up a headshot on a zed, don’t shoot the zed in question. This will only make it harder for the sharpshooter to score headshot(s) on the enemy.
Commando: Assault rifle user or “Recon” of the team. Can spot Stalkers and see enemy health from a distance. Assault rifles are effective for crowd control of most zeds, but not Fleshpounds or Scrakes. Keep pressure off of your team and let them know how wounded power enemies are, especially the Patriarch.
Tip: You can use a SCAR and a crossbow to have some versatility; even though you’re using the crossbow off-perk, you can still 2-3 shot a Fleshpound or Scrake if every bolt is a headshot.
Berserker: The juggernaut of the team. Runs fast when using melee weapons and has damage resistance to everything. Berserkers of all levels are too cool to be grabbed by clots. Early level berserkers can take out zeds up to scrakes. At later levels, they can take on Fleshpounds without being touched, and can even kill the Patriarch by themself without getting hit a single time*. Arguably one of the most OP perks. Melee weapons have no upkeep cost, so once you buy a axe or sword, thats it, no worrying about ammo. Berserkers can stagger scrakes with every katana hit on normal or beginner, making it possible to kill a scrake without being hit once.
*With much skill while on the beginner, normal, and hard difficulties
Tip: Alt-Fires from fire axes, claymores, the Dwarfs!? Axe, and the scythe stun scrakes, as long as they are hit on the head.
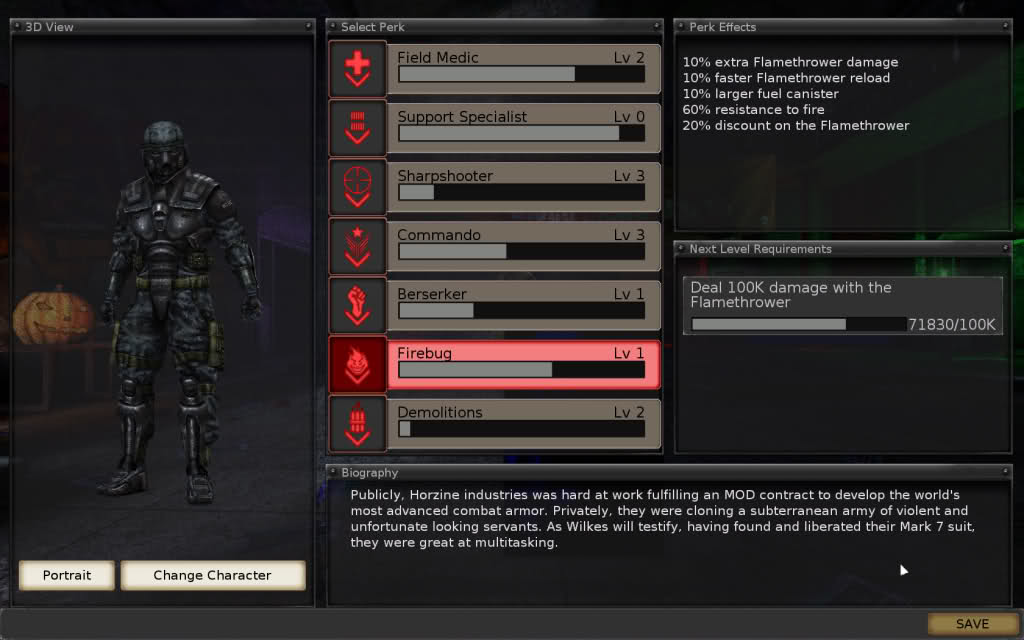
Firebug: Specializes in fire-based weapons, and is a supporting / crowd control class. Gets incendiary grenades later on in the perk levels. Ignited enemies either die from burn damage or are weakened to be taken out by another weapon or player. After a zed has been ignited for a set amount of time, (s)he will become charred. This will hinder their movement and cause them to stop chasing you and flail around like a 200 pound 8 year old whose mother refuses to give him cake. Charred enemies turn red and black from being burned, and are very easy to spot. Firebugs at later levels are immune to fire damage.
Tip: Don’t fire a flamethrower on full-auto unless it’s an emergency. Instead, use short bursts for smaller enemies, and use full-auto for scrakes, fleshpounds, and patriarchs as needed.
Tip: Light the Patriarch on fire to both possibly slow him down via charring and allow your teammates to see him while cloaked. (His rump catches fire while cloaked. Not joking.)
Demolitions: Specializes in explosives. Uses grenade launchers, pipe bombs, grenades, and the LAW. Takes out groups of zeds with ease. Fleshpounds take vastly increased amounts of damage from explosives as opposed to other weapons. Directs hits with grenade launchers are often fatal. Gains resistance to explosives, and can carry more grenades.
Tip: Throw a regular frag grenade or 2 before shooting your grenade launcher at your target to deal incredible amounts of damage.
Tip: Scrakes, behind accidental explosive suicide, are one of the major problems that demos have to face. It is highly reccomended that you leave the Scrake alone and alert your team so that someone suited for the job can take it out. If you absolutely must take the Scrake out, then try to score headshots with your grenade launcher(s). This will deal increased damage.
Tip: Jump and aim before shooting your grenade launcher to get your grenades in the best location to do the most damage to as many zeds as possible.
Myth: “The LAW is the weapon you want to have for the patriarch.” The M32 (6 chamber grenade launcher) Does more DPS than the LAW, Is cheaper and lighter, and has a smaller radius so that you wont be hurting yourself as much.
Common Courtesy: Don’t be that guy that mashes LMB with the M32 in a hallway. Every time you blow something up, that dust cloud gets bigger and thicker. Nobody likes being blind, you asshat.
That’s it for perk-related information.
“What difficulty should I play on?”
That depends on your skill level and your perk level.
A good rule to follow is “If you cant solo it, don’t play it.”
If you can’t handle yourself then you aren’t helping your team, you’re hurting them.
If you’re just starting out, play on Beginner until you get a perk to level 1 or 2.
Then you can move on to Normal.
Once you feel comfortable with that, and have a rank 2-3 perk, you can move on to Hard.
From there, If you feel like playing on suicidal, bring a rank 4-5 perk or else people will get mad.
Finally, HoE is usually for rank 5-6 perks, but if you’re really good you can get away with lower.
People tend to get a bit butt-flustered at you if you join high difficulties with low perks.
Weapons, Pt 1 (Basic, Sharp, Medic)
In this section-series, we will be going over the various tools of destruction you will be using to burn, shoot, gib, slash, bash, impale, and blow up all sorts of zeds.
We’ll begin with the basic starting gear.
Equipment

The 9mm handgun
Your basic handgun, nothing special. Has a decent fire rate, and can be dual wielded. Good for taking out small zeds in one or two headshots.
Ammo: 15 to a clip, 30 if dual wielding, 7 clips extra (14 if only using 1 handgun)
Pros:
Good fire rate
High clip size
Has a flashlight for dark areas
Cons:
Relatively weak
Not good for bigger zeds

The Combat knife
Your starter melee weapon, again, nothing special.
Ammo:N/A
Pros:
Good for decapiating smaller zeds with alt fire
Run faster when using this, or any other melee wep
Cons:
Not very strong
Not much reach
The Medical syringe
This is what keeps you and your team going, whip it out and heal yourself or someone else with it. You need 100 pts to use on yourself, and 50 for a teammate. It restores 20 HP on use, more if the healer is a medic. If used when playing alone, it will restore 50 HP. It regenerates at ~8 points per second.
The Welder
This is how you stop zeds from coming through doors. Shut a door, use the tool, and hold LMB. If your charge on the welder falls too low, your weld speed will drop dramatically. Support specialists have more charge on their welders, enabling them to weld doors faster and for longer periods of time.

The Grenade
Throw one of these, and anything in roughly a 15 ft radius will be eating shrapnel. Medics have healing grenades, when thrown, they emit a green cloud. Standing in the cloud will regenerate you and your team’s HP. Zeds also tend to avoid the cloud, as it poisons them.
At level 3 firebugs get incendiary grenades, which have a decent radius and will light multiple zeds on fire.

Combat Armor
CA doesnt stop your HP from being damaged, but will greatly reduce damage taken. A medic’s armor is much stronger than any other class’ armor, making the medic able to tank damage better than other classes. Armor can be bought and repaired at the trader, or found on the map.
Field Medic weapons

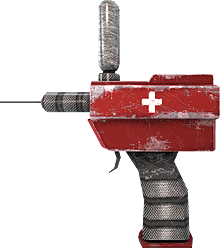
The MP7M Medic gun
The MP7 is the first medigun. It has a high rate of fire, high recoil, and a decent clip size. As with all mediguns, alt fire launches a healing dart.
Ammo: 20 per clip, 19 extra clips
Pros:
High rate of fire
Cheap
Cons:
High recoil
Burns through ammo quickly
Low dmg per bullet
Very expensive if bought off-perk (3000 euros)

The MP5 Medic gun
The MP5 is the second medigun. With a high clip size, decent damage, and faster recharge rate on alt fire syringes than other mediguns, this makes an excellent medic weapon.
Ammo: 32 per clip, 12 clips extra
Pros:
High ammo count
Fast syringe recharge
Cons:
Low damage per shot
Slow reload
Incredibly expensive if bought off-perk (5000 euros)

The M7A3 Medic gun
The M7A3 is something of a battle rifle. Rate of fire isn’t that high, but it does the most dmg per bullet of any medigun.
Ammo: 15 per clip, 20 extra
Pros:
Great stopping power
Med-high reserve ammo
Cons:
Low clip size
Medium-Low rate of fire
Expensive
High recoil
Slower syringe recharge
Weighs 6 blocks
Ridiculously expensive if bought off-perk (7500 euros)

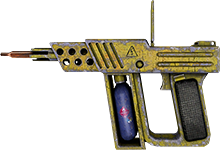
The Schneidzekk Medic gun
The Schneidzekk has great damage, a high fire rate, and doesnt weigh much, but burns through ammo like no other gun and is very expensive.
Ammo: 25 per clip, 13 clips extra
Pros:
Great damage
High fire rate
Low weight
Fastest syringe recharge speed in game
Cons:
Expensive
Low reserve ammo
The most expensive item in the game (10,000 euros, 1300 at max medic rank)
Sharpshooter weapons

The Lever-Action rifle
The lever action is a dependable rifle. Due to its good stopping power, excellent accuracy, and its low cost, this is a great weapon, regardless of perk.
Ammo: 10 chambered max, 70 extra
Pros:
High ammo count
Great stopping power
Great accuracy
Cheap
Cons:
Slow reload

The .44 Revolver
The .44 is your average revolver, 6 to a clip with good accuracy and stopping power, and can be dual wielded. Also penetrates targets.
Ammo: 6 per clip, 12 if dual wielding, 21 clips extra
Pros:
Good stopping power
Penetrates
Dual wieldable
Fast fire rate
Cons:
Slow reload, especially when dual wielded
Low magazine capacity

The MK23
The MK23 is a reliable back up pistol, and is an excellent choice when dual wielded due to its fire rate and high capacity.
Ammo: 12 per clip, 24 if dual wielded, 24 clips extra
Pros:
High capacity
Can be dual wielded
Low recoil
Decent damage
Cons:
Slowest reload of all dual pistols when dual wielded
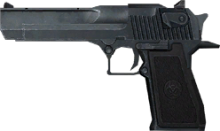
The Handcannon
The handcannon is exactly what the name implies. It has power, a good fire rate,
and pierces enemies. Its a formidable back up weapon.
Ammo: 8 per clip, 16 if dual wielding, 10 clips extra
Pros:
High power
Pierces enemies
Can be dual wielded
Cons:
High recoil
Low ammo count
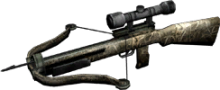
The Compound Crossbow
The compound crossbow is a sharpshooter’s pride and joy. It’s extremely damaging bolts can kill an entire row of zeds in a single shot, and can kill a scrake or fleshpound with little effort.
Ammo: 1 chambered max, 36 extra
Pros:
Extremely damaging, can instant-kill fleshpounds and scrakes
Has a scope for long range
Penetrates targets
High reserve ammo
Fast reloads
Cons:
Scope limits visibility when zoomed in
Ammo is a bit expensive
Weighs 9 blocks

The M14 EBR
The EBR is a semi-automatic carbine, and can deal with small and large enemies alike. It also sports a Laser sight, used with alt fire.
Ammo:20 per clip, 7 extra clips
Pros:
High ammo per clip
Laser sight
Low recoil
Good power
Highest DPS of all sharpshooter weapons
Fast reloads
High reserve ammo
Cons:
Constant firing lessens accuracy
Weighs 8 blocks

The M99 AMR
The M99 is a deadly but expensive anti-material rifle for sharpshooters.
Ammo: 1 chambered, 24 reserve shots
Pros:
Exceptional stopping power
Med-High amount of reserve ammo
Highest damage per shot in game
Cons:
Long reload speed
Knocks player backwards on shot
Most expensive ammo in game (250 Euros a bullet)
Very Heavy (13 blocks)
Weapons, Pt 2 (Berserker, Support, Z.E.D)
In this section we will be going over the berserker’s and support specialist’s weapons, as well as the Z.E.D.
Berserker

The Machete
The machete is the cheapest and lightest berserker weapon that a player can get a hold of (Excluding the knife). It has slightly more reach than the knife and can decapitate medium-sized zeds with the alt-fire.
Pros:
Cheap
Very Lightweight
Fast swing speed
Cons:
Short range
Low damage

The Axe
The axe is a balance of weight, speed, damage, reach, and price.
Pros:
Decent reach
Decent damage
Decent speed
Cheapish
Cons:
Vertical Alt-Fire makes it nearly impossible to kill more than a zed at a time

The Katana
The katana is a very fast, very light weapon that can mow through crowds with ease.
Pros:
Decent reach
Fast speed
Lightweight
Cons:
A bit pricey
Damage is a bit underwhelming

The Claymore
The claymore is the powerhouse of the melee weapons.
Pros:
Great reach
Great damage
Cons:
Expensive
A bit slow

The Chainsaw
The chainsaw is a unique melee weapon as it has two types of attacks; the primary fire revs it up and hits enemies multiple times very quickly for decreased damage, and the alt-fire swings the chainsaw at an enemy, hitting it once for massive damage.
Pros:
Great for closed in areas
Primary fire keeps lighter enemies staggered so that they cant hit you
Alt-fire has highest DPS of all berserker weapons
Cons:
Expensive
Heavy
Does not give player the “Melee weapon movement speed boost”

The Scythe
The scythe is the longest reaching melee weapon, and is known for its ability to kill 5+ zeds in a single swing.
Pros:
Amazing reach
Decent damage
Altfire hits everything in a 180 degree arc in front of you
Cons:
Slowest of all the melee weapons

The Dwarfs!? Axe
The dwarfs axe is an odd little weapon. Primary fire sends zeds flying through the air, and altfire turns zeds into mist (But only when enough damage is done to kill it)
Pros:
Funny as hell
Altfire knocks back enemies
Cons:
Laughter may make it hard to play the game
Is basically a crappier claymore with some special effects thrown on it
Vertical altfire

The Buzzsaw Bow
The Buzzsaw Bow is the only berserker weapon that fires a projectile. It shoots out buzzsaw blades that will drop to the ground after a time, and will ricochet off of walls, floors, and ceilings before finally coming to a stop. You may retrieve the buzzsaw if you walk over it.
Ammo: 1 loaded, up to 15 reserve
Pros:
Great damage
Great weapon for fleshpounds, scrakes, and the patriarch
Penetrates through enemies
Ricocheting often causes collateral kills
Does double damage on headshot
Cons:
Somewhat expensive ammunition
Expensive
Heavy
Slow reload speed
Support Specialist
Note: All weapons listed here are ineffective at longer ranges unless stated otherwise.
(I know someone is gonna say something along the lines of “well duh, they’re shotguns”, but whatever, i’ll take that risk.)

The Shotgun
The basic shotgun is a pump-action semi-automatic cartridge shotgun that holds 8 shells to a mag. Each shell has to be reloaded individually. It has a rechargeable flashlight.
Ammo: 8 loaded, 40 reserve
Pros:
High damage
Good fire rate
Cheap
Cons:
Slow reloads
Heavy

The Hunting Shotgun
The Hunting Shotgun is a double barreled shotgun that has the highest damage per shot of all other shotguns. Players can fire off both barrels at the same time with alt fire.
Ammo: 2 loaded, 44 reserve
Pros:
Excellent damage
Great for scrakes
Cheap
Cons:
Very heavy (10 blocks)
Incredibly inaccurate
Cannot be reloaded until both barrels are fired
Somewhat expensive ammo
Slow reload

The HSG-1
The HSG is a semi-automatic pump-action magazine-fed shotgun that has an adjustable bullet spread.
Ammo: 12 in a mag, 3 reserve mags
Pros:
When set to tight spread, very effective even at long ranges
Good fire rate
Great damage
Fast reloads
Adjustable spread
Lightweight (For a shotgun)
Affordable (On-Perk)
Cheap ammo
Cons:
Somewhat low reserve ammo

The Combat Shotgun
The Combat Shotgun is a semi-automatic shotgun with a red-dot sight and flashlight attachment.
It’s mostly the same as the regular shotgun stat-wise.
Ammo: 6 loaded, 42 reserve
Pros:
Faster fire rate than shotgun
Good damage
Cons:
Slow reload speed
Very low magazine size
Heavy

Vlad The Impaler
VTI is a magazine-fed nailgun. Nails fired from the gun ricochet off of surfaces a few times before disappearing.
Ammo: 6 in a mag, 7 mags extra
Pros:
Attached flashlight
Fast reload
Ricocheting projectiles
Cons:
Low magazine size
Relatively low damage
Heavy

The AA12
The AA12 is any specimen’s worst nightmare. It is a fully-automatic combat shotgun with high damage, rate of fire, and clip size, which all come together to make one hell of a weapon.
Ammo: 20 in a mag, 3 extra mags
Pros:
Best raw dps weapon in game
Best Support Specialist shotgun hands-down
Semi-Auto / Full-Auto settings
Fast reloads
High mag size
High rate of fire
Decent damage (Per shot)
Cons:
Incredibly expensive
Very Heavy (10 blocks)
Low reserve ammo

The Zed Eradication Device
The Z.E.D is a very unique classless weapon that has two attack modes previously unseen in Killing Floor. The primary fire shoots out energy projectiles that travel to their target at a somewhat slow velocity, and the alt-fire shoots out a beam of energy that instantly travels to it’s target and slows it down by roughly 70%. The gun also has a motion tracker radar that a player can use to keep an eye on troublesome enemies, and a green laser sight. Needless to say, this gun, in addition to being really cool, makes the patriarch a cakewalk.
Ammo: 100 to a.. Screw it, we’ll just call it “Active ammo”
Active ammo: 100
Inactive ammo: 300
Pros:
Altfire slowing debuff makes fleshpounds, scrakes, and the patriarch himself virtually defenseless for the duration of the debuff
Semi-Fast reloads
Extremely large clip size
Somewhat fast fire rate
Cons:
Expensive (2000 Euros, cannot get a discount)
Primary fire does very little damage per shot
Heavy
Not usable unless unlocked from xmas achievement
Weapons, Pt 3 (Comm, Firebug, Demo)
In this section, we will be going over the weapons for the commando, firebug, and demolitions expert perks.
Commando

The Bullpup
The Bullpup is the cheapest commando weapon. It is, like every other commando weapon, an automatic rifle that has a HOLO sight attached. Like all assault rifles, it can be set to semi-auto or full-auto by using the secondary fire.
Ammo: 40 in a clip, 9 reserve clips
Pros:
Incredibly Cheap
High-Capacity mags
Very fast reloads
Ammo is cheap
Low recoil
Holo Sight makes it easier to aim
Cons:
Worst damage-per-bullet of all commando weapons
Not effective against anything bigger than a gorefast

The Tommy Gun
The Tommy Gun is a classic submachine gun that owners of the community weapon pack DLC can buy.
Ammo: 30 in a clip, 9 reserve clips
Pros:
Somewhat cheap
Lightweight for an assault rifle (5 blocks)
Low recoil
Reliable for weaker zeds
High fire rate
Cons:
Low damage per bullet
Not effective against bigger zeds

The M4 Carbine
The M4 is an assault rifle with an aimpoint sight.
Ammo: 30 in a clip, 13 reserve clips
Pros:
High ammo capacity
Very accurate
Cheap
Scope makes it easier to aim
High fire rate
Cons:
Low damage per bullet
Not effective against bigger zeds
High recoil when fired on full-auto

The AK47
It’s an AK47, I shouldn’t have to tell you anything.
Ammo: 30 in a clip, 9 reserve clips
Pros:
Decent damage per shot
Decent DPS
Accurate
Cheapish
Easy to use iron sight
Decent fire rate
Cons:
Looks stupid
Is outclassed by the MKB42 in damn near every way
The MKB42
It’s an assault rifle with an iron sight, enough said.
Ammo: 30 in a clip, 9 reserve clips
Pros:
Accurate
Great DPS
Fairly priced
One of the best weapons to go full-auto with
Great fire rate
Great damage per shot
Cons:
Quickly burns through clips

The Scar
A powerful assault rifle.
Ammo: 20 in a clip, 14 reserve clips
Pros:
Best damage per bullet of all assault rifles
Can oneshot crawlers
Amazing headshot weapon
Running out of ammo is rare
Easy to use sight
Light (5 blocks)
Cons:
Low clip size

The FNFAL
A battle rifle fitted with an ACOG scope.
Ammo: 20 in a clip, 14 reserve clips
Pros / Cons:
It’s basically a scar that deals 5% less dmg per bullet but is more accurate, has less recoil, fires faster, and has an actual scope.
Firebug
The Mac 10
A machine pistol that sets people on fire when used by a firebug for magical unknown reasons.
Ammo: 30 to a clip, 9 reserve clips
Pros:
Cheap
Lightweight
High fire rate
Cons:
Laughable damage, even with rank 6 firebug

The Flamethrower
A thrower of flame.
Ammo: 100 to a tank, 3 reserve tanks
Pros:
High DPS
Amazing crowd control
Cheap
High rate of fire
Incredibly large magazine size
Cons:
Heavy as hell (10 blocks)

The Flare Revolver(s)
A revolver that has been modified to shoot out flares instead of petty bullets. Neat!
Ammo: 6 / 12 to a clip, 21 / 10 reserve clips
Pros:
Badass
Great DPS when dual wielded
Great damage per shot
Cheap
Ultra Lightweight
Cons:
Accuracy is subpar unless only using one
The Trenchgun

A shotgun that shoots incendiary rounds.
Ammo: 6 loaded / 48 reserve shots
Pros:
Great for dealing with tough targets
Great damage per shot
Affordable
Cons:
No crowd control whatsoever
Heavy (8 blocks)

The Husk Fireball Launcher
A Husk’s arm-mounted cannon. The longer you charge it, the bigger the explosion radius and damage, and the more ammo is used. Fully charges in 2-3 seconds. Ammo cost depends on charge time.
Ammo: 150-240
Pros:
Explosion radius is huge when fully charged
Massive damage on direct hits
Pretty much wrecks all lightweight enemies it hits when fully charged
Cons:
Heavy (8 blocks)
4000 Euros to buy
The Demolitions Expert

The M79
A Single-Barrel grenade launcher.
Ammo: 1 loaded, 23 reserve
Pros:
24 grenades that explode on impact for lods of edamage
Deals Insane amounts of damage when 2-3 grenades are tossed at the target beforehand
Running out of grenades is a rare event
Cons:
A bit pricey off-perk (1250 euros)

The M32
A multi-chambered semi-automatic grenade launcher.
Ammo: 6 loaded, 30 reserve
Pros:
6 Grenades can be fired off in 2 seconds for ridiculous damage
Completely plows through crowds
Cons:
Long reload times and frequent reloads
A bit pricey (2500 Euros)
A bit heavy (7 blocks)

The Pipe Bomb
Proximity Triggered Explosive devices.
Ammo: 2 (Capacity goes up with demo levels)
Pros:
Extreme damage in a large area
Buying it gives you two pipebombs. You can lay one down and find an ammo box to get another pipe bomb for infinite pipebombs.
Can stack pipebombs on top of each other for a total of ~10,000 damage for 12ish pipes
Nearly weightless (1 block)
Cons:
Expensive if you don’t use the ammo box method mentioned above

The M4 203
It’s an M4 that has an attached grenade launcher.
Ammo: 30 bullets in a clip, 9 reserve clips; 12 grenades
Pros:
You get an assault rifle and a grenade launcher in one weapon
Cons:
Bullet damage does not increase with demo perk, and therefore the actual gun is laughably bad
Way too expensive for what it offers at 3500 euros
Cannot toggle between semi and full auto
See the M4’s entry for more

The LAW
I sure hope you like large open maps.
Ammo: 1 rocket loaded, 10 in all (capacity goes up with perk levels)
Pros:
It’s a ♥♥♥♥♥♥♥ rocket launcher.
Surprisingly affordable
Massive AoE
Very high damage
Crowd and Fleshpound destroyer
Cons:
The only other things you’ll be able to carry are pipe bombs or a machete
Reccomended Loadouts
At first I was against the idea of having a section like this, but then I got to thinking about how people’s efficiency might improve from trying certain loadouts. Keep in mind that these are not perfect. You can thank Rem for this section coming into existance.
Medic
#1: Schneidzekk, Katana, Lever-Action Rifle
#2: Dual Flare Revolvers, Crossbow
Berserker
#1: Katana, Axe, Lever Action Rifle
#2: Claymore, Buzzsaw Bow
Sharpshooter
#1: EBRM14, Lever Action Rifle
#2: Crossbow, Dual Handcannons OR Dual MK14s
Commando
#1: SCARMK17, Crossbow
#2: SCARMK17, MKB42
#3: SCARMK17, FN-FAL
Support Specialist
NOTE: THIS VARIES HEAVILY BASED ON PERK LEVEL
#1 Hunting Shotgun, HSG
#2 Hunting Shotgun, AA12
#3 AA12, HSG
#4 Combat Shotgun OR Regular shotgun OR HSG, M79, Hunting Shotgun (M79 for grenade detonations that deal lods of edamage)
Firebug
#1 Flamethrower, Dual Flare Revolvers OR Mac 10
#2 Husk Cannon OR Trenchgun, Mac 10, Flare revolver
Demolitions Expert
#1 M79, Lever Action Rifle, Pipe Bomb, Katana
#2 M32, Lever Action Rifle, Pipe Bomb
Specimens, Pt 1 (Trash Mobs)
In this section, I’m going to show you what you’re up against.
Note: Unless otherwise stated, you should attempt to aim for a specimen’s head.
Warning: Specimens behave differently on Suicidal and Hell on Earth difficulties.

The Clot
Clots are the most common enemies of Killing Floor. Weak, slow, and barely dangerous, they are nothing more than nuisances.
However, there is strength in numbers. When coupled with stronger enemies, clots can be the cause of your untimely demise.
Clots have little health and can be killed with a single headshot from nearly any weapon. When within reach of you, they will grab and claw at you and keep you in place until you break free or kill them. Berserkers, however, are immune to this ability. You can jump free from the grab. They are seen in every wave, and come to protect the patriarch.
Basically, shoot at them until they die. Nothing special about these guys.
The Bloat
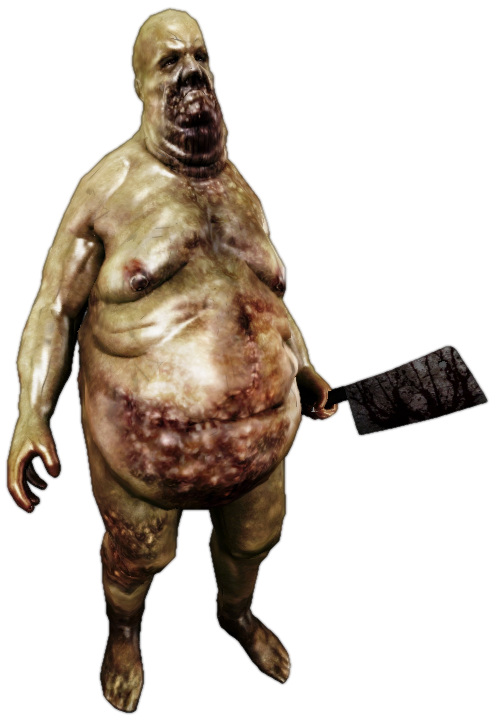
Bloats are large, slow moving, resiliant, and disgusting to look at. They have two attacks: They vomit up corrosive acid onto targets at a short distance, and use their cleaver to attack players in melee range. Once a player has been puked on, a visually impairing distortion will come on screen and hinder your view of what is in front of you while dealing damage over the length of the effect.
On top of that, their bodies will explode on death if you dont bleed them out via headshot, covering all nearby players in acid.
Their bodies are tough, but their head comes off relatively easily. Shoot at their head until it comes off, then just let them bleed out. However, even after having their head shot clean off, they can still attack, so don’t get too close!
Bloats are seen in every wave aside from the Patriarch wave.
The Gorefast

Gorefasts are stronger and faster than clots. They are roughly 2-3x stronger than clots, and can charge at you when you’re within a certain distance of them. When they are within melee distance of a player, they will attempt to rapidly slash at them twice with their arm-blade. This move does quite a bit of damage to a player, and can kill you very quickly. They also appear to have a slight resistance to explosives.
Gorefasts appear in every wave aside from the Patriarch wave.
The Crawler
Crawlers are humanoid creatures that scurry along the floor at a normal pace. When they get close enough, they leap at the player, dealing low amounts of damage. Crawlers are incredibly weak and can be killed in one to three shots by almost any gun. They’re more annoying than anything else, but don’t let your guard down; an unseen crawler swarm can quickly cause things to take a turn for the worse.
Berserkers have an incredibly hard time trying to kill them, as they are difficult to hit with any sort of melee weapon. As a result, many berserkers despise crawlers.

Crawlers are found after the first wave of any length setting, and come to protect the Patriarch.
The Stalker

Stalkers are female zeds that have a cloaking device which allows them to become semi transparent. They run a bit faster than a clot, but are actually weaker. The real problem is seeing them before they sneak up on you. Keep an eye out for them, especially when playing the demo perk (accidental explosive suicide isn’t fun, kiddos). The Stalker runs up to you while cloaked, and then breaks out of cloak to claw at you, doing a small amount of damage.
Stalkers appear after the first wave of any length setting, and come to protect the patriarch.
The Husk

Husks are somewhat large zeds that shoot fireballs at you via their arm-mounted cannons. They are somewhat tough, a bit slow, and have incredible accuracy. The cannon will lead you on, so moving in the same direction is never a good idea. The cannon deals initial explosive damage and then ignites the player for a short time. One direct hit deals about 15 damage. The Husk also will attempt to club you with his arm if you get within melee range. Triggering his swing and then moving out of harm’s way can be a viable tactic for stopping him from shooting at other players while you try to dispose of him. Husks only take 25% damage from fire weapons, so firebugs may have trouble dealing with him. Husks are a bit hard to kill, so a medium-sized weapon (Like a lever-action, handcannon, shotgun, or assault rifle) is ideal for taking a Husk out.
Say, for example, you see a husk charging up a shot. Let’s say you were walking right. If you continue to walk right after he shoots, it has a 99% chance to hit you.
Now let’s change “Continuing to walk right” to “changing direction and walking left after he shoots”. The only chance he has of hitting you is if you’re incredibly close to him and are backed up against a wall.
Jumping over the shot is also possible, but very tricky and risky.
Husks appear after the first few waves on any length setting.
The Siren

Sirens are malnourished female zeds that use their screams and teeth to attack players. They walk slowly towards the player(s) and, when close enough, will emit a ear-piercing scream that disorients players, disables grenades, pipebombs, and other projectiles, and goes straight through body armor, dealing HP damage based on how close she is to you. The closer you are to her when she’s screaming, the harsher the disorientation, and the more damage is dealt to you. Despite appearances, The Siren is a somewhat resilient zed. Her head has almost as much health as her body. If you can decapitate her in a single shot, then do so. Otherwise, just shoot at her body so you can land more shots quicker. If a player gets within melee distance of her, she won’t scream; instead, she will bite at the player. This can be useful at times. Attempts to jump while in the area of effect of the scream will drag you closer to the Siren for some reason.
The Siren appears in waves 3-7 / 3-10 of medium and long length games, and in waves 2-4 in short length games.
CONT.
Specimens, Pt 2 (Power enemies)
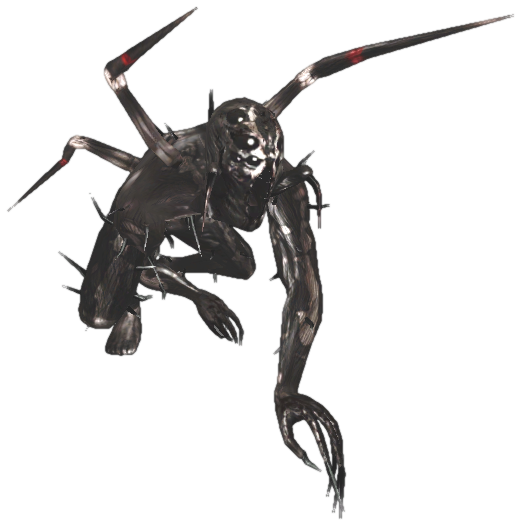
The Scrake

Scrakes are very resilient, very fast, and very dangerous. Scrakes can kill a player in a matter of seconds with its arm-mounted chainsaw. They walk towards the closest player they see, and when damaged enough, will go into a frenzy and charge at whoever last shot / hit it. It is impossible to outrun an enraged scrake unless you are a medic or berserker, and even then it’s impossible on any difficulty higher than normal. It has two attacks; It can swing its chainsaw back and forth at the player dealing a large amount of damage, or it can use it similarly to how a player would use the chainsaw’s primary fire (roughly 2 hits a second for varying amounts of damage). Try to let the level 3-6 perk users take the scrake out, preferably a sharpshooter, berserker, or a firebug that is using a husk cannon. If you absolutely have to kill a scrake, Shoot at it a little bit at a time, reloading inbetween bursts, so that you can deal the most damage to it before it rages. When it rages, just unload mags into it until it dies.
In case you didnt read the note at the top of part one before, Aim for the head.
Scrakes are found in the later waves of a game; waves 3-4 on short, 5-7 on medium, and 5-10 on long.
The Fleshpound
The Fleshpound is a gargantuan roid-raging monstrocity that can and will instantly wreck unprepared players. When enraged, fleshpounds move 2-3x faster and deal 2-3x more damage. It is resistant to nearly all forms of damage, has a great deal of health, and is incredibly fast. Fleshpounds wet themselves at the sight of explosives; in fact, it’s their one and only weakness. They take 2.33x damage from direct hits with grenades and pipe bombs, and 2x damage from direct body / head shots with the LAW. As such, demos or zerker kites are somewhat necessary for higher difficulties. If it hits you, and you dont have body armor, chances are you’re dead. For up to hard mode, a sharpshooter with a crossbow can take down a fleshpound in 1-3 headshots. For suicidal and hell on earth, the crossbow deals reduced damage to the fleshpound, and is no longer a viable option if you’re playing with others.
If there isn’t a Demo, Sharpshooter, or a berserker that knows how to kite availible, get as many people as you can to nuke him with grenades. If it’s still moving, shoot at it until it dies.
Fleshpounds rage if:
1. They do not attack after a certain period of time while a player is in sight.
2. They receive damage over a certain threshold inside of about 2 seconds.
Hitting the FP does NOT reset his rage timer. Only two things will reset the timer:
1. Get out of his line of sight.
2. Allow him to attack. (He doesn’t have to score a hit on you, just has to attack.).
Therefore, a medic or a zerk (due to their enhanced speed on higher levels) can kite a FP with nearly any weapon if they have the running room and the patience (and the skill). Their speed will allow them to get out of the way of a FP’s swing attack, thereby resetting his rage timer and avoiding damage. Any other class is, sadly, too slow to do this. Therefore they will have to rely on a lot of objects to get out of the FP’s line of sight, and avoid dealing excessive damage in under 2 seconds.
Fleshpounds are found in the later waves of a game: wave 4/4 on short, waves 5/7 to 7/7 on medium, and waves 7/10 to 10/10 on long.
FINAL WAVE INCOMING
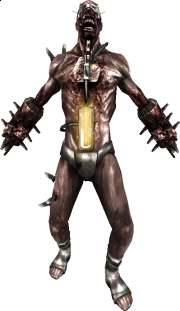
The Patriarch
Meet Kevin. Kevin is the CEO and Founder of Horzine Biotech, the company you’ve been cleaning up after. He was hired by the Government to create the perfect soldier, the ultimate killing machine, devoid of emotions, fears, and feelings. Kevin didn’t appreciate you murdering his family.

Sure looks like fun.

Let’s go over what he can hit you with:
-Pointy Tentacles(?)
-Claws
-Chaingun
-Rocket launcher
He also:
-Goes invisible
-has three 50% heals
Read the following and you’ll suck less.
Kevin has massive amounts of health that go up by anywhere from 1500 (Beginner) to 5250hp (Hell on earth) per player on the server. His chaingun, which he fires in 3 10-round bursts, will shred you in under a second at close to mid range, so if you see him spinning it up, duck behind a trash can or whatever other type of pitiful cover you can find in the split second you have to live. Him saying “One in the pipe” Is never a good thing. As soon as you hear that line, duck behind a wall. If no walls are available, try to trick him into firing his missile off to the side of you as you would trick a Husk. Just keep in mind that a missile is much faster than a fireball, and that a direct hit will go far beyond simply setting you on fire. He can hit you roughly three to four times (Fewer times on Suicidal and HoE, More times on Beginner). Once you lose your armor, you are vulnerable. Get hit one, maybe two more times after that, and you’re through.
Never, ever, ever surround the Patriarch. If three or more players are in melee distance, he will use a very powerful spin attack that will more than likely get someone, if not everyone, killed. If the patriarch has to come through a welded door, he will blow through it with his missile launcher. This deals some damage to him and buys your team a couple extra seconds to get ready for his arrival. Once you deal enough damage to the patriarch, he will go down on one knee, cloak, and retreat. He will try to find a secure location to heal himself. He will also summon zeds to protect him after he heals. He summons clots on the first heal, Clots and crawlers on the second heal, and clots, crawlers, and stalkers on the third heal. After he heals, he usually likes to cloak and run up to one of the players, come out of cloak, and smack them halfway across the room. Afterwards, if no players are within melee distance, he will usually charge up his chaingun and mow your startled team down in seconds. This tactic he uses wipes many a party out, so be prepared to run up to within melee distance of him to prevent him from using his chaingun. Once he uses his last syringe, he will not run away any more. Most of the time, he won’t heal more than once or twice, but bigger games with more players can be iffy. Stick together, heal each other, keep up with and avoid his attacks, and eventually he will go down.
If you want to be a loser and the patriarch has under 10,000 hp, go demo and stack as many pipes as you can on top of each other, then make him walk over them for an easy win which you did not in any way shape or form deserve to get you filthy casual
Video Demonstration of Berserker Kiting
Voice Script/Editing/Gameplay: Remulzan
Narrator: Xehanoth
rem’s script had spelled slowly “slowely” which is why I said it like I was mental
Killing Floor.mp4
Feedback + Contributors
This section has absolutely nothing to do with Killing Floor.
I’m always looking to improve myself, whether it be as a player or as a guide writer. If you think you have a tip or two for me, Or spotted an error in what I currently have out, or even if you found a typo or grammatical error, Please let me know.
Contributors:
Ruckus: Information, Editing out a few errors, Giving me a guest pass to try out this great game. Without him, I never would have even thought of getting Killing Floor. Also for being a pretty cool guy.
FF: Giving me BOTH of his guest passes so I could play for just a bit longer before I was able to buy the game, Helping me out with the weapons section, Information, and being a bro.
xmodius [Cipher]: For informing me of the fleshpound’s rage mechanics, and explaining how FP kiting works
Remulzan: For perk-related tactics / common courtesy suggestions and lods of eterms
Captain Toaster: Pointing out errors in the guide, suggesting a term
IamTheSpy!: Helping out with multiple weapon sections
Your name here: Help the guide out and have your name listed here.