Overview
Only three more Zeds, three more guides. Just a side note, if there is a guy at your door claiming to be a door to door chainsaw salesman, he’s lying.
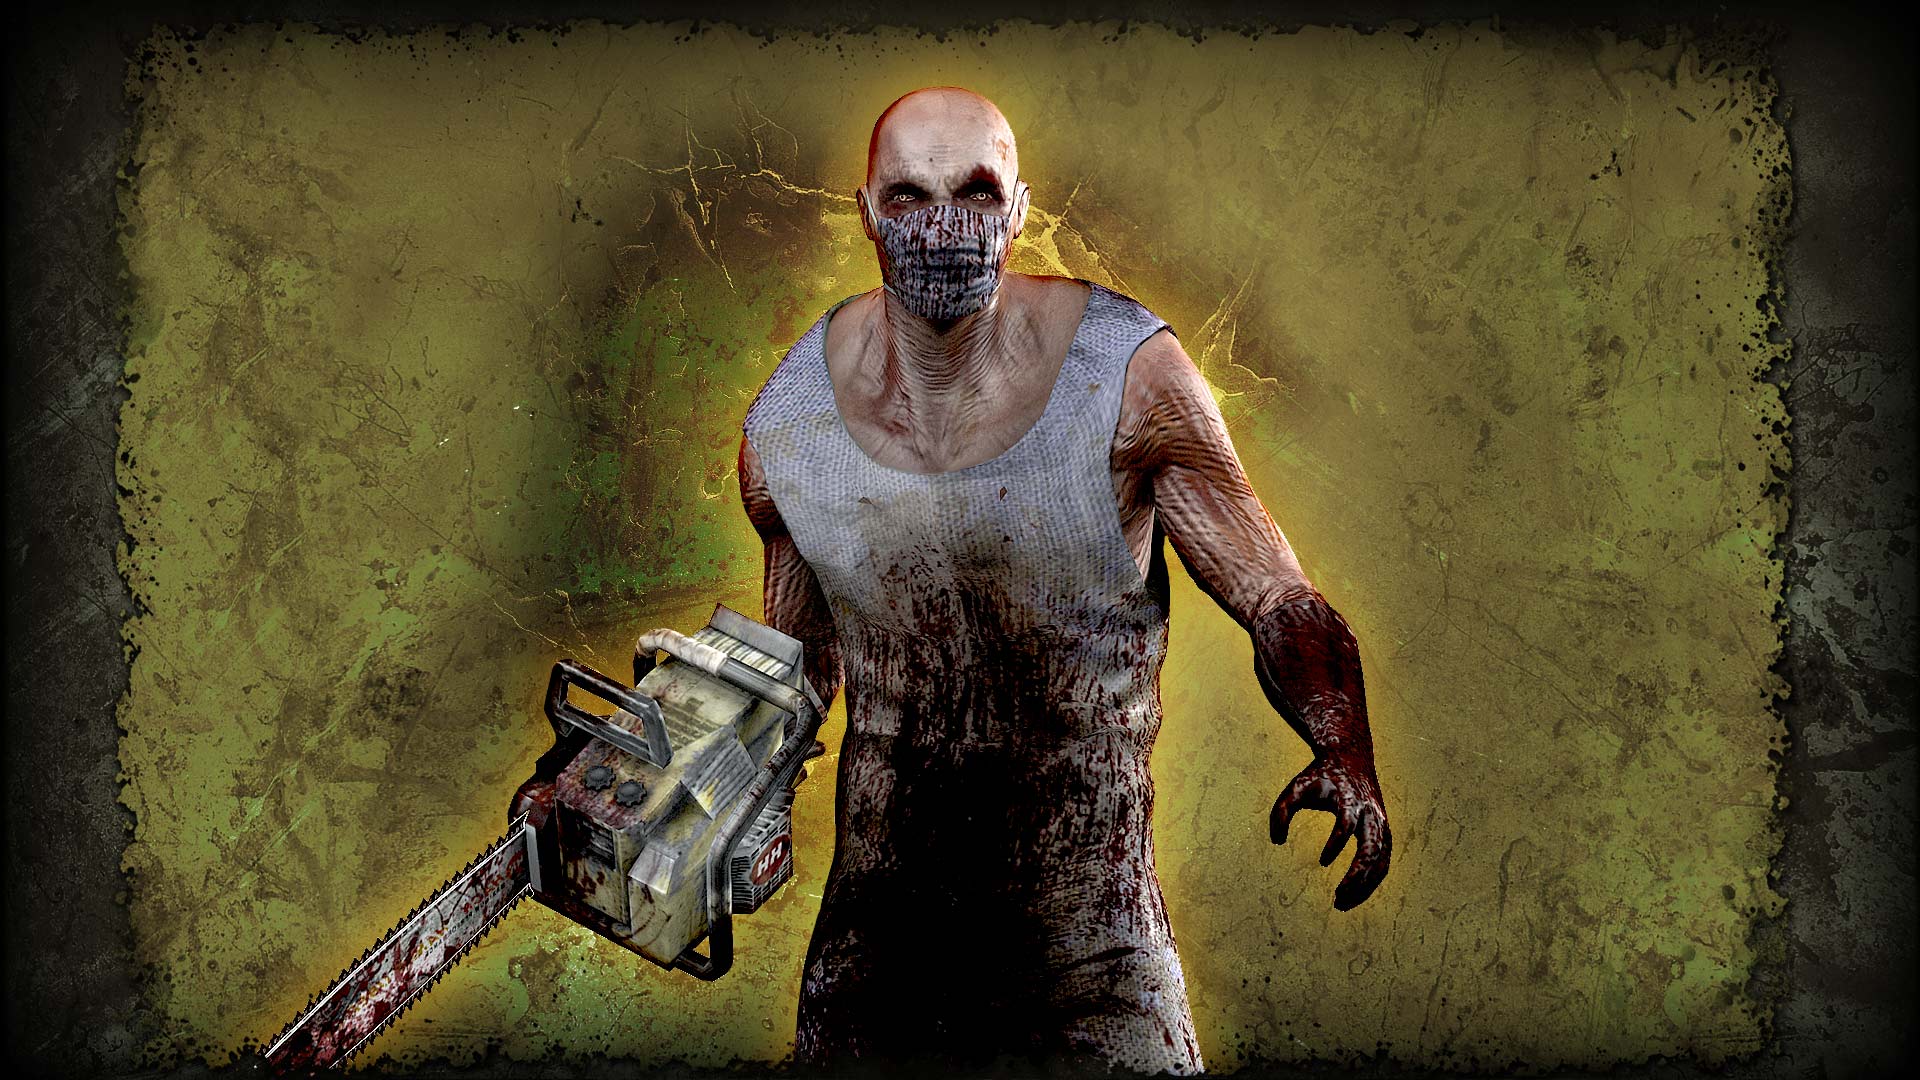
Introduction

Out of all of the Zeds, this one stands out. With all of the creatures with meat cleavers and blades for arms, it doesn’t get much worse than a chainsaw. The Scrake is rated second on the list of Priority Zeds, and is one of the big headaches. He appears on wave three in a short game, wave four on a medium game, and wave five on a long game onwards. He chooses to find a job at his local Fred Meyer during the Patriarch’s wave. He has a chainsaw for an arm, because zombie horror clichés! He is one of the slowest Zeds, that is, until you piss him off.
Behavior
The Scrake will walk at a steady pace towards its target, and will attack with its chainsaw when close enough. It will swing its chainsaw with either one or two powerful swings which will deal deadly damage. After said swings, it will impale the player with its chainsaw, which will do small damage over time. It will continue to use this impaling attack until said player is dead or moves out of its attacking range. Once a player leaves its attacking range after being impaled, it will use its powerful swing again and will repeat said process until the Scrake is dead. However, it will not walk slowly for long, as once it loses a certain amount of health, it will rage. Once a Scrake has raged, it will not stop until it is dead. A Scrake rages based on how much health it has left, and the variable that determines how much health it loses before it rage is the difficulty. On Hard and below, a Scrake rages when at fifty percent health. On Hell on Earth and Suicidal, a Scrake will rage when at seventy percent health. It will retaliate for friendly fire, and will almost always win, unless their opponent is a Fleshpound.
Strategy
A Medic should do his job if a Scrake is nearby. A Scrake can deal a large amount of damage to his team, so it is a good idea to inform your team of the nearby threat. A Medic’s weapons do not have a large damage output, therfore they should stay by their team members and attempt to protect them from the Scrake. Due to a Scrake’s impaling attack doing less damage then its regular attack, a Medic should stay still, since said attack will require the Scrake to be stationary. Therfore your team will be able to easily finish off the Scrake with a headshot.
A Scrake can easily be taken down by a Support Specialist due to their large damage output in a short time. Their arsenal is one of the most effective against the Scrake. Although the Scrake can get in a few swings before they are killed. There is a combo of weapons that is ideal for using against the Scrake. This combo should only be used by advanced players, because a simple slip-up can easily lead to your death. The combo consists of the combat shotgun, the hunting shotgun, and the katana. The combat shotgun is primarily used to take down the rest of the horde, and can be used to save yourself if you screw up a combo. The hunting shotgun is for use against larger specimens, and can be used to kill a large amount of Zeds in one shot. The katana is a backup weapon, used to cut down enemies that are too close, or to conserve ammo. The hunting shotgun and katana are both used as a combo to instantly kill a Scrake on any difficulty with any amount of players. First, use your strong attack with the katana, which is the middle mouse if keyboard settings are default. This will flinch the Scrake. Be warned, the Scrake can only be flinched once on Suicidal on Hell on Earth, so you only have one chance to hit this perfectly. Then after flinching him, crouch, switch to your hunting shotgun, aim upwards at the Scrake’s head, and use the alternate fire (also middle mouse). If done correctly, the Scrake will be killed instantly.
This video was made by DarkFalz.
A Sharpshooter’s line of weapons, excluding the default 9mm, are extremley effective against the Scrake. They can safely kill a Scrake from a long distance with a few well placed headshots. Some suggested weapons to use against Scrakes are the crossbow and the M99 AMR sniper rifle. However the use of a crossbow is preferred, since the overall price is much less than that of the M99.
A Commando’s weapons do small amounts of damage to bigger specimens, for this reason they aren’t exactly cut out for Scrake extermination. They can help the team by identifying how much health the Scrake has left, so that the team does not trigger their rage accidentally. If a Commando is the only one left on the team, and there a few Scrakes on the map, there is a chance for their survivial. First, they must clear out all the smaller Zeds, such as Clots, Gorefasts, etc. Next, one simply has to put a large distance between them and the Scrake (this may not work on smaller maps) and trigger their rage. The player must then back away as the Scrake speeds towards them. If there is enough distance between the Scrake and the player, the Scrake will drop dead. This is due to a certain mechanic which causes the Scrake to lose health over time after it has raged. If it does not attack anything after a certain amount of time, he will die. Note that this will only work if there are five or less specimens left, since a raged Scrake will not lose health if his rage if triggered and there are more than five specimens.
This video was made by a friend of mine, ~Ren~.
A Berserker is one of the most useful perks for fighting a Scrake. They can easily flinch-lock and stun-lock a Scrake. Their damage reduction allows them to absorb damage without much of an issue. However a Berserker should be aware, should the Scrake be accompanied by other specimens, the tides can easily be turned. As mentioned earlier, the Scrake can only be flinched once on Suicidal and Hell on Earth. This means that the Scrake can not be flinch-locked with the katana. The Scrake can be stunned an infinite amount of times on any difficulty, so a headshot with most strong melee attacks is enough to stun a Scrake. A single buzzsaw from the buzzsaw bow can also stun a Scrake.
A Scrake can cause the Firebug much grief, considering it can eat up to 100 units of fuel. This makes Scrakes a threat to Firebugs. The flare revolvers can do massive damage to the Scrake, and can easily finish it off. Firebugs can also let a Scrake burn, and switch to an off-perk weapon and do damage with that.
A Scrake can easily be stunned with the Demolitions wide variety of explosives. During this time other team members can kill the Scrake while it is stunned. To maximize the damage of any projectile explosive, a Demolitions should aim for the head or mid-torso.
Statistics
A specimen’s movement speed is based off the difficulty multipliers. 95% for Beginner, 115% for Hard, 120% for Suicidal and 130% for Hell on Earth. Humans run at 200 units when at full health and jump 325 units.
Conclusion
The Scrake is one of the specimens that can easily kill you if you are alone, so it’s advised to stick with friends when battling this creature. You should leave him alone until you are ready to face him and safely trigger his rage.
Memorial
From all of the monsters that crawl in dark corridors across London, not all have given in to their bloodlust. Some still attempt to befriend the survivors, help those who are being cornered, or they will just stare at you for no reason, but they won’t attack so we should only assume they are contemplating whether or not to gut you. The most common specimens that have displayed this behavior are Scrakes and Fleshpounds. A sad sight to behold when a cloned life-form that tries to make new friends gets their head cut off. The friendly monsters are always the ones that die the quickest. One specimen however, had lived long enough to be recorded. The one known only as DarkFalz had been playing a six man Hell on Earth game when along came a Scrake known now as Greg. Falz and his friends had recorded the creature for a short period while fending off hostile monsters. Sadly when it came time to get to the trader, Falz and his friends took off, and since Greg wanted to stay with his new friends he pushed his body too far to keep up with them. He finally succumbed to death, when a Field Medic by the name of ArmoredPuppy shot all her medic darts at him, causing his body to completely disintegrate. He currently resides in Scrake heaven with all of his other friends. Rest In Peace Greg. You will live on in our hearts for all eternity. Never forget people. Never forget.
August 30, 2013 Hospital Horrors: Wave 9 – Trader Time
Community Feedback
Did I miss something? Comment about it and I will post it in this section of the guide!