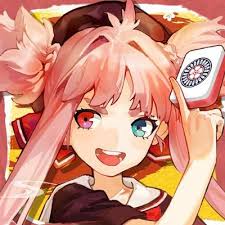
Overview
In this guide I will teach you how you can get any client-side character skin to work on ANY character!
Step 0: Introduction
Have you ever wanted to have a game full of Mr. Fosters, DJ Skullys, generic soldiers or even anime waifu?
The last one is probably a yes, so this is a guide for you. ( ͡° ͜ʖ ͡°)
Step 1: Getting Started
Before we get started, you need any text based program. Notepad works but I recommend Notepad++. You may also need Winrar to download some mods. The workshop is very buggy and at times won’t download subscribed mods.
Download for Notepad++: [link]
Download for WinRar: [link]

This is in case you mess up or just want any vanilla characters back without doing the whole verify cache thing, which can remove other mods.
Go to your system folder:
Copy all the upls and place them in another folder or compressing them in a rar file.
 For this example we will be using Blu Pyro. Let say our Blu Pyro already has a skin over it but we found another skin that we like. Maybe we don’t want to replace Blu Pyro and wish the mod can replace someone else. We want to have both!
(I think the Pyros are free for everyone, regardless if they have TF2 in their library…)
Step 2: Downloading our skin
Let say you have this mod installed, (shameless plugin!)
[link]
But also want this mod as well and don’t want to replace your existing mod.
[link]
So we are going to keep the top mod and have Azusa replace someone else.
Go ahead and download Azusa: Dropox: Nakano Azusa[www.dropbox.com]
After your download is complete go to
Place every file where they need to go except for the upl file inside the System folder. We will need to edit this upl first!
Our victim we will be replacing is Pvt. Schnieder.
 Sorry Schnieder [link]
Step 3 A: (Replacement)
For this method we will call it The Replacement method.
From our downloaded Azusa file, inside the System folder, drag & drop Pyro_Blue.upl anywhere, like on your desktop.
Next we will open up the upl.
So open up the file in a text based program and you should see this:
Or if your like me and have Word Warp Off

First replace
with
Like so:
 The name has to be inside the quotations or else it wont work.
Hit ctrl + s to save. You know its saved when the red floppy turns blue.

Secondly rename the file from
to:
Now place the edited upl file into your system folder, replacing the existing Schnieder file.
Start your game and you should now have Azusa in your game.
[screen]
To revert Schnieder, copy and paste your backup you made.
Step 3 B: (Copy&paste)
For this method we will call it the CnP method. This is the method I use.
Open up the Azusa’s Pyro_Blue.upl and copy (ctrl + c) everything below [Public]/the entire 2nd code line like so:
Now open up your Private_Schnieder.upl thats already in your system folder.
and you should see this:

to

Now skip line 3 and on line 4, paste the Azusa Pyro code. You should have this now:
Finally change
in line 4 to
Save. You should have this:
Start your game and you should now have Azusa in your game.
[screen]
To revert Schnieder, you can place a slash on the Azusa code (line 4) and remove the slash from the original code like so:

The beauty of the slash is that it tells the game to skip over this line and move on to the next one. With this method, you can have a single upl hold up to several characters and change who you want to use with just slashes.
You can use your backup to completely revert your file back.
Notes
If you didn’t make those upl back ups i asked earlier, well no problem cause here is a link to them:
[link]
As you can see, the name from DefaultName=” “ must match the upl file name.
There is only ONE exception to this and thats for the 2nd Harchier they released. His file name is Harchier__Spebbington while his default name text is Harchier_Spebbington_II
And speaking about the 2nd Harchier, no you can’t copy and paste the coding from Harchier II onto someone else’s upl and get the “No Time for Love, Dr. Jones” achievement that way. It has to be done with either Harchier upl.
You can replace anyone regardless if you own them or not, of course you still need to buy/unlock characters to actually use them.
You can’t make your own upls and play with them like this. The game is coded to only use the 50 upls as characters.
Thank you for reading and have fun.
The next tutorial is making Custom characters work via clientside without the need for Serverperks.


