![[Guide] Indepth Boss Guide & Tips (Main story Chaos Complete!) [Working On Sub-bosses] for Tales of Zestiria](https://steamsolo.com/wp-content/uploads/2021/08/guide-indepth-boss-guide-tips-main-story-chaos-complete-working-on-sub-bosses-tales-of-zestiria.jpg)
Overview
This guide is ment to help people who’re having trouble with that one pesky boss and/or how to learn and defeat the boss themselves with some helpful tips!
Working on Chaos Mode
Chaos mode has been updated on all main story monsters, and I’m working on the sub-bosses!
Chaos Mode ~ My Strategy to Beating Chaos
Hello all! Its been a bit since I last updated this guide. I’ve finally completely Chaos Mode and gotten a lot of the bosses and sub-bosses recorded in my monster book to upload. The thing I however thought would help people who were wondering: What did I do to beat the Chaos Mode? I’m going to outline my Build, and basic information. I can answer questions if you have any so don’t be afraid to inquire in the comments!
The answer to this is in two different ways. If you want to start on NG+ because of the grade benefits fromt he Lords of the Land, you can. However, there are some things while they may sound great, I didn’t even use. However, since you start at level 1 in the beginning, it does help a ton to start on NG+ in order to acquire the triple EXP since you gain little-to-none EXP in Chaos mode. You can level up without it, but its very, very hard.
However, in the build i did (down below) with my characters was not possible without removing one of the Lord of the Lands grade shop: Advanced Divinity. This at the start was nice, but when I needed to make a build in order to actually beat some of these bosses, I had to take this off as it reset some things when armatizing.
In a sum: Yes, you can enter your first playthrough with Chaos, but its very hard.
In all admitance, I knew nothing about skills in the skill sheet and didn’t even bother to look at it in my first playthrough. After getting myself murdered by some bosses, I started exploring online to help explain what I should do to help defeat bosses. After exploring and experimenting for over 50 hours JUST fusing equipment, I found my favorite setup that is extremely good in my opinion. For
Sorey: 15 Faira, 9 Priventi, 20 Invlada
Bonus Skills: Halve SC cost, Halve dmg taken 1000, infinite combo as long as you have SC.
Seraphim: 11 Faira (Or respective element for Wind, Earth, Water), 11 Priventi, 20 Invalada
Bonus Skills: 40% casting time reduction x2 (Which makes it 80%), infinite combo as long as you have SC.
This above build becomes very powerful when you armatize. In particular Lialah and Sorey, because the beauty of Armatizing is it adds both skills on each skill sheets into one. This means you can literally spam your Artes with a huge amount of damage. I chose Lialah (Faira) because she seems to have the least enemies that are resistant to her. You can do this with any of the seraphim so it’s your choice.
However, keeping Priventi and Invalada is a TREMENDOUS help. This is because it prevents up to 16000 damage (armatized) and can reduce the max damage the enemies do to you. This essentially equals you being a tank almost.
You can do this on any gear you seem to gain a majority with. I’m going to point out, you can go a different path by fusing and getting the “ultimate” weapons for each character. That however requires you to get certain items and farm/sell. Whichever method you prefer, you can. You cannot win very easily however without learning about the skills sheet.
I’ve a few tips to help you find better equipment
Higher Level weapons can only be found against higher level enemies (I.E. Bloodied Sword which requires level 90 enemy) so what if you can’t find enemies high enough? Assigning Normin allow you to increase the enemies level, so you can farm higher equipment on normal creatures better now!
Other ways to farm equipment besides killing enemies? One way you can is by selling a item to a store, then ordering that item. Be careful when you sell however, otherwise it’ll go away in the ordering option. I used this while farming to increase my items list.
Best farming areas? I found the crucibles were the easiest to get equipment as they give a nice amount. Depending on how far you are in the game (and adding normin to increase enemy level), your farming spot can differ. So be sure to check the level that your item is, and try to find enemies on that, or very close to that. If the item in question is rare and you doubt you can find a copy, try the selling and ordering method above. Careful however, as sometimes I’ve had this won’t work on a few random items.
I would advise looking online about the specific item you want to farm, and look at the corresponding level and enemy you need to fight.
Proper Use of this Gude
This guide is ment to help people who are struggling, HOWEVER it isn’t just supposed to be an easy cheat sheet.
My advice is to read the General Boss tips FIRST, then if you’ve died about say, 5-10 times and have had enough, then consider going onto the particular boss.
If you like what you see, please thumbs up and/or subscribe if you want info on future updates
General Tips
Fighting a boss in a Tales of game requires that you study the enemy to figure out their tells etc. These tips can help if your struggling to figure out how to defeat the actual boss him/herself.
- Study The Boss: Every boss no matter what has a tell, certain moves, and artes. The trick is figuring out what they do, how they do it, and sometimes in the case of arte casting, how to interrupt. Does this specific attack take a long time to cast? Can i stop that attack from where I am? Should I defend against his attack or try to disrupt? etc.
- Are you defending?: Early on, I was a complete idiot. I didn’t defend period until I came across on particular boss that beat the crap out of me. I then discovered, “Hey! I have this neat button that i never used that really dampens their damage on me!”. It does help to Defend a ton.
- Spamming Won’t Always Work: People seem to think that the game is ment to be a “Hack-an-Slash” rather than a tactical JRPG. They spam attack, attack, attack, and don’t even think about managing their SP. You can only attack so much before you have to wait for your SP to come back. which can be dangerous.
- Pace Yourself: Unless your doing a speed-run, don’t think you gotta defeat this boss really fast. Most of the bosses won’t let you do much damage before they dish out their own. A thing I learned is that you can’t just go hailmary on them. You gotta be patient, wait for an opportunity, then strike!
- Watch their casts!: This falls into the “Pay Attention” category. Each boss can cast a certain arte that is either fast and low damage, or long and higher damage (many at any rate). When you see a quick arte being performed, it almost isn’t worth trying to interrupt unless your RIGHT near them. If they have a longer cast going on, always try to interrupt and get damage in.
- Be Mindful of You and your Allies Health!: Managing to stay alive in a tedious boss battle is crucial to winning, or being forced to restart because you forgot to throw that healing gel at yourself. This doesn’t JUST go for you either. Your allies can help a lot if setup properly with proper strategy. If you can manage to keep your allies and yourself alive, you should do better. Note: Sometimes you can’t always save your allies, in those cases, focus on your own health and change their strategies.
- Are you Chaining Combos Properly?: When you chain combos, it’s best to watch your allies as well. If your allies are damaging an enemy, don’t just rush in all of the sudden (but you do rush in case of stagger). When you know your allie’s move is about to stop, THEN start attacking. You’ll continue to rise the damage higher and higher, and the boss can do nothing to stop you.
- Armetization, Blessing and Curse: The benefits of Armetization are high, but they can come with cost. The best thing is that your damage literally can skyrocket even if the element of the Boss isn’t the one you have. This can also get you out of a tight bind when the enemy has either KOed you, or your low. Enacting allows new moves and abilites, however, caution should be used:
Don’t right-off-the-bat go into armitization! This wastes a valuable assest that can be used later for recovery and extra damage. Do what damage you can before you armatize, then use it.
Don’t Armitize with the wrong element! If the boss in question (unless given no other option) isn’t the element weak against your seraphim, DON”T WASTE YOUR BG!
Don’t think your invincible! Bosses you’ll learn, get much, much more nasty as you go along, especially in hard mode. They will literally maul you in that mode regardless if you look super awesome or not.
Don’t forget your Single target Artes! This is said mainly for the fact that you can do 3 different versions of artes. Balanced attacks which are simple attack. Wide Range attacks for more than one enemy which is left or right, and single target attacks which do superior damage to the other two, but low area range with down.
- Check the Bosses Element Weakness and Resist!: You won’t get far if you can’t damage the boss well in the first place which would be crap. When I analyze (RB for my Xbox Controller), I take into consideration what they are strong and weak against. Sometimes the boss has no weakness OR resistance to one element, but that means the element can still do more damage.
- Manage your Seraphim!: It’s very important to be able to manage your Seraphim. Especailly if everyone is dieing, charging, reappearing, dieing etc. This should be monitored constantly so you know when to go in, and when to stay out in a drawn out battle.
- Bosses have SP To!: Despite what you may think, Bosses have a hidden SP meter on them. This is essentially the Blue bar just below your characters HP bar, that tells you how many hits you can do/artes to cast. This is the same for bosses. They can’t attack ALL the time, they wear out and have to recharge their hidden SP before they attack! Noticed how the boss just stops attacking? He’s out of SP! Blocking drops their sp more, dodging drops there SP more, so when they stop attacking, they’re out! Attack then and there and you could get a higher stun chance!
- Are you using your BG?: I admit, I didn’t use my BG period for awhile because I didn’t understand it very well, but BG allows you to continue attacking constantly doing higher and higher damage without worrying about the boss breaking from your combo! This is the best option for when they’re stunned, or when your doing the “chain lock” and preventing them from doing anything period!
Boss Guide Preface
Still can’t get it huuuuuuh? Well, no worries, I’ve had to scream my head off because nobody made a guide for me use. Forcing me to play for sometimes an hour to beat THAT ONE STUPID BOSS THAT’S USING THAT STUPID CHEAP MOVE!
This guide is incomplete as I’m playing this game on Hard mode. This requires me to take longer on Bosses than is normally neccesary on the first playthrough so bear with me! There WILL be updates.
Boss Guide

General Strategy: This Boss is simple in all honesty, the thing you need to do however, is guard is fast attacks which can do damage at higher levels of mode. Essentially, he’s straightforward: Guard all attacks, then attack, repeat. Simple!
The 2nd encounter is the same process: Guard, attack repeat. Only this time, he does more damage, and has more health.
————————————————————————————————————————-
General Strategy: This boss can be straightforward till he starts to get near death. At a point where he’s about 1/3 hp, he’ll begin to heal himself. This in turn can cause an issue for your team if you aren’t properly hitting him.

The idea is when he hits his “healing” phase, your supposed to wait until he is starting to cast THEN attack him. If this method is boring to you, then keep doing chain damage. Let your AI partners attack, then quickly follow up to prevent the boss from doing anything and to continue the damage.
Attacks: They’re simple and straightforward.
1. A simple quick bite: You can easily counter this by either sidestepping, or blocking. Watch for when he rears his head back.
2. An AOE (Area of Effect) attack: This attack has him spinning around prodcuing a “Wind” Element effect which damages surrounding people. You cannot sidestep this attack so either backstep or block.
———————————————
NOTE: The troll before this next battle cannot be defeated, merely play for time.
——————————————–
General Strategy: Don’t worry, Zavied is just a big pushover in this fight. It doesnt’ take too many hits before he holds up his hands and gives up. It is alright to play cautiously in this one however if your low from the troll. Simple guard, then attack. Have Mikleo heal you and your party if things get nasty, but they shouldn’t. This fight is mainly for show.

General Strategy: This Assassin is again, mainly for show in my opinion. You can instantly start attacking him, and continuously attack him. When your HP gets low, you can Armatize and by then, he’ll be toast.

(I swear all these beginning “for show” bosses….)
I control Lailah constantly (my avatar probably gives that away), and during the fight against Assassin Woman she wont attack you while Sorey’s unconscious. I simply spammed Photon Blaze over and over again, and when she was down to literally 1%, I used a Life Bottle on Sorey and defeated her.
Alternative and Credits to Krys Star on how to Defeat Female Assassin

General Strategy: The deal is, he might be able to do a lot of damage early level, but he can easily have his attacks stopped. The best method is to keep the pressure on him as until he gets to a low enough HP, he won’t be able to react in time to you bashing his skull in. This in turn stops him from attacking. Since He’s weak to Earth, you can decide to armatize if you want, but that would leave you with only 3 people to keep the combos going.

Attacks: He has his tells you should be mindful of on Higher Difficulties!
1. Step-forward slash: His basic attack, he’ll walk forward with his arm behind him and then swing at you. Due to his weapon size, the only option is to very quickly sidestep the other direction, or block.
2. Double Swipe: This attack is performed faster when he’s closer. He’ll raise his arm to his left (if your facing him) and a flash from his lance will appear. That’s his tell. He’ll then swipe twice in each direction. Due to the issue with his lance somehow hitting the sides as well, you can either backstep very quickly, or block.
His !! Attack: At low HP, the boss will start to perform his !! attack. He’ll draw back to thrust (his tell and the !! is also a tell lol) and stab once, then on his second attack, produce a wind element on his lance and do an uppercut with it. The best method if your caught napping is to block simply. If you have the chance, sidestep to the right, and attack while he’s doing his animation.
General Strategy: Say hello to the most annoying early game boss! This guy has resistance to all the elements you have, so this will be a slight toughy. The trick here is not to overextend yourself. He’s got some powerful blows that can knock your health down fast if your not careful, but luckily they’re relativly slow. He’s also flying which can cause some of your ground attacks not to hit, so be mindful of what buttons your pressing. Keep the chain going for as long as possible!

Attacks: Slow, but powerful. It’s best to dodge if you can, if not, blocking is the last option.
1. Double claw: His basic attack. The Boss will rear up a little and fly a tad higher (his tell). He’ll then proceed to claw with one foot, then the other. This is done rather slow so dodging shouldn’t be an issue.
2. Tail Swipe (back): A swipe in the back with his tail. His tell is he starts to look back and flap a little higher. You can’t sidestep as his tail will still hit you. You can either backstep or block.
3. Fire Breath (low HP): Whatever you do, DO NOT get caught in this. It’s easy to dodge, but its practically an instant KO to you or party if caught unaware and lower levels. His tell is he’ll instantly flick towards someone, then start rearing his head back. Flames start spewing out as well. He essentially breathes fire which if your caught, does a stream of damage. The BEST option is to sidestep away. If you however realize it’s too late, block. But be prepared to have if healed.
General Strategy: The frontal assault of this plant is fierce, but it’s not the main problem. Your first priority should always be the little plants. Otherwise, they will cause you no end of issues. Once they’ve been defeated, proceed to attacking the boss. It’s best you try and stay to the side, or behind the boss as his attacks are directed in that general direction. He’s weak to basic attacks and not resistant to Earth. My strategy was having Sorey armatize with edna, and attack while my other partner (can’t remember the girl’s name with lance…) attacks with basics. She starts the power attacks and i follow through.

Attacks: Frontal and wide swipes are this plants ability! Stay to the side and behind for max performance!
1. Swipe: The basic attack, a wide sweep that covers the left and front of it’s body. You cannot dodge by backstepping, but you can by sidestepping right (as it’s swinging arm is from the left) and if not that, block. You can tell he’s going to use it when he swings his arm backwards.
2. Triple-Swipte His basic attack done 3 times. This attack will force you to block as his attack will come from the right and the left arm. Dodging won’t work in this case unless your far enough away.
3. Spin (low HP): This large AOE is non dodgable unless far away. The boss will spin aorund fast in a circle hitting anything within a wide radius. This attack can hurt if your trying to run away and get caught in the back. His tell is he’ll crouch down, then raise his head and jump.
Boss Guide Continued Part 1
General Strategy: The bosses attacks are easy to deflect, and with the exception of his overhead cut, you should just have to block. Whenever he is finished with his attack, instantly start attacking. Then block again and wait for him to attack again. After a few times he’ll be staggered leading to heavy damage output from you.

Attacks: Quick, moderate hitting swipes and abilites, the best option is to block!
1. Swipe: The basic attack. The boss will do a swing of his sword over his head then strike the left and middle of his range. This can be dodged by sidestepping right, or by blocking.
2. Double-Swipe: A copy of the basic attack, Instead, the boss will continue to swing his sword to his right shoulder, then swing at you again. This is better blocked in this scenario
3. Body Slam: This ability can only be blocked unless at a moderate distance. He’ll quickly jump in the air and almost instantly slam into the ground. This is his AOE. You can easily block it. If you want to try and not take damage, you can simply backstep, but you need enough room in order to dodge it.
4. Overhead Cut: This ability he gains at about half health. This overhead cut is very easy to dodge, but you can take heavy damage if it lands. He’ll raise his hand in the air and yell, you’ll see a red aura going around him. He’ll then slam his sword into the ground in front of him. This can easily be sidestepped. Blocking isn’t a great option as it can lead to you being staggered.
General Strategy: To start with, you’ll want to just play for time until a cutscene occurs. Then after that cutscene, you need to widdle down the enemies health some. The simple method is attack then run away, or to keep the pressure of combos on. This can be rather tedious as he’s resistant to your attacks, but just keep at it! Eventually after ANOTHER cutscene, you’ll be able to start pummling him. Armatize with your new ally and don’t give up the attack! He’ll fall fast enough.

Attacks: quick and moderate damage, this things got a decent defense.
1. Slash The Basic attack. A simple slash that’s quick and can do decent damage. Best to either sidestep right, or block in this case.
2. Shield Bash: Another quick attack. He’ll draw back a little and quickly slam forward his shield. You can either backstep, sidestep, or block his attack.
3. Arte – Rock Satalite: If he starts running into a corner or away, follow him. He’s attempting to summon the ability that only Edna can use: Rock Satalite. You can stop him by either attacking as he’s focusing, or just as he’s casting. Either one will interupt him.
4. !! Attack: His !! attack consists of a quick jump into the air, double handed cut downards. This can be dodged by sidestepping, but don’t try to block as the overhead could possibly stun you.
General Strategy: An easy fight if you take your time. The boss will attack you with multiple attacks, but he’ll always end with one, giving you a gap for counter-attacking. The idea here is to block all the attacks until the boss stops, and/or uses Lion’s Fang. This attack usually means the end of his attack stream until of course when he’s little HP.

Attacks: This boss has got a lot of attacks with different abilites. All of these abilities can be blocked easily, but you need to be cautious of your SP meter!
1. Attack: The boss will proceed to strike at you three times with his sword. These can be blocked, then you can attack.
2. Thrust: This attack is a quick thrust forward. The tell is when the boss pulls back and his sword’s tip turns green. He’ll then thrust forward. Again, easily blockable.
3. Lion’s Fang (mid HP): Now the real fun begins. Instead of using his sword, the boss will start using his right hand (when your facing) and almost palm punch you. It can be blocked. When this stage hits, wait for this attack to happen after he’s attacked you with other moves, as his tell that you can attack,
4. Sword Flurry: This attack has the same tell as the thrust, except, he starts thrusting his sword several times in quick succession. This can do a lot of damage if not blocked.
5. Jumping Earthquake: The boss will leap into the air and dive down again, creating a small AOE of fire around him, and cracks shooting out towards you of fire. This can be blocked and is easy to tell when he’ll use it.
General Strategy: What you need to do in this case is wait for the bird to start using an ability, then attack it. It if uses it’s !! ability which is slow, attack before it can begin its breathe out. If it decided to claw, dodge the claw and attack. Finally, if it uses it’s hurricane on you, simply block it and attack. The key to this fight is counter-attacks, and continous attacks!

Attack: A bird whose slow, quick, and moderate attacks can prove fatal. Stop the slow, dodge the fast, block the wind.
1. Double Claw: Like our drake friend, this bird will leap into the air and raise its claws. It’ll then proceed to claw with both feet. These can be blocked as the animation is slow.
2. !! Attack: A griffin that breathes fire….not sure if its a dragon guys. Anyway, unlike most bosses, this boss has a slow !! attack. When it starts, it raise it’s head and blow fire in a cone in front of it. This fire can do a lot of damage so be careful if you can’t stop it. The best option is to quickly sidestep the other direction to avoid the flames.
3. Wind Counter: This attack is projected in the front of the Griffin so that your reminded to attack from the sidelines. The griffin will jump back and flap it’s wings hard once producing a miniature hurricane in front of it. This can be blocked however.
General Strategy: Completely ignore the salamander. Ignore it. Head for the 4 statues in each corner and touch them all. Once you’ve done so, you’ll get your friends back to help join the battle. Now that you have your friends, the best option is to armatize with Mikleo. As the combo of his bow allows heavy damage to be inflicted. The Salamander will most like target your allies first so use this as an advantage. If you also use Mikleo’s “Saint’s Arrow” with proper timing, you can cause the lizard to slip over and over and over.

Attacks: This salamander has quick and moderate-to-slow attacks. But they can all pack a punch! dodging and counter-attacking during animation is the best option here!
1. Sword Swing: The basic attack. A simple quick sword swipe upwards. He’ll make a sound and draw back his sword, your quene to dodge.
2. Quick Thrusts: He’ll lean back, and perform 4 quick thrusts of his sword. Easily dodgable by sidestepping to the right and countering
3. Arte – AOE Flames: The boss will surround himself in flames in a small AOE circle. This cast is short, so don’t bother attempting to stop it mid focus. Just wait for the cast, then quickly dive in and attack.
4. Arte – Meteorites: Attack the boss during this focus as it’s slow. Be sure you either dodge quickly forward, or to the left or right in order to avoid the meteorites as they have AOE on them if he gets the cast off.
5. !! Attack (mid HP): MORE BREATHING FIRE ALREADY BLOODY…..Anyway, his !! attack involves him quickly going to the side (left if facing) and breathing fire. This damage is high but the real danger is that this fire is quicker than other bosses fire. You need to Sidestep right and then attack during this animation for damage, or simply wait for it to stop.
Boss Guide Continued Part 2
General Strategy: This thing is a real pushover. It may look imposing enough, but once you’ve gotten into the swing of attacking, its just repeat until dead. You essentially want to draw here into a corner and start pummling her. After about mid HP, she’ll try to summon monsters. This can be stopped of course which gives you more damage output. She’ll keep doing this for a long time with the occasional attack. Eventually at low HP she’ll try to use a more powerful ability, but if your close enough, it won’t so much as scratch you. More damage!

Attacks: Artes with a little light attack to boot, Interuption and timing are key in this battle!
1. Slash: A quick, weak attack with her claws. This is really weak but it’s worth blocking to avoid damage and to counterattack.
2. Arte – Earth Spike: a spike shoots from the ground. It’s a moderate casting time. If your close enough, interupt and attack. If not, merely defend then continue attacking.
3. Arte – Wind Shard: Shoots a small shard of wind towards a direction. Quick casting time, easily dodgable left or right, or can block.
4. Summon Monsters: Will attempt to do this a lot. Medusa will raise up a little and start shrieking. You can easily interupt her and get damage in. In the event she succeeds however, a rather pitful weak snake will come for you. This can be killed easily by mearly lining up your attacks with medusa and the snake.
5. Stone Gaze: This attack will paralyze a character for a long time. However, it has to land first. Medusa will have two circles of ivory appear before her in a certain direction, make sure you aren’t in that direction when the spell goes off, otherwise, even during attack, you’ll be stuck for a long annoying amount of time. However, if your close enough to medusa, even if your in its sights, it won’t work.
General Strategy: The nice thing about this fight is that Asura’s attacks mainly go right over your head. This allows for you to continue pummeling him forever without taking damage except for some cases. The best method is to get close and under him where his attacks can’t meet, and just lay into him with Edna armatized, or basic attacks. If your worried about his frontal attacks, you can circle around and start to attack from behind and to the side as he doesn’t have a back attack.

Attack: This boss has got double the weaponary, which means double the attack power! However, he’s so tall that if close enough, he can’t even hit you! Be wary of his Huricane Slash though!
1. Double Slash: His basic attack. Two sweeps of his swords from the front. These can easily be blocked, however when attacking at close range, it’s not possible to dodge.
2. Double Hammer to Double Slash: Two hammers come from the left and right at the same time and smash above you. Then Asura slashes his swords. The only issue with blocking this one is that sometimes the hammers register as hitting you from behind because they reach out more. When you see asura’s hammers go back along with him, backstep THEN block to avoid that chance.
3. Stab ‘n pound: Asura thrusts his swords forward and holds them there, while then having his hammer’s each bonk you individually. If your close enough however, the attacks can go over your head which is rather funny. However, blocking should still be done just in case.
4. Arte – Shadow Wall: An arte that shoots up a wall of black shadows, this can be either backstepped or frontstepped but not side. You can also block this attack despite it being considered below and above.
5. Hurricane Slash(low HP): Asura will flash red, then put his swords at his sides flat up. He’ll then raise them in the air and a hurricane will rise around the front of him in a moderate AOE. This cannot be dodged and should be blocked if it happens.
General Strategy: The idea here is to continously attack the minatour so that he cannot attack. His Rate of Attack is rather slow leaving him to easy vunrabilite. I had no trouble with this boss at all. The only slight problem is his low HP ability to body slam people. He spams that. This boss is very easy even on Hard mode.

Attack: A simple opponent who uses brute strength rather than tactical attacks to win. Block his slow blows, but be wary of his body slam!
1. Slash: His basic attack. A simple swing of his axe. Due to the largeness and range, blocking is the best option due to it’s quick attack rate
2. Double Slash: A copy of his basic, except he continues from the other direciton. Blocking is the only option in this case.
3. Body Slam: The boss jumps up and falls down. This cannot be blocked, and can only be dodged. Thus, you are required to backstep in order to avoid the damage.
4. Enrage(mid HP): This ability enhances his attack and doubles it. This allows for twice the damage of a normal attack.
5. Summon Monsters(mid-to-low HP): He eventually starts calling for monsters. This can be interupted of course, but if it suceeds, you’ll have to deal with a giant boar.
6. Minatour Rush(Low HP): This ability will be spammed until you can somewhat stop him with more flurry attacks. He will turn red and roar, putting his horns down in the direction of a person and charge very fast. The only sure way of countering this is to block unless you can run fast enough to get away.
General Strategy: This time he ain’t messing around no more! Zavied has the ability to combine range and close range attacks in a flurry. His Artes are also annoying as they can be cast quickly without much hope of dodging forcing a block. Since Zavied has neither a weakness nor a resistance to Water, I used Mikleo’s armatization to engage from a range. This forces Zavied to either use his artes, or come running at me. If he used artes, I merely defended or sidestepped. You have to be careful though what artes you sidestep. Eventually, he went down with not much trouble.

Attacks: Combining both quick high damage range arts with close range artes and attacks equally damaging, Zavied can really be a handful. Engage at range, or make a nice combo string!
1. Flurry of Attacks: This is his basic attack. He will come close and begin using 2 pendulums on you and follow-up with kicks, smacks, more pendulums for a lot of blows. You can attempt to dodge, but it’s risky as he can follow you somewhat during his combo. Blocking is the best defense in this option.
2. Arte – Wind Teeth: This is his highest damaging art. It has a quick cast time, and creates a long wall of teeth between you. This can be blocked, but not dodged. If it hits you, you’ll lose a lot of health.
3. Arte – Fire bubble: Another quick arte cast, when cast, tiny bubbles of red fire float around a character’s position and explode. This can be easily dodged by simply walking around until it detonates. This also however can be blocked if in a corner.
4. Arte – Diamond Shots (status effects): A bit annoying, this ability summons 6 or 7 jewels that Zavied shoots at you each with their own color and damage. This is of course related to status effects they can have: Fatigue, Paralyze, Stun etc. They don’t always activate, but it’s safer to dodge then block.
5. Pendulum Whip: Zavied whips his dual pendulums at a person and reels them in a little. This is a follow-up of Flurry of Attacks normally. This can be easily backstepped or blocked.
6. Full BG Attack: An undodgable, Instakill ability that uses Zavied’s power in the same way if you used yours with full BG to unleash an Arte. This will kill any target it hits.
Boss Guide Continued Part 3
General Strategy: This guy can be a real pain if your not leveled correctly. First off, hitem with what you’ve got all out first. This for me at least, always led to an instant stagger for tons of damage. He’ll eventually start swinging, but that’s the easy part of it as it can be blocked. At a certain point abou 3/4 health, he’ll start trying to summon monsters. Don’t let him. If he manages to summon even 1 pixie, you could possibly lose. Why? The pixies abilitie to shock you and make you immobile for a lengthy 8 seconds. The way I dealt with them and the Boss was by using armatization with Fire, and using only wide range attacks. This killed off the pixies, and stopped the boss from more summoning. Eventually, you’ll defeat him.

Attacks: Swings of a spear that are moderate in hit, and monster summons that are worse than the boss himself! Take care to stop his summoning!
1. Slash: The Basic attack. A simple wide arc attack that can be easily blocked.
2. Summon monsters: He’ll rise up on his horse and start to try to summon monsters. Don’t let him. During this time he’s very vunrable to getting staggered which allows for mega damage. If he summons, you’ll be forced to deal with pixies and/or harpies.
3. Dark Rend (low hp): He Rears up in his saddle and his scythe turns to dark. He then sweeps his scythe a few times sending dark energy out from it in waves. Dodging to the right is the best option. If not avalible, simply block.

This battle is a repeat of the previous Zavied Battle. Except take a look at his stats and health which have gotten better.
General Strategy: He’s the same guy you beat up before, just with more health. Merely go to town with everyone’s abilities and he’ll die pretty quickly.

AFTER the first battle. You’ll be placed against 5 (at least i was) Lunarres. This isn’t too bad, but be careful when they gang up on you. They can use Artes that deal decent damage. Add to that their AOE effect of the Artes and that there’s more than 1, and your in a bit of a tougher fight. The only real strategy is, focus on one at a time, or if you can manage to get them in a line, Armatize and hit them all at once. He’s not really weak or strong against any abilites, but Edna works best in my opinion.
General Strategy: I must say I was disappointed in this boss battle. Anyway, the main task is trudging from one end of the area where you are, to where the boss is on the other end. The boss will start pummeling lazers at you so stick to the edge if you can. Now, run behind him and go to town. That’s it. Why? BECAUSE IT DOES NOTHING BUT SHOOT LAZERS. You can sit behind it and drink tea and it will still shoot lazers forward the entire time. It has no AOE so your completely safe behind it to kill at your whim.

General Strategy: You have two options: One is walk around aimlessly till the next cutscene and do this three times, or attack pointlessly doing damage for three times, or even mix and match! This is “considered” a boss battle but it’s really just a pointless fight. Heck, you don’t even have to fight, just wander and dodge.

Though after me fighting him cause i was bored NOT attacking, I found that his moves aren’t very impressive. If this is a forshadowing of the future fight, i’m gonna be very sad.
Boss Guide Continued Part 4
General Strategy: This boss has a variety of high damage that can be blocked, but when he starts hitting you, he doesn’t let up very easily. The general idea is to hit him hard and to quickly get out of his AOE damage, and his closer range attacks during his attacks which means essentially that he’ll pummel you if your not guarding or in armatization. He can also use his full BG attack which again is an instant kill, so keeping your allies alive, if just for preventing YOU from dieing, is a good idea. You need to start pummeling him straight off the bat to get the early damage in, then he’ll start attacking. The thing about this boss is he isn’t Reistant, nor Weak against anything. This is a great thing for us since we can then armatize with Mikleo and shoot him from a distance without having to get too close. During your close range attacks though, use your BG to continue as long as possible. This boss when he starts hitting, will just keep hitting. If you can manage to lower is SP (yes every boss has one) than you can start basic attacking again. So you can either chain attacks and keep that going, or armatize and hit from a distance.

Attacks: Hard hitting attacks when in too close, and moderate damaging range attacking artes. Also capable of higher stun rate, and comboing. Keep that chain going, or attack from a distance!
1. Plate Throw: The basic attack, Mayvin will throw 2-3 plates at you. This attack can be blocked easily as he is can be seen reaching around himself into his pouch. Either that, or if your close enough, dodge around and attack.
2. Fire punch: Mayvin will slowly draw back (his tell) and then quickly punch forward with a fire element attack. This can be blocked or dodged. Careful! If your attacking during this time, you have a high chance of getting stunned
3. Wind punch (Medium HP): A simple punch but it can interrupt combos easily. Marvin will quickly punch forward causing a straight line of wind to erupt in a long decent line in front of him. This can be comboed into other attacks.
4. Earth spikes (Medium HP): A punch to the ground sends spikes of earth in a decent lined direction, this will cause your character to fly up a little, leading to Mayvin being able to continue his combo. This ability isn’t blockable so sidstep if you can.
5. Double Pipe Swipe: This pipe can easily be blocked, but if not, it can still do a lot of damage if not countered correctly. Blocking is easier since it’s a fast attack that can be comboed, but dodging can be done if your quick.
6. Plate Rain (Mid-Low HP) (AOE): Mayvin will toss a lot of dishes in the air, and a red circle will go around him. This circle is rather large so if you can’t get out in time, block. If you don’t block, you’ll be constantly damaged for a lot of health. This is equally deadly as Mayvin can keep attacking during this.
7. Full BG Attack(Mid-Low HP): The unblockable attack can instantly kill you no matter what. This is one of the reasons you should be range attacking, and/or have your allies alive.
General Strategy: An imposter Sergei, but still the same moves that can be blocked then countered. This is a simple enough task and he doesn’t have much HP to begin with, but your main concern should be the 3 undead casters. These will be top priority to start with as they can cast medium to powerful spells. Once they’re dead, simple use the same method you used when you fought the first Sergei. Another option is to simply armatize and pummel him until he’s dead. He’s resistant to everything except fire which he isn’t even weak to, but Fire damage still does more damage so armatizing with Lailah is an option.

Note: Since this guy uses the same moves as the real Sergei, refer above to the first Sergei fight for list of attacks
General Strategy: He has a ton more health this time, and he actually puts up a decent fight finally. The way you defeat him is straightforward at best. His abilites do have their own amount of damage, but they can easily be seen and either dodged or blocked. You can pummel him for quite awhile before he starts to get dangerous. He also has some very quick casting Artes which can also hurt you if your playing ranged.
1. Dark Uppercut: This is his basic attack, He’ll draw his hand back and dark energy envelops his hand (tell). This can easily be blocked, but it’s quick.
2. Dark Energy Shot: Dark Energy envelops both his hands and he goes rigid pointing both his hands at you (tell). Then, dark energy shoots out in a line. This can be dodged, or blocked. Dodging is better mainly for no loss of HP.
3. Quick Flare (Arte): He almost instantly performs an Arte that blows up at your location. The move is quick and can catch you unawares if your not ready. If your caught, simply block. If you can dodge, then dodge.
4. Dark Energy Throw: Unlike the shot, this flame will stay in the air for a set period of time doing damage to anyone who it hits. The issue with this one is that it’ll continously damage you if your caught in a corner, or if he’s hitting you and backs you into it.
5. Dark Pool (slight AOE): The boss will raise his arms and throw them at the ground. Dark energy will then appear in a circle around a targeted area dealing damage. This issue is it cannot be blocked and will knock you up so back or front stepping is the best option.
6. Full BG Attack: He’s got one to! This again is an unblockable insta killing attack. It’s good to have allies who aren’t armatized when this happens.
General Strategy Maltran was one of the most annoying for me. Her attacks can always combo into a bunch of hurful strikes that leave you with low HP. If your caught in a combo, your gonna either be hurt a lot, or be KOed. She isn’t ranged, so attacking with range is an option. She can gap close with her lunge, but that’s it. If your thinking of close range, keep the chain attacks going to prevent her from attacking. She’s resistant to everything but fire, so Lialiah Armatizing is an option for better damage.

1. Spinning Hurricane (AOE): Maltran Spins around creating a whirlwind around her. It damages anyone around her that’s too close, and can launch them in the air. Backstepping is the best option.
2. Twirling Launch (combo): Maltran will spin her spear around in front of her, and then launch the person in front in the air, hitting them three times. Then groundpounding them with her spear. The best thing to do is to backstep away so your not caught in the combo.
3. Spinning Kick (AOE): Maltran stabs her spear into the ground and spins on the top in a circle, damaging anyone around her. This attack is wider but it can be blocked and/or backstepped.
4. Diving Ice: Maltran jumps into the air, spins once in a circle and divebombs in front of her producing ice spikes to appear. This attack can be blocked if a bit back from Maltran, but right underneath her, it’s best to backstep very fast then block.
5. Charging lunge (combo): Maltran will draw back a little, then launch forward. Afterwards, she’ll spin around hitting twice more, then stab forward again for a knockback. The best option is to dodge to avoid damage, but you can block the attack.
6. Full BG attack: An unblockable damage that can instantly kill anyone, she can quite easily activate it after she’s killed a member of the party, to quickly kill another.
Boss Guide Continued Part 5
General Strategy: This Boss can be rather easy if your dodging around him properly. The general idea is to watch for when he turns towards you, and begins any sort of attack, then dodging to his side and continuing to attack him. He does have an AOE that you can’t dodge, but it’s easy enough to block. The Dragon is weak to basic attacks and isn’t resistant to wind damage so keep that in mind as you fight. One option is to have Rose and Zavied Armatize (option to make them armatize in menu) and have them activate the “power hits” which allow for higher damage. Add to that your continous slashing with basic attacks and the dragon is quite easy even on Hard Mode. The battle will be 3 parts, and on the 3rd and final part where he’s full health, whenever the dragon attempts to cast an arte, don’t attack as it’ll just speed it up. Arrows will rain down and stun him leaving open huge damage outputs.

Attacks This dragon has heavy hits with some annoying !! abilites. Also has some Artes that are hurtful and hard to disrupt. His attacks are slow, dodge to the sides but not the back!
1. Swipe: This ability has the dragon slowly bend down and swipe in front of him. This attack goes all the way to the side as well so don’t think your safe there. It’s best to dodge to the side where his arm is starting to attack from, so the end of his swing doesn’t catch you on the opposite side. This also has a (Paralysis) Status effect if landed.
2. Fly and Drop: The dragon will begin flapping it’s wings and gaining height. Then after a second or two, will drop down causing a tremor in the ground. This is better blocked as dodging is a little unreliable.
3. Tail Thump: Remember, DON’T go behind the dragon. This !! attack is practically instant, and will stun you. This ability when an enemy is behind, will cause his tail to thomp up and down several times doing hurtful damage since your stunned if it hits you. It’s hard to tell how to dodge properly because as i said, he does it almost instantly.
4. Meteorites (Arte): This Arte cannot be stopped unless you know for a fact you can stun this guy. When it casts, it’ll shoot down three meteorites that can do decent damage to high depending on your
5. Breathe Fire (Mid to Low HP): This ability which is essentially a !! attack like all of his attacks, causes him to rear his head, then start blowing fire as he is coming down. This is rather easy to dodge to the side. Blocking shouldn’t be done as you can still get hit by him.
General Strategy: This doggy maybe fast and hurtful, but his patterns are predictable and easy to dodge. However, his attacks CANNOT be blocked. I tried multiple times and just waited patiently for him to attack while guarding. You can only succesfully dodge or get damaged with this guy. Also, he’ll only spam 2 attacks the entire fight, then a low HP arte later. The issue is these 2 spam abiilities do a decent amount of damage which is annoying. Best method is to pound away at him. If your the main target, watch which head he uses, then dodge to the opposite side of that head. Then if he still attacking you, HE ALWAYS does the same attack (different element) the other way. Same plan. One way of defeating him is to make him target you, then just dodge his attacks. Set your friends to “all out” in attack so they won’t be hit.

Attacks While this doggy isn’t the most versatile in abilites, he can spam his abilties very quickly, and they cannot be blocked! Dodge the opposite way!
1. Ice Breath (left head): The left head will rear to the side, then breath ice quickly to the left side and cone to the front.
2. Fire Breath (right head): The right head will rear to the side, then breath ice quickly to the right side and cone to the front.
3. Ice and Fire Breath (both heads, mid-low hp): Both of the heads will rear, and quickly shoot both fire and ice from both sides and shoot the sides and front very quickly.
4. Heal (Arte low HP): This annoying arte will heal the boss about 4000+ which can be very annoying if your damage output isn’t enough. Attempt to use an Anti-focus arte during his casting to have a higher chance to stun him.
General Strategy: This boss can easily be defeated if your in close. She only casts her Artes when she’s at a ranged which gives her one the most boring gameplay issues. Anyway, she can hit you at close range but for not much damage. She can also teleport away sometimes and then begin casting Artes there as well, but she can still be interrupted. She also has a Full BG attack that can insta kill somebody in your party. The main thing you should do is keep the pressure on so she can’t run away. If she does run away, run with her and attempt to get close enough to hit her before she can start casting. Repeat this, and you shouldn’t have a problem. She eventually summons 4 identical copies that have the same abilites as her, which can lead to annoying attacks. Also, you cannot just keep attacking the same person when these copies appear. You must kill all the copies than kill the last one to beat the boss.
Attacks: A easy boss to kill, but don’t let her get away far enough to start casting her hurtful artes!
1. Staff Swipe: The basic attack. She’ll come straight up to you and swipe at you with her staff. This can easily be blocked as it’s one of the only close ranged attacks she has, so you can block ahead of time to counter, or just lead her around for a merry dance while your teammates attack.
2. Copies (Arte, mid-low HP): If she wasn’t annoying yet, she’s about to be. The boss will start a caste that takes a medium time to pull off, which will result in a copy that has about 8500 HP. This would be fine, if they copies themselves couldn’t copy more. They can. Copies can make copies of copies etc. and can easily overwhelm you if your getting to relaxed. However, this is her endgame move so once they’re all dead, you win.
Note: This boss attack description might be incomplete as far as her Artes, but if you can manage to hit her enough, you’ll win easily….At least that’s what happened for me.
Final Boss Guide
General Strategy: The Main strategy for this boss is to contiously hit him so he can’t do anything period. Issues with letting him loose is that he can summon monsters, and perform a ranged Aqua attack that can do a hurtful continous damage. His attacks are easy enough to dodge because they’re slow. If he manages to summon a monster, have your teammates attack the monster instead of you so you can prevent further summonings (go to strategy “weakest target”). Continue this till he’s dead. If your good at chaining with AI, then watch your bots SP carefully and attack when they’re low, this’ll help continue the chain preventing anything form happening.

Attacks: This kitty can go from range to close, but he’s got slow windups on most of his attacks. Just dodge and wait for him to use it, then attack with all you’ve got!
1. Punch: The basic attack. The boss will draw back with one hand pointing out, the other pulled back and punch forward. This effect doesn’t work if your blocking so you can either dodge and keep attacking, or just block.
2. Teleporting Slash: The boss will draw back and teleport forwards. At the end, he’ll slash in front of him. This is his gap closer. It can easily be dodged or blocked so merely watch as he draws back to dodge. Or simply wait and defend.
3. Summon Monsters: These monsters aren’t merely the simple easy guys. These monsters can be quite annoying. They normally have at least 10000 health each, and can all cast a certain Arte that has large range. Best Idea is to keep at the boss yourself and have the AI attack the little guys, this way he won’t be able to summon more. His tell is he’ll hold up both hands in front of him doing a little wig-wag of his hands. This will summon a monster if not stopped.
4. Aqua Ring: This attack is similar to Armatized Mikleo final shot when using the single target attacks. It shoots out a ring of water in a circle that does continous damage. This wouldn’t be annoying if they blocking could be disrupted. The boss also tracks your movements during his pullback. The tell is the pullback. He’ll go back and have a circular water orb between both hands preparing to shoot. Try to stop him so you can avoid damage.
5. Full BG attack: Essentially an instant kill, this ability is why you should have at LEAST one more person alive. Even when you’ve almost killed him, always keep a guy up to prevent issues with him winning.
General Strategy: I normally am always Sorey in the game and pretty much nobody else as I like what the bots are doing and how they accomplish it. However, this was the only reason I came to ADORE Rose. Rose was the reason I was able to beat this boss, and even then, Moderate was a close call. The reason I think you should use Rose is because of her one hidden arte that allows her to jump up into the air, throw 5 knives, and land. This ability can be spammed however until you run out of SP, but it does it’s job. I’m sad I didn’t use this before actually. Rose’s damage (on Moderate) did a little over 1000 damage EACH TIME. This made me do about 5 to 6000 damage per full SP. I used this ability and spammed it over and over to kill him. It also helped in stopping his charge ability. The only real damage you need to worry about is his swiping claw and ground pound. The issue with this bosses design is that most attacks of his can’t hit you when your close enough. Using this, I merely had to block or dodge his attacks in order to win. Eventually, he’ll go down.
Attacks: Heavy hitting, but easy to read movements. Be sure to watch carefully so you aren’t hit!
1. Claw Swing: The basic attack, The boss will draw back and slowly slash forward. This can be dodged or blocked, but you need to know where it’s coming from, especially during when your in close.
2. Long Range Claw Swing: The boss will rise up some and reach outward, doing a full claw swing to everything far away. This effect doesn’t do any damage to people in close to his head.
3. Ground Pound: The boss will life both hands into the air, then slam them into the ground creating a tremor. This is rather hard to dodge, so blocking is the best option
4. Erupting Ground: This damages people mid and somewhat close to the boss. He’ll breathe in, and the start blowing outwards causing rocks to start flying upwards from the ground. Sometimes It doesn’t hit you when your in the right spot close to his head, but sometimes there’s a rock that can hit you because that’s where it spawned.
5. Judgement: The chargeup that happens 4 times in the battle, YOU MUST deal enough damage. If you don’t you’ll die and be forced to start over again. The required damage output to stop him is above 12000 (in Moderate). That may not seem like a lot, but his charging ability sure seems fast as your building up the damage. Using Rose, That’s how I stopped him.
This battle is mainly a “for show” battle. All that’s required is to build up enough BG to unleash your full BG attack which will start a cutscene. HIs moves only go so far as his punch and teleport slash so just build, use BG, and enjoy the cutscenes.
Sub-Boss Guide Preface
These bosses aren’t listed in any particular order, so it’s good to make note of what boss your about to attack. Some of the bosses listed you won’t be able to access until certain points in time. Usually you can see the sub-boss and engage whenever you like. In some cases when on side quests, you’ll come across a save point before a big open area. This is normally where a sub-boss is lurking so be prepared!
Sub-Bosses Guide

Attacks: This puppy is fast and is coupled with fast attacks. Keeping him in line involves making sure you keep your chained combos going!
1. Bite: The wolf will run up to a person and bring his dead down, then quickly bite in an upward motion with his head. This can be easily blocked since it’s slow, but it can also be dodged to the left or right.
2. Quick Slash: The wolf will run close then quickly raise himself up a bit with both claws, then slash with both of his claws. This attack is a bit fast to dodge but can be done, but it’s advisable to block instead.
3. Backflip (Utility): Not many bosses have a utility. The wolf when he rushes forward (sometimes) will backflip away then charge again with a random attack. This “fake” can make you slash randomly in air and miss him. Don’t continue slashing until he’s close enough again. As his health lowers, he’ll use it more and more often.

Attacks: Brief charge up to attack, but watch for it’s tells when it does to easily block or dodge in order to counterattack.
1. Peck: The boss will waddle up and breifly lean it’s head back. Then it’ll quickly peck forward. This tell can give you the option of either dodging or blocking.
2. Multi-Peck: The boss will waddle close, then crouhc and jump. When it jumps, it’ll start to peck in front of it a lot. This can do a decent amount of damage if your not blocking or have dodged.
3. Twirl: The boss will get close but not too close. It’ll then make a flash, jump in the air, then spin a lot in the air. This is easier to dodge by backstepping.
General Strategy: I first really laughed at this guy. He’s small and doesn’t look at all dangerous period. The issue is not that he’s hard, its that he’s annoying. He’s small which allows most of your attacks to go over its head. Be sure to use attacks that have lower attacks or an attack that can cause a AOE effect, or a Arte that has an on-hit effect. One of the better options is to armatize as it’s easier to hit because of the area effect. The best option would be armatizing with Lialah.

Attack: The leech has two attacks that can be spammed, but one of his attacks can cause posion that can stop your combos if your effected. Blocking is the best option so your in a position to attack still without risk of your hits going over this thing.
1. Somersault: The leech will quickly flip in the air, damaging anyone in front or behind it. This can easily be blocked, but it can spam it quite fast.
2. Posion Spew (Posion Effect): The leech will leen back a tad, but then spew a green bubble forward. The best option is to block, but if you can catch it leening back, then you can dodge.

Attacks: The bat can gap close faster than you can slash, so defend his gap closer and counter-attack!
1. Bite rush: The bat when he’s coming towards you will gap close quickly and attempt to bite you. This instance, you want to guard and wait for his attack to go off before attacking, because his gap closer can hit you first.
2. Spinning rush: His second gap closer, the bat will spin around towards you with his body outstretched. This again, is why you should pre-emtively block, then counter-attack and pummel.
3. Echo attack: The only attack that isn’t a gap closer, when he begins to fold his wings over his face and draw back breath, start attacking to disupt, or dodge, or continue to block. The attack will send an echo wave forward and stop on the first person it hits.
Sub-Bosses Guide Continued Part 1
General Strategy: At close range, this boss can pummel you if your not guarding. Another issue with him is that he’s immune to all elements and not weak to basic attacks either which makes it hard to stagger him. The nice thing is you’ll always know when he’s gonna attack because he’ll just start walking up to you to attack. His attacks are mainly punches that can be blocked but he hurts a ton if you don’t block or sidestep away fast enough. Now since he’s immune to the elements DOESN’T mean you can’t use them. You can start the “power” effect to do more damage with basic attacks, then armatize to increase that power a ton if you keep the chain going. Issue with having your AI set for nothing (to run away) is they can easily be placed in a corner of the ring and die, so leaving them to attack is the best strategy. One way to prevent everyone from dieing is to take control of whoever the boss is going towards, blocking or sidestepping, then resume battle.

Attacks: This bosses attacks allow for heavy damage if not blocked or sidestepped, but its easy to tell when and who he’s attacking to easily get away from him. Basic attacks to power hit him, then elemental damage to increase damage a ton!
1. Four-Punch: This ability is his main attack, and will consist of him punching four times at his target. These attacks can easily be blocked and deflected, and you can also sidestep as he’s coming towards you to easily evade.
2. Double-Uppercut: Unlike his four-punch, he’ll draw his hand back further and down a bit, then quickly uppercut two times. This ability sometimes will penetrate blocking if too close, so the best option is to dodge to the side or back.
3. Power Punch (slight gap closer): This ability allows the boss to attack before he’s in his normal attack range. It isn’t much, but he can slightly gap close the area and can potentially stun you. Always back away or block if he just stops short of getting close. This usually means he’s winding for this attack.
4. Powerful Uppercut (mid-low hp): This ability has the same tell (slight pullback of arm) but with a longer pullback time. This can lead to high damage however if you don’t dodge it, but the issue with this attack is it takes longer to pull off which makes it easier to dodge away. Again, this uppercut cannot be blocked.
General Strategy: This boss has got a wider range of attacks than it’s smaller counterparts, can cast some artes, and will start to annoy you with unblockable jumps near the end of its HP. Luckily it’s weak to basic attacks, so chaining combos with your BG can cause a ton of damage. I found the best way to effectively defeat the boss is to continue to use BG in chains, and wait for the AI to almost finish their attacks to help continue chains. Also, if you change to Rose when Sorey’s BG is out, you can continue to use the BG to continue with Rose’s basic attacks and just keep spamming for a long time. The tree is also not resistant to Fire, so Lialah is great in this battle for staggering potential. If you can keep the combos going with BG, you’ll easily defeat the tree no problem.

Attacks: This tree can spam his ability non-stop to the point of death, so be sure to block his attacks or risk getting a lot of damage done to you!
1. Multi-Swing: The apparent “basic attack”, the boss will swing in front of it with its limbs four times moving forward while doing so. You cannot sidestep this attack as the sweeps are wide, so backstepping or blocking the attacks is best.
2. Arte: Target Explosion: A medium cast time, this attack can easily be interuppted with basic attacks, but if it goes off, fire particles will appear on a character (normally whomever its facing) and then detonate. This can be blocked or dodged or even free runned.
3. Stomp: An AOE effect, this ability is used when surrounded normally, the tree will raise itself up on all limbs (easy tell) then quickly come down dealing damage to anyone surrounding it. This can be annoying if your in the middle of a combo, so be sure to watch out for it as it can somewhat knock you back.
4. Arte: Gravity Ball (mid-low hp): This ability is a long cast so interrupting it is easy, however if it goes off, a ball of purple energy appears over a person and does a ton of damage if not dodged or blocked. It’s easy to dodge if you see the ball beginning to form over the person growing bigger.
5. Jump (mid-low hp): This attack is the annoying one as the tree will jump up into the air and slam down. It can damage as it goes up, and as it comes down, dealing a good amount of damage. This attack when low can also sometimes seem like the only spammable attack by the tree which can get annoying. Blocking when it jumps then backstepping as it lands is the best option.
General Strategy: A fairly easy boss, it uses the same attack as it’s little counterparts but with more damage. The first thing you should focus on is killing the little goblins first, then attacking the big one. Another way is to somehow line up the big one with the little ones, armatize with Edna, then attack using wide range attacks. Eventually he’ll go down and rather easily as well. This boss isn’t a real issue as his attacks can easily be seen being pulled off and dodged or blocked.
Attacks: This boss likes to hide in the back and attack from afar, but it can easily be killed if you interrupt it’s attacks and stagger it.
1. Multi-Arrow shot: As it implies, the boss will slowly load 3 arrows into it’s cannon, then fire them fast. You can easily block or interrupt if close enough.
2. Arrow Rain: The boss will slowly load arrows into his cannon, then aim up into the air and fire, creating an AOE effect wherever the target the boss has chosen is. This can only really be blocked as stepping in any direction will make you get hit.
3. Arte: Energy explosion: A medium timed cast rate, the goblin will walk away and begin charging the arte. If it goes off, the person it’s targeting will have little energy particles come over it, then explode. This can be blocked or dodged however. The cast time is easily stopped if close enough.
4. Power Arrow: This attack involves the boss loading a single arrow into his cannon, then slowly aiming then firing. This attack does a lot of damage if it lands, so dodging with right timing, or blocking is the best approach. If close enough, you can easily disrupt.
General Strategy: Another slow boss with easy tells, and an almost useless power charge. The first and foremost thing is to take care of the little minions first so they won’t annoy you. Once you’ve dealt with them, you can start attacking the boss. The safest method is attacking with armatized Mikleo and pummeling the boss as it isn’t resistant to water. Another method is to simply attack non-stop and dodge it’s slow attacks at close range. Heck, it’s so slow with it’s attacks, that you can easily stop him with your own attacks before you can even be halfway through them.

Attacks: Very slow and easy to stop, but if they land can cause devistating damage which can even one hit kill if it lands!
1. Slam: The boss will slowly draw back it’s club than bring it down almost lazily. This attack can easily be interuppted, but in the case of you not being able to, it can either be dodged or blocked.
2. Empower: This ability only serves to give the boss more damage. It’ll quickly pound it’s belly and glow a little red gaining more strength each time it does it. However, this ability does no damage whatsoever. Keep attacking.
Sub-Bosses Guide Continued Part 2
General Strategy: This Elephante Elephant is slow, but annoying. It’s attacks are widespread which allows it to do heavy damage if you aren’t blocking. Heck, even blocking doesn’t work with one attack that it spams. The best method is to attack him before he can attack, and continue the chain from there. If your having trouble making sure he doesn’t pull off his attacks, attacking the side is the best option. Attacking behind is an option, but it’ll activate his spinning AOE attack which can hurt everyone around (mainly AI friends). He isn’t resistant to basic attacks and wind so Zavied is a good option here. The issue comes when the boss actually does pull off an attack. Especially since they’re high damage. Attack as much as you can without breaking combo to bring it down quickly.
Attacks: Slow but high damage, this elephant also comes with an unblockable spray attack that can do high damage. Attack constantly to prevent attacks, and dodge his normal attacks if you can!
1. Trunk Swipe: The basic attack, the boss will swing it’s trunk in front of it in a wide arc. Since it’s slow, you can easily block it, or you can dodge to the side of where the trunk is headed to get to the side quickly.
2. Spin: The boss will rotate it’s entire body in a direction, (its tell) and then spin its body around. It normally faces the opposite direction it was facing when it spins so use that to your advantage. Also, the can’t be sidestepped, so blocking or backstepping is the best option.
3. Bubble Blow: This unblockable attack will have the elephant’s swing animation, but with water coming from its trunk. It’ll then start shooting water out in front of it in a slow stream. This is best sidestepped as backstepping can still get you hit sometimes.
General Strategy: The pill bug isn’t a real threat, you can easily attack without much reprecusion. If it’s doing enough damage to you however from you just constantly attacking, then strategy will be required. Since the bug is weak to wind, Armatizing is always an option. Merely keep attacking, and if you need to, dodge and block.

Attacks: A quick attack, a utility, and a long spin-up are all this boss uses, but it can still hurt if your not blocking or dodging.
1. Headbutt: The bug will jump up and headbutt the person in front of it. When he does it, he’ll lean back a little then ram (the tell). It’s easier to block than dodge, but if your quick you can dodge.
2. Backflip (utility): A rare utility in bosses, the bug will flip backwards away from the person it’s facing. This can prove annoying if your in the middle of a combo and it jumps away, so don’t mash away unless you know it can’t do anything and risk losing SP.
3. Super Spin: A easy tell, the enemy will spin a bunch in his shell on the ground, then shoot forwards. It’s easily dodged, so merely move to the side, and wait for it to go off. You can even go and wait ahead so you can attack when he hits the end range of his spin.
General Strategy: The giant may hit hard, but his attacks are very sluggish. Simply dodging his attacks then attacking nonstop is the simple and easy method. The only real danger is his stomp which is an unblockable AOE attack. If you can dodge that, you’ll easily take down the giant. As the giant isn’t weak to water however, you can also Armatize with Mikleo and merely attack from afar. Either strategy works very well.

Attacks: Slow and easy to see attacks, this boss can easily be defeated, but don’t think about blocking! Dodge whenever he attacks!
1. Club: The giant will slowly bring it’s club back, then swing in an uppercut towards it’s target. This is easy to dodge, so just sidestep. Backstepping isn’t as reliable as the range on the swing is a little long.
2. Punch: A copy of the club attack, but with the fist instead.
3. Stomp: An AOE attack, the giant will slowly raise his foot then stomp downwards. This attack cannot be blocked, so backstepping is the best way to get away. You need to be careful though as the AOE has a decent range.
Note: Due to the fact that these are a direct copy of the Boss of the Cardinal, please refer to that explanation in the bosses guide. Also, the only thing to take note of is that they spam their Petrify beam more at lower health. When you eventually face both of them, focus on one primarily to prevent two spammers of petrify. This can be easily be done by having your AI partners focusing on one person (lower hp which is whoever you hit first) to kill that person faster.


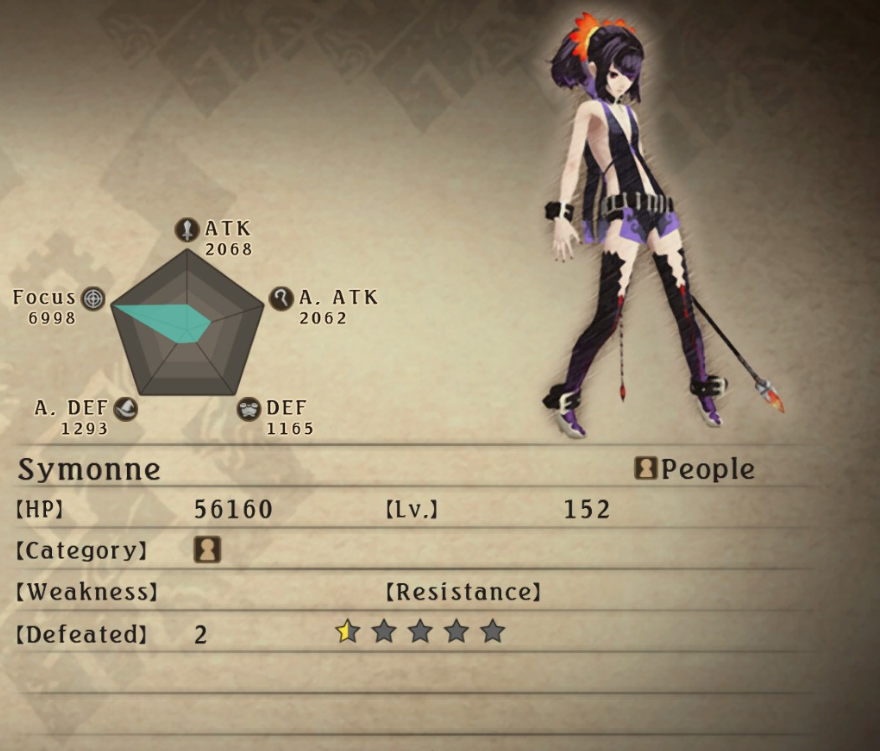
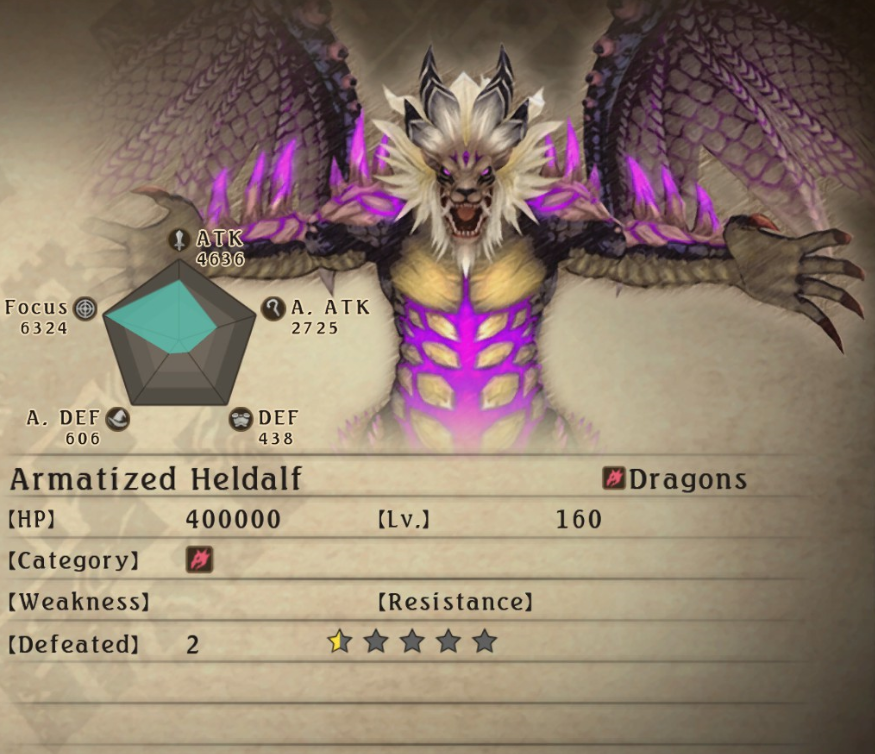
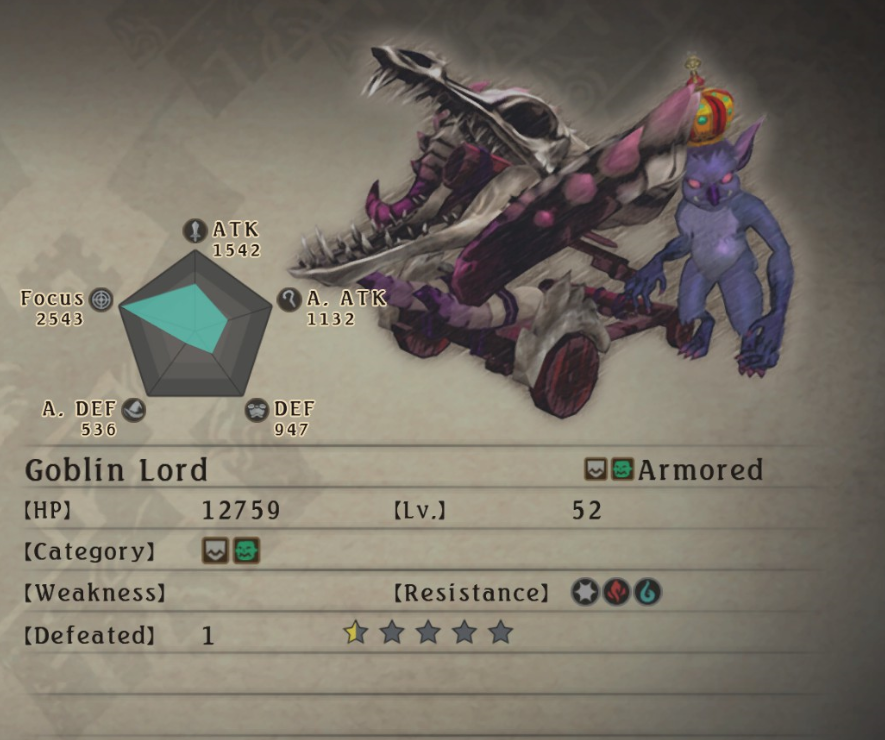
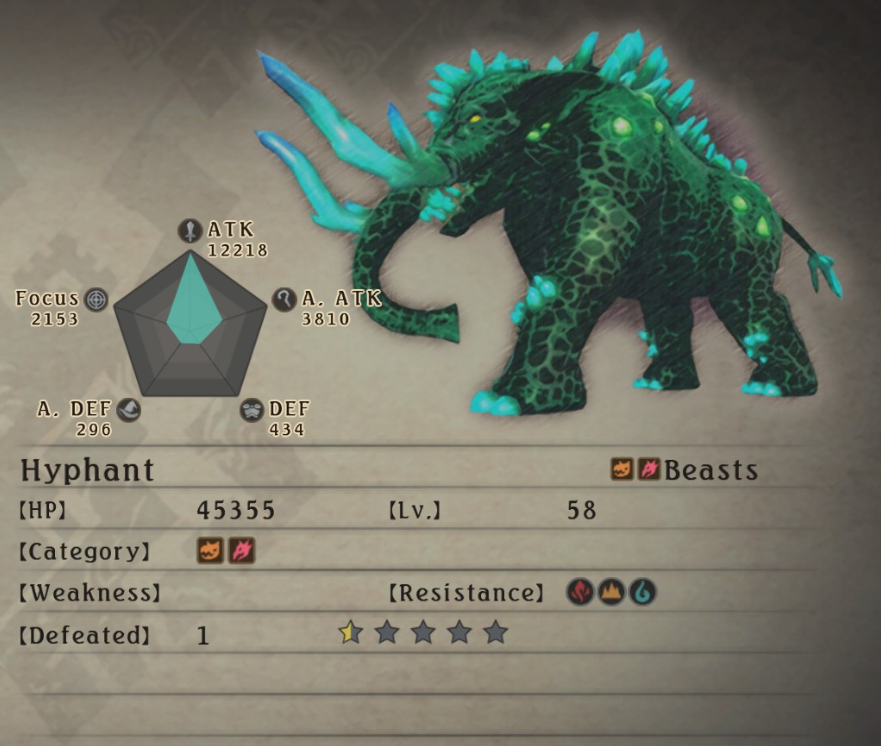
These previews are posted mainly for stats.
Q&A
Q: Why do I see so few bosses on your screen? I think i fought more in between the ones you have.
A: The “Sub-Bosses” are optional Bosses for you to fight. The Bosses I’m listing here are not optional and you will have to fight them. I do intend on making a Sub-Boss Addition when I’ve finished my first playthrough.
Q from Azasyl: I’m on salamander and i can’t beat it, on lvl 24 (my best char) and he is 41. Saw in your picture lvl 38 on him, what lvl u had there? Cause i think my best option is fight to get more lvl.
A: Leveling up is always an option, however, here’s another option. The Salamander LOVES targeting your allies. Using this, i found a cheapo way to beat him. It is rather tedious but it worked lol. Essentially have your strategy for your characters (except Mikleo and Sorey) set for nothing. Just nothing, don’t burst, don’t attack nothing. The salamander will rush at them and try to attack. The characters just run away. This just goes on and on which is funny. If or when they die, just simply dodge like i said. His attacks I found are easier to dodge to the right than anything. Also, if he starts running away, he’s gonna use Artes. Follow and pummel him with Armatization Mikleo.
At this point you should have “Saint’s Arrow” for The Armatization (default its down then attack). The Down makes it so that it focuses on one target doing more damage. Funny thing is, the Sain’ts arrow trips the Salamander XD. He chases a guy, trips, chases trips its funny to watch haha. Anyway, managing health wise, Mikleo has the BEST recovery in the game: Elixer. Use it when at half health or a little lower just in case. Essentially: spam attacks from range.
Hope this helped.
Q from Benjigascar:
For now I wanted to beat the behemoth at Meadow of Triumph, do you have any tips? I think Lailah/Mikleo said the best way to do it is dodge the Behemoth’s attacks. I tried fighting it for once, I managed to stay alive for some time but my party members died so fast. I haven’t tried commanding the party but I’m guessing prioritze defense is not really working for this battle, since the Behemoth’s charge is just an instant kill.
I am now on level 21 if I remember correctly. Cheers
A: The thing about the behemoth is its slow. It’s only fast (ish) attack is the upper thrust of his horns, but that can easily be blocked (he just stops and leans back a bit easy tell). He can also be stunned fairly easily.
When your attacking the Behemoth, whenever you see him pawing the ground, sidestep to his side then resume attacking. The risk of getting hit if he does manage to charge is then eliminated. As far as your teammates go, if you have one person the behemoth likes targeting, simple set that person for nothing. No attack, no burst just nothing in strategy. They’ll run away whenever the sub-boss gets too close. However, this sometimes doesn’t work as his charge confuses the allie AI into running away too late which gets them hit, and in most cases its best to have them set for “Aim for Weakness” to stagger the boss more.
If you have trouble and your the only one alive, a slow but effective method is the Mikleo Armatization which allows you to attack from afar (don’t forget single target attacks with down!). Whenever you see him charging to run, just free run until he charges and then continue shooting. He’ll eventually go down.
Finally consider the bosses level (not sure what mode your doing) and your own. You might have to go back to that boss and fight him rather than fighting him now. Don’t worry, the sidequests are always there to do. Hope this helped
Q from Kittygal:
can someone please tell me where to go after the wind trial? i am currently fighting ednas brother out of boredom and have no idea how to kill him so i would like to see that here as well if possible even though i kinda wanna go to glaivend basin i dont know how to get there
A: My apologies for not updating this, as I’ve been busy. The next place you should go is the earth temple (as a skit plays after defeating the wind temple). For advice but not spoilers: A place with a LOT of sand. You can also get hints by talking to NPCs or your friends you have!
Onwards to the question: Edna’s brother Eizen is extremely strong and I’d like to add (shouldn’t be fought just yet as important story is later revealed!!! This boss has very long sweeping attacks and can even hit you at the side with front swipes! After constantly attacking close range I realized I didn’t try Mikleo Armatization yet on him as he isn’t resistant to Water.
The thing is that Eizen can easily be defeated with Mikleo armatization or just long range Artes. Eizen’s attacks are easy to stay away from as his attacks are slow. Eventually it gets even easier as when he’s damaged more, he’ll use AOE attacks around him. Which do nothing since your shooting from afar.
He’ll go down rather easily if you can just manage to stay away from him and walk away from his slow attacks. If you ARE going to get hit though, make sure you have a 3rd or 4th person to revive you and Mikleo!
It’ll take a while as his Health is really high. I hope this helped!
Q from Mr. Manual:
Sometimes bosses will just stop taking damage completely for a period of time, even when they’re not guarding. Is that Iron Stance? And how do I get around it?
A: This can be because some bosses actually are resistant to whatever your attacking them with, or your not using your Artes to help start a “chain” or a “series” off attacks. Some bosses have a tendency to be resistant to EVERYTHING except for a few things. In this case it can be very, very annoying when they don’t take damage.
A few examples: If a large monster is casting an arte, your attacking but doing NO damage and merely speeding up the casting process (this does happen) it means your not attacking correctly. Whenever you fight a monster/boss, they usually have a weakness. If you use and arte that they are not weak against, they will either resist it (little damage) or nullify it completely (no damage).
Sometimes the only way to damage a monster is to use an arte to start, then follow it up with basic attacks (keep the chain attacks going!). I’m unaware of what type of monster your trying to fight against, but in any situation, if your basic attacks aren’t doing anything, then try using artes instead. Make sure they aren’t resistant to the ones your using though! Sometimes basic attacks are what you need to “disrupt” an enemy, then use artes.
In short: Check enemy resistances, try a basic attack to disrupt and if it doesn’t work use arte to start, if they can be disrupted using artes first, then use arte then basic attack to keep chain gauge going. If they are disrupted by basic attack first, then use artes (or armatize works) to deal higher damage.
Remember: ALL Bosses/monsters have an invisible SP meter.
Q&A 2
Q from DBryan06:
what control settings do you recommend for new players on xbox pad/manual semi auto or automatic? any tips for me and were route too follow when playing the game? thanks
A: It can depend on how you enjoy playing the game. Automatic involves the Computers to take control of it, and your in the background issuing commands and telling them what to use etc. This is great for people who like to take a more strategic approach and don’t want to mess with all the commands.
Semi-Auto Is almost an annoyance of sorts but is easier for newer players if its hard for them to gauge range etc. It essentially makes the character they’re controlling move to the point where they can hit the enemy, then performing the inputted command. Recommended for starting if you want to be the one in control and just starting.
Manual is my personal preference because if you know the range of your strikes, you can attack instantly when you press the button instead of your character walking closer on its own. This is mainly because I simply gauge how far the enemy is away and its better if the enemy is coming closer so I can hit it before it comes too close and begins it’s hit animation.
In a short Sum-up Response: Automatic for Strategic Approach, Semi-Auto for newer people needing to learn to gauge the attack range, Manual for people who know their range and want instant input of their commands.