
Overview
This is a guide for Dante Devil May Cry 4 Special Edition. It covers game mechanics, his different styles, every action in his Skill List, Just Frame Attacks, Weapons Switching, and lots more.
Introduction
There’s no denying that Devil May Cry 4 is a difficult and complex action game to master, so I have created this guide to assist players that are having trouble mastering the techniques that they see in combo videos created by high level players.
Think of this guide as a reference sheet. Each section of the guide will include a technique/skill and will go into detail on how to execute it. I can only show you how to preform the techniques so adding it to your gameplay is something that will only come with time and practice.
Devil May Cry 4 is a game that I’ve been playing since December in 2012 and to this day, I still have trouble with this character in some areas. Don’t worry if you have a tough time executing any of these things right off the bat because this character will take time.
The complexity of this character is oftentimes intimidating for new players and average players alike. If you have trouble with one of the techniques in any of the following chapters, just skip it for now and practice another. Keep in mind that the chapters aren’t in any particular order. Remember that this game is only as complex as you need/want it to be and you don’t need to learn a majority of the techiniques listed here in this guide. You could complete the entire game using a single style and weapon if you wanted to and still achieve SSS rankings. So if playing for efficiency is what you’re interested in then this is not the guide for you.
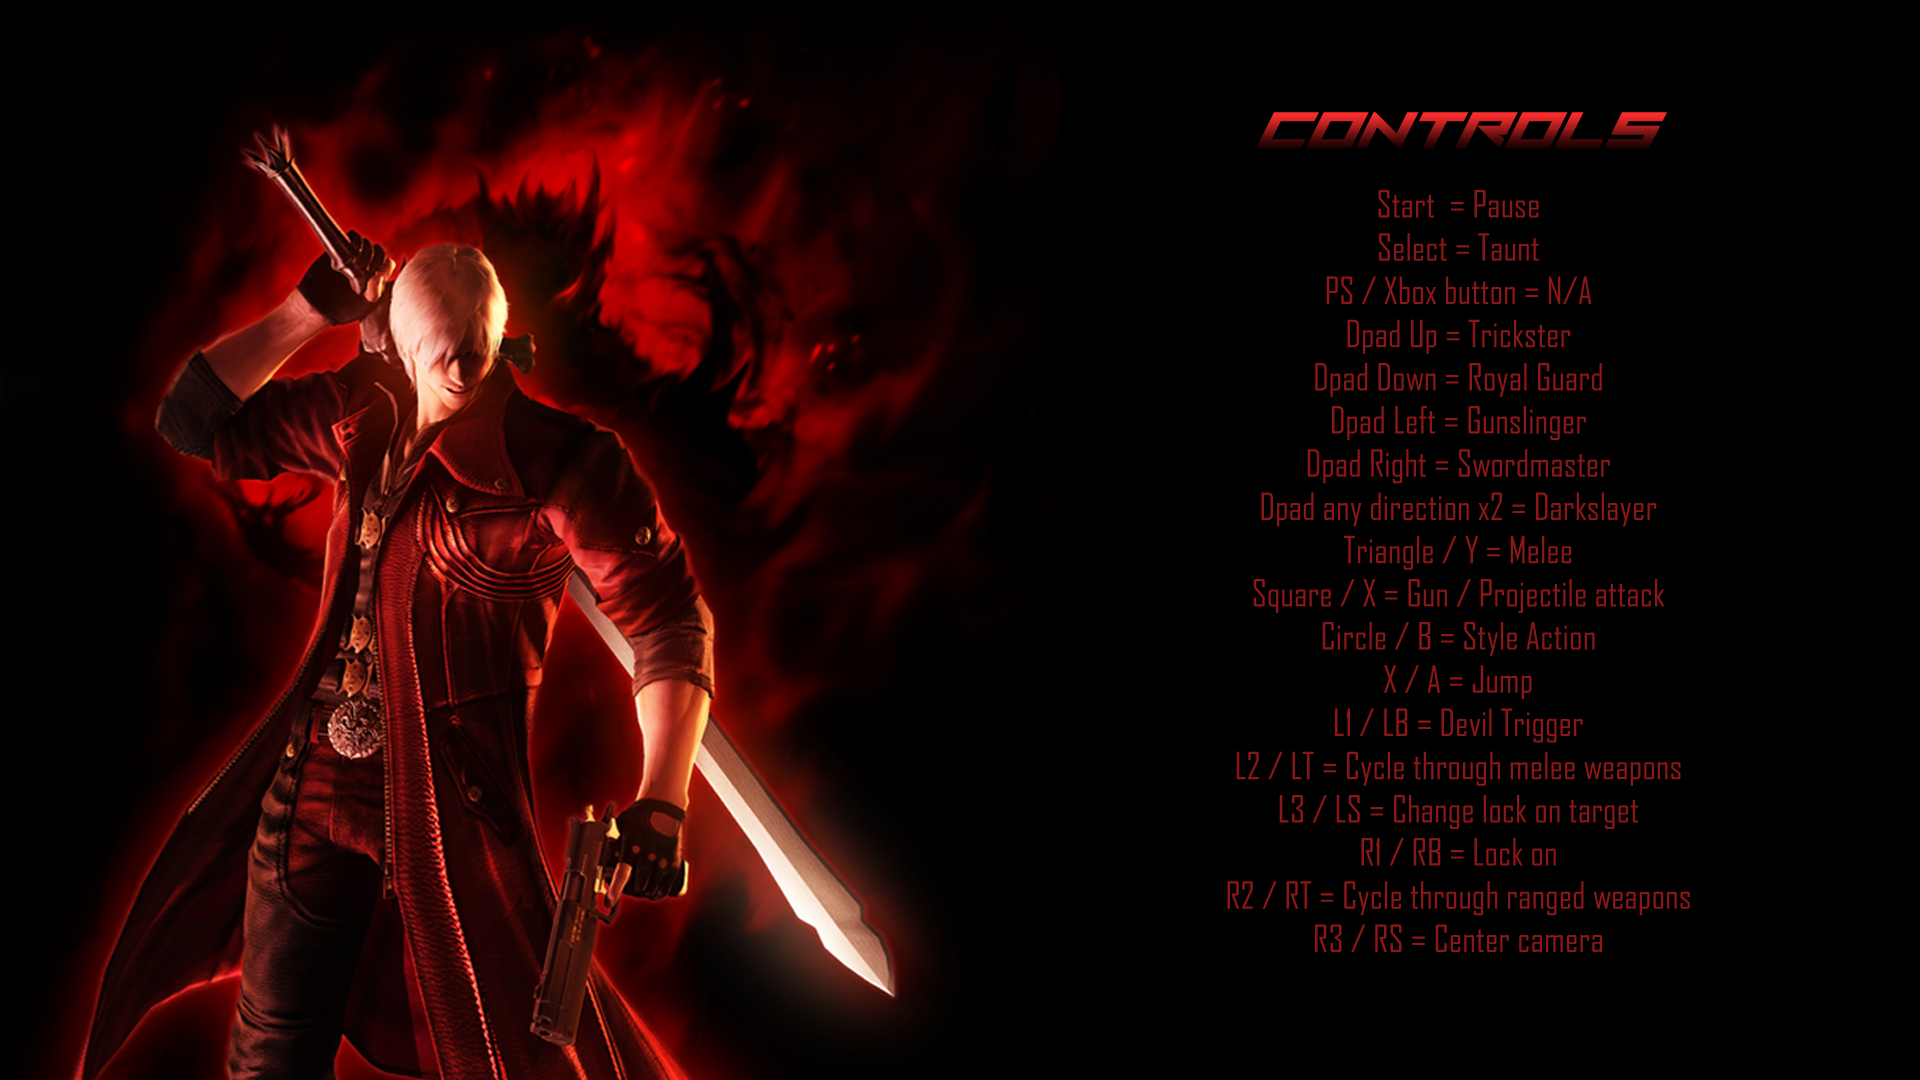
Controls
I’m sure everyone reading this guide already has a good understanding of the controls, but I will write them here so that you can come back to it incase you forget something.
Devil May Cry 4 allows you to create any control scheme you’d like. Experiment around with different controls and see what works best for you. I would also like to point out that everything in this guide was done with the default controls. I have listed the controls for both the Dualshock 3 and the Xbox 360 controller.
Turbo Mode
If you’ve checked through the game settings menu, you may have noticed an option named “Turbo” which can be shut on or off. Turbo Mode is a setting that was exclusive to the PC version of the original Devil May Cry 4 and is now available on PS4 and Xbox One in Special Edition. It will increase the speed of the game by 20% creating faster gameplay.
I would recommend having this setting turned off if you’re having trouble learning the techniques that this guide will teach you. As you play the game, you may feel as though the game is too slow for you, and that is when you know you’re ready to turn Turbo on. Feel free to try it out if you haven’t already.

Because Turbo Mode increases the speed of the game, timers in game will also increase in speed
Dante’s Movelist
Due to the movelist being a bit cumbersome and very unorganized, I have decided to list all of Dante’s attacks and abilities in one section. You do not have to read through this section, this is only here for those who are looking for a specific attack/move.

-
Side Roll
– Lock on + Left/Right on the analog stick + Jump
-
Kick Jump
– Press the jump button near a wall after jumping once
-
Speed
– Continue holding the analog stick in the same direction to begin sprinting (10 steps req, changes to 2 steps outsite of combat)
-
Enemy Step
– Press jump in mid air while near an enemy to use him/her as a stepping stone
-
Air Hike
– Create a circular platform below your feet that can be used to double jump (After having pressed the jump button, press it again).

-
Rebellion Combo A:
Triangle / Y – Triangle/ Y – Triangle / Y
-
Rebellion Combo B:
Triangle / Y – Slight Pause – Triangle / Y – Triangle / Y
-
Stinger:
Lock on + Forward (hold) + Triangle / Y
-
Million Stab:
Lock on + Forward + Triangle / Y (hold)
-
Round Trip:
Triangle / Y (Hold until Rebellion glows red and makes a distinct noise, charges much quicker in Special Edition. Choosing a stage as Vergil then switching back to Dante makes his Round Trip charge faster)
-
High Time:
Lock on + Back + Triangle / Y (Holding Triangle / Y will have Dante follow the enemy)
-
Helm Breaker:
Triangle / Y (Mid air)
-
Prop / Swordmaster:
Circle / B
-
Shredder / Swordmaster:
Circle / B after Prop (Hold Circle / B to add hits)
-
Drive / Swordmaster:
Lock on + Back + Circle / B (Can charged up two more levels)
-
Quick Drive / Swordmaster:
Triangle / Y + Circle / B
-
Overdrive / Swordmaster:
Press Circle / B immediately after Drive
-
Dance Macabre / Swordmaster:
Lock on + Forward + Circle / B x10 (Can be stopped at Million Stab and it can be mashed for additional hits)
-
Gilgamesh Combo A:
Triangle / Y – Triangle / Y – Triangle / Y – Triangle / Y
-
Gilgamesh Combo B:
Triangle / Y – Triangle / Y – Slight Pause – Triangle / Y – Triangle / Y
-
Draw:
Lock On + Back + Triangle / Y
-
Straight:
Lock on + Back + Triangle / Y (Hold, can be charged up two more levels)
-
Kick 13:
Lock On + Forward + Triangle (Activate Devil Trigger for additional hits that end with Vergil’s Rising Sun attack from Devil May Cry 3)
-
Flush:
Jump (Transforms jumps into kicks that deal damage)
-
Full House:
Jump – Triangle / Y
-
Shock / Swordmaster:
Circle / B (Can be charged up two more levels)
-
Shocking / Swordmaster:
Circle / B (In mid air, cannot be charged)
-
Beast Uppercut / Swordmaster:
Lock On + Forward + Circle / B (Can be charged up two more levels)
-
Rising Dragon / Swordmaster:
Lock On + Forward + Circle / B (Hold untill Gilgamesh successfully charges once)
-
Divine Dragon / Swordmaster:
Lock On + Forward + Circle / B (Hold untill Gilgamesh successfully charges Twice)
-
Real Impact / Swordmaster:
Lock On + Back + Circle / B
-
Lucifer Combo A:
Triangle / Y – Triangle / Y – Triangle / Y – Triangle / Y… (This is the only combo/string in the game that does not end. Press the attack button as many times as you desire)
-
Lucifer Combo B:
Triangle / Y – Slight Pause – Triangle / Y (Mash until Dante places 6 pins in front of him)
-
Lucifer Combo C:
Triangle / Y – Slight Pause – Triangle / Y (Mash till Dante places the final pin, the last one will be placed at an angle and will cause a knockback)
-
Lucifer Combo D:
Triangle / Y – Triangle / Y – Slight Pause – Triangle / Y
-
Lucifer Combo E:
Triangle / Y – Triangle / Y – Triangle / Y – Triangle / Y – Slight Pause – Triangle / Y (Mash untill Dante uses his final pin)
-
Ecstacy:
Lock On + Back + Triangle / Y
-
Pin Up:
Lock On + Forward + Triangle / Y (Preform 3 times in a row to place the maximum amount of pins on the field, 15)
-
Discipline / Swordmaster:
Lock On + Circle / B (Repositions all pins currently on the field around Dante’s body)
-
Climax / Swordmaster:
Lock On + Back + Circle / B (Repositions all pins currently on the field around Dante’s body to create a protective barrier)
-
Bondage / Swordmaster:
Lock On + Forward + Circle / B (Repositions all pins currently on the field around the enemy you’ve locked on to.
-
Shoot:
Square / X
-
Charged Shot
Square / X (Hold untill Dante’s forearms glow red, effect last for 3 seconds)
-
Twosometime / Gunslinger
Circle / B (Pressing the Style button once will only fire 4 bullets and mashing will continuously fire. Use the left analog stick to change the direction Dante is firing)
-
Honeycomb Fire / Gunslinger
Circle / B (Mash untill dante flips Ebony and Ivory around. Ebony and Ivory will fire much faster in Honeycomb fire. You cannot control the direction in which Dante fires)
-
Rainstorm / Gunslinger
Circle / B (Mid air, tap once for a few shots, hold down to continuously fire.
-
Shoot:
Square / X
-
Charged Shot
Square / X (Hold untill Dante’s forearms glow red, effect last for 3 seconds)
-
Fireworks / Gunslinger
Circle / B
-
Fireworks Air/ Gunslinger
Circle / B (Mid Air)
-
Backslide / Gunslinger
Lock On + Back + Circle / B
-
Gun Stinger / Gunslinger
Lock On + Forward + Circle / B
-
PF013 Epidemic
Square / X (Can be aimed either up or down using the left analog stick)
-
PF124 Hatred
Square / X (Rotate the left analog stick in a full 360 motion, only a 180 in Devil Trigger)
-
PF398 Revenge
Square / X (Rotate the left analog stick in full 360 motion twice, only a 360 in Devil Trigger
-
PF262 Jealousy
Square / X (Mid air)
-
PF594 Argument / Gunslinger
Circle / B (Mid air, uses up the meter you’ve built up even when not firing. Press Square / X to fire 1 missile, and Circle / B to fire multiple)
-
PF422 Grief
Lock On + Back + Circle / B (Tap style to throw for a short period of time, hold the style button to increase the attacks duration)
-
PF666 Omen
Lock On + Forward + Circle / B (Omen damage output is determined by how much meter you’ve built up in your Disaster Gauge)
Note:PF Stands for “Pandora Form”. All non style based Pandora attacks will fill up your Disaster Gauge, Maximizing the damage and usefulness of style based attacks with Pandora. The Disaster Gauge is the Pink bar below your first health bar.


Dante’s Movelist Continued

-
Yamato Combo S
Circle / B, Circle / B, Circle / B (If you allow Dante to resheath the Katana back into it’s scabbard, you will be rewarded with a full D.T Rune, and some style points)
-
Slash Dimension F
Lock On + Forward + Circle / B
-
Slash Dimension C
Lock On + Back + Circle / B
-
Aerial Rave V
Circle / B, Circle / B
-
Dash
Point the left analog stick in any direction and press Circle / B (Keeping the Left Stick in a neutral position will Dash Dante Forwards. Devil Trigger allows for consecutive dashes)
-
Sky Star
Circle / B (Mid air, Aerial version of the ground dash. While in Devil Trigger, you are allowed two consecutive Sky Stars)
-
Mustang
Circle / B (press and hold, must be in direction of enemy)
-
Flipper
Circle / B (Press the style button when you are hit to execute an air recorvery)
-
Air Trick
Lock On + Forward + Circle / B (Teleport, You are allowed one on the ground, and one in the air. That rule changes to one on the ground, two in the air when In Devil Trigger)
-
Block
Circle / B (Fighting game styled block. You will still receive damage for blocking)
-
Air Block
Circle / B (Mid Air, Fighting game styled block. You will still receive damage for blocking)
-
Royal Block
Circle / B (Perfectly timed block, you will receive no damage by using Royal Block)
-
Air Royal Block
Lock On + Forward + Circle / B (Mid Air, Preform just before you’re hit by an enemy)
-
Release
Lock On + Forward + Circle / B
-
Air Release
Lock On + Forward + Circle / B (Mid Air)
-
Royal Release
Lock On + Forward + Circle / B (Preform just before you’re hit by an enemy)
-
Air Royal Release
Lock On + Forward + Circle / B (Mid Air, Preform just before you’re hit by an enemy)
Note:As you block, you will fill up the “Rage Meter” located below Royal Guard on your HUD. The amount of meter you built up from blocking will determine the amount of time you can remain in Dreadnaught form and the amount of damage you deal with Royal Release. Royal Blocks build much more meter then standard blocks, but requires precice timing.
-
Dreadnaught
Lock On + Back + Circle / B (The Dreadnaught cannot be hit/stunned. The amount of time you spend in Dreadnaught form is dependent on the amount of meter you’ve built up from blocking. Using Royal Release while in Dreadnaught form will use all of your Rage Meter.)


Chapter 1 Royal Guard Canceling
At first glance, Royal Guard seems like just a block but there is a lot more to this style then just blocking/guarding. Royal Guard allows you to cancel many of the attacks that are available to Dante.
To avoid any confusion, I have placed the captions/descriptions to the images you are about to see, above the in-game screenshots.
Here is an example of an attack being canceled with Royal Guard (RG):


If you done correctly, the animation will end early, and Dante will not execute the final stab. After the animation has ended, you can follow up with any attack you’d like. This is just one of the many things that can be done with Royal Guard. I can’t list all of the combinations and possibilities because there are too many, but don’t be afraid to experiment with Royal Guard. Some attacks can be canceled earlier then others and some later then others.
This technique doesn’t only apply to attacks on the ground, but Dante’s aerial movelist as well.
Here is another example of Royal Guard canceling:


You get the idea by now, use Royal Guard to cancel attacks early and open up new options for combos.
You can cancel attacks the same way using
Chapter 2 Jump Canceling
“Jump Canceling” is possibly the most difficult technique to fully master in Devil May Cry 4 but it is easily the most rewarding. Jump Canceling is exactly what it sounds like, you are canceling something with a jump, in this case it’s attacks.
Enemy Step is required for Jump Canceling. Enemy step is one of the universal abilities (meaning it is available to all characters) and can be purchased at a Divinity Statue under “Abilities”.

Enemy Step will reset all of your aerial attacks, allowing you to repeat them and extend your combos.
Normally, you are only allowed one Air Hike but with Enemy Step, you can use it as many times as you’d like to.


So now that you understand what Jump Canceling does, let’s try it out with some attacks.


You can repeat the first hit of Yamato’s Aerial Rave as many times as you’d like.
Here is another example of a combo that involves Jump Canceling:


I won’t list every combination and possibility since there are hundreds of combos that can be put together with Jump Canceling so start experimenting.
Keep in mind that every enemy is different, certain enemies will require different timing and positioning. Another thing you should remember is that certain enemies stay in the air with Dante, and others with fall to the ground as you hit them. For example, Frost’s stay in the air with Dante while the Cutlass’s move away from him. You’ll need different combo’s for every enemy, don’t expect to put together one combo and automatically assume your set for the rest of the game.
Chapter 3 Guard Flying
Guard Flying is one of the most effective and most fun techniques you can learn with Dante. Guard Flying pretty much let’s you zip around the level at a very fast speed and opens up a countless amount of options for new and interesting combos. Guard Flying can be used for evasion, but can also be placed in combos.
Understanding how to Jump Cancel is a necessity for this technique. To execute a Flying Guard, you’re going to need an attack that generates inertia, preferably one of these two skills:
-
Sky Star (Trickster -> Jump -> Style)
-
Killer Bee(Gilgamesh -> Jump -> Triangle/Y)


If done correctly, Dante will fly in whatever direction that the analog stick was facing.
If the analog stick is in a Neutral position, Dante will fly forwards.
Because the jump is what causes Dante to fly, you can use an Air Hike/Double Jump to add distance to your Flying Guard, or change the direction of Dante without losing speed.
If you want to preform a second Flying Guard, input the FG as if you were Jump Canceling it (slide your thumb across Jump then Style), don’t just jump and guard. Faliure to do this will cancel the Flying Guard with just a regular guard, losing your momentum in the process.
Remember that this can also be done with Full House. You may even find it easier to execute using this method.


Make sure Full House hits the target before canceling it with Royal Guard. If you cancel it too early, you won’t fly anywhere.
Chapter 4 Devil Trigger
Dante can change into his demonic form by pressing L1 / LB. You must have the first three Devil Trigger runes on the HUD filled in order to activate it. In Devil Trigger, Dante has access to certain abilities that are not possible outside of DT.
- Dante’s health will regenerate at a steady pace
- Dante will deal more damage
- Gain a 15% speed boost
- Gain access to attacks and skills that are not available outside of Devil Trigger
- Will take more hits before getting knocked back or knocked down
- Allows you to preform two Air Hikes / Double Jumps (three jumps total)
- All gunshots become charged shots automatically
- Sprint will only require 5 steps instead of 10
- String together consecutive Dashes
- Teleport twice in the air
- Sky Star twice in a row
Change made to Dante’s Movelist/Abilities while in Devil Trigger:Stinger
Stinger hits only onceStinger / Devil Trigger
Stinger will drill through enemies and hit multiple timesKick 13
5 kicks ending in a launcherKick 13 / Devil Trigger
Buffed version of Kick 13, additional kicks with a launcher that ends in the airPin Up
Dante will place pins 5 on the field at once. Repeat two more times to place the maximum amount of pins (15).Pin Up / Devil Trigger
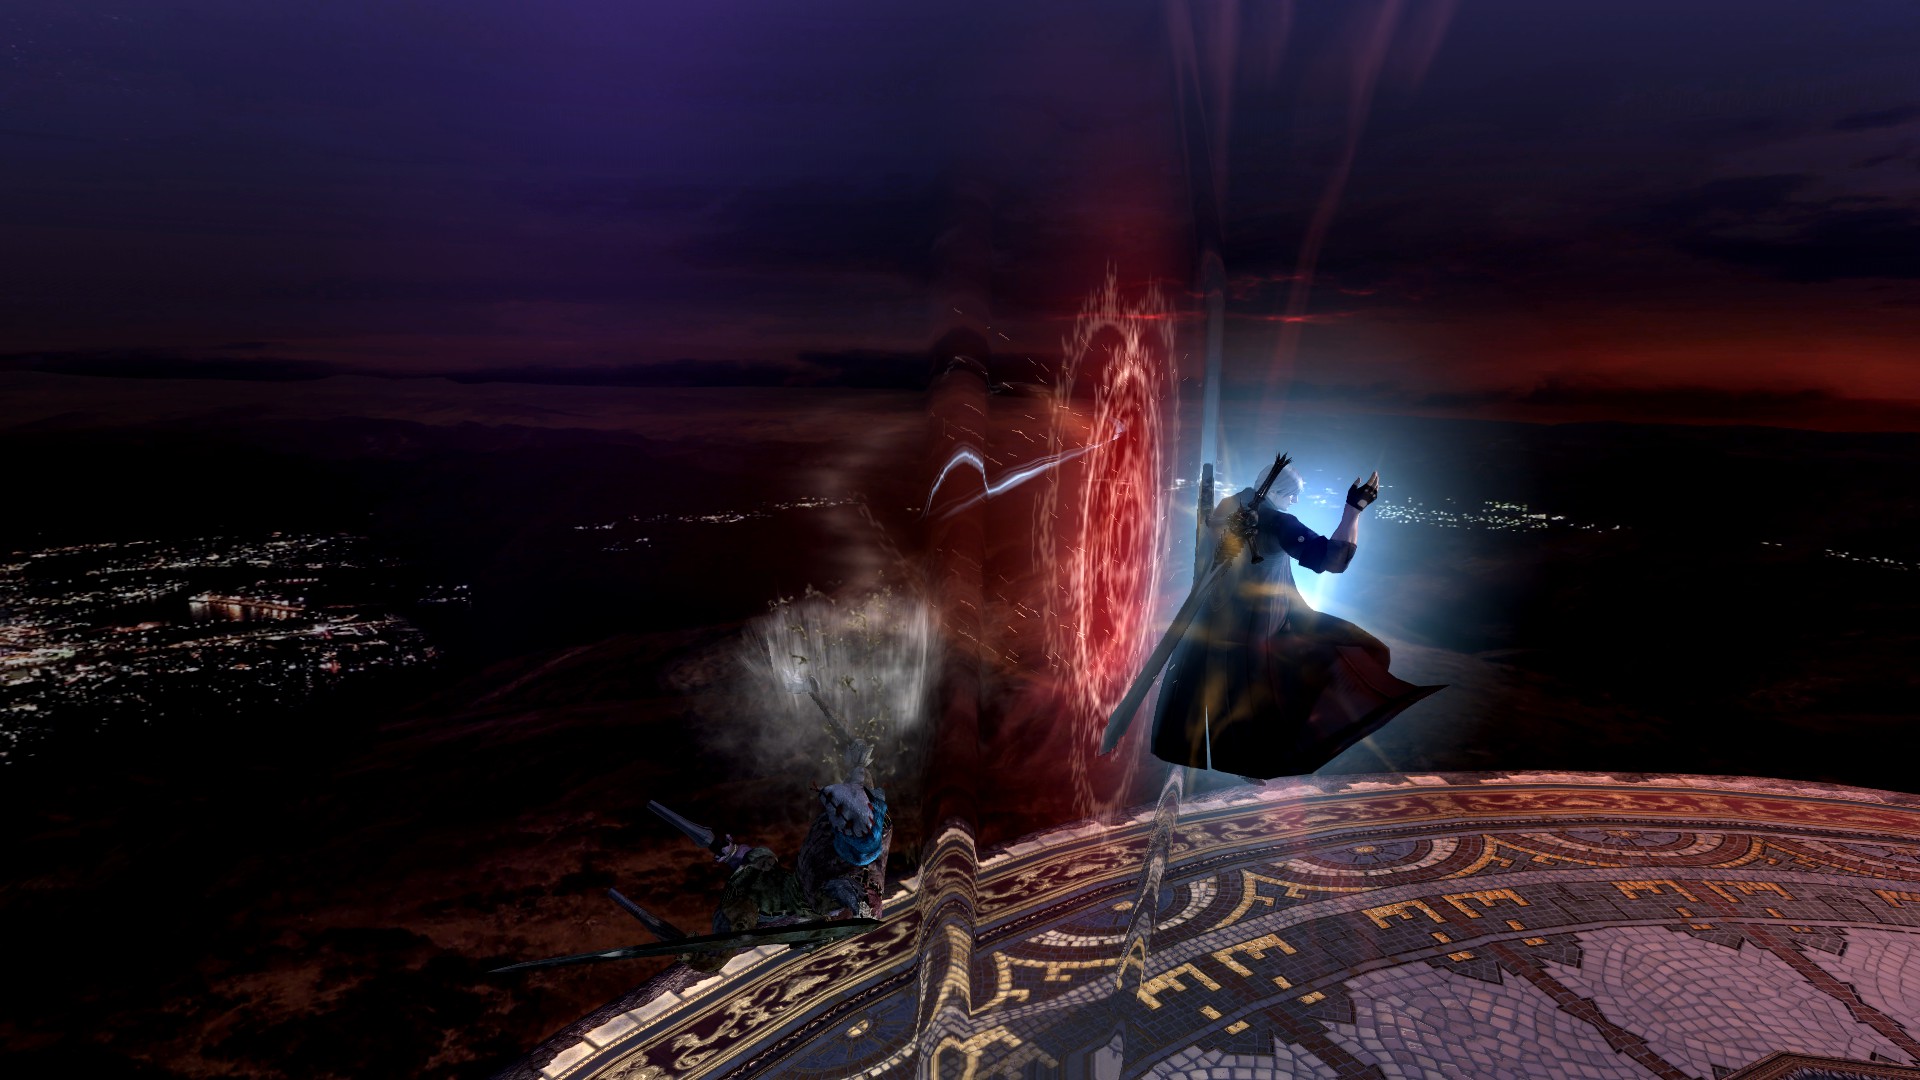
Identical to the standard Pin Up however in Devil Trigger, Dante will follow up with another set of Pins.Devil Trigger Distortion Is a technique that add’s a colossal amount of damage to your attacks. I will briefly cover the “Distorted Real Impact” in this guide but I encourage you to experiment around with other attacks / strings.
Normally, Real Impact only hits 3 times but activating Devil Trigger before the third hit connects will add and extra hit + damage.
This is what a Distorted Real Impact looks like (DRI)I personally practice this on The Savior (Mission 18) since the blue orbs on his body are easy to hit, and because he has a health bar which allows you to see the damage you’ve dealt better then the lock on’s hp display.
Devil Trigger Distortion can also be mixed with Just Frame Gilgamesh attacks also deal a massive amount of damage. This can kill many of the lesser demons in 1 hit even on harder difficulties.


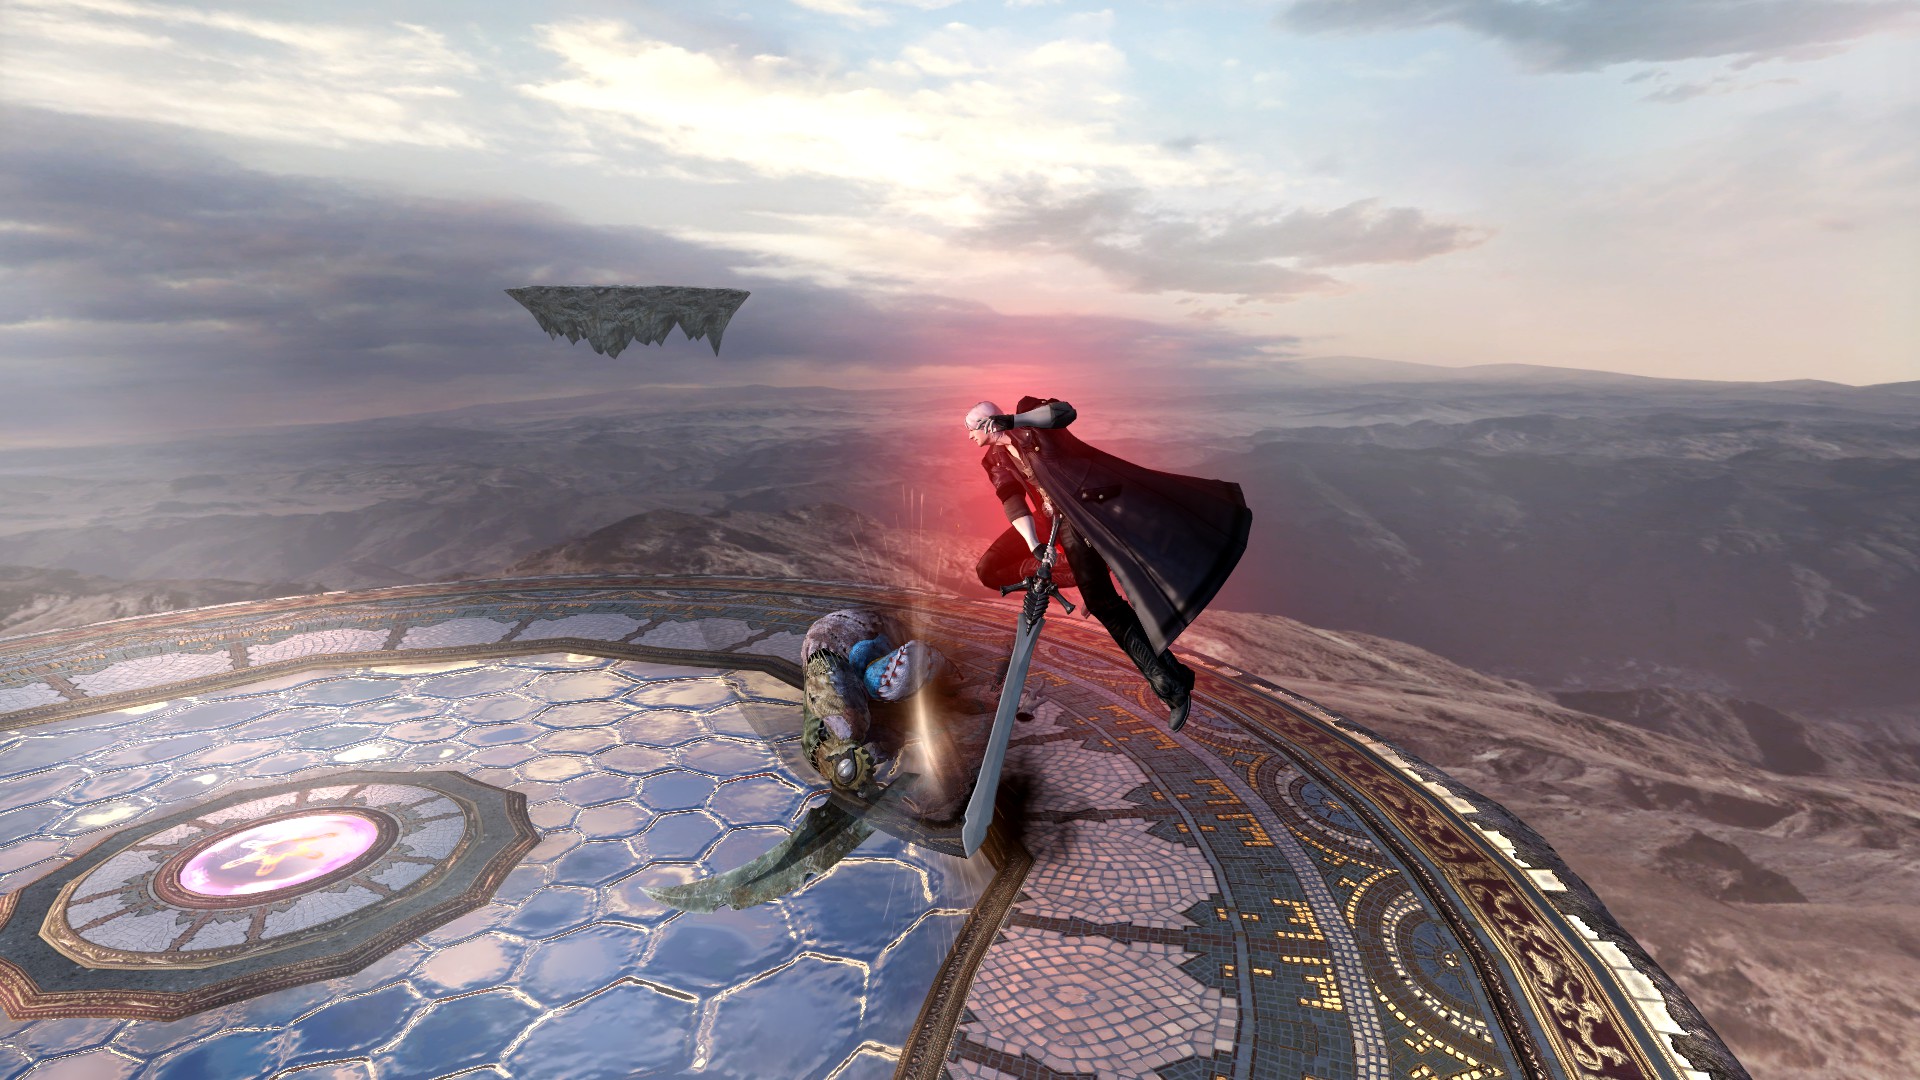
Chapter 5 Sky Star
The Star Rave is a flashy way of staying in the air while constantly hitting the enemy. To execute a Star Rave, simply combine a Sky Star and one hit from Aerial Rave and repeat the process as many times as you like/can.This is of course easier said then done. You will be using one action from two different styles while trying to stay in the air, all at the same time.


This can also be done on enemies in the air, and it is done the exact same way.
I strongly recommend practicing this on Berial since he is one of the largest enemies in the game and is great for practicing Jump Canceling.
This is technique is named “Star Rave” because it mixes Dante’s Sky Star and Aerial Rave but that does not mean you can’t apply it to other attacks. After a Sky Star you can JC into any other aerial attack you’d like to use.
I’ve listed a couple of combo’s below for you to try out. They’re short, practical, and will help you practice placing the Sky Star skill in your combos with different attacks. Remember that these are just examples, feel free to change up the attacks in them, use them as tempates.
High Time – Aerial Rave (x1) – Sky Star – Aerial Rave (x1) – Full House – Shocking!
High Time – Aerial Rave (x1) – Sky Star – DarkSlayer Aerial Rave(x1) – Aerial Rave (x1) – Full House – Shocking!
Chapter 6 Double Weapon Switching
Double Weapon Switching Is exactly what it sounds like, switching/cycling through your weapons twice. With as simple as it may sound, it can actually be pretty difficult to do consistently and is even more difficult to fully master. Having the ability to cycle through your weapons efficiently is a skill that is well worth learning because It opens up a countless amount of opitons and combos.
Here is an example of Double Weapon Switching:


This is a technique that requires a lot of patience, and practice (like anything else really). Don’t overlook this, double weapon switching really pays off, and you’ll be glad you learned it.
With this you can switch from:
Rebellion –> Lucifer
Gilgamesh –> Rebellion
Lucifer –> Gilgamesh
This also applies to your guns.
Ebony and Ivory –> Pandora
Coyote A –> Ebony and Ivory
Pandora –> Coyote A
Get practicing!
Chapter 7 Aerial Rave and Guns
Using Ebony and Ivory (E&I) and Aerial Rave (AR) together are very useful for keeping enemies in the air.
Mixing the two together will look something like this:


Repeat this untill you hit the ground. By doing this, Dante slowly descends while the enemy stays in the air. You can then follow up with any attack. I personally like to follow up with Ecstasy (Lock on + Back + Triange/Y) to relaunch the enemy and continue the combo in the air.
Ebony and Ivory are very weak in DMC4 and will not keep heavier enemies in the air without DT or charged shots. Scarecrows and Assaults are very light, but enemies like Bianco Angelos and Frosts are heavy.
Doing this with Ebony and Ivory is a great way to keep enemies in the air but it dosen’t do too much damage, so let’s try it with the shotgun instead. The same technique applies to Coyote – A however the timing is slightly different. Keep in mind that shooting enemies with Coyote – A at short ranges will cause a knockback so this cannot be done on Scarecrows.
Since this cannot be done on light enemies, select a level with Bianco Angelos. Remember to break it’s shield first, if you don’t, he will break out of your combos.
Aerial Rave + Coyote – A


The timing on this can seem tight/tricky but it’s actually much easier then it looks. I slide my thumb from the shoot button to the style button. Practice this untill you get the rhythm down. This technique should not be disregarded.
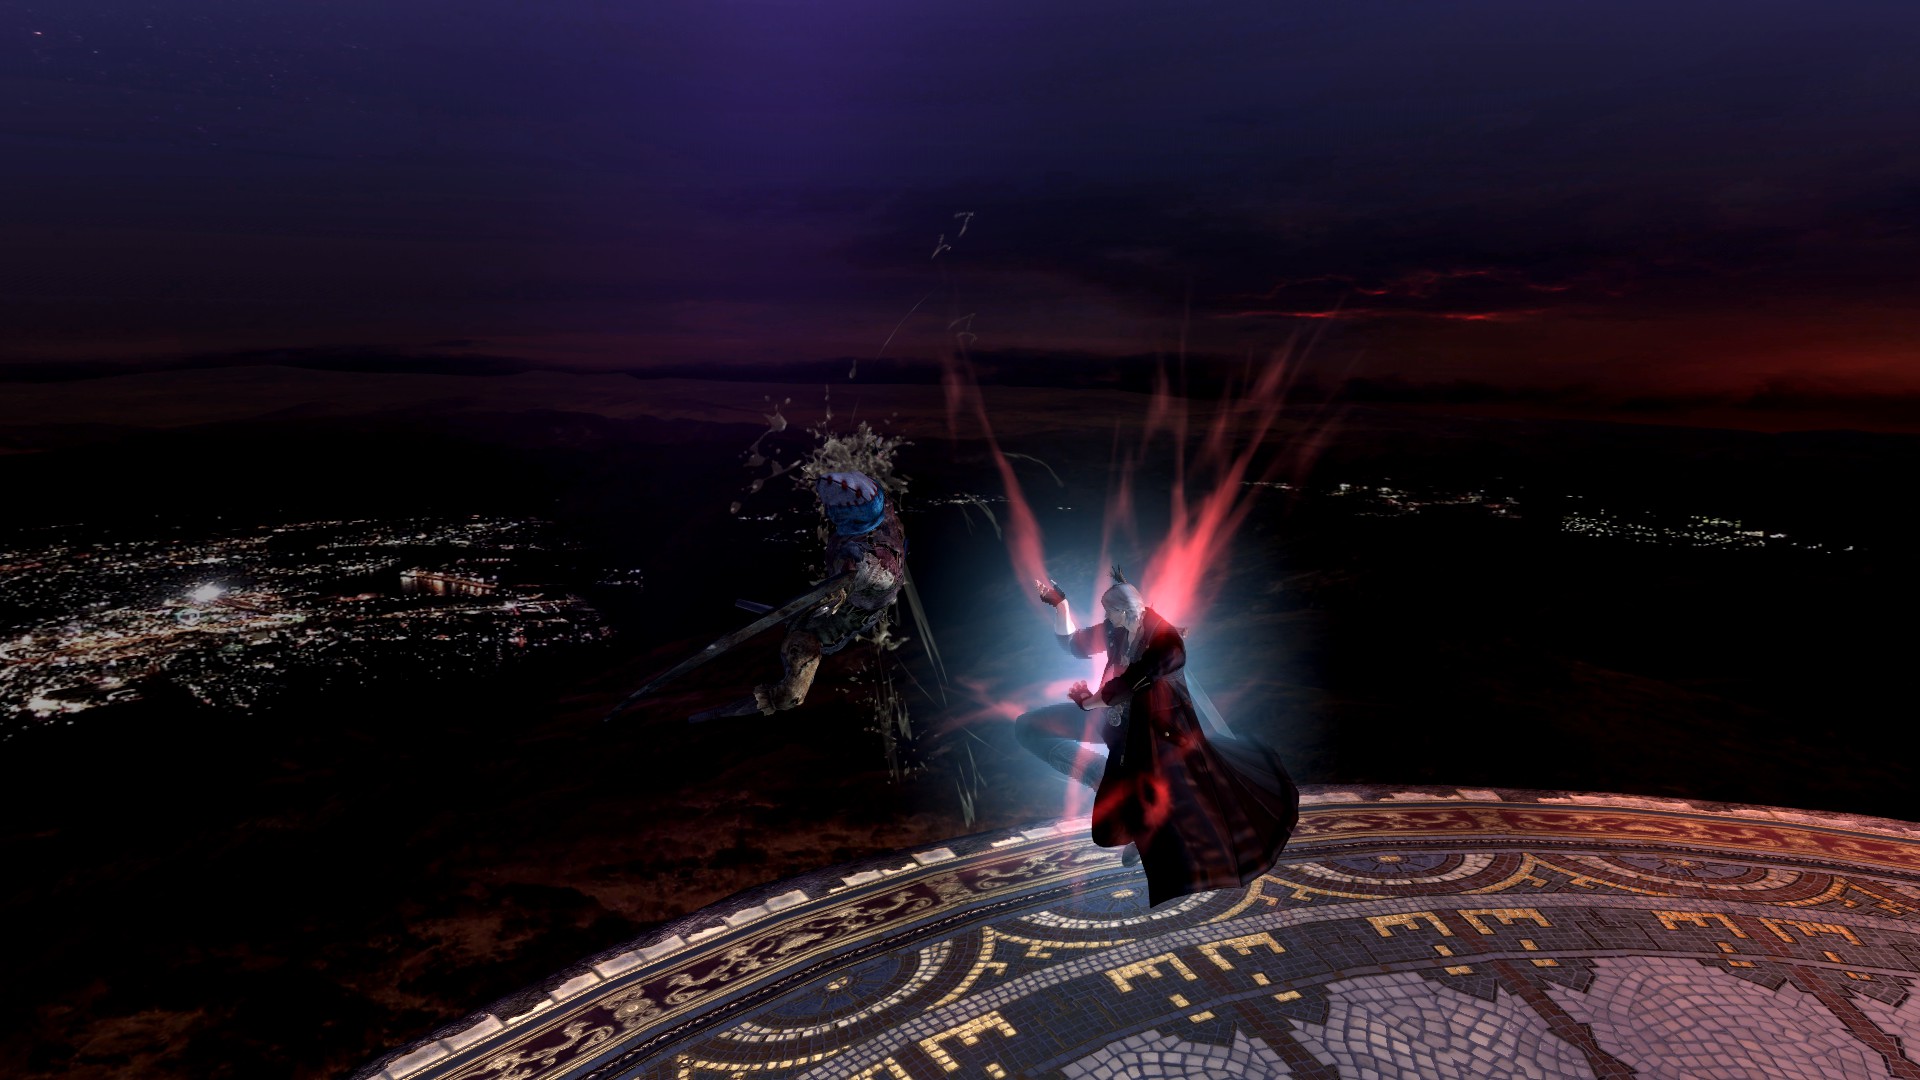
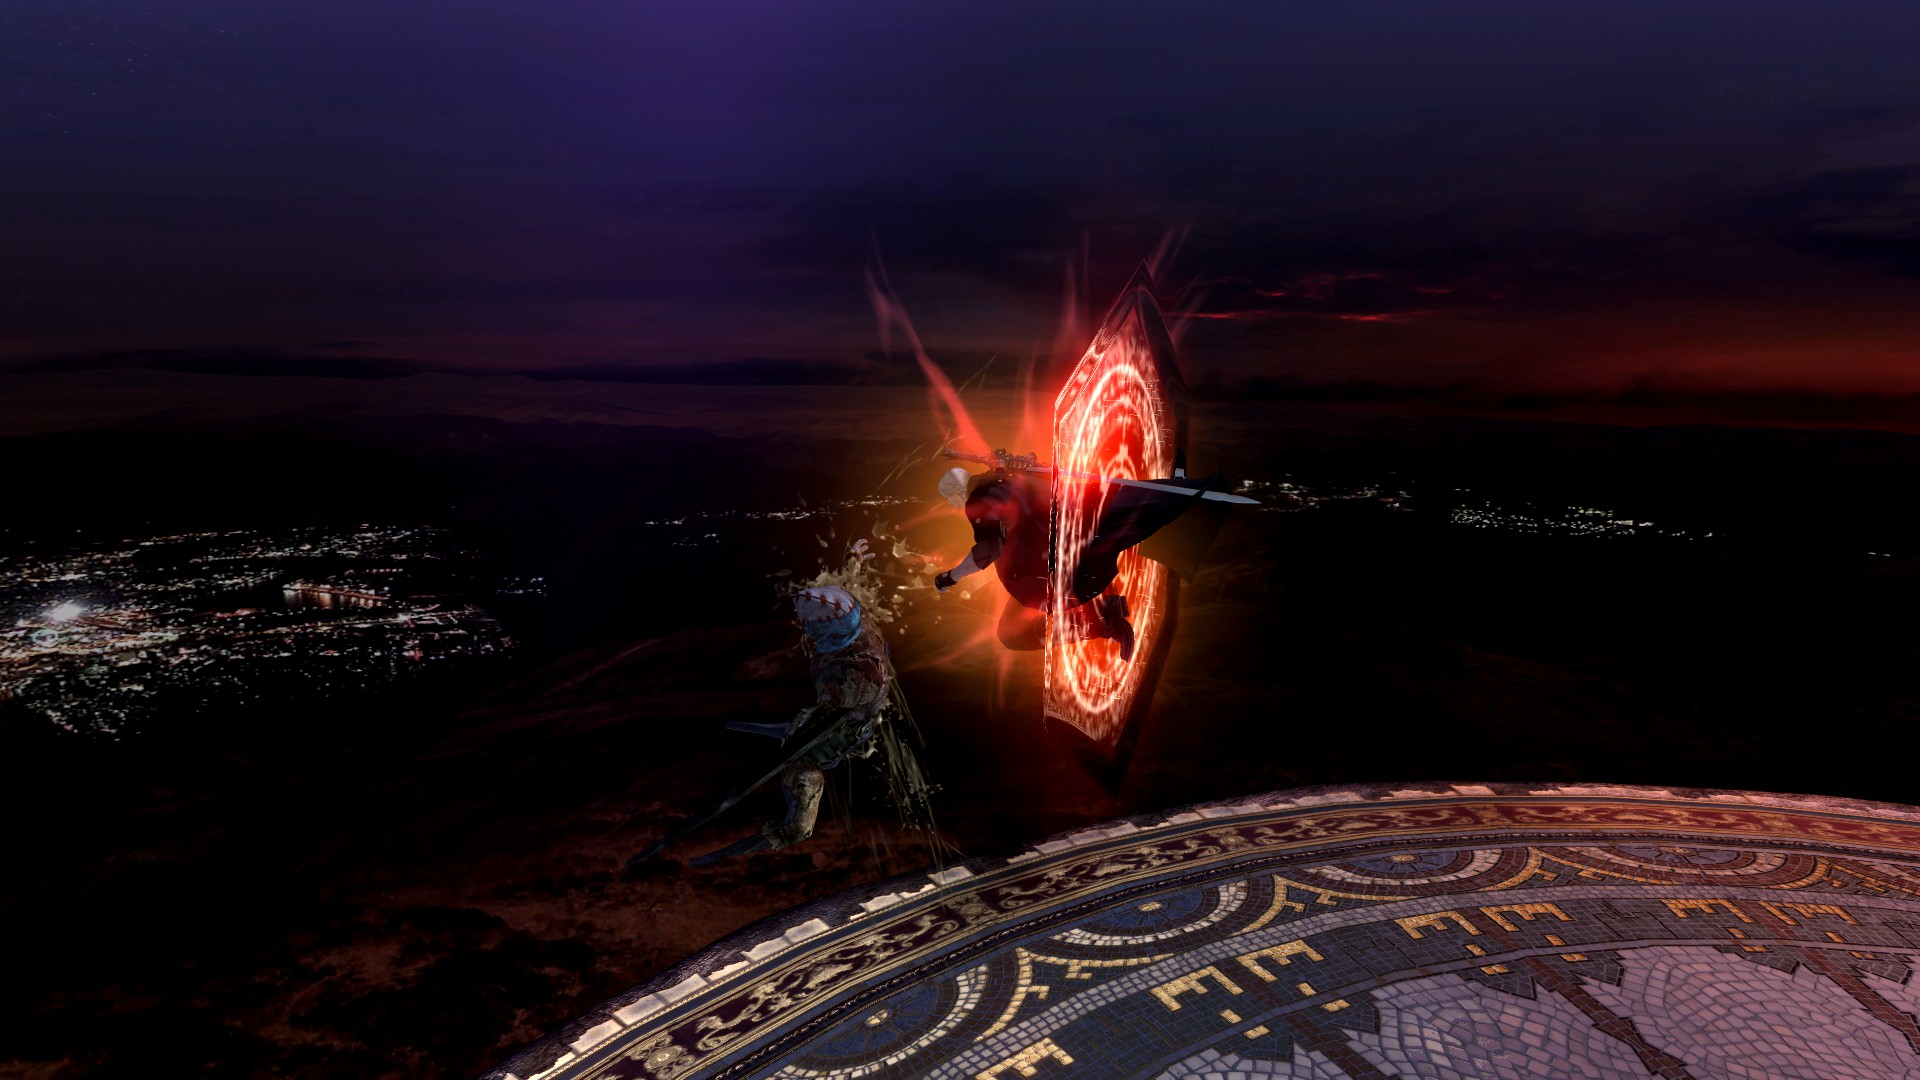
Chapter 8 Just Frame Attacks
Just Frame attacks are simply perfectly timed charged attacks from Gilgamesh that deal a substantial amount damage in comparison to the normal charged attacks. This technique isn’t particularly difficult so there is no excuse to not learn this and add it to your repertoire.
Similar to Yamato’s sheathing animation and Mustang, Dante can build devil trigger meter indefinitely upon successful execution of a Just Frame attack. This rule applies to both Vergil and Dante regardless of whether or not the attack hits an enemy however, you must be around enemies to build any meter.
Keep in mind, Just Frame attacks combined with Devil Trigger Distortion are devastating and deal a broken amount of damage.


As you can see in the screenshots above, there is a resounding difference between the two images. This is more then likely something you will overlook in game because the animation of the spark only appears for a short period of time.
Gilgamesh attack Level – 1 (No Charge)
Gilgamesh attack Level – 2 (Normal Charge)
Gilgamesh attack Level – 3 (Just Frame Charge)
“Just Frames” apply to all Gilgamesh attacks excluding those that cannot be charged.
- Full House (Jump -> Triangle/Y in mid air)
- Draw (Lock on + Back + Triangle/Y)
- Kick 13 (Lock on + Forward + Triangle/Y)
- Flush (Jump with Gilgamesh equipped)
- Gilgamesh Combo 1 (Triangle/Y x4 , all hits can be charged)
- Gilgamesh Combo 2 (Triangle/Y x2 – Slight Pause Triangle/Y x2, all hits can be charged)
- Straight (Lock On + Back + Triangle/Y *hold*)
- Shocking! (Jump -> Circle/B in mid air)
- Real Impact (Lock on + Back + Circle/B)
- Shock! (Circle/B)
- Beast Uppercut (Lock on + Forward + Circle/B)
- Divine Dragon (Lock on + Forward + Circle/B)
Chapter 9 Reversing Attacks
Reversing attacks can seem impractical, but it actually has it uses. It can even make attacks like Backslide practical/useful (Lock on + Back + Style in Gunslinger with Coyote-A). The timing is tricky at first, but with some practice it will become as easy as preforming the attacks normally.


Keep in mind that the timing is different for every attack. If you can’t reverse attacks using High Time, try it with any other attack. It’s all a matter of practice. I can only tell you how execute this technique, applying it to your gameplay is something that you have to practice and learn on your own. Experiment with different attacks and see what you can come up with!
Conclusion
Thanks for reading my guide to Dante in Devil May Cry 4! I hope it helped you in some way. Remember that this guide was intended for average players, not high level players. Since the information that’s included in it describes techniques that they are already familiar with, it probably won’t be of much use to them.
It took me roughly and month and a half to write and edit everything you will see in this guide, and to this day it is still a work in progress. If there is anything that I missed or if there’s anything that you think should be added, please let me know and I’ll be sure to include it in the guide. Keep checking back for updates, changes, and new sections within the guide!
The reason I wrote this guide is because I was really disappointed with the “Devil May Cry 4 Prima Strategy Guide”. Not only is it outdated, but it doesn’t really teach you much and it only shows you how to get through the levels. What good is a guide that doesn’t teach you how to play?
I’ve been collecting these Strategy Guides for years now and I’ve read through more guides then I can count, so I figured it’s time I wrote one myself. The illiustraions, screenshots, the format in which things are layed out, the way things are explained, all of it is inspired by the guides that I’ve read in the past. This is the reason behind having more screenshots then videos in each section. If I was to create a game, this is what the manual included with your copy would look like.
My objective when writing this guide was to create something reminiscent of a strategy guide, but instead of walking you through the levels and stages of the game, it would focus solely on the combat. Since I’ve been playing DMC4 for 3 years now, I’m able to provide more information then the Prima Guide ever could on this character.
If you’re wondering why the Lucifer Glitch is missing from the original guide, it has been removed in DMC4 Special Edition.

Credits
Dante (Myself) – Wrote the guide and took the screenshots for each chapter
Hyatt Excel – Recorded the videos and also helped me with any questions I had.
Hydris – Read this guide and helped me correct some parts that were incorrect.
Everyone who read this!