
Overview
Enable Anti-Aliasing for OMSI 2, and get rid of all those jagged edges on your buses and maps. This guide is fairly basic, and you are free to experiment with different levels and methods of Anti-Aliasing and Anisotropic Filtering.
Why bother with Anti-Aliasing?
Anti-Aliasing will smooth out the jagged edges in-game and provide you with a much smoother and a better looking OMSI experience. No more pixelated edges!
Enabling Anti-Aliasing for OMSI 2 (nVidia)
To enable Anti-Aliasing for OMSI via an nVidia card, first ensure you have the latest driver for your chipset. You can ensure this by opening the nVidia Geforce Experience application and checking for driver updates, or by going to [link] and downloading the latest driver.
Step 1: Opening the nVidia Control Panel
To open the nVidia Control Panel, simply right click on your desktop and click ‘NVIDIA Control Panel’

Step 2: Enabling Anti-Aliasing Settings
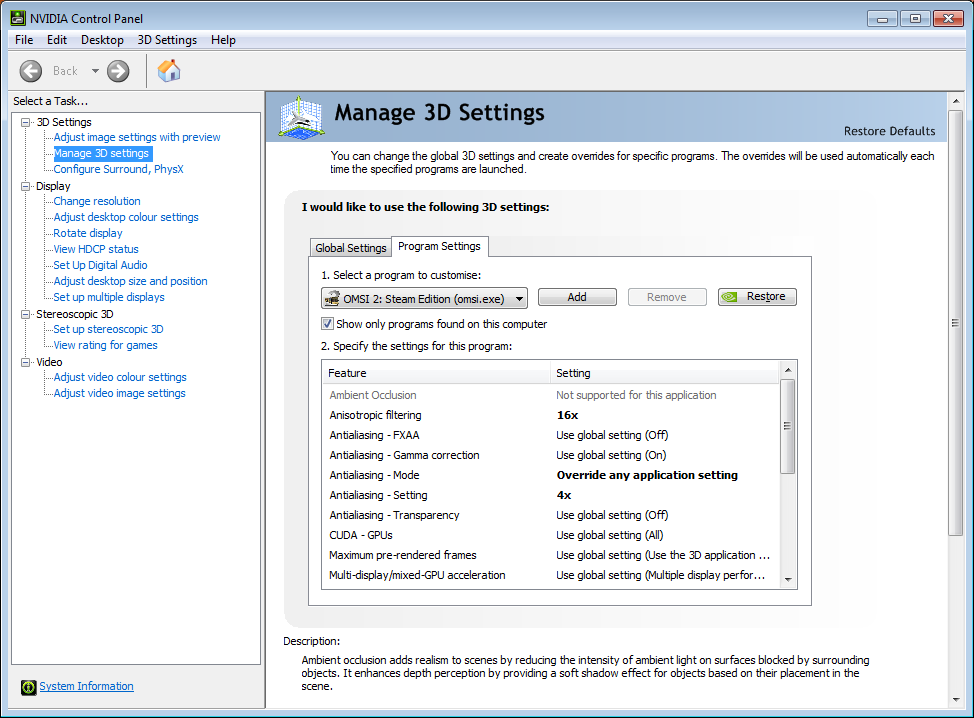
To enable the Anti-Aliasing settings, click on ‘Manage 3D settings’ and under ‘Program Settings’ choose OMSI 2: Steam Edition. If it isn’t in the list you may need to click ‘Add’ and browse to your omsi.exe, typically located in ‘C:Program Files (x86)SteamSteamAppscommonOMSI 2’
Once OMSI is selected, you will need to override the anti-aliasing options. I also highly recommend that you enable Anisotropic filtering, which will make distant textures clearer. Ensure your settings are like the following image. You are welcome to increase or decrease the level of anti-aliasing and filtering to your needs, as this is likely to impact system performance.
Enabling Anti-Aliasing for OMSI 2 (AMD)
To enable Anti-Aliasing for OMSI 2 on an AMD card, first ensure you have the latest driver for your chipset. You can check via the AMD Radeon Software or by manually going to [link] and downloading the latest driver.
Step 1: Accessing the AMD Radeon Software
To access the AMD Radeon Software, right click on your desktop and choose ‘AMD Radeon Software’.

Step 2: Adding OMSI 2 to Radeon Software
To enable Anti-Aliasing settings, you will need to be in the ‘Gaming’ section, and under ‘Games’ you will likely need to add OMSI 2 if it does not already exist. To do so, click the 3 vertical dots at the top right, and click ‘Add a game’ as shown in the screenshot. Find and add your OMSI 2 exe file, commonly located at “C:Program Files (x86)SteamSteamAppscommonOMSI 2”.
Step 3: Enable Anti-Aliasing for OMSI 2

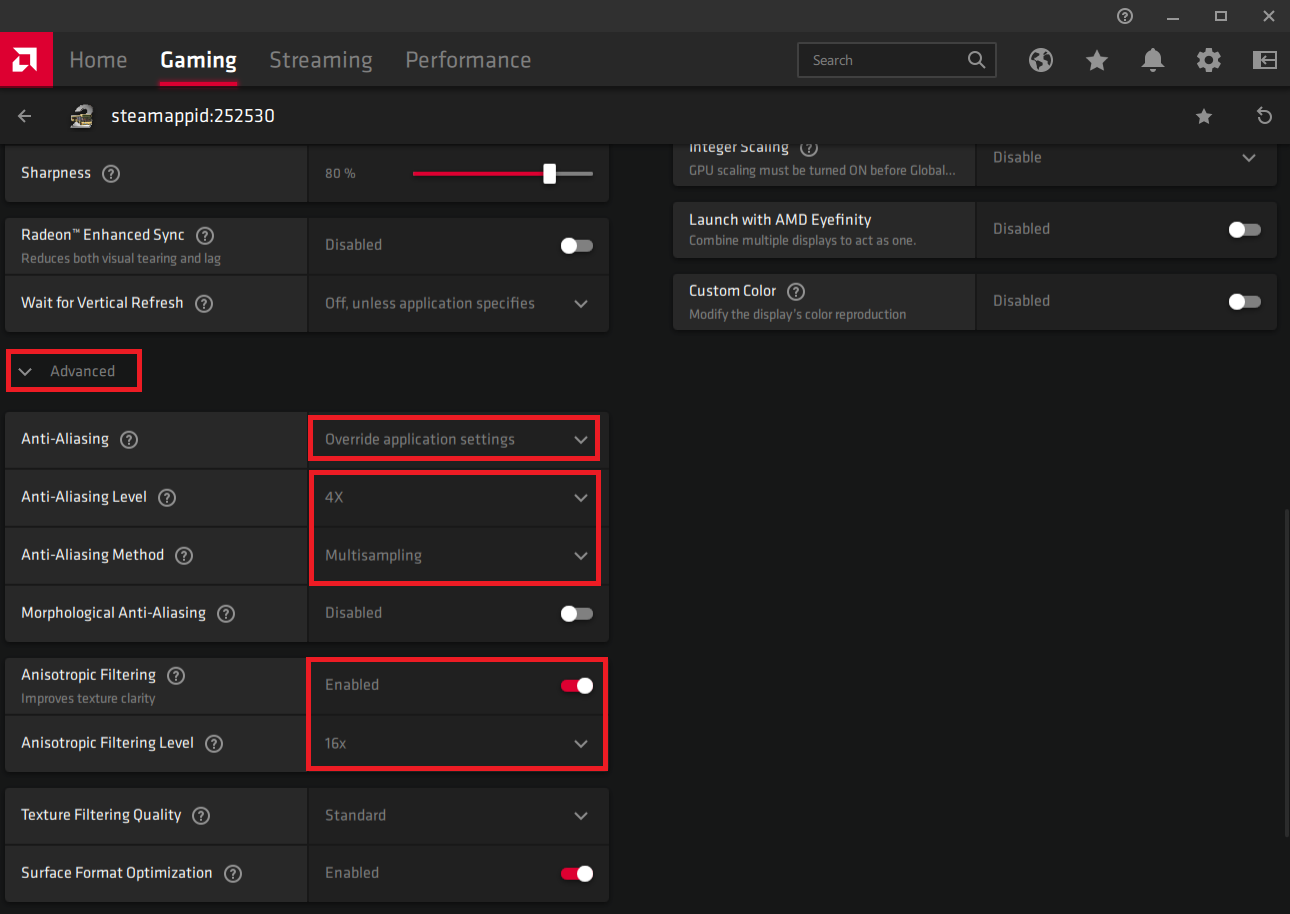
Once added, click onto OMSI 2 to manage it’s settings. At the bottom, you will need to expand the ‘Advanced’ section.
Set the Anti-Aliasing setting to ‘Override application settings’ and Anisotropic Filtering to ‘Enabled’. Change the Anti-Aliasing Level to your preferred amount. I use 4x which works fine for me. The higher the amount, the higher impact on performance so you may need to play around with this to get the optimum amount for your system.
Change the Anisotropic Filtering Mode to your preferred amount, I recommend 16x as it prevents the blurring of distant textures.
Enjoy your smooth OMSI graphics!
Enjoy your smooth Anti-Aliased graphics! If you run into any problems, please let me know and I will do my best to help.
