
Overview
Detailed information on getting all the achievements and videos with the location of the collectibles of the main game and the story expansion Awakened. It is important to know that statistics are linked to a specific save slot, so the accumulated amount for achievement conditions is not added to another slot.
Prologue

Brave New World
Obtain all Achievements
- Getting 100% in an honest way is not possible due to a broken given achievement.
- EA support refers to the game’s internal problems: «the trigger that opens the achievement in the Origin client does not work, so it is not given in Steam either».
- The question arises: why was it necessary to add the achievement to Steam if it does not work and cannot be obtained? On consoles, such an achievement makes sense because of the platinum, but on PC…
- Unfortunately, nothing can be done about this, because the problem was known back in the days when there was a studio Visceral Games, which created the Dead Space series. Counting on something in our time is like believing in miracles or the return of a series.
In any case, this will not prevent you from enjoying
the passage of a good action-horror alone or in the company of a friend, right? Well, enjoy your game!
Story


Story-driven achievements. Opened automatically when
passing the storyline, certain chapters of the game.
Difficulty Levels


Get On My Level
Complete the game on any difficulty setting
The achievement is unlocked after the first pass of the game.

Survivalist
Complete the game in Pure Survival Mode
Access to the “Survival” mode opens after completing the game on any difficulty. In this mode, you start the game from scratch. In addition to bonus rewards, DLC and the Legend of Dead Space costume, there will be nothing else. The difficulty level is “High”, the enemies do not leave ammunition or first-aid kits after death, instead, they can now only pick up resources, with the help of which the necessary consumable items are created on the assembly machine.
«Every time you come to a workbench you need to quickly decide what you want to do. Improvement? First aid kit? Plasma core? Think faster they are around the corner…»
— Steve Papoutsis (Executive Producer of Dead Space)
Completing the game in Survival Mode unlocks a set of improved MK-II weapon modules and Mega Resources.

Aren’t You Thankful?
Complete the game on Hardcore Mode
The “Hardcore” mode is unlocked after completing the game on any difficulty. The difficulty level is “High”. If you die, the game will automatically delete the save slot and you will be forced to start the game from the beginning!

Epic Tier 4 Engineer
Complete the game in Classic Mode
Access to the classic mode opens after completing the game on any difficulty.
In this mode, you start the game from scratch, the difficulty level is “High”. You can only create original weapons from the first part of Dead Space. The cooperative is completely disabled.
Missable Achievements


Under a Buck
Shoot the deer head trophy in the Admiral’s Quarters
› CHAPTER 4
After completing the puzzle with the EEI power circuit, you will take the elevator to the storyline location – the Admiral’s Quarters. As soon as you leave the elevator, in the corridor on the left on the wall you will see a trophy deer head. You need to shoot her to get the achievement.

In cooperative mode, the achievement is awarded to the one who first shot the deer head.
Restart from the last checkpoint, and this time have your partner shoot.

Space Ace
Shoot at least 70 targets during the ride to Tau Volantis
› CHAPTER 7
At the end of Chapter 7, you have to control the ship and shoot targets on the way to Tau-Volantis.
It is recommended to perform in cooperative mode, so it will be easier for you to concentrate on one thing – to control the ship or shoot targets. In single player mode, you will have to do both. Also, during a certain segment of the flight, the ship will need urgent repairs, while you are repairing the ship, your partner will continue to shoot targets (additional 10-20 targets, as opposed to single mode).
The achievement will be received by both players if the condition of 70 targets is met.
With the proper skill, it can be performed in single player mode. Keep in mind that you can restart the game from the last checkpoint if you missed a lot of targets. Most importantly, remember to restart the checkpoint earlier so that you have a better chance of completing it.

Hungry
Reach the pump room of the Waystation without alerting any Feeders
› CHAPTER 9
- It is easy to perform, the main thing is not to use aiming and running while moving.
Watch this walkthrough video:

Drill Sergeant
Complete the Drill Room without taking any damage
› CHAPTER 10
If you go through the Drilling Room without getting damaged, the achievement will open after you leave the arena to the elevator.
- In order to know well what to do, watch the video below ↷
- It is not necessary to create a weapon exactly as in the video. For example, you can make a Pulse Rifle using a blueprint, put body kits on it and supply it with a full set of upgrade circuits. It is advisable to install more circuits to increase reload speed and clip capacity.
- Be sure to stock up on stasis batteries and plenty of ammo.
To charge your stasis module without opening your inventory, press the [C] button.
- Stand up as in the video and shoot enemies that climb out of the ventilation. If you stand in the right place and can stop the drill in time (every 3-4 seconds) with stasis, then the enemies will not be able to bypass you and will only attack from one zone with ventilation.
- In the first and second waves, it is important to kill all enemies, and only then shoot at the yellow fuse in the center of the drill. Get ready for the third wave: reload your weapon and wait for the drill to go down, and a yellow fuse appears in the center of the drill – quickly discharge the entire clip into it. After a short cut-scene, the drill will be destroyed and all enemies will disappear.
- Having received damage, exit to the main menu with saving progress (save and quit).
Restarting from the last checkpoint will invalidate the achievement!
- In cooperative mode, only the host of the game will receive the achievement. Once you (host) get the achievement, click «save and quit». This time, your buddy should start the game as a host, invite you, and continue from the last save, before the Drill Room.


Weedkiller
Kill 5 Cysts in the Biology Building with a single poison gas cloud
› CHAPTER 14
During the passage of chapter 14, you will gain access to the department of biology. After reaching the door leading to this sector and opening it, you will encounter a special type of necromorph – Cysts. They are motionless and seem completely harmless, however, upon close contact, the cysts shoot larvae that explode on impact, thereby causing damage to themselves and to those who fall within the radius of the explosion.
In cooperative mode, both players will receive the achievement at once.
Go along the corridor with cysts without letting them die. To do this, freeze one of the cysts with stasis, and at the moment when it fires its «bomb-larva» in a slow motion, catch it with kinesis and throw it aside, outside the affected area. Do this until you reach the end of the corridor. Then go down the elevator and restore power. After returning, start the gas in the gas control booth.

There’s Always Peng!
Find Peng
› CHAPTER 14
Peng is a unique collectible and, at the same time, a valuable (salable) prize that is present in all games in the Dead Space series. Unfortunately, in the third part, the Peng statuette acts as a common collectible and only rewards an achievement.
Peng is found in Chapter 14, almost at the beginning of an Optional Mission 5: Reaper Barracks:
⚠ POSSIBLE PROBLEMS GETTING THE ACHIEVEMENT ⚠The location of the Peng should be the same as in the video. If the location is even slightly different (for example, Peng is in the center), then you will most likely not be able to pull it using kinesis. Try restarting the game from the last checkpoint or start the optional mission over.
In cooperative mode, the achievement is awarded to the one who first grabs the figurine. Restart the game from the checkpoint so that your partner takes the Peng figure this time.
Cooperative


Ghosts of the Past
Face all of Carver’s demons by completing all Co-Op only optional missions
There are 3 optional co-op missions in the game. You can go through them during the passage, or return to them at any time using the chapter selection in the main menu. For detailed (important) information about co-op missions, see the description of the «The Explorer» achievement. Completing missions counts for both players, regardless of whether you play as Isaac or as John.
- Chapter 4: History’s Ember
- Co-Op Mission 1: C.M.S. Brusilov
- Chapter 11: Signal Hunting
- Co-Op Mission 2: Archaeology
- Chapter 14: Everything Has Its Place
- Co-Op Mission 3: Marker Containment


From the Jaws
Save your Co-Op partner from an execution by killing the attacker

When your partner is grabbed by the enemy, he will need to quickly press the [E] button to free himself from the grab. You must kill the attacker before your partner is killed or he performs a QTE, personally finishing off the attacker.
- This doesn’t work on all enemies,
so don’t be surprised if your attempts
to save your partner seem futile.
One of the most convenient places to complete this achievement is in Chapter 9. Feeders die quickly enough from shots on any difficulty. Wait for your partner to be grabbed by one of the Feeders, and kill the enemy to save your partner.

Share and Share Alike
Use the RIG to give an item to your Co-Op partner
Open inventory [TAB], select any item [E] and give it to your partner.
He must have free inventory space in order to receive your item.

Medic!
Revive your Co-Op partner 10 times
When entering co-op mode, don’t forget to turn on the «Revival» option. You have about 10 seconds to get your partner to his feet, go up to him and press the [E] button several times.

Architect
Share a Blueprint with your Co-Op partner
Blueprints collected as you progress are likely to have your partner, especially if you go through the game together. In this case, create your custom blueprint and submit it via the assembly machine menu (your blueprint is usually at the end of the list).
Killer 1


Go for the Limbs!
Dismember 500 limbs from living enemies
The achievement should open towards the end of the first playthrough of the game.

And Then We Doubled It!
Dismember 1000 limbs from living enemies
The achievement will be completed while you go through different game modes. The main thing is to always use one save slot. In the game menu, you can see the number of cut off limbs and how much remains to be done. To see, during the passage, press [ESC] and go to the «Achievements» section, find the required achievement in the general list.
If somehow there were not enough cut off limbs or you just want to farm, quickly complete the achievement and immediately forget about it, then start Chapter 6, at the very beginning 2 Hunters will attack you – these necromorphs cannot be killed, but you can endlessly chop their limbs until you get bored or run out of ammo.

Shootbang
Kill 30 Soldiers with head shots
Shoot the soldiers with an accurate hit in the head, this is the fastest way to kill them.
⌞Enemy soldiers are found in the following chapters: 1, 10, 12, 16, 18⌝

Empty Chamber
Kill 30 enemies using melee strikes or a melee Weapon Part
Press LMB to strike melee / [SPACEBAR] to trample a lying enemy.
For quick execution, use the Rip Core as a melee weapon.
Can be combined with achievements: «Electric Lawnmower» / «Dropping Acid».

Slow Mo
Kill 50 enemies while they are in stasis
While aiming, press the [C] button to shoot stasis at the enemy, and while the enemy is under its influence, chop his body to pieces. The duration and effectiveness of stasis can be improved in the wardrobe by leveling up your RIG.

Axes High
Kill 30 enemies using Fodder axes
- Load Chapter 6 on Casual and follow the story until you are asked to refuel the shuttle.
Using kinesis, you install a fuel nozzle to supply fuel to the shuttle, after which 4 enemies (Fodders) will appear with axes in their hands. - To cut off an enemy’s hand, shoot at the wrist or forearm. Then lift the fallen ax with kinesis and load the ax into the lower part of the leg – this will most likely kill him completely, and will not open a second life in him by releasing several sharp tentacles from his body.
- Having dealt with all the enemies, click «save and exit» and return to the game. You will again be in front of installing the nozzle. Do the same until you unlock the achievement.


Killer 2

Payback
Kill a Soldier by TK’ing a grenade or rocket back at them
Only Danik’s people (unitologists) will throw grenades at you or fire missiles at you. You have to catch them with kinesis and kill the soldier by throwing the grenade / rocket back.
To catch a grenade / rocket, press the [F] button in aiming mode
The easiest places to complete the achievements: 10 and 15 chapters. Throughout the entire 15th chapter, unitologists will repeatedly shoot at you from a rocket launcher (about 3-4 times).
TO COMPLETE THE ACHIEVEMENT IS IN CHAPTER 10

Close Encounter
Kill 10 alien Necromorphs

For the first time, Alien Necromorphs will appear in Chapter 16 and will continue to meet on Isaac’s path until the end of the game, as well as in the Awakened expansion.
THESE NECROMORPHS HAVE THREE MAIN ATTACKS charging towards the players, giving a powerful punch if the player gets too close and being able to burst out Crawlers made from the extinct alien hosts. The Necromorph will burst out the Crawlers if the player gets too close but they can also burst them out if they are far away, possibly to cause chaos and distract the players while the Alien Necromorphs begin charging towards the player.

Blast Corps
Kill 30 enemies with explosion damage
Use kinesis to pull in red fuel tanks and toss them towards enemies, this will instantly rip them to pieces. Starting from chapter 10, enemy soldiers will start throwing grenades at you and firing rockets. Using kinesis, catch grenades and flying missiles, then knock them back at enemies.
But these are all childish games, for serious explosive power against necromorphs and soldiers begins after creating your own Grenade Launcher / Rocket Launcher.
To create a Grenade Launcher / Rocket Launcher, you need the following parts:
- Heavy Standard Frame (any, choose the best one).
- Install the «Survey Charge» on the upper tool (this module can be found in Chapter 8).
- On the upper tool variator, set what you have in stock. Better, of course, to put the module «Directed Suspension Field» (found in Chapter 10) to get a Rocket Launcher.
The game has many places to farm kills with a grenade launcher and other weapons.
One of these locations is described in the achievement.

Dropping Acid
Dissolve 50 enemies with acid
It is necessary to kill 50 enemies precisely from acid damage, and not by the weapon itself. I recommend using the Rip Core with the «Acid Bath» attachment as a weapon. Read below.

Electric Lawnmower
Kill 30 enemies using an electrified Ripper blade
- You can assemble such a weapon yourself using the following components:
- Compact Standard Frame
- Install weapon part Rip Core as the Upper Tool (if you don’t have one, create using various resources). Additionally, you can install another Rip Core in the Lower Tool – then the first saw will be fired by pressing LMB, the second with the [SPACEBAR] button, the damage is summed up.
- To electrify the saw blades, set the «Electric Charge» modifier in the Attachment 2 cell.
https://www.youtube.com/watch?v=oAGCHXsh2JA
Engineer

Strapped
Craft a Weapon
You will first encounter the Workbench in Chapter 3. After turning on the workbench, the game will guide you through a short tutorial. Craft a weapon following the instructions.

Circuit’s Edge
Add a Circuit to a Weapon
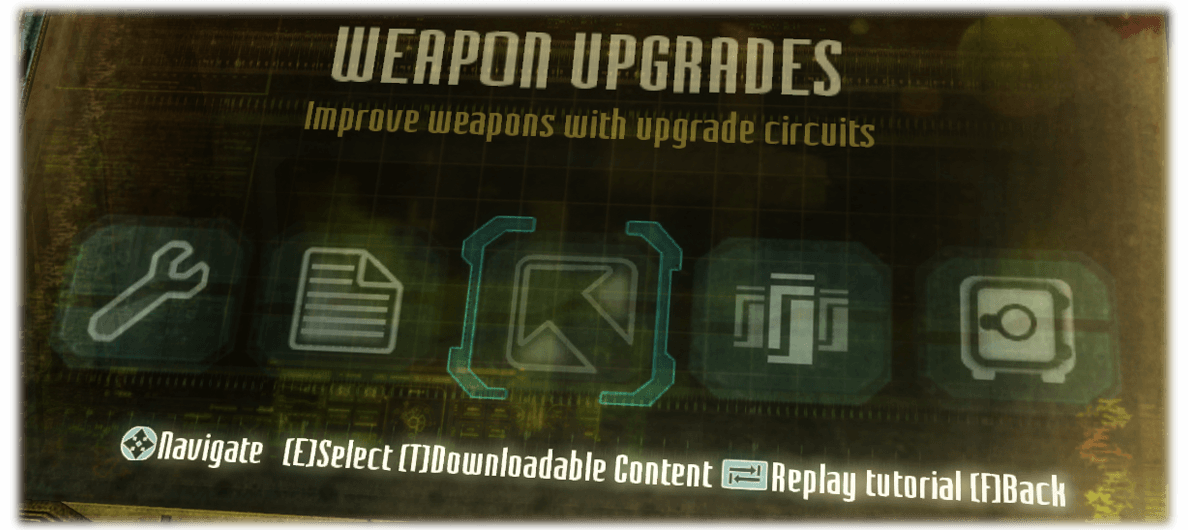
Using the workbench, go to the «Weapon Upgrades» section and attach any available upgrade circuit to your weapon.

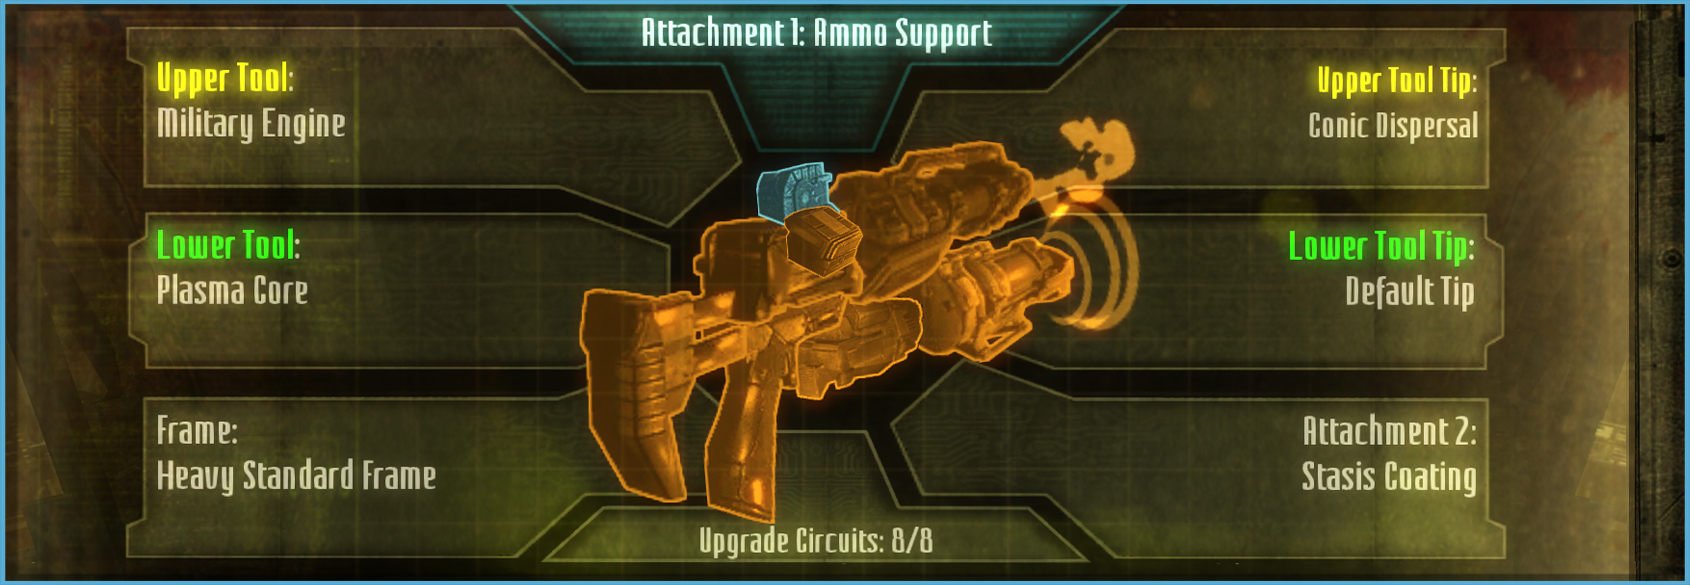
Full House
Craft a Weapon with 2 Tools, Tips, and Attachments with all Circuit slots filled
For a complete set, the base of the weapon must consist of a heavy bed so that the installation of the lower block variator becomes available in the modifications menu. Complete Weapon:

Master Plan
Create a Blueprint that needs at least 2000
resources worth of parts and Circuits to build
For greater fidelity, modify your weapon to the fullest: put an upper and lower tool, a good frame, a variator, and also install a full set of upgrade circuits. Further in the menu of the workbench (section «Weapon Crafting»), press [T] button to create your blueprint.
Send the blueprint to your partner in co-op mode to get the «Architect» achievement.

EMT
Craft a Large Med Pack
You will need 240 units of somat. gel to create a large first aid kit. If you want to get an achievement in the early stages of the game, you can sell 12 small first-aid kits or 5 medium ones to get the right amount of somat. gel. But this makes little sense, because useful resources will often fall in lockers and from the killed enemies, so by the end of the game it will accumulate so much that you can create dozens or more large first-aid kits.

My Buddy
Retrieve Resources from a Scavenger Bot at a Bench
You will find the first Scavenger Bot in Chapter 5, when you get into the cargo hold. Run it anywhere, but better in the resource area. In a few minutes it will be waiting for you at the workbench. The game will notify you of the arrival of the Scavenger Bot. The time before the arrival of the bot can be viewed through the RIG menu in a special section – [TAB] › [4].

Metal Detector
Successfully deploy Scavenger Bots to 15 Resource Areas
- Resource Areas are marked on the radar when you use the Scavenger Bot. Without a radar, resource areas emit a characteristic growing sound. Upon reaching the resource areas, the pointer on the radar will change to a green circle, which means that there resources in this place. Leave the scavenger bot at its destination, and in a few minutes it will be waiting for you at the workbench to unload all the resources.
Explorer


Overpowered Healing
Use quick heal to heal yourself 20 times
- When at low health, press the [Q] button to instantly
use the first aid kit without opening your inventory.

RIG Master
Fully upgrade your RIG

The Explorer
Complete all optional missions
There are 10 optional missions in the game in total. 3 missions can only be completed in cooperative mode (detailed information in the «Ghosts of the Past» achievement). You can complete optional missions during the passage or return to them later at any time using the chapter selection in the main menu – in this case, you will load immediately before the start of the optional missions.
and a suit of protection from aggressive environments will become available to you
- HOW DO YOU FIND AND GET TO AN OPTIONAL MISSION?
Almost all optional missions appear after finding certain audio messages that activate new goals and paths to special unexplored locations in your RIG menu.
- Press the [J] button to instantly jump to the task section.
- Select the required mission from the list.
- Hold the [В] button – the locator will indicate the path to the mission.
IMPORTANT NOTESomehow the checkpoints in the game are not working as expected. If you exit the game (even after saving) in the middle or just before the end, then when you restart the game, you will suddenly find yourself in the place of the last save BEFORE the optional mission. The good news is that all the collectibles found are saved, and you do not need to collect them again, instead of them there will now be random items. The bad news is that all enemies will have to be killed again and the mission has to be completed to the very end in order for a real preservation of progress to occur; in the upper right corner you will see the icon and the inscription «Saving…»
In order to find out if an optional mission has been completed – open the menu, go to the game «progress & unlocks» section, find the chapter you are in; If there is a white marker next to the mission, then it is considered passed.
- Chapter 4: History’s Ember
- Optional Mission 1: C.M.S. Greely
- Co-Op Mission 1: C.M.S. Brusilov
- Chapter 5: Expect Delays
- Optional Mission 2: Conning Tower
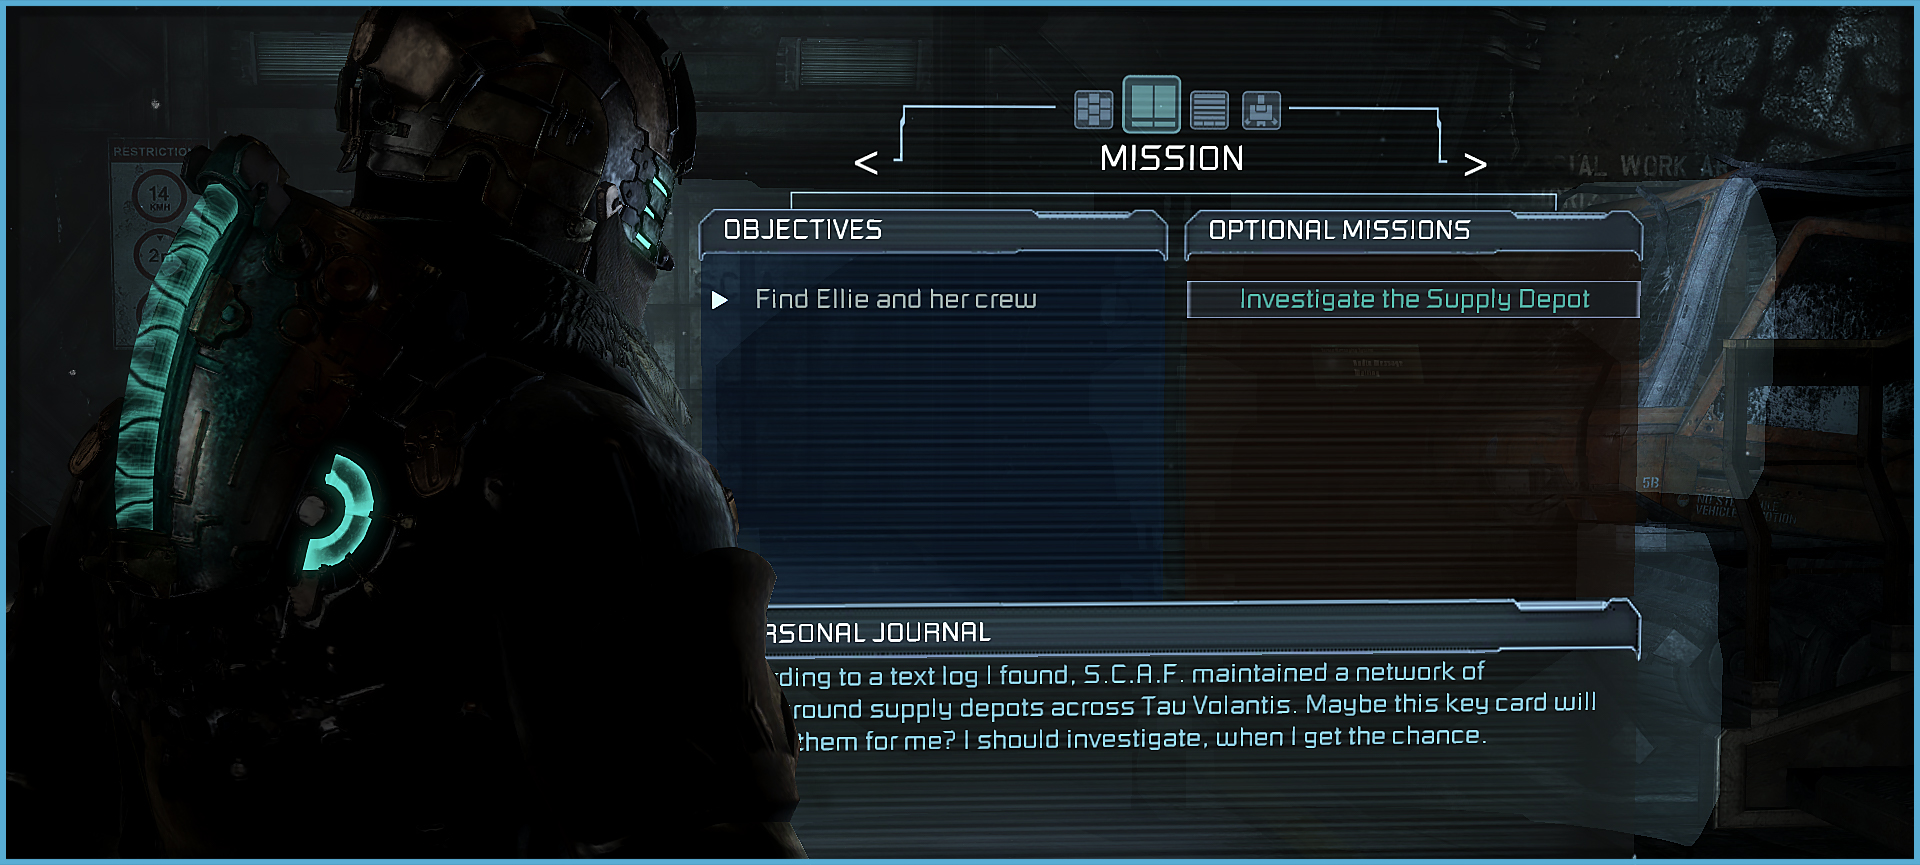
- Chapter 9: Onward
- Optional Mission 3: Supply Depot
- Chapter 11: Signal Hunting
- Optional Mission 4: Armory
- Co-Op Mission 2: Archaeology
- Chapter 14: Everything Has Its Place
- Optional Mission 5: Disposal Services
- Optional Mission 6: Reaper Barracks
- Co-Op Mission 3: Marker Containment
- Chapter 17: A Strange City
- Optional Mission 7: Artifact Storage
Collector

Please note that if you have the Awakened add-on installed, you will not get the achievements
«The Librarian», «The Armorer» and «Gun Collector» after finding all the collectibles in the main game. The thing is that when the add-on is installed, the game’s progress stats become whole so brethren moons decided, and to get the above achievements you will also have to collect all the records, chains and modules that are in the add-on.

The Librarian
Collect all Logs
In total, there are 71 Logs in the game, including the addition of Awakened – 76 Logs.
- Main Game:
- Audio Logs – 36
- Text Logs – 35
- Awakened:
- Text Logs – 5

The Armorer
Collect all Circuits
There are 61 Circuits in total in the game (69 Circuits including the Awakened add-on). Most of them are hidden in secluded places in different parts of locations or in locked rooms. Some can only be found in co-op mode, so it is impossible to reach them alone.
Chains are used to modify and improve weapons, and can affect several parameters at once: rate of fire, reload speed, damage and clip capacity. The weapon, depending on the frame, has from 1 to 8 slots for modification. The best Circuits are given as a reward for passing at different levels of difficulty, as well as for collecting collectibles. Changing / Installing chains takes place at the workbench in the «Weapon Upgrades» section.

Gun Collector
Collect all Weapon Parts
A total of 73 Weapon Parts in the game, including the Awakened add-on – 80 Parts.

Aliens
Collect all Alien Artifacts
Unlocks with the achievement «Professor».

The Professor
Collect all Artifacts
There are 40 Artifacts scattered throughout the game, divided into four categories:
S.C.A.F. (18) EarthGov (6) Unitologist (6) Alien (10)
*screenshots taken from deadspace fandom

❐ Database | Chapters 1-10

This section lists all collectibles (logs, artifacts, alien artifacts, upgrade circuits, blueprints and weapon parts) in chronological order by chapter. This list will help you find out what items you have to collect, as well as what items you have not yet collected or missed. You can restart any chapter from the main menu at any time to collect the missing items and exit ― all progress will be fully saved!
For convenience perhaps next to the title of the chapters are the timecodes for the video. Click on the chapter timecode to quickly
jump to a video showing the location of all the required collectibles.
- 1. S.C.A.F Artifact 01
- 1. Rent Due
- 2. I For an Eye
- 3. EarthGov Artifact 01
- 4. Unitologist Artifact 01
Logs: 2 | Artifacts: 2
- 1. Eudora Life
- 2. EarthGov Artifact 02
Logs: 1 | Artifacts: 1
- 1. Heavy Standard Frame
- 2. Tesla Core
- 3. +1 Reload
- 4. S.C.A.F. Artifact 02
- 5. +1 Rate of Fire
- 6. Official Orders
- 7. S.C.A.F-ISC-31005 CMS-Roanoke
Logs: 2 | Circuits: 2 | Artifacts: 1 | Weapon Parts: 2
- 1. PERSONAL LOG: ELLIE LANGFORD
- 2. Plasma Core
- 3. +1 Damage
- 4. EarthGov Artifact 03
- 5. A Desperate Mission
- 6. TURN IT OFF
- 7. Shotgun Blueprint
- 8. +1 Clip
- 9. Defraction Torus
- 10. S.C.A.F. Artifact 06
Logs: 8 | Circuits: 7 | Artifacts: 6 | Blueprints: 1 | Weapon Parts: 12
- 11. S.C.A.F. Artifact 08
- 12. Compact Standard Frame
- 13. Compact Standard Frame
- 14. Interrogation
- 15. +1 Damage +1 Clip
- 16. Alien Artifact 01
- 17. Electric Charge
- 18. Research Mystery Discovered
- 19. Telemetry Spike
- 20. +1 Rate of Fire +1 Damage
- 21. Precision Tip
- 22. +1 Reload
- 23. S.C.A.F. Artifact 09
- 24. Death at First Light
- 25. Explosive Module
- 26. Sleeping Puppets
- 27. EarthGov Artifact 03
- 28. Called to Study
- 29. +1 Reload +1 Rate of Fire
- 30. Plasma Core
- 31. Compact Conic Dispersal
- 32. Ammo Support
- 33. +1 Damage
- 34. Miltary Engine
- 1. Heavy Standard Frame
- 2. Keep on Truckin’
- 3. S.C.A.F. Artifact 03
- 4. +1 Rate of Fire
- 5. Specimen Transfer
- 6. Hydraulic Engine
- 7. Planetside Confidential
- 8. +1 Reload +1 Damage
- 9. Not Many Runs
- 10. Compact Directed Ejection Field
- 11. Kept in the Dark
- 12. Terror Nova 2
- 13. S.C.A.F. Artifact 04
Logs: 9 | Circuits: 6 | Artifacts: 3 | Weapon Parts: 6
- 14. Conic Dispersal
- 15. Tram Radio 2 (ᴛʜɪs ᴀᴜᴅɪᴏ ʟᴏɢ ᴄᴏᴜɴᴛs ғᴏʀ ᴄʜᴀᴘᴛᴇʀ 6)
- 16. +1 Reload +1 Clip
- 17. +1 Reload +1 Rate of Fire
- 18. Rotator Cuff Module
- 19. S.C.A.F. Artifact 05
- 20. PERSONAL LOG: LT EDWARDS
- 21. Edwards Diary
- 22. Edwards 06
- 23. +1 Rate of Fire +1 Clip
- 24. +1 Reload +1 Damage
- 25. Medic Support
- 1. Tram Radio 2 (sʜᴏᴜʟᴅ ʜᴀᴠᴇ ɢᴀɪɴᴇᴅ ɪɴ ᴄʜᴀᴘᴛᴇʀ 5)
- 2. Stasis Support
- 3. +1 Rate of Fire +1 Damage
- 4. +1 Damage +1 Clip
- 5. S.C.A.F. Artifact 07
Logs: 1 | Circuits: 2 | Artifacts: 1 | Weapon Parts: 1
- No Collectibles
- 1. Survey Charge
- 2. +2 Damage -1 Clip
- 3. Gravy Train
- 4. Pipe Worker Log
- 5. Bolas Gun Blueprint
- 6. +2 Damage -1 Rate of Fire
- 7. S.C.A.F. Artifact 10
- 8. Compressor
- 9. Tighten Your Belt
- 10. It’s Me Again
- 11. Stasis Coating
Logs: 4 | Circuits: 2 | Artifacts: 1 | Blueprints: 1 | Weapon Parts: 3
- 1. Canister Recovery Module
- 2. Compact Standard Frame
- 3. Care and Feeding of Feeders
- 4. +2 Damage -1 Clip
- 5. S.C.A.F. Artifact 11
- 6. Explosion Amplifier
- 7. Depot 212
- 8. Medic Support Handgun Blueprint
- 9. Last Ditch Effort
Logs: 11 | Circuits: 5 | Artifacts: 3 | Blueprints: 3 | Weapon Parts: 8
- 10. Where’s Lumley?
- 11. Lumley’s Log
- 12. Shouldn’t We Turn Back
- 13. Repeater
- 14. LOG ENTRIES: SFC LUMLEY
- 15. Heavy Metal Thunder Blueprint
- 16. Soon We Feed
- 17. S.C.A.F. Artifact 12
- 18. Scope
- 19. +2 Reload -1 Rate of Fire
- 20. +2 Reload -1 Clip
- 21. Food All Gone
- 22. +2 Reload -1 Damage
- 23. Electrocution Module
- 24. Tesla Core
- 25. Heavy Standard Frame
- 26. Pulse Rifle Blueprint
- 27. Trying to get in
- 28. S.C.A.F. Artifact 13
- 29. Grease Monkey
- 30. +2 Clip -1 Damage
- 1. Brandy, Cigars and Aliens
- 2. Pneumatic Torch
- 3. Directed Suspension Field
- 4. Alien Artifact 02
- 5. Hammond’s Heavy Frame
- 6. +2 Clip -1 Reload
- 7. Telemetry Spike
- 8. S.C.A.F. Artifact 14
Logs: 1 | Circuits: 1 | Artifacts: 2 | Blueprints: 3 | Weapon Parts: 4
❐ Database | Chapters 11-19
- 1. Serrano discusses Facility One
- 2. +2 Clip -1 Rate of Fire
- 3. +2 Rate of Fire -1 Clip
- 4. Instability
- 5. Unitologist Artifact 02
- 6. ALL HANDS MEMO
- 7. MESS HALL CREW LOG
- 8. Repeater
- 9. +2 Rate of Fire -1 Damage
- 10. +2 Rate of Fire -1 Clip
Logs: 10 | Circuits: 10 | Artifacts: 4 | Blueprints: 2 | Weapon Parts: 9
- 11. Unitologist Artifact 03
- 12. +2 Reload
- 13. Stasis Amplifier
- 14. Contact Beam Blueprint
- 15. +2 Damage
- 16. Munitions Request
- 17. Plasma Core
- 18. Train Shipment
- 19. Unitologist Artifact 04
- 20. Acid Bath
- 21. Stasis Support
- 22. ANGER MANAGEMENT PROGRAM
- 23. Never Home
- 24. +2 Rate of Fire
- 25. Like Father Like Son
- 26. Directed Ejection Field
- 27. Soulless
- 28. Rip Core
- 29. Flamethrower Blueprint
- 30. Flame Glaze
- 31. Weller’s Compact Frame
- 32. +2 Reload
- 33. +2 Damage
- 34. EarthGov Artifact 05
- 35. +2 Clip
- No Collectibles
- 1. +2 Damage +1 Reload
- 2. HUN-E1 Badger Blueprint
- 3. Compact Standard Frame
- 4. Weller’s Compact Frame
- 5. Ammo Support
- 6. S.C.A.F. Artifact 15
- 7. Rip Core
Circuits: 1 | Artifacts: 1 | Blueprints: 1 | Weapon Parts: 4
- 1. +2 Damage +1 Rate of Fire
- 2. Seeker Rifle Blueprint
- 3. Heavy Standard Frame
Logs: 11 | Circuits: 13 | Artifacts: 7 | Blueprints: 3 | Weapon Parts: 14
- 4. Rip Core (ᴛʜɪs ᴄᴏᴜɴᴛs ғᴏʀ ᴄʜᴀᴘᴛᴇʀ 15)
- 5. Full Zoom Scope
- 6. Unitologitst Artifact 05
- 7. S.C.A.F. Artifact 16
- 8. +2 Reload +1 Rate of Fire
- 9. Hot Death Blueprint
- 10. EarthGov Frame
- 11. Exterminate
- 12. +2 Clip +1 Reload
- 13. First Contact
- 14. +2 Clip +1 Rate of Fire
- 15. Full Zoom Scope
- 16. Last Contact
- 17. S.C.A.F. Artifact 17
- 18. Ammo Sweeper
- 19. Precision Tip
- 20. Compressor
- 21. Conic Dispersal
- 22. +2 Reload +1 Clip
- 23. STERILIZATION PROCEDURE
- 24. Piece: Brain
- 25. Alien Artifact 04
- 26. +2 Reload +1 Damage
- 27. Explosive Module
- 28. Two Strands
- 29. Head Above the Rest
- 30. Getting A Head of the Game
- 31. The Axe is of Evil
- 32. Damage Support
- 33. +2 Damage +1 Reload
- 34. S.C.A.F. Artifact 18
- 35. Show Stopper Blueprint
- 36. Heavy Elite Frame
- 37. Rail Accelerator
- 38. +2 Damage +1 Rate of Fire
- 39. +2 Damage +1 Clip
- 40. Alien Artifact 03
- 41. Piece: Gills
- 42. Hysterics
- 43. +2 Rate of Fire +1 Reload
- 44. EarthGov Artifact 06
- 45. +2 Rate of Fire +1 Damage
- 46. Rail Accelerrator
- 47. Ammo Box
- 48. +2 Rate of Fire +1 Clip
- 49. +2 Clip +1 Damage
- 1. Rip Core (ᴏʙᴛᴀɪɴᴇᴅ ɪɴ ᴄʜᴀᴘᴛᴇʀ 14)
- 2. Flame Glaze
Weapon Parts: 2
- 1. S.C.A.F. Frame
- 2. Rail Accelerator
- 3. Safety Guard
- 4. Turn it Off
- 5. +2 Damage +1 Clip
- 6. Javelin Gun Blueprint
- 7. Heavy Standard Frame
Logs: 1 | Circuits: 1 | Blueprints: 1 | Weapon Parts: 4
- 1. Alien Artifact 05
- 2. The Sound of Music
- 3. +2 Reload +1 Damage
- 4. Unitologist Artifact 06
- 5. Witness Protection
Logs: 7 | Circuits: 10 | Artifacts: 4 | Weapon Parts: 2
- 6. Prized Posession
- 7. Witnessing the Truth
- 8. Realistic Statuary
- 9. Stasis Coating
- 10. +2 Reload +2 Clip
- 11. Strangeness in the Tubes
- 12. Alien Artifact 09
- 13. +2 Damage +2 Clip
- 14. +2 Rate of Fire +2 Clip
- 15. +2 Rate of Fire +2 Damage
- 16. +2 Reload +2 Damage
- 17. +2 Reload +2 Rate of Fire
- 18. +2 Reload +1 Rate of Fire
- 19. +2 Reload +1 Clip
- 20. Compact Standard Frame
- 21. Hieroglyphs 1
- 22. Alien Artifact 06
- 23. +2 Reload +2 Damage
- 1. Acid Bath
- 2. Electrocution Module
- 3. Language Speculation
- 4. Alien Artifact 08
- 5. Point North
- 6. +2 Rate of Fir +2 Damage
- 7. Alien Artifact 07
- 8. Serrano’s Last Words
Logs: 3 | Circuits: 1 | Artifacts: 2 | Weapon Parts: 2
- 1. Alien Artifact 10
Dead Space 3 Awakened


Get to the Chopper!
Escape from Tau Volantis to the Terra Nova
Story achievement. Unlocks after completing the first chapter of the add-on.

Just the Tip
Craft a weapon using a MK-II Weapon Tip
It is not at all necessary to assemble a weapon from scratch, it is enough to install a variator of the MK-II type on an already finished weapon. All sorts of MK-II modules will be scattered in different places throughout Awakened (see the add-on database section).
⌞ Installing the MK-II module in the main game will NOT unlock this achievement ⌝
If you collected ALL artifacts in the main game, then a set of improved MK-II variators for one-handed and two-handed weapons will already be waiting for you on the assembly machine. Equip a variator on a previously created or new weapon while in the Avakened add-on and get the achievement.

Heretic
Kill the Unitologist Cult Leader

True Believer
Allow the Unitologist Cult Leader to survive
This place is located almost at the very end of Chapter 3, after you defeat the invulnerable follower of the brethren moons in the arena with a yellow marker.
YOU WILL HAVE A CHOICE: KILL OR KEEP HIM ALIVE

load the game from the last checkpoint to fight the unitologist again and this time make a different choice.

Heaven Can Wait
Stasis your Co-Op partner when he is downed to slow his bleed out timer
When your partner is knocked to his knees and he is in a state of waiting for resurrection ―
freeze him with stasis to slow down the bleeding and get an achievement.

Supercharger
Finish charging the reactor in under 90 seconds
- The countdown begins with the launch of the reactor, from that moment gravity will turn off and you will be able to fly [ALT] around the compartment. 90 seconds is enough to have time to charge all three divisions of the reactor, throwing fuel spheres.
- It is necessary to turn the valve using kinesis and take the fuel spheres, then slow down the rotating reactor with stasis and throw the fuel spheres inside.
- So that the power does not drop, you need to destroy heat coolers – yellow tubes that will appear in the lower part of the reactor in the amount of 3 pieces.
- Do not pay attention to the necromorph cysts that have settled on the walls and shoot their “bomb larvae”. Also, try not to get caught in the energy beams from the rotating reactor. To straighten the character in a state of gravity, press the [Z] button.

Bad Moon Rising
Complete Dead Space™ 3 Awakened
The achievement will unlock for the first playthrough on any difficulty.

Pure Lunacy
Complete Dead Space™ 3 Awakened in Pure Survival Mode
❐ Database | Awakened 1-3
- 1. MK-II Overclocked Heavy Frame
- 2. +3 Reload +2 Damage
- 3. MK-II Directed Suspension Field
- 4. MK-II Overclocked Compact Frame
- 5. MK-II Ammo Support
- 6. +3 Reload +2 Rate of Fire
- 7. Thought Diary
- 8. +3 Reload +2 Clip
- 9. A Call to Action
- 10. +3 Damage +3 Clip
Logs: 2 | Circuits: 4 | Weapon Parts: 4
- 1. +3 Rate of Fire +2 Damage
- 2. +3 Reload +3 Rate of Fire
- 3. Faith and Madness
- 4. New Boss in Town
- 5. MK-II Stasis Support
- 6. Instruments or Tools?
- 7. +3 Reload +3 Clip
- 8. MK-II Damage Support
Logs: 3 | Circuits: 3 | Weapon Parts: 2
- 1. +3 Rate of Fire +3 Clip
- 2. MK-II Diffraction Torus
Circuits: 1 | Weapon Parts: 1
СREDITS
- This achievement guide has been redesigned and translated into English based on the Russian language Dead Space guide, at the request of a Steam user.
I hope this guide was useful to you. Thank yoy for reading!