
Overview
Complete walkthrough with 100% achievementsThis contains a map, a basic game guide, a list of all NPCs and their requirements, a full list of items and objects in the game – including images.You are welcome to post things I may have missed in the comments below and I will add them to the walkthough.
Game Basics
This walkthrough contains spoilers. Duh!
In A Street Cat’s Tale you play the young kitten to a street cat. After your mother is the victim of a car crash, you have to survive the next twelve days and find your place in a harsh world, unlocking one of the eleven possible endings.
Except for two endings (5 & 6), all possible endings are unlocked by reaching the maximum intimacy level of 7 with one of the NPCs in the game – only one NPC’s intimacy level can be maxed out per playthrough.
During a total of 13 days (12 + D-day) you have to watch your health and food meter, while you try to gain ever higher intimacy with one of the NPCs, by gifting them items they like, or complete little errands for them. As you prowl the city, you have to avoid being run over by cars, manage your time and resources, make friends and stay alive, as you try to unlock a new ending.
Once you unlock all the endings, you get access to an additional feature of the game.


Time – Day & Night
You have a total of 13 days until your playthrough ends. Time progresses by the second unless you talk to a NPC, have a system or info window open, or have pressed pause. Note that clicking outside of the game window (if playing in window mode) does not pause time progression.
Every day runs for about four minutes if you don’t do anything. Two minutes daytime and two minutes evening hours. One minute before your time runs out (a quarter day left) a message will appear, warning you that it is getting late.
When day switches to evening, the world gets a bit darker. Any daytime-NPCs will disappear and evening-NPCs will appear.
Note that if you run out of time and don’t make it back to your cat-home, you will fall asleep where you are and wake up at the usual spot the next day, with your meters starting at a low 20/90. You can advance to the next day anytime you want, by going to sleep at your cat home.
Health & Food
In A Street Cat’s Tale you have to survive for thirteen days. To survive, you need food and stay relatively healthy. As time progresses, you loose one point of food for every second; if your food meter runs out, you loose health for one point every four second instead. Once your health reaches zero, you are dead.
You can fill up your meters by eating various foods, or sleeping in your cat home – which regenerates a certain amount of health and food, depending on the upgraded level of your home.
You can drain your meters by eating unhealthy items, being hit by an unfriendly NPC, being run over by a car, or by not sleeping in your cat home.
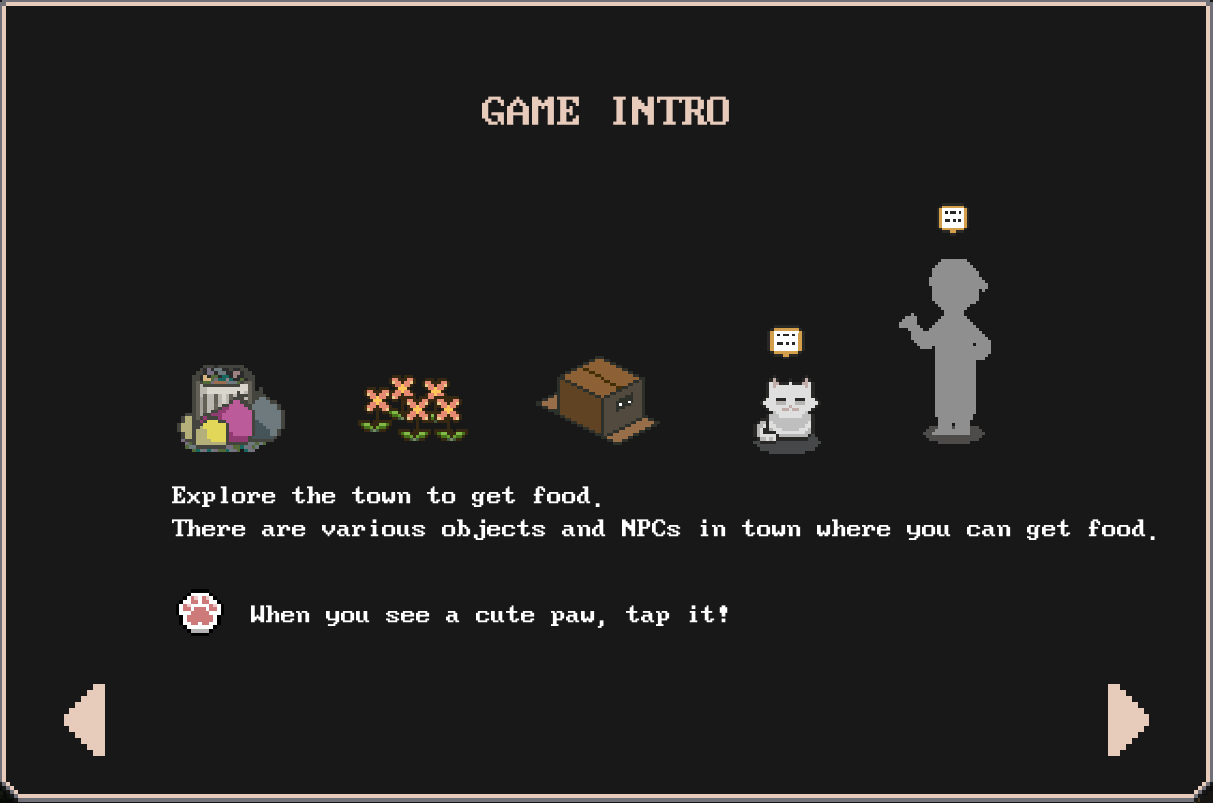
NPCs
There are three types of NPCs, cats, humans and a dog. Each NPC has a bar of affection that you can fill up by either being nice (does not work on the mean guy) or by giving the NPC a gift. Once you reach a certain level of intimacy, you have to do something specific to be able to progress gaining affection. In this guide we call these requirements “quests”, for sake of simplicity.
Each NPC has their own story, needs, and requirements for you to be able to reach maximum intimacy with them – you can find those requirements in the NPC section of this guide.
There is only a limited number of interactions with all NPCs per day – usually two, unless you have a fully upgraded house, which allows for three interactions per day.
While the cats and the dog are available all through the day and evening, humans are either available only during the day, or only during the evening, which makes timing an important factor.
As long as a NPC has a speech bubble over their head, they are interactable.
Sometimes a NPC stays interactable, but requires a specific object to progress, so timing and managing the limited amount of possible interactions becomes strategy.
There is no indicator what you have to do, but as long as you are on a quest for a NPC, you can talk to them for a reminder of what they want, and you won’t loose interactions doing so.
Objects
There are various objects in the world you can interact with, usually yielding an item. Those objects are trashcans, boxes, broken bottles, flower patches, shop stalls. Different objects have a maximum amount of interactions available every day, and different objects yield different items.
If you already carry an item, you can not interact with objects, since you can only carry one item at the time. You will find details on Objects & Items in the appropriate section in this guide.
Items
There are a range of items in the world that have various effects, and many are used to progress through the story. Most items can be eaten, but not all items are healthy, lowering your health meter.
Note that you can only ever carry one item at the time – which one is seen in a speech bubble over your head.
There are special quest items which will only appear if you have the associated quest. Such items can not be eaten or dropped, and can only be handed over to the appropriate NPC. If you are not careful, this can even kill you, since you can not eat when you are carrying a special quest item; and if you can’t hand it in before your health meter runs out, you will walk the rainbow bridge.
Housing
You start your journey with nothing but some old newspapers as sleeping mat. But the first character you meet is a rather strange stray cat in a box, who offers you to upgrade your housing, which will grant you various benefits.
You can upgrade your home three times, with ever more and harder to get items. The first two upgrades grant you a higher health and food meter, and higher amounts of regeneration if you sleep in your home, while the third and final upgrade allows you to interact with all NPCs one additional time per day, which is a huge advantage and time saver.
Cars
Whenever you cross a street, a car might come around the corner and hit you, draining your health meter. Be hit too many hits, and you could die. Try to avoid being hit by cars!
You can use the lights of the signals as an indicator to know whether a car may be coming through, with green being save to cross and red meaning that a car is about to drive through.
Either way, keep your eyes open and don’t get hit too often. Damage seems to rise if you get hit several times in short succession. If you get hit by a car once or twice while your meters are full, you will be fine, but the lower your meters are, the more it hurts.
Endings
Part of the game, and necessary for a 100% completion, is to play through several times and try to unlock a new ending every time. A detailed list and description of all possible endings is available at the end of this guide.
Objects & Items
There are various interactive objects in the world that yield a range of items. Below you find a list of all those interactive objects, how often you can interact with them, and what items they may yield.

- Food Waste
- Banana Peel
- Bone
- Fish Bone
- Leftover Fish

- Rat
- Banana Peel

- Glass Shard

- Flowers
Note that when you steal from shops, the intimacy meter of all humans and the dog will drop a few points. You can not drop to a lower intimacy level, but may need to fill up the meter again.

- Fish Bone
- Leftover Fish
- Huge Fish

- Gloves
- Band Aid
Special quest items only appear when the quest is underway. You can not drop or eat quest items, which locks your inventory use, until you deliver the quest item.


All normal items can be eaten (except gloves), or dropped. Once dropped, items disappear.


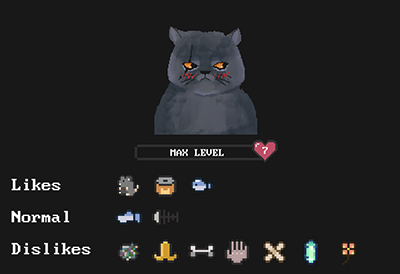
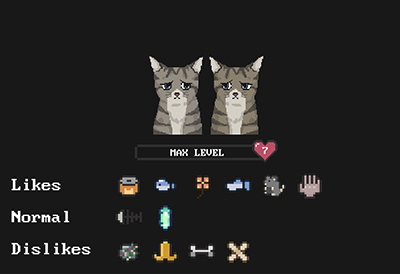
NPCs (Cats & Dogs)
and what they want…
Note that when you reach a new level of intimacy, you need to interact with the NPCs again to receive their quest to be able to advance further with them. Some NPCs will drop items as a reward for completing their quest. Some of these items can be used for other quests if timed right.
It is also of note that whatever NPCs drop, will stay there until the end of the day, but disappear the next.
Unique quest items appear once the quest is given, and stay there until you pick them up – be careful though, those items can not be dropped or eaten and will block your inventory slot until you hand them to the NPC the item belongs to.
Some quests require you to talk to some NPCs or befriend them by reaching intimacy level 2. You will need to be able to interact with those NPCs to do so, so mind your interaction limits.
Once you have finished the level 6 quest for a NPC and interact again with them, you can choose to maximize your intimacy with that NPC (unless you already are at maximum with another NPC) which will unlock an ending specific to that NPC.
If a NPC does not have any quests for you, just advance to their next intimacy level by acting friendly or give them their favourite items.


NPCs (Humans)


Getting Started
First things first
I highly suggest to upgrade your home first. This is crucial and allows for much more time and less overall survival stress as you regenerate more health and food when you sleep in your home. You also start with higher meters and the final upgrade even allows for three interactions with NPCs instead of two.
To do so, talk to Jimmy, the cat in the box, standing right at the starting spot where you wake up every morning.
Jimmy will give you a shopping list of items he needs to upgrade your house. You can talk to Jimmy anytime, for a reminder in what you still need. Note that you can only carry one item at the time and should not forget to eat once in a while too.
Once Jimmy has all the items from the list, you will have to wait for the next day, by either going to sleep right away, or play through the rest of the day normally. The next day, you will wake up, next to your new home, and with Jimmy ready with another upgrade. Once you have fully upgraded your home, Jimmy has no more uses and just hangs out next to your home, creepily standing there in his box…
Making Friends & Finding Food
The two other things you should do is to get to know how to interact with objects and NPCs. Go over to the trash can and when you see a paw, click the trash can. A bubble appears over you head, telling you what item you found. You can click the bubble and eat or drop the item. You can take an item to a NPC and give it to them as a gift, or automatically handing it over if it was for a quest you received from that NPC earlier. Elder Cat, the white cat a little to the southwest, likes leftover fish – if you find one in the trash can, give it to him. You can also act friendly and gain affection that way, or run away and end the interaction. Most NPCs don’t have much to tell you until you reach an intimacy level of 2. When you have reached a new intimacy level, the next time you talk to the same NPC, they probably have some quest for you. Pay attention to what they are saying, as their conversation will hold clues to what they could want.
Some NPCs will send you to other NPCs, or give you hints where to find them. Some quests require you to interact with specific NPCs, others will require you to bring them an item, or befriend another NPC.
You won’t understand what humans say, or see how they look like, unless you reach a certain level of intimacy with them. Gifting items and acting friendly usually works best – although there are NPCs that don’t accept gifts or kindness – and most NPCs will need just two or three of their favourite items or a few friendly interactions to progress to the next intimacy level. Often a favoured item and acting friendly twice will do the trick. This usually means that you can gain up to one level of intimacy and fulfil the requirement to progress to the next; and then come back again tomorrow and do the same for the next intimacy level.
However, some NPCs don’t seem to have errands to run at ever intimacy level, in which case you just progress normally to the next level by gifting items and acting friendly.
As you walk the streets, you need to eat. Trashcans and boxes can hold various edible items, although some trash is not as healthy, but can still do in a pinch. Food waste is not great, but it could still be a better choice than starving. Other possible food sources are some NPCs; and there is always the option to steal some food.
If you go all the way to the west, you will find a dumpster at the end of a road. An elderly lady will drop cans of food, the second best food items in the game. If you befriend the fish monger, he might give you fish now and then. You can also steal from his fish shop if you like. You get two tries and if you are lucky, you get a huge fish, the best food item.
From here on, you will have to decide who you want to reach maximum intimacy with and start building up your relationships. Once you reach level 7 intimacy with an NPC you will unlock their ending.
The End
Every NPC has one ending you can unlock with maximum intimacy, while two endings can be unlocked by either dying – when your health meter reaches zero – or by not reaching maximum intimacy with any of the NPCs.
*meow*
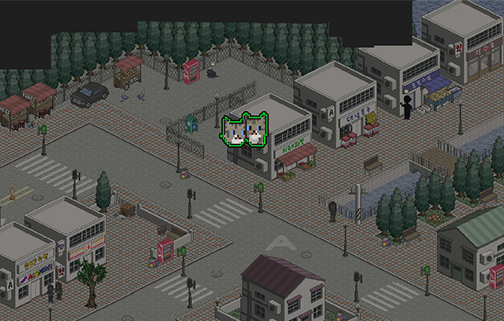
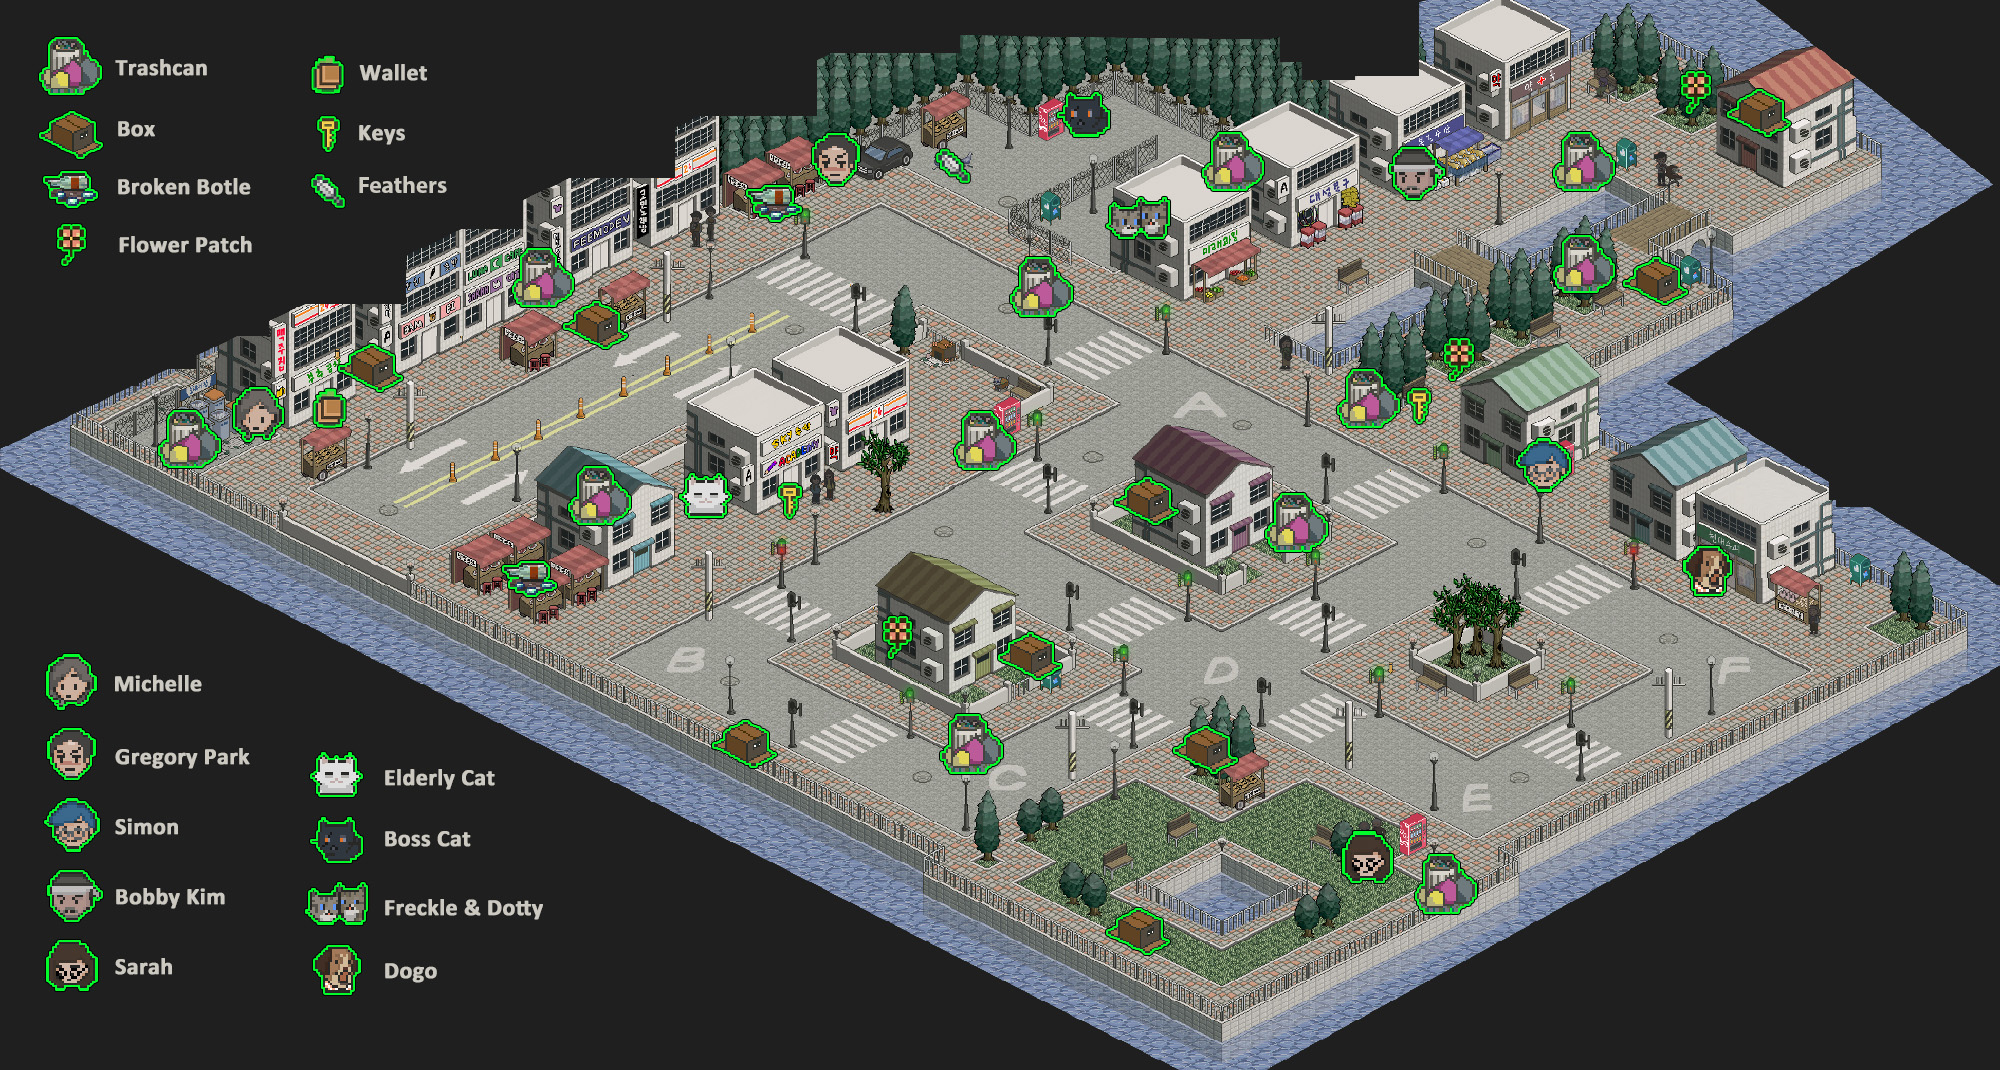
Map
Endings


Once you have unlocked all endings, you get access to some “hidden” features.