
Overview
All the info you need to get you started with the level editor! Build your own missions, chapters, skins, weapons and more. You can even create new enemies and playable characters!
The Level Editor
You can use the level editor to build your own levels and upload them to the Steam Workshop. You can start the editor by selecting the second option from the popup window when starting the game from Steam (Launch Game Editor) or by looking for the exe file (ActionSquadEd.exe) in the game’s “tools” folder.
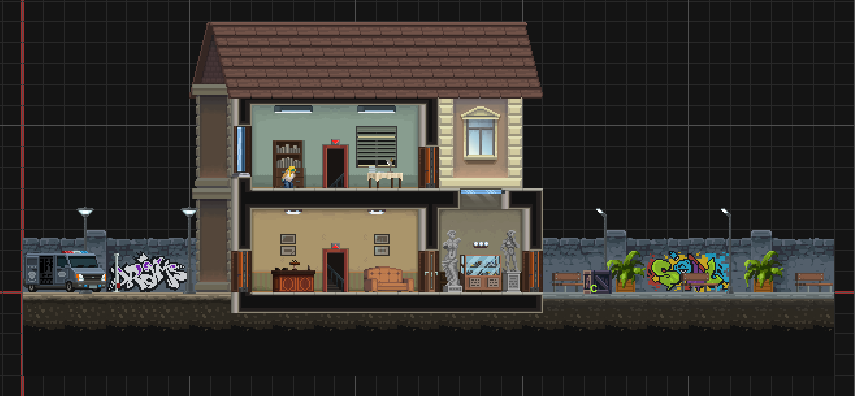
When starting the editor it will load a default level that you can use as a starting point for your amazing new missions.
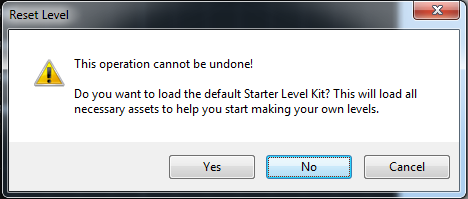
Or you can just hit New and start quickly with an empty sheet.
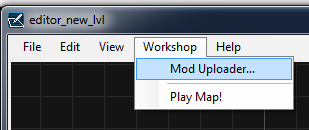
If you want to easily test your level just save it in the media/levels/missions directory, where the original levels are located, then click the Workshop menu inside the editor and select the Play Map! option.
When you’re ready to upload your level to the Steam Workshop just select the Workshop menu again and click the Mod Uploader option. Fill in the required data, select an image and click Upload. That should get your level up on the Workshop.
The image that you want to be associated with your mod should be a PNG file with an aspect ratio of 16:9. A resolution of 768×432 pixels would be best. You can create nice pictures of your level by disabling the grid and zooming out in the editor, then doing a screenshot of the editing area.
Mod Types
The editor lets you upload 2 types of mods. You can select the type of mod from the first dropdown list (named Type) in the Mod Uploader window (Workshop menu -> Mod Uploader…)
This type of mod doesn’t change the game files. It only adds your mission to the “Workshop” chapter. Your mission should only rely on the standard content of the game (no new art, sounds, etc.).
Your mod is identified by its name so make sure you use the same name when updating the mission or it will get uploaded as a new mod instead of updating the old one.
After uploading your mission just Subscribe to that item on the Steam Workshop, fire up the game and go to the Workshop menu to activate it. You’ll find your level in the last chapter, the workshop chapter.
– For best results don’t use descriptions that are too long and please write the description in English so we can all understand what your mission is about.
– Don’t add or remove files from the “Affected Files” section. Only the mission will get loaded inside the game.

Use this mod to upload game changing mods. This means that you can change any file from the “media” folder in order to customize the game as you see fit.
When making this kind of changes it’s better to back up your media folder and do all the changes directly on the game files themselves.
After finishing the changes (like maybe changing the tileset, or sounds, or menu images, etc) just start the Mod Uploader from the editor’s Workshop menu, set the Type of the mod to GAME_CHANGER, fill the text fields and select an image, add all the files you changed to the “Affected Files” section and click Upload.
To activate the mod inside the game first subscribe to it on the Steam Workshop then fire up the game, co to the Workshop menu and click the mod to activate it. The changes will take effect as soon as you go back to the main menu.
– If you try to activate 2 mods that both change the same file you’ll get a “mod conflict” warning message and the mod will not activate. If that happens just deactivate all mods and try again.
– When creating Game Changer mods you don’t have to include the level you’re editing in the Affected Files list. The editor asks you to load a level just to get the paths to the game files. Remove the level from the Affected Files list if your mod doesn’t need it.
Final Words
We’ll continue to improve this guide but meanwhile, if you have any questions just post them in the modding support thread OFFICIAL: Modding Support
Controls
Scrolling the map
In order to scroll the map and the tileset window press the middle mouse button.
How to delete objects and enemies
In order to delete an object, switch to the “Objects” view by clicking the Objects button on the main window (top right). After that, right click the object you want to delete in the main editing area and hit “Del” on your keyboard.
Do the same moves in order to delete Actors (or Collision boxes). Switch to the Actors or Collision view, right click the actor or collision and hit “Del” on your keyboard.
When in AI mode you’ll still be able to select actors and objects and collision boxes but you won’t be able to delete them.
Also, don’t forget that the bottom status bar gives you all the keyboard shortcuts.