
Overview
A (picture) guide for Automachef to succeed the campaign levels.It will be updated little by little, while I am going further and further with the game.If you require more explanations, comment or message me.Edit: Addition of level 20 and 21 (14.12.2020)
Introduction
My first guide ever so I am sorry if things are weirdly worded or formatted (plus English is not my first language).
I know people can do better than me on each of these levels but right now, I couldn’t find solution that showed only pictures. I always found videos of walkthrough.
I am not trying to have 100% efficiency for all levels, but merely completing the three checks.
Some basic rules that I often follow:
– By recipe, I attached an Order Reader to all the dispensers necessary. (For example, for a BLT, one Order Reader will be connected to the lettuce, bacon, bread (to deliver 2 slices per new order) and tomato.)
– Try to reduce Energy Consumption by associating another Order Reader to Preparations stations (Assemblers, Grills, etc.)
-Try to make as short as possible.
These are not respected all the time but I try to stick to it.
I also tried to make clear the links between the Order Readers and what it is attached for you.
If you need more explanations about the level resolution, please ask.
It will be uploading more when I achieve each levels. Thanks for your patience.
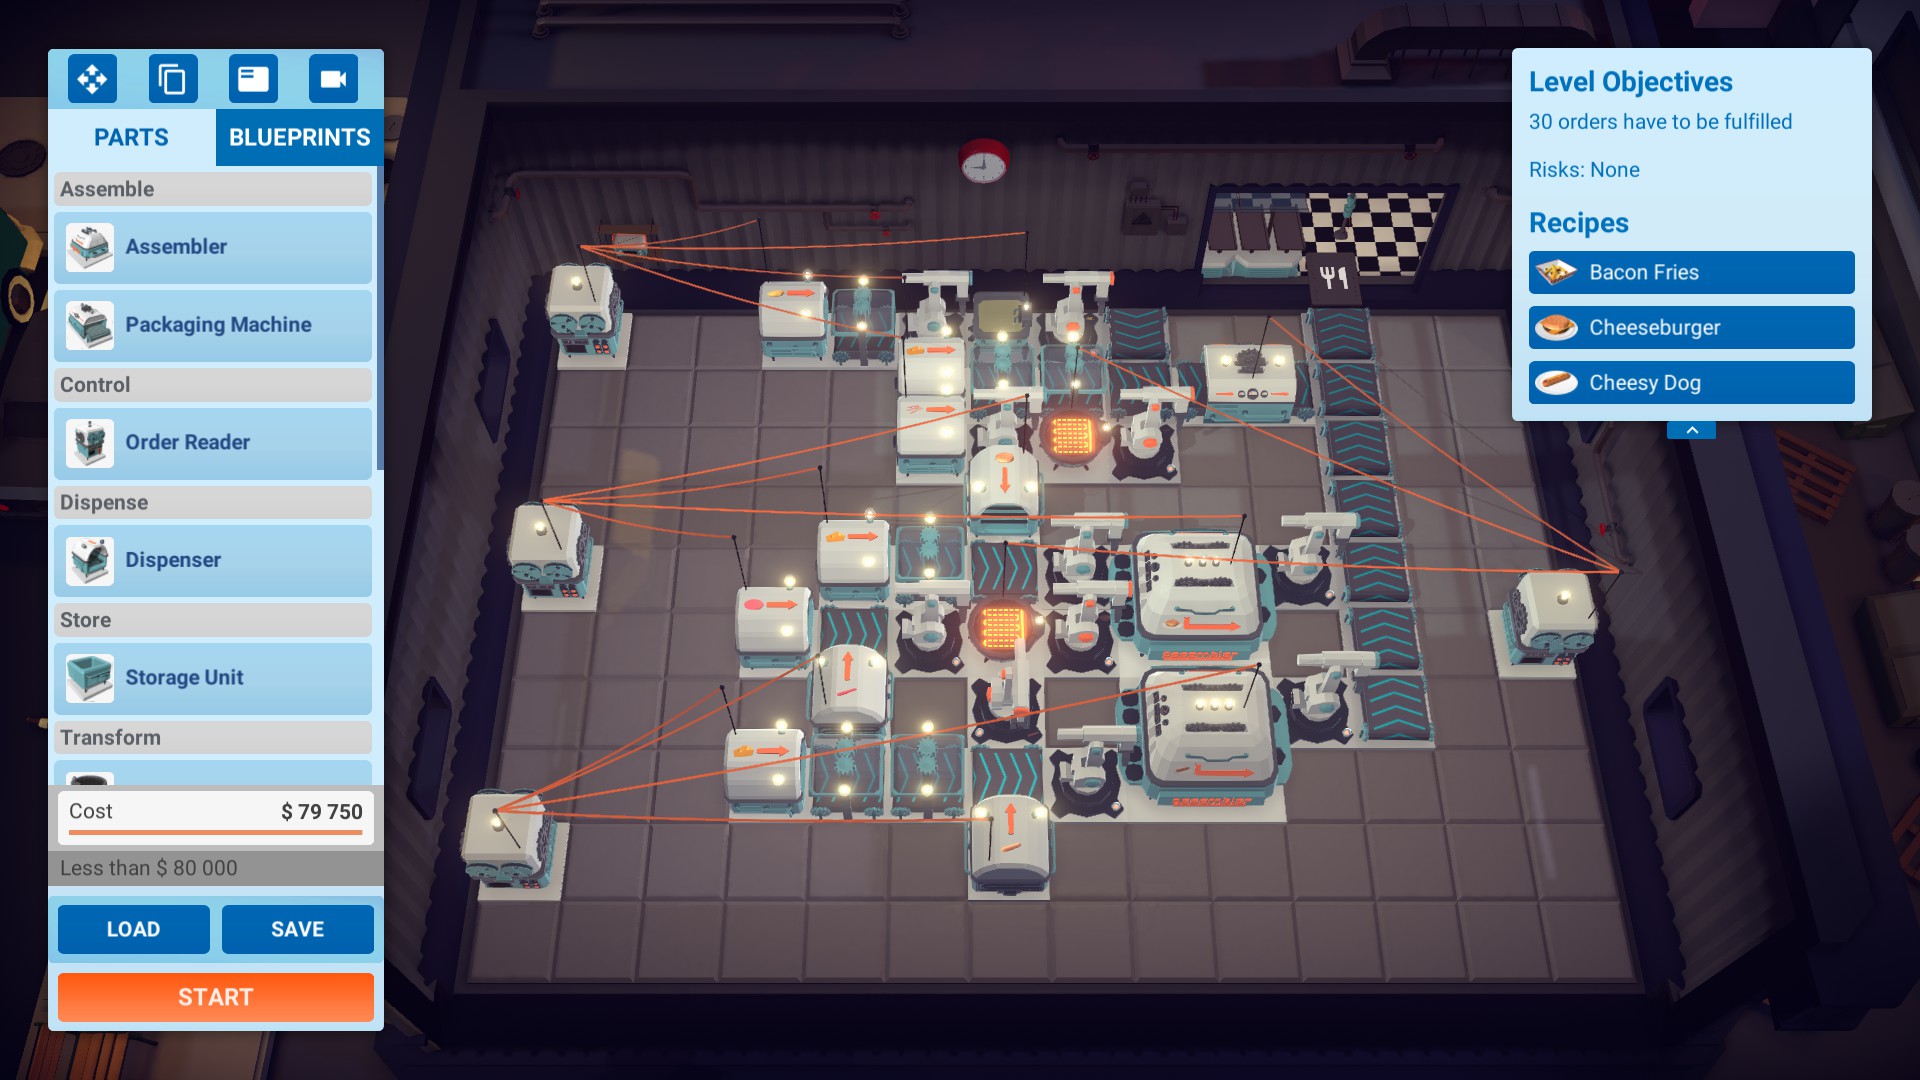
Level 1
So on that note, here for level 1.


Level 2


Level 3
Thanks to Neekow, I present the solution for also a 100% clearing:
Right grill stay on for 14s on new order
Rest is classic speed and work for new order (if connected)
Layout: [link]
Score: [link]


Level 4
Notes for the Order Readers:


Hope it helps!
Level 5

Level 6


Thanks to Neekow, I present the solution for also a 100% clearing:
Grill is on when BTS or burger is waiting
Rest is classic speed and work for new order (if connected)
Layout: [link]
Score: [link]
Level 7
For this level, getting everything was pretty challenging.
1) For being able to get under 125 ingredients, it is necessary to speed up every production.
But because of this, the Energy Used is sky rocketting.
2) So make sure to link them to Order Readers so they activate only when required.
3) Also, make your path as short as possible.


The Robot is giving the advice to use a Cooler but in fact it is not necessary.
At the exit of the fries preparation, connect a dumb arm to pick up if it’s a Fries Order, and another one for the Dopamine order.
That should help you achieving the three checks.
Level 8
Tip on the power mode:
Grills (both of them): normal
Assemblers (both of them): low power


Level 9
Not the best of scores but did work nicely.


Thanks to Gomzinator, there is a 100% score!
[link]
[link]
Level 10
With more difficulties come greater challenges… duh.
I succeedly checked the 3 boxes but I am sure there is still a better way to do.
I thought about a system that would create fries for every boxes and arms taking the item when an order is coming in. But, the problem was I kept loosing reputation by not serving the Heart Stopper Meal (HSM). So here the advice:
– Focus on the Heart Stopper Meal.
It need to have full speed on its lane and a a special fries lane on its own so you can double the amount of fries made.
Problem is that it raises the amount of Energy used.
Maybe by reducing the power on the Salad lade, we can even everything out?
There is still enough money to add some Order Readers to cut down power where not needed. OR to replace the heat conveyers by grills.
Enjoy finding your best method!


Thanks to Neekow, I present the solution for also a 100% clearing:
Grills and Fryers are set ON on new order
Everything else in classic speed
The trick is the top left packer is set to do Dopamine Meal AND Heart Stopper Meal (So bottom fries are triggered by both recipes)
Layout: [link]
Score: [link]
Level 11
Lots of readers… everywhere!
Just connect them by recipes to save ingredients and electricity.


Level 12
Thanks to Morgaln, we have the answer of this level.
I quote the suggestion:
“I put everything I could on powersave.
The ingredients for breaded chicken and side salad got dispensed every 12 seconds each. Everything on the burger and fries line only got activated when an order came in.”
The plan offered works also perfectly fine as you can see below.


Level 13
It is not the best efficiency but at least it has the 3 checks…
The key is to have two robot-arms that will be programmed with an OR to deliver to the restaurant or the take out accordingly to the type of order.

Level 14
What a mess.
Control every grill and fryers with a reader so you avoid fire. There is not enough space for putting lots of damage control robots.
Have the same patty deliver for both burgers with a smart arm taking controlled by an OR to take according to the order.


Level 15
Build each lane separately with their own OR for dispensers and for the grill/assemblers.
Don’t forget that pomps are necessary between the tanks and mixers or assemblers.
No need to put anything in high speed.
Use as much as Advanced Dispensers as your budget can.
That should do the trick.


Level 16
Still need some tunning as I only have two checks at the moment.
Here the pictures nonetheless until it is bested:
Details:
——————
Settings
——————
Burger Assembler: High Speed
Salad Assembler: Normal
Both Grills: Power Saving
Frymatic 3000: Power Saving
Potato dispenser: 5 sec
For Salad making:
Tomato dispenser: 7 sec
Carrot dispenser: 7 sec
Lettuce dispenser: 5 sec
Raw Chicken dispenser: 2 sec
For the Burger:
Raw Patty dispenser: 3 sec
Burger Bun dispenser: 9 sec
Tomato dispenser: 9 sec
Mushroom dispenser: 5 sec
——————
Burger
——————
- OR 1
- OR 2 (shared with Salad, same as Burger-OR1)
- Computer (R0 : Burger)
- Code :
——————
Salad
——————
- OR 1 (shared with Burger, same as Salad-OR2)
- OR2
- Computer (R0 : Salad)
- Code:
Level 17
Not 100% of efficiency but has the three checks.
The robot tells you the solution: use the advanced readers for the drive thru.


Level 18


Level 19
Oh my…
It is not perfect BUT it works.
I guess with more OR, we can raise de Efficiency. I was a bit lazy for it.
The whole plan and score:
A slight close-up in two parts:


Level 20 (not completed)
Another level with not a perfect score.
The top Assembler is for the Spicy BLT, and powered in Low.
Bread and Bacon being grilled together and one is being fed directly to the Assembler while the other goes to the lower belt.
The BLT is then placed in the Storage Unit.
One arm will take the BLT to deliver it as it is when the order is up.
A second will bring the BLT to the packaging machine (make the command of the arms with the OR).


The Assembler in the middle is for the Chicken Salad (with normal power mode). All the ingredients are fed to the Assembler by a single dumb arm.
When the Chicken salad is ready, it is placed in the storage unit with two arms that do the same plan than for the BLT).
Hence the last assembler being for the Big Salad (normal power mode). and same finale with the Stoage Unit and the two arms.
To save power, attach as many OR as you can to limit the use of the equipment.
Good luck!
Level 21
It is very messy but if you follow the basic way I do, you shouldn’t have any trouble to complete it with three checks.
So as usual:
– Shortest path possible
– Put a OR for each dispenser and if possible fryer and/or assembler.
– No need for advanced dispensers. Keep your money and power low.
There is a way to achieve 100% of efficiency I believe, but I let you work on it yourslef! Post your results in the comments if you succeed and I’ill update the level with your credits 🙂


Level C1


This special level asks for coding the big computer thingy.
I am bad at computing so I asked someone to do for me.


Level C2


Level S1
Little note: Everything in High Speed BUT the Fries fryer AND the Plain burger grill.


Level S2
The robot is asking you to help him because his kitchen is not working.
Nothing easier! Shorten everything and make the fryer be shared by the fries and the fried chicken.
Et voilà !

