
Overview
In This Guide, I will show guide the difference of Level Difficulty each Difficulty on RER2 also include guide here
Basic Information
In This Information, You will have another knowledge guide to choose a comfortable difficulty before attempting a game.
Difficulty Comparison – Resident Evil Revelations 2
Resident Evil : Revelations 2 – Difficulty Comparison
This Content will show the difference apperance of Diffuclty Gameplay in RER2
There are 4 level difficulty on this game, that is :
Casual Difficulty
Casual (Suggested to Play 1st time RER2)
*Health Claire/Barry and Natalia/Moira more durable/high health
*Enemy attacks very weak or slow (Almost wear higher armor that reduce damage 75% damage from enemy. Except for Ironhead, even you got hit from him. You will automatically Bleed that can reduce health slowly).
*Running Distance are Last Longer for 12 seconds
*Lesser to Recover Stamina (Its takes 3 second to recover full stamina)
*Enemy Spawn rate is slighty (Means that Enemy are less appear)
*Enemy spawn location standard
*Enemy Health very slighty (Included to Mutant Pedro, Dhargla, Neil, and Mini-boss)
*More Ammunition during Breaking a box and finding hidden item
*Enemy Easily to Stun/ Instant Headshot.
*Item Placement not change.
*Sub-Weapon more impact damage especially to Explode, Firebomb and Decoy Bottle for Boss.
Fact :
*If you collect some sub-weapon and use it for Mini-Boss, Neil, Pedro. You will save a lot of ammo for it because its has dealing high damage when attempted Casual Level
1st Encounter Enemy on Barry Chapter 2
2nd Encounter Enemy
Crate Location : Casual


Normal Difficulty
Normal (Average Level)
*Health Claire/Barry and Natalia/Moira standard
*Enemy attacks have a normal average (Takes 4-6 hit you will get a red screen caution)
*Running Distance rescaled from 12 seconds to 10 seconds
*Standard Recovery Stamina (5 seconds to get freshed)
*Enemy spawn rate is average
*Enemy spawn locations added
*Standard Amunition during Breaking a box and finding hidden item.
*Take 2 shot for Daze Enemy/ Not Instant Headshot (But still can headshot if Equip Parts like Damage Lv4)
*Item Placement not Change (Except to Crate to reach higher areas in Chapter 2 Barry)
*Sub-Weapon have standard impact damage. (But still need collect this for horde enemy)
*Item Placement change for Barry Chapter 2
1st Encounter Enemy (2 Enemy Appearance)
2nd Encounter Enemy (Notice the awareness natalia)
Crate Place : Normal


Survival Difficulty
Survival (Expert Player / Experience Player)
*Health Claire/Barry and Natalia/Moira standard
*Enemy attacks have a high damage average (Takes 3 hit enemy to make a red blood caution)
*Standard Stamina to Running (Limit Distance are same as Normal Difficulty)
*Standard to Recovery Stamina (Same as Normal Difficulty)
*Enemy spawn rate is more spawning (Maybe new enemy or different spawning enemy. Because a horde enemy are rescaled to higher spawn appeared)
*Enemy spawn locations rescaled to different placement (Like Glasp in Chapter 4 : Claire or New Enemy Added Placement Location on Change in All Chapter)
*Lesser Amunition (Contain Higher BP every finding Hidden item and Breaking a Box. Note You will still get ammunition in lesser value)
*Item Placement changed (Like Crates to Raise a higher area on Barry Chapter 2)
*Sub-weapon have standard impact damage. (Nothing Change to Dealing Damage to Enemy)
1st Encounter Enemy
2nd Encounter Enemy (Hide in Bushes near where you see a Key inside from outside window)
Crate : Place


No Escape Difficulty
No Escape (Like No Hope in Resident Evil 6)
*Health Claire/Barry and Natalia/Moira standard
*Enemy attacks have a higher damage(If caught by enemy, instand bleed and caution red screen will makes you danger situation)
*Lesser Distance to Running (Use Evade to Change Running for better option like Countdown Mode. In This Case, Use Running if get patrol by enemy horde in large scale)
*Standard to Recovery Stamina (Same as Normal and Survival Level)
*Enemy spawn rate is highly spawning (Maybe new enemy or different spawning enemy type and Replace some new enemy)
*Enemy spawn locations rescaled to different placement.(Like Glasp and Little Crab)
*Lesser Amunition/No Amunition Appearance (**)
*Item Placement rescaled to better locations (Like Crates to Raise a higher area)
*Sub-weapon have low impact damage. (Take 6 Sub-weapon or more to take down Neil and Pedro)
*Enemy attacks more fiercely/aggresive (Never go to kill enemy because its waste the ammo. Use Stealth or Decoy for Attract Enemy)
Fact :
(**)Sometimes Amunition can be get by breaking a box/ finding hidden item. It Has a slighty ammo than Survival difficulty. Highly spawn to BP like Saphire, Emerald in higher scale
(*)You can still evade enemy even AI still in trouble. But I Suggested to keep an eye for AI action because it will stay in position or bug where AI cant respond Player Command at some range
(*)If You Have low ammo on Neil Boss, I Suggested to Keep some ammo for triggered scene where he got burned by fire and gas.
1st Encounter Enemy (Enemy Move slightly faster different than Survival)
2nd Encounter Enemy (Same as Survival Difficulty but Enemy get more faster on this Level)
Crate Place : Barry (Enemy was spawned there before auto-save triggered)


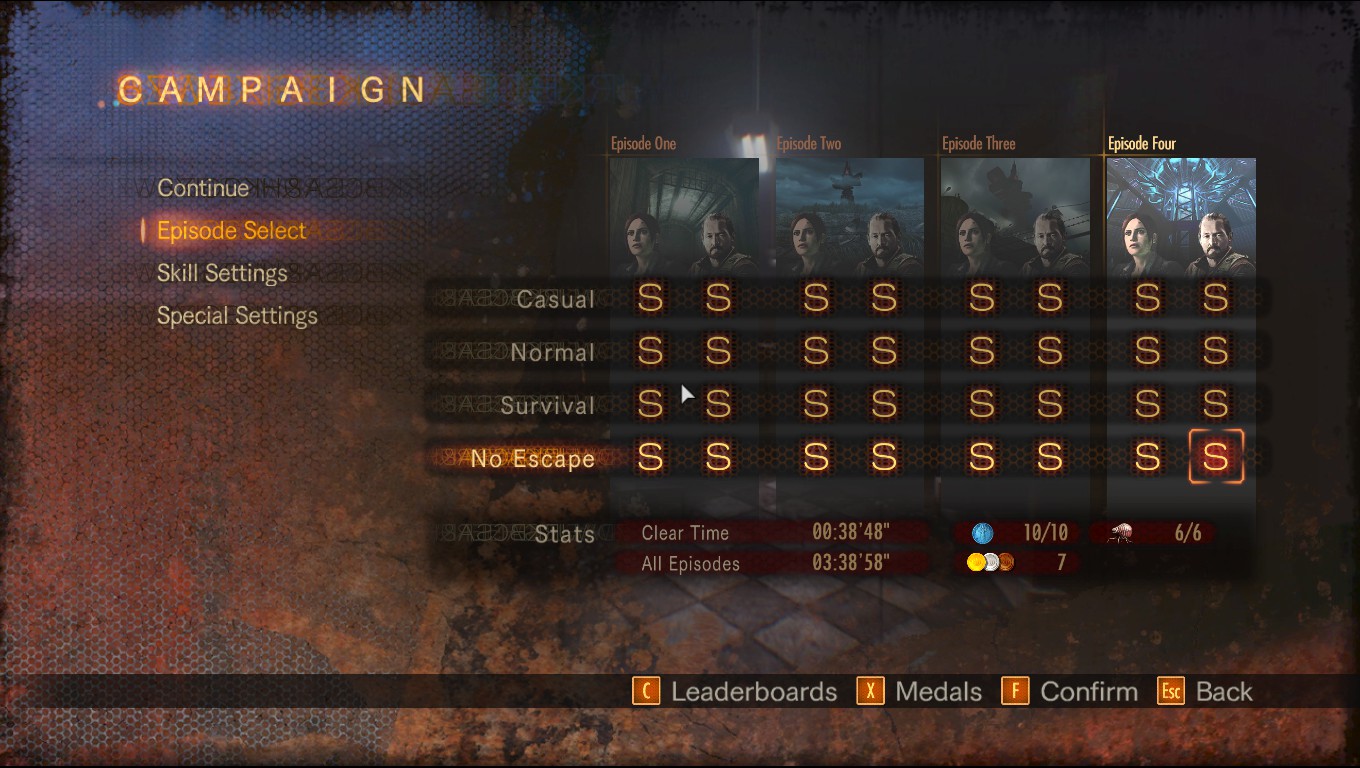
Difficulty No Escape Full Rank S Guide
WARNING! Before Attempting this Level Difficulty maxed out all your Skill before play this level.
This Difficulty will makes you more aggresive and Rob any chance for survival. (Except for Experienced User)
<No Escape Difficulty can be attempted from Finishing a Campaign on Survival Difficulty on Rank S>
No Escape Difficulty Starter Guide :
*Prepare Stock your ammo (Especially to Magnum Ammo. You will need a lot to take down mini-boss, Pedro and Neil) (*a)
*Use a Equip Parts High Level for Magnum Weapon (Charge Shot,Damage Lv4, and Burst +1, or Whatever you like used eqiuip part comfortable)(*b)
*Stock Herb, Disinfectant, and Tourniquets
*Rearrange Inventory Claire/Barry stock up ammo and herb, Natalia/Moira stock 3 herbs/Tourniquets/Disinfectant and free slot at least 3 slot for get a main item(Like Fuel,Key,Battery,Etc)***
*KILL Enemy doesnt recommended just past enemy using evade or Running from it (Except Alex, Pedro, Neil, And Mini-Boss or Triggered Scene on Barry Campaign Chapter 4)(*b1)
*KILL enemy that you’ve should do (Like a Iron Head, Revenant, Glasp, and Some Mini-boss)(*c)
*Take a Any Campaign Chapter that easy to finish it.(**** Reference at End Page)
*** From My Experience, If Moira on Red Screen/ Natalia on Fog Black&White Effect use herb as fast as you can. If not, can cause knockdown and dying state if you don’t do it. You should at least save herb for Natalia/Moira because sometimes AI-Controlled bugged itself.
Note : Why Should Collect this Tourniquet and Disinfenctant? Just In Case you have some trouble/bugged on some chapter that triggered enemy or you in trouble. AI will help you in Great Distance if you already maxed out all skill.
(*a)You can stock ammo in casual difficulty before attempt No Escape Difficulty. Farming on Chapter 3 Claire – Barry using Knife or Evade enemy for saving a lot of it.
(*b)Equip Parts what you are comfortable suit to you. Its my own build Part for dealing Alex, Neil, Pedro, and Mini-boss.
(*b1) If you defeating some enemy. Its only waste of ammo and time for that. But If you want go for Rank S. Try to use smoke bottle/ Stealth Kill for saving ammunition or Remembering Pattern Enemy Moves Direction. On Chapter 3 Claire you will cost all of your stock for it because enemy spawn are higher scale. Except for Boss Neil, You will need more ammo and sub-weapon for it. Except you are expert player, Use evade and kill enemy that blocks your way.

(*c)If you don’t kill this quickly, They will chase and kill you faster. In No Escape Difficulty, Enemy Reaction more fast than Survival Difficulty.
<Item Inventory Setting Recommendation: No Escape Difficulty >
Arrange the position item inventory like this.
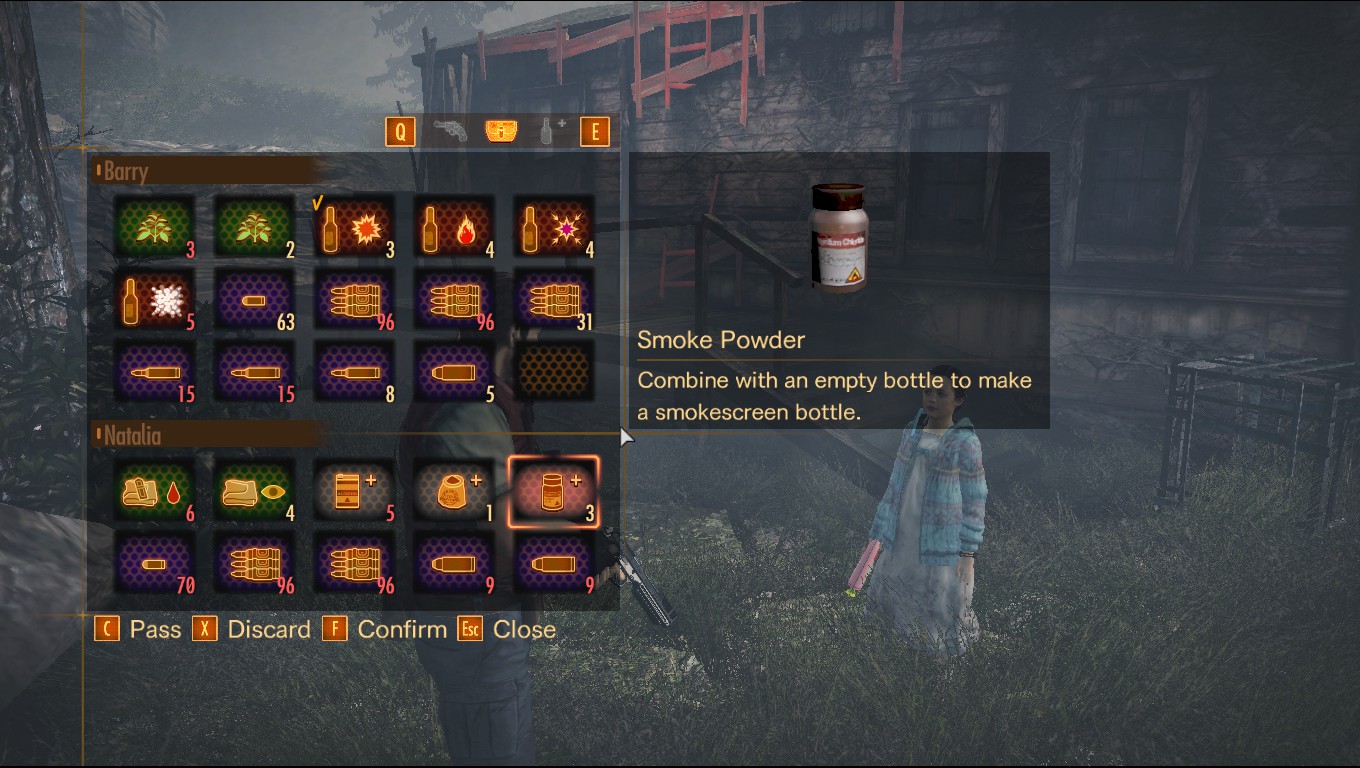
(****)To Make Everything can work, After Finishing Chapter on No Escape Level. Choose a Campaign Select and Go on Casual Level to Restock Ammo again. After That, Play Stage on No Escape Level. Automatically Ammo added from where you finished campaign on Casual Level