
Overview
First off, a special thanks to the steam community and my fellow xcom players who have mentioned some of these tactics but not really explained them. So thank you for that. Let us get started. I also welcome any feedback or suggestions to help improve this guide. I would like to help the xcom community and also the steam community as well. If you have any questions about xcom, I will be happy to discuss, explain or help give any advice to new or veteran xcom players alike. I am also open minded. If you have anything you would like to contribue, please let me know so I can add you as a contributor. However, please, not trolling alllowed. Thank you and hopefully we can add things to this guide to help other players.
Attacking from concealment with grenades

Cmdr. “Gnat” here: This can be a very useful tactic if, like me, you played a lot of XCOM:EU before the expansion came out and had gotten used to carrying only one item. The new tactical rigging foundry project available in XCOM:EW means that there are a lot more opportunities for your troopers to carry grenades. I almost NEVER used grenades in XCOM:EU because I felt that the Scopes or Chitin Plating were more useful. With tactical-rigging… I no longer have to choose between the two. This became a very useful strategy to remove cover, damage enemies, and provide killing shots during my playthrough of XCOM:EW.
Below is a screenshot from the 2K Playthrough demonstrating this tactic in action.

DO NOT UNDERESTIMATE ENEMIES WITH GRENADES. A favourite muton tactic is to use grenade to remove cover and then its squadmates will shoot at you while you are now out in the open. You can do the same and very much should. Grenades are far more useful for destroying cover or creating “entrances” than in inflicting direct damage on the enemy.
Tile Scanning
What tile scanning is: you are checking movement tiles around blind corners or places in the fog of war with your mouse to move your cursor, after triggering enemies in combat. The game will not allow you to move to a tile that an enemy occupies, even in the fog of war. So when you retreat into positions that hide your troops from line of sight of the enemy, during your next turn, you can check movement tiles around blind corners to see if enemies are hiding just around the corner from you. This tactic will help ensure that before you make a move, you can determine the possible line of sight the enemy can have on you. You will be able to take less risks from enemy overwatch shots as well. This can also protect you from being dangerously flanked by the enemy. It can also allow you to flank the enemy when you find them easier.There is one downside, however, this tactic will not work against enemies that can fly, because they are off of the ground. The credit for this tactic goes to a steam community member who mentioned this, so thank you for that. I thought I would post about it to help other players who do not know about this tactic.
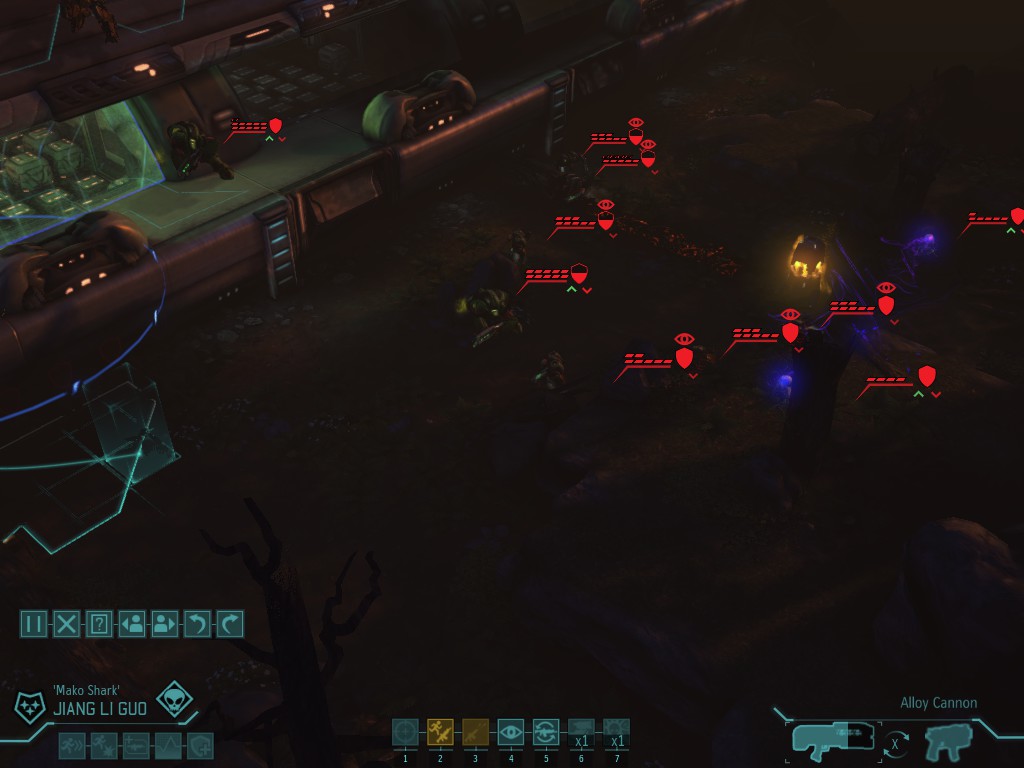
Cmdr. “Gnat: You can also use tile scanning in conjunction with grenade and rockets. “Hmmm… game will not allow my soldier to move into *these* 3 tiles beyond this corner… I think I will throw a grenade over the wall to that location to see what happens… MUAHAHAHAHAA!!!” (I call it explosive reconnaissance) I *REALLY* wish I had used this tactic before peeking around the corner as the following screenshot demonstrates…

Sneak and peek
A tactic that is essential on harder difficulties. It is simple. Hide from the line of sight of enemies from around corners after activating them, then, on your next turn, take a look to see if the enemies have moved from their last known positions. Very useful to keep track of enemy movements so you avoid allowing the enemy to flank you. It is also an effective tool to use if you want to use your non sniper troops as “spotters” for line of sight on enemies for your squadsight snipers.
Cmdr. “Gnat”: This can be a risky tactic when facing fast-moving aliens such as advanced floaters and thin-men. They sometimes have the movement to be able to flank you while you are now out of moves. Not a pleasant outcome. I recommend this tactic only if you have Run-n-Gun in conjunction with a distant sniper… or if the rest of the squad is also around the corner ready to back up the “spotter” if things go wrong. (This is still very risky if the enemy has a combination of high movement along with Lightning Reflexes to avoid all your overwatch shots… which DOES happen!) Chryssalid swarms are also BAD NEWS…

Learning the maps
There are many maps in xcom. This will take time. The more you play a map, you will become familiar with the possible spots that enemies can be hiding in. This knowledge will also allow you to know where you will have the advantage and disadvantage on a map. As I have learned in xcom, there is always a reward or consequence for every move you make on a map. Having said that, you will be able to recognize on a map where you could move to deny the enemy their options. Not all maps offer the ability to do this. However, an example would be a map with buildings that have rooftops. By choosing to move to a rooftop, you can offer yourself some concealment from enemies on the ground when scouting, but you can also put yourself in a bad position if the enemies you are facing can fly. Your choices will vary depending on the types of enemies you are facing. It all takes practice.


Maintaining control over the battlefield
As I have learned throughout my time with xcom, it is always important to maintain control of the battlefield. If it is not 100 percent, it is NOT guaranteed unless it is explosives. (And with Second Wave or Long War Mod options maybe not even then!) Since there is no time limit when scouting for enemies during missions, you can actively check your grenade ranges for your soldiers in a complete 360 degree radius if you do not make contact with the enemy. Heavies have a similar ability even though you cannot fire a rocket after moving; you can check their rocket range as well. Enemies can actively appear to attack you from any direction at any given moment. By checking the ranges of your explosives beforehand and even after moving, it will be easier for you to determine if they will be in range should the need to blow up an enemy arise. This will allow you to set up effective kill zones that the enemy cannot pass through and also destroy their cover. Having a backup plan if your plan should fail is essential. As you will not have unlimited explosives in the field, this will allow you to check your dead zones or blind spots with rockets, meaning if the enemy moves to those positions, you will not be able to attack them with explosives if needed. Credits to bakkelun for this next tip: It is also very important to utilize overwatch when you have not activated enemies on the field. It allows you to get free shots on enemies before they get a chance to move to cover. This is also an important part of controlling space with rockets and grenades. As always, the less options your enemy has, the more options you have.
Cmdr. “Gnat”: Smoke is often overlooked as an effective method of controlling XCOM battlefields. This is unfortunate because smoke has a much larger area of effect than the explosives available to you. Placing smoke on your squad-members can quickly give you concealment that might not otherwise be available. Those few % points of difference in the enemies’ “to-hit” chances can certainly matter. Think of it as the reverse of removing cover from the enemy… you are instead adding cover to yourself.
Blocking door entry points when assaulting buildings.
This title may seem confusing at first. Let me explain. In all of my travels of xcom there is another set of tactics that needs mentioning, so that those who are not aware of these tactics can know. Blocking door entry points is a tactic where you deliberately place a soldier in front of the door as opposed to stacking up alongside the door. This tactic is best used when you suspect enemies to be in a dangerously close situation, meaning that they are directly behind the door or very close to it. The benefits of this tactic is twofold: not only can you more easily enter the room to clear it out, it also prevents those enemies from moving through that door and positioning themselves potentially behind your troops granting them flanking bonuses. Enemies will be forced to move inside the building instead of trying to postion themselves behind you. When executing a dual breach from multiple doors this also provides an opportunity to push or force the enemy toward a situation where you can attack them from 2 sides.
Cmdr. “Gnat”: Remember that clustering several troopers near one place is something of a grenade magnet… When breaching move quickly and spread out into the area. Hopefully you can neutralize all adversaries before they retaliate… If your troopers are still clustered when the aliens’ turn comes up your squad could be in trouble.
Roof Dropdowns
Utilizing the roofs of buildings provide many benefits. They provide concealment from enemies because you are above their line of sight and also provide a stealth element to your movements. (Not to mention several aiming bonuses.) Roof dropdowns are when you have a soldier drop down from a roof to easily set up a flanking shot, when breaching buildings, and for surprise attacks from your assault squad. Be sure to utilize a straight line and make sure that you can land right next to the enemy so you go into their line of sight without actually moving at all after the drop down. Otherwise, if the enemy is on overwatch, you will trigger a close range overwatch shot from the enemy.
Cmdr. “Gnat”: Unfortunately, roof terrain typically does not have as much cover as others. Bring some smoke grenades for emergency situations. In addition, you may find that if the foe is directly against the wall while you are on the roof you may not be able to achieve line-of-sight. Grenades and explosives can be your friends in such situations.
Drawing enemy overwatch fire
This tactic is not recommended in all situations as it tends to be risky at times. However, when you need to negate an enemy that is playing defensively and utilizing overwatch as a defense against your squad being able to safely advance foward to neutralize the hostiles before them, this is the tactic to use. Without an assault class soldier that has lightning reflexes, you utilize a smoke grenade combined with a soldier who dashes through the smoke to help negate overwatch fire. However, in order to be efffecive, your soldier must be dashing through the smoke cloud at the point where the enemy overwatch shot is triggered to ensure that the soldier receives the maximum defensive bonus against the overwatch shot.
Cmdr. “Gnat”: Sometimes you may just have to hunker-down and wait a turn. Or worse yet, retreat a little to draw the enemy out. (GASP… I know… Strange advice to come from me since I typically play very aggressively… but my casualty rate is also somewhat high in comparison to other commanders.) One trick I do to mitigate the small shame of retreating slightly is to place proximity-mines in the locations where I once was… 😀
Cancelling enemy overwatch
The enemy will sometimes use overwatch as a defensive tool to try to hinder your attempts to advance safely to engage them. However, this is where the suppression ability shines. Either your heavy or your support can acquire this ability. Supressing an enemy that is on overwatch will cancel their ability to have an overwatch shot against you. This gives you the ability to advance and engage the target or targets more safely. It also removes the danger of an overwatch shot from that enemy for that turn.
Cmdr “Gnat”: You also may sometimes get a nice combination of perks that will allow your suppression-fire to become more effective. There are also perks that allow you to perform overwatch-fire even if the enemy does not move… You basically get a shot before their overwatch shot begins. With some skill and preparation you can even bait the enemy into *trying” to take a shot at your trooper with lightning reflexes so your overwatching soldier with the appropriate perk can fire first.
Attempting to bait enemy behaviors
Once you have an understanding of your options and the enemies options, it is possible to set up situations where you attempt to bait out enemy behaviors. For example, the one thing I have noticed throughout all of my gameplay is that the enemy has somewhat predictable behaviors. An example would be a situation where you are moving your squad throughout a map. You are attempting to remain stealthy. The enemies on the map that are “moving patrols” will teleport between set points in between your turns of not discovering them. Now, depending on where you decide to move throughout the map, their locations can and will change. It is possible to time your movements on the correct turn to have them arrive closer to you.
It is also possible to predict dangerous areas where it would not benefit your squad should you make contact. You will have situations where the enemy decides to come to you instead. If you are moving your squad and pushing to the left side, and the enemy is on the right side of your formation, they have 2 options. Note that their behavior seems to differ slightly depending on whether or not they are closer to your squad upon discovery or farther away. The first is to run away from you and to the right, since you pushed left and triggered them. The second option they have is to move towards you, which always seems to happen a lot less. The interesting thing is, that if you were to push to the right and trigger them from that side, they would move to the left and away from you. Unless they can move to an easily defendable position in front of you, they will always seem to run away from you. However, with this knowledge of their options, you can bait them into being flanked if your squad members are in a position to flank them. You are basically forcing them into a trap. This is especially deadly against enemies in close quarters, like buildings and breaching UFOS in close quarters.
Cmdr. “Gnat”: Enemy squad composition can affect this greatly. Fast moving aliens have more options to seek cover while others will be more aggressive. Using the “twitchy trigger tentacle” Second Wave Option may also give you a nasty surprise occasionally. EX: That advanced thin-man with squad-site perk just one-shotted my poor support from halfway across the map upon being revealed…
Berserker squads are the easiest to “draw out”… although you may not like the results as the screenshot I took below reveals…
