
Overview
So, you want to know how to make a custom save file? Well, then this is the perfect guide for you!From changing gold to spawning in other areas, i will tell you how to do it.
To Know before customizing
The number one thing you need to know before customizing save files is that if you dont backup your original files, you will lose all your progress. So be sure to backup your files, which i will talk about in the next section.
Backing up
So, if you want to backup your previous saved files then you have to do this:
First, press the windows key and the “R” key at the same time. A window will pop-up.
Type in %appdata%
A new window will pop-up

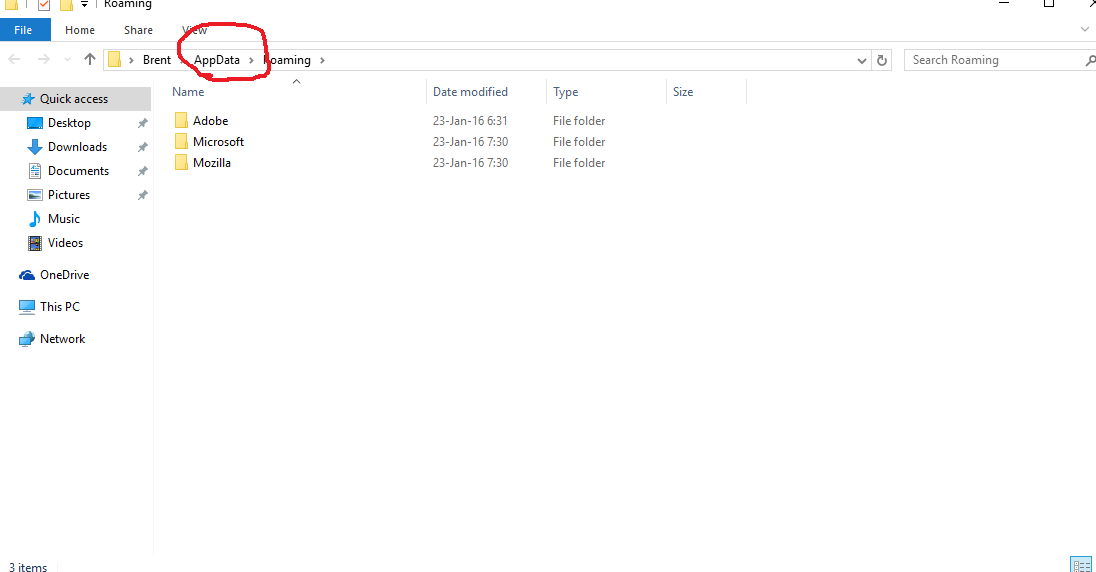
Now, Click on “Appdata”.

Then there should be 3 folders: Roaming, Local and LocalLow.
Click on “Local”
Inside that folder, there should be a folder called UNDERTALE. CLick on it.
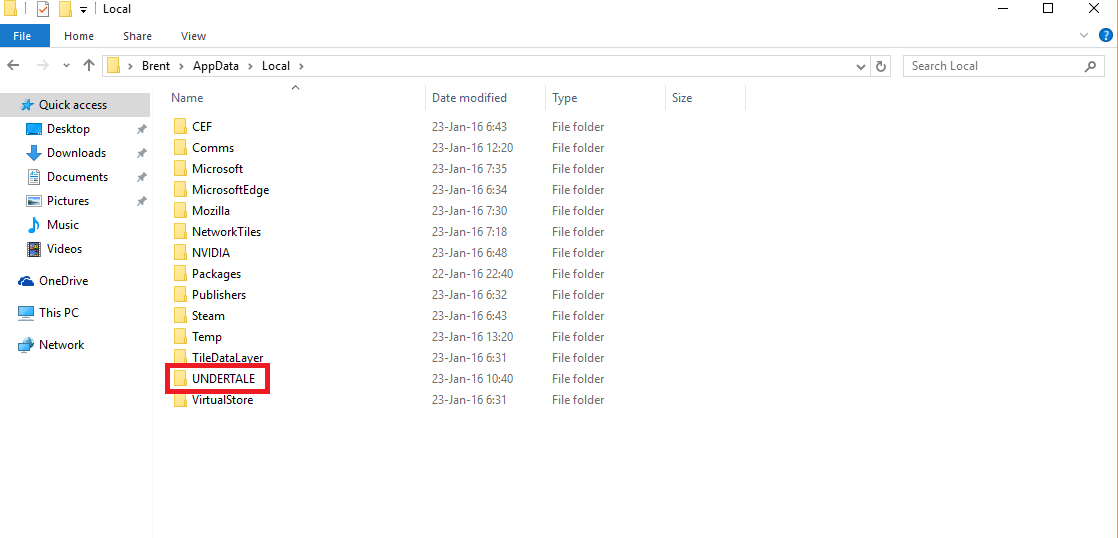
Inside that folder there should be 3 files.
To backup your files copy the Undertale.ini file and the file0 and put them into a folder.
Now, dont close the window! You will need it later.
You successfully backed-up your save file.
Customizing Save Files
So after backing-up, you can finally start making custom save
files!
Open your browser (I mean like mozilla firefox, chrome and stuff) and go to:
[link]
This website is made by the awesome “Crumblingstatue” and allows you to make custom save files.
Of course at the top of the website, you can load several presets, like Sans’ battle.
If you want you can use that but im gonna tell you how to make whatever you want!
So, to use Flowey’s Time Machine you’ll first have to make your Undertale.ini file.
This is the file that remembers if you did things like a genocide run before.
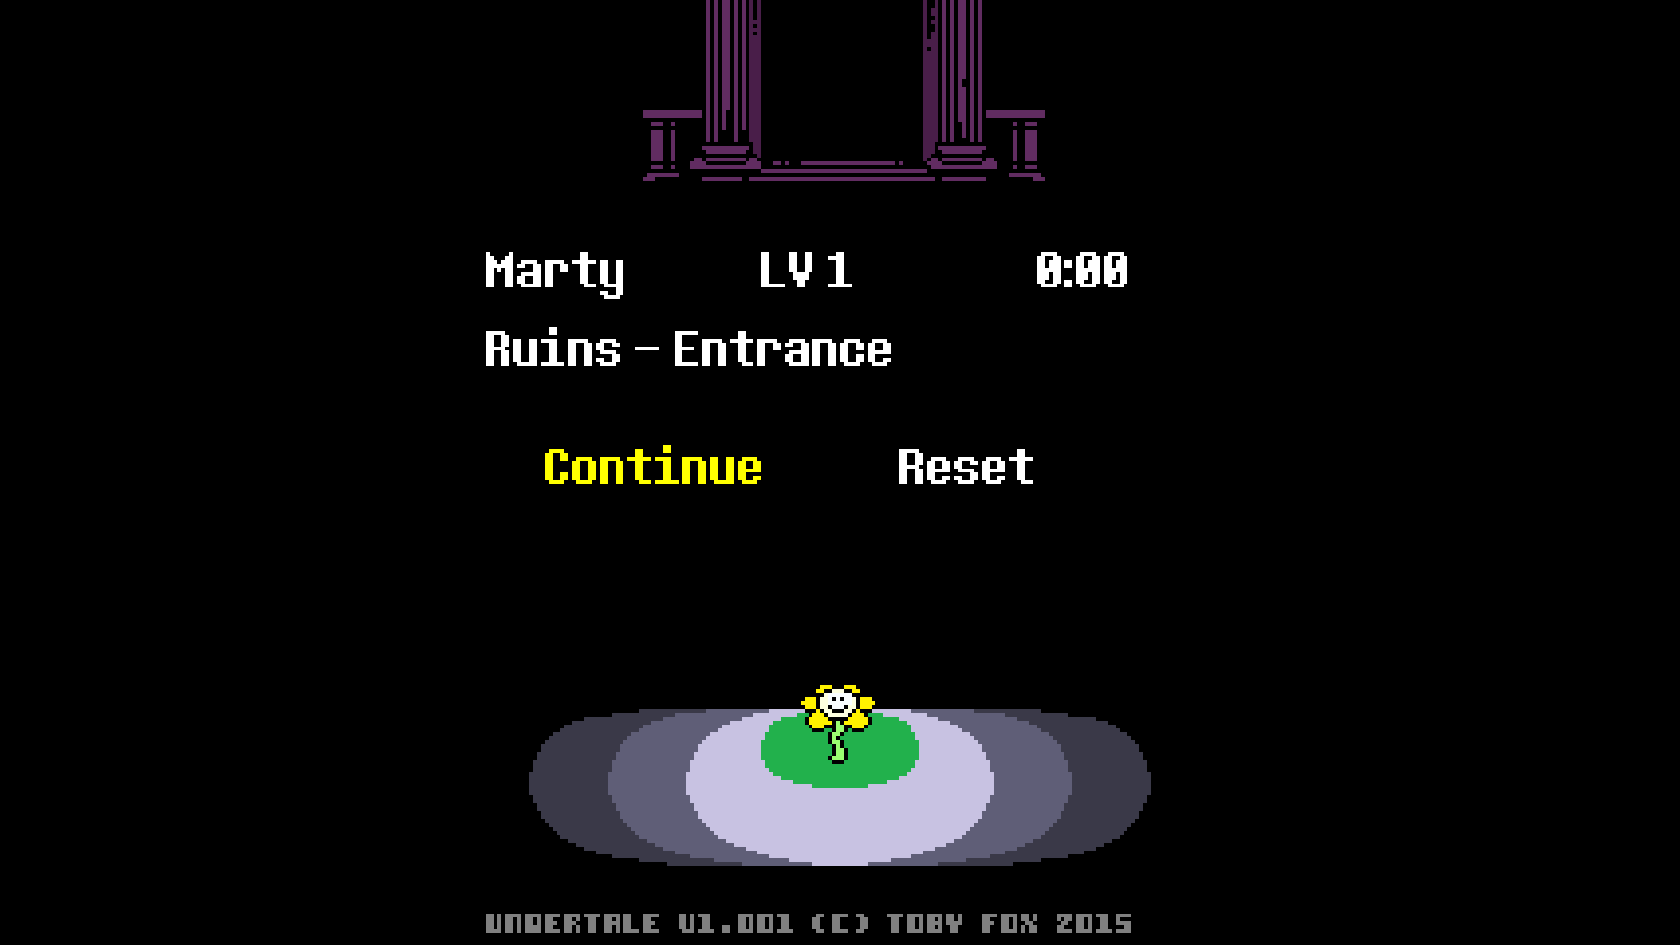
So first, we want to change our name ofcourse (or maybe not if you like the name Marty).
Just click the box and write whatever you want.
Then you need to change the location where you will spawn.
It’s recommended to choose a location with [SAVE] after it, otherwise it might not work.
You can then change you kills and you Level. If your planning on doing a True Pacifist route, just leave it on default. Dont worry about the other options, you dont need them.
Then, when finished, just click “save”.
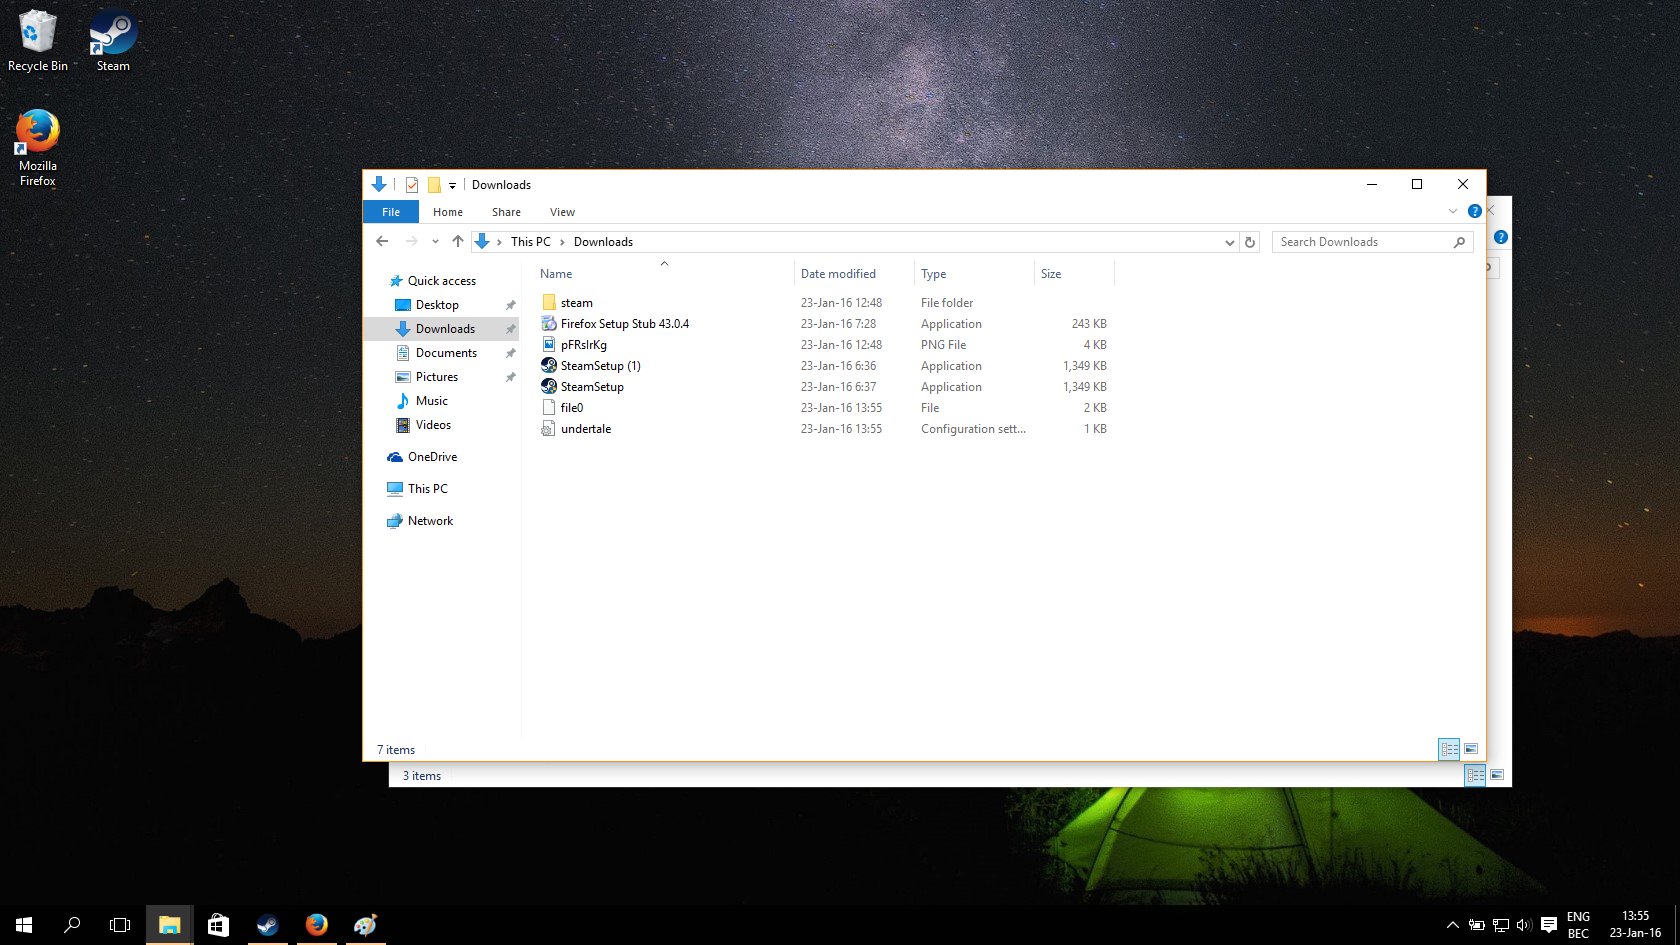
A file will start downloading, dont open it.


Next, you have togo to the “file0” section.
At general you write the same info as you filled in above (so same name, same location and same killcount).
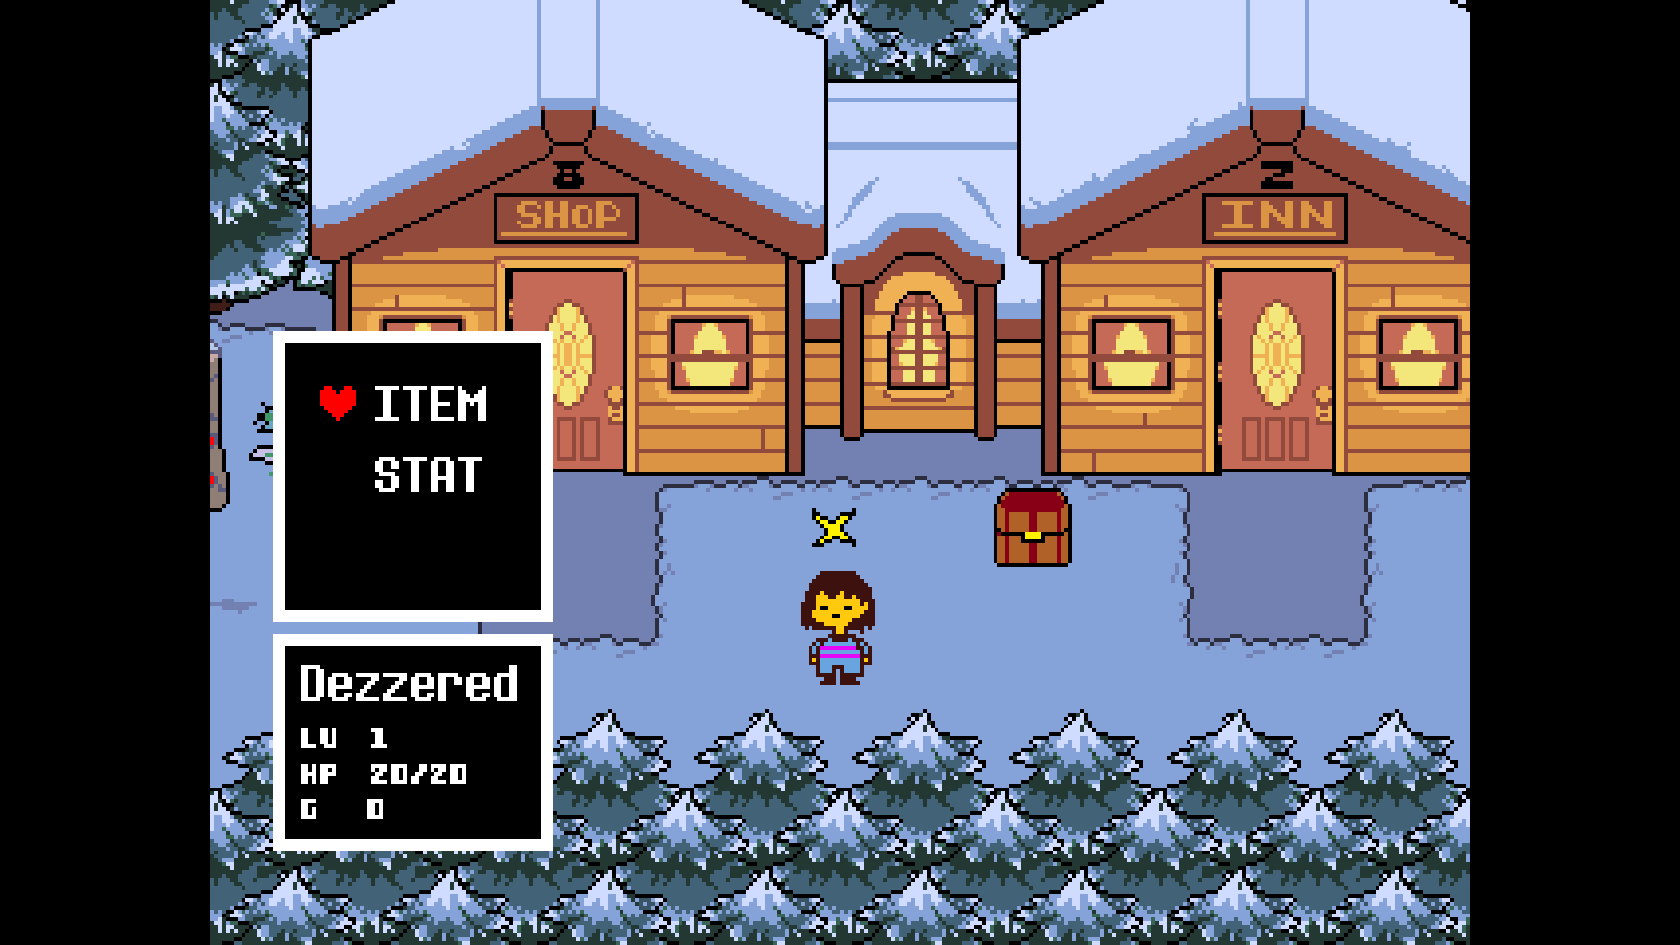
Its the best you dont change your stats too much, only your Level, gold and maybe HP.
At the right, you can change things like inventory.

Now, here are a few things you need to know:
If your save file will take place in a pacifist route, then check the “You have Cellphone” box.
If you want to get to the True pacifist ending then you can also check the “Exited True Lab” box.
If your save file takes place in a genocide route, then dont check these boxes. Also dont forget to change the dropdown menu’s to “killed” and at the killcount sections fill in these numbers:
Dungeon 21 Snowdin 17 Waterfall 21 Hotland 44.
You can try whatever combinations you want, its also possible to check “You have cellphone” box while doing a genocide route, but it’s not recommended.
If youre done with everything and youre satisfied, click save.
To apply save files, read the next section.

Applying Save files
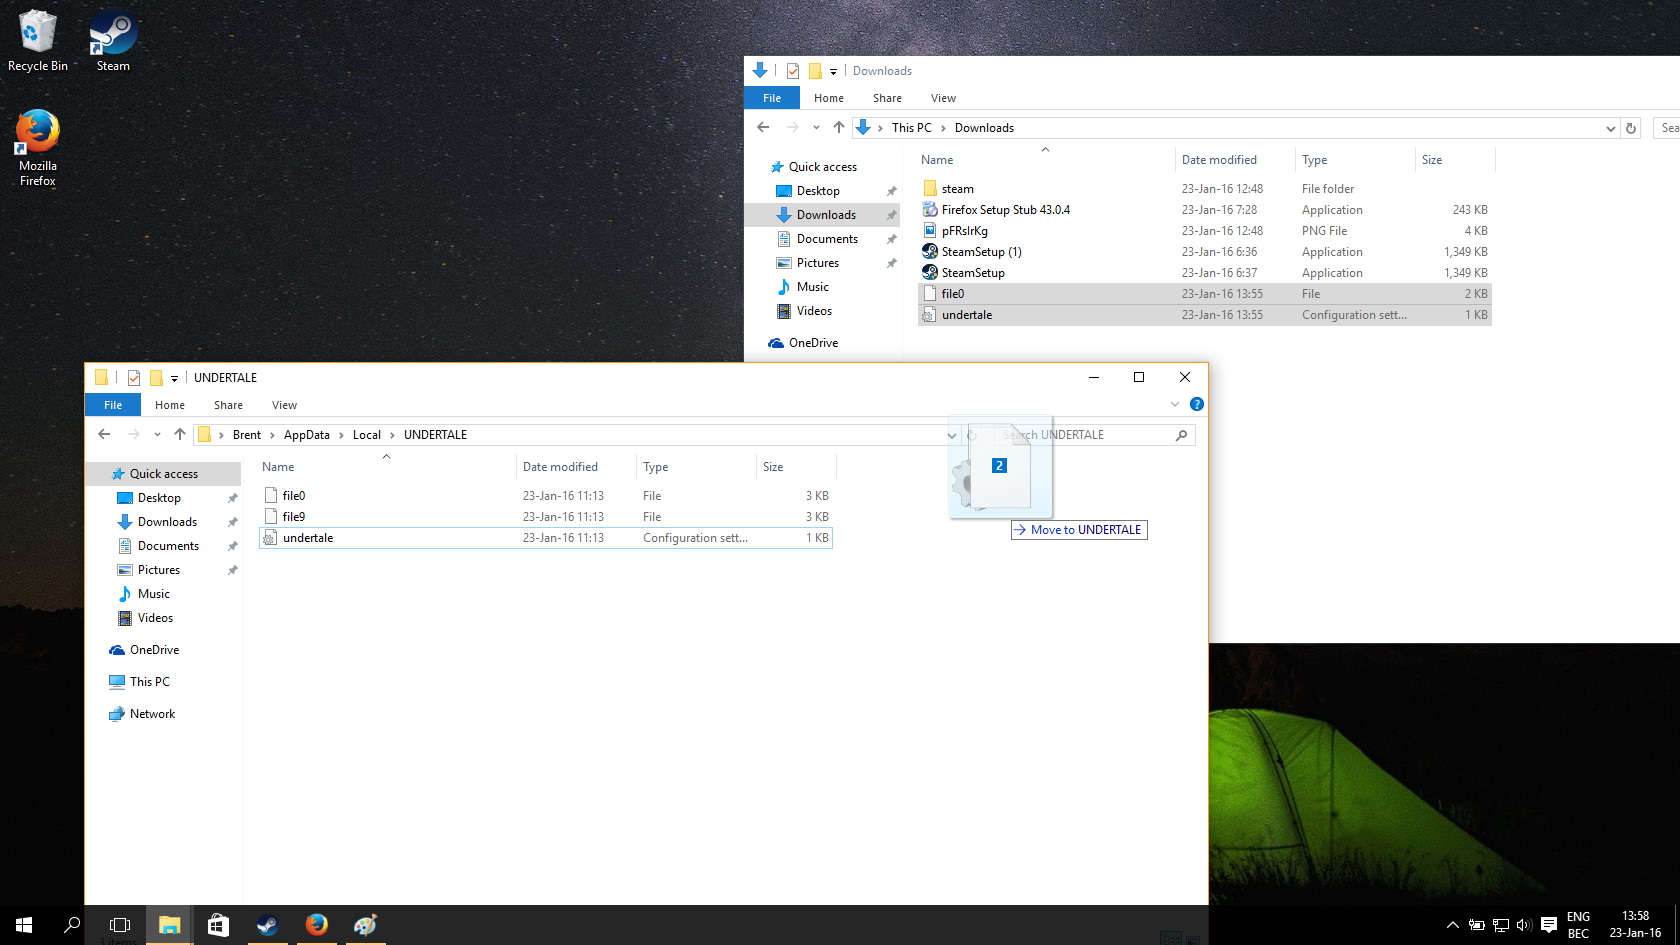
To apply you custom save files go to your download folder.
There, select the Undertale.ini and the file0 files and drag the to your Undertale saves folder (As shown in the “Backing Up Save Files” section).
Click “Replace Files”.
And youre pretty much done now!

now, startup your undertale game.
Now Press “Continue” (Yes, i know that it said the wrong name and location, i screwed up while making the files).
And, you’re done!
You now got your own custom save file!
Enjoy!
Maybe leave a like to support me and thanks for reading!
-Dezzered