Overview
This guide will provide a basic layout in Factorio in order to help new players making their own one.
Common Tips
Toggle detail info (default key : ALT) for a better navigating in your factory.
There is tons of good layout and ratio out there, but do it your own is fine too.
Each transport belts can carry two good lines of item at once.
Faunas can bleed and you can kill it. Play in peaceful mode if you’re not ready.
Do not build assembly lines too close to each other. Spare some space.
Patience is essential. Struggle is certain.
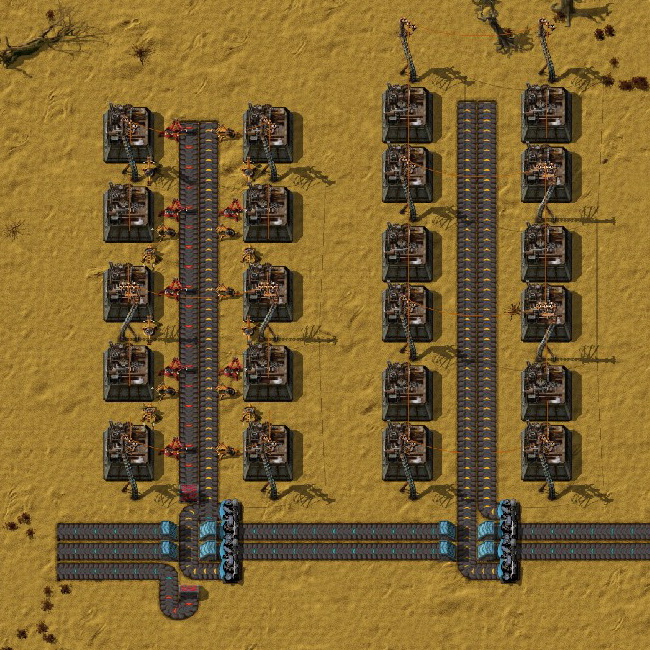
Quarry
Burner mining drills are powered by
fuels and provide a 2×2 mining area.
Electric mining drills require electricity and provide a 5×5 mining area.
1) Burner mining drills unit. (

2) Burner mining drills unit. (regular)

3) Electrical mining drills unit.

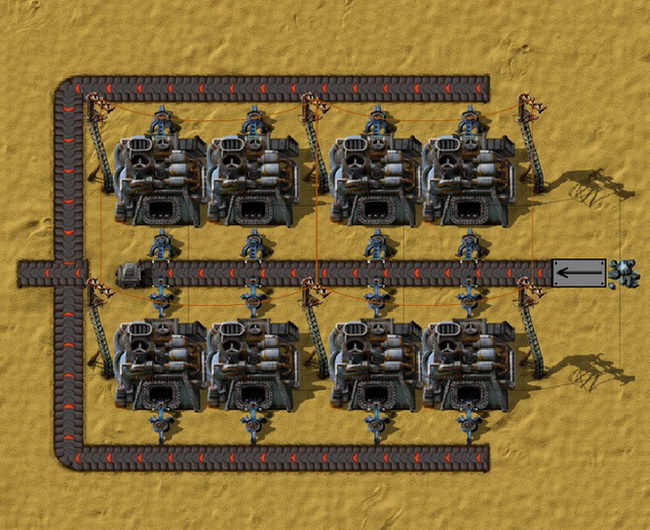
Smelting Area
Stone and Steel furnaces require

1) Stone/Steel furnace smelting unit.

2) Electric furnace smelting unit.
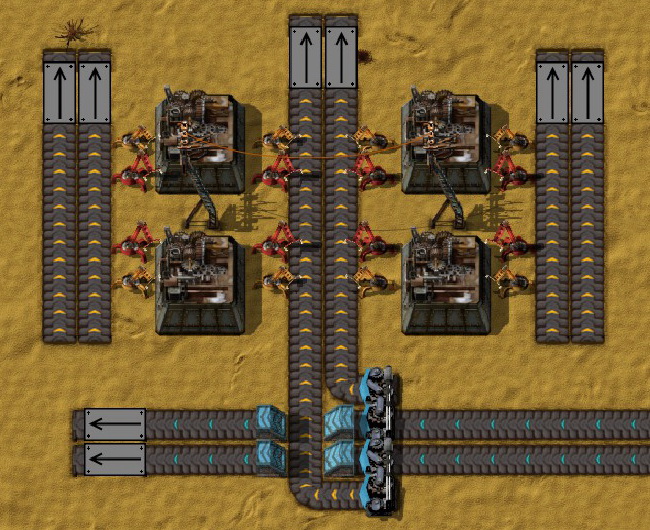
Balancer and Feeder
Balancers are used for equalizing items on the main bus.
Feeders are used for providing the assembly line with items from the main bus.
1) Four-belts, two-belts and one belts balancer, respectively.

2) Assembly line’s feeder. (4 to 2 belts)

3) Gun turret’s chain loader.

Note : Be careful, 2-to-1 balancer will create a bottle neck area where items on the outer area will be stuck and going nowhere.
Main Bus System
Main buses are a bundle of transport belt made to carry items in quantity.
It is advice to have some space between (a bundle of) belts of each item.
1) Main Bus Diagram.
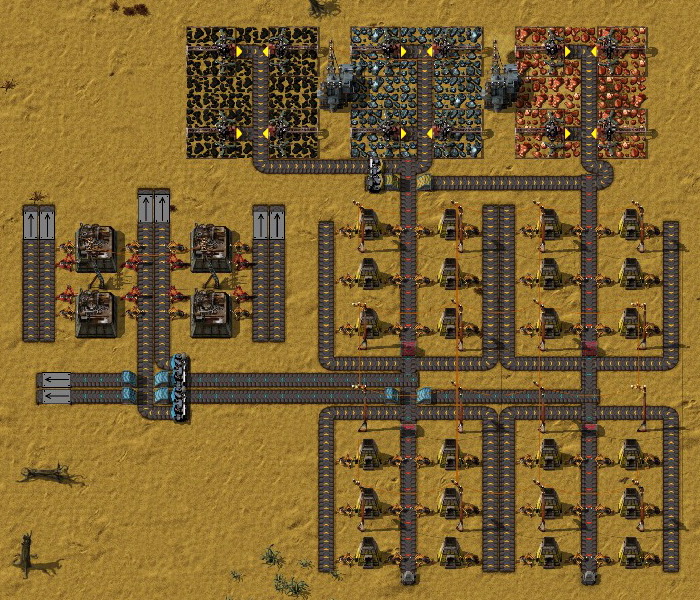
2) Main bus’s feeding point. (Close up)
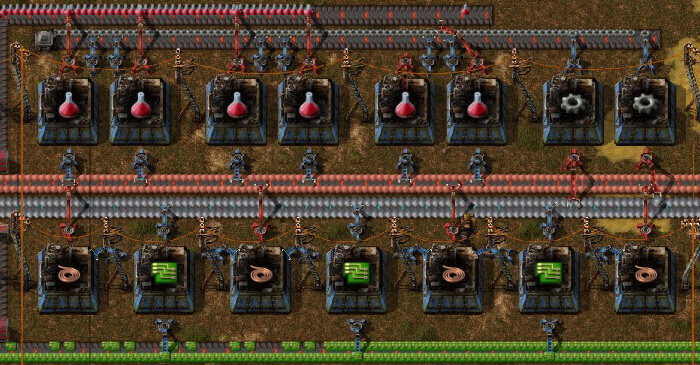
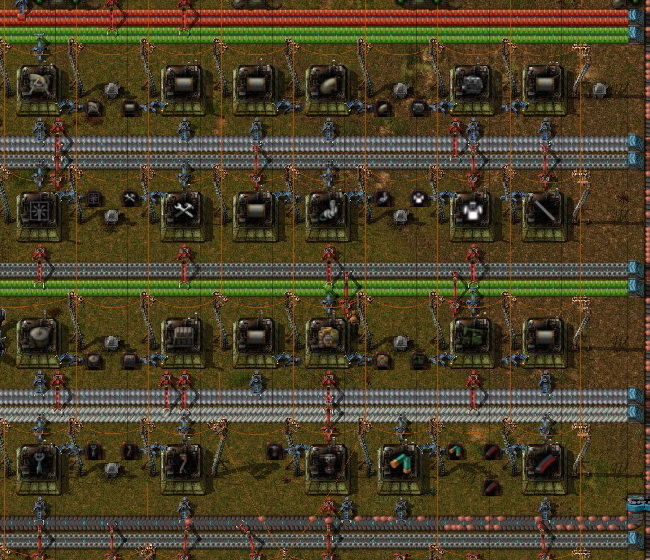
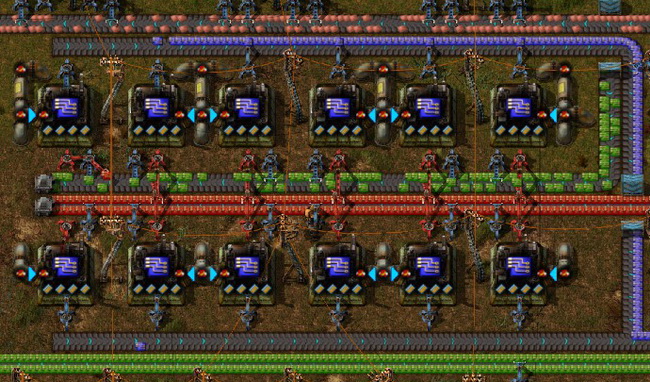
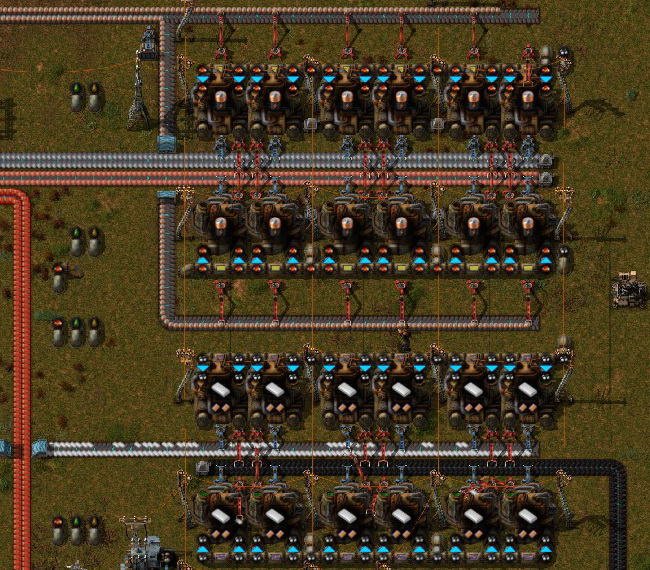
Assembly Line
Avoid building each assembly line too close to each other.
Some products may need pipelines or storage.
Creativity is key to design your own effective assembly line.
1) General form of assembly line (Left = Odd production, Right = Even production)
2) Science pack 1 and linear electronic circuit production
3) Science pack 2 and advanced electronic circuit production

4) Miscellaneous production

5) Belt production

6) Blue circuit production
7) Module production

8) Robot production

Laboratories
Red, Green, and Black science packs don’t required crude oil to craft.
Blue, Purple, and Yellow Science pack require crude oil to craft.
White science pack is only used for infinite research.


- Fixed Sushi Belt Laboratories.
- Extendable Sushi Belt Laboratories
- Extendable Grid Laboratories
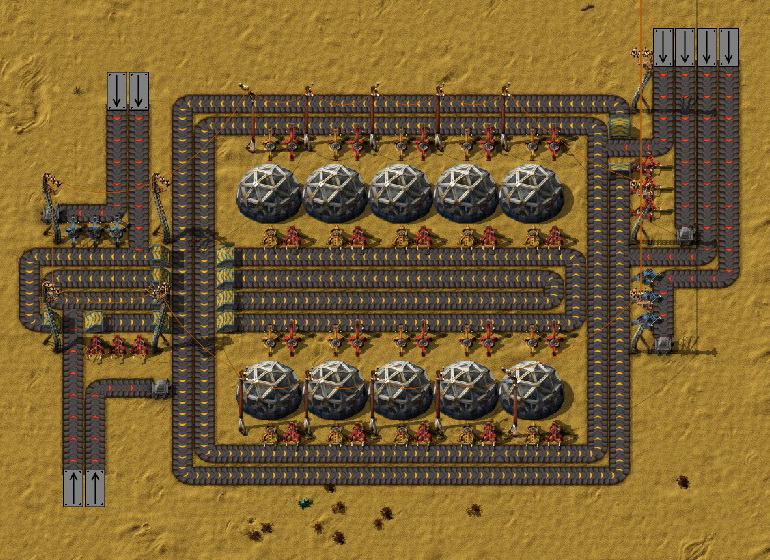


Oil Processing
Crude oil can be gathered by pumpjacks on an oil field.
Trains or long pipelines are generally required to deliver crude oil to refinery.
Petroleum gas are mostly used for plastic and acid production.
Heavy oil are used for making lubricant, cracking, or coal liquefaction process.
Light oil are used for cracking or turn into rocket fuels.
Multiple radars/outposts can be deployed to find oil fields even faster.
1) Advance Oil Refinery Line (Normal refineries require no water pipe)

2) Oil Storage Tanks Area

3) Cracking Process

4) Lubricant and Acid Production

5) Plastic and Battery Production
Train System
You can learn how to setup a train system by using a tutorial in the game
Tutorials in Stream or Youtube can explain more but can be overwhelming.
1-4 train (1 locomotive with 4 cargoes) with duel rail is recommended.
Using 1-3-1 train (1 locomotive at each end, facing away from each other with 3 cargoes in between) with monorail if you are not good at setup train system yet.
1) Train Loading Station.

2) Train Unloading Station.

Outpost
To find resources nearby.
To observe the areas. Keep the fog of war revealing.
To watch out faunas / other player assault.
To protect the power line or pipeline outside the base.
A well-positioned outpost is very useful, so place them well.
1) Frontier Outpost. (Dependence)

2) Self-powered Outpost.

Note : The outposts here can last long enough to scan all terrain within its range.
Summary
Most raw and intermediate products should be delivered by a main bus properly.
Productivity module 3 is OP. It reduce the cost and increase the output.
Speed module 3 can also increase the output by reducing the crafting time.