
Overview
This is a very high level overview of how to get the “There is no spoon” achievement in factorio. It assumes general knowledge of the game and it mostly just breaks down the run into stages with miniature goals and expected timelines. Exactly how you build your factory is your own choice 🙂
Note
This guide is current only for 0.14, and is not up to date with 0.15, see comments. The newest update made this achievement considerably more difficult, so I would advise playing on an older version (0.13 or 0.14) through the game->properties->betas until they make it easier to achieve again.
Notably: Science was made much more difficult, and logistic bots are probably no longer achievable early game
Introduction
There’s a few things to keep in mind before starting out an attempt to beat the game in 8 hours.
First, the game doesn’t count time spent while paused as play time, so if you are in a tricky spot and need some time to think about next steps, you can bring up the tech tree, main menu, or directly pause with shift+space. The game does keep running when bringing up the main map, though.
You might want to make a new save every hour or so. If you find yourself just barely unable to win in time after a certain point. it would really suck having to go through the entire burner phase or green science part of the game if you’ve already done that quickly.
Since you’ll be building huge amounts of things, spread yourself out a lot. The extra belt cost is miniscule in the grand scheme of things.
The “aim to finish” is roughly where you’ll want to finish the whole contents of each section, although you can be off by about half an hour throughout the game.
NOTE: This is a logibot-driven speed-run, as I find this makes only the first 3 hours or so feel frantic. I have located another guide which is belt driven if this is your preference.
https://forums.factorio.com/viewtopic.php?f=5&t=35803&p=221500&hilit=storage+chests#p221500
Some noticeable differences with the belt driven approach: Mush more efficient (< half the raw resource draw) but more reliance on perfect ratios and good planning for basically the same launch time.
Stage 0: Map settings
The biggest help to get the achievement will be setting start area to “very big”. This essentially makes it a peaceful run without disqualifying you by setting the peaceful flag. The only issue is when it comes time to hunt alien artifacts, you can spend as much as 5 minutes running your tank there and back to where the aliens appear. But 10 minutes total is a small price to pay for being able to neglect defenses and pollution considerations.
Naturally large size and richness on all resources. Choose whatever you like on frequency, although stone is probably best at high frequency since you don’t need a lot, just access. Copper/iron do well at high frequency so you have flexibility in building a wide base, although very high might be overkill.
Water is probably best at high frequency, small or very small size. I believe it influences tree growth as well, and you’ll want to start in a desert ideally.
Choose high richness of biters for more artifacts, but don’t choose low frequency or large size. You will be fighting entirely with a tank, and you don’t want to have to fight worms in clusters of more than 3.
Stage 1: Pre-conveyor stage
Aim to finish at: ~30 minutes.
This stage really isn’t that critical, if you’re 50% slower than the best time here, you only gain 15 minutes. So don’t worry too much about being perfect.
You should aim to build about 12 iron mines, 2 stone mines, 5 copper mines, and 10 coal mines (and associated furnaces) before moving on to anything. No belts, just builds straight to chests or mine to furnace. The main idea is you should only stop building metal mines when you are building more metal than you can make use of through manual crafting.
Some tips to shave off a few minutes of your time:
-Use cntrl-cleft click and cntrl-right click for speedy interaction with machines.
-The fastest way to get stone is to mine large rocks. Each one is worth 20 stone.
-Chopping wood for fuel is usually much faster than mining coal by hand.
-Using the above two tips, you can aim to build your intial half dozen mines entirely on iron while getting fuel and stone quickly yourself
Once you’ve reached that goal, you should get automation as your first tech, followed by logistics.
These are the only two techs you’ll need for quite a long time, so there’s no need to go on straight away to automating red science or green science. In a speedrun, you’ll be building lots of things very fast, so the first goal is to set up the following assemblers for personal use:
-Iron wheel
-Conveyor belt (connected to another wheel assembler)
Drop a few hundred iron in chests to supply these and let them build for you. Replace your burners with electric mines before mass building coneyor belts so you dont have to supply them with coal.
Stage 2: Green science stage
Aim to finish: 2 hours 30 minutes
Once you finish connecting mines and furnaces, your next step should be to make things even more convenient for yourself. Don’t worry about science, just keep ramping your ability to manual craft as fast as you can.
You’ll want to start off by moving your early wheel and wheel-belt assembers to be driven by belts and then build a pipe assembler, all dumping straight to chests for pickup. Move on to building three circuit assemblers which also dump to a chest but later feed to green science. You want to get to a point where you can build non-stop mines, furnaces, steam engines, and boilers. As a general rule, if you feel like you’ll need some iron or copper soon, don’t build a few mines, build like 20 at a time and build steam engines in chunks of about 30. Don’t bother with solar ever, it’s way too expensive for a short term game, and don’t bother with efficiency modules
After getting fully set up, build red and green science as normal, but build 5 or 6 assemblers of each, leave room to expand, and don’t bother with any offensive techs other than military.
The first tech you should get is steel, and build about 8 furnaces for personal use so you can get oil going fast and a steel pickaxe. At about this time you’ll want to finalize whether you’re going for a main bus with a little bot support, or just loads of bots. You may want to leave a save game to mark this decision, because your playstyle will be radically diffferent, and either one is viable.
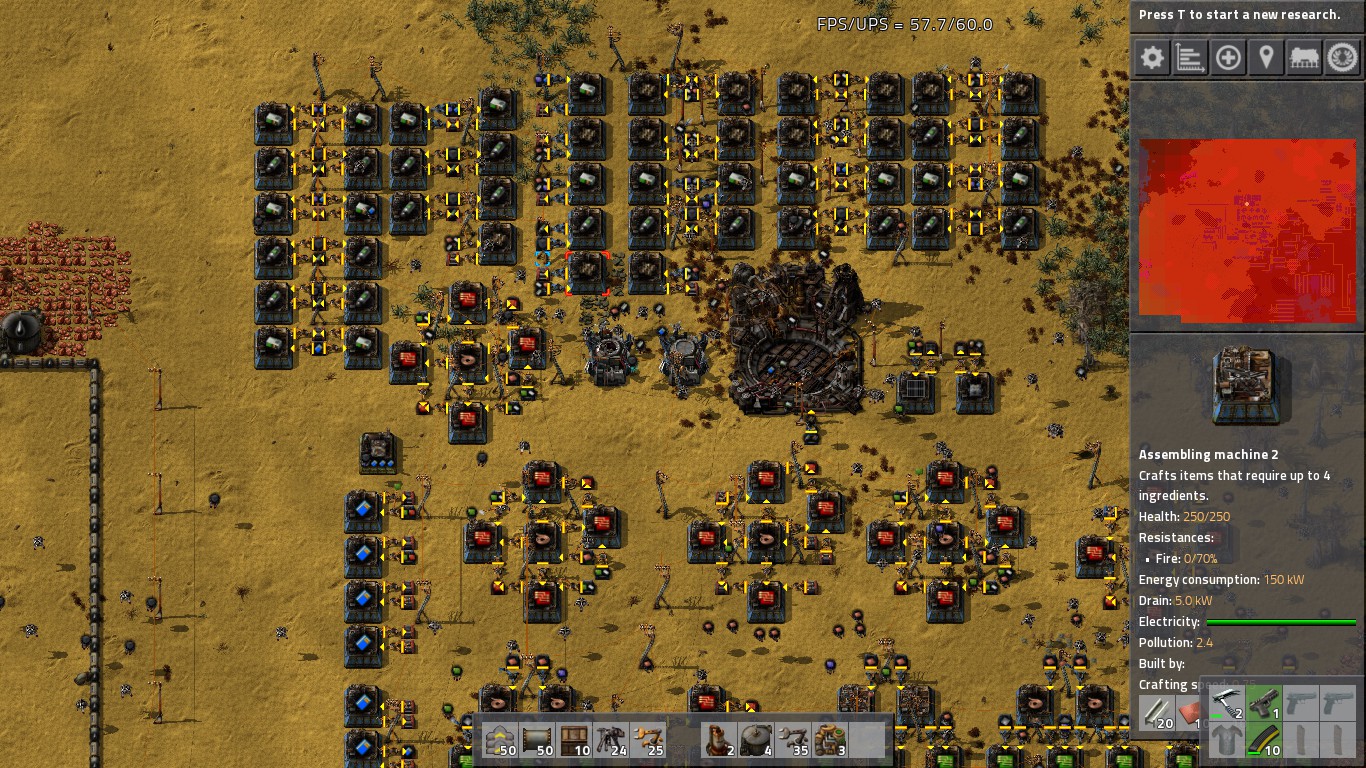
Roughly what your factory should look like 75 minutes in. Note the assemblies to the north building stuff only for my own use and the chest inserting leftover circuits for myself to the southwest.

Personally, I like bots, which is probably the weaker option, but this guide will assume that choice. Just ignore sections on bots and give yourself a bit more time to fully automate blue science if you’re going for a main bus
From hereon out, all assemblers for the rest of the game are assumed to be assembler 2s with no modules.
Going for bots, you’ll want to start straight away before even getting the logistic system set up. First thing you’ll want is a whole 5 refineries straight up working non-stop. Build a half dozen tanks to fill leftover light and heavy oil. Next up, build 3-6 more regular circuits followed by about 6 advanced circuits. Get steel going heavily so you can build electric furnaces from now on, and build 5 engine assmblies,5 electric engine assemblies and 5 bot frame assemblies. Build them anywhere, you can just pick up the engines and put them in the electric engine assemblers by hand. 3 battery plants should be enough for science and the bots and aroung this time you’ll want about 8 advanced circuit assemblers to get ready for blue science, bots and roboports.
Don’t skimp on oil! Pipes are a pain to set up, so just do it all at once. Extra tanks for light/heavy oil are cheap. Also don’t be a dork like me here, put the oil in the other input for when you switch to advanced oil processing.

Make plenty of room for yourself so you don’t go crazy over belt management. These circuits are built about a screen away from the rest of the factory

Stage 3: Pre-purple science
Aim to finish: 4 hours, 15 minutes
Since we’re going for bots, there’s no need to even build a functional blue science automation right off the bat. The goal is merely to get 150 science for the logistic system, by any means necessary, in a very short amount of time. Your best bet is to build 2-3 blue science assemblers, build the filter inserters by hand with on-hand circuits and regular inserters, and plop the rest in the assemlers by chest. You’ll waste a lot of time running chests, but this will make up for itself in convenience later.
By the time you’ve finished researching the logistic system, you should have bot frames for 100+ bots, enough advanced circuits for about 6 roboports and 50 requester/provider chests. Go fully logistic bots. Use these chests to connect your scattered blue science components to the logistic system, and start researching all of the blue science bot techs so your bots aren’t worthless. Keep the 4-5 bot frame assembly running the whole time. Use belts to expand existing systems since your bot system is still a little weak, and use belts to bring metal and circuits to a common area.
The old factory runs as is untouched or expanded on with belts, while bots focus just on the newer stuff

More examples of bots mixed with legacy factory. From later on in the game, this is blue sciences being shipped via bots to a belt and purple science also being added on

It takes half an hour to hunt alien artifacts, so you’ll want your factory to be running smoothly while you’re out being basically worthless. Spend an hour or so ramping up your science to 4-5 blue science assemblers, make sure you’re at full electricity (again, only steam!) connect enough oil to refineries and start cracking oil/advanced oil processing. Leave some light oil uncracked, and build a few tanks of reserves.
Things you’ll need to prepare for alien hunting
-A tank
-Either 40-80 poison capsules or a few hundred piercing rounds
-200+ coal
-50+ repair kits
-NO cannon shells (they’re great in a normal game, but you don’t have the time to spare)
Stage 4: alien killing
Aim to finish: 4 hours, 45 minutes
Take your tank and go kill stuff 😀 Do the entire hunt in one step. Don’t bother trying to fight the nests or worms, just ram them to death. You want the artifacts, so try and clip.the corners of the nests to avoid bulldozing artfiacts. Once you’re at < 30% tank health, retreat a long ways, dump your capsule or piercing rounds on the swarm of biters, repair up, and repeat. This phase is pretty self explanatory.
Ram those little ******s This is probably a bigger nest than you should go after, though. Don’t be like me and waste 5-10 minutes getting a cannon chain set up, it won’t save you 5-10 minutes.

.. and off to heal 😀

Meanwhile, research all blue tech necessary for rocket silos in the background, as well as anything useful like logistic slots.
You’ll need 260 artifacts for all silo research. I would go for ~300 so you can also take the awesome logstic cargo 2 research as well as anything else you want.
Stage 5: Pre-silo
Aim to finish: 6 hours, 30 minutes.
Upgrade your blue science and expand your other science to 7 or 8 assemblies, research logistic cargo 2, and start the silo purple researches. Save your game beforehand in case you accidentally screw yourself out of the necessary purple science, cargo2 is nice but not critical.
MOOOORE SCIENCE

It takes roughly an hour and a half to research the silo/module3s/rocket speed techs. Don’t panic! If you want, you can even skip upgrading your science rate and have the silo researched at > 7 hours in. With logistic bots, actual assembly of the rocket parts is quite easy, just build about 10 of each part piece assembler or more and if they’re full capacity it’ll go fast.
What’s difficult is getting the resources required to get them running at full capacity. You will need
roughly…
5k raw plastic
1k concrete (start one of these ASAP)
~1.5k blue circuits
1k speed modules
A “Crapton” of green circuits and advance circuits
10k solid fuel
~20k steel
500+ total bots (assuming cargo2 and all additional non-metal assemblers here on are chest driven)
100 solar panels
100 accumulators
200 electric engines
What this very roughly translates to over time (increase whatever you do later):
4+ additional refineries, with 15+ more derricks
12+ additional circuit factories
15+ additional advanced circuit factories
4+ blue circuit plants
6+ total plastic plants
6+ speed module assemblers
40+ additional iron mines
40+ additional copper mines
15+ additional steel furnaces
~200 steam engines
8+ solid fuel plants
1 concrete assembler
1 solar panel assembler (post-silo)
1 accumulator assembler (post-silo)
An example of the kind of expansion you’ll eventually need. Note my not even bothering to even connect the liight/heavy oil and just building tanks for the new stuff since I didn’t need anymore. Also I didn’t even bother cracking heavy oil, it just went straight to rocket fuel. Inefficient? Yes. But you’ll be doing a lot of inefficient things

You will need LOTS of power. This is less than half of it.

If you’re using speed modules or assembler 3s, which may actually save you some time, you’ll have to do the math yourself on how much less you need to build 😛 Just don’t bother with level 2 modules, and be prepared to build some extra steam engines.
And you’ve got about 3 hours to do it in. Actually finishing this before the silo is almost unattainable, so just aim to do the best you can, start by getting about half of the lower level materials first at least.
With your hundreds of bots, the only belts you should be building are to ship your metal to a common small area, you don’t even need to handle circuits via belt. Have the metal inserted into passive chests via fast inserters at the end of the line, you’ll probably want ~6 at each metal belt end since they fill up fast and you don’t want them backing up. Copper wire should go straight to assemblers, two can supply 3 green circuit, and one can supply any number of advanced circuit assemblers.
No time for belts! Let the old factory do it’s thing, but let bots handle the new stuff. To the right, ou can see me starting a main bus and saying **** it. Be smart and make your decision earlier

Metal, circuits being shipped in and placed straight into passive chests. for bots. A while ago engine factories used some of they’ve been shut down.

Don’t use filter insterters: The above list is basically what you need, so just have them build at full speed and you’ll have excess resources waiting for you if you overbuild and later need them. You start to see what you’re overshooting by about the 7 hour mark, and you can just switch off whole assemblers when you see yourself overbuilding.
You should start off by attending to personal conveniences like making sure you have plenty of metal circuits to expand your factory. Use logistic bots to always have the following delivered straight to you:
-Advanced circuits (100)
-Steel (200)
-Iron (200)
-Copper (100)
-Wheels (100)
-Green circuits (200)
-Inserters (50)
-Pipes (100)
Initial roboports will probably be insufficient to handle the bot load, so if you see more than 10 bots waiting in line to recharge, build a roboport right next to that roboport.
Stage 6: Launch
Aim to finish: 8 hours (duh)
The first thing you should do after finish silo research is start shutting down unecessary production.
Chances are you can completely shut down
– battery production (only need 500 for the accumulators)
– all flying robot frames (only need about 500 total bots, 700 for wiggle room if you like)
– all engines but keep enough running for 200 electric engines for the sattelite
-all science
Do this quickly by placing passive provider chests on top of their requester chests, or for the old pre-bot factory stuff by switching off the assemblers to produce nothing. Reroute metal belts in the old factory to your common bot ground, dump them to passive chests. This should free up a lot of extra petrol/steel for basically no loss to you.
Even if you’re falling behind in the giant list of resources above, you’ll want to start with 8 of each rocket part assembler (8 low density, 8 rocket fuel, 8 control) to give you a better idea of your rocket progress and needed resources
About how many assemblers you’ll eventually need. You might need ~15% less as I actually forgot the productivity modules for the silo
Productivity modules are probably not worth your time, EXCEPT for the rocket silo itself, which should have 4 level 1s. If you add them anywhere else, you should use them exclusively in assembler 3s, with two level ones and two speed modules, but this is probably not worth the hassle and energy cost.
From here on out there’s not really much advice to give that hasn’t been said earlier. Just remember, the sattelite and rocket is the only goal here. If you start overshooting the necessary amount in one resource, completely shut it down to favor another. Good luck!