Overview
This guide will show you how to change the default (original) and ugly “Desktop Shortcut” (Icon) that Steam creates for the game “The Walking Dead (Season 1)”.
Introduction
This guide will show you how to change the default (original) and ugly “Desktop Shortcut” (Icon) that Steam creates for the game “The Walking Dead (Season 1)”.
“The Walking Dead (Season 1)” original and ugly Desktop Icon ->

How to?
1. Go to your Steam client and look for the “LIBRARY” tab, then select the “Games” tab; after that, create a “Desktop Shortcut” by right-clicking from the “The Walking Dead” game from your library (you can skip this step if Steam has already created one for you after the installation process of the game).
2. Download this [s.go.ro] file to your PC (it’s the original “.exe” of the game from the retail version). The password for the download link is 306005
3. Extract the archive in another folder from where you have “The Walking Dead” game installed!
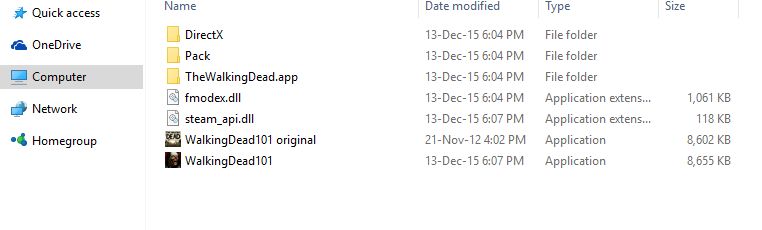
4. Rename the extracted file to smth like “WalkingDead101 original”.
5. Paste the newly downloaded and renamed file (“WalkingDead101 original”) to your “The Walking Dead” install directory – smth like (by default) – “C:Program Files (x86)SteamsteamappscommonThe Walking Dead”.
It should look like this ->
6. Right-click on the “Desktop Shortcut” that Steam has created for you (Step 1), click on “Change Icon…”, then “Browse…” and after that navigate your way to where you have your game installed – smth like (by default) – “C:Program Files (x86)SteamsteamappscommonThe Walking Dead”; double-click on “WalkingDead101 original”, then click on – OK -> Apply -> OK and Voilà! your done!
7. Enjoy your new “The Walking Dead (Season 1)” “Desktop Shortcut” (Icon) and don’t forget to “Support the software developers. If you like this game, BUY IT!” 😛
The Result
After you’ve correctly followed the above steps, your custom “The Walking Dead (Season 1)” “Desktop Shortcut” should look like this ->
