Overview
This guide contains: a beginners guide, how to beat the flagship, tips and tricks and how to unlock all ships (type A). It goes through everything from the most basic to complex. This guide is entirely based on Advanced Edition and will contain spoilers.
A beginner’s guide Systems, Crew and Ship
When you’re starting out in FTL there’s a lot of stuff going on so I will explain it all. You are carrying vital information for the federation fleet. The rebel fleet will hunt you all the way to sector eight where you must deliver the information to the federation base. But before doing anything you must know how to control your ship and crew.
You can always pause by pressing space.
Tip: Hovering over stuff in FTL often makes information boxes appear explaining what they do.
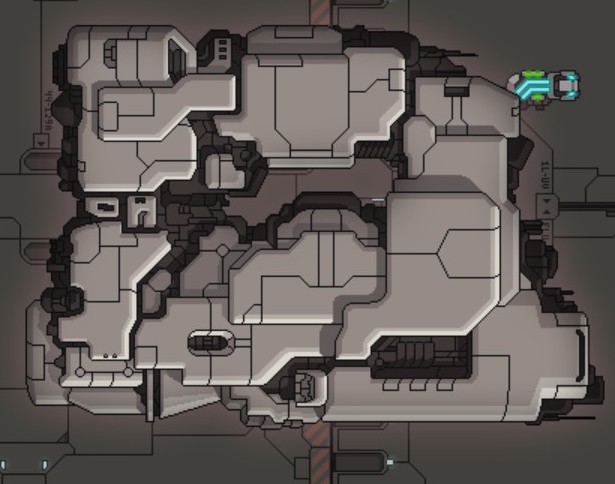
Let’s start with your ship’s systems.
To work the systems need power. You start with a certain amount of power but you can upgrade your reactor to get more. You power systems by left clicking and de-power them by right clicking on them. The Systems in the list are the one’s on the picture from left to right. Each system has a dedicated room, if that room gets shot the system will break and has to be repaired to function properly.
Shields are used in combat to block projectiles. You can have four
Engines are used in combat to dodge projectiles. Each powered level of engines increases your dodge chance by five percent. Engines are also needed to jump to other beacons.
The medbay is used to heal your crewmembers. Your crewmembers will take damage from these things: fighting, shots, fire and lack of oxygen. When the medbay is powered it heals all crewmembers in it. The medbay heals your crew fast enough that they can’t die from lack of oxygen while in it.

The oxygen system supplies the ship with oxygen which is vital for survival. If the system is powered the oxygen level will slowly rise but if it is unpowered the oxygen will slowly drain. Your crew starts to suffocate when the oxygen level is below 6 percent. The oxygen level only shows the ships percent though. Individual rooms can have high or low oxygen. When a room is out of oxygen it will have diagonal stripes of pink and light pink.
The Weapon System’s function is to power your weapons. Weapons are used in combat to fire projectiles. Different ships start with different amounts of weapon slots. You can place one weapon in each weapon slot. I will go through this more in the combat part.
You should also use your power efficiently. Having the medbay powered up when no one is inside is a waste of power. Instead power up your engines so you take less damage.

You also start with three subsystems. Subsystems don’t use power and are powered automatically.
The Piloting system is required to jump and dodge. Piloting only works if you have a crewmember in the systemroom, otherwise you can’t jump and can’t dodge unless you have upgraded the system.
The sensors show you your ship so you can see where intruders, breaches and fires are. Upgrading them allows you to see the enemy ship too.
The doors system allows you to remotely open and close doors around the ship. You can also open the airlocks. Upgrading the door makes it harder for intruders and fires to spread through them. If you open the airlocks the oxygen will dissapear in those rooms.
Next is your crew. If all crew dies it’s game over. On the Kestrel you start with three crewmembers. You can select them by left clicking on them or draging left click to select multiple at a time. Then right click in the room you want them to go to. You can see your crewmeber’s names and health at the left side of the screen.

Shields regenerate faster.
Higher dodge chance.
Weapons charge faster.
Higher dodge chance, you can dodge, you can jump.
Works as if they had one more power.
Works as if they had one more power.

A crewmember manning a system will gain xp for that system when certain triggers happen and eventually level up and increase the manning bonus. For example: whenever a shot hits your shields your crewmember manning the shields will gain one shield xp, when reaching 55 points they will level up and increase the manning bonus.
Each skill has two levels and both takes the same amount of xp to reach from the previous level.
Skills crew can increase are:
Piloting
Engines
Shields
Weapons
Repair
Combat
At the top left of your screen you can see a green bar divided in thirty parts. Thats your ship’s hull points, hp, if they reach zero your ship will explode and you lose the game. Right of that you see a cog with a box besides. It will display how much scrap you have. Scrap is the currency and also used to upgrade your ship. Under the hull meter left of the shields thing you see three smaller boxes. These are from left to right:
Fuel is required to jump. Each time you jump you consume one fuel.
Missiles are required to fire missile weapons. You consume one each time you fire.
Drone parts are required to deploy drones. You consume one each time you deploy one.
Left of the scrap box there is a yellow jump button. Pressing it will take you to the beacon map and from threre you can choose where to jump. Next to the jump button there is a button with a ship icon. Pressing it will take you to the ship menu. There you can upgrade systems, rename crewmembers and switch weapons.
You have three augment slots. You can find and buy augments. Augments improve your ship, for example they can increase weapon charge speed, increase scrap gains or put out fires.
A beginner’s guide Jumping and Fighting
When you press the jump button you will see this.
If there is a green line between you and a location it means you can jump to it. Having this enabled shows you where you can jump from a beacon by hovering over it with the mouse. 


When you jump to a beacon that is unexplored an event will trigger. This could be having to fight, make a tough decision or something else. There’s also a chance nothing happens. All events have some set options but you can also find blue options. These are unlocked by having certain crew or equipment and are nearly always a good option. Though make sure to read it before clicking. The blue option could make you skip a fight you could earn scrap from.
Most events end in fights.

There are several types of weapons:
Lasers deals hull and system damage but gets blocked by shields.
Ions temporarly disables systems for five seconds per damage but deals no other damage of any kind. If an ion hits the shields it deals ion damage to the shield system.
Missiles require missiles to launch but pierces all shields. They deal system and hull damage.
Beams are targeted by drawing a line across the enemy ship instead of choosing a room. The beam deals hull damage for each room i damages. Beams go through shields but for each shield their damage is reduced by one. Beams allways hit.
Bombs require missiles to launch and teleports past shields and defence drones but does no hull damage, only system damage.
Flak weapons shoot random debris. Gets blocked by shields and deals hull and system damage.
Crystal
Crystal Weapons pierce one shield. They deal hull and system damage.
If a projectile hits a room it will do damage. The amount of damage depends on the projectile. Breaches and fires can also occur. If you hear a honk when a shot hits it means it caused a breach. Fires can also be heard. If a systemless room gets damaged only the hull takes damage, but if a room with a system gets damaged the system will take damage too. Each damage will decrease how much power the system can use by one. The systems have different colors based on their state: gray is normal, orange is damaged, red is completely broken and blue is temporarily ioned. Crew can repair the system so its ♥♥♥♥♥♥♥♥♥ again.
Breaches will slowely drain the oxygen in the room they’re in and fires will spread, damage crewmebers and slowely damage systems.
All zoltan ships execpt one has a zoltanshield. There is also one ship that isn’t a zoltan ship that has this shield. This means that the ship has an additional non regenerating shield that absorbs five damage before the ship can be hurt. Ions deal doubble damage to zoltan shields. The ship is completely unreachable until the zoltan shield is destroyed. The only projectile that can pierce a zoltan shield is an ASB projectile.
If the enemy has a teleporter they can send crew to your ship. They will destroy stuff and fight until you kill them or they tp back. You can deal with boarders by fighting them or suffocating them.
If you try to kill them by suffocating them it’s important that you have level two doors or someone manning the doors. If the doors are unmanned and level one they will just be able to walk right trough and escape the vacuum but if the doors are manned or level two they will have to break their way through which means they will take much more damage.
When the enemy ship is badly damaged they might try to escape. If they try to escape it will say that they’re trying to flee and a red text will apear over the ship saying: Enemy FTL charging. When it’s almost charged completley the text will say Jump Imminet instead. If the enemy succedes it will jump away and you won’t get any rewards. You can stop the enemy from jumping away by destroying them before they are able to escape, by completely disabling piloting or engines or by making the pilot go to repair or fight. You can also escape by jumping away when your FTL is fully charged. But you have to have ♥♥♥♥♥♥♥♥♥ engines, piloting and a pilot.
When the enemy notices they’re losing the battle they have a chance to surrender. They will offer you scrap and resources and sometimes even weapons or crew. If you don’t accept surrender the fight will continue. You often get more scrap but less resources if you destroy them so you should only accept surrender if:
You need the resources badly
You think the surrender is better than what you otherwise would have got
You feel like you’re losing the battle
The enemy probably will escape if you continue the battle
A beginner’s guide Upgrading and Shopping
When you destroy enemy ships you will get scrap and recources. You can use your scrap to uppgrade you systems.
You should only jump to shops if:
You need to repair
You have 45 scrap or stuff to sell
You need fuel, missiles or drone parts
At shops you can buy new systems, drones, crew, augments and weapons.
Here’s a list of all systems that you can buy and what they do:
Used to temporarily make enemy crew fight for you. Can also be used to make your mindcontrolled crewmembers un-mindcontrolled.
Deploys a hacking drone that costs one dronepart and temporarily hacks the system you aimed at.
Allows you to teleport crew on board the other ship. Killing all crew members gives more scrap than destroying the ship.
Allows you to use drones.
Allows you to temporarlily cloak giving you 60% higher dodge chance. If you fire while cloaked the cloak will stop earlier.
If you buy a clonebay it will replace the medbay. When a crewmember dies the clonebay will ressurect them if it’s powered. You have a short amount of time to power up the clonebay after the crewmember died. If the clonebay is destroyed or you don’t have enough power the crewmeber will die forever. The penality for dying is reduced experience. Every jump the clonebay heals all crew a little even if it’s not powered.
Backup battery is acctually a subsystem that increases your totall amount of power by two for thirty seconds.
Hacking and cloaking are both great additions to your ship.
If you’re starting with a ship that is missing any starter system you will be able to buy that too.
In FTL there are multiple races. Here’s a list with all of them and what is special about them.
Unless otherwise mentioned they have 100 health.
Skills improve a bit faster.
Repairs faster, deals less damage.
Zoltans only have 70 health but deals 15 damage to all enemys in the room when they die. They also give one free power to the system their in that can’t be disabled by ion.
Deals more damage, repairs slower.
Immune to mindcontrol. Telepathic abillities shows where the enemy crew are.
Rockmen has 150 health, walks slower and takes no fire damage.
Walks slower, takes no suffocation damage and slowely drains the oxygen from the room they’re in.
Has special lockdown ability wich makes movement in and out of the room impossible while active, also walks slower and takes less suffocation damage. Has 125 health.
Buying crewmebers is often a waste of scrap since slave traders often offer you slaves as surrender offers.
You now know most the stuff you need to know. Have fun exploring the game!
Still having problems? This youtuber is really good at FTL and has learned me several of the tricks I know.
Tips, Tricks and Facts
1. If the enemy has a defence drone and you want to hack them you can launch your hacking drone and pause when the defence drone shoots, depower the hacking drone completely, wait for the shot to miss and then power it up again. You have succesfully dodged the defence drone!
2. If you have a clonebay go on all suicide missions like giant alien spiders and stuff like that because if your crew dies the clonebay is just going to bring them back. This doesn’t work in the zoltan great eye event and dilcapitated station event.
3. If an enemy has an ion and a beam you can power down shields so that the ion hits something else and then power them up again so that the beam cant damage you.
4. Visiting homeworlds is a good idea since you can do the ship quest and earn a lot of scrap.
5. Engi sectors contains three stores.
6. If you want the crystal ship you should try to unlock Rock C since it starts with a crystal crewmember.
7. Enemies can have systems uppgraded to higher levels than eight.
8. Automated ships works as if all systems were manned.
9. Automated ships automatically repair systems without breaches.
10. All ships that you fight while not having any fuel will try to escape.

Defeating the Flagship
Many FTL players have problems with the flagship. But defeating it is often easier than it seems. The requirments for a decent player are not that high. I’ve seen several players that think cloaking is a requirment even though it isn’t. I would say you need at least three shields, level three engines and a good weapons system. A good weapons system should consist mostly out of lasers and be able to take down a ship with four shields. Hacking, cloaking, drone control or a crewteleporter helps a lot. Personally I think mind control is over valued. It controls one crewmember for a short period and doesn’t have a lot of impact. Try to get to the base before the flagship and then wait for it.
The flagship will immediately start it’s cloak and send a hacking drone. If you have a defence drone activate it now. The flagship acctually only has 10 drone parts. If you are lucky the flagship hacks medbay, sensors or something like that. If you feel like the hack is in a very bad spot like shields or weapons you might want to flee from the fight and then jump back in hopes of getting a less important system hacked. If you have hacking you can hack their hacking if you don’t want to escape. The flagship has four weapons:
An ion that fires three ions and uses three power.
A laser that fires three lasers that do one damage. The system uses four power.
A missile launcher that fires three missiles that do one damage. Uses four power.
A beam that deals two damage and uses three power. (Basically a halberd beam)
On phase one destroy all weapon systems by teleporting in to them and killing the crew and have your boarders destroy the system. Do this until only the lasers are left. Killing all crew will activate the AI that automatically repairs stuff and the lasers alone can’t damage you through three or more shields. Then kill the rest of the crew except the lasers guy have your boardes destoy the shields and then tp them back and destroy the ship. This strategy will make the next stages easiers since the crew dont come back so there will be no one to repair stuff.
In a run without the teleport you should hack their shields if you have hacking. Fire everything at them until they’re down and then destroy the ship. Use the cloaking system if you have it to avoid the missiles.
When you have destoyed the first phase upgrade systems if possible, repair stuff, heal up and if you have a hull repair drone repair back to full hull. Then it’s time to take on the next phase. Stay in the base and wait for the flagship instead of jumping into it.
In phase two the flagship has lost it’s abillity to cloak and hack but has gained the drone control system. This means you can teleport and hack directly instead of having to wait for the cloak. If you have trouble getting the hacking drone past the defence drone there is a trick you can read about in the tips and tricks section. If you have hacking hack the shields and if you have cloaking use it to avoid the power surge. Cloaking only needs to have one power to avoid the power surge. The flagship will also send boarding drones wich can be shot down by defence drones if you have them. If you don’t have cloaking you should try to just destroy the ship as fast as possible and be prepared to take a hit during the power surge.
After deafeting phase two you should repair, heal and prepare yourself for the last phase.
When you are done, jump to the flagship instead of waiting in the base. This gives you a safe retreat if things are going wrong.
This is it, the final phase. The flagship will start with a giant zoltan shield so you can’t hack, mindcontrol or teleport past it except if you have the bypass augment. If you have a attack drone you should power it up now since it helps a lot with getting rid of the zoltan shield. If you have mindcontrol you should use it to keep your crewmembers from being mindcontrolled instead of mindcontrolling the enemy. Save your cloak for the power surge and if you don’t have cloaking you’ll just have to take it. If you have hacking, hack the shields. The flagship will teleport all it’s remaing crewmembers to your ship except the weapons personal. Focus on getting the shields down and then mindcontrol and weapons.
Unlocking All Ships (Type A)
You can get each ship by winning with the ship before that one or by doing a special quest. This section goes through the quests. This part won’t be written in great detail since it isn’t the main focus of the guide.
Reach sector five with any layout of the kestrel.
Quest found in rebel stronghold on a random beacon without a ship. The text will say something like: “You see an impressive ship yard…” Click the option pull in closer. This will result in a fight against a work in progress version of the flagship. When deafeted you will unlock the federation cruiser.
Quest found in zoltan homeworlds. Text will tell you that a zoltan ship contacts you and says something about spreading peace and not using weapons or shields. Press the alternative “Hear them out”. A quest mark will appear on your map. When you have travelled to it a rebel ship will approach you. Click the option 2 then 1 and then 2 again and you will get the zoltan ship.
Quest found in mantis homeworlds on beacon with ship. The text tells you that a famous thief named Kaaazaakplitih is attacking and that your crew seems scared. Kill the crew. You must do that pretty fast, otherwise it won’t work. Then you will find kaaazaak dying in a corner. You need level two medbay or clonebay to heal him. He will join your crew and a quest beacon will show his hidden stash where the mantis ship is. Go there and you will get the mantis ship.
Found in slug nebula at a beacon with a ship. The text will be exactly the same as all other ships there. Fight them until they surrender and accept the surrender. They will offer you a weapon but taking that options won’t give you the slug ship. Click option two: We don’t want the weapon, we want information. A quest marker will appear.
When you arrive at the quest marker you will see some slug ships working on a big ship.
You will have the option to charge in and try to defeat a large ship defending it or to try to follow them. Click option 2: try to follow them. Next you will have a couple of different options but only if you have level two sensors or a slug you will be able to select a blue option that allows you to fight a small ship that’s trying to escape. If you defeat the ship before it escapes you will unlock the slug cruiser.
Quest found in rock homeworlds. The text will say something about the you not being strong enough and the alternatives will be: “We’re going to save them or die trying”, “We’re strong enough to defeat you” and “Ignore them”. Choose any alternative except ignore them. You will get a quest beacon on your map and upon jumping to it you will get attacked by a rock next to a giant star. The rock will try to escape and if you survive until it escapes you will get a new quest beacon. When you arrive at the beacon you will get the unlock the rock ship.
Quest found in engi homeworlds. The text tells you some engis are talking about something. If you have an engi a blue option will be avaible that let’s you ask what’s going on. Two quest markes will be added to your map. On each quest marker there will be a rebel ship trying to escape. Damage them enough to make them surrender before they escape. One of them will give you another quest marker when they surrender. Upon arriveing to it you will have to fight a mantis ship manned by humans. When you have defeat it you will unlock the stealh cruiser.
The lanius ship is unlocked by having four ships unlocked.
Found in distress beacons. The text tells you a lifeless ship inside a dense astroid field is sending the distress signal. Choose the alternative: “investigate”. If you’re lucky you will get aboard the ship and have a choice between getting the weapons or a mysterious stasis pod. Choose the stasis pod. Then you have to find the random zoltan lab event. Instead of choosing “Participate in their study” you now have a blue option where they can fix the stasis pod. When they fix the pod you will get a crystal crewmember and a quest marker in the rock homeworlds. When arriveing at the quest marker you will see some rock monument thingy. Your crystal crew will give you a blue option and upon clicking it you will be transported to the secret crystal sector.
There you will get another quest marker at which you will unlock the crystal ship.
Notes
This guide surely contains loads of spelling errors so please report them in the comments. The ship guides may be a little incorrect since I wrote them from what I remember. If you know any useful tips or tricks that I didn’t write down you can suggest them as well.