Overview
Getting mad at Hardcore Mode for existing? Is grinding for something that gives you a seemingly higher level of superiority in just one game beginning to feel increasingly forced? No, don’t you dare quit and waste your potential, because this is just a little guide created by a JS&B player, for JS&B players, containing strategies, tricks, and recommendations for every level of Just Shapes & Beats in Hardcore Mode, along with tips on how to get Beatpoints faster and more efficiently. Special thanks to Croness for letting me build on their Normal Mode guide. :)The tips for the 5 new mixtape levels I’ve recently built into this guide with are quite rough, so feel free to comment down below if you find something wrong or unclear with it that I’ve mentioned.N.B.: This guide is incomplete and it is uncertain when I can call truly deem it ‘complete’. I still have to add screenshots and improve wording in some places.DISCLAIMER: Everything that I note down is based off personal experience and time playing the game. Everyone has a different playing style, so if you follow this and fail to get results, try your own style or someone else’s, until you achieve your goal. Remember: Practice, focus, and patience is everything.Also note, all Beatpoint award measurements in this guide are for Hardcore, so halve these for Normal Mode values.Without further ado, let’s begin! 😀
PREFACE – PLEASE READ BEFORE COMMENTING!
I feel it be imperative that I address the opening statement of this guide in further detail, because the comments section is peeved that I apparently say what dashing a certain level is ‘impossible’ or whatever the hell other complaints. First off, just because you can what dash something and I can’t does not mean I must alter it to your preference.
It’s simple as that; if you can what dash it, what dash it. You don’t need a guide to tell you that if such is the case. And should I mention, some of the levels you pointed out that one can what dash I did not state were impossible in the first place. I just put “Not Recommended,” meaning it is perhaps not impossible, but I do not suggest you attempt to do it. What part of “PERSONAL EXPERIENCE” do you not understand? I created this guide for people who’re just starting hardcore mode, not for players who are at the top of their game and are capable of doing feats that are difficult to starters by comparison.
I find it very annoying that people try and rectify my time in the game with mere statements that falsely go with what I put in my guide. I don’t say it’s impossible unless it genuinely is impossible, like in Close To Me. Otherwise, I put Not Recommended, because I am constantly unsure of whether one should be able to What Dash whatever level or not.
Now that’s out of the way, let’s get into the guide, for real this time.
Introduction: Beatpoints
I’m basically taking this from Croness’ guide and modifying/expanding it, so unless you haven’t read theirs already, you can skip this bit, straight to the “Gaining Beatpoints” section.
Essentially, Beatpoints are a measure of ‘currency’ in Just Shapes & Beats. I quote ‘currency’ because you don’t actually buy anything with them. But you do gain them by completing levels in either Challenge Mode or Playlist mode. If you get certain amounts of BP (I’ll just call them that from now on to save time hehe), you can unlock extra levels*, as shown below:
HYPE: 1,000
Strike the Earth: 1,200
Flowers of Antimony: 1,400
La Danse Macabre: 1,600
In the Halls of the Usurper: 1,800
Tokyo Skies: 2,000
Dance of the Incognizant: 2,500
FOX: 5,000
Core: 7,500
Crystal Tokyo: 10,000
On the Run: 12,500
Mortal Kombat: 15,000
Katana Blaster: 17,500
*These are not all the levels you can unlock! They’re just the ones you unlock with earning beatpoints.
-If you’re playing JSAB on Switch (but why are you even here on Steam xd), you can unlock all Shovel Knight levels (STE, FOA, LDM, ITHOTU) with the Shovel Knight amiibo.
How to get BP:
You can obtain BP by
-Completing challenge levels, either public where you play with strangers, or with your friends
-Running into them in the public lobby (they don’t spawn in any other mode)
-Beating playlists by yourself because you have no friends or you have a sh*tty internet or none at all (and somehow ‘got’ the game… but if you have no internet, how [and why] are you even reading this)
Every time you get a certain amount of BP, your bar with the fancy token-looking thingos will exchange for other, fancier, token-looking thingos that you can flex to your friends and the public with. The tiers:
(Image: bmjay from Berzerk Studio’s Discord server[canary.discord.com]. They’re no longer in it, but this chart by them is useful)
Tier 1: 1BP
Tier 2: 5BP
Tier 3: 25BP
Tier 4: 125BP
Tier 5: 500BP
Tier 6: 2,500BP
Tier 7: 10,000BP
Tier 8: 50,000BP
Tier 9: 250,000BP
Tier 10: 1,000,000BP
-It’s worth noting that only Tier 1 (1BP) and 2 (5BP) coins can be collected in public lobbies. Try and aim to obtain the white BP coins over the darker ones; those are tier 2 coins.
Gaining Beatpoints – Info
For every level that you complete in Playlist or Challenge Mode, you will get
– a certain rank, depending on how well you performed in the level:
– [Public Mode exclusive] 20BP from playing online (or if you ended up by yourself)
– [Friends/Community Room] BP from playing with friends varies, depending on how many you’re playing with: 1 other player = 10BP; 2 other players = 20BP, 3 other players = 30BP
– Two (2) bonus BP awards depending on how you turned out.
– If you finish a boss level in Challenge Mode, you will get 60BP, along with the above. (Only 1 bonus BP award though.)
The bonuses at the end of each level award slightly less BP than ranks but it adds up in the long run. I’m too lazy to paste all the bonuses here so here’s a guide by Guille36 that shows all possible bonuses that can be earned after levels and how many BP they award you with. Btw, the values shown there are for Normal Mode, so double them to get the Hardcore numbers.
[link]Maximize your Beatpoint gain
Before I bring on tips for individual levels, here’s just some info and advice on BP as a whole.
As aforementioned, after completing a level, there are bonuses you can achieve that award a certain amount of BP. In particular, there’s 3 that award more BP than others that you can get (almost) any time.
What Dash?
Complete the level without dashing. Rewards 20BP.
Righteous
Stayed on the right side of the screen for more than half of the level. Rewards 16BP.
Danger Zone
Dashed over pink 25 times or more. Rewards 16BP.
Since you can only get 1-2 bonuses after every level, it’s always best to aim to get at least one of these achievements- What Dash along with Righteous, or Righteous along with Danger Zone (if you somehow got danger zone along with what dash, your game is probably cursed). But some levels produce an impossible to extremely unlikely chance of getting either at the same time. So be wary, and don’t put too much on your plate. Though, I still strongly recommend you get these bonuses, but only if you’re confident that you’ll end up with at least an A rank after a level.
WARNING: Attempting to get a What Dash will result badly if you do not have enough experience to perform it while getting a decent rank. If you can’t get Righteous along with What Dash… DON’T ATTEMPT (unless you have a good team who don’t break at all, then you may end up with “All Star” [16BP] unless you’re the one who lets the whole team down you n0ob). It really isn’t worth it to attempt to nodash a level and end up with a B rank or worse.
However, this doesn’t mean that you shoudn’t attempt to What Dash a level, unless it’s downright impossible (Spectra and Try This). Just be cautious, and don’t get on the high road too soon.
Anyway, if you can’t nodash a level, you should go for Righteous and/or Danger Zone:
Righteous+Danger Zone=32BP
Otherwise, if you can nodash a level:
What Dash?+Righteous=36BP
However:
What Dash?+other bonus (most likely: The Cheese Stands Alone=12BP OR First/Aced It=8BP)=≤34BP
There’s also the Hero(+(+)) and Show-off achievements for rescuing 8, 9, or 10 friends in a challenge, awarding 16, 18, or 20BP respectively. Aside from only being achievable in multiplayer, trying to What Dash a level while also rescuing your noob friends is the downright equivalent of suicide. (but if you and your friends cooperate, it isn’t impossible…)
General Level Tips: Preface
Here’s some of my personal advice for general gameplay:
– Never dash over an obstacle you’re not certain of getting over safely. When in doubt, find another way around.
– Don’t rush over to the place you’ll be immediately. Especially in Hardcore, warnings are shorter and your reaction time will be tested. If you rush, it’s likely you’ll subconsciously lower your guard and get struck.
– If you’re playing with others, keep to the left of the screen, since it’s where broken players drift towards. You being on the right side of the screen while the others are dying on the other side won’t help much.
– Sometimes, you’ll experience hitbox desync in online games, making other players look like they’re using noclip. Unless they seem to be purposefully staying in pink zones, it’s probably desync, or they left the game a while ago and it’s taking a while for it to process fully. (And if they get hit later on, that’s gonna immediately disprove your initial beliefs.)
– Low-end computers like mine (4GB RAM- half the required amount but still can run it somehow) can run into issues ranging from minor framerate drops to severe lag spikes that can last for 10 seconds. If this occurs, it helps to turn off Vsync in settings. Some of the graphics will appear a little choppy, but it’s a small tradeoff for a more consistent framerate and making sure this monstrosity doesn’t happen:
[Tutorial+New Game] Level Strategies, Recommendations
This section and the following are strategies for every level, including from Shovel Knight and 2nd anniversary mixtape. As noted at the beginning, these are told from my experience and I strongly suggest you follow these ONLY IF you’re confident enough in the levels and can consistently achieve an S or A rank, or nothing you tried prior has worked.
PS- like I said before, never attempt What Dash until you’re fully confident enough. It’s already hard enough on some levels and you’ll pretty much lose your S rank’s bonus 20BP if you get hit. Just to reiterate, this guide and all its labels is for hardcore mode, not normal. If you’re looking for the normal mode guide, ask Croness or go back to the Guide section of the JSAB hub where you also found this.
Chronos
Difficulty: Easy-Medium
Righteous: Not Recommended
Danger Zone: Recommended
What Dash: Recommended?
Righteous is just as hard to obtain in Normal Mode due to the right side of the screen’s frequent particle spam and the incoming particle bombs. Since you have less reaction time, Danger Zone is a little harder to achieve, but not impossible. Though I’ve seen experienced players What Dash this online, it’s hard and requires a little luck as well, since the crashing pillars at the end are more unpredictable and quicker to attack than in normal.
Milky Ways
Difficulty: Easy
RIghteous: Recommended
Danger Zone: Recommended
What Dash: Recommended?
Attacks from the right are much faster, so definitely don’t immediately rush there and try to get a Righteous; you’ll get it with time and focus. Danger Zone is a little harder to get since the snakes are faster. To What Dash this, you’ll need to stay at the far end of the screen to where the spikeballs explode, then squeeze through when you get an opening. The rest of the level isn’t too much harder/different to Normal mode, albeit the beam thingos coming in from the sides are faster.
Logic Gatekeeper
Difficulty: Easy-Medium
Righteous: Not Recommended
Danger Zone: Not Recommended
What Dash: Not Recommended
What Dash is pretty much impossible due to the huge@$$ pulsing circles at the end, unless your luck is incredible and they don’t spawn right on top of you. I wouldn’t go for Danger Zone cuz the pillar slams are thicc and you’ll probably dash into another one of them anyway. For the starting pillars, stay right on the central X-axis (horizontal), and as far left as you can so you can easily avoid the particle bombs.
[BOSS] Long Live the New Fresh
Difficulty: Medium
Righteous: Recommended
Danger Zone: Recommended
What Dash: Not Recommended, probably impossible
There’s a bunch of cheese spots, not as much as Normal mode though. As usual, the corners while the boss is swinging its arms is a good place to go (mind the arm attacks though). For the final phase, beware of the corners, which don’t cheese as well as in normal.
[BOSS] New Game
Difficulty: Medium-Hard
Righteous: Not Recommended
Danger Zone: Recommended
What Dash: Borderline Impossible
Before the tower climb, you can dash over the beams that come out of the tree to add up your “dashed over pink zone” count. Climbing the tower is much harder than in normal mode due to the decreased reaction time, so don’t dash too far so you hit the beam in front of you, or too little so you don’t get past. Just before and during the drop, you can sorta chill in the bottom left corner, dashing over the rain of spikeballs if you have to. When the boss transforms into a big ball, go into the very top left corner, you won’t get hit there. During the cannon attacks, line yourself up with it, and before it shoots, move to the right side of where the projectiles will go. Same applies in the second half of the cannons, just be cautious of the revolving particles.
[Island] Level Strategies, Recommendations
The Art of War
Difficulty: Medium
Righteous: Recommended
Danger Zone: Recommended?
What Dash: Not Recommended
Since you have tighter spaces to fit in, be more steady with your movements. The phase just before the final is a lot harder and requires extreme focus. Practice and practice. Definitely don’t What Dash this unless you know exactly what you’re doing.
Termination Shock
Difficulty: Easy-Medium
Righteous: Recommended
Danger Zone: Recommended
What Dash: Impossible
I feel that Hardcore Termination Shock is somewhat easier than in normal (my opinion, you don’t have to agree). You won’t have a problem with Danger Zone, but What Dash is impossible unless some miracle happens and the second phase doesn’t spawn large@$$ pillars. Strafe left-right during the spike-pillars section, and dash over them if you have to, at the opposite side to where it will slide towards.
Sevcon
Difficulty: Easy-Medium
Righteous: Recommended
Danger Zone: Recommended
What Dash: Recommended?
Right side is pretty much equal to the left side’s difficulty level, so you should be fine. To make sure you dash 25 times, do it forward and back with the tiny circles in the middle of the screen at the start and end of the level. I’ve never seen anyone What Dash this level (especially with the extra particles during the first drop) so unless you really want to/have confidence/have done it prior, then don’t.
Cascade
Difficulty: Easy
Righteous: Recommended
Danger Zone: Recommended?
What Dash: My Brother Could Do It
The bottom left corner is the only place you’ll need to remain (except for the first half of the pillars attacks). Be careful to still avoid all tiny particles, but the end phase you should be completely fine staying still unless you’re in any top corner. It’s anxiety-inducing but stay calm and still in the bottom right corner and you’ll pass, likely with a What Dash.
[BOSS] Barracuda
Difficulty: Medium
Righteous: Recommended
Danger Zone: Recommended
What Dash: Not Recommended
DO NOT GO HERE UNDER ANY CIRCUMSTANCES:
seriously. it’ll f**k you up and nothing will end well. don’t even attempt to cross into that.
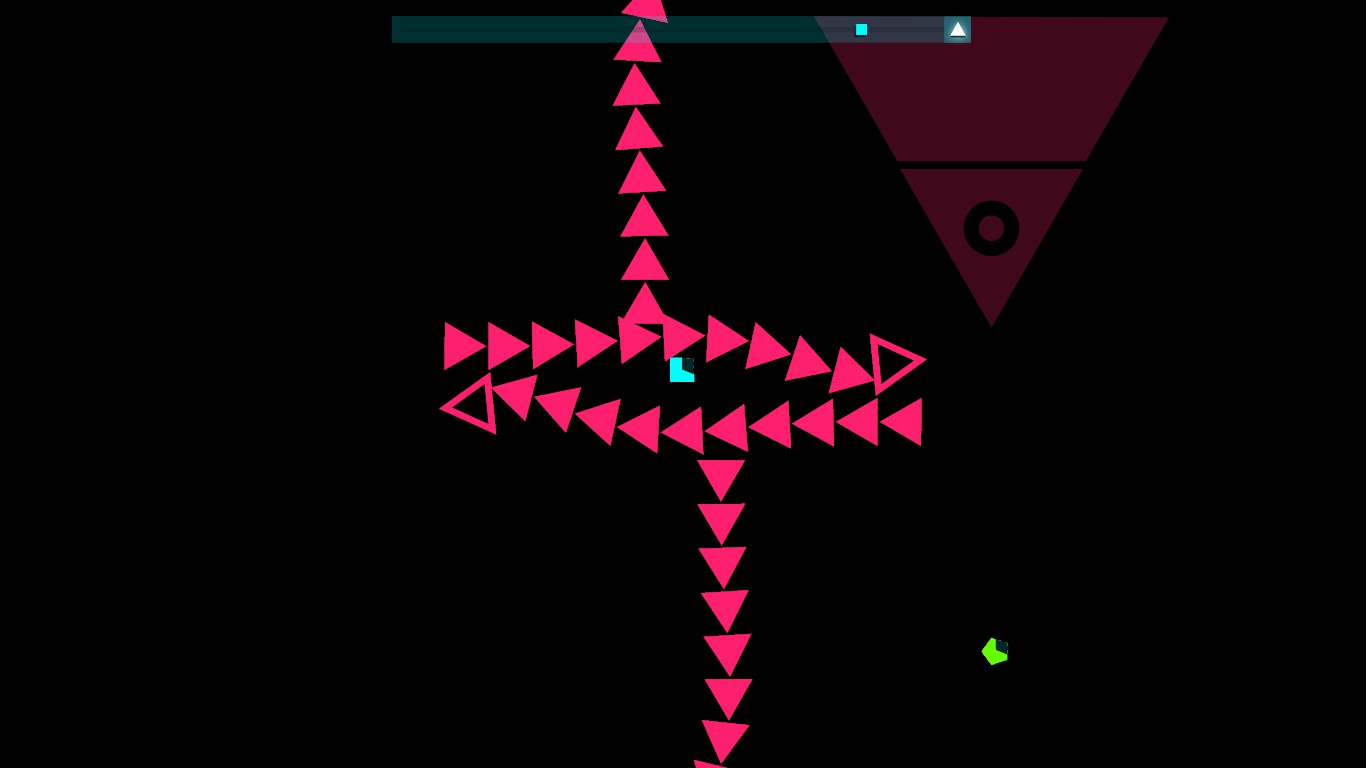
Wait until the very last moment to dash during Barracuda’s first particle attacks. In the second phase, stay in any corner so that you can avoid the snakes and Barracuda’s pyramid attack. Definitely don’t stay around the middle where all snakes converge, or near to the middle of the edges of the screen where they enter and probably will strike you out of nowhere.
[Volcano] Level Strategies, Recommendations
Dubwoofer Substep
Diffculty: Easy-Medium
Righteous: Recommended
Danger Zone: Recommended?
What Dash: Recommended?
Since you have less time to react to stuff, you need to memorize where to go at what times. The top is probably the safest except around where pillars crash down and just before the spikes come from the ceiling. The drops are a little faster so be careful around those. What Dash isn’t impossible (I did it once), but I don’t do it much anymore, due to the bit before the final phase where beams push you down and the water threatens to hit you (cries in slow poke)
Cheat Codes
Difficulty: Medium
Righteous: Not Recommended
Danger Zone: Recomended?
What Dash: Borderline Impossible
Rotating projectile cannons means more trouble and less space to rest for dashing. The drop part is a little harder from the beams. I don’t have much more to say about this except stay in line with the corners of the square cannons and you should be alright.
Clash
Difficulty: Medium-Hard
Righteous: Recommended
Danger Zone: Recommended?
What Dash: Not Recommended
Not much changes in the first phase – go to the top, then the center, then the top again before the drop. But in the second phase you need to have more care from the additional projectiles. The cannons have about 4 positions where they basically remain still, so find a spot during that time and stay there until they move again. Right side isn’t much different from the left.
[BOSS] Lycanthropy
Difficulty: Medium
Righteous: Recommended
Danger Zone: Recommended
What Dash: Recommended?
For the first phase, stay as close to the top of the screen as you can so that you don’t have to dash over the drops coming from the bouncing balls. Time your dashes when the boss splashes so that you don’t collide with the water. What Dash is not impossible but requires better timing, precision, and fitting into small spaces, so don’t attempt if you’re not confident.
[Industry] Level Strategies, Recommendations
Cool Friends
Difficulty: Medium-Hard
Righteous: Recommended?
Danger Zone: Recommended
What Dash: Impossible?
The conveyor belt goes a little faster, so you need to dash a little more frequently (you can still get Danger Zone with the pink square pistons at the start). The gap in sawblades are reduced so you have to keep dashing back and forth to avoid them. Before the second phase starts, the sawblade border forms a bit faster, be quicker with that. Also, the rotating blade is much faster, dash over it more and be wary of the prompts so you don’t dash into a crashing pillar/beam. For the big sawblade part, patience is everything. Don’t rush over the particles. Rinse and repeat, then for the final phase you should wait for the blade to rotate once before you go under it. Dashing recommended in this bit so it doesn’t crush you.
The Lunar Whale
Difficulty: Medium
Righteous: Not Recommended
Danger Zone: Recommended?
What Dash: Patched
For the start bit you need to stay at the very left to avoid the exploding Rubix Cubes and projectiles. When the second phase starts, don’t try and cheese it through sticking to the walls, because the collision updates make it impossible to stay there and survive now. As you dash through the beams, make sure you’re not headed for the particles coming in from the right.
Spectra
Difficulty: Easy-Medium
Righteous: Recommended
Danger Zone: Recommended
What Dash: What sort of a question is this?
Not too hard to chill on the right side of the screen. You’ll get Danger Zone and Righteous no problem. Be cautious of the slightly harder obstacles in hexagons, especially those that are cut in half. For these ones, stay in one half, and move as you need to, or else you’ll get smacked as it rotates.
Unlocked
Difficulty: Easy
Righteous: Recommended?
Danger Zone: Recommended
What Dash: Impossible
Since the first phase splits the screen into 4, put yourself in one of those quarters. Dash along those lines and you’ll get Danger Zone no problem, but be careful of the checkered lines. The second phase isn’t too different than Normal, just beware of the edges and the spinning… rotor thing (idk the name xd).
[BOSS] Close to Me
Difficulty: Medium-Hard
Righteous: Recommended
Danger Zone: Recommended
What Dash: Impossible
The spaces between the spinning beams at the start are smaller so be careful there, while also avoiding the big spikeballs floating up. No big changes to the main attacks, but since the big gear’s got a saw in the center, you can either squeeze into that smaller space or dash right under here


[Tower] Level Strategies, Recommendations
Into the Zone
Diffculty: Medium
Righteous: Recommended?
Danger Zone: Recommended
What Dash: Not Recommended
First phase, stay at the left side of the screen so that the right wall doesn’t bash you. And no, dashing like a madman is not my ideal strategy for the part after the guy says the first ‘into the zone’. Just be calm and don’t rush. If you dash over the pillars in the final phase you should get Danger Zone no problem.
Vindicate Me
Difficulty: Medium
Righteous: Not Recommended
Danger Zone: Recommended
What Dash: Not Recommended
If you can, head in the gap between any of the pistons in the first part so you don’t have to deal with the flipping boards. (Don’t stay at the very bottom though, there will be a border thing there.) Keep to the bottom sector before the top for the third bit. Time your dashes well here. Righteous is doable but good luck with that – the projectiles from the right will likely end that.
Try This
Difficulty: Easy-Medium
Righteous: Recommended?
Danger Zone: Recommended?
What Dash: lol
No way you’re gonna What Dash this. Be more wary of the floating circles and where you end up dashing. In the bit in the second half with the four rotating beams, the circles are the least of your worries – dodge the shurikens and the beams, but still be ready to escape the circles just before they pulse.
[BOSS] Final Boss
Difficulty: Medium
Righteous: Recommended
Danger Zone: Recommended?
What Dash: Good Luck With That
Stay at the bottom as much as you can before the pre-buildup starts so that you can avoid all the pulsing projectile attacks. There’s no indicators for the cannon parts, so be careful there. However, you got a better chance of Danger Zone if you dash back and forth along this middle beam:

If you want to, you don’t have to dash upwards during the first half of climbing with the boss (though you will gradually drift downward), though you have to in the final bit.
[BOSS] Annihilate
Difficulty: Medium-Hard
Righteous: Recommended
Danger Zone: Recommended?
What Dash: I’ve seen ppl who’ve done this once by cheesing the rotating arms, but I can’t
For most of the level, precision is key. Practice fitting yourself into the small gaps. No dash is impossible cuz of the rotating arms (though some people can cheese through it). Right side isn’t too different from the left, you just have to dash through an additional burst of exploding spikeballs at the start.
[Extras 1/3] Level Strategies, Recommendations
Legacy
Difficulty: Medium-Hard
Righteous: Not Recommended
Danger Zone: You’ll Get It Without Even Knowing
What Dash: Patched
Stay at the extreme top or bottom so you can easily dash through everything without drifting off into something else. What Dash has been patched, so don’t even think about attempting it (unless you’re the boldest of the bold and somehow have the most minute of precision).
Wicked
Difficulty: Medium
Righteous: Recommended
Danger Zone: Recommended
What Dash: Not Recommended, But Possible
For the first bit, stay at any top corner (not exact, so you don’t get hit by the projectiles coming in). Just dash through all the particle attacks, and while you got the squares sitting in position, just dash over those repeatedly, you’ll get Danger Zone easy. Since everything shoots faster and there’s literally nowhere for you to not dash, What Dash is tough. But it should be possible (im too lazy to prove this, so comments section, do your thing… ig)
First Crush
Difficulty: Medium-Hard
Righteous: Recommended
Danger Zone: Recommended
What Dash: Not Recommended
Left and right sides are equal difficulty. Dashing across the fountains is ez way to get Danger Zone. You won’t be able to outrun the spiralling fountains in the part before the buildup. Just stay in a sector and dodge them – it’s not too hard. You can chill in the top right corner just before the drop. Be very careful with the larger fountains because they’re fast and unpredictable. Stay at the top, dash if you need to. At the end, stay at the middle left for the rest of the level.
Yuckyman Yokuman Stage
Difficulty: Easy
Righteous: Not Recommended
Danger Zone: Recommended?
What Dash: A Bit Of Luck Is Required (Otherwise, You’ll Be Fine, I Recommend It)
The left side of the screen is all you need to remain. Just keep moving up and down, and squeezing in here. To What Dash this, you need to pass through here (don’t worry about the first 3 rows of the small spikeballs, you only need to pass through the last bit). Coming out of there with an S rank is kinda up to the internal RNG because the horizontal beams could strike right as you pass the big spikeball.
Paper Dolls
Difficulty: Medium-Hard
Righteous: Recommended
Danger Zone: Recommended
What Dash: Recommended?
Like Termination Shock, I find this a little easier in Hardcore. What Dash is easy if you go to the right spots at the right time I guess? Otherwise, you’ll get Danger Zone naturally as you play. Memorize which pillars come crashing at you and their order so you can dodge them better. Righteous isn’t too hard if you have a good enough reaction time to dodge the projectiles flying in from the right.
Commando Steve
Difficulty: Medium-Hard
Righteous: nope
Danger Zone: Recommended
What Dash: Recommended?
EDIT: I attempted WD and it still works as of July 25. To achieve it during the bit before the drop, wait for the pillars to slam, then plant yourself into one ever so slightly. Remember to reset yourself every time the pillars slam, because the hitboxes are updated. Stay at the complete left side at the screen at all times, just move up and down (and slightly sideways if you have to). If you’re going for Danger Zone, just dash along the beams and larger spikeballs (not the ones with a trail).
Houston
Difficulty: Medium
Righteous: Recommended
Danger Zone: Recommended
What Dash: Not Recommended
Wall after wall, the possibility of What Dash in this level is really slim not that i’ve wanted to try it anyway; you’ll have to cheat yourself through the tiny gaps in the walls. Not too hard to Righteous this, little tougher than being on the left though, especially since the walls are faster.
Here’s a video of me S ranking it w/ Righteous:
HYPE
Difficulty: Medium-Hard
Righteous: Recommended
Danger Zone: Recommended?
What Dash: Recommended?
Hardcore HYPE gains significant difficulty from normal (again, my opinion). There’s way more bullets and they fly faster; ingredients for stress. Depending on how well you know the level, you could go for either WD+Righteous or Righteous+DZ. The final part is as confusing as normal, and with the added projectiles you’ll probably get stress 9001. Stay in the bottom left corner for that.
[Extras 2/3] Level Strategies, Recommendations
Tokyo Skies
Difficulty: Medium-Hard
Righteous: Recommended
Danger Zone: Not Recommended
What Dash: Recommended?
If you’re going to What Dash this, you’ll need extreme focus. Right side isn’t too much different from the left. Other than that, I don’t normally choose this in public games unless there’s nothing else I can nodash or I just want to practice my focus and reaction times.
Dance of the Incognito Mode Incognizant
Difficulty: Easy
Righteous: Recommended
Danger Zone: Recommended?
What Dash: Recommended
Though it doesn’t seem like it, No Dash is possible (also mentioned in Croness’ guide). It’s not too hard to dodge the first phase, and in the second phase you just squeeze in here


FOX
Difficulty: Medium-Hard
Righteous: Recommended
Danger Zone: Recommended
What Dash: Impossible
Because of the bouncing donuts at the end, it’s pretty much impossible to nodash this level, so you may as well get Danger Zone by dashing over (or under) donuts. Both sides are of equal difficulty but the level design requires you to strafe left-right a few times. For the bouncing donuts section, get as close as you can to the unstable ceiling or floor, then dash right through. Avoid the beams, dash through those if you can.
Core
Difficulty: Medium
Righteous: Recommended
Danger Zone: Recommended
What Dash: Not Recommended
This level has been unfairly portrayed as one of the hardest levels throughout its time in the game; it really isn’t like that at all if you do it properly with the correct strategy. All you need to do is dash at the right times. Left side is slightly easier than the right – dash through the left exploding box, the right one you won’t need to dash through. Shortly after, in the second rotating beams phase, see if you can dash through both the beams and the particles at the same time. Overall, it actually isn’t that hard if you don’t overthink it too much.
Crystal Tokyo
Difficulty: Medium
Righteous: Recommended?
Danger Zone: Not Recommended
What Dash: Recommended
Though it’s tough to pass the buildup with What Dash (also relying on the RNG a little bit here), sharp maneuvers can get you through easily. Stay on the left side during this part, then you can move to the right. Before the second half of the drop, move into the orbiting circles around the center, then you can just follow along with the rotation of the beams. Don’t move too much, precision is needed to preserve your S rank.
On The Run
Difficulty: Medium-Hard
Righteous: Not Recommended
Danger Zone: Recommended
What Dash: Not Recommended (some guy on r/JustShapesAndBeats did it once)
Though the level’s name may be tempting, don’t rush yourself in this level. Give yourself time to figure out where the obstacles are coming, and subsequently dodge them. In the second phase with a hundred obelisks, stay in the center while avoiding the beams and shurikens. The bit after that is pretty much impossible to overcome without dashing, along with the one before the drop. Unlike in Normal mode, don’t immediately rush to the left or right of the screen during the drop, as shurikens will not allow it. Again, patience is key; don’t rush.
Mortal Kombat
Difficulty: Prepare To Rage And Subsequently Break Your Keyboard Or Controller
Righteous: Don’t Even Bother
Danger Zone: i mean… you could?
What Dash: xd
If you’re looking to What Dash this (it isn’t impossible), you’re gonna need a lot of luck with the RNG. Keep to the left of the screen at all times so that you can avoid the kickers. You can’t dash against the wall this time, so use your directional pad or W and S keys. Pay attention to both sides: right so that you can see what’s coming so that you can dash out of the way, and left so you don’t run into the borders. Righteous is pretty much impossible due to not just the kickers, but the unpredictability of the vertical beams.
[Extras 3/3] Level Strategies, Recommendations
This guide is one for Hardcore, not Normal. But while tips for these 5 new levels don’t yet exist for Normal Mode, I still recommend Normal players to follow these tips, and employ HC strategies for Normal (again, these are written for Hardcore, so don’t worry – I’m sure the levels in normal mode aren’t as bad as they sound in here.)
Creatures Ov Deception (“why is it only NOW I realize that i misspelt deception as destruction” -Hoyuten (formerly Acédia), 2020)
Difficulty: Medium
Righteous: Recommended
Danger Zone: Recommended?
What Dash: Recommended?
Right as the level starts, go to the far left (or right) of the circle (exactly horizontally) so you can cheese the first phase. Don’t be intimidated by this level, it’s the harmless trails that make the illusion. I tried to What Dash this once and very barely came out with an S rank. It’s the double circle spam phase thing. Don’t stress too much about it either if you’re not trying to What Dash it, otherwise your patience and movement reflexes will be tested.
Deadlocked
Difficulty: Hard
Righteous: Recommended
Danger Zone: Recommended
What Dash: Not Recommended
GD players: Don’t underestimate the awesomeness of this famous Geometry Dash track being included in JSAB. It is quite hard for most beginners, even more so in Hardcore mode. Even I’ve only been able to S rank it in HC 3 times only, so all I can really say for this is: don’t spam dash, don’t panic, and maybe you can turn off your music entirely and listen to C418’s Minecraft music while you attempt to not die. Danger Zone and Righteous can be achieved naturally.
Granite
Difficulty: Medium
Righteous: Recommended
Danger Zone: Recommended
What Dash: Recommended?
In the first part, dash right into one of the ball clusters just after they explode so you can easily avoid the rest. Do NOT dash into the center during this part 
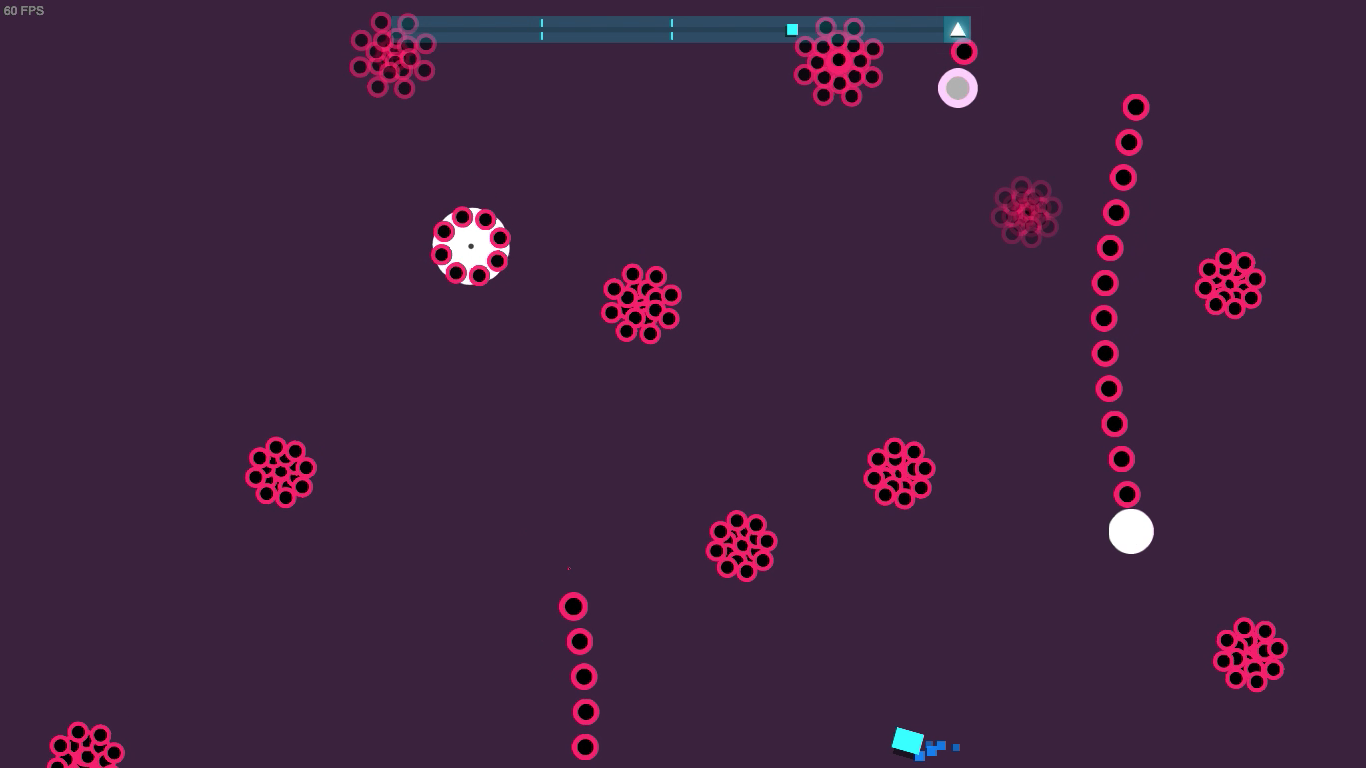
Lightspeed
Difficulty: Medium
Righteous: Recommended
Danger Zone: Recommended?
What Dash: Recommended?
Tiny explosion particles are perhaps the most important thing to avoid in the first half of the level; they can strike you and end your S rank in an instant. Dash down as the spikeballs come crashing. In the second phase, know where the 4 balls are striking, then you can dash in there as they do. Do not spam dash during this part 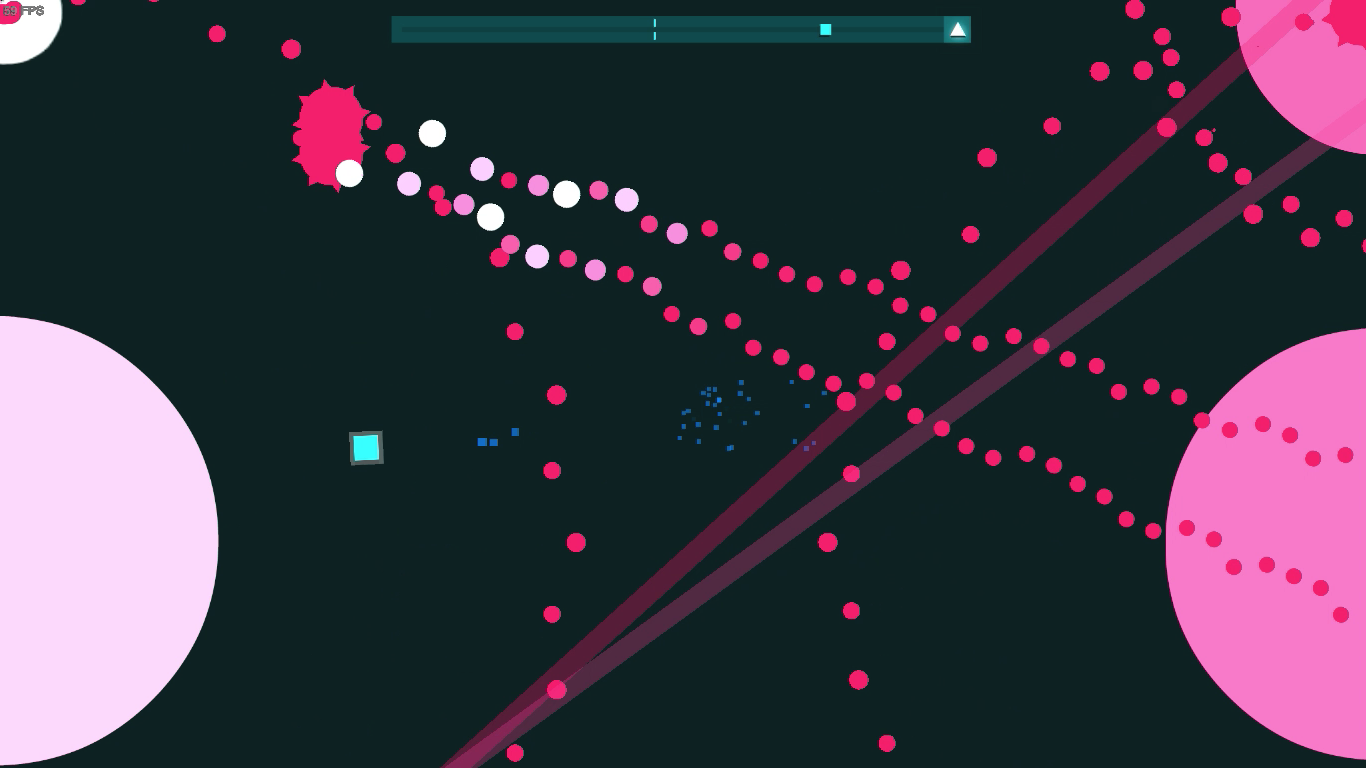

Katana Blaster
Difficulty: Medium-Hard
Righteous: Recommended
Danger Zone: Recommended
What Dash: Not Recommended
Dashing is quite restricted in this level due to the tiny gaps you have to fit in – otherwise, you can try and Danger Zone this with the hexagon wall sections. Righteous is possible, you just need to memorize the pattern of the obstacles so with it, you can escape with an S rank.
[Just Shovels & Knights] Level Strategies, Recommendations
TLDR: There used to be a Normal Mode tips section of the JSAK levels here, but I deleted that. So if you’re playing in Normal Mode, you can employ some of these Hardcore strategies anyway.
In an earlier revision of this guide there was a Normal Mode version of this. Actually, this is the Normal Mode version, or should I say, was. I was too lazy to transfer all my tips from here to the original Hardcore section that came after this. Anyway, you can still use these strategies for Normal. Those in the latter aren’t as toughly portrayed as I put them here, so you should be fine.
Strike the Earth
Difficulty: Easy-Medium
Righteous: Recommended
Danger Zone: Recommended
What Dash: Not Recommended
Simple level, all you need to do is stay around the top and go in the gaps between the shovels. The shovel hit spam around the second checkpoint is NOT luck-based, contrary to popular belief. You have to find a good path around them that you can weave through to stay alive. I start on the moderate far right so I can fit through the first hit and dash through the others, then for the second round I just follow the same principle, going right-left until I don’t have to dash.
Flowers of Antimony
Difficulty: Medium
Righteous: Recommended
Danger Zone: Not Recommended
What Dash: Recommended?
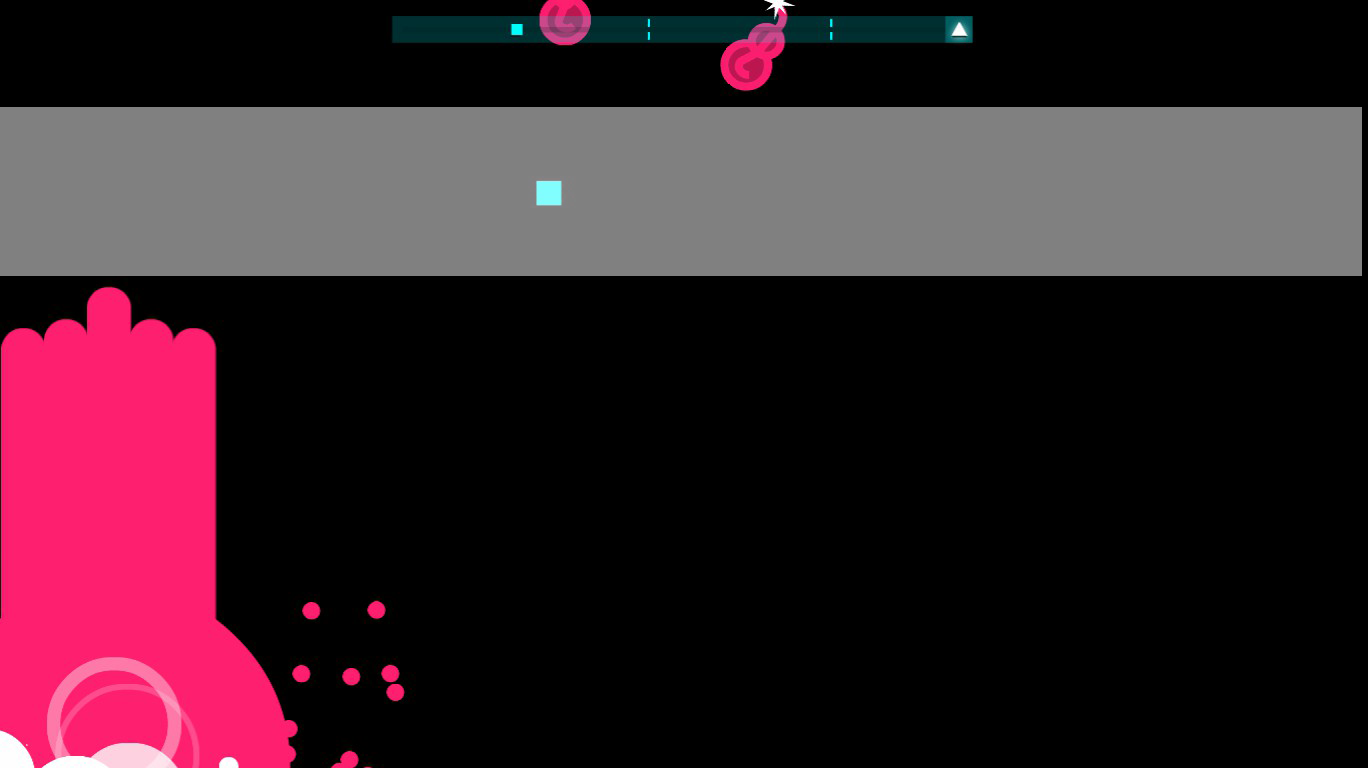
For the dropping bombs, just hang around this little area here (highlighted):
[BOSS] La Danse Macabre
Difficulty: Medium
Righteous: Recommended
Danger Zone: Recommended?
What Dash: Not Recommended
I prefer to stay to the left of the screen for this, but I haven’t seen others with an issue being on the right. For the first drop, you can cheese the entire thing up until the breakdown right here (Cyan).

The left wall is the only cheese you’ll need for the scythe parts. What Dashing this level’s not impossible but I don’t recommend it (the rotating beams bit about midway).
In the Halls of the Usurper
Difficulty: Medium
Righteous: Recommended
Danger Zone: Recommended
What Dash: Recommended
There’s a lot of cheese in this level. Top right just above or below the trumpets is the best place to hang for the first phase. Be careful that it doesn’t stab into you as it comes onto the screen. To avoid this, just nudge yourself a little bit left. Go in between the cauldrons and you can stay there until the next phase, where you go back to above trumpets. The final phase may seem a little chaotic, but keep to above and/or directly below the trumpets, avoid the scepters and cauldron spills, you’ll make it out with a What Dash unscathed.
Final Words, Conclusion
Some cheese/tips/etc mentioned in this guide will likely be patched/fixed in the future. I will keep this up-to-date whenever possible. Inform me if I missed anything.
Final words, adapted and expanded from Croness’ guide:
1. You will never S rank a song immediately first try (unless you’re really experienced). Don’t expect to be a pro in your first week of playing. Time and patience is required. Never quit immediately after you fail to S rank Mortal Kombat, otherwise your potential is wasted.
2. Assuming that, in every level in an online challenge: you S Rank every level and get Righteous and Danger Zone: 3x(40+20+16+16)+60-16=320BP. Challenges take around 7 or so minutes – you can get 1,000 BP in 17, and probably around 4,000 in an hour (these numbers are just extremely rough estimates and maximums, so don’t have these expectations).
– But, if you’re playing with 3 other friends:
3x(40+30+16+16)+60-16=350BP
– So, if you have 3 friends free, you can invite them along to play with you so that more BP is
awarded between you all ;D
3. Like I said, time and patience is required, but also practice. No matter how many times you practice, you’ll never really be the best player in the world, but you can improve. Start by recalling the level design from memory, or try a different strategy if your current one/s don’t work.
4. Know subconsciously how long the invincibility frames for a dash last (approx. 0.5sec), so you know when and where to dash (don’t have to be too specific, but it helps).
5. If you’re playing with others, either publicly or with friends, think of how they’ve been playing for the past level or so, and decide whether or not they’re good enough to earn you the All Star award, which gives just as much as Righteous/Danger Zone; then you just have to not die and let everyone else down with your B rank. (controversial thought: If you really want to judge the likelihood of All Star before you play, just look at their BP count.)
6. S Rank>What Dash. If you’re getting in a tight space and it seems even in the slightest that you’ll get hit, abort and dash the hell out of there. It’s not worth it to risk your @$$ and an extra 20BP just to not press space/A. Though if you do have to lose your What Dash, at least you got the extra 20BP’s in the S Rank. But then again:
– S Rank+Righteous+Other Award>A Rank+What Dash+Righteous
40+16+(≤16)>20+20+16
– If you can confidently What Dash a level with an S rank… well, obviously you should go for that:
40+20+(≤16)>40+16+(≤16)
– But still apply the principle that if you’re not confident with getting S+Righteous+What Dash, then always use this order, to determine which ones you should get:
S Rank>Righteous/Danger Zone>What Dash
– I put What Dash last because like I said previously, it’s not worth it to get hit or worse trying to What Dash a level and lose the +20BP of an S rank. If you crash while trying to What Dash a level and end up with a B rank:
10+20+20+(≤16)<40+20+(≤16)+(≤16)
So yeah, don’t risk dying for a What Dash. It won’t be worth it. But again, if you’re really confident and/or have enough experience, don’t hold back on completing a level with it.
7. Aside from being new to the game or inexperienced, the main cause of breaking and crashing in a level is stress. Keeping calm under pressure is one of the most important attributes that you need to have if you are to S rank and/or What Dash a level. Take long breaths between phases if you need to. And when you’re away from the game, try doing what calms you down most. I do 5 minutes of meditation to relax myself, or just straight up nap for who knows how long. Doing stuff like this can relax your mind, so you’re ready to take on levels that would have taken you on a stress trip.
8. Have fun. Yes, getting BP does seem repetitive and forced on some, but you play games to have fun, and you especially deserve it on Just Shapes & Beats. And never be afraid to try new things: If there’s a strategy you thought of overnight but haven’t tried yet… try it! Even if it fails miserably, at least you tried. You got hit/crashed while you and your friends were messing around, dashing/dancing all over the place? As long as you have fun, beatpoints, S ranks, and What Dashes aren’t always everything. Additionally, you have much more time to earn them over the years. JSAB is a game that you will never really “complete”, kinda like Minecraft and Terraria. Keep grinding those BP, you’ll get the 250k coin soon ;>
Thank you for taking the time to read through the whole thing (unless you jumped all the way down here you uncultured swine). A special thanks to Croness, the creator of the Normal mode guide, for letting me create this expanded Hardcore version. If I’ve missed anything, let me know in the comments! I hope to see some of you in public hardcore games someday, I’m (not too) often on there being a tryhard/showoff on every level and you can feel free to say hi/mention me in this JS&B group chat that I’m in but am very inactive on. [link]
Need me to clarify stuff better? Disagree with something(s)? Spelling/grammar errors triggering your OCD? Don’t hesitate to comment down below about it. I’m also active on Berzerk Studio’s discord server[discord.gg], so feel free to ping me (Hoyuten#7726) and ask stuff there too. (:
See you and happy gaming!
– Hoyuten

