Overview
This guide will cover decompiling BSPs using BSPSource, putting them into Source 2 Hammer, and porting materials with VTFEdit. Hopefully it makes map porting easier for people.
Introduction
So, you have a cool source 1 map and want to port it. This guide will help you start with that! This guide won’t cover porting models or decals.
BSPSource and VMFs
Do you have a .VMF for your map? If you already have one, skip this section.
If you’re still reading, you must have a BSP. The source engine compiles maps into BSPs, but the Source 2 Hammer editor can’t read those. Instead, it reads VMFs, the files you use when making the map in the original Hammer.
We can get around this by decompiling a BSP. There’s a number of things you can use for this, but I personally recommend BSPSource.[github.com]
Scroll to the bottom of that page and click the text that reads “bspsrc_<version>.zip”.

BSPSource requires java. That’s free, just go install that here[www.java.com].
With java installed, go into the zip and launch “bspsrc.jar”.
Once you open BSPSource, you’ll be greeted by this:

Find the folder your BSP is in and simply drag it to the white box.

You’ll see the file path of the BSP in the box now. Hit the decompile button.

A file prompt will open and you’ll pick a location to save a new file named “<BSPName>_d.vmf”
Select a location. You now have a VMF, but there’s one more step.
Open the VMF with Wordpad. Add the following line at the top:

Opening a VMF in HLA tools
In the HLA tools, make a new addon or use an existing one. Open the Hammer editor and select “file”. Then select “open”. The file browser will open.
Go to where you saved the decompiled VMF. Don’t see it? Make sure to select “Source 1.0 Map Files (*.vmf)”. The file should be there now.


Select it and press open.

Materials!
Depending on the map you’re porting, you may have just been smacked in the face with varying levels of ERROR.
Look at it! The materials are scaled incredibly small, some are missing, it’s just not right.

Lets start by dealing with how tiny those are. In my experience (2 map ports) you can very easily fix the scaling with the same number every time. .25.
Change what you’re selecting to faces. Click and drag over the entire map in your top down view.


Now go to your tool properties window.

I’ve underlined the above image for the next step. Double click on the X scaling and type “.25”. Do the same for Y.

Much better!
If the number doesn’t work for whatever reason, select one single face (look for square crates) and scale it until it looks accurate to the original. Then take the scale and offset numbers from that face, select every face, and scale them all with that number.
Missing Materials
Missing materials? Here’s your options.
-Use similar HLA materials
-Look to see if your materials have already been ported
-Port the materials yourself
I didn’t show you but I actually already ported every material you saw earlier. Had I not, the map would be completely red wireframe other than the triggers and skybox brushes.
To port Source 1 materials, use VTFEdit.[valvedev.info]
The map I’m using to demonstrate is gg_lego_SpaceTower by Faithless.[gamebanana.com] The original textures were released on gamebanana by BoHaRoX.[gamebanana.com] I used that linked upload.

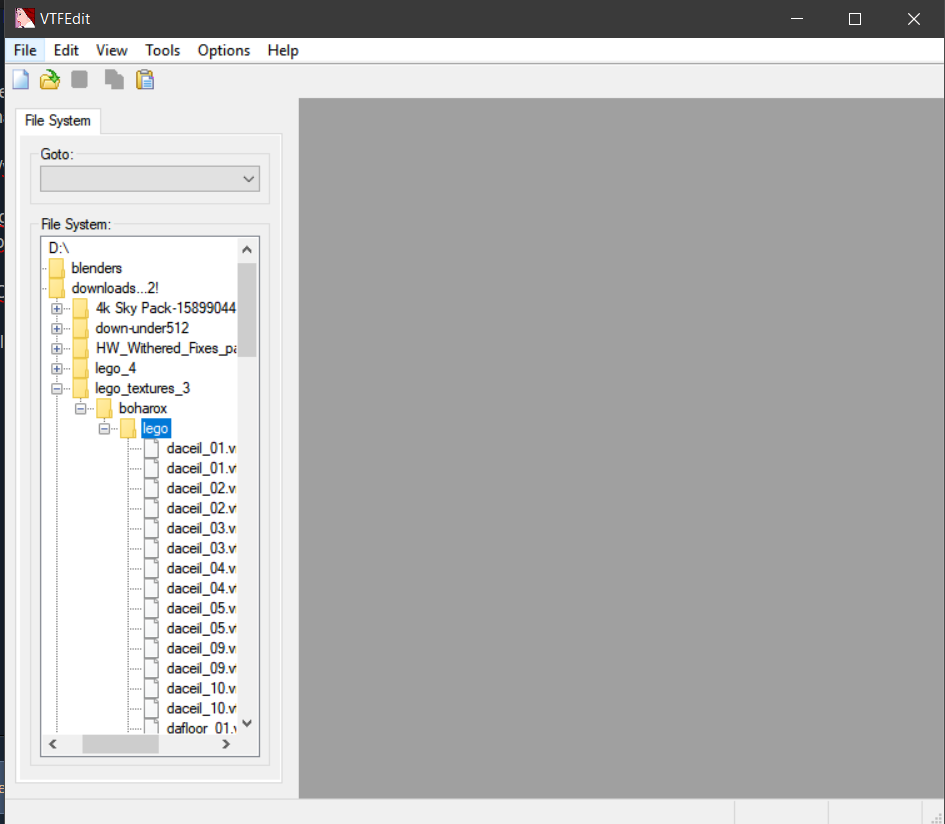
So great, we have a ton of VMT and VTF files. What do we do with these? Let’s go back to VTFEdit. Open it and find the location of your texture files.
VMTs hold the information relating to your materials. Open one and notice the directory.

This directory tells the material where to look for its image source. Otherwise it will appear as the classic purple and black tile.
Let’s open a VTF.

There’s our image source.
When you have a VTF, you can then go to “file>export”, but if you have a folder full of them there’s an easier way.
Select the folder that contains your VTFs and not just one of the files.

Now go to “tools” at the top and select “convert folder”.

Hit the 3 dots by “input folder”

Find the folder containing the VTFs.

Do the same for the output folder. Select a folder to dump the exported files.

The window should look like this now. Check the box that says “To <format>”. You can select any format, but for this guide I’ll export them as a PNG. Hit convert.

Done! Look at all those PNGs. Beautiful. They even have the same names as the originals, but we aren’t done yet.
Identical Directories
Now we have a ton of PNGs, how do we use them? Lets set up our directories before we make new materials.
Take a look at the original file directory of your downloaded materials.
The materials I’m using are meant to be put in:
steamappscommoncounter-strike sourcecstrikematerialsboharoxlego<materials>.
This means that if we port a map that used these textures, it will look inside the materials directory, then inside those folders for a material with that name. If you shift and right click a missing texture, you can see this in the bottom right window, even if the texture is missing.

So let’s recreate that directory. If we do it right, we can open our map and all the materials will automatically be applied.
Start by going to HLA’s install folder. Go to
Half-Life Alyxcontenthlvr_addonsYOURADDONNAME
If there isn’t a materials folder there, create one.

Go into the materials folder and begin recreating the directory as seen with the original materials.
I already have the materials here, but you won’t. This is where my image sources go as well.

Great! Now the directories are identical. In this case, the image sources are in the same folder as the materials themselves. Your layout will differ depending on the textures. What’s important is that the directory starting with the materials folder is the same as the original VTFs and VMTs.
Now that everything is ready, it’s time to make new materials.
Material Creation
You have two options now: Use this github script[github.com] to make original source 1 material scripts into vmats which should automatically work , or the manual way. I’ll do the manual way here, but I recommend trying that script. This part will only go into the basics of material creation using those images you exported earlier.
Note: I know nothing about that script, someone just DM’d me on discord about it and I was too busy to actually look into it.
In your asset browser, launch the Material Editor.

Let’s create a new material.

Once created, save your material in the directory the VMT would be in the original, and with the exact same name of the original VMT.
Optional: Change the shader! The VR Simple shader is a little reflective. If you’re lazy and want to get around that, set it to “VR Complex” and then leave all the settings alone. There are plenty of shaders and settings to mess around with.

Back to the point, go to “color” and click the folder icon. Find the image you exported and use it as your texture source.

Click open once you have it selected.

There it is! Hit CTRL+S to save it again, and your material is done.
Repeat this process for each material you’re porting and you’ll have it ready to easily port! Once you’re done, go back into hammer. You should see that the map has its materials now!
You’re on your own now.
That’s all I can do for you! I hope this was useful. Everything else you’ll need to do isn’t really specific to porting maps, other than porting models which I don’t know. Just look at other guides for whatever you need.