
Overview
A guide for setting up Hammer editor.Jack is a more recent editor that can do many more things than hammer, you might be better off using it instead of hammer.Free versionhttp://jack.hlfx.ru/en/Paid version.https://store.steampowered.com/app/496450/JACK/
Downloading the Tools
Lets start by downloading the tools we need.
Start steam
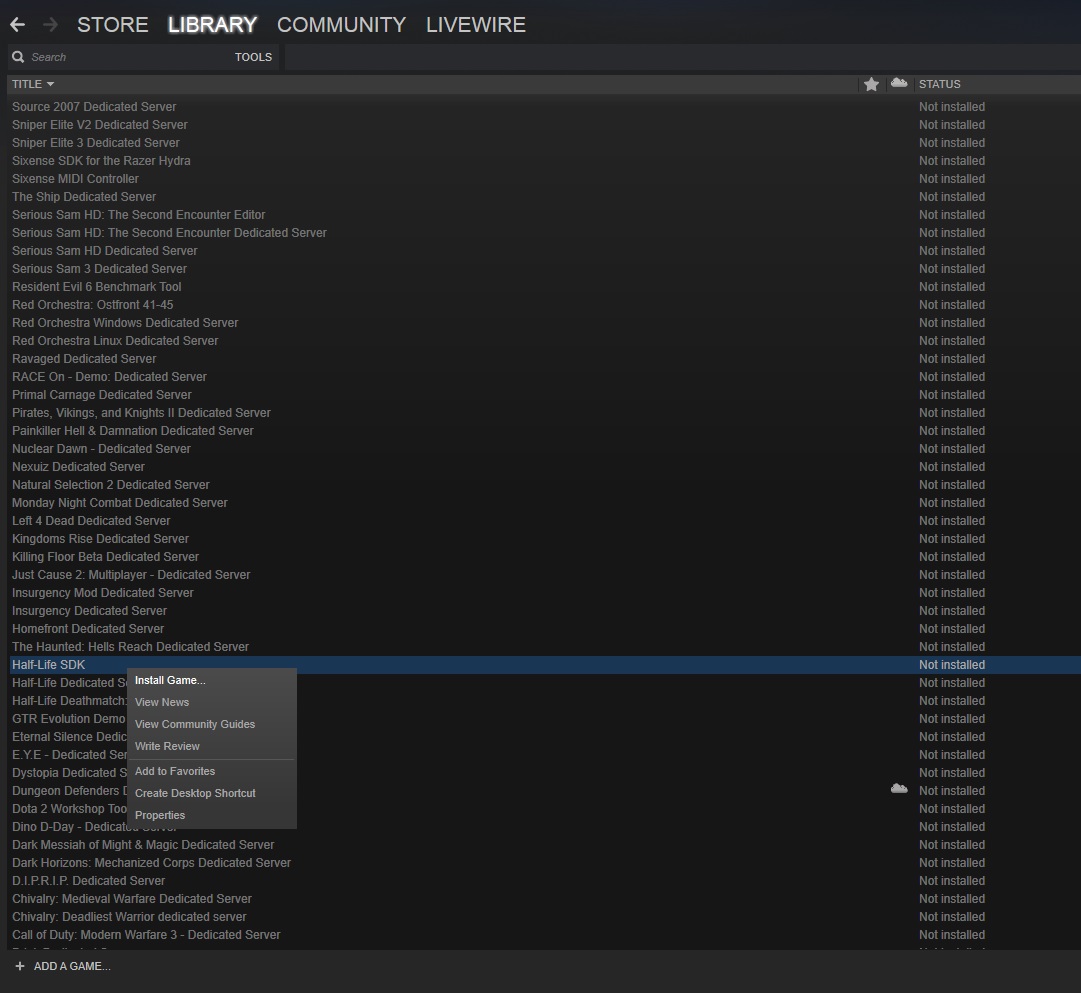
Mouse over the Libary tab, and click on tools.
Find “Half-life SDK” right click and install.
Depending on your connection this might take a while to download.
The sdk tools are old so you will need to download the newer versions.
Download Hammer 3.5 from here
[link]Download the new FGD fromm here
[link]Download either the 32 or 64 bit version of the compilers, if your not sure use the 32 bit version.
Windows 32 bit compiler.
[link]
Windows 64 bit compiler
[link]
Updating the SDK tools
Once the `Half-life SDK` has downloaded we need to update these tools.
The new version of hammer renders models which makes it easy to add and position models in our maps.
First replace the old hammer editor with a new version.
- Open folder C:Program Files (x86)SteamSteamAppscommonHalf-Life SDKHammer Editor
- rename hammer.exe to hammer-34.exe
- Open hammer_testbuild04.zip and extract the new version of hammer to the folder.
For the models to show in hammer we need to use a new FGD.
- Place the halflife-35.fgd file to the following folder.
- C:Program Files (x86)SteamsteamappscommonHalf-Life SDKHammer Editorfgdhalf-life
The sdk compilers are very old and as these do all the hard work we need to update them. we will be using Zhlt because they are much easier to use.
- Open the folder C:Program Files (x86)SteamSteamAppscommonHalf-Life SDKHammer Editor
- Add a new directory called ZHLT
- Extract the compilers to the ZHLT folder.
Setting up Hammers Game configurations menu
These settings are for 64 bit, you will need to adjust them for 32bit windows
Start hammer either by making a shourt cut to the hammer.exe or double clicking Half-life SDK in your steam libary tab.
Hammer will ask if you need help setting it up, click no.
You should now have the main settings menu for hammer, click the Game configurations tab
- Press the top Edit button, next to the Configuration
- Click Add and type half-life zhlt
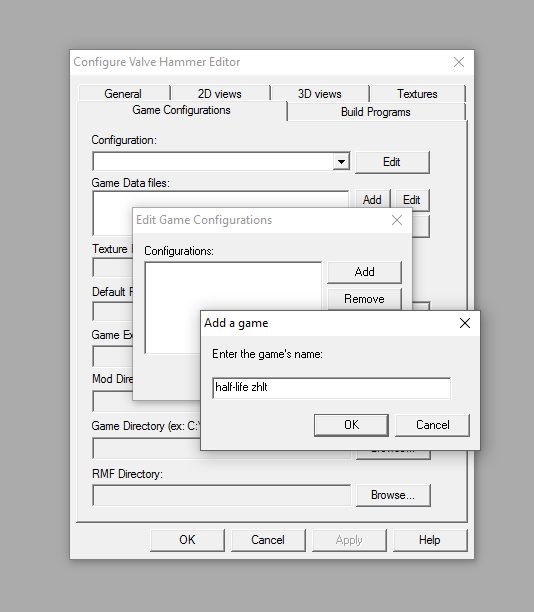
- Click ok, and then click close
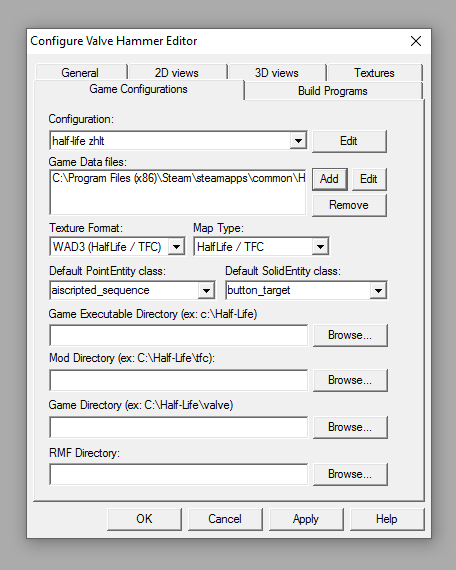
- Click the Add button next to Game Data files
- Select halflife-35.fgd from the folder:-
C:Program Files (x86)SteamsteamappscommonHalf-Life SDKHammer Editorfgdhalf-life
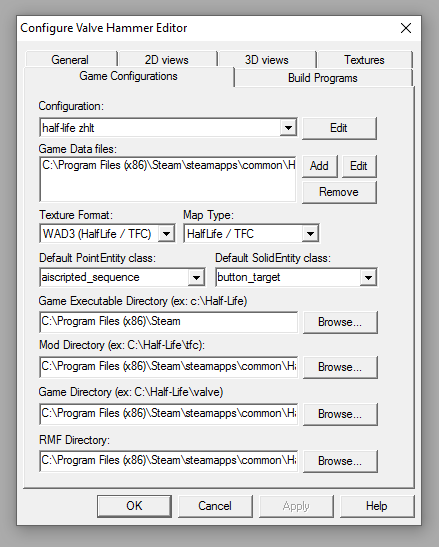
- Set Game Executable Directory C:Program Files (x86)Steam
- Set Mod directory to C:Program Files (x86)SteamSteamAppscommonHalf-Life
- set Game directory to C:Program Files (x86)SteamSteamAppscommonHalf-Life
- set Rmf directory to C:Program Files (x86)SteamSteamAppscommonHalf-Life SDKMap Files
- Click Apply button
Setting up Hammers Build Programs
These settings are for 64 bit, you will need to adjust them for 32bit windows
Click the Build Programs tab
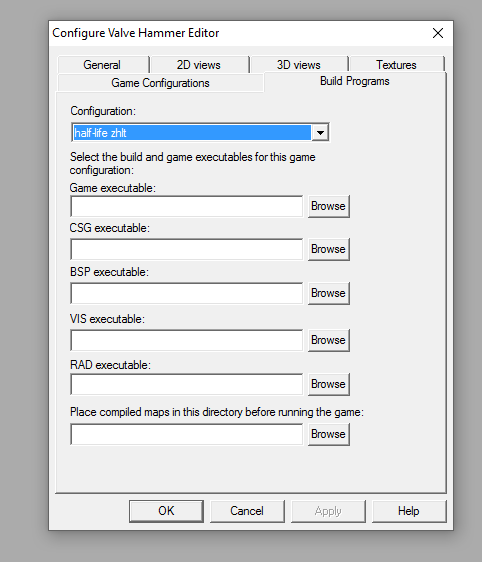
Make sure configuration is set to half-life zhlt
In Game executable type
steam.exe
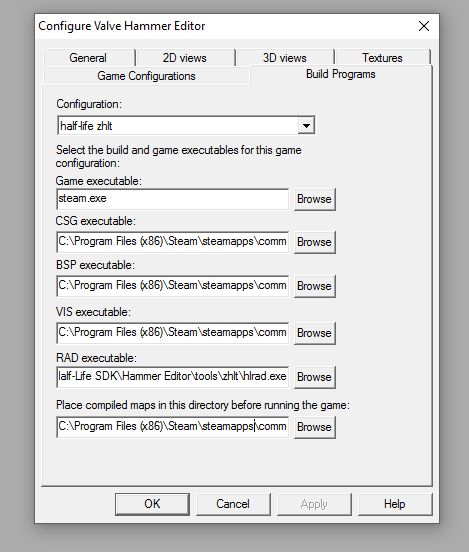
Use the following paths for 64bit windows.
Set Csg executable to:-
C:Program Files (x86)SteamsteamappscommonHalf-Life SDKHammer Editortoolszhlthlcsg.exe
Set Bsp executable to:-
C:Program Files (x86)SteamsteamappscommonHalf-Life SDKHammer Editortoolszhlthlbsp.exe
Set Vis executable to:-
C:Program Files (x86)SteamsteamappscommonHalf-Life SDKHammer Editortoolszhlthlvis.exe
Set Rad executable to:-
C:Program Files (x86)SteamsteamappscommonHalf-Life SDKHammer Editortoolszhlthlrad.exe
Set Place compiled maps to:-
C:Program Files (x86)SteamsteamappscommonHalf-Lifevalve_downloadsmaps
(valve_downloadsmaps folder will not exist unless you have played online, so either create them or set above to C:Program Files (x86)SteamsteamappscommonHalf-Lifevalvemaps )
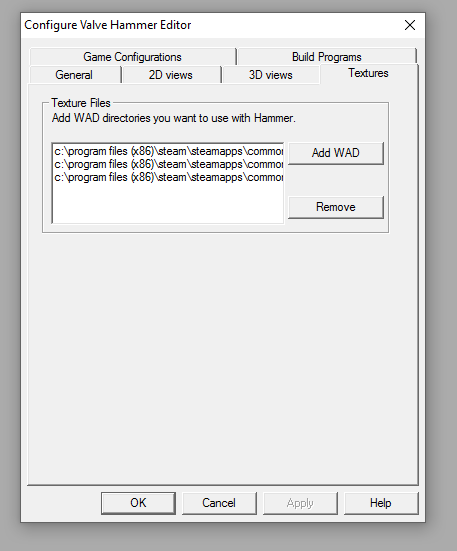
Set the textures
Before you start you need to add a few textures, we will just add a couple of common wads.
- Click the Textures tab
- Click Add wad
- Select halflife.wad and liquids.wad from this folder:-
C:Program Files (x86)SteamsteamappscommonHalf-Life SDKTexture Wad Files
- Click Apply, then OK
Load a map and test
Open the file menu (top left) and select open
Select c1a0.rmf from this folder:-
C:Program Files (x86)SteamsteamappscommonHalf-Life SDKMap Files
Save it as test.rmf
Click the compile button
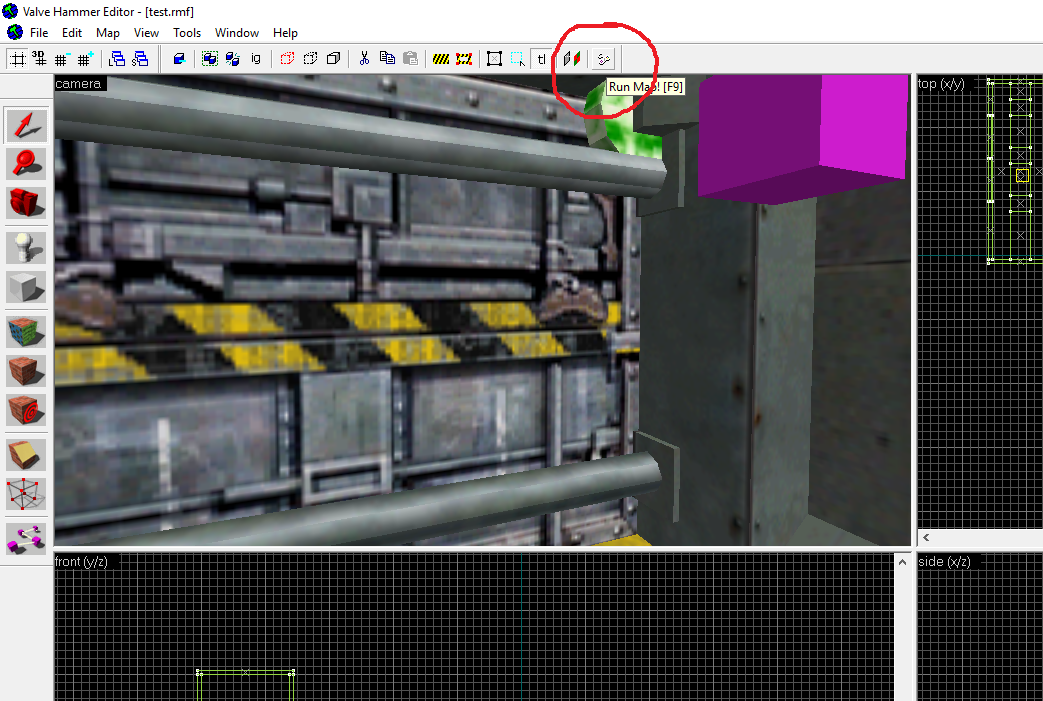
If your menu looks different to the pic click the expert button
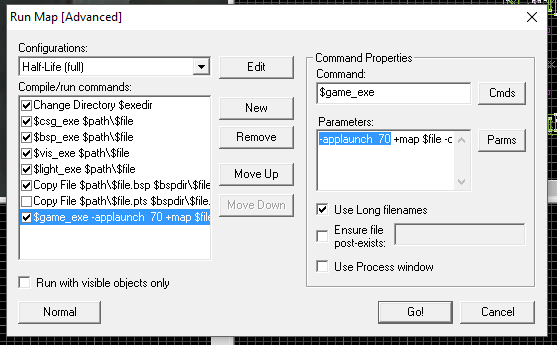
Highlight the $game_exe in the compile/run options and paste this into the Parameters box
-applaunch 70 +map $file -dev -console
Click Go
Your map should now start compiling(this might take a few mins), if everything is setup right half-life should open with your map.
Don`t worry if the map stops when you run though the corridor, it would work fine if we renamed it c1a0.bsp and placed it in C:Program Files (x86)SteamsteamappscommonHalf-Lifevalvemaps.