
Overview
How to create custom sprays/decals.
How to Create a Custom Spray/Decal.
Ever been in a server and seen someone that had a custom spray and thought to yourself that would be cool to do? Well today is your day and it is not as hard as you think. It used to be that you had to use a program called Wally[stu-pidaso.net] in order to make a spray. Don’t get me wrong, Wally is a very useful program that you can use for making textures in Half-Life but you also needed to figure out an image size. The image size had to be divisable by 16 pixels with a maximim of 10752. This means you would have to edit the picture you want to use first and get it to a size that wally could work with such as 16 x 16, 32 x 16, 64 x 32, 128 x 64, etc. After that you would then need to make anything was going to be transparent the color blue with a value of 255. Sound confusing? Don’t worry because we will not be using Wally but HlTagConverter[stu-pidaso.net] which makes the process easier by automatically sizing the image and helps you get the blue in the right areas.
The first thing you need to do is download HlTagConverter. After you get HlTagConverter, extract the files and run the HlTagConverter executable. The following window will open up.

Click on the Open Image button as indicated above and locate the image you want to turn into a spray/decal. For this instance I found a picture of a grunt.
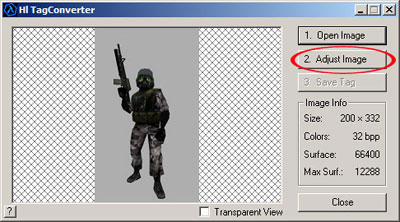
Once you see the image has loaded click on the Adjust Image button and you will see the Adjust Image menu come up as seen below. Once open click on the button that says This tool will allow you to make a specific color transparent.

You will now have a wand that will let you click on the gray area around the grunt thus turning it into the needed blue color. Be sure to click on small areas near the edges as indicated by the arrows in the below picture. Anything that turns this shade of blue will not be visible in game.

After getting in good and close your image will look like this.

When done making the desired ares blue, click on the button that says Apply changes and convert to 256 colors.

Now click on the Save Tag button.

You will see the Dialog box open. Select Export to WAD file and click on OK.

Locate your Valve folder in the Save As window and name the file tempdecal. Click the Save button to the right and your ready to check out your new custom spray.

Go to a server or create one from your in game menu. Go up to a wall and press the key you have set to spray your decal. Below is a screenshot of our finished result.

Remember to be respectful and not use any images that may be offensive to others.
More of my tutorials can be found at [link]