
Overview
This will show you how to change your crosshairs.
How to change your crosshairs.
Using custom crosshairs can help your game a lot over using the default ones. There are plenty out there to choose from and are pretty simple to install. First you will need to choose which ones you want to try. Head to the crosshairs download section[stu-pidaso.net] of my site and look at each one clicking on crosshairs 1, 2, and so on to see which ones you want to try. Once you have decided which ones you want click on the download link. The file you have downloaded will be in a zip format so you will need to extract the crosshairs with the unzip built into Windows or use an alternative like I do such as 7-zip[www.7-zip.org]. I use 7 zip because it works faster and can uncompress other files such as RAR format also. You will find a sprite file named crosshairs.spr. Navigate to your installation of Half-Life which is typically “C:Program FilesSteamsteamappsaccount_namehalf-lifevalve” and find the folder named “sprites”.
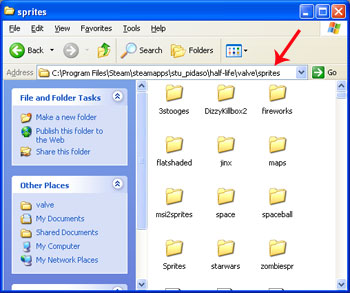
If there is not a folder named sprites, create one. Take the crosshairs.spr file and place in the sprite folder and check out your new crosshairs. If you decide you want to change them, follow the same procedure and replace the crosshairs.spr file. If you want to go back to the original crosshairs, simply delete the crosshairs.spr file from your sprites folder and all should be back to normal. Below is picture of before and after.
Before

After
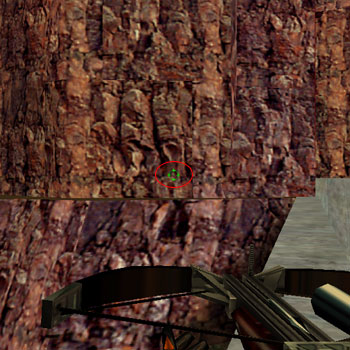
As you can see the default crosshairs are nearly impossible to see sometimes. Hope this helps improve your game somewhat (but not too much)! 😉
More of my tutorials can be found at [link]