Overview
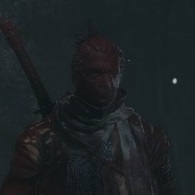
A look at the AI of the Headless Ape fight. This will not be a quick/easy win guide but hopefully a step towards understanding and overcoming the boss on your own.
Phase One
The first phase is not the central concern of this fight. Any experience with Phase Two of the Guardian Ape fight applies almost if not entirely one-to-one here. But, in the interest of being slightly robust: here are some details.
Useful tools: Loaded Spear (any variant): When you deflect him repeatedly resulting in him being downed, you can use the loaded spear’s second hit on his neck-hole to deal massive damage to his vitality and posture by pulling out his controlling centipede.
Iron Fortress (The Umbrella/any variant): When he screams you can simply pull out this bad boy and be completely safe from the scream’s effects. Not necessary as fleeing with decent timing is usually just as good but if your priority is keeping close or you don’t react in time to get away, it can be helpful.
Standard patterns to the AI: this phase doesn’t have super hard and fast rules as to which moves it will do but the general pattern it follows is to do an attack chain to completion, scream, and return to that. At arms reach he tends to do very standard sword attack chains (his swings or thrusts); if you’re to his sides or just too close he is more likely to do his erratic swipe and spinning attack chains. If you’re a good distance from him he may do his lazy dive swipe that is very easy to dodge by simply walking to the right and is very open to a few punishing blows.
Personal tips: This phase can be fought in many ways but deflecting him is a very potent as repeated deflects in his chains will lead to him being in a downed state and vulnerable to many standard attacks as punishment.
Phase Two
The real meat and potatoes of this guide and the main reason this fight can be unbearable for many. The Headless Ape calls in his mate and things tend to get hairy.
Useful tools: see Phase One. Additionally: Firecrackers: They are exceptional at doing stagger damage to the Ape’s mate.
Standard AI: This fight is not 2v1 in the standard Fromsoft fashion. These two apes actually operate with an overarching controlled UI. In general only one Ape will be the “dominant” one. This is usually the original Headless Ape. Provided you do not get too close to the additional ape (usually you need to get VERY close and/or be attacking her to break this rule) it will not attack until it is given a trigger from the main one.
These triggers include:
- Being downed by a deflection chain: the second ape will then perform a large leaping smash. This can be deflected, dodged, or avoided by running perpendicular to it’s trajectory.
- Performing a perilous sweep mid attack chain: the second ape will attack once. Usually closing distance and doing her standard lifting swipe but, if extremely distant, it is possible she may perform the leap smash.
- His lazy diving swipe: His super easy to dodge and punish attack now punishes you by having her come in and perform a single attack. She prefers her usual single upward swipe but keep your eyes open for a leap smash.
- His leaping perilous sweep: She will move to perform a single attack (again the lifting swipe primarily but possibly the leap if deemed too far away) after the sweep and before he performs his big followup slam. A deflected slam will then also provoke her leaping as mentioned above.
Whenever she is triggered I strongly advise that you move towards her to trigger the attack (and just move away from her as it’s triggered to avoid it entirely) as soon as possible to hopefully proc her upward swipe and to give you more time to punish instead of risking her actually being delayed enough to overlap an attack with the original.
Another key detail is that this dynamic is interrupted any time he screams. When he screams he essentially gives her an attack order and makes her the primary combatant. He will largely retreat and/or just stand back while she acts. He will sometimes scream some more while secondary.
She will charge at you and perform her one and only attack chain of five moves. Afterwards she will perform a retreating strike to get away from you (she will move towards you to make it likely to hit, though). If she is staggered or completes her retreating strike, she returns the role of primary combatant to the Headless Ape. The Headless Ape can scream while being secondary and give her another attack order and extend her time as primary combatant.
Why Even This Guide?
This fight, particularly once phase two hits, can be very very intimidating. The camera can also be very unfriendly especially if you’re constantly worried about what each ape is doing and you’re trying to keep them both in sight.
If people know how the fight actually works and can be confident in knowing that the second target actually isn’t a threat (until appropriately triggered/swapped to) they will hopefully be able to control the flow of the fight and their positioning more easily and not be bogged down by fighting to keep both enemies on camera.
This will (again, hopefully) allow people to learn the fight, if they’re so inclined, instead of trying to rely on bugging out the second ape or instantly deleting it with massive amounts of fireworks.
Also: I spent quite a long time fighting them on a no attack/vitality enhancement/no prosthetics run and I am overly eager to share some revelations that I eventually had to figure out. This might be old news to many but… Eh.

