Overview
Part three of an in-detail guide at FtD building. This series of guides aims to get players who know the fundamental mechanics of the game into building detailed and quality crafts that are both effective and polished. This section covers the basics of building an effective APS cannon. We go over almost everything outside of railguns.
Introduction
Advanced cannons are cheap, scaleable, and highly effective weapons capable of several different roles. They can function everything from large caliber main battery weapons to small caliber AA guns. At first, they are complex and daunting, but once you get the hang of how they work, its a rewarding and fun process to create. You don’t actually need any background for this section, we cover almost everything from top to bottom.
The only answers you need to have are:
-How big is my APS going to be?
-What does it need to accomplish?
What Type of Gun?
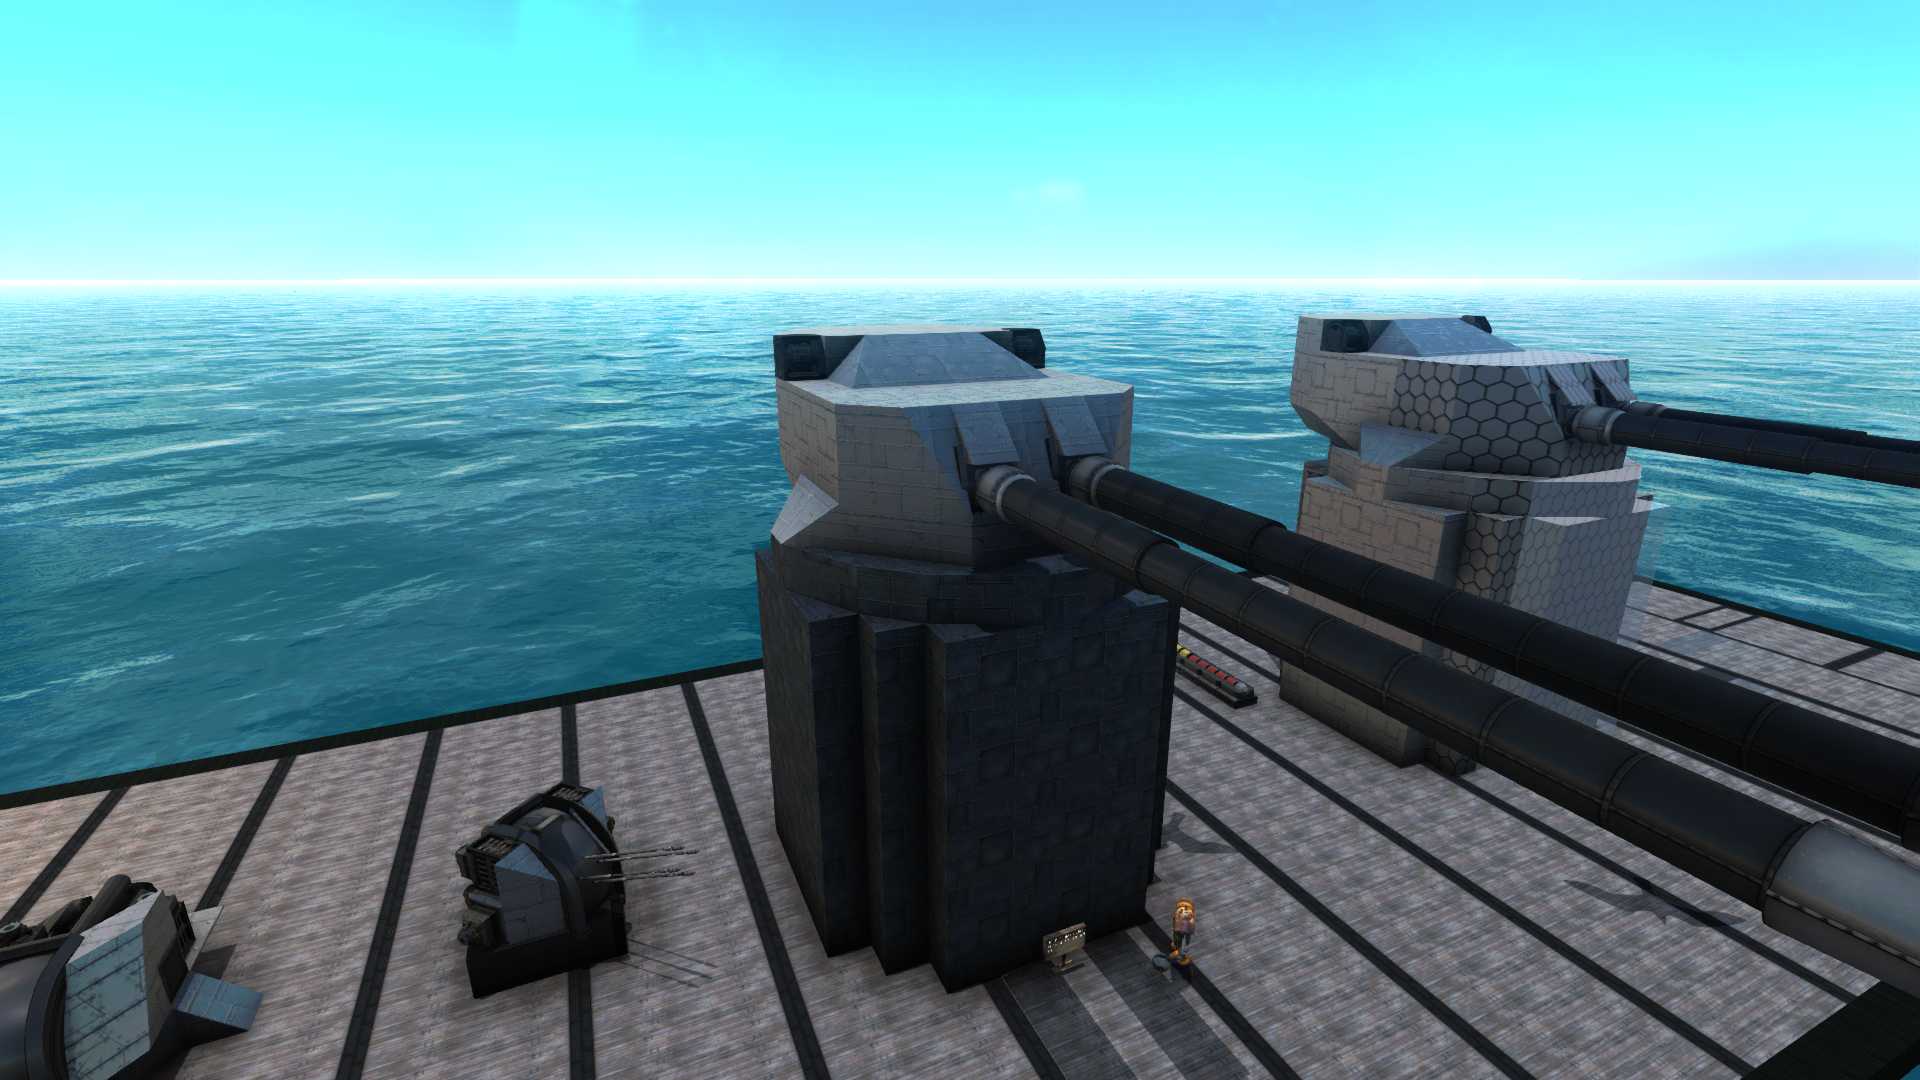
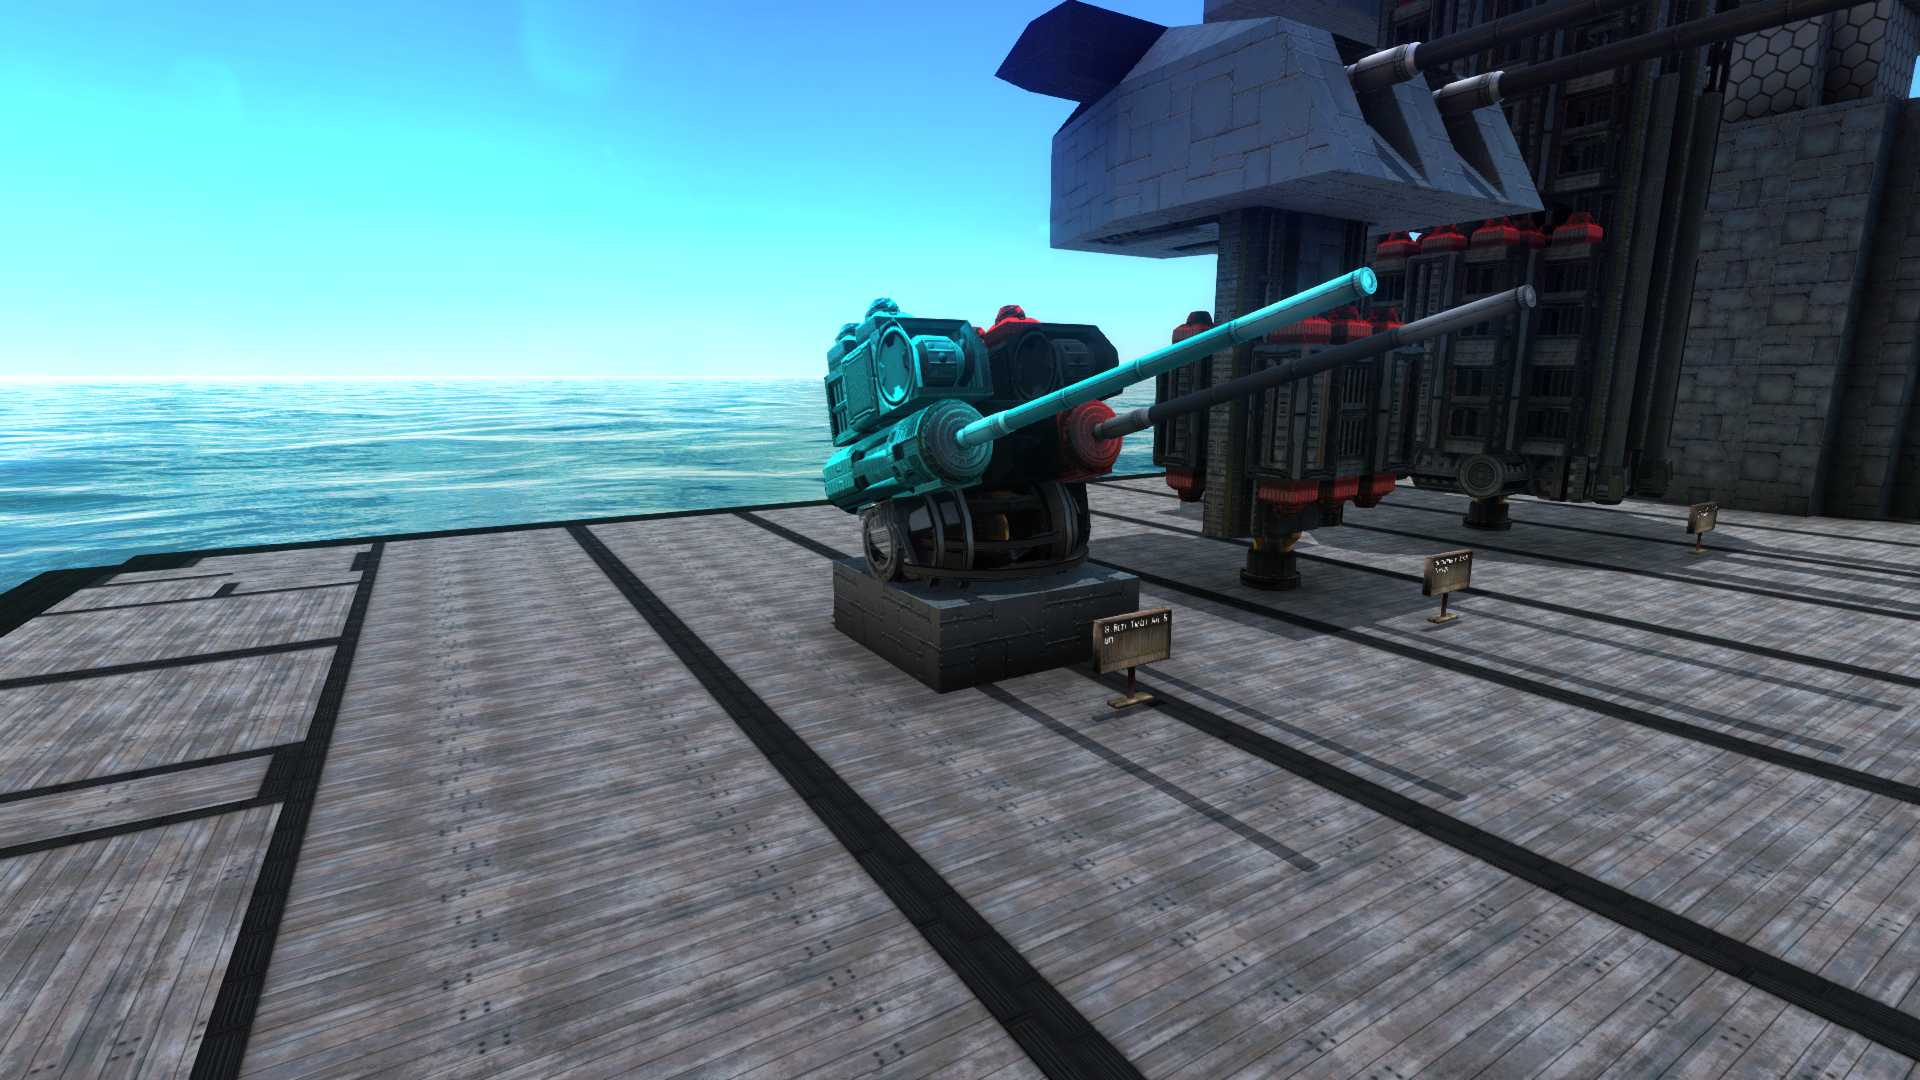
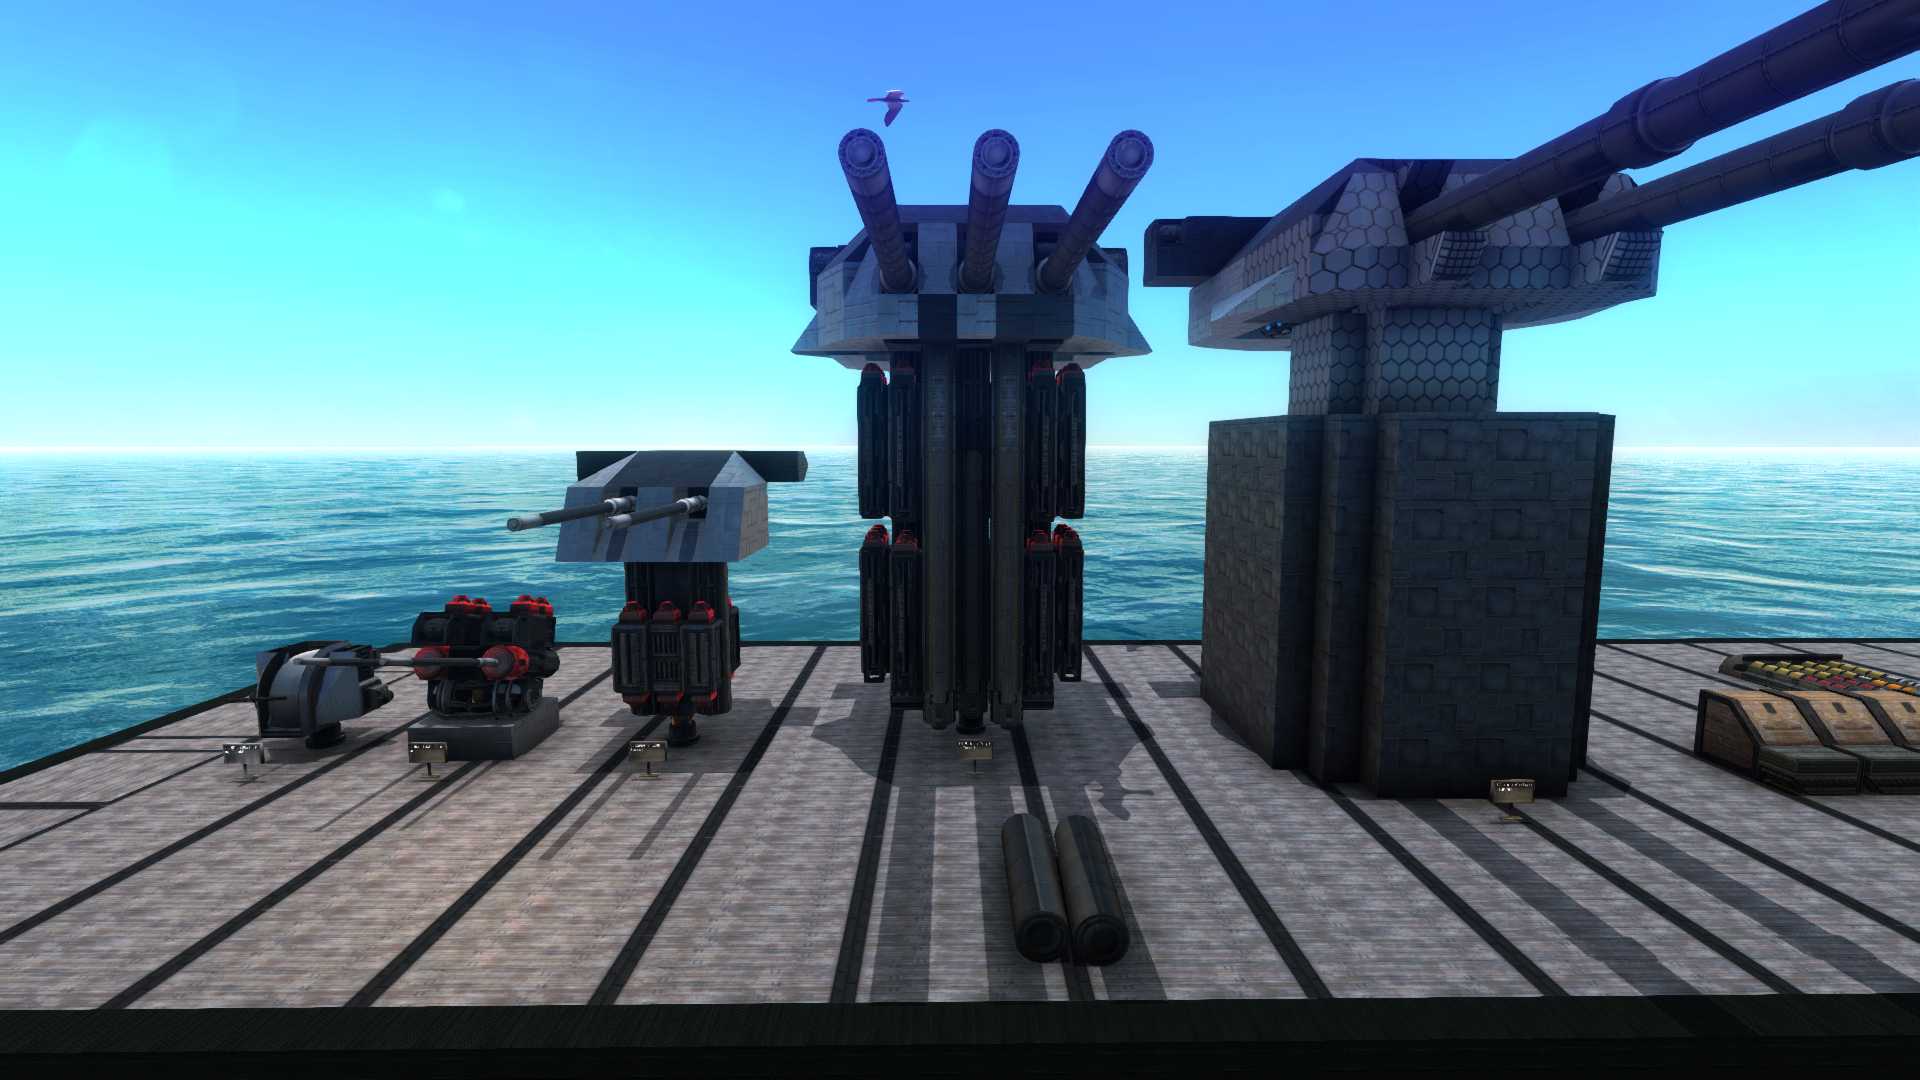
First, lets look at a few different types of APS.
In this screenshot we have:
– Small caliber AA guns on a dual mount
– Medium caliber dual turret
– Large caliber triple turret
– Large caliber dual railgun turret
They all take up different amounts of space and do different things. For example, the smallest one is designed to be compact, numerous, and reasonably powerful for a weapon of it’s size. Both of the large turrets are designed for a main battery (the primary armament) and have large, dedicated mounting points in the hull. The difference between these two is that one requires a “barbette”, or a large, armored, hollow cylinder that houses the internals of the APS. The other is self contained and needs a large amount of space around it that allows it to rotate (there are ups and downs to each approach).
If you still don’t know what you want at this point, I’ll give some advice and tips:
– If you have a large hull and can spare the space, large, armored, APS systems are typically what you are looking for.
– Decently large spots in the hull between main batteries, open spaces in the superstructure, and open deck space are good places for secondary weapons (29.3cm – 12cm). These pieces are often rapid fire, but have a good punch for their size (better than a dedicated AA for example). Historically, these tended to be for use against small craft like torpedo boats, destroyers, and aircraft. Instead of building these systems to try and match your primaries, you can build several smaller low investment turrets and succeed through breadth of fire.
– Empty superstructure space with open fields of fire provide the best places to put down AA guns. The same rules as secondaries apply here, you can either build them up to be effective individually, or place low cost pieces en-mass for better 360 coverage.
You should keep all these things in mind when you lay out your ship, because the dimensions of the APS will need to fit with whatever you are building. For the purposes of this guide, we will be constructing all three types of APS for a theoretical battleship. We want a main battery, secondary guns with AA use, and small caliber AA guns.
Small Caliber APS (Part I)
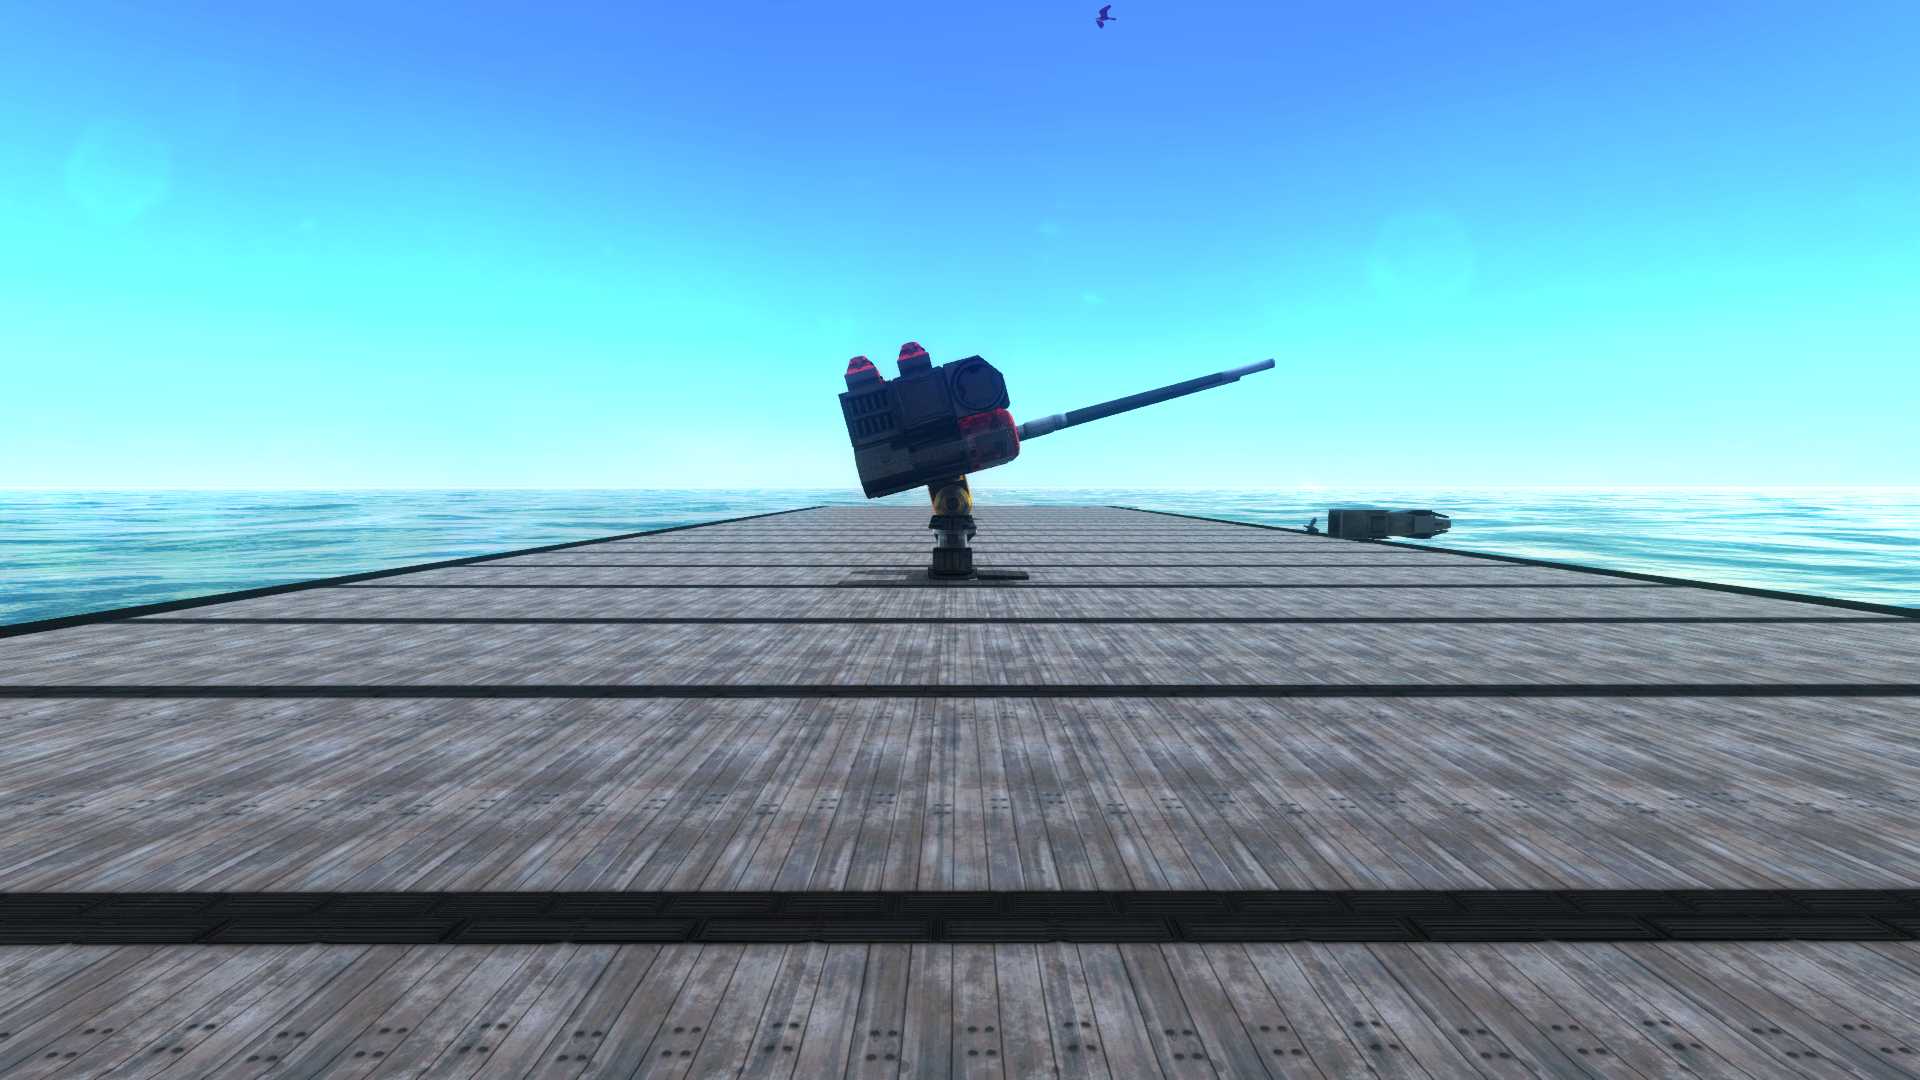
Lets have a look at an AA gun in action:
Although it appears complex, 80% of this piece is just decoration. The “meat” of the gun can be seen when we take that all off.


The mechanical elements of this mount are:
– APS piece with single cooler, and gauge increaser
– Magazine with autoloader and inputs
– Turret rotator
– Turret elevator
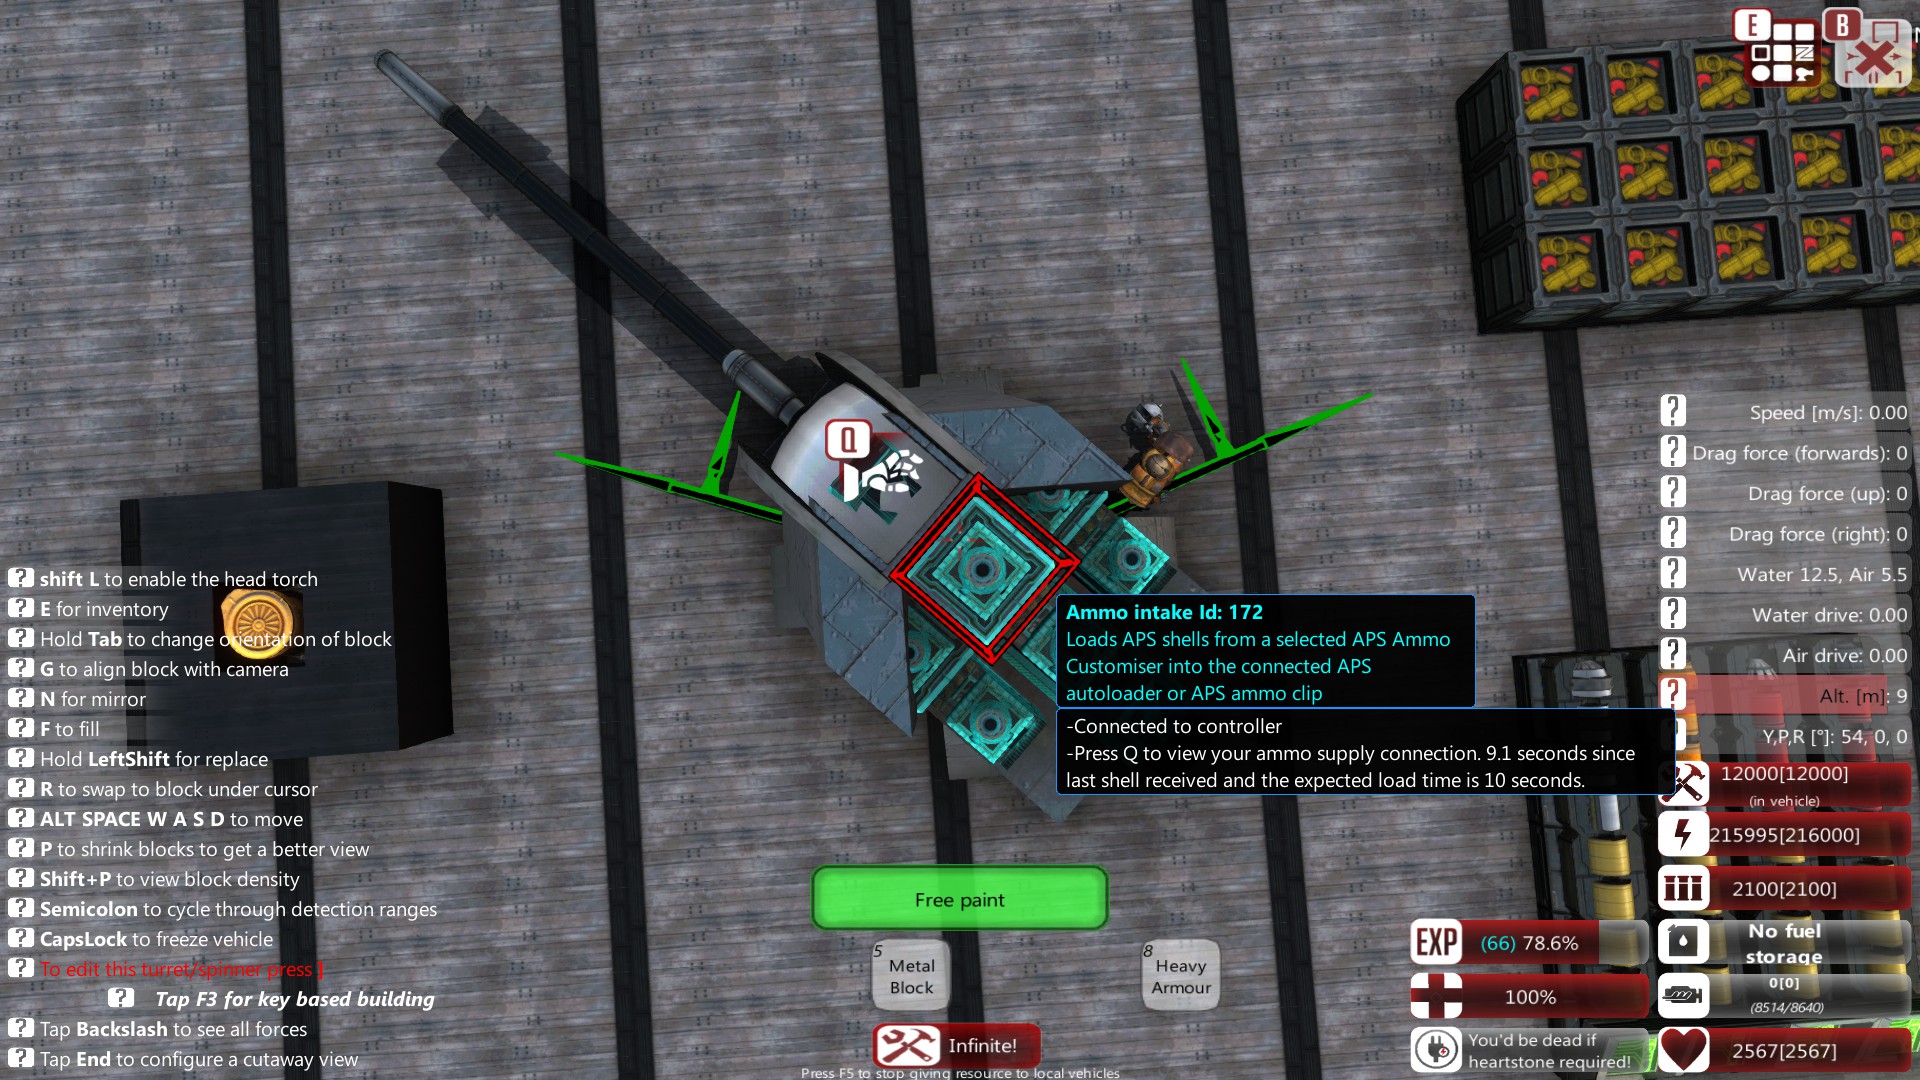
The way APS works, is that a firing piece is connected to a magazine/autoloader via gauge coolers and increasers. There is also an ammo selector that allows us to customize the ammo. Once the gun is assembled (all of those parts connected), we use the input selection GUI to select ammo and shoot.
Keep in mind, there are endless ways to make an above deck mount, but these are the ways I find most effective.
You can either make:
– A hull mounting point (in our case, a star shaped ring of metal to protect the turret piece).
– No mounting point and have no turret floor for the mount (In our picture, the black pieces are a part of the craft, not the turret subobject)


Let’s built the one with the mounting point first:
We start by building a gunshield and placing the APS firing piece. The objective of this build is to keep the piece compact, so we wont extending the rear of the gun past the star mount.


We add the barrels, in this case, its a small 6 meter barrel with one of the pieces using a bore evacuator (this will help the cooldown and increase ROF).
Keep in mind that a larger shell means you need a larger barrel. We don’t need to be that accurate, so the small length is not a huge deal for us.

We place a single gauge cooler and increaser followed by the autoloader/magazine and inputs. Since we are small caliber, we can use 1 meter pieces (larger calibers will require larger autoloaders). Notice how the orientation of the magazine is wrong in one screenshot, and how it is corrected in another (they need to be lined up on the same axis and plane).


Next, some decor. We use mimic blocks to add detail without extending the rear of the gun and mimiced plates to create the crew platforms.


Small Caliber APS (Part II)
Now we have to create the ammunition. For this, we use 4 of the dual controller pieces. We will also be creating other types of ammo, so I eventually lay down 3 copies.


Ammo creation can be complex and difficult to understand, but getting a basic shell isn’t actually that hard.


For our 8 piece shell:
(Top)
– Gunpowder
– Gunpowder
– Gunpowder
– Gunpowder
– Fuse
– Explosive
– Explosive
– Head
(Bottom)
Take a look at the bottom section of the GUI and what I have my cursor over. The important bits are the shell speed, barrel length required, shell rack needed, and effective range. You also need to move the slider to your caliber to get an accurate picture (12cm in our case). Keep the following in mind:
– A smaller shell needs less barrels, but is also less powerful
– A longer shell has a higher cooldown and lowers ROF (countered by gauge coolers)
– Higher muzzle velocities make it easier to hit a moving target
– A longer shell will have a longer effective range
Since we are building a small AA gun, we need to have medium range and cooldown. Our 8 piece shell does both of these, so we go with it. I also create 3 other shells with virtually the same characteristics. One of them is a frag AA shell (also with a fuse) and the other two are hollow point and squash head with no fuse (good for anti-surface use). All of them go around 330-40m/s and have an effective range of 2000 meters.


The characteristics of our gun. With a cooldown of 2.12, we have a good ROF, but we are being bottlenecked by our autoloader (later we switch this to a belt-fed system to speed it up).


After a bit of tweaking, we get to the 2.12 reload. We also use mimic blocks to move the autoloaders to the side of the gun without removing the details of the gunshield.


For firing restrictions, you need to set two angles which will be the limits of where the gun can aim. Horizontally, the green arrows must be pointing towards the center of the arc. Not pictured are vertical firing arcs, which work the same way, just with red arrows. Occasionally, you will not be able to get the arrows pointing in the correct direction, so in this case, you should use the “Flip Constraints” option (which flips the arrows to the other side of the arc).


With that being said, we now have the right restrictions on the gun (about a 140 degree field of fire).

If you are constructing a pure water boat, you will need to keep an eye on recoil. In order to keep it under control, use an appropriate amount of compensators to the recoil force indicated by the gun.


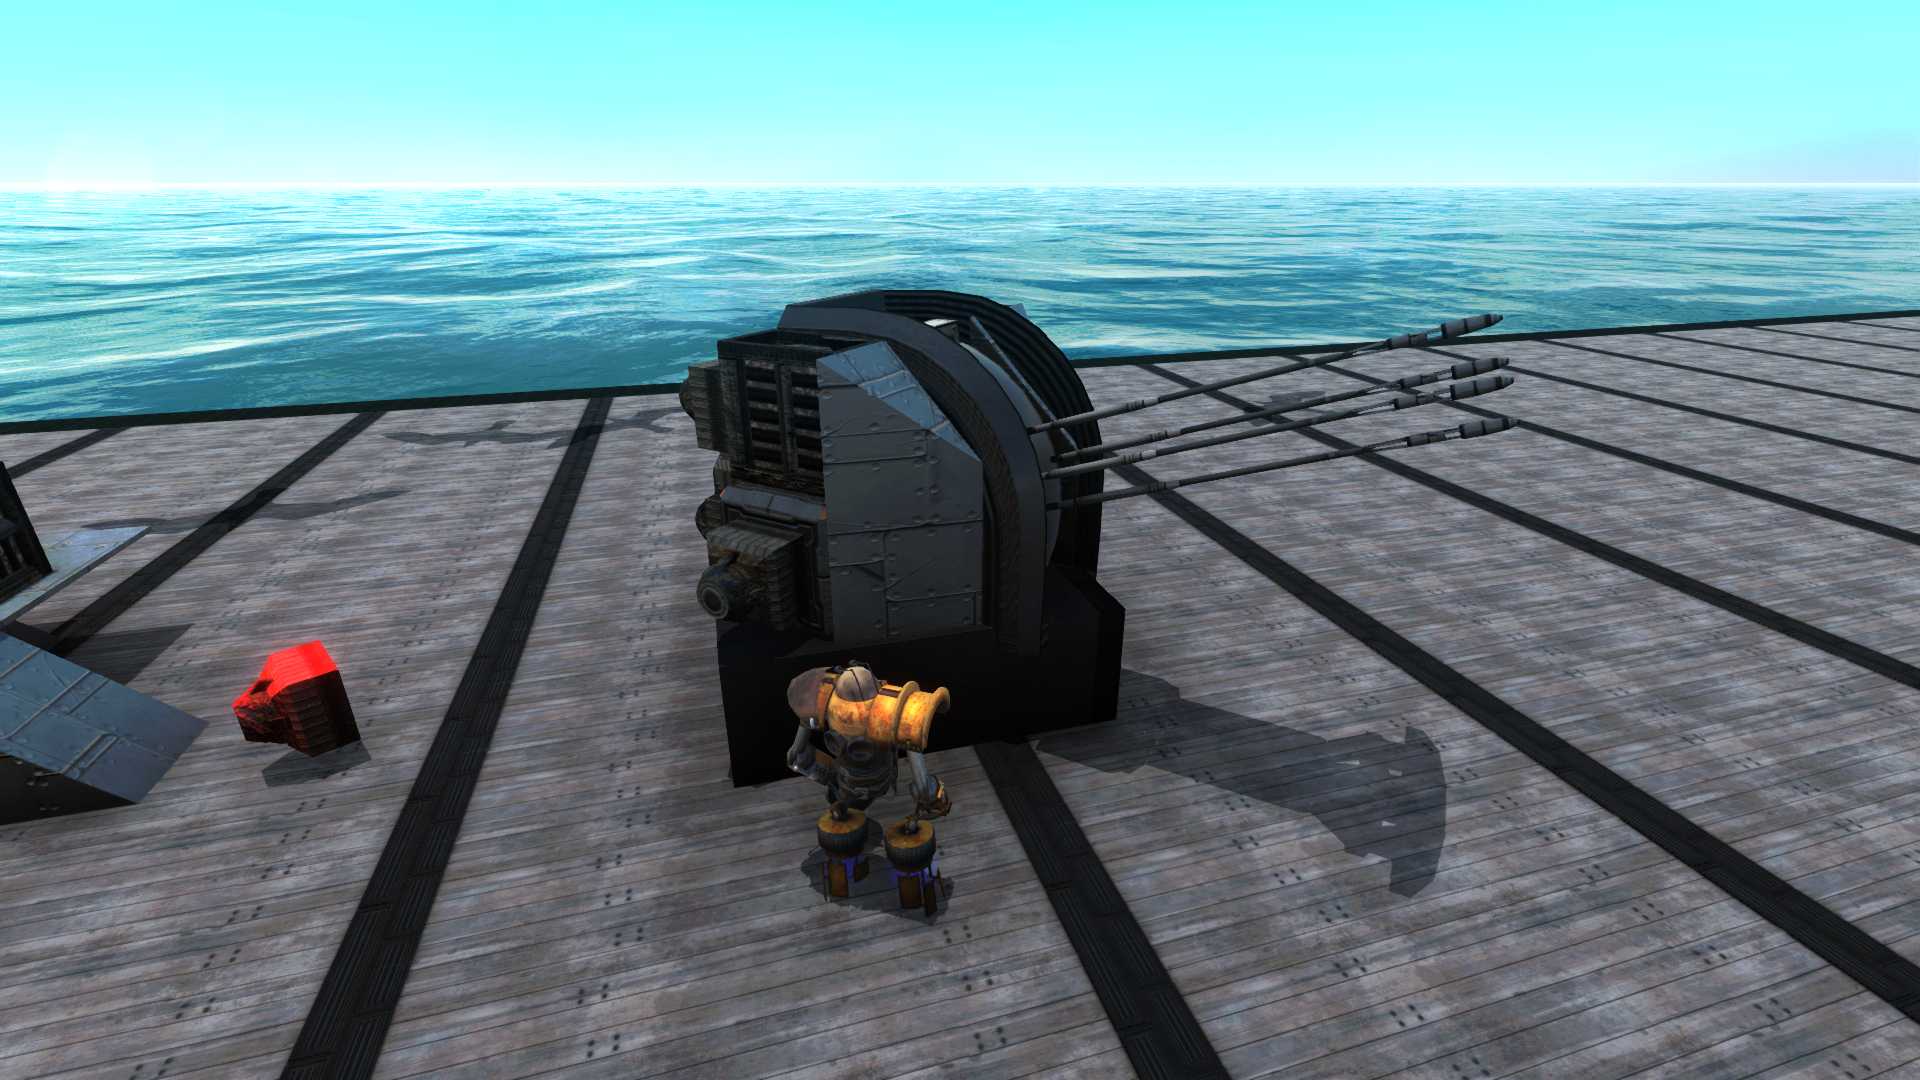
Now using the same process, we create a small 2.3cm quadruple gun firing the same frag shells we made earlier. The only difference is that this gun would require no mounting point, just a free 1m port on the hull or superstructure.

Now we shift our attention to larger guns.
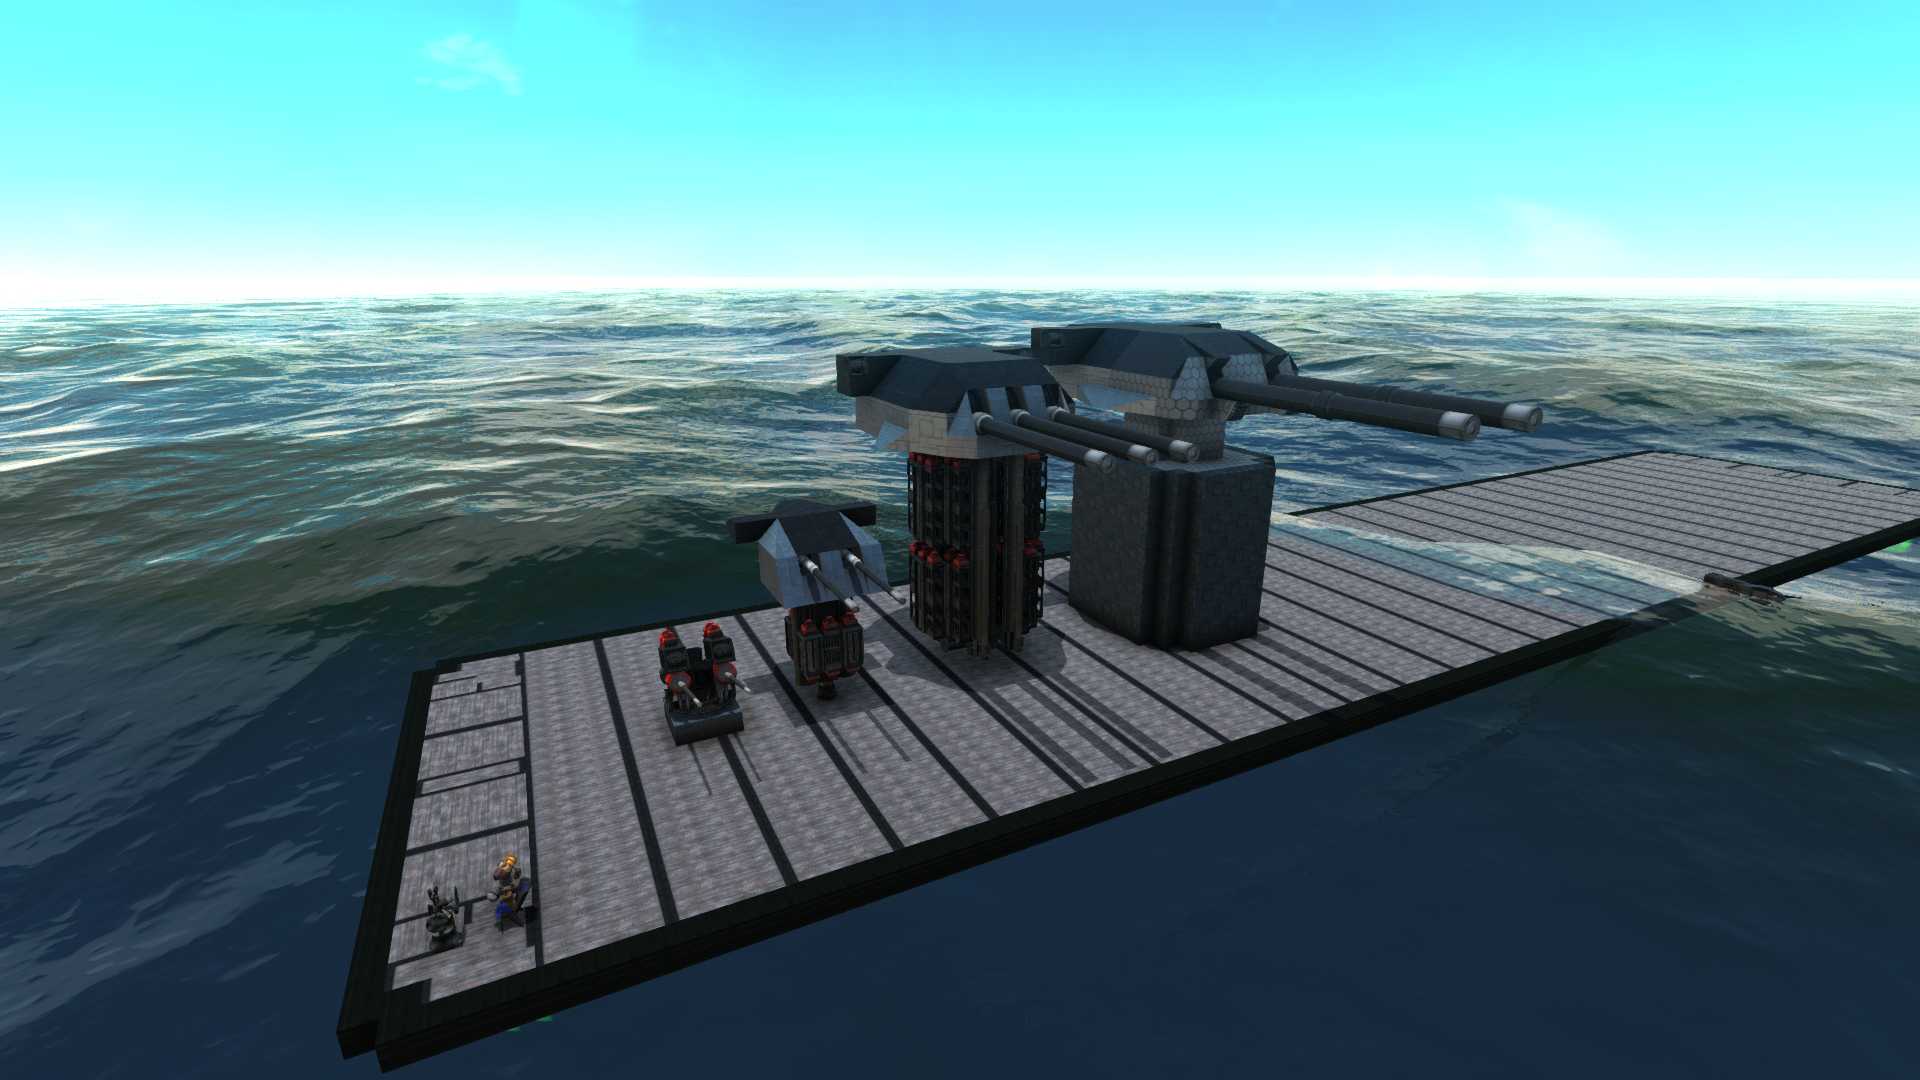
Large Caliber APS
Most large caliber APS will all share a common characteristic of having their internals either in the hull, in the turret itself, or a combination of both.
Of these three, we will be building a main battery turret in a barbette. Due to the way APS scale, this is entirely applicable at smaller calibers. Just scale your turrets and barbettes accordingly.
A comparison of a barbette on a light cruiser and a battleship. One obviously has more armor than another, but the same basic premise remains.


A cross section of the Steel Strider’s Thyr. The barbette armor is built directly onto the turret and rotates with it. Due to the way explosions work, this is actually a more reliable form of protection, but requires that you have a larger space available or the turrets will jam.

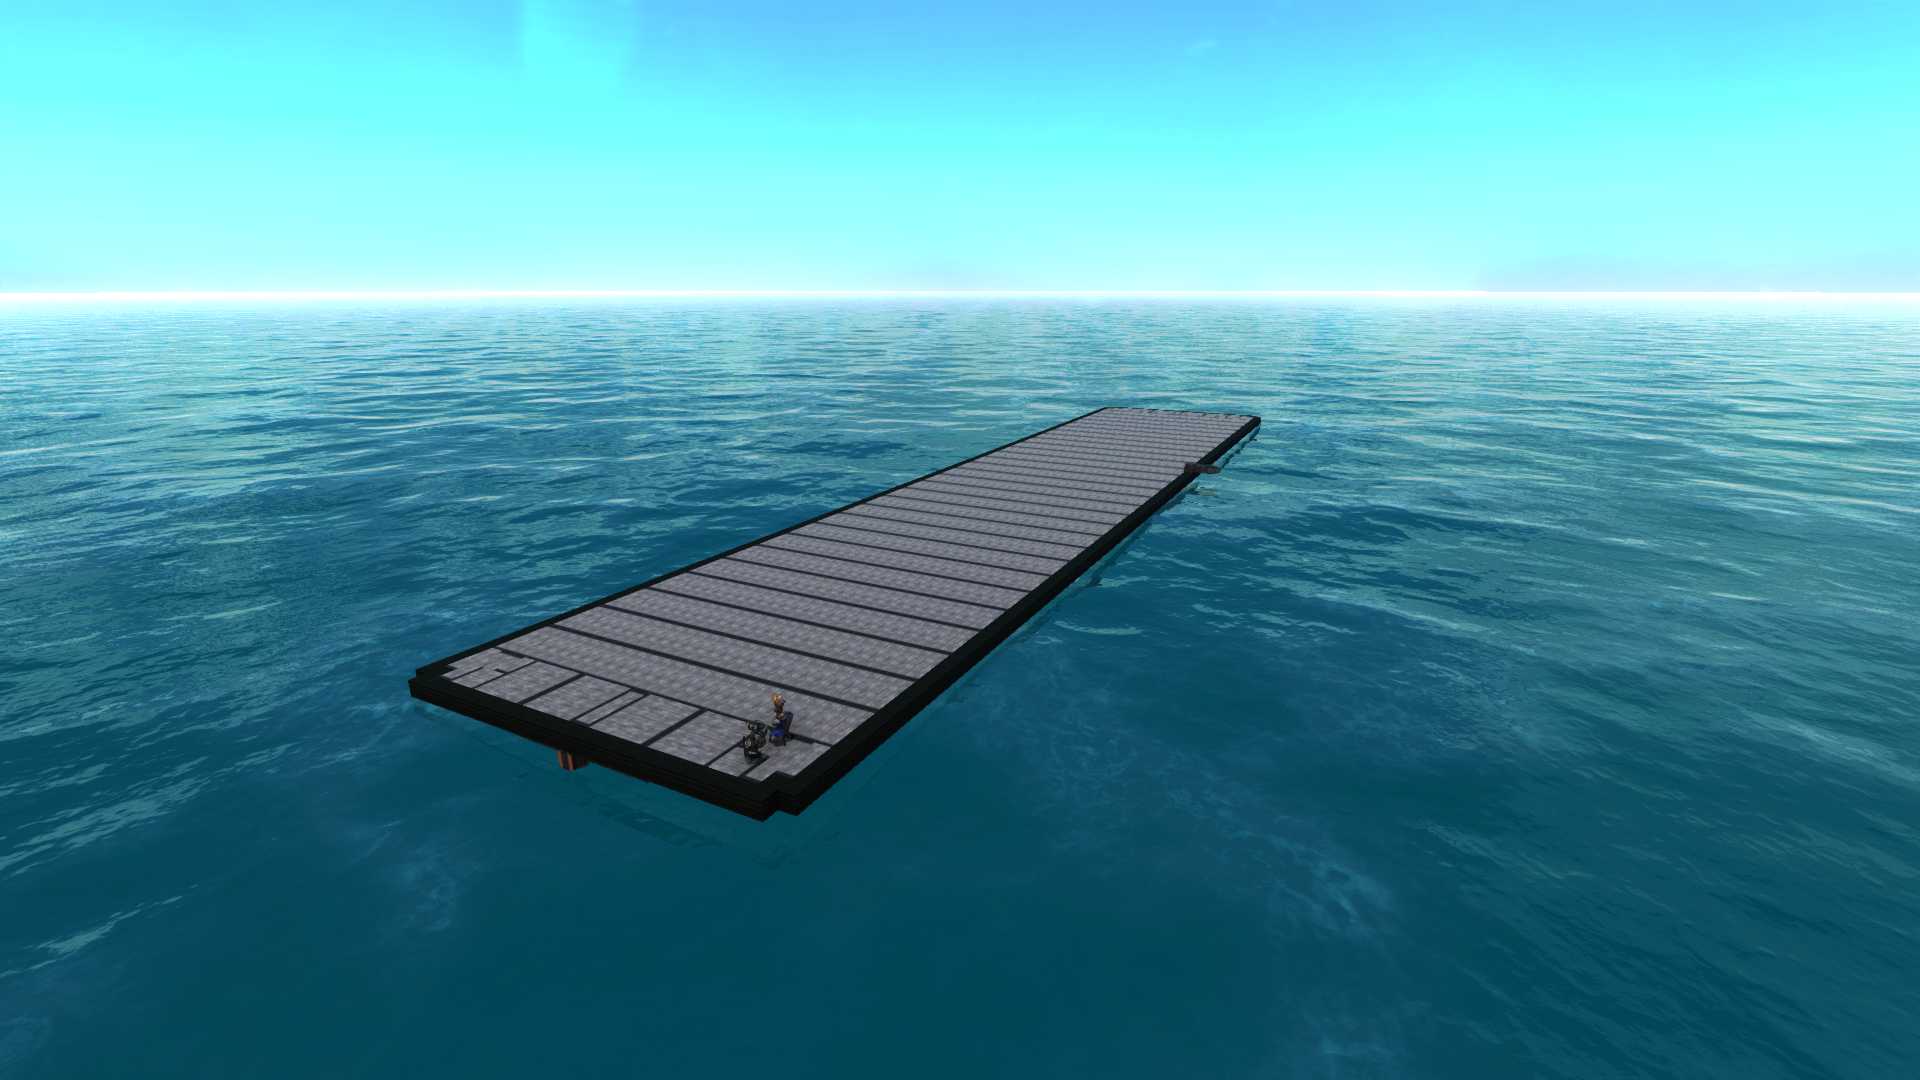
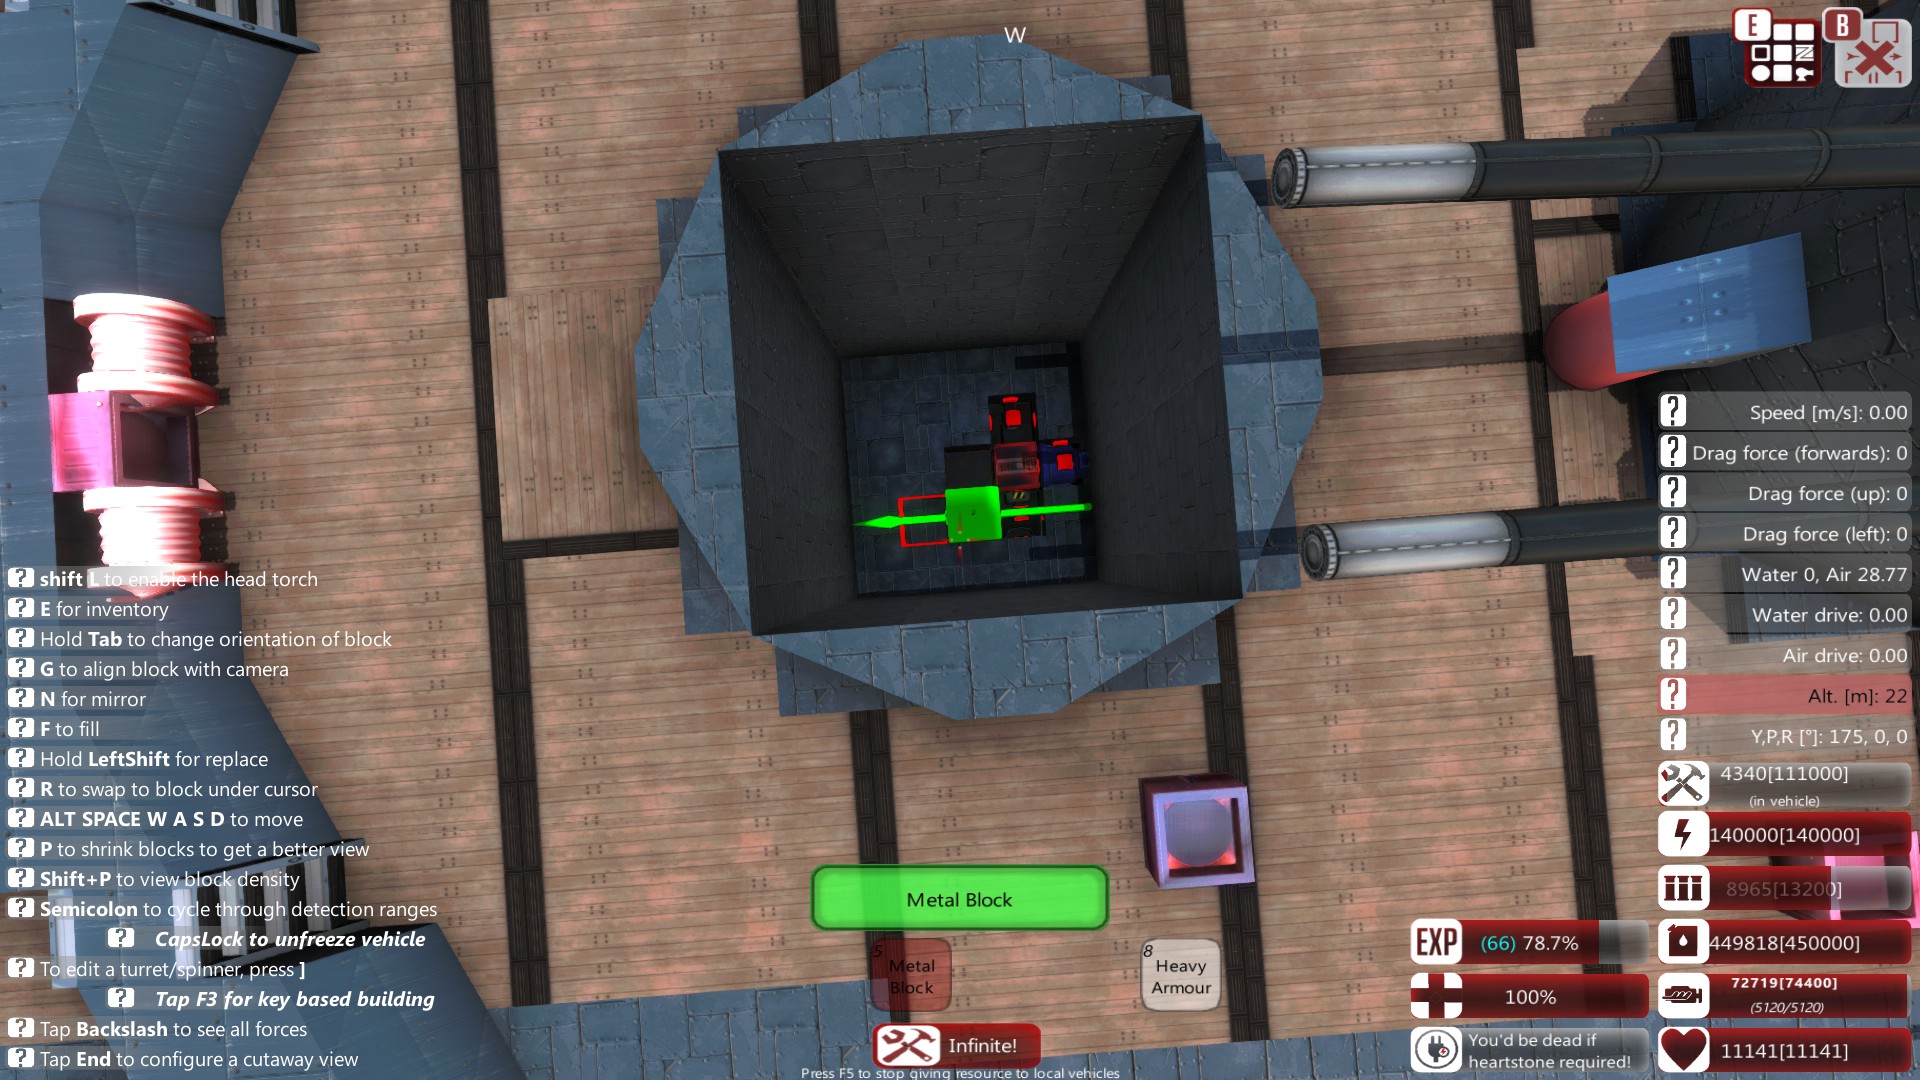
We’ll be using a 2m thick barbette for our hypothetical battleship gun. Its important to get the size and depth correct when building your vessel, otherwise the turret won’t fit.

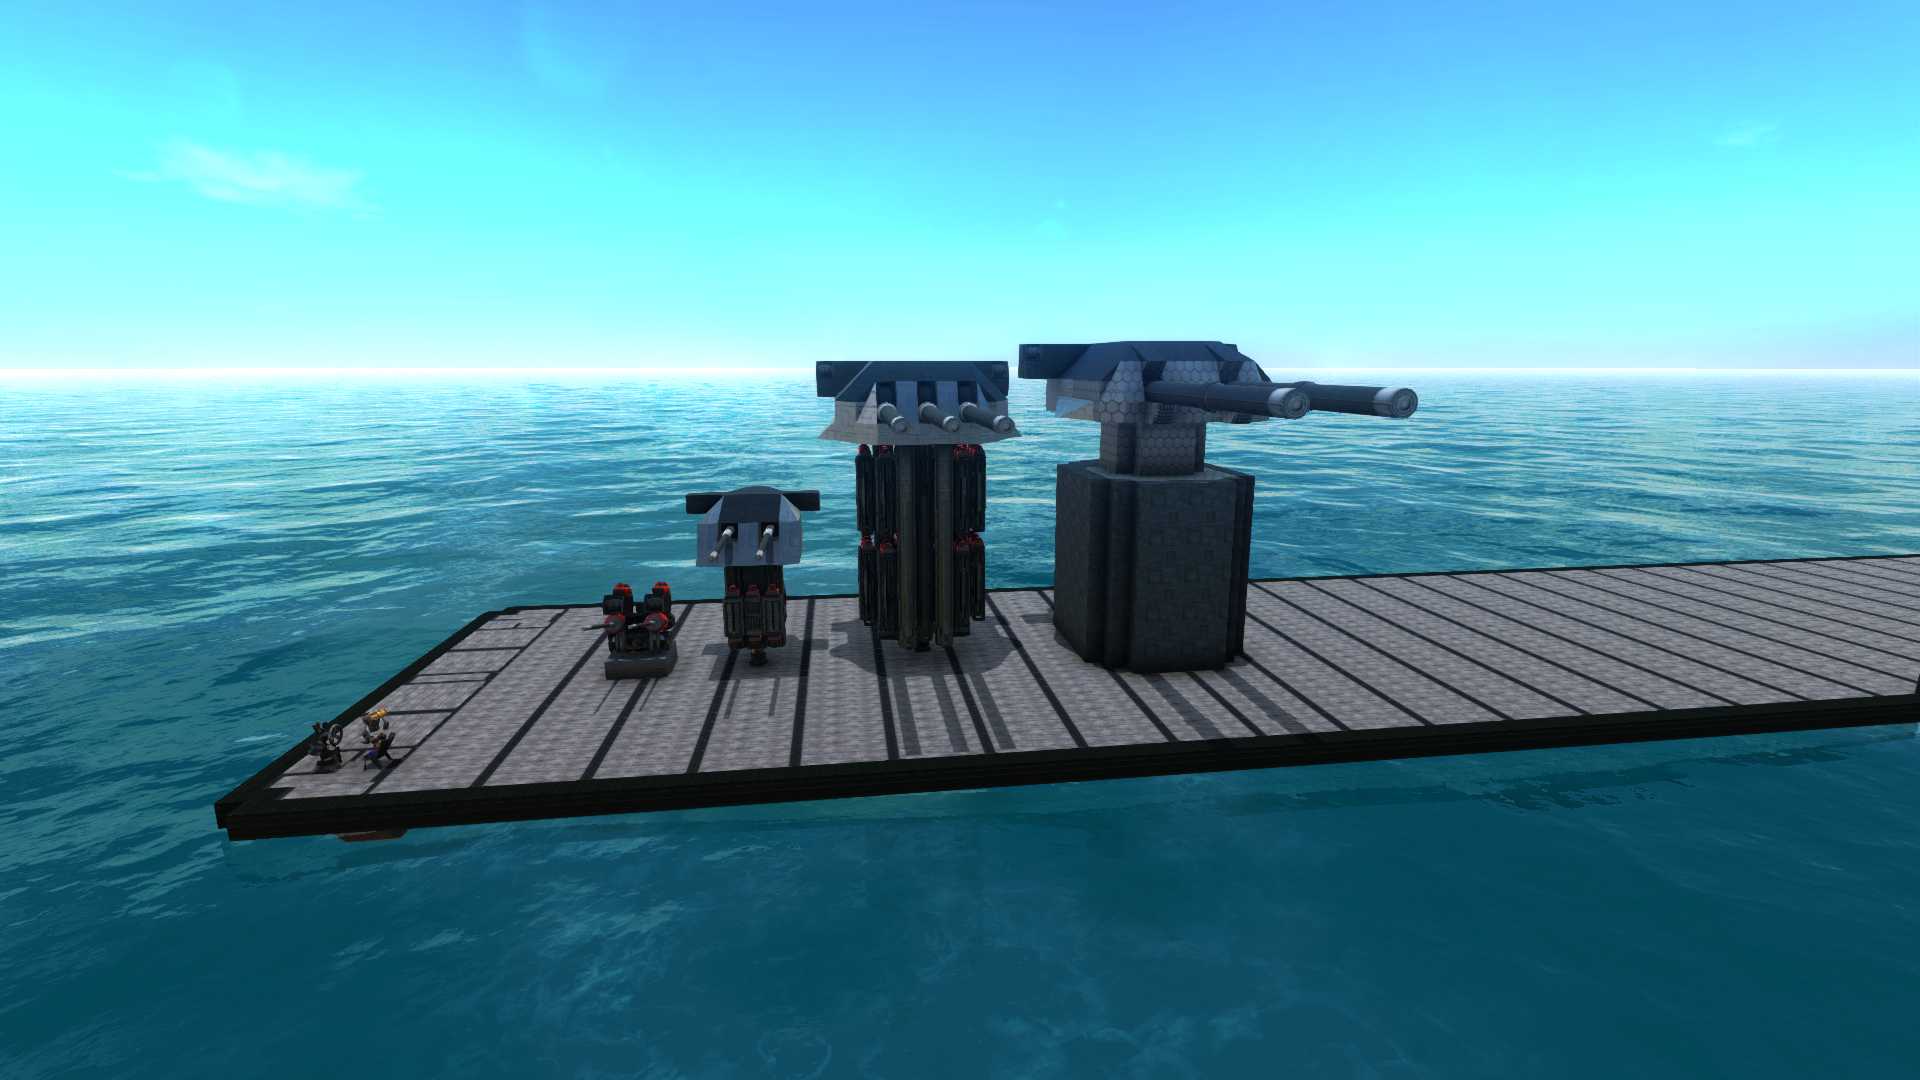
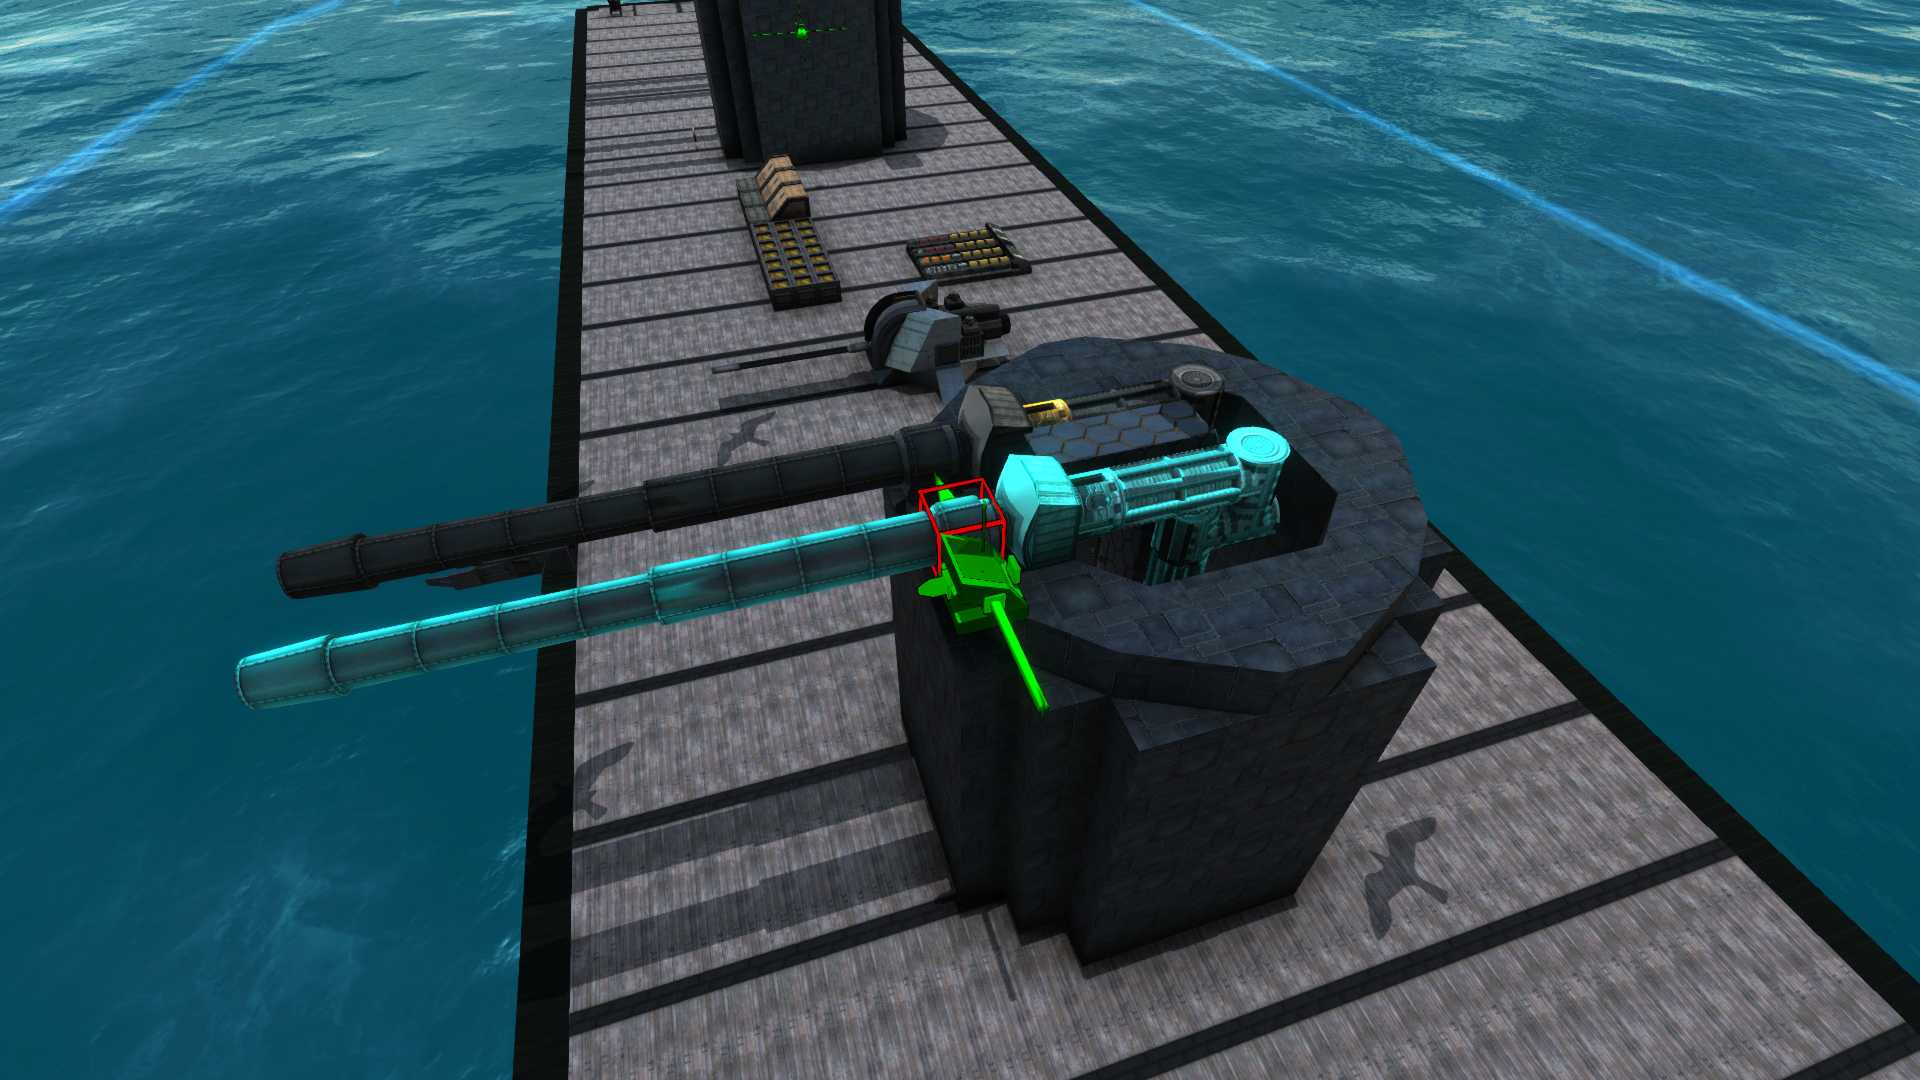
The turret block is placed at the bottom and we build a pole to support the APS pieces towards the front of the turret.
With the APS pieces placed, we put down the mantle, and begin the “turret snake” (gauge coolers and increasers). Your main concern should be getting to the right caliber at this point since coolers can be used to fill out empty space. Our desired caliber is 34.8cm (one of the defaults).


We place barrels and go through ammo creation again. At cursory glance, we deduce that we can fit 2x 4m autoloaders on top of each other with space for intakes, so we build a shell that will be 4m compatible.


Main battery shells work just like small caliber ones, you need to balance power, speed, and accuracy. Since we are using shaped charges (HEAT), shell velocity doesn’t affect out AP value and only out ability to hit the target. For that reason, we go with a 299m/s shell, which is slow by my own standards, (I prefer lighter shells at around 350-400m/s) but will be fine provided we have the accuracy.
HEAT, HESH, APHE, Hollow point, and Composite head are all good choices for large caliber shells. Of these HEAT, HESH, and Hollow point are all pure explosive rounds and have different qualities when they hit the target. APHE and Composite have AP values and will damage the armor itself before exploding. You can use fuses as need be (penetration depth fuses work well with APHE and the HE shells work well with inertial fuses).
This is also a good time to talk about the base-bleeder. Short summary, it gives back speed to shells based on size (larger giving more). So when working at big caliber guns, a base bleeder can give you a higher shell velocity instead of another gunpowder casing.
In order to get a consistent ROF, we keep the same amount of autoloaders and coolers on both guns. Each side resembles a L shape, making a solid asymmetrical block. We place recoil compensators in the free spaces. Be careful that your turret can rotate 360 degrees (there is a guide on this topic on steam).


Our barrels aren’t long enough to give good accuracy, so we lengthen them to get .600 accuracy (which is an acceptable number).


Putting together the turrets themselves is mainly a process of style, but armor remains an important factor.


Some firing tests reveal we deal a good amount of damage.


Since these are battleship turrets, we make the choice to up-armor the turret faces and barbettes to heavy armor. The hidden layer of metal armor is switched to HA while the turret faces are swapped completely (there isn’t anything to hide it). We should now be reasonably protected against large caliber fire.

One way to increase the flexibility of your ships is to incorporate EMP shells to counter shields. The EMP shell is initially faster than the HEAT shell, so we change the propellant density to get to 299m/s.


Our EMP shell uses proximity fuses, so we place a fuse setter on the right gun (the one that we will be shooting them out of).


The results are good. We are breaking shields and still doing damage out of the other cannon. On an 8 gun ship, we would have 2 firing EMP with the rest firing HEAT.


The guns don’t fire evenly, but its close enough where it doesn’t matter to us. You can fix this by working with the ROF slider.


To increase survivability, you can also subdivide your turrets.

Conclusion
That concludes the APS part of our guide. Advanced cannons are a powerful system that is both highly configurable and useful in a slew of situations. Stay tuned for the next part of this guide where we will cover building larger warships.

Crafts used in this guide (not in order of appearance):
APS Tutorial by Evily: [link]
Danzig Class Light Cruiser by Evily: [link]
Superstructure Prototype Platform by Evily: [link]
Friedrich der Große Class Battleship by Evily: [link]
Godly class ship Thyr from the Steel Striders