Overview
Blackwake is fun if you know what you’re doing. Read this guide and learn how to play.
Introduction
This is my complete guide to playing Blackwake. Once you’re done reading this, you’ll be ready to sink all those that stand in your way! (and hopefully not suck in the process)
Here’s a picture with all the controls you need to know.
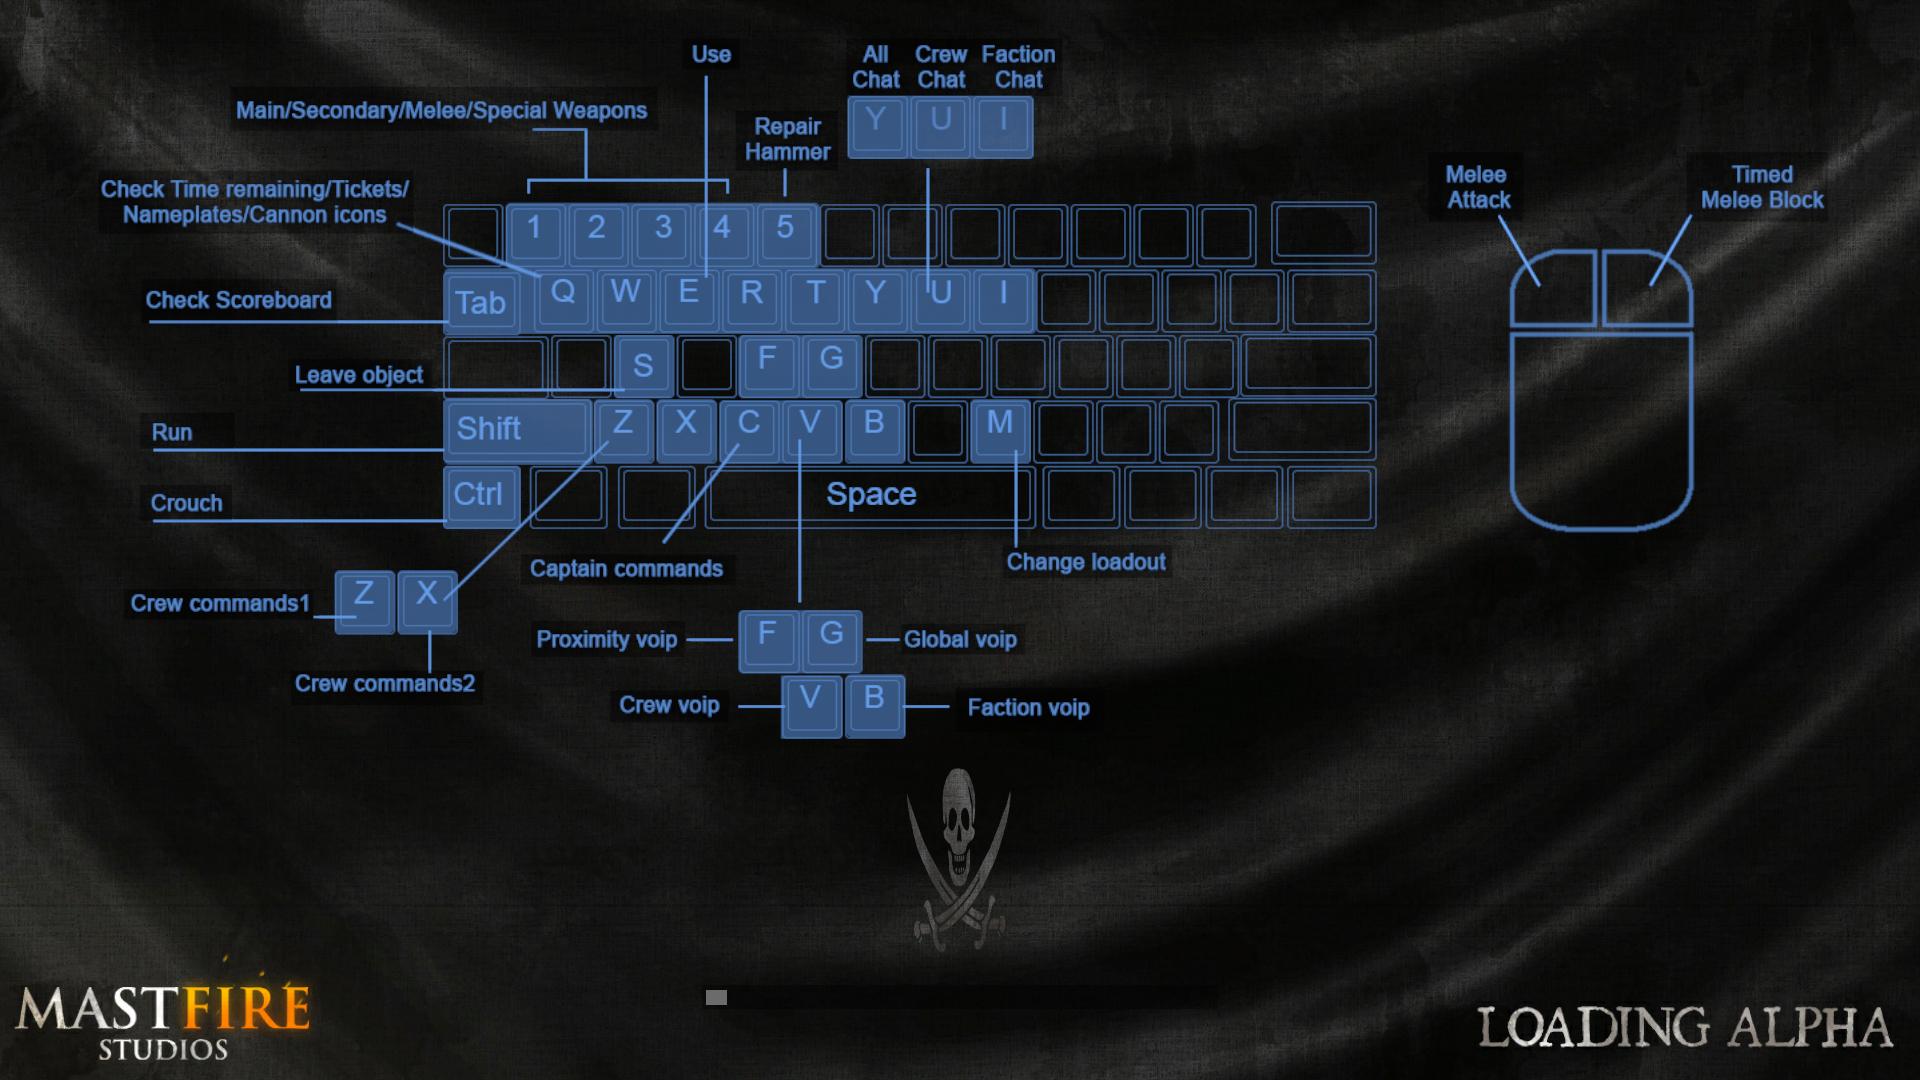
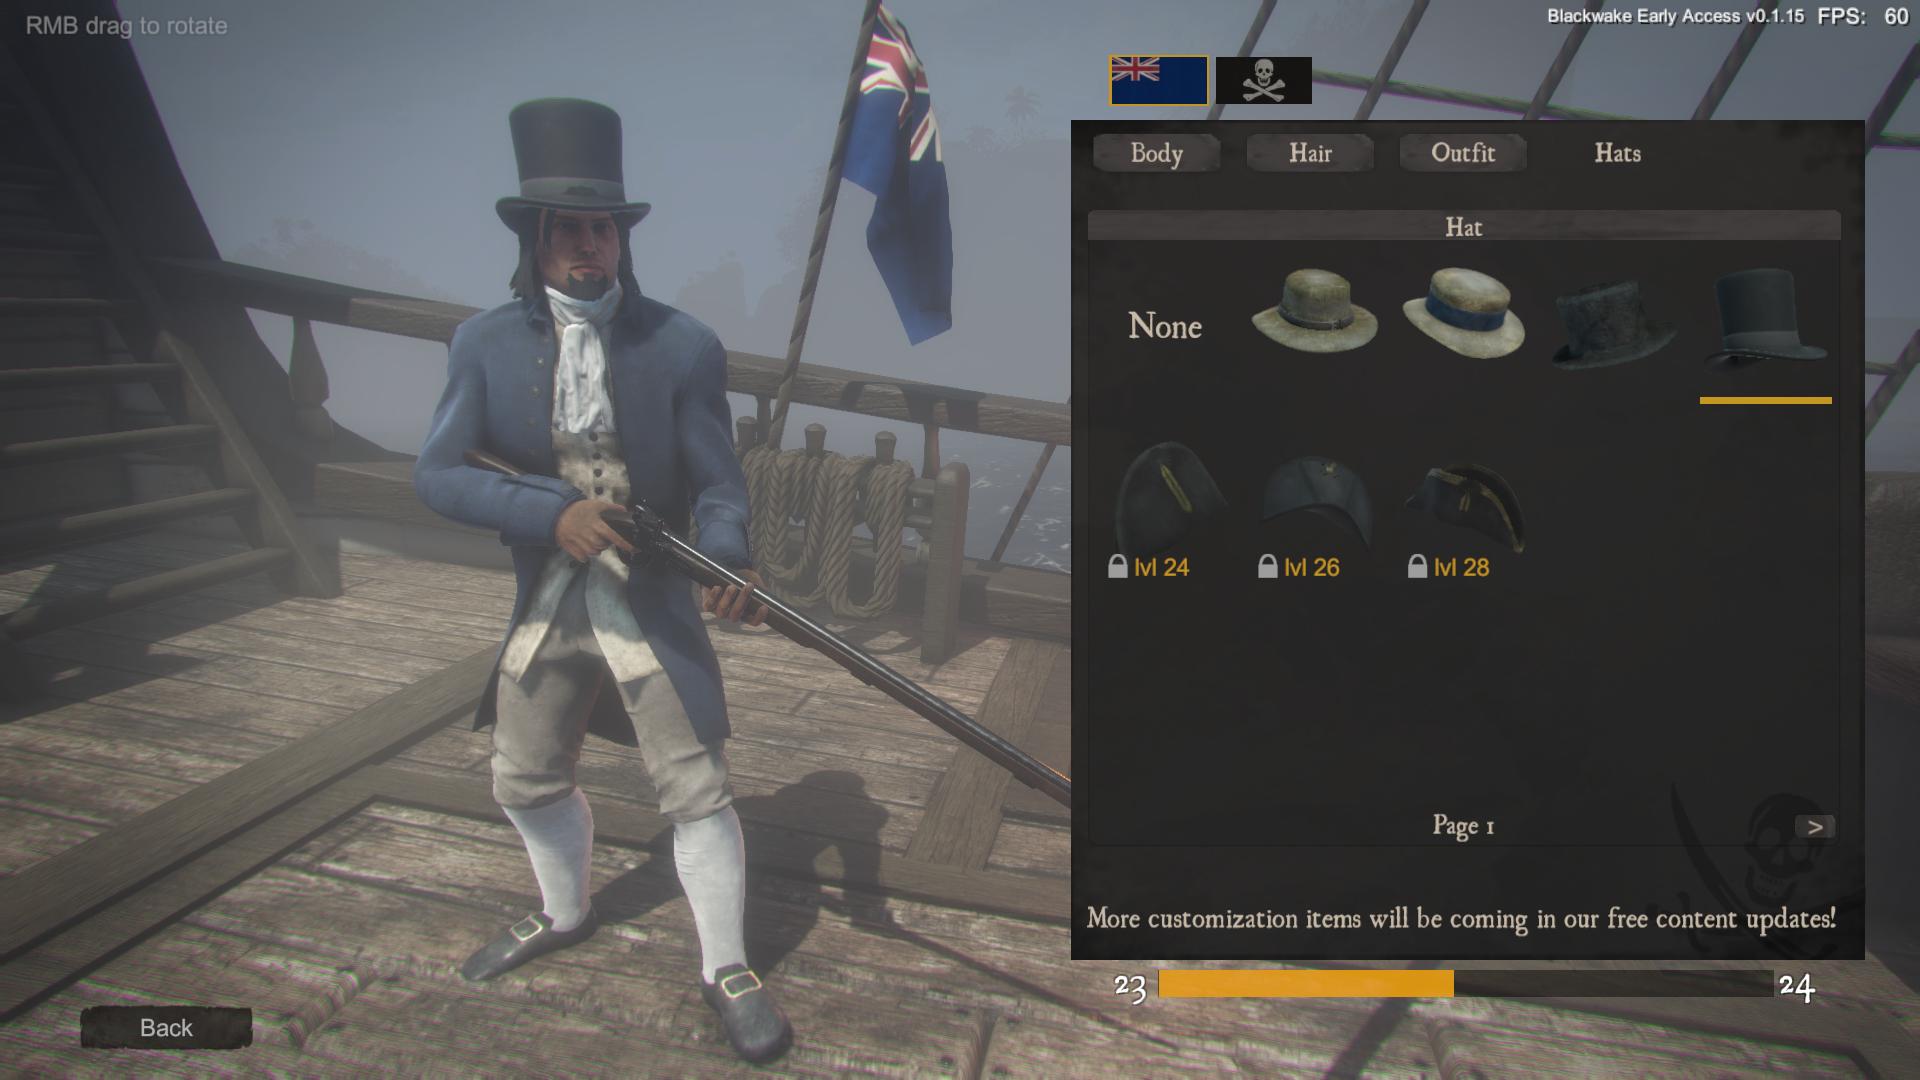
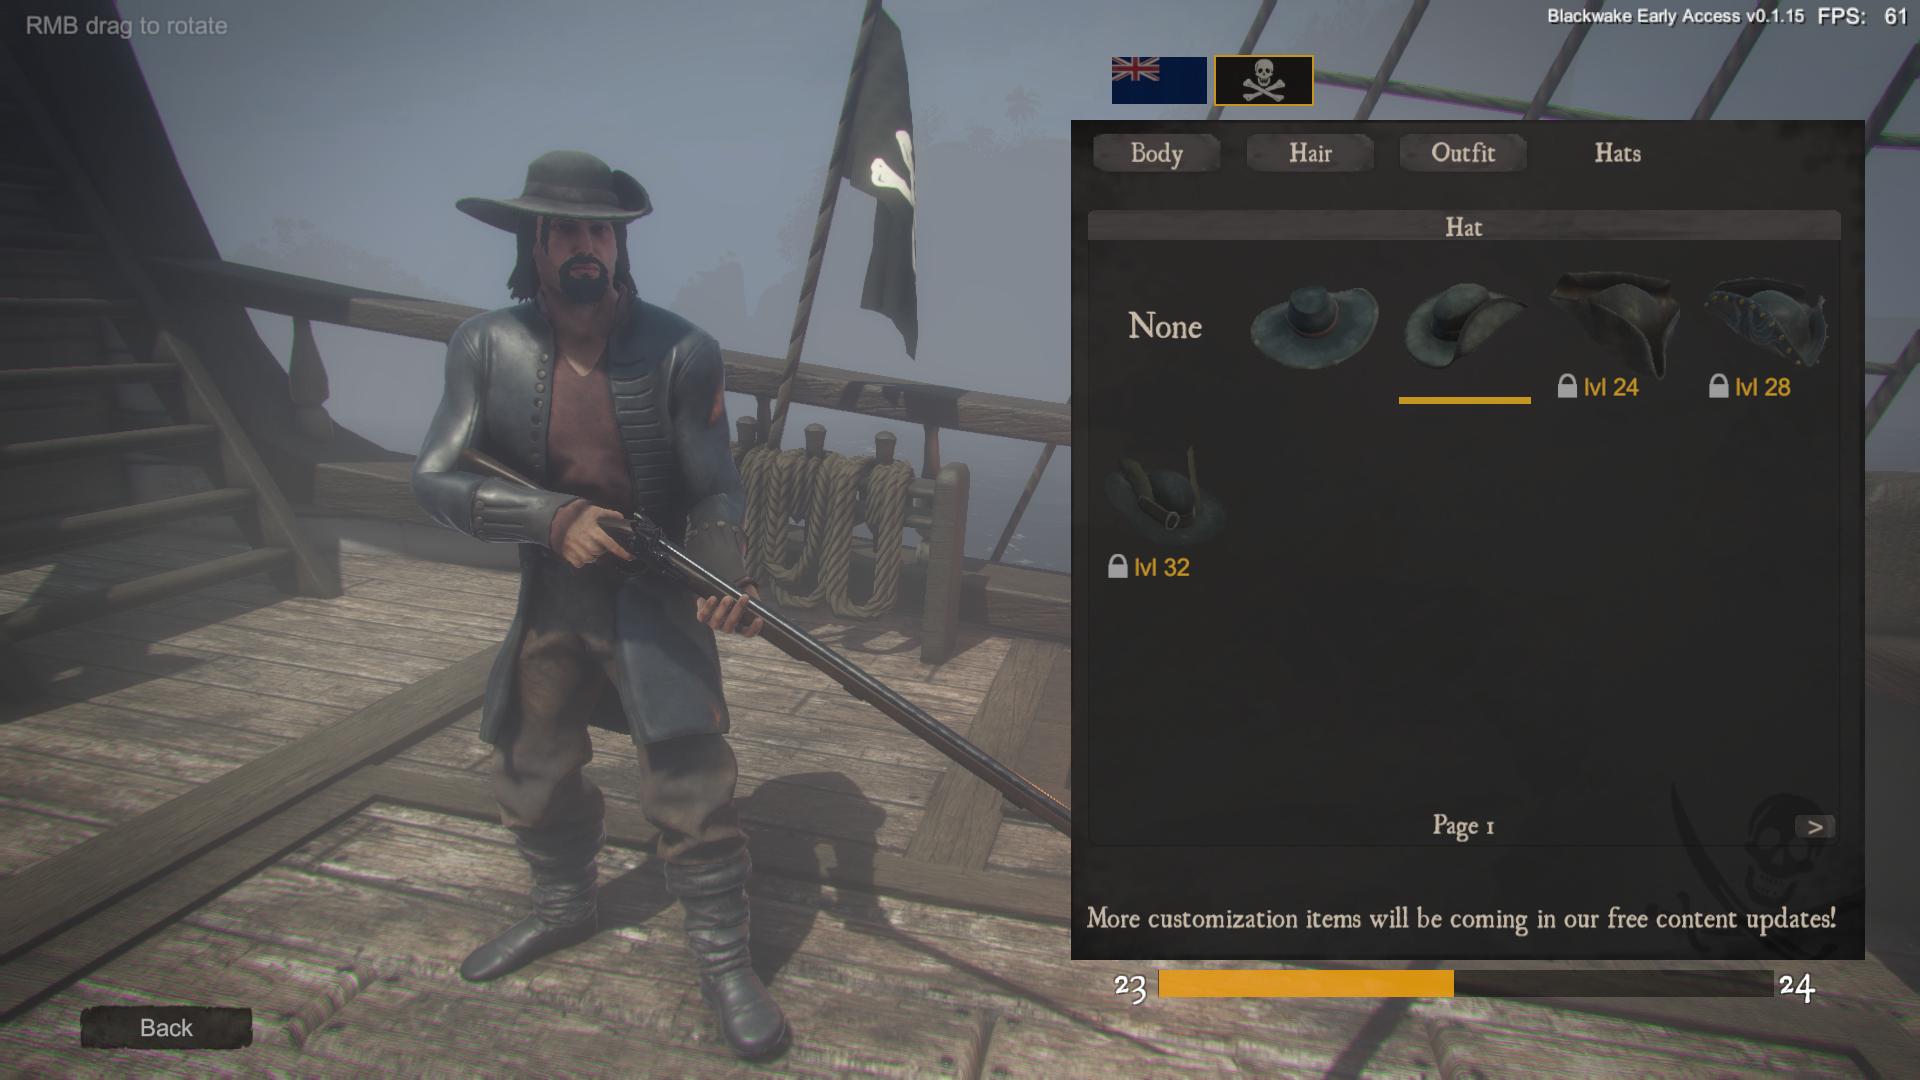
Blackwake offers character customization through a ranking system. Each level that you progress through will unlock new pieces of clothing for your British or Pirate character. There is a basic character design screen that enables you to customize your players through either hair or facial option screens via the main menu.


Currently there are different outfits and hats that can be unlocked. Blackwake uses a ranking system that rewards you points for helping your crew; like killing enemies, patching holes, loading cannons, repairing sails, etc.


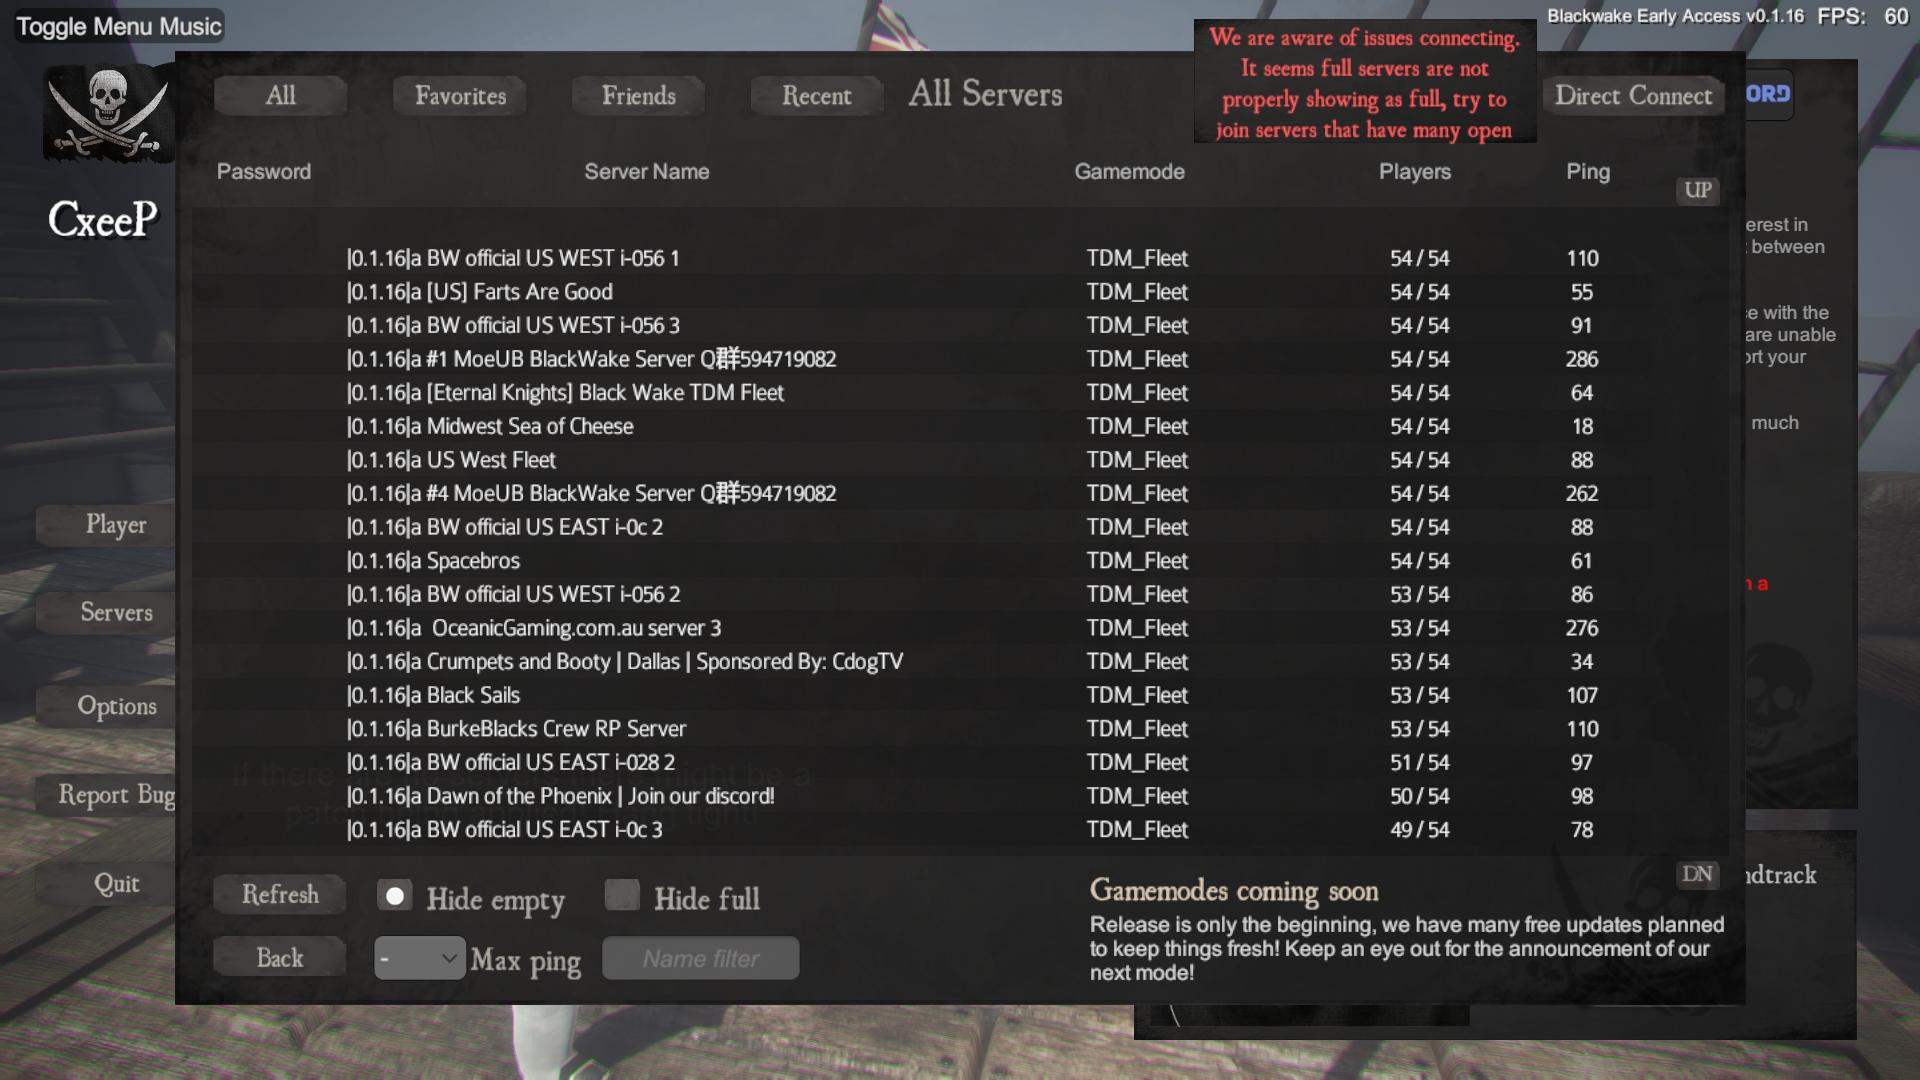
Blackwake has a server browser with filters.
The whole point of the game is to sink the enemy ships while keeping yours afloat. If it’s your first time playing it’s probably best to join another ship that already has a captain. As a shipsman, it is your foremost responsibility to keep the ship alive. Listen to your captain and do as they say!
It’s best to use your V key to talk through your microphone for shipwide/squad talk. Many people tend to use F, which is proximity voip, and the sound quality is terrible; you can’t hear people on the other side of your ship. You can’t hear what other people are saying at all unless they are standing directly next to you. Stick with V for your crew and B for your faction if you need to talk to other captains or players not on your ship. Only use proximity if you are trying to talk to an enemy crew that you are boarding or antagonizing.
If you don’t have a microphone you can use Y to type in global chat or U to type to shipmates.
If you are using the V key, only your shipmates will be able to hear you. If you are the captain, your name will appear in gold when you speak. If you are a shipsman, your name will appear in blue.
The B key is for speaking with members of the same faction. People that speak through faction chat will have their name in purple above their ships name.
G is for using global voice chat. Allies names will appear in green and enemies will appear in red.
As mentioned earlier, you can use the F key for proximity voip. People that can hear you will see your name appear in white.
Once you connect to a server you can choose which faction to play as. Currently there are two factions; Pirates and British. After you select your faction you will be prompted to join a ship. If you want to be a captain you should join a ship that doesn’t have any players on it.
If you’re joining a ship at the start of the round you will be prompted to vote for your ship captain. By pressing T you can bring up your cursor to click on a captain to cast your vote, or you can select be captain yourself.

Pressing escape will allow you to change ships or teams. If the game has already started and there is an empty ship available, you can join it to become the captain immediately.
Once you select a ship and spawn, press M to bring up the loadout selection screen. We’ll go over all the equipment for the load screen later.
Pressing escape in-game brings up the escape menu. From here you can:
- Customize settings
- Suicide
- Leave
- Favorite Server
- Report Bugs
- Change teams
- Mutiny your captain if they aren’t doing well or don’t know how to play
- Resign as captain if you are currently captain but no longer wish to be
- Transfer captain if you are currently captain, but wish to give someone in particular the captaincy

Holding down Q will bring up your navigational user interface; this is what you will use to differentiate between friendly and enemy ships. Holding Q will also show you the time remaining in the match, as well as the ticket counter. Every time you die a ticket is deducted from your team tickets.

The winning team will be the team with the highest ticket count after the time limit. You can also win by reducing the other teams ticket count to 0 before they deplete yours.

Use Q as a map to find out where you need to go. Friendlies are identified by their names and enemies don’t have names above them.


Holding Q will show you shipmates with names in blue and friendly players with names in green.

You can use default voice commands from the Z and X menus, followed by the corrosponding number on your keyboard.


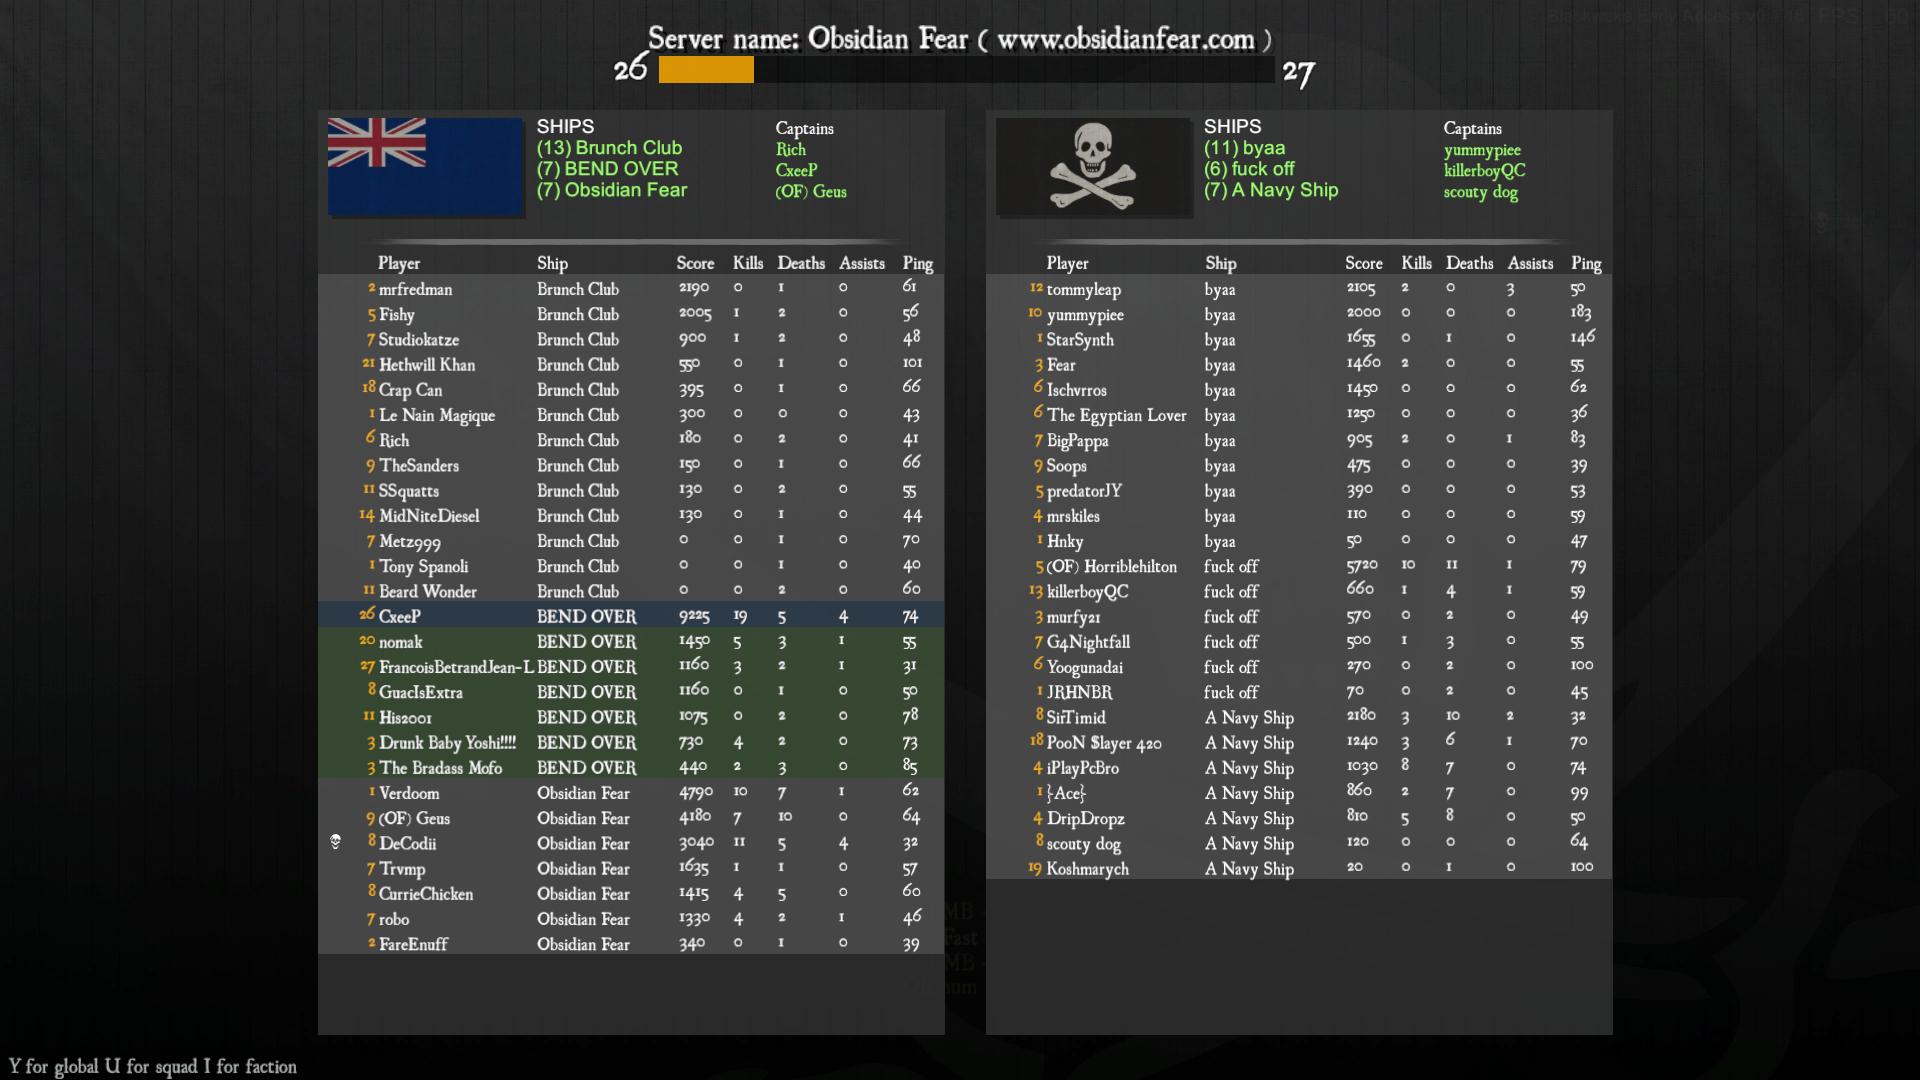
Holding tab brings up the tab screen. Use this screen to see your score. You can click someones name if you want to mute or votekick them.
Game Modes
There are a few game modes so far with more to come soon. The current game modes are pretty self explanatory:
1v1 HOY
1v1 Galleon
2v2 HOY
2v2 Galleon
Fleet
The fleet gamemode is a 3v3 ship match. Each team has 2 Hoys and 1 Galleon. The trick to winning is to keep your ships together. There is strength in numbers.
Equipment
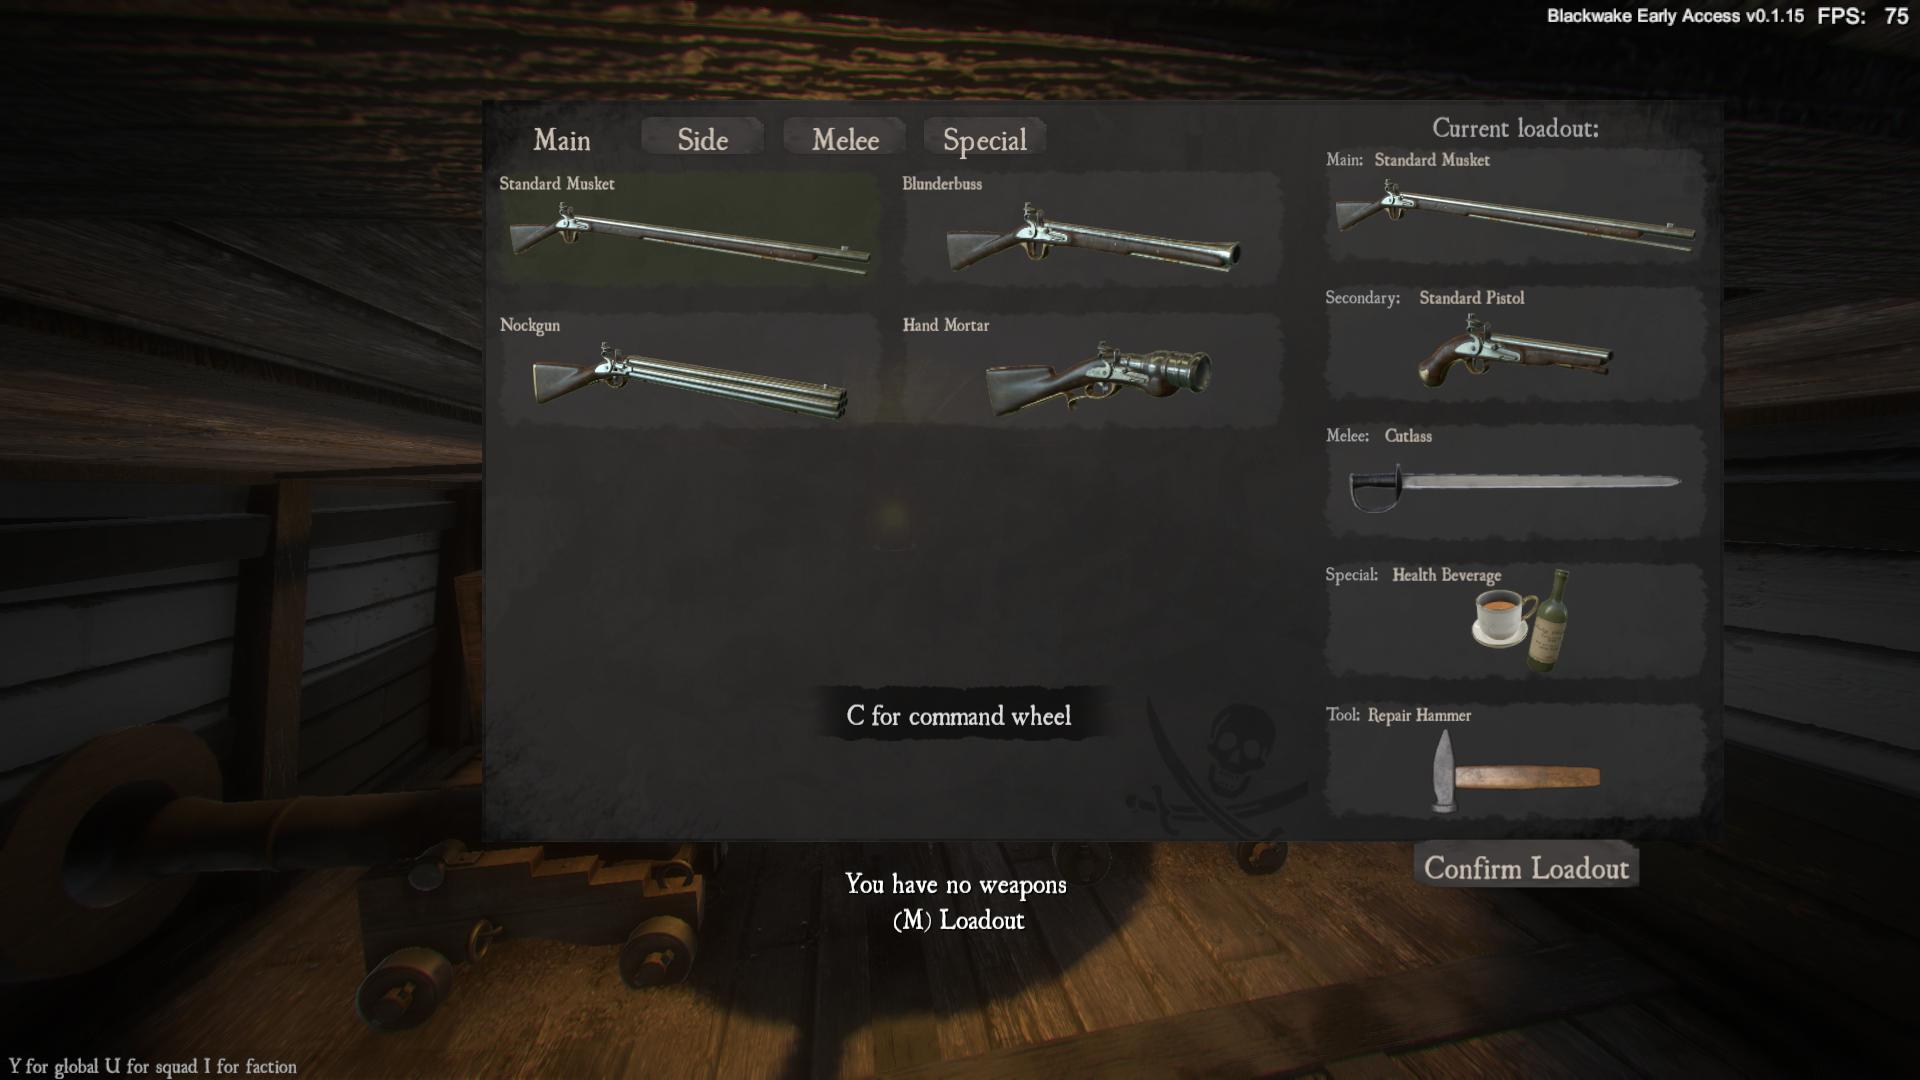
- Musket – This is the default starting gun. This is the bread and butter of the game. It has great accuracy for sniping.
- Blunderbuss – This is like a shotgun and does devestating damage up close. It is best to charge someone and use it at the last second when you’re in sword fighting range.
- Nockgun – This is a musket, but it shoots seven bullets at once. It’s amazing to use, but takes forever to reload. You can’t use iron sights, but you can still get some long distance kills. If you can’t snipe with the musket try using the nockgun.
- Hand Mortar – This shoots grenades. It doesn’t do any damage to ships.

- Standard Pistol – This is the default starting pistol. I like to use the standard pistol as my side arm as it has good accuracy (you can essentially snipe with it) and doesn’t take forever to reload. You can use the right mouse button for iron sights.
- Duckfoot – The duckfoot is the shotgun of pistols. It shoots four bullets at once in an arc and is good for close encounters with one or more enemies. It does take forever to reload.
- Short Pistol – It’s a smaller version of the standard pistol and it does less damage.
- Annley Revolver – This shoots faster than the short pistol, but takes longer to reload.
- Matchlock Revolver – This thing is pretty cool. It shoots three times and does good damage. It does take a while to reload though, and you can’t use iron sights.

- Cutlass – The generic default sword. Good damage, but not a lot of bleeding.
- Rapier – Faster than the Cutlass, less damage, little more bleeding.
- Dagger – Less damage than the Rapier, little faster, more bleeding.
- Broken Bottle – Fastest, least damage, most bleeding.

- Health Beverage – This is the default item for a reason. If you get hurt, or start bleeding, you can press 4 to bring up your health beverage. It will be tea if you’re British and rum if you’re a pirate. While equipped, hold the left mouse button to heal.
- Grenade – Good damage and range. Throw some grenades on enemy ships while you’re passing them, before/during a grapple, or at enemy ships that are tailing you too closely.
- Tomahawk – You can use throwing axes which can be kind of fun sometimes. Two axes, but you can’t pick them back up again.
If you do find yourself hurt all of a sudden with a red tinge around your screen, drink a health beverage immediately before you bleed out. If you don’t have one equipped, ask a teammate to give you one of theirs. You can give a health beverage by looking at a friendly teammate right clicking on them with your health beverage equipped.


The Ships
There are currently two types of ships. The speed of interaction is based on the crew size of your current ship. This means that the more people that are on your ship, the longer it will take to do things, like load cannons, make repairs, etc…
Let’s take a look at the two types:
Hoy or Sloop
The sloop has 8 guns total, with 4 guns on each side. It has less health than the galleon and can only accomodate a 7 man crew. The sloop makes up for its smaller size by being more nible, faster, and remaining a smaller target for galleons.
Galleon
The galleon has 20 cannons total. There are 8 cannons on each side. There are 2 broadside cannons on the top deck and 6 on both sides of the bottom level. Unlike the hoy, the galleon has two cannons on the front and back of the lower deck. These cannons are excellent for engaging enemies that are directly in front of or behind you.
Staying Afloat
The most important thing is staying alive and keeping your ship afloat. Equip your hammer with the 5 key and repair damaged parts of your ship. Holes in your ship will appear with red highlighting. Hold down your left mouse button while looking at the hole with your hammer equipped to repair it. While you are repairing a hole it will show green highlighting. Don’t bother repairing a green highlighted section, someone else is already working on it.

Without the hammer equipped, a hole won’t be highlighted. You can tell if your ship has any damage or holes by looking at the top middle section of your screen.
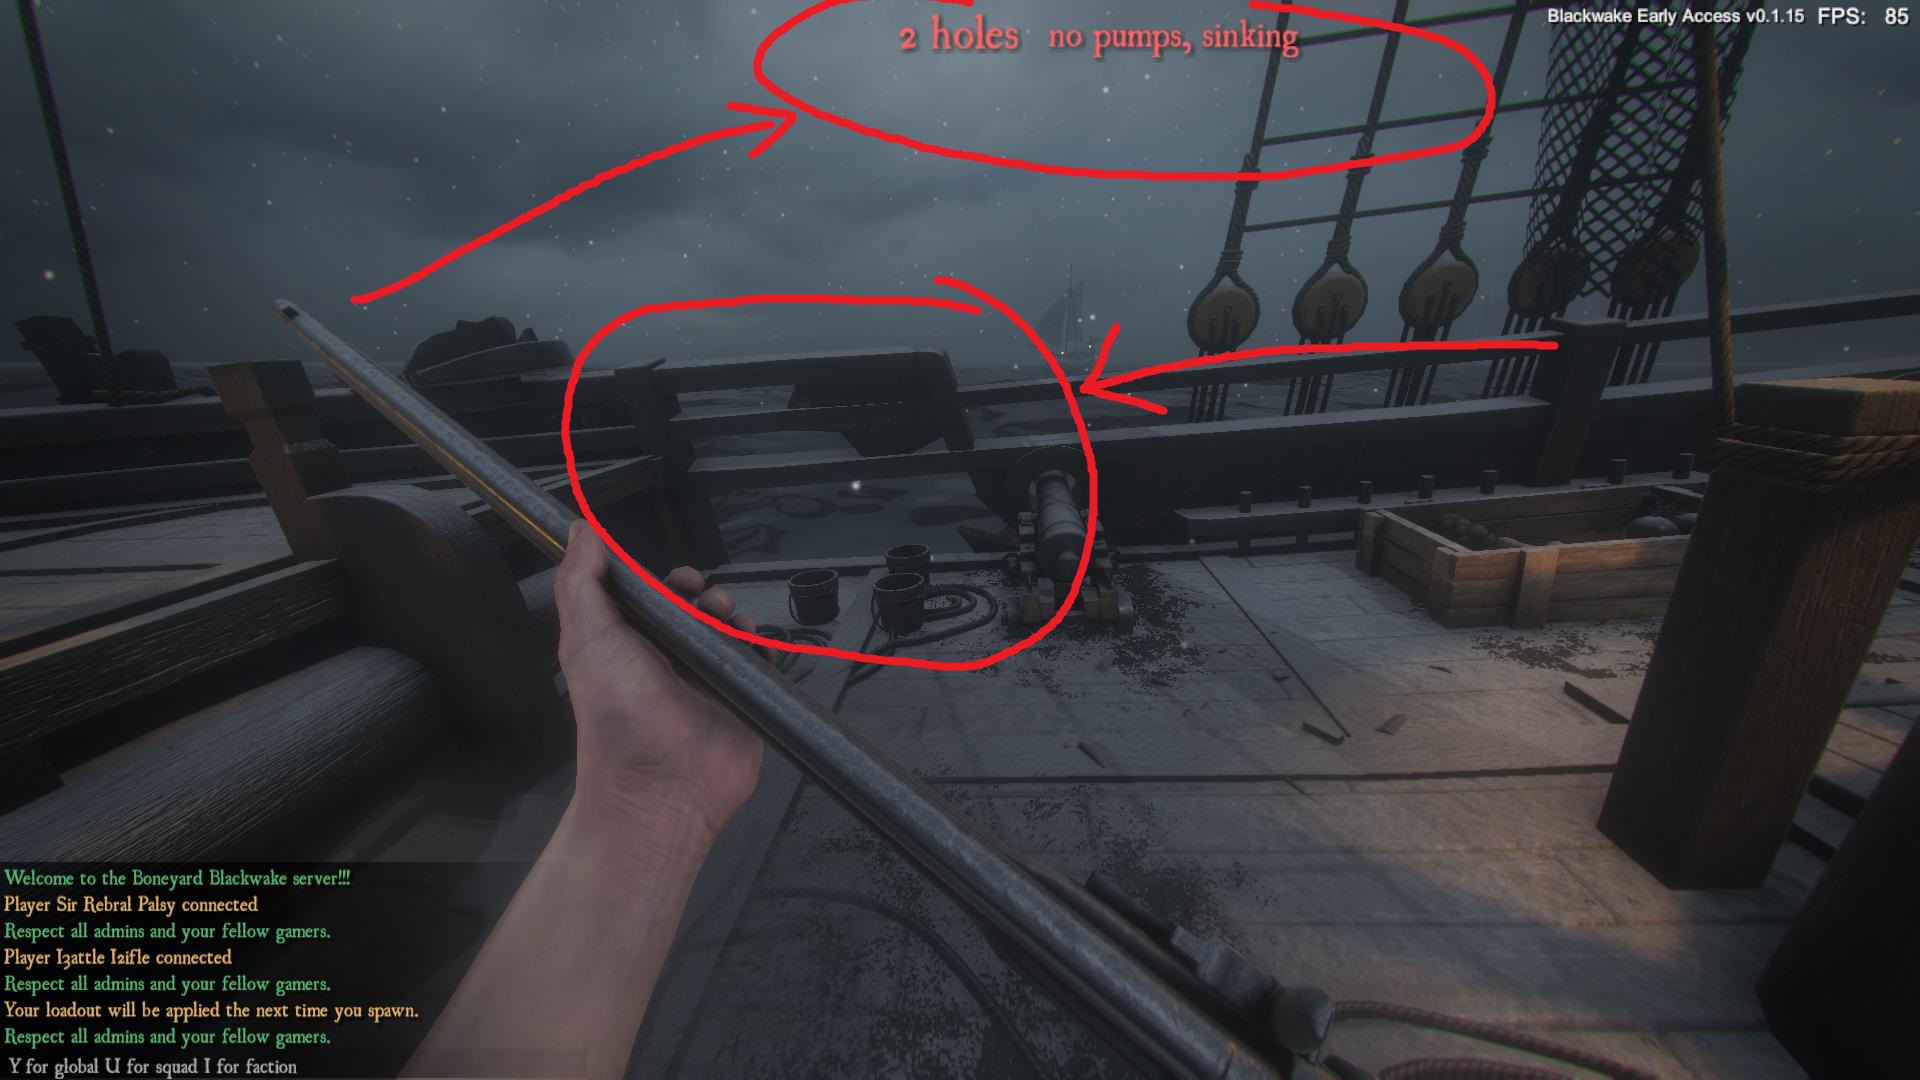
If your ship has holes that means you are sinking. You should immediately stop whatever you are doing and repair your leaks. Ships are meant to float on top of water, not underneath it like a submarine. Once your ship sinks to a certain level, your ship is considered sunken and your team will lose points.
If your ship gets hit with a cannon, or gets rammed by another ship, it will take on holes. You can see if your ship has any holes by looking at the top middle of your screen. It’s important to focus on fixing the holes before you man the pump as you can still sink while pumping. If you have a large crew, have someone on the pumps while the rest of the team patches the holes.

The pump will help to counteract the water you are taking from the holes, so it will extend your life, but not indefinitely. Hypothetically speaking, if your ship just has one hole and you do nothing about it, you’re going to sink. If you have someone on the pump, you’re still going to sink, but it’s going to take a little while longer.
The sloop has one pump near the front of the ship by the main sail mast.

The galleon has two pumps, both are downstairs in the center-ish area of the ship.

After your ship has sunk it will respawn and if you happen to be alive when your ship has respawned, usually the best option is using suicide from the escape menu. This also goes for accidently being stuck on someone elses ship.
The Ships Nose
Another important part of your ship is the very front tip, or the nose. If your nose gets damaged from ramming, your ship will become immobilized. You can tell if your ship is immobilized by looking at the top center of your screen.
To repair the nose of your ship, pull out your hammer and hold your left mouse button on the broken nose. Try not to get killed as you will be a pretty big target. You can have more than one person repairing the nose at a time. Having more than one person repairing the nose will slightly speed up the repair time.


It takes three full repairs to get your nose back in working order. The second it is repaired the ship will be able to move again.
After the nose is repaired, the front sail that goes directly over the nose will need to be repaird for full maneuverability.


If you leave your nose damaged, enemy ships will position themselves to unleash their broadsides onto you and there will be nothing you can do to stop it.
The Ocean
If you fall over the side of the ship while it’s at full speed ahead, the best and quickest way back on is to press escape and click suicide.
If you do happen to fall overboard while the ship is stopped, you can find your way back on by climbing the ropes that hang at the front and back of your ship. It’s important to note that you can only see your ships rope and the only way onto an enemy ship is by jumping from deck to deck.


There is a timer for the ocean and if you are out too long you will drown and immediately die. The timer is around 20 seconds, so it’s best not to stay out too long.
If your ship is on fire, but also sinking, it can sometimes be beneficial to let the ocean put the fire out for you before repairing and pumping.

Cannons
In order to use the broadside cannons you first have to load a shot. This can be done by pressing E on the gunpowder and loading it into the cannon with a left click.

Once the powder is loaded you can choose to load regular cannon balls, grape shot, or grapples. Grapples can only be picked up and loaded on the captain’s orders. We’ll talk more about grappling later.

Once the shot is in your hand, hold left mouse button on the powder filled cannon until it is rammed and ready to be pushed forward.

Once the cannon is rammed, press E to push it forward so it’s ready to fire.
Once the cannon is pushed forward, press E on the cannon to pull out your torch and left click the cannon to ignite the fuse.
You can press E on a fully loaded cannon to zoom in for a better shot, but it isn’t required. The cannon will fire after about 2 seconds, so wait until you have a clear shot. If you miss your shot 40 points will be deducted from your score. You can also crouch behind a cannon to get a good idea of where the shot will go. This can be particularly useful for the lower deck of the galleon.


Press your back button, S by default, to get off the cannons.
Ammo Types
There are three different types of shot that you can load into the cannons. You can load standard cannon balls, grape shot, or grapples.
Cannon balls are the main weapon of the game. Remember that cannons do much more damage than your musket. Cannon balls are long range and shoot straight. They cause direct damage to the effected enemy ship, but by default won’t do any damage to friendlies. Use cannon balls if you want to sink ships.

Grapeshot is great if you are low on tickets or need to quickly decimate a crew. Try loading one side with complete grapeshot and one grapple. Once the grapple is engaged, and the ships are close, fire the grapeshot for best results. The grapeshot is for close range and doesn’t cause any holes to the enemy ship. Grapeshot is many small metal balls exploding out the end of the cannon like a shotgun. It will penetrate wood and cause a lot of damage if used correctly.

Grapples can only be loaded on the captain’s orders. The grapple needs to be shot at close-ish range to be engaged.

Grappling
The only way to load grapples is on your captain’s orders.
The captain can order grapples to be loaded through the command menu (C)

When your ship is engaged in a grapple the respawn timer for both ships will be very long. Once a grapple starts it essentially turns the fight into a ship on ship deathmatch. The team that lives through the grapple wins and the losing boat will sink instantly, regardless of damage.
It is important to note that enemy and friendly ships can still influence the fight. They can shoot grapeshot or muskets to kill the enemy crew or yours, but cannons do not have any effect on grappled ships. If you are passing ships that are engaged in a grapple, you could pass by slowly to shoot off some grapeshot to help out your allies. Stay aware of the enemy ships near you if you are starting a grapple.
Look for the GRAPPLED notifier at the top middle of the screen.

If a grapple is started, try not to die. Play it safe. Shoot some grapeshot off if you have the chance.
Grappling is a great choice if you have strength in numbers. It’s important to note that galleons cannot grapple sloops and vice versa. Ships can only grapple other ships of the same classification.
You can find a grapple that has hooked onto your ship by looking for the red X. Hold E on it to release the grapple. If the grapples are released while there are still people on each ship the engagement will end and everyone will spawn back.
If you are winning a grapple don’t let them release it. You can release an enemy grapple by holding E on it.

Resupplying
At the start of the round your resources/ammo will be maxed out. Each crate of supplies/ammo will have 12 uses before they need to be resupplied. You can look at any of the items in the cache to see how many uses you have left.
See how much supplies you have left by looking at your resource cache at the back cabin of your ship.


Once all the ammo is used up the cache will look empty.

Run to the resupply cache and press E to pick up a crate. Take the crate to the empty ammo box and left click to resupply the cannon ammo.

Swivel Guns
There are currently two different types of swivel guns: anti-sail swivel guns and anti-personnel swivels. Both the galleon and sloop are equipped with two anti-sail swivels that are located at the front of the ship.
Anti-Sail Swivel Guns
The anti-sail swivel guns are for taking out the sails of enemy ships. If a ship is running away from you, man the anti-sail swivels and take out their sails. Once they are dead in the water, pull up behind them to unleash your broadside cannons for maximum damage.


Anti-Personnel Swivel Guns
The anti-personnel swivels can be found on the sides of the upper deck. These don’t cause holes in the enemy ships, but shoot a single pellet like from a grape shot. This is good for taking out the captain of enemy ships. If you are in close range the cannons are much more effective than the swivel guns.

Sails
Your sails are one of the most important parts of your ship. Always be aware of damage to your sails.
The speed of your ship is determined by the amount of water you’ve taken onboard as well as the status of your sails. You can see the health of your sails by looking at them. If your sails are damaged, pull out your hammer with the 5 key, climb the ropes on the sides of your ship, and fix the sails. If your sails are critically damaged it will tell you at the top center of your screen where it shows the amount of holes and pump status.
To get onto the sails you first need to jump on the ships railings and then jump again onto the rope ladder on the side.


Fires
Getting your ship caught on fire can be devastating. The fire will continue to spread and if you get caught on fire you can die. A fire can randomly start when your ship or an enemy ship is struck by a cannon ball.
When a fire is started on your ship you should stop whatever you are doing, grab a bucket, and put the fire out. You can put out a fire by equipping a bucket with the E key and pressing the left mouse button at a fire to throw water on it. Try not to let the fire spread to your sails or it will consume them and you will be dead in the water until you repair them.


The buckets are great for putting teammates out if they are on fire too.
The sloop has buckets at the front of the ship and the back near the captain’s wheel.


The galleon has three buckets, two below deck and one on the main deck near the front.


Being Captain
PORT = LEFT
STARBOARD = RIGHT
Once you are captain you will be able to customize the name and color scheme of your ship, as well as adjust the level of grunge.

If you are the captain go up to the wheel and press E to take control of the ship. You have to be standing on the platform in order to interact with the wheel. Steer with your A and D keys and use your left and right mouse button to increase or decrease your ships speed. Back off the wheel by pressing S.
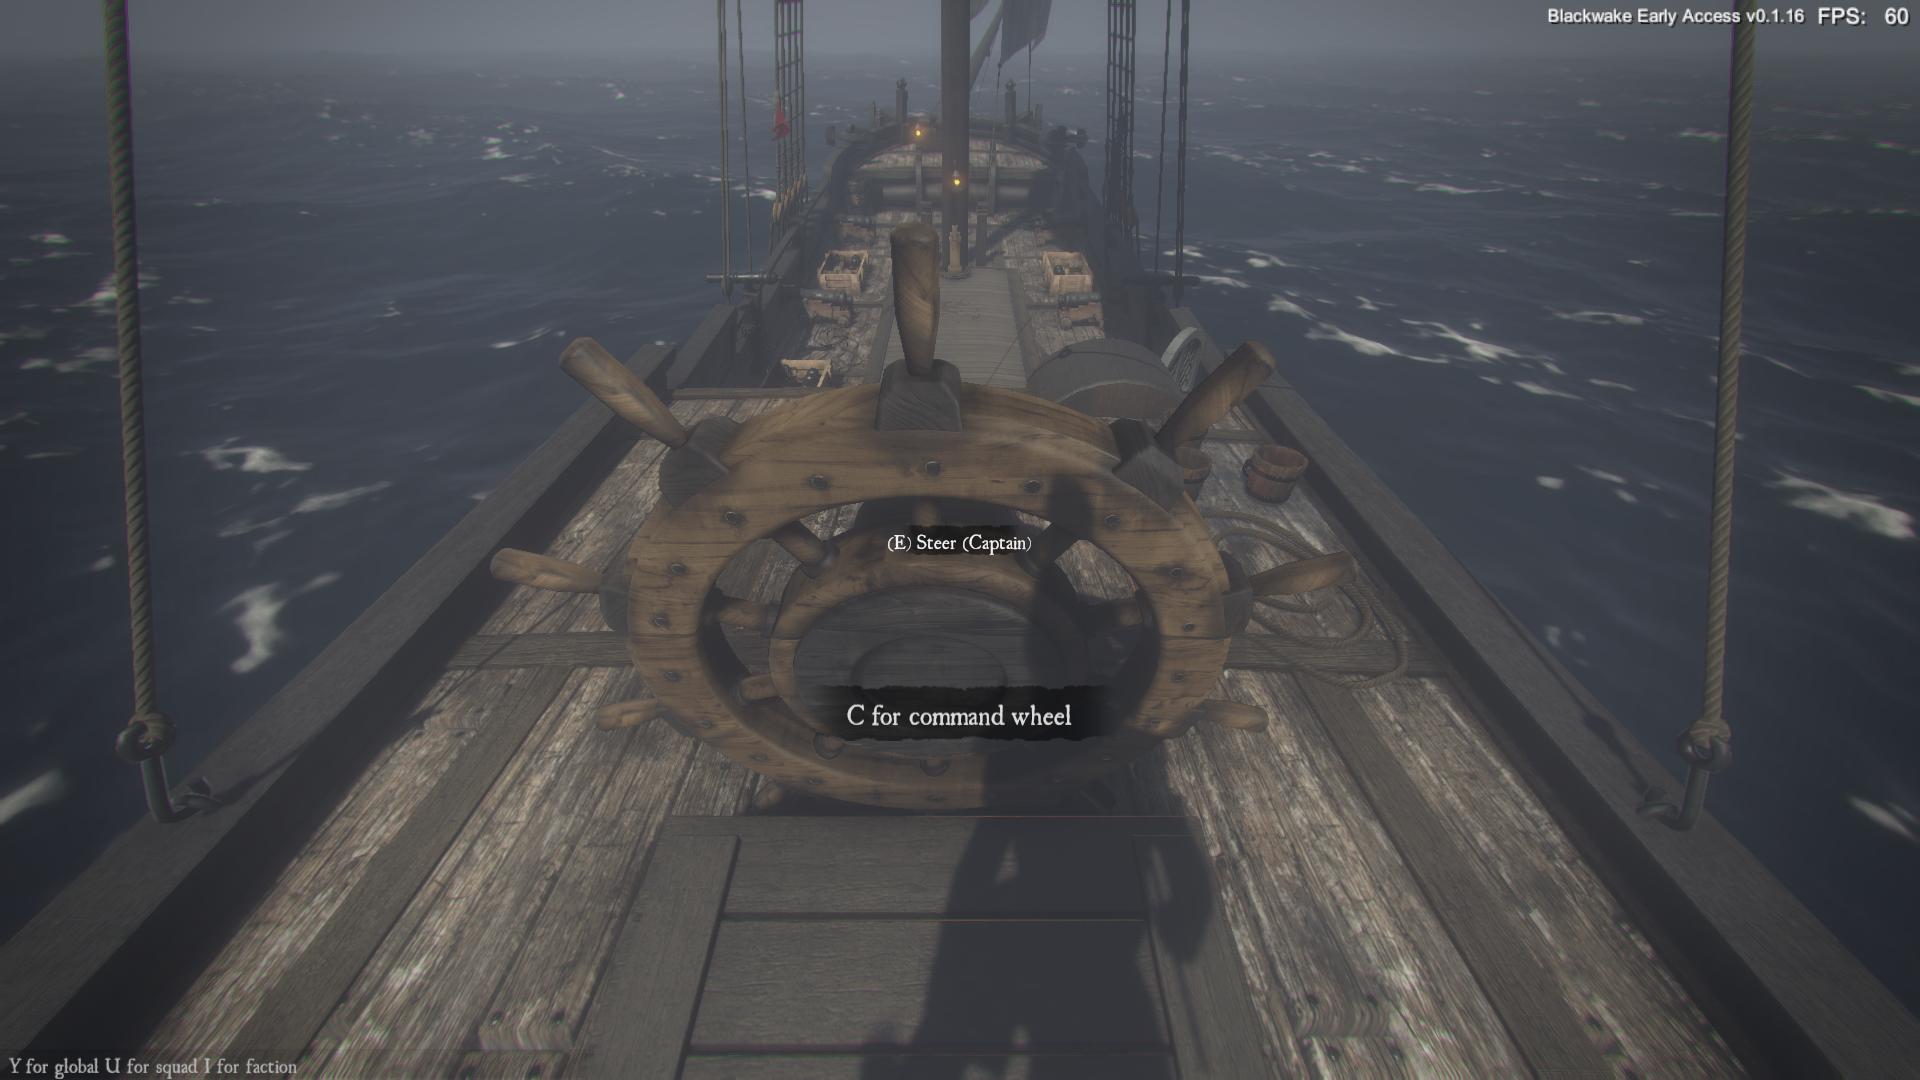
It’s important to note that you can only steer a ship if you are part of the same crew. You cannot hijack enemy ships and you cannot steer friendly ships.
If you are using the steering wheel keep in mind that your speed will be displayed at the bottom middle of the screen when you adjust the speed.

The only way to be a good captain is to communicate with your crew. It is your responsibility as a captain to keep your ship and crew alive, while also getting kills. Let them help you aim and spot enemies. Tell them where you need them most. Use your command wheel to give orders. Use a microphone.
Here’s a few tips on how to be the best captain you can be:
- Try to fight a ship of your own size
- If you are in a sloop the only advantage that you have over the galleon is speed. Try to keep their sails as damaged as possible so you can stay in the blind spots to escape or get in shots of your own. Just don’t go head to head with a galleon unless they have 1 – 3 people and your ship is fully staffed.
- Be aggressive. Load all but one of your cannons with grapeshot and load the remaining one with grapple. Grapple them before you shoot off all the grapeshot for best results. Be aware of the ticket counter and play cautiously.
- By default, there isn’t friendly fire. Try not to ram friendly ships unless it helps the both of you. You can ram friendly ships to help them, or your ship, turn much quicker and there is no damage to either your ship or theirs.
- Focus on staying alive. The enemy ships will try to focus on killing you because you’re in control of the ship. If you are a captain you should always have a health beverage. If you are hurt, go to the cabin where it’s safe from musket fire to heal. Just keep in mind that your ship will keep moving even if you aren’t on the wheel.
While on the wheel use the wooden boards and ship items as references for your aim. Communicate with your crew and let them know your intentions. Use the command wheel with your C key. Check out the images below.
Hoy

Galleon

Conclusion
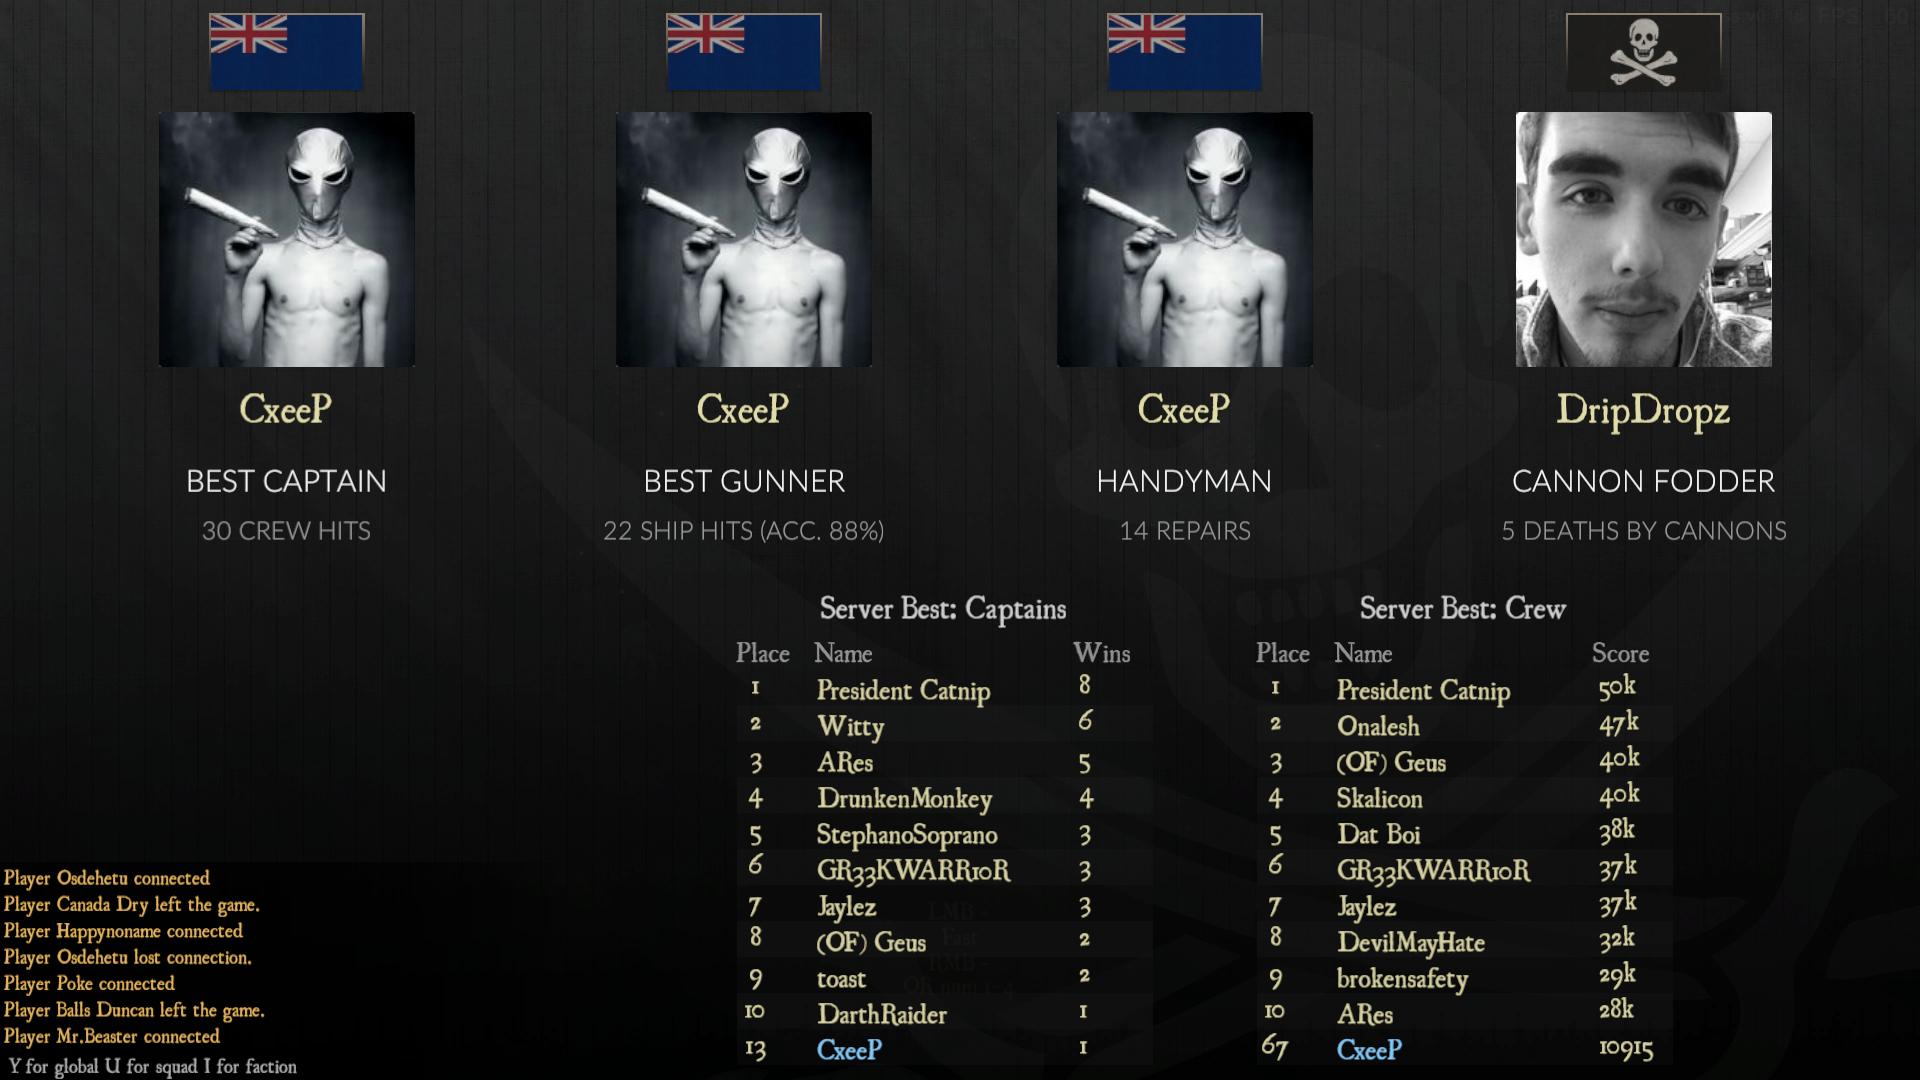
The round will end when the timer reaches 0 or when one team doesn’t have any tickets left.
After the round ends the game will enter a display screen before the next round starts. This screen will display four players who have the best captain accuracy, best cannon accuracy, most repairs, and most deaths by cannon.
Here’s a quick video that shows some of the gameplay mechanics in action.
And that’s all there is to this guide. Now it’s time for you to go out there and kill some things.