Overview
Demonstration how to create a rail yard like setup for train deployment and line use. This is a cosmetic guide and not required for game play
Introduction
Creating a switch yard is not necessary for gameplay. In fact, using it will cost you money, and can be difficult to fully setup in the early game due to construction costs. This game doesn’t have any real rules for play and it’s up to you as the player to play the game your way. Personally, I prefer to setup at least one yard, and just treat it as the startup cost.
The basic idea is to layout tracks that exit from a depot to a series of sidings that will be used as a staging area while you move trains into and out of active lines. The goal is to cause minimal disruption to all lines running into and out of the station and to provide good control over the new and old trains.
One issue with adding or replacing trains, especially long trains, is the time that is required for the train to exit the depot. Poor placement of a depot could result in very long delays for the many lines disrupting factory outputs. The switch yard will let you create the train, move it out of the depot to the staging siding, so it is ready to move with speed into the active line. To remove a train from an active line in in TpF2, selling it pops from existence. However, for the added challenge you can only allow yourself to sell trains in the depot. For a train being removed from the active line, it can quickly be moved out of the way to another siding, and then sold once the yard has been cleared.
Requirements
The construction will require at least one mod, the No Buildings Station, from the workshop to create the yard. (you can do this with the built in stations, but it takes more space and doesn’t look as nice)
[link]Other mods seen in this guide:
[link]
[link]
[link]
[link]
[link]
[link]
Track Layout and Line Setup
Creating Tracks
To begin your yard the first thing to do is plan ahead. A yard requires space, a lot of space. Each switch siding needs to be as long as the longest train you plan to use. So if you are using 400m stations, and want to run 500m trains, make sure all the switch sidings are at least 500m past the last switch. Seems obvious, but getting the lengths correct can be a little tricky at first. Use trains stations as a ruler to double check the siding lengths or use the Distance Meter mod listed in the mods section.
This example will setup a station at the construction materials plant to receive Stone from a distant quarry and ship the product by trucks to a nearby town and two rail lines to distance cities. Leaving 1 spare lane for expanding in the future. The setup will use a four lane enter one lane exit from a main line configuration.
The first thing to do is to get the area setup. Flat is the key. The terrain tools make this easy. Figure 1 is the before picture and figure 2 is the after image.
Before Preparing
After Preparing
Terrain Prepare Video
Transport Fever 2 Yard Guide – Terrain Prep
[link]


First step is to figure out where the station is to be and how many stops are desired. Four in this case. Create Drop the station create use the <> mod to create the turn ends. This video shows the process of creating the tracks.
The tracks coming from the two deploy lines make sure to set the crossover to a double switch to allow trains from the deploy lanes to exit to any of the line lanes.
Add Signals at the crossover points and to hold trains after making the turn to allow other trains entering the turns or being deployed to wait.
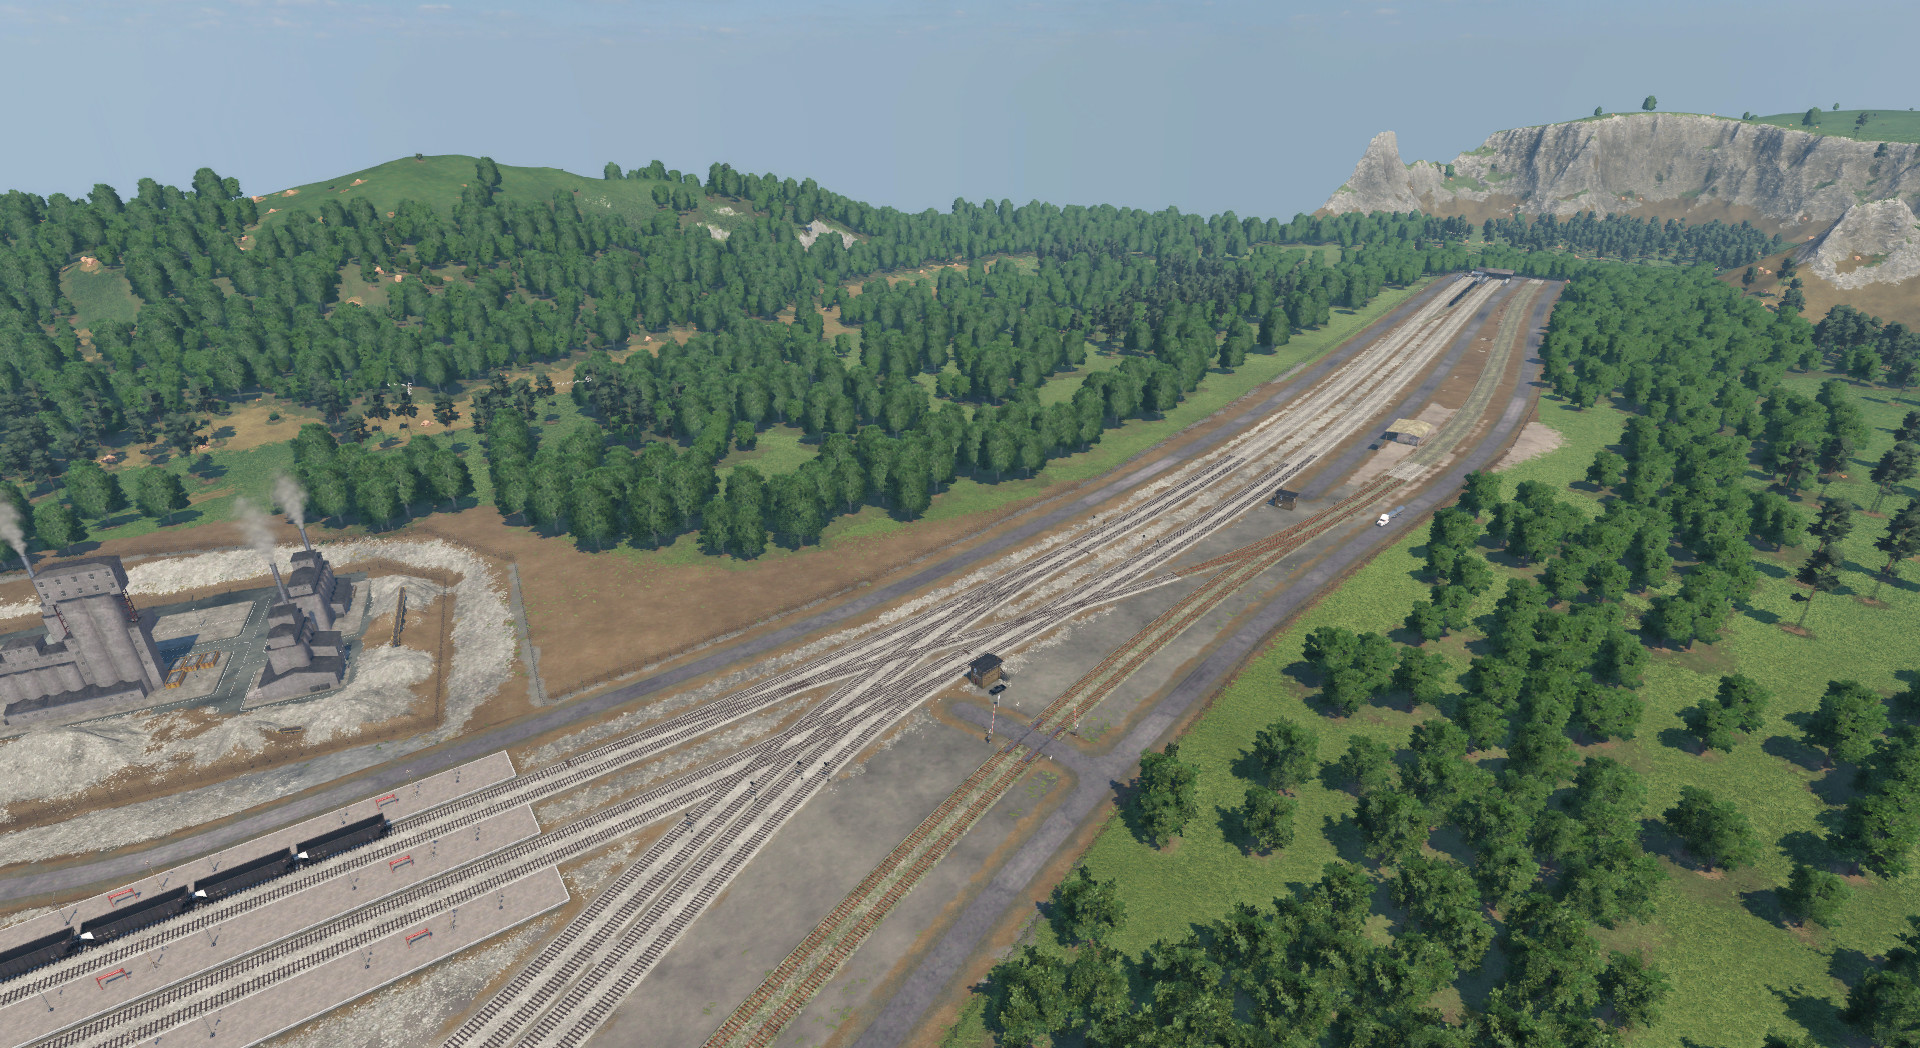
When the full layout is done it looks like this.
[link]

For this yard there are 5 lines that need to be created. Two lines will serve as the deploy lines, where all trains from the depot are sent. One is for delivery of stone and the other two take CM to the cities.
For the deploy turn, set the wait time to unlimited, then once a train makes it out of the station, it will wait for you to assign it to the line.

One thing not shown in the line setup video is to for the Turn Stops for each line, disable all cargo unload at those stations. Otherwise the stone will get dropped into nothing.
[link]Using During Play
Finally do a little detailing to make it look nice and it’s ready to go.
If you wanted to send trains back to the depot, when they are heading towards the Turn stop, just assign them to the Deploy line, they will exit and stop at the hold point. Then you can send them to the depot. There isn’t any reason to do this other than simply playing with the trains.

This video shows the train deployment.
[link]Extended Play
[link]For those interested in seeing the map that was used to make the vidoes, the map is located here
[link]
Be aware this has many steam mods that will be needed, however, most are not used in the map.
Improving the Yard
Keep in mind this is a basic setup that is will get you started. Add additional sidings to support deploying multiple trains at one time. Improved management for staging adding and removal. Support for lines running in both directions where the yard is located off to the side of the cargo station. Using much longer stations and trains (give yourself lots of space).
For a real fun challenge use the fake train mod and setup other bounce around lines that are moving freight around the yard. Decorate with buildings and bring the whole place alive.