Overview
A walkthrough for a 100% total world conquest in the Cold War scenario, playing as the Soviets. Maps and graphics planned. The dictatorship of the proletariat demands nothing less than the complete liberation of humanity, comrade!
Front Matter
The Cold War campaign lasts only 14 turns, and it’s a tense geopolitical situation with armageddon as a constant threat. The cost of war is prohibitively high, and the stakes are immense. Because of this, many players give up and write off a 100% world conquest victory as impossible.
In fact, a total global conquest is very possible, by exploiting various scripted events that accompany the campaign.
Note: This walkthrough first appeared in a simpler form on the Rise of Nations Heavengames forum, posted by my alternate user profile, “PalaceGuard”. It can be found here[ron.heavengames.com]. This guide is a work in progress and I may add in maps or other graphical aids in future revisions.
Basic Principles
Campaign: Cold War
Side: Soviets
Goal: 100% conquest of the world within 14 turns.
Basic principles:
- Excluding USSR and Warsaw Pact, there are 22 “flag” territories you must conquer for a 100% win (these nations will be bolded in this walkthrough when the time comes to convert or conquer them). You have 14 turns, so on average you should be aiming for two new territories each turn.
- You do not need to conquer all of these 22 territories militarily – some will change their allegiance to you through scripted events (South Africa, North Korea, Cuba), and others will be willing to become client states with a large enough bribe.
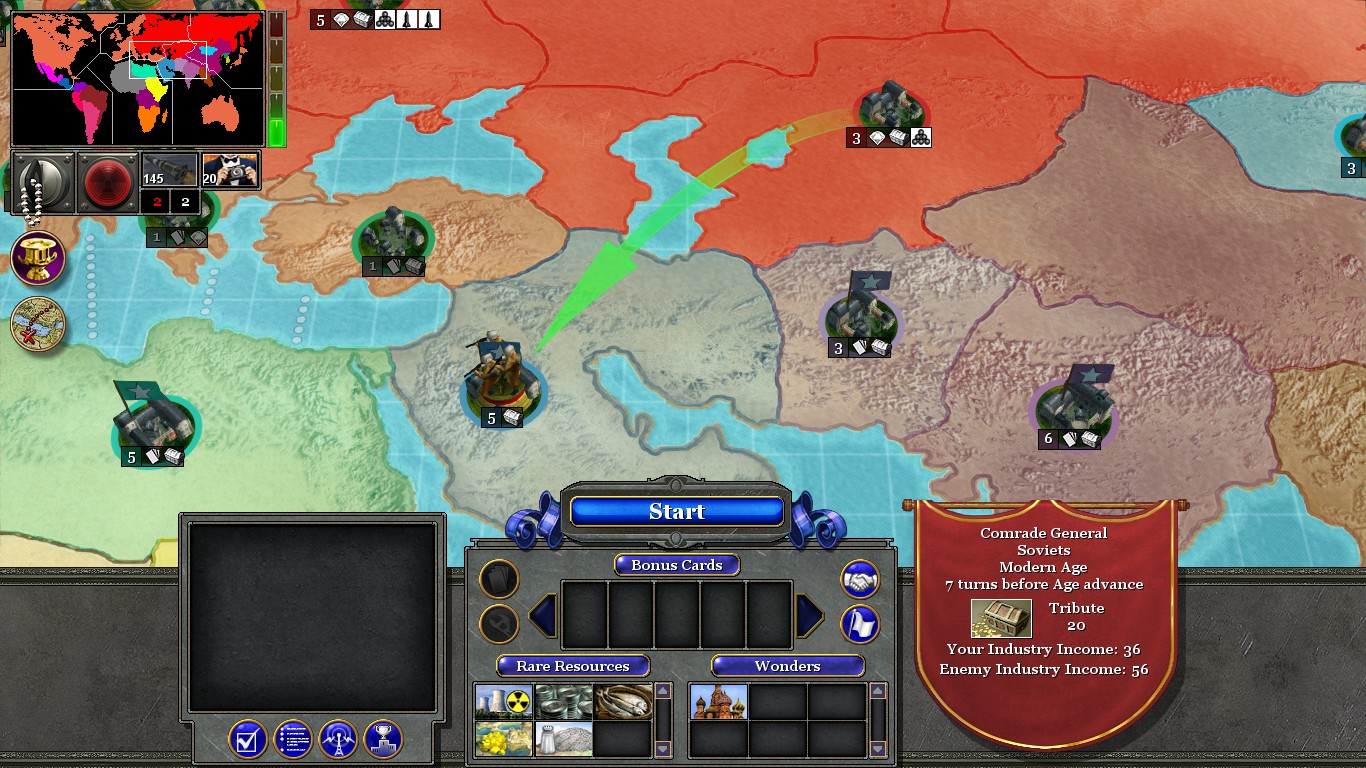
- Tribute is the single most important thing in this campaign. Your armies can only conquer one flag territory per turn. Your tribute can convert any number of territories to your cause per turn. It generally costs at least 90 Tribute to make a neutral state into a client state. Make sure you have at least this amount at the start of each turn, after accounting for income from territory strength. Sometimes the scripted events happen at the start of your turn right after you have received income, and you’ll want to make sure you have enough money in the bank to accept an offer.
- If you ever initiate a Police Action, that will end your turn, regardless of success. Make sure you’ve accomplished everything you wanted to do in a given turn before sending your troops abroad.
- Nuclear warheads are not much use because they force you to wait a turn before you can attack the devastated territory. As mentioned above, speed is crucial. The Soviets start off with two nuclear weapons – that’s already plenty. Your tribute is better spent bribing other territories to become client states.
- Declaring war against the US and its allies is a very expensive undertaking. However, goading them into declaring war on you is completely free! A provocative policy regarding DEFCON is helpful here, as it will goad the Americans into war without you spending any tribute.
- After a declaration of war, nuclear exchanges mean you will likely lose two or three territories. You must have enough armies remaining at this time to initiate Overruns to reclaim these territories quickly. Otherwise, a 100% global conquest is very hard.
Turn 1: Securing OPEC, Repairing Eastern Europe
100 Tribute, 22 nations remain:
Build up the three Warsaw Pact territories from strength 1 to 2 [-60]. Historically, the Soviet Union took the opposite route, initially plundering their European gains to repair the devastated Soviet infrastructure back home under the guise of “war reparations for colluding with Fascists”. Do not make the same mistake in your playthrough.
Espionage Mission 1:
Initiate the first espionage mission [-20]. Infiltrate all the enemy cities, leading with your Scouts first to eliminate enemy Scouts, and bribing enemy infantry where necessary to keep your Spies safe. The middle city, Minnetonka, is protected by one U.S. Scout to its southwest which will alert the Machine Gun troops to covert operations. Either send your Spies to approach the city from the north, or send in a Scout of your own to assassinate the enemy Scout.
Police action in the Middle East:
Your adviser suggests controlling OPEC to deny the Americans oil. This is excellent advice, and as such we will initiate a police action in Middle East [-20].
Build AA at the Fort to survive the initial wave of Fighters, then build Spies to bribe the Airfield to the southwest, to ensure a decent squadron of air units (which your starting Fortress cannot otherwise create for you).
Bribe or take by force any nearby Towers or Oil Wells. Supply all Oil Wells with Citizens, and then build up an invading force of Tanks, Light Infantry, and Katyusha artillery. Spies and an Air Force of Fighters will help you overcome enemy Tanks.
For bonus fun, select your Fort and hit “B” (to tell the Fort to research its B-column techs). You can actually upgrade your Generals and Spies quite a bit with this, if you can spare the Wealth.
Income: 0 Tribute at end of turn, +100 from Middle East, +50 extra from scripting for conquering Middle East, +41 from industry. Total tribute: [191].
Turn 2: Consolidating Power in the “Near Abroad” – Warsaw Pact and Korea
191 Tribute, 21 nations:
Build up three Warsaw Pact territories to 3.
The liberated populace of Eastern Europe, Finland, and the Balkans will no longer grumble for more nylons and washing machines, leaving you free to focus on the Arms Race, the Space Race, and the Peace Race. You have succeeded in fulfilling this objective and these territories will no longer rebel, allowing your armies to conduct better-supported operations overseas. [-90]
Initiate the second espionage mission
Your Spies will have to infiltrate and bribe enemy units. Make sure to send the Spies in groups, as the enemy patrols will usually arrive in groups. Also, make sure to set escape waypoints far from the enemy to get your Spies out of harm’s way once they’re done bribing (after you’ve right clicked on an enemy unit to bribe, hold shift and right-click at a safe distance to tell your Spy to run away once she’s done). There is a Barracks facility just north of your starting point, and an Auto Plant to the east. Three U.S. Howitzers also patrol to the northwest. Once you have bribed them and a sizeable attack force, go north and launch an attack against the major city there, using the Alt-RightClick command so your army protects its artillery. The Blue army will put up some resistance, but if you’ve preserved your Spies, they can bribe away enough enemy Tanks to neutralize the threat. South Africa becomes client state. [-20]
Police action in South Korea
The Korean War may have been born of mutual misunderstandings. Kissinger maintains that Kim Il-Sung of North Korea made contradictory representations to Stalin and Mao, successfully exploiting distrust between the two Communist leaders and securing the green-light for his invasion of the South. Another potential miscalculation by Stalin meant that the Soviets were not present to veto the UN Security Council resolution to intervene in the Korean War – leaving the Soviet support for the attack grudging at best, and requiring a large-scale intervention by the Communist Chinese to avoid a complete collapse on the Communist front. Fighting ended almost at the same frontier on which it began, on the 38th Parallel North, with a growing rift between the Chinese and the Soviets, and a Korean nation that remained split over five decades later.
We will not be making these same mistakes in our runthrough as the Soviets. We will be supporting the North Korean assault directly with boots and treads on the ground, and most importantly we will refuse the Chinese offer of aid (which will make them more amenable to client state negotiations in following turns).
First, take a look at where the Soviet economic infrastructure is located on this map. Most of your Timber, Metal, and Food production is located near Vladivostok and Slavyanka. They are right by the seaside, in coastal regions of the map, and the UN Allied Forces will soon be sending ever-increasing naval raids to destabilize our economic base.
Accordingly, we’re going to send all of our Civilians up north, to Khabarovsk – an inland city with good access to Timber and Metal. We are going to raze every economic building at Slavyanka and Vladivostok to the ground, and then we will build Farms and a Granary around Khabarovsk.
Meanwhile, our economy is lagging far behind practically everybody else’s, and our tiny expeditionary force stranded in North Korean territory is not likely to even dent the conflagration below. The one thing we do have is open slots for more cities. We will send a Civilian to the military base to put down a city (which may well emerge as a Large City, thanks to the variety of buildings in its radius). We will also put down a Fortress and maybe another Airbase when the time is right. In time, with a few redundant key buildings such as an extra Library, Market, and University, it may look something like this:
Putting down a city near military buildings will also increase their strength, which is important because halfway through this scenario, the UN will start launching missiles at hard targets, including our military production buildings. Anything that increases survivability is good.
Economically, there are also a good number of Rare Resources around the top edge of the map, hidden by the shroud. If your Scouts can uncover them, send out Merchants to collect them. To bring our economy back on track in this underdeveloped eastern hinterland, I placed one final city somewhat north of the military base (above) where there was a good source of Metal and Timber. Keep an eye on the Market’s exchange rates, as well – I found Timber to be extremely cheap on the market, which helped me build basic infrastructure quite quickly.
A further five Farms and a Granary, and we’re at roughly 10 gatherers per resource. The Soviets should start off with about 4 Oil Wells scattered throughout the map, so no need to build any more. Just remember to send Civilians out to gather Oil at those wells, and build Refineries at your cities when possible. (Annoyingly, there is no easy way to find empty Oil Wells. The best I could do was to click on one, then hit HOME to select all wells, and then go manually one by one through the wells and assign Civilians to them.)
At somewhere around the 10 minute mark, the Chinese will offer to intervene in exchange for a non-hostility pact. However, if you accept, then the Chinese will be unreceptive to client state negotiations later on. Although the Chinese can offer significant infantry backup, we will decline their offer and prosecute the war on own own. This will make the Chinese more amenable to client state relations in future.
Once your economy is strong enough, you can set up an invasion force to break through to the South and take their three cities. Aging up to Age8 and upgrading your units will allow you to sweep the UN and South Koreans into the sea. Fighters will be useful to give them cover, and Cruise Missiles will be helpful to reduce cities so your ground troops can take and hold. First attack Seoul with two squadrons of Fighters and one of Bombers, coordinated with a ground invasion force:
Then cut east to bomb and take Suwon, and finally southwest to take Daejeon.
Income: 60 from end of turn, +40 for South Korea police action, +50 from industry. Total tribute: [150].
Military Tactics – A Brief Primer
The large-scale attack of the Korean War may give us a good opportunity to discuss military tactics.
In the post-Industrial age and beyond, most ground forces will be built around two main units: Light Infantry (LI), and Tanks (HC). The HC will provide most of the speed and battlefield superiority, and the LI will clear opposing anti-tank ground forces, and take and hold cities once reduced.
There is typically a smaller force of artillery and supply bringing up the rear, to clear enemy fixed defenses quickly.
Ground Control Group F3 – Infantry:
This rallies on a General (or The Comrade, if he’s around). The group itself will include LI, HI (heavy infantry, e.g. Bazooka), and MG (machine gunner infantry), as well as the General. I usually infinite-queue Barracks to rally on this General, to keep up a constant flow of new units to replace casualties. If I use a General instead of The Comrade, I will tell a Supply Wagon (SW) to follow the General by right clicking on him, and sometimes I will tell an AA Battery to do likewise. I almost always send a Special Forces (Sc) after the General to keep enemy Spies at bay.
Note: the noncombat units, such as AA, SW, and Sc, must not be included in the control group itself. If this happens, then combat-related orders which you give to the group may be inadvertently relayed to the noncombat support units too. This results in Sc leaving the General and attempting to bomb enemy defenses, which is risky and unnecessary. Make sure to order these noncombat units to follow (right click) the General, and leave them out of the group definition.
Ground Control Group F4 – Armored Superiority:
This rallies on a General, and will consist of HC and Armored Cavalry (LC). This is usually the most numerous force, as it can cover a lot of ground very quickly, and engage and pin down enemy ground forces. Like the Infantry, if this group has any support at all, these will be ordered to follow the General around, and will be otherwise excluded from the group itself. I will always attach one Sc and maybe a SW and AA to this group. Auto Plants will rally on the General on infinite queue to replace casualties.
Ground Control Group F5 – Artillery and Support:
Siege and artillery will rally on a General. This may include the AA for once, and may also include specialized anti-building ground troops such as the Flamethrower (FT) units. If I have Sc that I actually want to attack buildings, then this is the only group in which I would include them. Even besides the attack Sc, I will always include several AAs and several anti-spy Sc as follow-units in this group (i.e. they will not obey orders, but will follow the General around to keep the siege safe). Losing an artillery unit to an enemy Spy is devastating.
However, ground forces need air support in order to survive enemy engagement. The aircraft management in RON is not particularly clear with the Airbases, so when I know a full-scale conflict is about to break out, I usually partition Airbases by aircraft type. Any modern military force will find its fighting efficiency multiplied by the use of Jet Fighters. Even with a minor ground force, a modern power can rely almost entirely on Bombers to take out fixed positions and Fighters to clear mobile opposition, and then rush a small invasion force to capture and hold cities
Air Control Group F6 and F8 – Air Superiority:
Each Airbase can hold 10 fixed-wing aircraft, so two airbases will provide a squadron of 20 Jet Fighters. These are among the most powerful combat forces available. By selecting an Airbase (F6 or F8, set to the airbase itself and NOT to the individual units), you can hit R and left click anywhere on the map for a swarm of Fighters. They can bypass massed ranks of infantry and armor to strike at enemy siege and supply units. They can swarm incoming infantry and armor to inflict massive losses in a fraction of the time it would take a ground-based defense screen. They can scout and spy and locate enemy positions better than any Sc unit could.
Air Control Group F7 and 0 – Strike Groups:
The Bomber squadrons (sometimes one, occasionally two) can inflict huge amounts of damage very quickly on enemy hardpoints. Carefully timed, they can arrive at an enemy city just before your ground troops and reduce it quickly, then take out Bunkers and Fortresses as your ground troops seize the city. As with Jet Fighters, I will assign each individual Airbase to a control group, and use the Rally mechanic to send out a strike. I almost never put individual Bombers into the control groups.
Control Group 7 – Engineering Corps.:
Sometimes a city is tactically important, and once you capture it, it’s important to get it up and running and repaired as fast as possible. (This is often the case with captured enemy capital cities.) In that case, I will usually have a small corps of Civilians follow the army into the city to patch things up. They can also build Barracks, Auto Plants, and Factories closer to the fighting, for quicker replacements of battle casualties, and shorter lines of communication.
Turn 3: Submarine Sabotage, Winning China, and the Suez Crisis
150 Tribute, 19 nations:
Initiate the third espionage mission:
This is the hardest of the missions, with very narrow margins for failure. You will have six Special Forces and two Spies. You may lose a Special Forces unit here and there and still prevail, but success is almost impossible if you start to lose Spies.
Your first wave of Submarines will have to fight off four Cruisers, one from each cardinal direction.


The hardest corner is likely to be the eastern corner, where two enemy Tanks await. More importantly, there is a Helicopter, which can uncloak Spies and can thus ruin your mission if you’re not careful.
You can deal with the enemy Helicopter by sending a sacrificial Special Forces unit to lure it away. As long as your Special Forces unit remains roughly within visual distance, the Helicopter will continue chasing after it. But if the Helicopter loses sight of its prey, it will return to its oversight position near the Shipyard.
The northern corner hosts a target Shipyard guarded by a handful of infantry and a pair of vehicles, so if you have been diligent about bribing enemy units, it should not present much resistance.
Completing this secret operation will give you +100 Tribute and an Embargo card.
Convert China into a client state:
China is one of the hardest nations to defeat in a military battle (save the game and declare war and give it a try – the map has extremely unfavorable terrain), so you’ll need to convert them to a Client State through diplomacy. To completely box in the Americans, the Soviets will need to gain control of Mexico or Central America plus Vietnam, preferably in the same turn. (America usually goes for one or the other in order to get a foothold into Asia or South America.) The Soviet armies can reach Vietnam through India or China, and they cannot reach Central America at all at this stage, meaning diplomacy is the long-term plan for converting Central America. China is a geographically more useful territory as it borders four others, instead of India’s three. The lowest price a territory usually will even consider joining you for is 90 Tribute. Start from that and offer upwards in increments of 5. At this point in the game, 155 Tribute or so for China to become a client state is a typical trade. [-155]
Start a police action in Egypt
Recall that two turns ago, the Soviets sealed a pact with OPEC. Now, by helping the Egyptians close off the Suez Canal to the U.S. and its allies, you can throttle the oil markets. Declare a police action in Egypt [-22].
This is a useful chance to raise the DEFCON alert level, to goad the Americans into declaring war on you. About a minute or so into this scenario, the Rebels will offer to side with you openly, at the cost of worsening DEFCON. Accept the Rebel offer. The rest of this mission is very simple – the enemy AI is set so low you can spend most of the game booming and then hit them with an advanced army.
Income: 53 from end of turn, +20 from Egypt client state, +63 industry income. Total [136] Tribute.
Turn 4: Controlling Korea, and Expanding into Africa
136 Tribute, 17 nations.
This is the first turn that the Soviet economy outperforms the Americans (66 income vs. 61 income).
Clienthood with North Korea:
The North Koreans will send a diplomat to offer client state relations, for a very favorable price. Accept the offer [-25].
Declare a police action on the Ethiopians, but don’t actually start the war yet. Make sure you pay the cost of declaring the police action [-23].
Offer all your remaining Tribute to Afghanistan for clienthood. [-88] If you do not actually spend all your Tribute before doing this, the Afghans will raise their price of complying.
Complete the police action in Ethiopia. It helps if you have one army in North Africa and one in Middle East to support. You’ll most likely find AA, Machine Guns, and Cavalry to be the most useful units. Generals also help increase shooting range of garrisons and unit survival, and Scouts are useful for jamming enemy AA near your Airfield. Your Science research is set at 8, so collecting ruins is also very good value for money. +15 Tribute.
Income: 0 end of turn, +15 Ethiopia, +72 industry.
Turn 5: African domination
87 Tribute, 14 nations.
Cuba revolts:
Castro overthrows Batista. This will become fairly important later on.
Overrun West Africa:
Use two armies, one from North Africa supported by another from Ethiopia, to overrun the uninhabited West African territories. This does not end your turn because it does not count as your police action for the turn. +20
Declare a police action on Central Africa:
Use two armies, one from Ethiopia and South Africa. Do not actually start the police action yet, but do pay the cost. [-24]
With your remaining 83 Tribute, offer Mongolia clienthood:
If you do not pay the Police Action cost up front first, the Mongolians will demand all your remaining treasury.

It does not matter which army you choose as the main and support. This battle requires that you save your Rebel friends from defeat, which is a significant risk early on. With your first army, send a skirmishing force to protect the purple capital from blue, while you build up your own economy. By the time your second army arrives, purple should be stabilized. If not, the second army can cut deep into the enemy’s territory and assault their capital. This usually forces them to withdraw their main force and to engage in defense of their capital.
From then, it’s a simple boom exercise against the AI as a prelude to a crushing offensive. +40
Once you prevail, you will receive an extra 50 Tribute for uniting all of Africa. We have assisted the honest working class of the African nations in completing the decolonization process.
Income: 0 end of turn, +40 Central Africa, +50 uniting all of Africa, +79 industry income. Total [169] Tribute.
Turn 6: Checking American Adventurism
169 Tribute, 12 nations:
Batista Overthrown:
The Cubans, under Fidel Castro, give hints that they will become an ally if the Soviets make an offer.
Do so. They will become clients for 90 Tribute or so. [-90]
America Awakens:
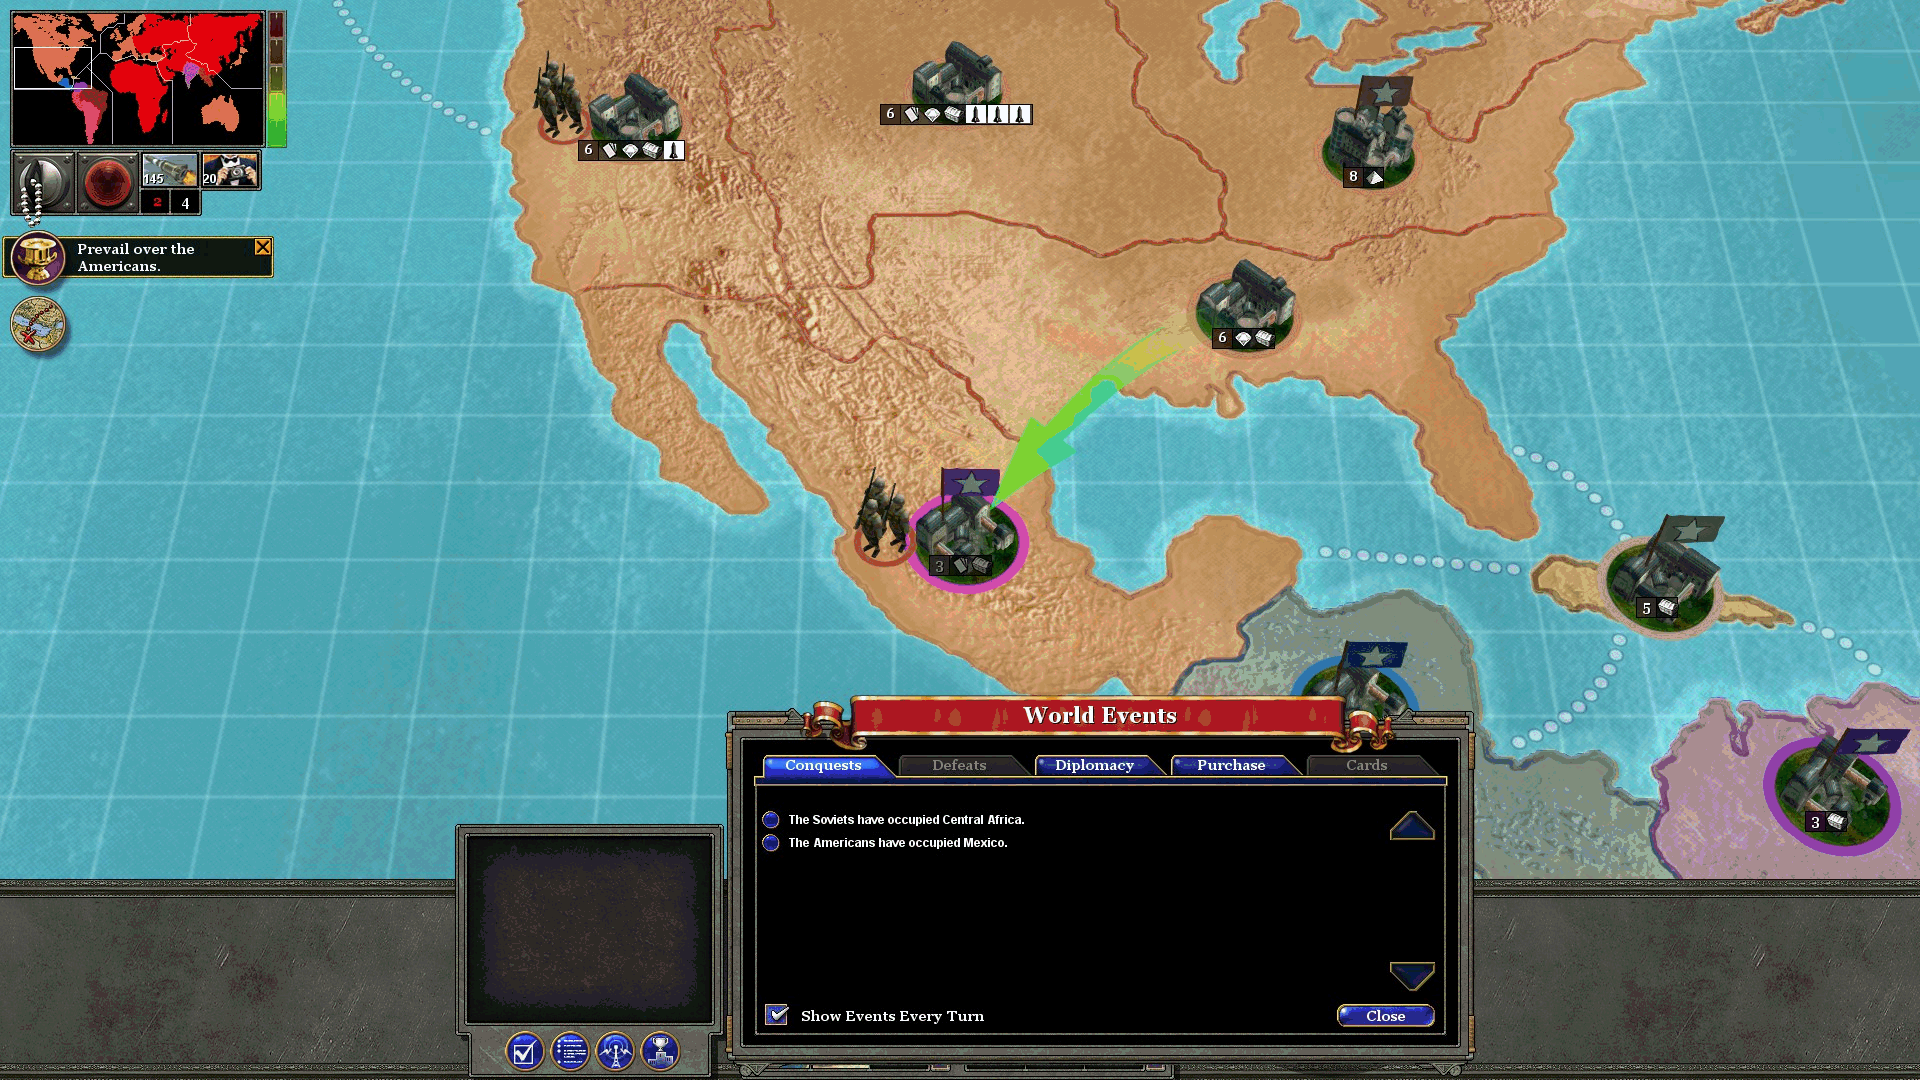
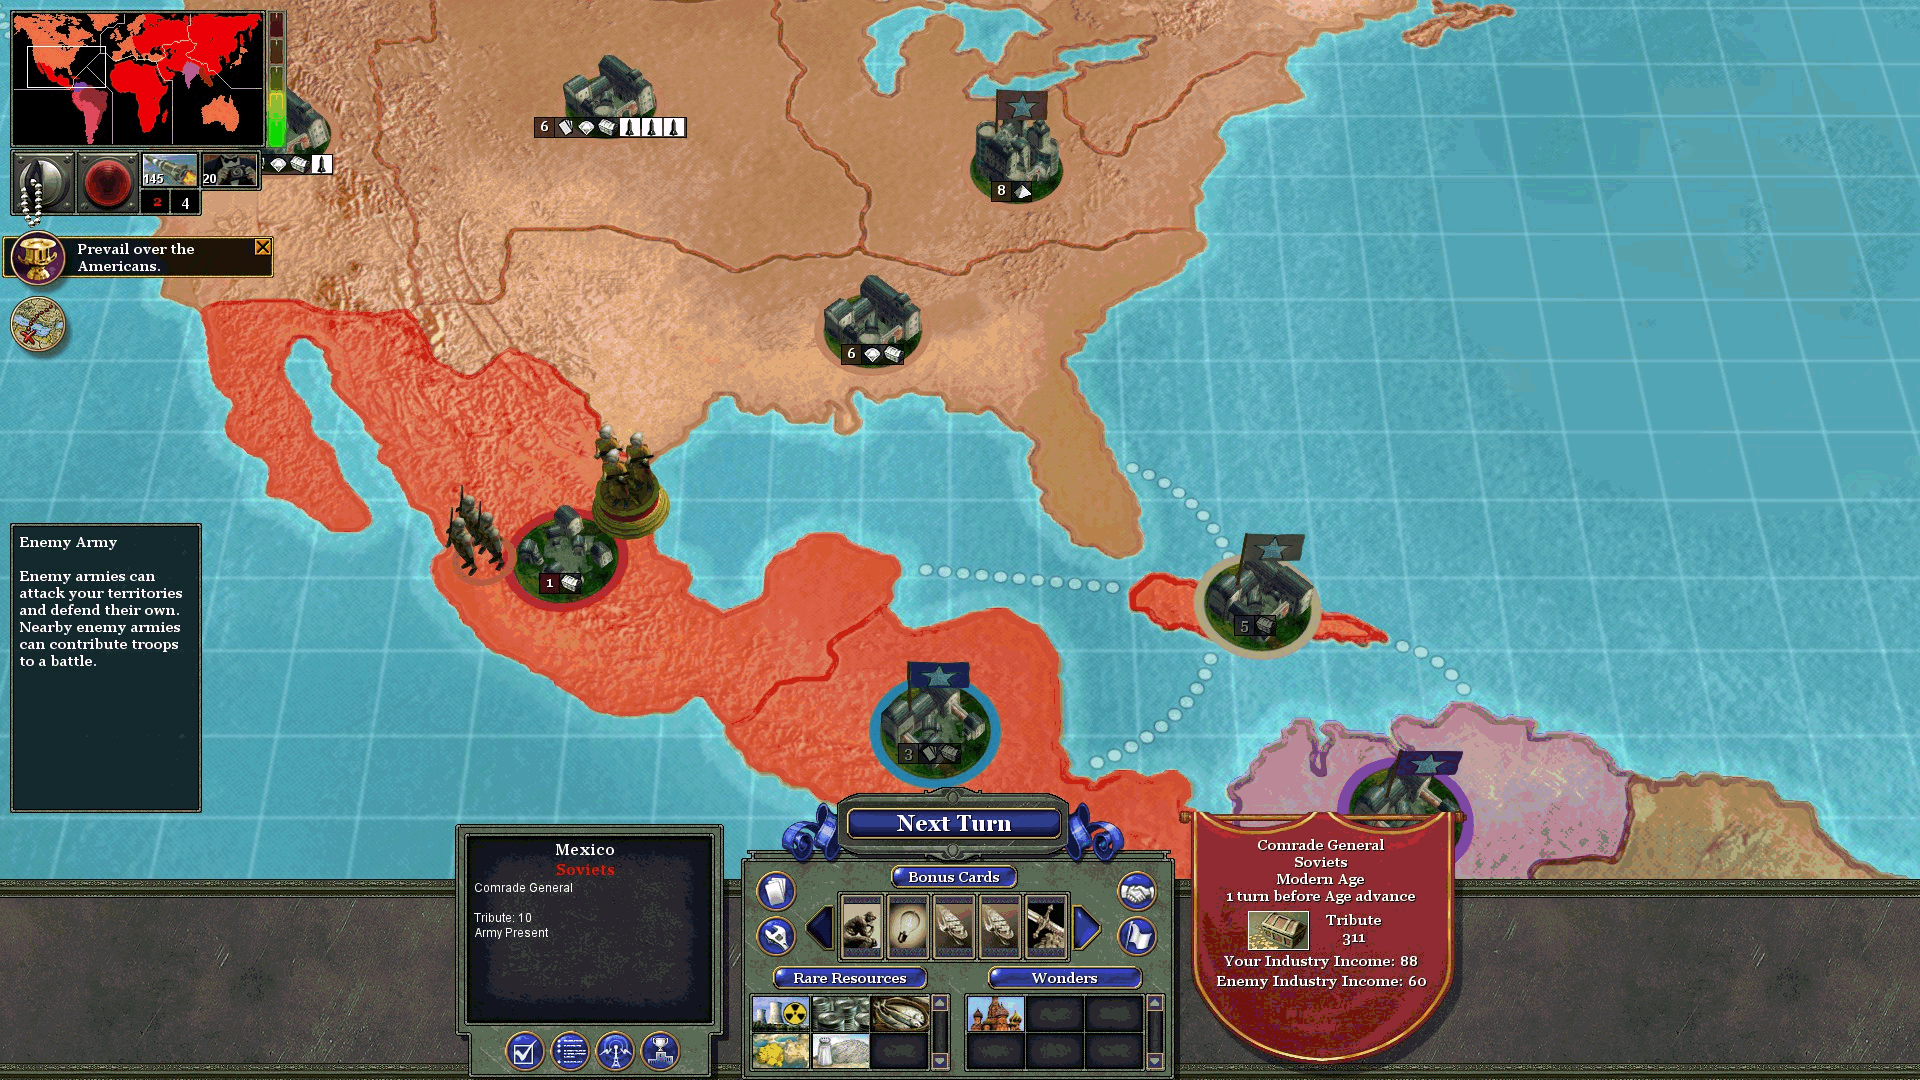
The American foreign policy focus has finally shifted from its Eurocentric slumber, and Mexico has converted into a client state of the US.
This is bad news. Each flag territory that America occupies means a flag territory that can ONLY be converted to your side through combat. You cannot conduct diplomacy with an American ally to convert them. Because we’ve already established that combat is a once-per-turn pursuit, the Soviets must nip American expansionism in the bud as early as possible. (It is technically possible to convert Mexico early on, but the Americans usually convert Vietnam immediately afterwards.)
Fortunately, the Cuban revolution comes at a perfect time, allowing us to strike just south of Mexico and to head off American expansion into South America.
Fourth Espionage Mission – Missile Defense:
Initiate the fourth espionage mission. This is so simple you could safely leave the computer running and make a samovar of tea. Place two Scouts northeast of the Missile Silos:
Place another two Scouts southwest of the oil wells:
Place the final two Scouts southeast of the refinery:
The Spies will never even get close if you’ve done it right.
For bonus fun, see if you can do research while doing this mission. You can get a fair bit of Temple B, Lumber Mill A, and University A research done, as well as Science at the Library. [-20]
Hemming in the Eagle
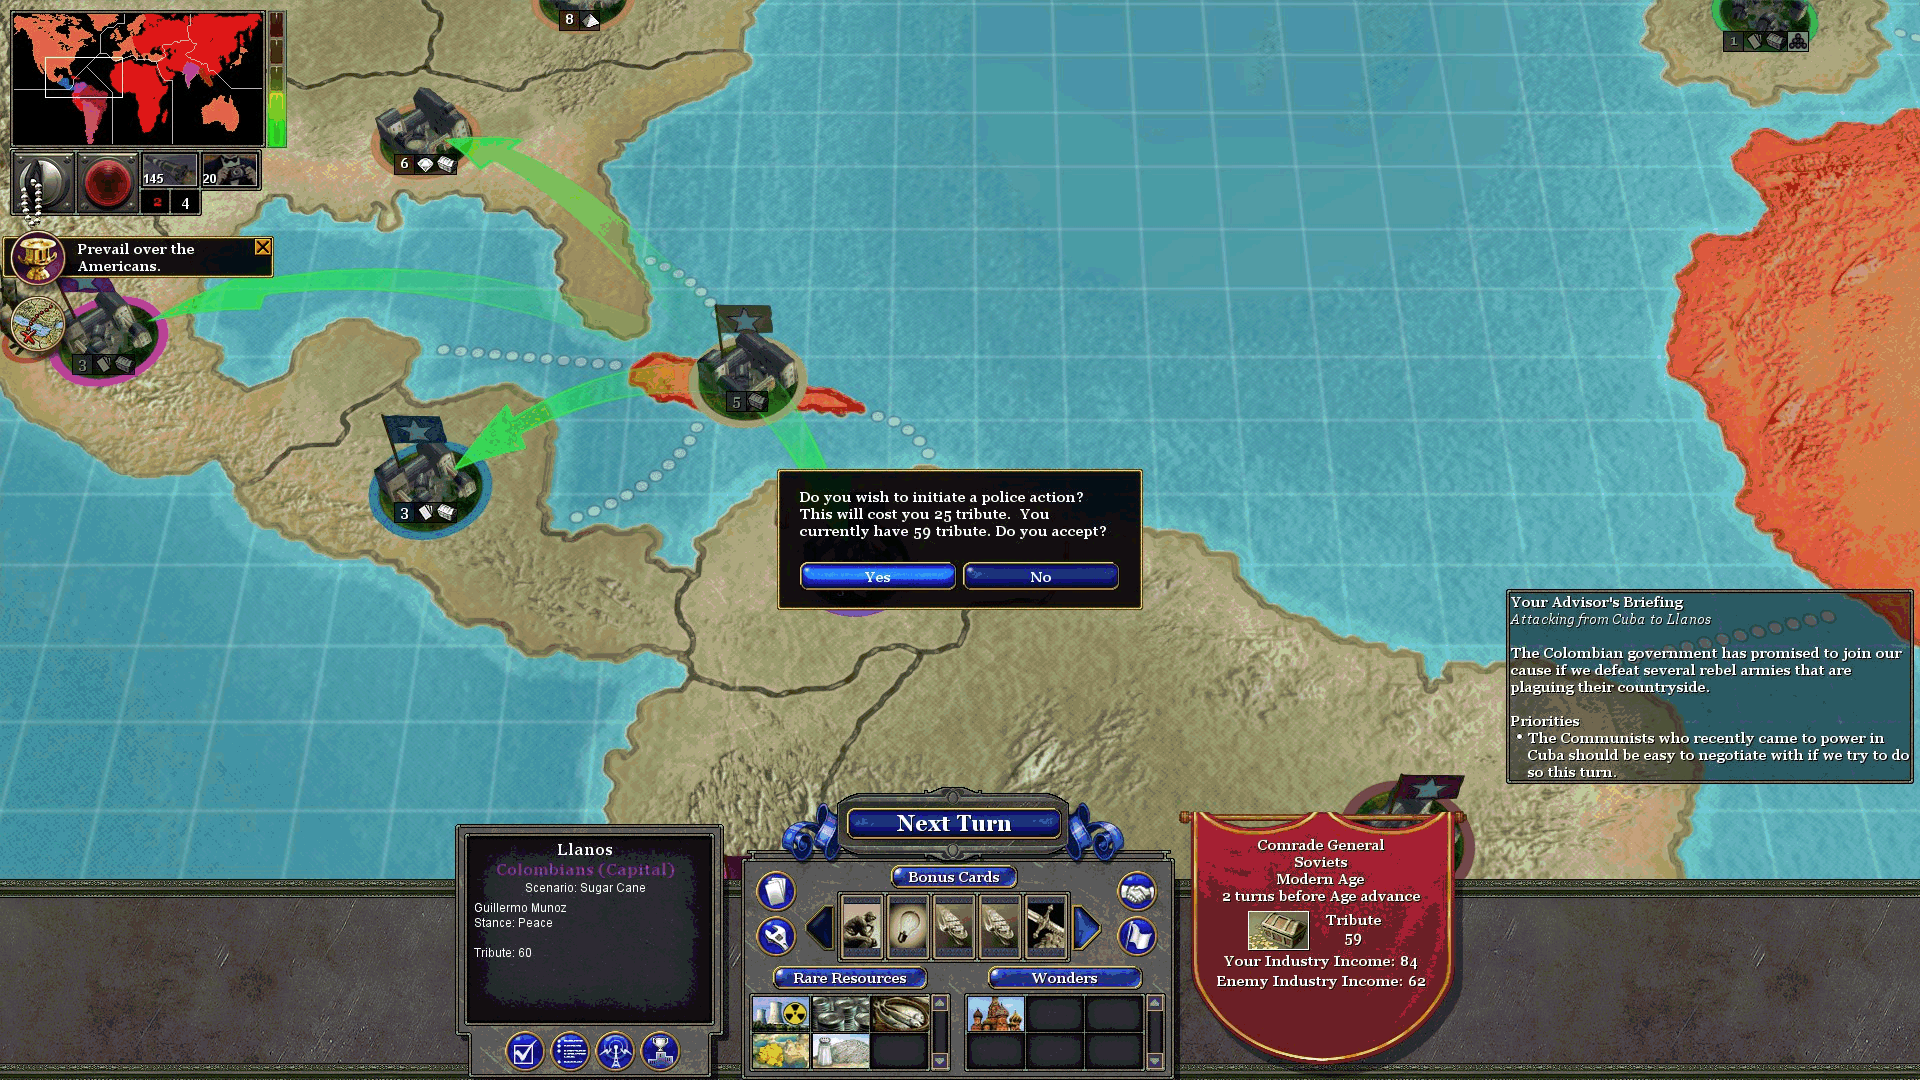
Initiate a police action from Cuba to Central America. This is crucial to stop the Americans from expanding further [-25].
This mission allows for some degree of diplomacy – you can negotiate with the AI nations to see if any one of them will become your ally. For the purposes of brevity, this walkthrough will assume that none of them ally with you. Bear in mind that at a certain point in the mission, all of them will unite under a single leadership, under Blue, to resist you.
You start off with a single city on the seaboard.
There will be some slight harassment by way of water, so it’s imperative to build a second city further inland to reduce your vulnerability to piracy and raiding.
After weathering one early raid from the southwest, and a second raiding party by way of the sea, the rest of the scenario quickly devolves into a standard military-industrial race. The terrain is relatively forgiving, in the sense that the AI has difficulty mounting effective attacks through it.
It’s not unheard-of to be fielding Stealth aircraft by the time you reach the Panama Canal.
(Note: on an earlier playthrough, I dedicated resources to a navy, which fielded one Battleship, well-protected by a screen of Submarines and Cruisers. The Battleship has very impressive anti-hardpoint bombardment capabilities, and this scenario can be won through sea domination using even a modest ground force.)
Remaining tribute 34, Central America tribute +20, industry tribute +87. Total 141.
Turn 7: Preventing a Quagmire, Flipping Central and South America
141 Tribute, 10 nations.
Protecting Vietnam
The Americans are thinking about sending an army to Vietnam, and we have a few turns to do something about it. We’ve already blocked off their South American adventurism with our conquest of Central America. If we can stop their Asian ambitions, we effectively render their armies useless. They would be able to expand only by diplomacy or by declaring war on us.
Engaging in the Arms Race
The people request that we increase our nuclear deterrence to beat the Americans. Ignore this request for now – the cost of buying nuclear weapons is prohibitively high, and the Tribute is better spent on soft power, persuading people to join our cause. If all else fails, we have some sabotage missions that allow us to reduce the US stockpiles by a significant margin, and we can carefully time the release and replenishment of our current nuclear force to manipulate this objective.
Initiate the Guerrilla Warfare Spy Mission:
This particular mission is not hard and merely requires you to keep up a constant supply of units running up the middle path to pick off enemy units. AA, LI, and HC are useful [-20].
Make sure to match up your units to attack enemies which they are strong against (e.g. HC vs LI, LI vs. HI and AC, and Helicopters vs. HC). You start off with four Helicopters and cannot build any more, but you can taunt the enemy Fighters into chasing your Helicopters… and right into the firing range of your distant AA Batteries.
This scenario will allow you to regain control of Mexico if the Americans took it over, which helps enormously.
Note the American army stationed in Mexico – if you move a Soviet army there, you now have two rival armies both occupying the territory! Don’t worry, the American army will disappear next turn.
+100 Tribute for mission, +10 for Mexico, +70 tribute apparently by event (not clear where it was awarded).
Stop the Americans cold at Vietnam
Now you have 311 Tribute, and the Americans have declared war on Vietnam. Bribe Vietnam for [-110] to forestall their invasion.
Expand into America’s backyard
You have 201 Tribute remaining; bribe the Peruvians for [-110]. (This is normally a very irritating battle.)
Solidify control of South America
Surround the territory of Llanos with three armies and initiate a Police Action there. [-26]
The simplest way to win this scenario is to play it as if it were a Territory Victory game. Keep a small force of ground units to fight off enemy incursions, and perhaps put down an airbase to help defend your ally’s capital against bomber raids.
Once the center is secure, you can simply border push until the entire map is your territory. Enemy buildings will be destroyed by the mighty Soviet attrition. You start off with three remaining City slots – one can go up in the northeast.
One can go in the northwest, to take care of the pesky lone Rebel base there.
The remaining one I put in the south, to better advance the border push.
The Rebels also have significant reserves of Partisans, who can inflict a heavy blow against your ground troops if they ambush them on neutral territory. However, Partisans suffer very high levels of attrition damage when they’re in enemy territory. (This was probably a design decision to prevent Chinese instant-Partisans from leading a massive invasion force.) The biggest concentration of enemy Partisans is just slightly southeast of the center of the map, behind the enemy airbase.
If you run out of City slots, build Forts. They will border push as well, and attrition is your single most powerful tool in this scenario.
Much of your work will be done for you if you continue pressing attrition outwards. Completing this mission gives you +60 Tribute.
With 100 industry income, your total should be 225.
Turn 8: the Lead-up to War
225 Tribute, 6 nations.
NATO teeters
Australia loses two territory strength.
Initiate the sixth and final spy mission [-20]. In this mission, you have a super-Spy with higher than usual HP and a huge amount of Craft. You also have a Supply Wagon that will heal at very high rates.
Your Spy will need to infiltrate the cities to find the nearby silos. Then she will need to bribe enough enemy units to destroy them.
This is the disposition of the easternmost city: one Tank, one Armored Cavalry, and one Anti-Aircraft Battery. There is a squad of Light Infantry near the east side of the map. Generally, if you bribe the armored units first, the remaining infantry units will not be able to do sufficient damage to
them before you bribe them back. Regroup all your military units on the Supply Wagon so they can heal up. For the Spy, have her stand still once the coast is clear, so she can re-cloak once more.
This is the disposition of the middle city: two Artillery, and a handful of Light Infantry squads.
Finally, the westernmost city has these forces around it: Artillery, HI, LI, and a Tank.
Once you have the force to do so, head up to the northern border and lay systematic waste to the American missile silos.
Once you return to the map, this will destroy two of the American nuclear missiles, and will give us a Wonder Card. (Edit: According to eagle-eyed gamer jan.koupil, this mission also gives you a Treachery bonus card, which is critical to this 100% CTW completion.)
Sputnik and the Space Race
The Soviets should build the Space Program (as in history) as it gives significant military benefits.
It’s usually a good idea to place this in a territory that does not have a Supply Center – the Americans tend to target those with nuclear strikes.
Negotiate clienthood with the Argentinians [-110].
Negotiate clienthood with the Brazilians, using 90 Tribute [-90].
This will unite all of South America under your rule, and allow you to claim +40 Tribute as a reward.
At this point there is only one remaining neutral state, and that is India. We’ll deal with them later, either through military action or (more likely) by bribing them to our side.
And now it’s time to declare war.
Turn 8 cont.: The Cold War Turns Heated
45 Tribute, 4 nations.
Deception and Armageddon
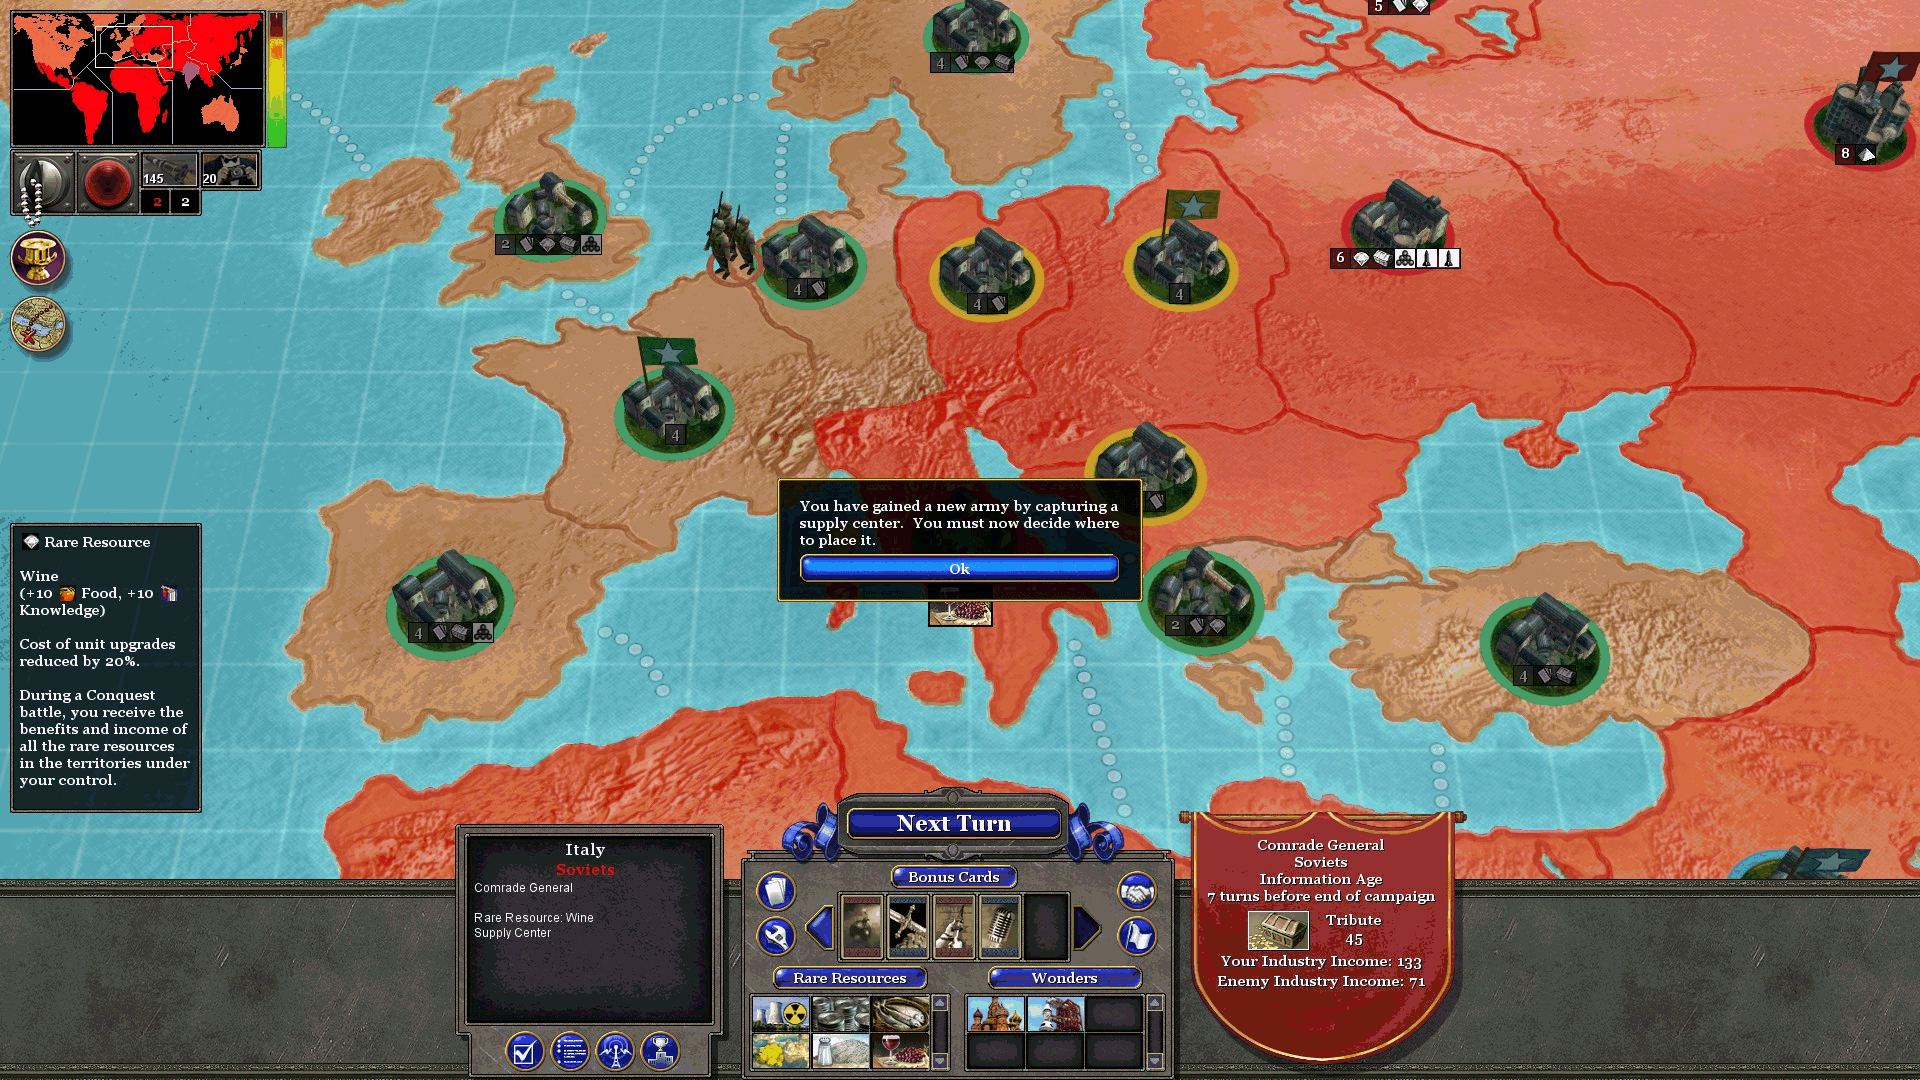
With only 45 Tribute, how do you start a war against the Americans? The trick is to use the Treachery card to steal a territory. This automatically causes war to break out, without any cost on your part.
We will use Treachery on Italy.
More importantly, Italy gives us possession of a new Supply Depot. This is vital.
We will place the new army right in Italy.
The Americans will declare war immediately.
However, we have the first military action before the panic buttons engage. Our army stationed in Italy will conduct a lightning raid across the border to France, to knock out the headquarters of NATO. This will allow us to seize the NATO capital and eliminate the American military presence in Europe.
Neutralizing NATO
It is useful to use a Mercenaries card and a Sabotage for this battle. If you back it up with a Trade Embargo, it’s entirely feasible to move your army more or less in a straight line towards Paris and end the scenario within five minutes. (Conversely, if you play this mission later in the game and provide insufficient support for your army, it’s entirely possible to suffer a humiliating defeat at the hands of that American warlord hawk, President Jimmy Carter.)
You start off with a city in the south.
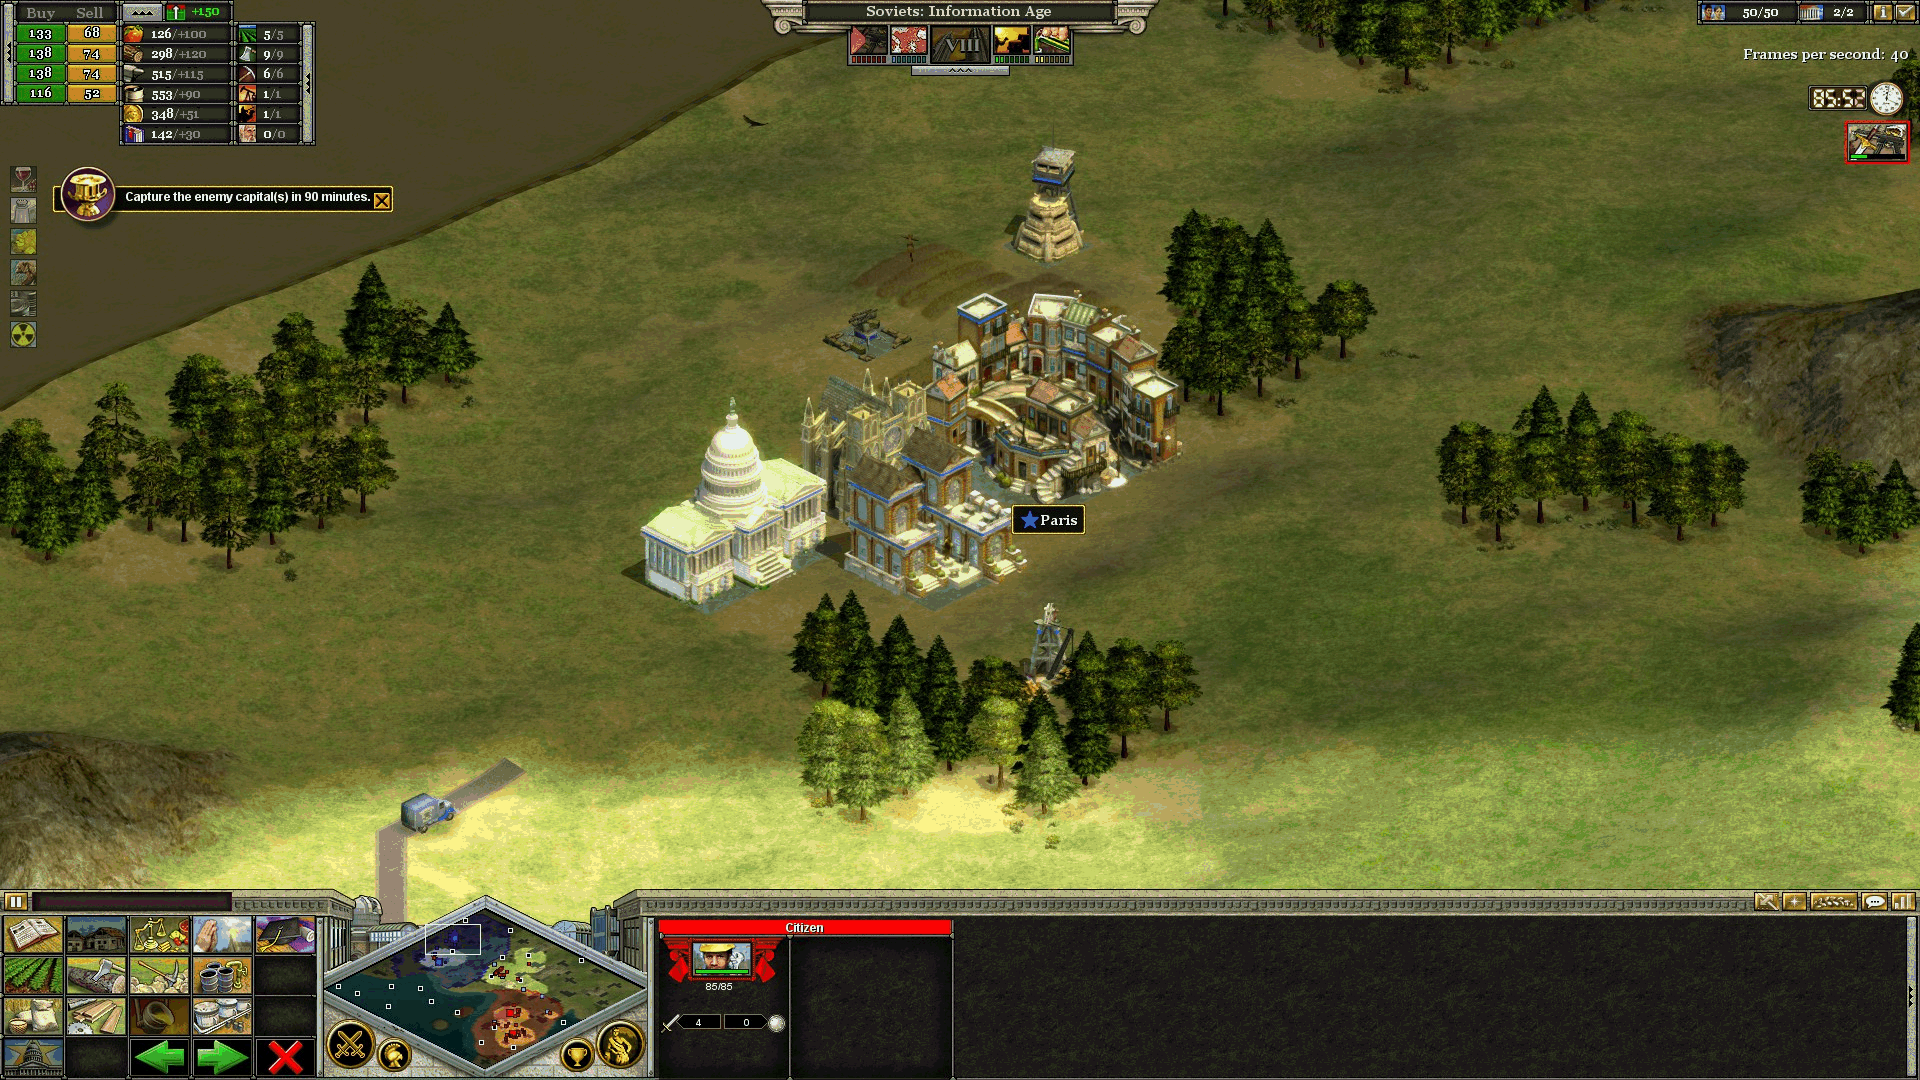
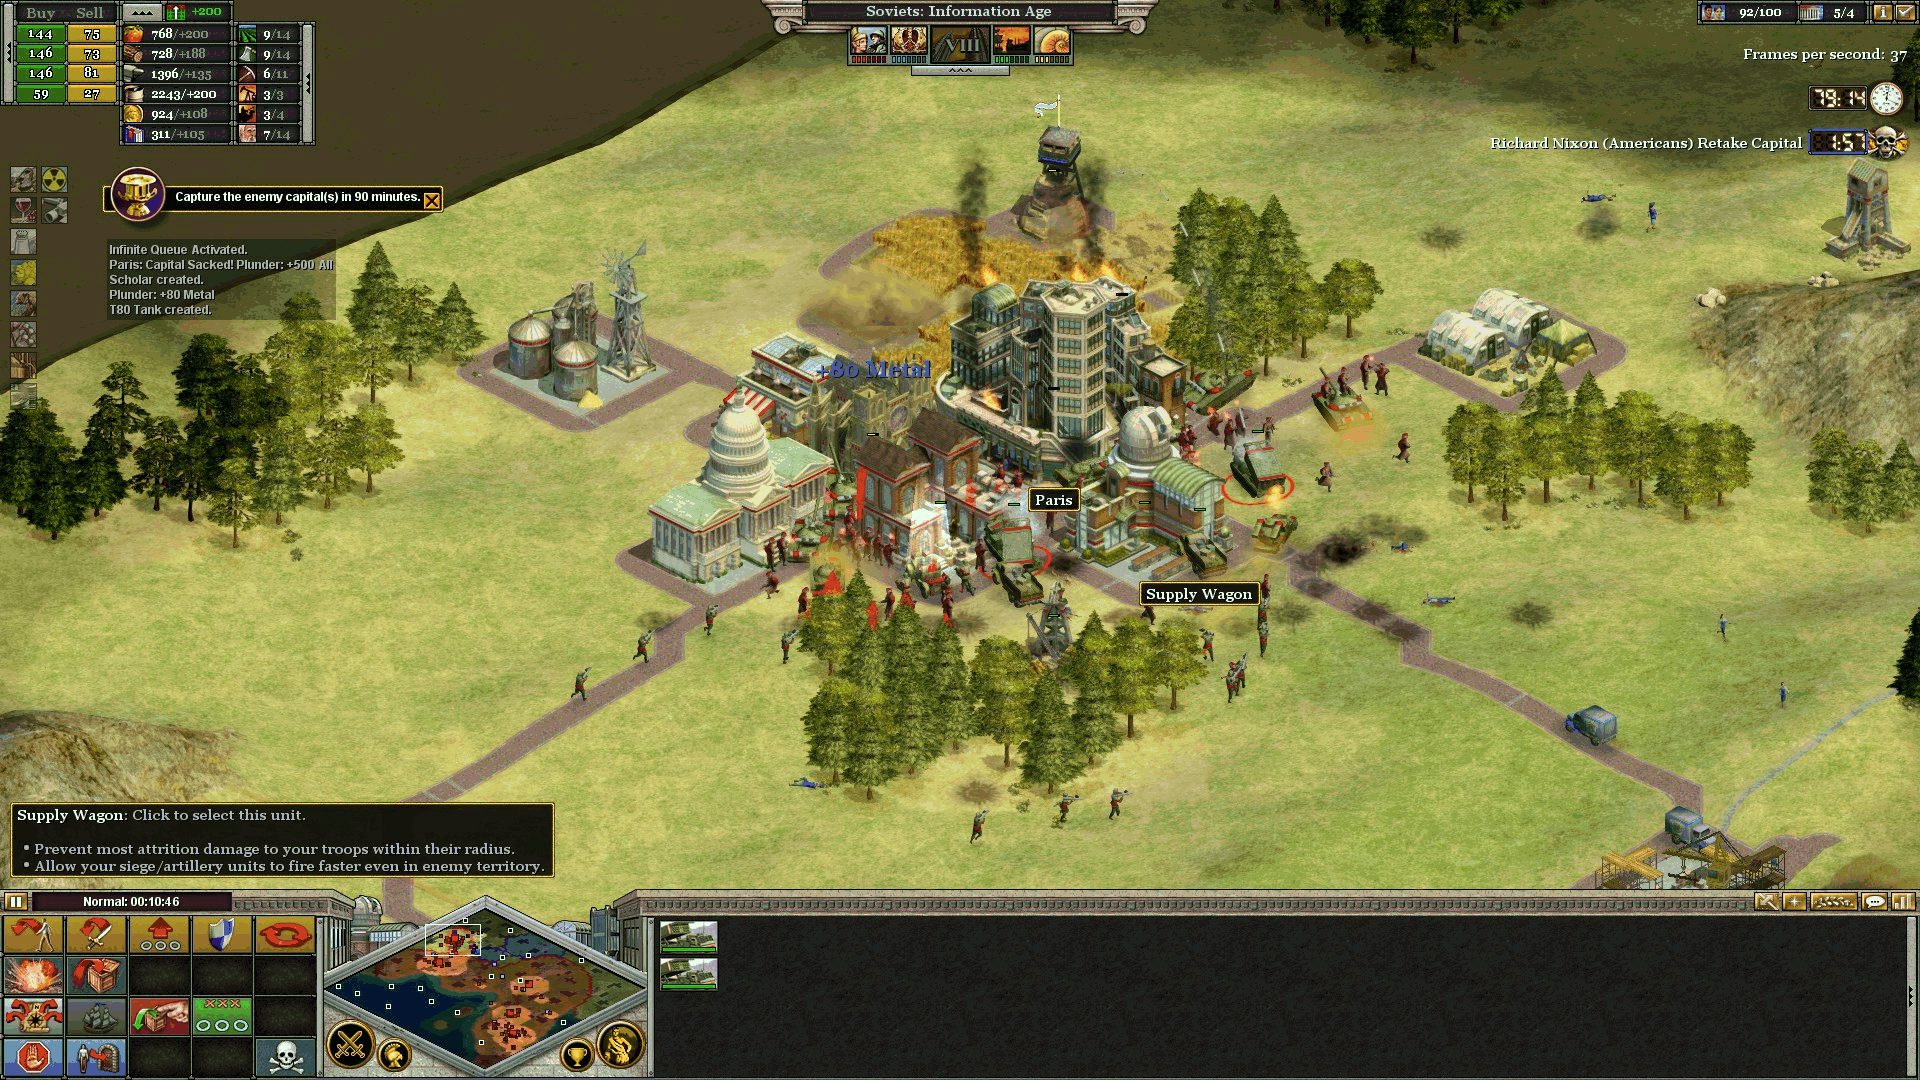
NATO’s capital is in Paris, to the north. Oddly enough, the Eiffel Tower is nowhere to be seen.
Capturing Paris is fairly straightforward.
NATO’s treasury gives +200 Tribute, two more Supply Centers, and control of Greenland and all of Western Europe.
It also gives us a bonus of +150 for gaining control over Western Europe.
Canada and Australia refuse to acknowledge Soviet influence, and they openly join America.
Your two new armies are likely best placed near borders with American territories.
Greenland is an especially common target for them.
The Kamchatka area is also a good area to reinforce, to provide a springboard to attack Japan or Alaska.
Nuclear Exchange
The Americans, now blocked in Central America, cut off from Vietnam, and entirely ejected from Europe, commit to a total release of their nuclear weapons.
They have enough nuclear weapons to lay waste to two of our Soviet provinces. The Americans almost invariably target two territories with Supply Depots, as shown below:
At this point, the Soviet economy has outpaced the American economy, and we can end the game with an Economic Victory. Had the Americans not just launched two salvos of nuclear aggression against us, we might even consider it. But millions of luckless laborers lie dead in the plains thanks to their actions, and their crimes against humanity demand that we march into Washington and hold their death-dealing leaders accountable.
Accordingly, we decline. And launch our own nuclear weapons.
Our deterrence force has failed in its primary function, and now it must fulfill a retaliatory function instead. Respond with a strike against any two US territories you wish. It may be desirable to attack the Gulf Coast and Alaska or Canada, because these regions are close to areas where the Soviets can initiate overruns.
End of turn 45 Tribute, NATO treasury +200, Europe united +150, industry income +141. Total 536 Tribute.
Turn 9: Aftermath
The Importance of Overruns
From here onwards, overruns will be vital. The Soviets gained numerous Supply Depots in their conquest of NATO, which means they outnumber American armies five to two.
We must attend to our domestic woes. Use pairs of armies to overrun the wasteland territories in your hinterland, so you don’t need to end your turn reclaiming territories. Be careful – the army that performs an overrun may not attack again, so make sure you carefully place your armies beforehand. Also, any newly-acquired armies from the overrun supply centers cannot move in the same turn you place them.
In my runthrough, the Americans attacked my two Supply Centers at Eastern Europe and Central Asia – luckily my Space Program was in Central Russia.
Reclaiming Eastern Europe actually gives you a second dose of the +150 Tribute reward for reuniting all of Europe.
However, this then requires you to lose an army (because it recalculates your supply depot to army ratio, and realizes you have one fewer depot than armies) – the wise general will “lose” the army he just used to overrun the territory.
Reclaim Central Asia with an overrun, bearing in mind that the newly placed army cannot move either. Keep it far away from the borders – you’ll need the border armies to attack the Americans later.
If you have the chance, overrun Australia using an army in Vietnam, supported by another army in South Africa.
The final overrun will be to advance into the Gulf Coast from Mexico and Cuba.
Now that we have established a bridgehead on American soil, we will be in strong stead to continue pushing into the Continental USA and to surround Washington.
Converting India
Only one unaligned nation remains. Use diplomacy to pull the Indians into the Soviet alliance. [-110]
Arms Race
Buy a nuclear weapon. I usually place new missiles in the capital territory, because the game rules prohibit destroying the capital as long as your enemy holds any other territories.
Realigning the Rising Sun
Sabotage Japan and attack with two armies – one from South Korea and the other from Eastern Russia. Your navy has one Battleship, which is an excellent unit to clear AA emplacements. Once you round the eastern or western end of the island, you can level Kyoto with your Battleship and Carrier jets, then land a massive marine force there. Use your Civilians to repair the Japanese capital. Once you assimilate their capital, you may also want to use your Spies to bribe their military buildings to produce a defensive screen of ground and air units. +30.
With the assimilation of Japan, the East Asian continent is united. +70.
Your people rejoice at the nuclear dominance of the Soviet Union over the United States, and you get an economic boom of each type of resource.
However, the Communist party needs funding, and we will need to conquer or build 5 territory strength to avoid negative economic effects.
Turn 9 cont.: The Invasion of Japan – a Naval Warfare primer
Realigning the Rising Sun
In this section, we’ll deal with modern naval warfare in the campaign’s fiercest marine invasion: Japan. If China is the stiffest challenge to a land invasion (see Turn 3 above), then Japan is the most challenging naval engagement you’ll see. Throughout history, the nation has resisted invasion by Chinese, Mongolians, and even the Americans, who took one look at the likely horrific cost of a marine invasion and opted for a far more drastic nuclear option.
Naturally, you’re going to want to soften this tough target up a bit. Sabotage Japan down to strength 2, and prepare an invasion force with two armies – one from South Korea and the other from Eastern Russia.
Your navy has one Battleship.
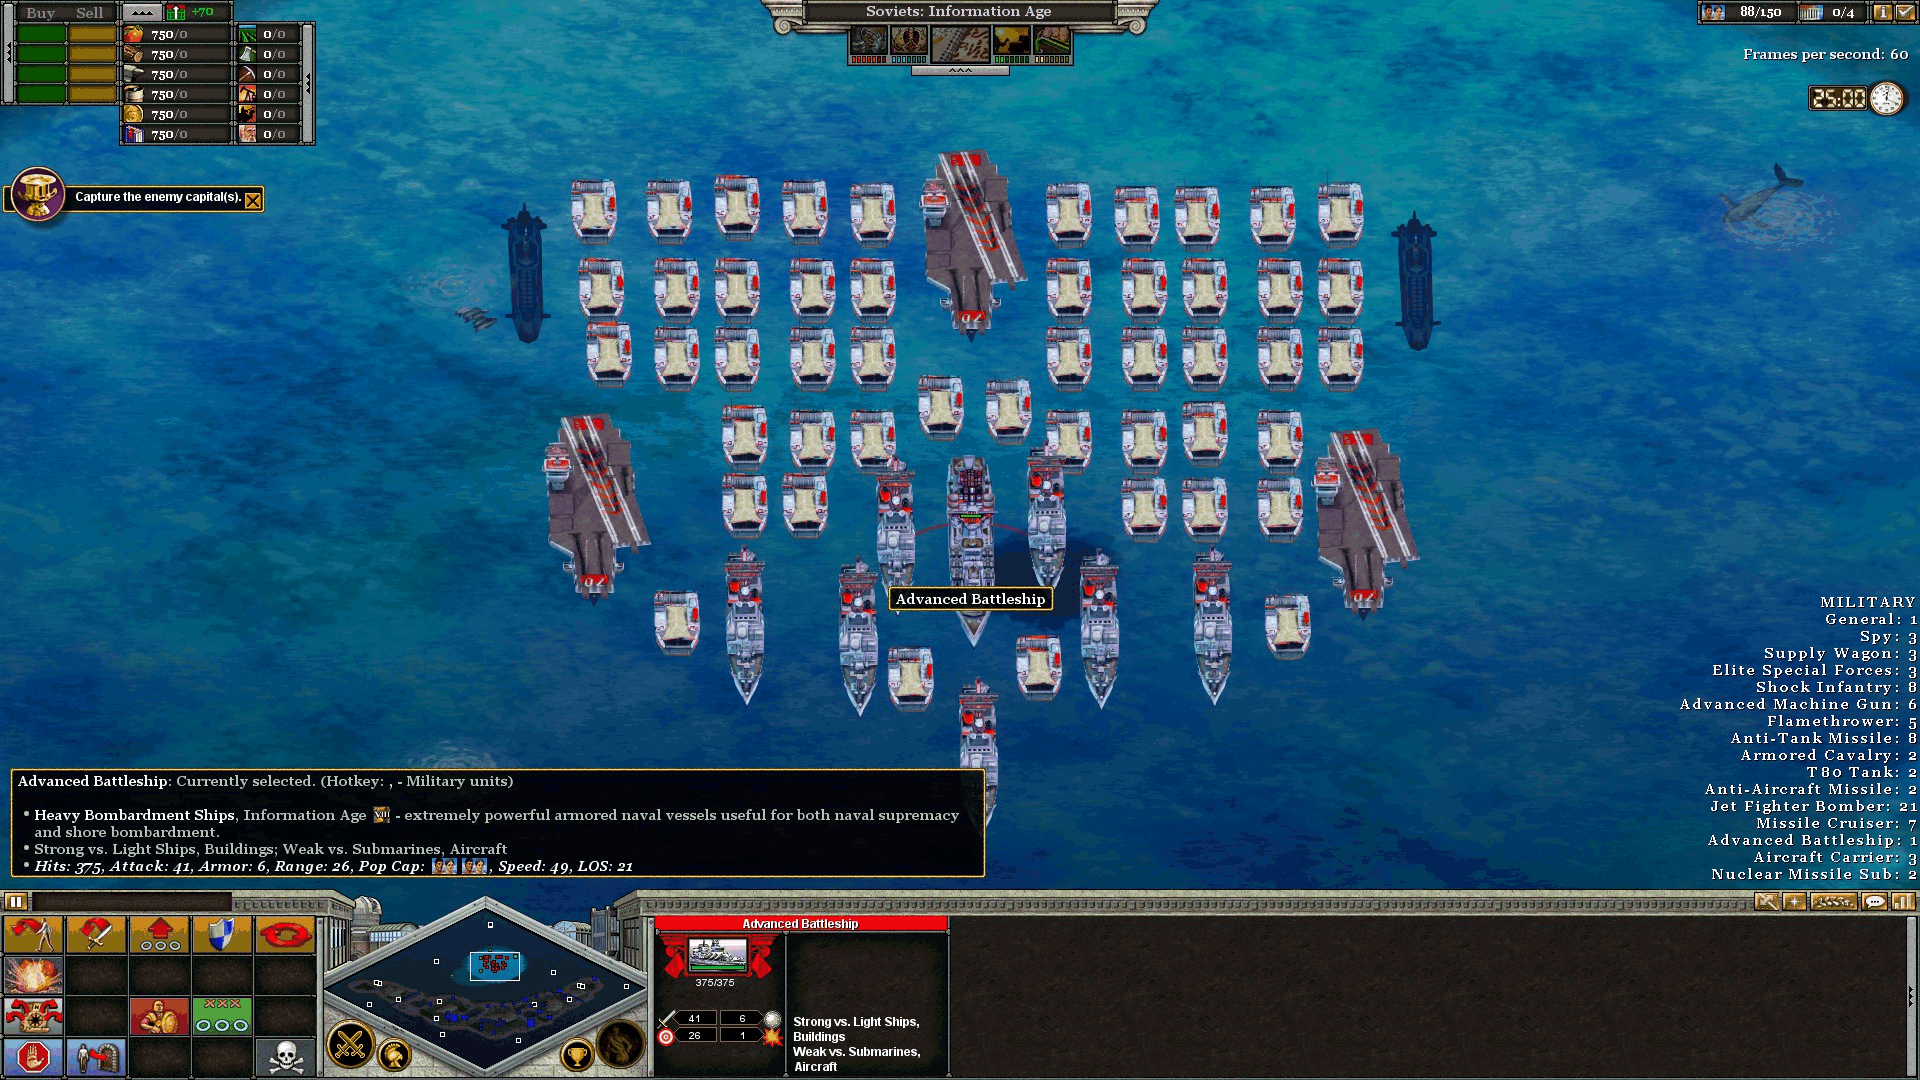
Next, we have seven Missile Cruisers.

We’ve been given three Aircraft Carriers.
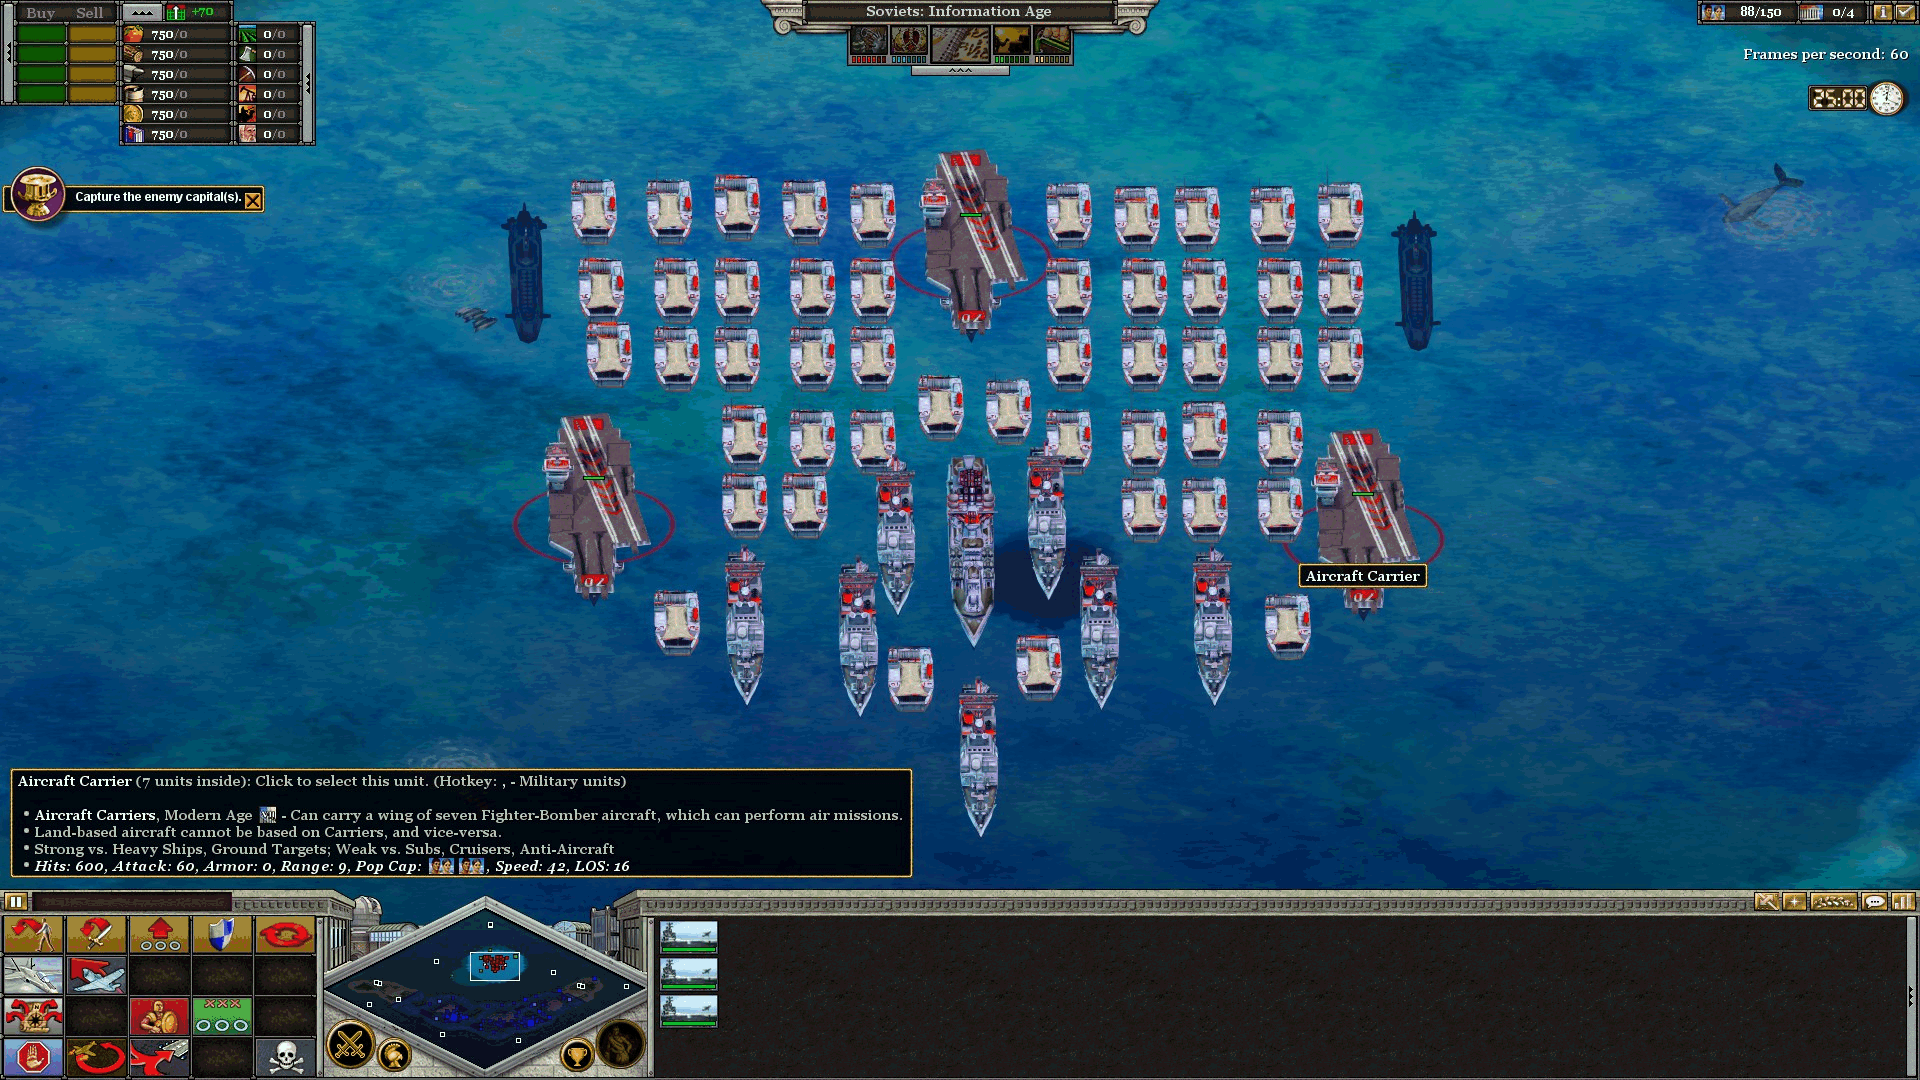
Finally, we have two Nuclear Missile Submarines. These are nuclear-powered missile submarines, not “submarines that nuke your enemies”. There’s probably a workshop mod for that if you want.

It is possible to snag a corner of the island and build a city on it, although this is extremely expensive and your scout force will come under sustained attack. We will just go around the Japanese island of Honshu and directly assault Tokyo and hold it until the timer expires.
We will move out our fleet in controlled stages, in order to avoid a maritime traffic jam and stray units getting lost and destroyed. First will be Missile Cruisers (F2) to clear any enemy submarine threats, followed by the Subs (F3). The Battleship (F1) will be next, followed by all the friendly transports (#0) and the Aircraft Carriers (F6 through F8).
Note that you can “thin out” or “deep stack” your units in their formations by holding right-mouse-button and rolling the mousewheel up or down. I have thinned out the Missile Cruisers and Subs to allow them to keep their distance from the shore and any lurking land-based defenses of the Japanese Defense Force. (This mousewheel command also works for ground units too.)
On our way to Tokyo, make sure to pause and use the Battleship to take out enemy AA and Towers on the way. If there are enemy units on the shore, your Jet Fighter Bombers can make quick work of them (select the Aircraft Carrier, then tap “A” and then left click on the map near the enemy), but you must make sure the Battleship has taken out all nearby enemy AA first! You can’t afford to lose your air squadrons at this early stage of the invasion. If you happen to see enemy missiles track and attack your planes, select your Aircraft Carrier immediately and press “Y” to recall your attack wing back to decks.

One single salvo from a Battleship will take out an AA emplacement.

The attack on Tokyo begins. First, the Battleship attacks and destroys as much of the AA around Tokyo as it can reach. Then, it attacks Tokyo itself, with Jet aircraft providing counterattacks against any artillery or other ground-based guns that threaten the Battleship. The submarines wait to pick off any enemy transports, while the Missile Cruisers provide a screen against any aircraft that might attack our fleet.
Once Tokyo is reduced, land all forces there.


Once you assimilate their capital, you may also want to use your Spies to bribe their military buildings to produce a defensive screen of ground and air units.
- Captured Japan tribute. +30.
- With the assimilation of Japan, the East Asian continent is united. +70.
- Your people rejoice at the nuclear dominance of the Soviet Union over the United States, and you get an economic boom of each type of resource.
- However, the Communist party needs funding, and we will need to conquer or build 5 territory strength to avoid negative economic effects.
Turn 10: Isolating the Enemy
773 tribute, 1 nation.
Operation Caribou
Now it is time to attack American territory directly and liberate their citizens. In order to score a total world victory, you must attack the American capital territory last of all. Accordingly, we will attack Alaska first. +30.

The Americans nestle along the southern shoreline of Alaska, and a number of their troops hold out directly to the southwest of your city sites. You should prepare for an attack from them. It’s possible to get a Spy very close to their armies to get a sense of their composition, too.
A city east of your starting position will help you collect Metal and do Smelter B research (for faster artillery and mechanized unit production).
The Americans will also target your main city, especially the Dock, with Bombers and Cruise Missiles at around the six-minute mark. Try to build enough economic buildings in the main city so that it’s a Major City by this time. The Major City boosts the hit points of local buildings, improving their survivability against such attacks. (Lumber Mill B techs also help a lot.) AA emplacements are also crucial.
The first big American presence is the city of Anchorage, directly south of your starting point. It’s possible to take it without siege, although artillery allows for a quick strike.
Our objective is the capital of Juneau, which is located – with a certain degree of defiant impudence – on an island off the mainland. We will have to get our feet wet taking this city.
Juneau’s defenses to the east include a Dock and two Airbases, all of which can collapse fairly quickly under a sustained onslaught.


Senator: “How about we take a vote on this?”
Congressman: “Hmm, that sounds dangerously close to democracy, comrade. Better vote against it.”
(Side note: This trick works against any enemy building that does not have border-push capabilities of its own: theoretically, this should be all types of buildings EXCEPT Forts, Cities, and the Red Fort wonder. If you wish to bribe an enemy building, capture the nearest city or destroy the nearest forts and then send in the spies. In one game where I played alongside my brother against the Axis of Roman/Germans/Japanese, we marched on Berlin and my brother insisted that we leave a certain defensive structure intact. After capturing the city of Berlin, he sent in a Spy to bribe the structure. When questioned why, he simply responded: “You never know what you might find in a Berlin Bunker.”)
Soviet military command was on the verge of finding the right words of articulating this eloquent ideological epiphany, when the Moscow hotline came alive and the Politburo testily instructed us to stop playing around with the American politicians and to get on with the проклятие conquest.
Accordingly, we shelled Juneau from the shoreline before launching a marine landing, and we won. The end.
Conquering Alaska gives us +30 Tribute, but from here on out, Tribute becomes less important and will no longer be accurately tracked from turn to turn. Evidently, the cultural exchange with the Senate also taught our staff several interesting accounting habits, too.
Turn 11: The U.S. stands alone
Nuclear Detente – Reprieve from the Hammer
The Americans have offered to abolish nuclear weapons. At this point in the game it hardly matters, although parrying a nuclear strike each turn does become tedious and runs the risk of global annihilation. Plus, from a moral viewpoint, the continued buildup wastes resources and lives – rather like locking your door while rain is flowing through your windowpane.
Accept their offer and let the world celebrate our progress. No longer shall we build our muscles as our body decays.
Unfortunately, the next thing the Americans do is to invade us. Evidently we’re still allowed to beat the tar out of each other using conventional weapons.
You can expect one such attack per turn, too. It’s a good way to build up tribute (each successful defense scores you about 25 Tribute from their abandoned field supplies), but it can get a bit tiresome. Of course, you can stack the odds in your favor by making sure each of your frontier territories is well-supported geographically by friendly armies in adjacent territories.
They want Alaska, but they can’t have Alaska. Granted, we sold it to them a long time ago, but we bribed it back much more recently.
This battle is not scripted, so it’s safe enough to play it as a standard skirmish without any special strategy. If you’re looking for a relatively low-effort strategy against the AI, you can set your entire starting military force to Explore (Shift+, then Ctrl+E) along with your starting Scout. Once your first force meets the American force, fight it out to the death.
By this time, your aggressive scouting efforts should have given you a huge economic headstart, allowing you to boom and churn out an overwhelming force. The arrival of your supporting army only cements your lead.
The capitalist foe thought they would attack Alaska and vault across us as they powered their armor through the wasteland, but the Alaskan Reclamation Campaign pipped them at the post and successfully contained the fallout with our forces of liberty primed, etc.
This Senate is too close to its host city to be bribed.
This daring exploit has made us wealthy.
Now that we have repulsed the half-hearted American attack, it’s time to set the rest of the globe right. The Americans have only one army remaining, and too many territories to defend. Note that we can still overrun them if we attack with a total force of two full armies’ worth of advantage. In the disposition below, we are attacking the Pacific Northwest with three armies, thus overrunning their one single army and forcing them to retreat.
The benefit of an overrun is that the enemy’s territory strength is irrelevant.

Operation Maple Leaf
This is the disposition of forces at the end of Turn 11. Soviet forces ring the American territories on all sides, but we cannot initiate another overrun.

Turn 11 cont.: Operation Maple Leaf
A Charitable Interlude
Now you have well over 1,000 Tribute, so it’s time to sow the egalitarian values of socialist charity and goodwill. Let us upgrade every territory that was reduced to strength 1 up to strength 3. This will help repair the damage of nuclear war, and also bring good repute to the Communist Party in Moscow.
Canada: America’s northern bulwark
It makes sense to attack the weakest territory, which is Canada, even though it will require an actual battle. We invade from Alaska, supported by a replacement army in Greenland.
As a wise man once said, “Why conquer Canada? For the same reasons why we conquered the Moon – The Spirit of Exploration and Challenge, of course! And Canada is very similar to the Moon, only colder.”
The benefit of attacking from Alaska to Canada is that it triggers a standard “Conquest” battle (i.e. both sides start off with a single city) instead of a scripted “Operation Goldstrike” scenario (where the Americans start off with three or four cities and specially prepared defenses).
The standard opening of “Select all units” (Shift+comma) and “Auto explore” (Ctrl+E) works well to take your mind off micromanaging exploration, while you get the economy up and running. Sci1, Com1, and Mil1 should be the first order at the library, with civilians on infinite queue for the beginning few minutes, building Temple, Market, Farms, Woodcutter Camps, and Mines (as well as expanding with a second city).
Once again, we’re going to explore until we hit the first skirmish with the American defensive forces, and then recall all units to a safe distance. Once they’ve all formed up, we’ll throw them at the imperialist capitalist forces to put a big dent in their defenses. Victory or defeat is immaterial for this initial engagement: in the philosophy of Edward Longshank in Braveheart, “we have reserves”. They’re on their way from Greenland and will arrive at the eastern edge of the map shortly.
And here they are.
If the timing is right, you can actually attack both American cities with a separate battle group each. Here we’re sending the Greenland support group against their regional capital…


As you can see, our first force’s attack on the secondary city has prevailed, while our secondary force’s attack on the primary city did not. However, the Americans are down one city and their sole defensive force is seriously damaged. We consolidate our hold over the secondary city and set our war economy to produce infinite queues of units to reinforce the primary group.
Once we punch through the remnants of the Americans’ defensive screen, we have the road wide open to their regional capital, for an easy victory.
Turn 12: Red Star Ascendant
In the final turn of the scenario, we will avert a possible economic embarrassment to our central planners in Moscow, and initiate overruns to isolate the warmongers in Washington. Finally, we will march into the streets of the capital and silence the tiresome grunting of the capitalist pigs for good.
First, some housekeeping in the Kremlin.
Funding Crisis Averted
A minor scripted event happens, which need not concern us overly much: the Communist Party was able to secure 5 territories’ worth of additional strength, and they have given us the Political Dissidents special card. It’s nice, but hardly a must-have. (Conversely, if we’d failed to secure the territory strength increase, the Party would have lost two strength ratings in Western Russia. Again, hardly catastrophic.)
Overrunning the Midwest
The final American army has wisely retreated to Washington D.C. to protect the capitalist capital, leaving the Midwest lightly defended. Because the D.C. army can support it for a strength of 1 army, we must attack with three armies.
This is easily done, however.
Red Army to the White House
It’s a little-known historical quirk that the American capital was in fact invaded, on one single occasion only, by a foreign ground force. In 1814, a combined force of British and Canadian soldiers invaded the capital and set fire to several public buildings, including the Presidential Mansion. One day later, a heavy storm caused a few casualties to the invaders, when a tornado lifted several cannons and dropped them on British soldiers. The invading forces left Washington D.C. after 26 hours.
We will do things a bit differently in our approach.
The Florida and Canada garrisons will combine to attack the U.S. Mid-Atlantic region, containing New York City and Washington D.C.
In something of a generous boost, the game scenario starts off with the Soviets in control of the far northeast region of the New England area.
The Americans control several naval groups near New York, and will happily raid New England to harass our gatherers. Accordingly, as we did previously, we will be relocating most of our production further inland away from naval harassment. Albany has abundant resources of Timber and Metal, and so we will establish our “booster” facilities (Lumber Yard, Granary, Smelter, etc.) here, away from the range of enemy ships. We will also set up our airbases here, as it’s a more central position on the map. Razing the existing Barracks, Auto Plant, Siege Factory, and Airbase is optional – I like to do it to reduce the cost of the new buildings somewhat.

At around this time, the Americans will likely throw a land force against us at Albany. With our primary force and secondary force, this would be a decent fight. However, if you’ve set up a wing of Jet Fighters at Albany’s airbase (or, better still, built and filled a second airbase with Jet Fighters) this allows for a very effective fighter screen.
Once we’ve repulsed and secured the upstate New York area, it’s time to strike at the main prize – New York City, heart of America’s financial markets, and home to the Statue of Liberty. We will move our naval fleet westwards to secure the waterways, with the submarines and cruisers leading the way to protect our more vulnerable battleships and carrier.
Once the waterway is clear, it’s time to bombard the Big Apple itself, with the Battleships attacking land-based defenses such as the Bunkers and Fortress, and the Carrier wings attacking American military units. It may be necessary to target enemy Artillery with your Jet Fighter Bombers, because they can do a significant amount of damage to your Carriers.
Once you’ve softened up the targets, perhaps with Jet Fighters from your land-based airbases, it’s time to send in our ground troops.
A short firefight later (hopefully), we will be in control of New York City and the two Statues of Liberty there.
Wait, what? Two Statues of Liberty? Yes – the game has placed two separate Statues of Liberty, both on the same location, and effectively one on top of the other, as shown in the picture below, and as immortalized in that decadent libertine louche fascist musical stageplay, .
For aficionados of very large female statues holding things aloft, the Soviets also have many impressive depictions of the Motherland Calling – most impressive of which is the Rodina Mat’Zovyot near Stalingrad (modern day Volgograd).
Pardon, please. The Politburo is once again calling us on the hotline. Apparently the Americans are attacking Providence with a fairly impressive naval fleet, including three Aircraft Carriers. At this point in the proceedings, we can happily lose control of the northeast. We have already secured Albany and New York City, and the path to victory leads us westwards.
Those of us who are frugally minded may wish to bribe away this American military installation, to the west of New York City, now that it’s in Soviet territory.
Philadelphia is next, and by this time a strong Bomber presence can largely sweep aside most resistance. Send in the bombers first, then move up ground in a rush, and rally fighters to the areas behind enemy lines to weaken their counterattacks.
Here’s a weird little bug in the game. If we use a Spy to Plant Informer in an enemy Auto Plant, the informer gives us line of sight around the building, as normal…
But if we border push (by assimilating the city) and then bribe the infiltrated Auto Plant, it now features an American Informer! (Indicated by the thicker reddish border around the Auto Plant icon in the lower interface.) This bug is present in all versions of the game and has been so even back in the CD versions. It rarely matters, but it’s still a weird little quirk nonetheless.

Turn 12 cont.: Red Star Triumphant
Striking at the Heart
Our next stop is Baltimore, where the U.S. main naval production shipyards are located. By this time, the American defensive response should be badly disorganized and confused, allowing a bomber wing to sink all the Docks and Bunkers near Baltimore and reduce the city itself.
Once Baltimore is out of the way, D.C. is next. If the Soviets have artillery, they could actually stay safely in the Baltimore suburbs and lob rockets into the capital district. In our runthrough, we’re relying on the somewhat more versatile airbase wings instead.
After reducing D.C., it’s a quick jump southwards to liberate Richmond.
We can either sit and wait for the victory timer to run out, or we can go proactively conquer the last holdout city to the north: Harrisburg.
If all goes well, you have defeated the Americans, scored a signal triumph for socialism, and conquered the entire world with several turns to spare.
Нас к торжеству Коммунизма ведёт!


