Overview
This guide is a collaborative effort of the “Kingdom: New Lands” community to discover, research, and document everything that is in the game. Please follow the instructions below if you want to participate.
Guide Overview & How to Help Out
The guide is now more or less complete, so here’s another thank you to everyone who helped create it! If you manage to find something not in the guide, or have a sweet strategy that you would like to be featured in the guide, feel free to post about it in the comments.
With that out of the way, enjoy the guide!
~KarmicChaos
- The pattern of when blood moons naturally occur; Is it random?
- Exact differences between each island (i.e. number of portals, vagrant camps, chests, unlockable structures, etc.)
I-I. The Basics
Before the game begins, you will see your character running on a loading screen. Pressing [S] or [Down Arrow] at this point will change your character’s appearance, but you can still use Blazons to change your appearance after you start playing, so don’t be too picky. Once you start, the keys to control your character are as follows:
If your character is hit by an enemy, you will lose a number of coins proportional to the attack. Be warned, you have no invulnerability period after being hit. If you get hit when you have no coins, your crown will get knocked off of your head. If it falls into the ocean or is successfully stolen by an enemy, you lose the game.
The game runs on a day and night cycle, where you build and expand during the day, and defend the onslaught of enemies at night. The longer you survive, the harder it gets.
Coins are what you need in order to hire subjects, build defenses, and progress in general. There are many different ways that you can find coins, but you can only hold a limited amount in your bag before it overflows. Any coins that overflow out of your bag will automatically either be dropped on the ground or discarded into the water.
I-II. Events
When playing Kingdom: New Lands, certain events may happen that will spice up your game. This section of the guide provides information on these events.
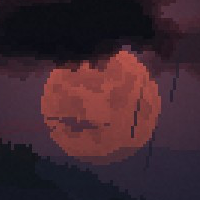
Every once in a while (or every time you destroy a Portal), the moon will be blood red for a night. During these Blood Moons, the wave of enemies that spawns will be much bigger and more powerful than normal. During a normal attack during a normal night, the enemies will retreat once it becomes daytime, but during Blood Moons, the enemies keep attacking into the daytime, until they either steal your crown or are killed off by you and your troops. Due to the fact that enemies never retreat during a blood moon, if they are held off for long enough for the next night to fall, more enemies will spawn and aid their assault. However, these enemies will still retreat like normal. More information is needed on the pattern of when Blood Moons happen.
Once winter comes, it will leave you with decaying grass and less and less animals for your Archers to hunt. Within 3 days of winter starting, the decaying will leave you with no grass to graze on and no new animals spawning for your archers to hunt. You will need to rely on existing Farms for coins during this time, because you also can’t create new crop fields in the winter. Farms now decay during winter, leaving you with no way to make any money. This makes surviving to day 100 much harder, and unless you are planning to do so, it is recommended that you leave your island before winter starts. Winter never ends, so survival will become exponentially more difficult as you get farther into the winter. The days on which winter starts are listed below:
I-III. Islands (WIP)
The game has five Islands, each one more difficult than the last. To unlock the next island, you must beat the previous island by constructing the boat and successfully leaving. Upon leaving an island or starting a new game, you can start on any island previously unlocked. There is also a sixth island, known as “Skull Island”, that functions a bit differently than the other five. Information on each Island and the differences between them are listed below. For more information on how to travel between and unlock islands, see “The Boat” under section “IV-I. Structures”.
This island is the easiest one, and is the default island when starting a new game, or when playing the game for the first time. One of the main things that makes this island special is that the island only has one portal: the Cliff Portal. This means that the enemies will only ever come from one direction, so it is completely safe to expand in the other direction. The obelisk does not spawn on this island, making it impossible to attack the cliff portal, or to build any strong defenses, meaning it is one of the worst locations to attempt the long-term survival achievements. The boat also spawns with half of its parts when it is first purchased on this island. This is one of the two islands that the merchant spawns on.
This island has a total of 2 portals; a normal Portal on one side of your kingdom, and the Cliff Portal on the other side. The Cliff Portal starts open on this island. This is one of the two islands that the merchant spawns on.
This island has a total of 3 portals; 1 Portal on each side of your kingdom, and the Cliff Portal, which will start closed, but will open if all other Portals are destroyed. This island is the first island to not have the merchant.
This island has a total of 5 portals; 2 Portals on each side of your kingdom, and the Cliff Portal, which will start closed, but will open if all other Portals are destroyed.
This island has a total of 7 portals; 3 Portals on each side of your kingdom, and the Cliff Portal, which will start closed, but will open if all other Portals are destroyed.
In order to get to skull island, you must beat Island 5. This will give you the opportunity to visit skull island, where you will have one shot at completing the island. If you fail to complete the island, you cannot start a new game on Skull Island, and will need to beat Island 5 any island once again to get another attempt. There are two different mechanics that are exclusive to this island. The first of these two is that there is no dock, and therefore no boat. In order to complete the island, you must destroy all Portals, and then destroy both Cliff Portals in the same 3-day period. Once both of the Cliff Portals are simultaneously destroyed, you will complete the island, and get four skulls added to the bottom of your coat of arms. Upon starting the next island, you will not have brought any of your subjects with you, as you will not have put any on a boat. The other mechanic exclusive to this island is the Statue of Time.
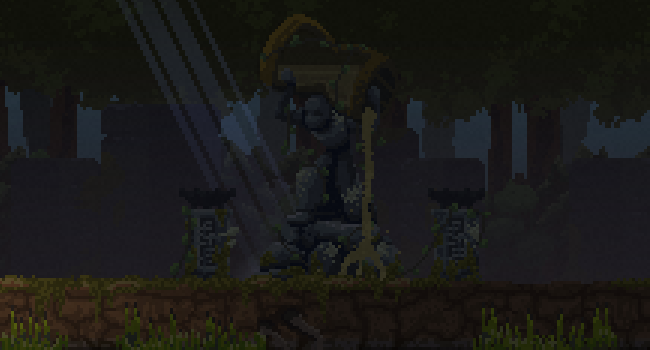
The Statue of Time will always appear on Skull Island, and serves as a countdown timer. The hourglass will slowly pour out its liquid as you play on skull island, until it eventually becomes completely empty. This process takes a total of 50 days, and when the timer expires, you will immediately get a game over, accompanied by the text “All is lost…”. The Statue of Time can be paid 8 coins, which will freeze the flow of liquid for the next day. After this day passes, the Statue of Time will resume pouring liquid out of the hourglass, at which point it can be paid another 8 coins to freeze it again.
I-IV. Holiday Events
Each year, the game is updated to add exclusive content for the duration of some holiday seasons. These holiday events are only active for a limited time around each Holiday, although the structures that spawn during the holiday events will not disappear once the holiday event ends unless the player dies or travels to a new island. Any mounts aquired during a holiday event can also be used by the player after the holiday event ends, but will be lost once the player dies.
This holiday event is only active for a limited time in October, celebrating the holiday of Halloween. This event adds the Undead Horse mount to the game, and makes all lights that would normally be torches look like Jack-O-Lanterns.
This holiday event is only active for a limited time in December, celebrating the holiday of Christmas. This event adds the Reindeer mount to the game, as well as the “Christmas Tree” and “Snowman” structures.
II-I. Animals

Rabbits periodically spawn from tall grass. Tall grass can spawn at any time, as long as the area they spawn in is grassy, devoid of buildings and crop fields, and is beyond your furthest wall. Because of the decaying grass, neither tall grass nor rabbits can spawn during winter. After spawning, each rabbit will wander around aimlessly, and will drop 1 coin if killed by an archer.

Deer will periodically spawn in the forest. Each deer takes 2 hits from an archer to kill, and will drop 3 coins when killed. They will run away from the player and archers in fear of getting harmed, but by sprinting past them, you are able to slowly herd deer back to your kingdom for your archers to kill. This is the only animal that can be hunted by archers in towers, and at night. When it is winter, deer will stop spawning.

Dogs can be found after breaking a fallen tree. It will follow you around, keeping you company, and will occasionally bark in the direction of incoming enemies. It also runs away from Greed, because when attacked, it will be picked up and carried away, so be cautious if you want to keep your dog alive. If you already have a dog and find another one, the new one will replace the old one. If you use a teleporter, the dog will not come with you, and instead will have to run across the island to reach you.
II-II. NPCs

The Ghost is an NPC that will appear at the beginning of each island, representing the fallen king/queen who came before you. They will try to lead you in the direction of the Kingdom, and will disappear once they make it there with you.

The Vagrants (AKA Beggars) are NPCs who spawn at Vagrant Camps, and are the only way to populate your Kingdom. They will wander around aimlessly within a certain vicinity of a Vagrant Camp, and are completely ignored by Greed. When paid a Coin, they will be hired to work for your kingdom, and thus will turn into a Peasant.

When a Vagrant is given a Coin, it turns into a Peasant, and the Peasant will go to your Kingdom’s center. A Peasant is anyone in the Kingdom who isn’t a Vagrant, and doesn’t have a job. When there are available tools, peasants will pick them up and do the job associated with the tool. During the day, the Peasants will wander near the shops awaiting a job. At night, the Peasants will run back to the center of your Kingdom and wait until morning. If chased by a Greed, they run. If they get hit once, they drop their Coin and become a Vagrant. Peasants can collect a maximum of 2 Coins at a time.

The Archer is the cheapest unit in the kingdom. Peasants can become Archers by picking up bows. During the day, Archers will wander between your outer Walls and the forest, hunting Rabbits and Deer. At night, they run back to and hide behind the outer wall to defend the kingdom. They will run away from Greed, but will occasionally stop to shoot at them. If they are hit once, they drop their bow and become a peasant. Archers can collect a maximum of 10 coins at a time, and have a (1/3?) chance of hitting their target.

The Worker (AKA the Builder or Engineer) is the one who builds, mans heavy weaponry, cuts down trees, and repairs your Kingdom. Peasants can become Workers by picking up hammers. During the day, they wander around the last site they worked on. During the night, they head to the outer Walls and wander around there. They will run away from Greed, and when hit, Workers drop their hammer and turn into a Peasant. Workers can collect a maximum of 2 Coins at a time.

The Farmer is the main money maker of your Kingdom. Peasants can become Farmers by picking up scythes, going to the nearest available Farm, and making a crop field. During the day, they will grow and harvest Coins for you (seems legit). At night, they run back behind the Kingdom’s Walls, or stay at their farm if it is a Tier 2 Farm. They run away from Greed, but are the slowest unit in terms of speed. If a Farmer does not have a valid farm to work at for 5 days, they will drop their scythe in the water and become a Peasant, which will happen en masse once winter starts. When hit once, they drop their scythe and turn into a Peasant. Farmers can collect a maximum of 14 Coins at a time.

The Knight is the best attacker/defender of your Kingdom. After you get a Tier 6 Kingdom, you can buy shields for 6 Coins each, two shields for each side of the Kingdom. When there is an available Peasant, they will go over and pick up the shield to become a Knight. When this happens, 4 random Archers will join the knight’s squad. These archers follow and protect the Knight, and do not hunt animals. They are distinguished by their colored armor. During the day, the Knight guards the border of the Kingdom. At night, he retreats behind and guards the outer Wall. If the Wall is 50% damaged, he retreats to the next outermost Wall. Knights can counter an attack once, but if they get hit again before recovering they drop their shield and become a Peasant. If you give a Knight Coins, it buffs their defense, and they can counter more attacks. You can give them a maximum of 7 Coins. After buying your second Wall, at your outermost Walls you will find a flag post with the option to pay 4 Coins. Doing this commands one of your Knights on that side of the Kingdom to attack the nearest Portal in that direction.

The Banker is a moneymaking NPC, who spawns automatically once you have the “church” built from upgrading to a Tier 4 Kingdom. He has many different looks, depending on what coat of arms you have. He goes inside during the night, making him and all your money that he holds completely safe from Greed. During the day you can give him Coins, which he will collect and store in the bank. He can only carry 10 Coins at a time, while the bank can hold an infinite amount of Coins. For each day that passes, the amount of Coins in the bank increases by 7% (it can never exceed 8 Coins per day, so at 101 Coins your interest stops growing). The interest is rounded up, so you will get at least 1 Coin per day, as long as you have invested at least 3 Coins. Because of this, it is a great idea in the long run to store Coins with the Banker. During the day, if you have more than two Coins in the bank, you can withdraw up to 33.3% (1/3) of your stored Coins by walking by the Banker. He never gives you more than your bag can hold.

On your first day the Merchant will be standing next to your fire, with bags on his donkey. Next morning, he will drop some Coins for you if you walk by, which will remove the bags from his donkey. He will then wait for you to pay him 1 Coin, and if you oblige, he will (if its not already night time) travel out into the forest to the Merchant’s Hut. When he gets there, he will take a few seconds to equip his donkey with some new bags before he heads back to your Kingdom. This process cannot be repeated once you destroy the Merchant’s Hut (by removing the Trees around it), and he will disappear shortly after. The Merchant is only available on islands 1 and 2, and cannot be killed by Greed.
A Hermit spawns from a Hermit Shack, and can be carried with you for 1 Coin, which will enable you to upgrade a Tier 4 Tower into a specific Tier 5 Tower. After upgrading a Tier 4 Tower, traveling past your outer Wall while enemies are present, carrying them for a day, or switching mounts, you will drop your Hermit and need to pay another Coin to pick them up again. Each of the Hermits can be brought with you on a Boat or through a Teleporter, as long as they are with you on your mount. All of the Hermits will stay behind your Walls like other NPCs, but unlike other NPCs, they can be picked up and carried away by Greed like a tool or coin. The type of Tier 5 Tower that you can upgrade Tier 4 Towers into depends on which Hermit you have.


II-III. Enemies
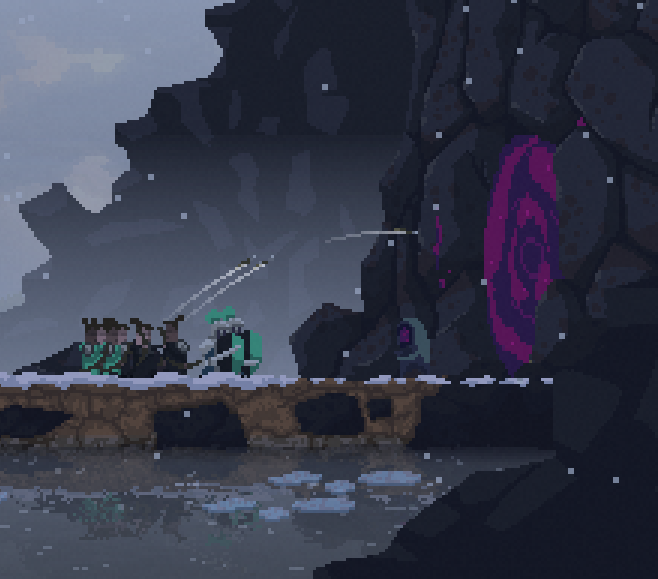
The Cliff Portal, once opened, becomes the spawn-point of your enemies. It is not possible to destroy the Cliff Portal permanently. There is only one Cliff Portal per island, and it is located on one random side of the island, opposite to the dock. It’s huge, it always stays open, and has far more health than normal Portals. On every island but the 1st & 2nd, the Cliff Portal will start closed, and will open when all other Portals are destroyed, releasing a wave of doom as it opens. If you manage to destroy the Cliff Portal, it will fall apart just like any other Portal, but then slowly reconstruct itself over the course of the next three days. It will not spawn enemies during its reconstruction period.
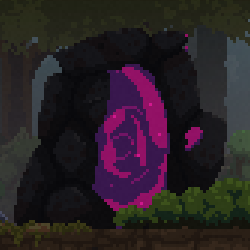
Portals are big, rocky gateways found in the forest, and, just like Cliff Portals, are the spawn-points of your enemies. Unlike Cliff Portals, Portals are usually closed during the day, but open at night to let out enemies. When they are closed, Portals can be safely passed by, but when open, they will spawn Greed to attack anything that goes near it. Portals will also open as soon as they are attacked. They can be permanently destroyed by ordering Knights to attack them, but they will put up a fight. Once destroyed, the sky will turn blood red and cries of anger will be heard. All your subjects will retreat as if it were night time. Your knights will eventually return to the Walls to guard. No songs will be sung, and it will be an eerily quiet rest of the day. Immediately after the day ends, it will be a Blood Moon, where you will get a wave sent at you from one of the remaining Portals. These Blood Moons caused by the destruction of a portal typically spawn a wave of enemies that is larger than that spawned during a normal Blood Moon. After destroying the last Portal, the Cliff Portal will open up, unleashing a massive wave of doom upon your kingdom.

Greed are the main enemy of the game. They are grumpy little thieves bent on noodling your stuff away.[www.noio.nl] They will bully you and your subjects out of your money and livelihood. They steal any Coins and tools they can find, and then run back to their Portal for safety. Every night, multiple Greed spawn from the closest Portal to your Kingdom on each side. If they reach a Wall, they will attack it until the Wall gives way. If they come across a subject, they will attack them, causing your subject to drop their tool and then, if hit again, lose their Coin, turning back into a Vagrant. Greed will also attack you, knocking 1 Coin out of your bag at a time. If you are hit when you have no Coins, your crown will be knocked off, and you will have an opportunity to recover it before the Greed can steal it. It only takes one hit with an arrow to kill a Greed, and they will drop any carried items or Coins upon death. Early-game strategies usually include dropping Coins for the small number of Greed that spawn on the first few nights, giving you and your Workers the ability to act with safety during the night. This tactic is widely known as “bribing”.

Armored Greed are are distinguished by the masks they wear, and are just like any other greed that attacks walls and steals items. When Armored Greed get hit with enough arrows, their mask is destroyed, leaving them as vulnerable as any regular Greed. The amount of arrows it takes to knock off their mask depends on the mask they are wearing. Armored Greed can also be bribed.

Floaters are the only flying enemies in the game, and thus can completely ignore Walls. When they swoop down, they do an area-of-effect attack that damages nearby Walls, knocks Coins out of your bag, and knocks the tools out of the hands of any nearby subjects. Then, they will grab up to 2 of your subjects and literally attempt to kidnap them. Archers in towers are typically targeted first, and are thus the most vulnerable. Floaters have a good amount of health, but one shot from a Catapult or Mighty Ballista will usually kill them, and so long as it is killed before it flies all the way back to a portal, it will drop your stolen units and shrivel up into a ball of flesh.
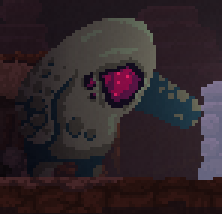
Breeders are by far the strongest enemy in the game, taking multiple Catapult or Mighty Ballista shots to kill. They are called “breeders” because every few seconds, they stop and spit out 3 Greed to aid them with their assault. Breeders are slow and hard hitting, making you drop tons of coins with each hit. Attempting to run past them will cause your mount to rear back, leaving you vulnerable to being hit before you can run past. They can throw your Catapult’s rocks back at you, which either does massive damage to a Wall, or knocks out any subjects it hits. If it hits you, you lose a ton of Coins. When your subjects get knocked out, they drop their tools on the ground and just lie there, being useless for a while. Breeders will also punch your Walls when they get close to them, and can take down most Walls in a matter of seconds. The worst part about Breeders is that they cannot be bribed, and will never head back to their Portal. They want your crown, and they are willing to die trying to get it.
III-I. Buildings (Part 1)
This section of the guide will list all the various types of buildings you can make for your Kingdom. Once you pay for a building, 1-2 random Workers will be assigned to go build it, no matter the time or place, so be careful with your building requests late in the day or at night.
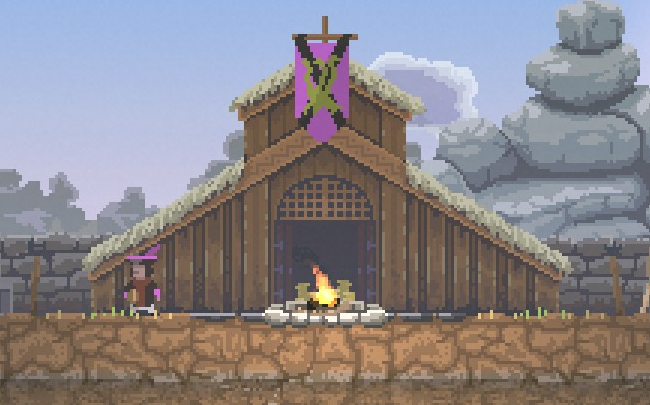
Your Kingdom is your main base of operations, and is the only place where you can buy tools for your subjects. When you purchase an upgrade for your Kingdom, It upgrades automatically, making it one of the two structures in the game that do not require Workers to upgrade.
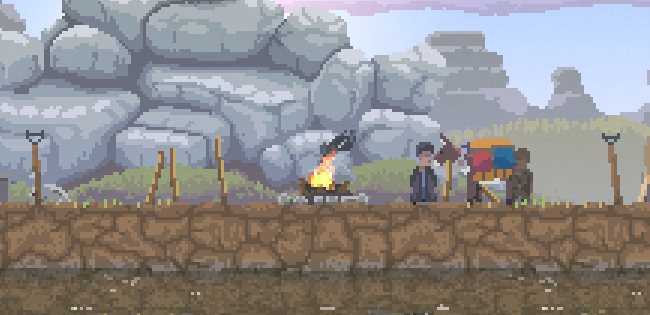
There is one of these in the center of each island. There are always two Vagrants that spawn near it, and it always has two Tier 0 Walls and two Tier 0 Towers on both sides of it.
This upgrade costs 3 Coins. It lights the fire, and spawns a shop on either side of the fire. To the right of the fire is the bow shop, where you can buy up to 4 bows at a time for 2 Coins each. To the left of the fire is the hammer shop, where you can buy up to 4 hammers at a time for 3 Coins each.
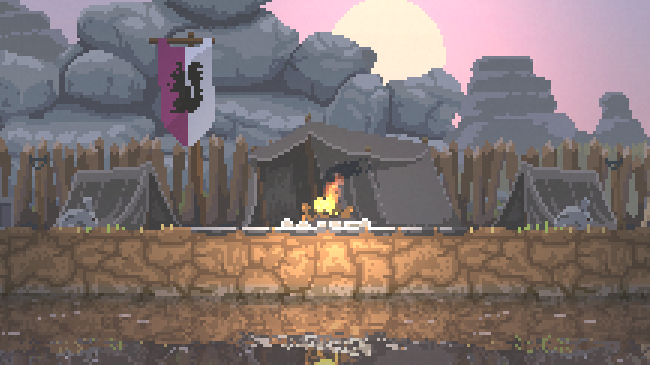
This upgrade costs 3 Coins. It erects a few tents around the fire, and unlocks the scythe shop to the right of the bow shop. This allows you to buy up to 4 scythes at a time for 4 Coins each.
This upgrade costs 5 Coins. It puts up wooden barriers surrounding your kingdom, giving you free Tier 1 Walls on both sides if you hadn’t already bought them.
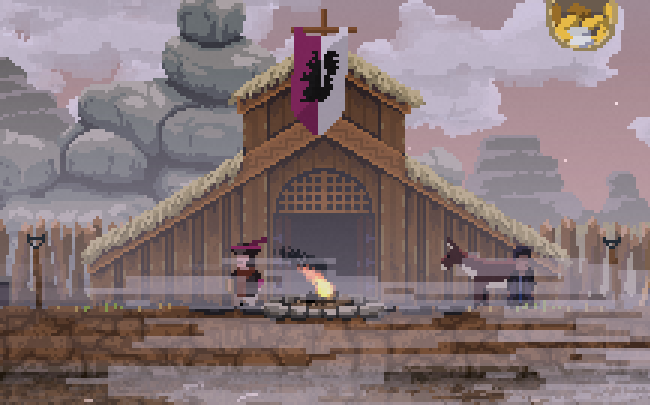
This upgrade costs 7 Coins. It will construct a big, church-like building in the center of your Kingdom, spawn the Banker, and make a Catapult shop to the left of the hammer shop. This is the best upgrade you can get until you find and pay the Obelisk.
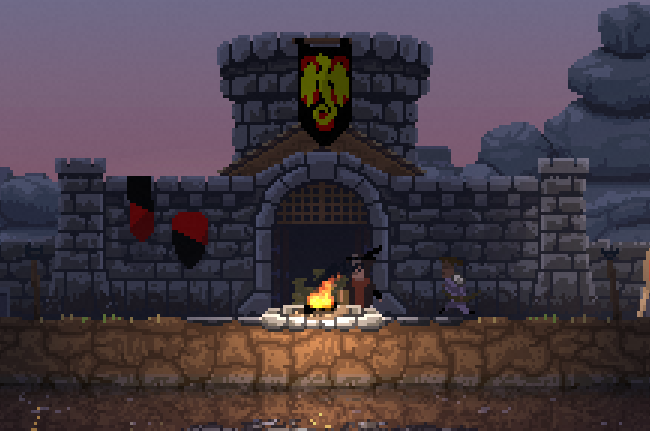
This upgrade costs 8 Coins. It puts up stone walls surrounding your kingdom, giving you free Tier 3 Walls and Tier 2 Towers on both sides if you hadn’t already bought them.
This upgrade costs 9 Coins. It constructs a Castle in the middle of your Kingdom, letting you buy a maximum of 4 shields for 6 Coins each.
Towers cannot be destroyed by Greed, and will not stop grass from spreading. They are built to give your Archers a height advantage over the Greed. Once a tower is built, the archers assigned to it will be chosen randomly.

These are naturally generated in random locations on the island, and are the base for where you can build your Towers.

This Tower can be built for 3 Coins. It can hold one Archer, but it barely gives them any height off the ground, so they can still get hit by Greed occasionally, which will knock them off of the Tower. Being in this Tower will help the Archer get direct shots on enemies, unless there is a wall (of any tier) in their way.

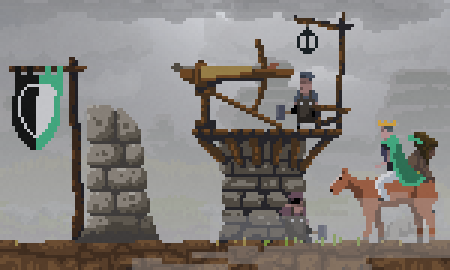
This Tower can be built for 5 Coins. It can hold one Archer, and puts them high enough above the ground that they can only be attacked by Floaters. Being in this Tower will help the Archer get direct shots on enemies, unless there is a Tier 4 Wall in their way. This is the best Tower you can build until you find and pay the Obelisk.
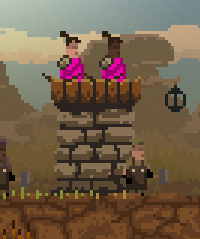
This Tower can be built for 7 Coins. It can hold two Archers, and it gives both of them the same benefits as a Tier 2 Tower.

This Tower can be built for 9 Coins. It can hold three Archers at a time. The two Archers on the lower part of the tower get the same benefits as a Tier 2 Tower, meaning they will get direct shots on enemies, unless there is a Tier 4 Wall in their way. The one Archer at the top will always get direct shots on enemies, even if there is a Tier 4 Wall in their way.
Walls will halt the spread of grass and delay the progression of all enemies (except Floaters). They are built to keep the Greed at bay while your Archers (or other defenses) kill them off. The higher tier the Wall is, the more hits it can take from enemies before it falls. Archers will defend your two outermost Walls at night. During the day, damaged Walls will automatically be repaired by Workers who have no assigned duty.

These are naturally generated in random locations on the island, and are the base for where you can build your Walls.

This Wall can be built for 1 Coin. It will barely hold back the Greed before it gets destroyed.

This Wall can be built for 3 Coins. It will provide a significant defense against the Greed, but will easily be destroyed late-game or during a Blood Moon. When destroyed, it can be reconstructed back to Tier 2 for 1 Coin. This is the best wall you can build until you find and upgrade the Obelisk.

This Wall can be built for 6 Coins. It can provide a solid defense against the Greed, and will take many hits before falling. It will, however, be destroyed rather quickly by a Breeder. When destroyed, it can be reconstructed back to Tier 3 for 2 Coins.

This Wall can be built for 9 Coins. It will provide the best defense against all enemies (except for Floaters), because it takes tons of damage before it falls. This Wall is your best bet to surviving late-game. When destroyed, it can be reconstructed back to Tier 4 for 4 Coins.
III-II. Buildings (Part 2)
Farms cannot be destroyed by Greed, but will halt the spread of grass. They are built to give Farmers a place to work. The amount of Farmers that can occupy each Farm depends on whether or not there is enough space around the Farm for each Farmer to create his crop field, with a maximum of 4 Farmers per Farm. Once a Farm is built, the Farmers assigned to it will be chosen randomly.

These are naturally generated in random locations on the island, and are the base for where you can build your Farms.
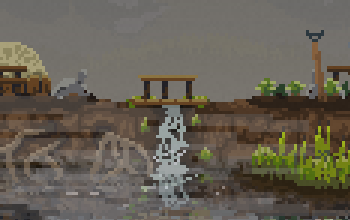
This Farm can be built for 3 Coins. Any Farmers working at this Farm will retreat to your Kingdom every evening, and will walk back out to the Farm every morning.
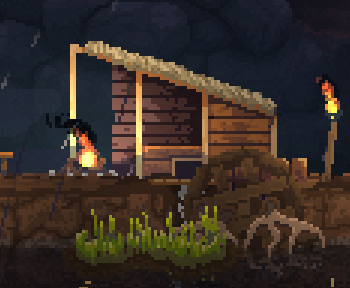
This Farm can be built for 8 Coins. Any Farmers working at this Farm will stand by the Farm (not working) when night falls, so make sure only to build this Farm if it is well protected. Due to the Farmers staying at the Farm during the night, they don’t need to walk back out to their Farm every morning, leaving them more time to grow crops. This, of course, gets you more Coins, faster!
Teleporters cannot be destroyed by Greed, and will not halt the spread of grass. They are built to provide you with a faster way to traverse across the island.

These will spawn where you destroy Portals, and are the base for where you can build your Teleporters.
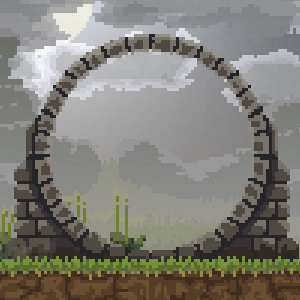
This costs 5 Coins to construct. Once per (day?), you can use it for 1 Coin. It gives you (15?) seconds to look around and select a location on the island, and then teleport there using [S] or [Down Arrow].

This costs 5 Coins to construct. After teleporting with an Unlinked Teleporter Gate, if there is enough space, more portal remnants will be spawned where you teleported to. They will disappear after (10?) seconds, but if you spend the 5 Coins required to build it, the two Unlinked Teleporter Gates will become connected. You can then use either one to teleport to the other for the cost of 1 Coin, with a cooldown of 70 seconds.

Catapults are the only mobile type of building in the game. After upgrading to a Tier 4 Kingdom, you will have the option to buy catapults to the left of the hammer shop for 6 Coins each. You can only buy a maximum of 2 catapults, one going left and one going right. The direction in which the Catapult goes depends on which side of the shop you were on when you bought it. Once a Catapult is bought and built, two Workers will man the Catapult, slowly pushing it to your outer Wall in their assigned direction. They will not push the catapult backwards, so if your outer wall is behind their starting point, they will ready the catapult where it was built. Even after they get to your outer wall, If you happen to build a Wall farther out, they will push the catapult to there. Once there, the two Workers will use the Catapult to launch rocks at the enemies every 8 seconds. The rocks will barrel through multiple enemies, instantly killing everything they touch, except for Breeders. Rocks that are catapulted will remain on the ground on the other side of the Wall, and can be picked up thrown back at you and your men by Breeders. If the Wall in front of the Catapult falls, the two Workers will attempt to retreat, and the Catapult will be left behind to be destroyed by the Greed. Once destroyed, another Catapult can be purchased for that side of the island at the shop.
III-III. Hermit Towers
Hermit Towers are Tier 5 Towers, and can only be built with the assistance of specific Hermits.
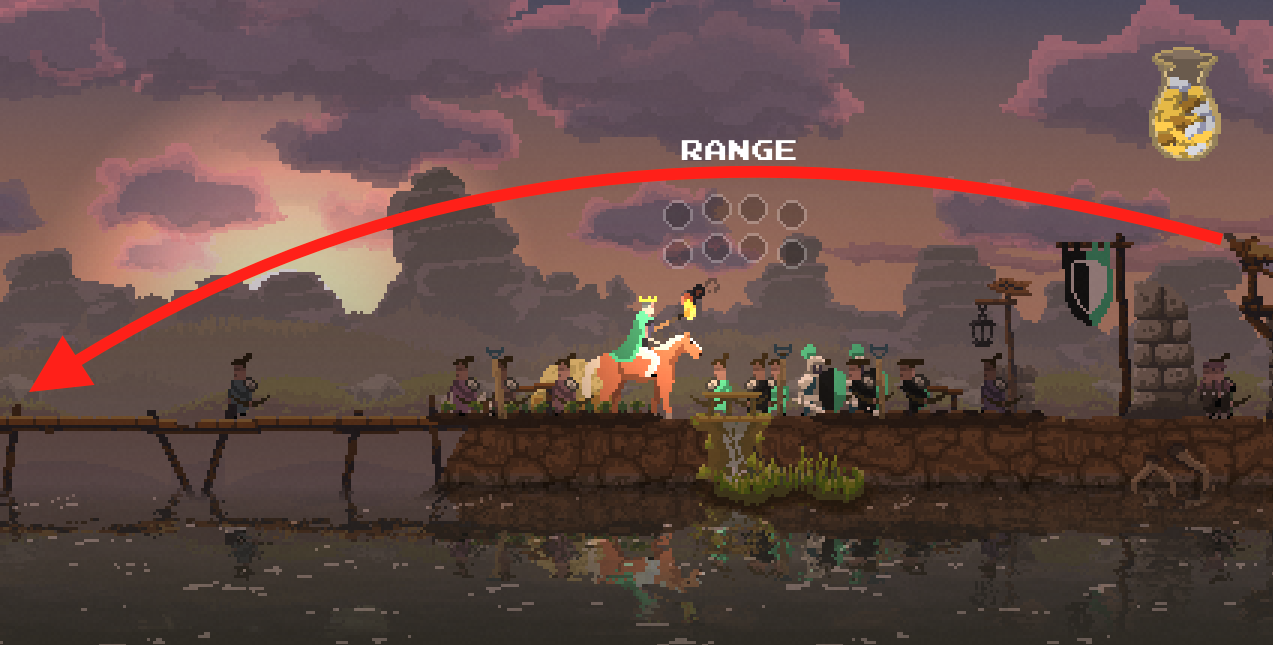
The Mighty Ballista can be built from Tier 4 Towers for 6 Coins, but only with the help of the Hermit of Tide. Unlike other towers, the Mighty Ballista is manned by a Worker, can pierce through multiple enemies, and has an extremely long range. It is also extremely powerful, to the point where it can kill Floaters in one shot.

The Armory can be built from Tier 4 Towers for 6 Coins, but only with the help of the Hermit of Valor. An Armory gives you the ability to hire an extra Knight on that side of the map, for 6 Coins. Each Armory can only hire one extra Knight, but you can easily build more, and thus provides an easy way to rack up an insanely powerful army.

The Bakery can be built from Tier 4 Towers for 6 Coins, but only with the help of the Hermit of Baking. Bakeries can bake bread for one gold each, which will attract Vagrants to the Bakery, where they will eat the bread. A single Bakery can hold up to 7 loafs of bread at a time. The Vagrants tend to get confused if there is more than one Bakery. The Bakery calls out to the nearest Vagrant (that is not already moving to the Bakery) every 20 seconds. Once a Vagrant arrives, they will eat a loaf of bread for 4 seconds, and then wait around for 90 seconds. Once this time is up, the Vagrant will head to the nearest Vagrant Camp with less than 2 Vagrants. However, if there is more bread at the Bakery, instead of waiting 90 seconds, the Vagrant will wait 20 seconds, and then eat another loaf of bread, which resets the 90 second timer. The more Vagrants you have waiting at the Bakery, the faster you will run out of bread. Bakeries are the easiest way to hire new peasants. Because of how far away the Vagrant Camps are from your kingdom on the 5th island, it is basically required if you plan on having a chance at escaping the 5th island.
IV-I. Structures
Structures are randomly generated things that you can come across in your adventures. Every structure is guaranteed to appear at least once on every island.
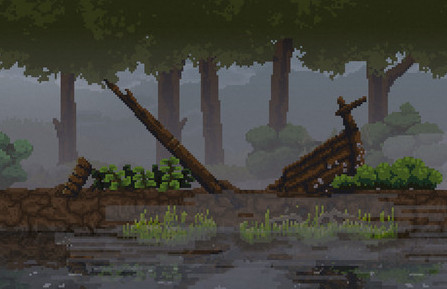
The Boat is by far the most expensive project, and it takes a long time to build and move it fully, so be careful about working on it late in the day. You will eventually come across a shipwreck that looks like this:
You will be asked to spend 10 Coins on the Boat, which will fix the skeleton of the ship, and, if you are on the 1st island, spawn 30 parts. You will need to purchase the rest of the 60 parts for 2 Coins each, which will spawn them on the ground. Any Boat parts left on the ground will be used by your Workers to tediously build the rest of the Boat, but will also be vulnerable to being stolen by Greed. Once the Boat is built, you will be required to spend another 2 Coins, and upon doing so, 3 of your Workers will place the Boat into the water and slowly push it to the side of the island with the dock. Your Workers will push faster on open land than they do through forests, so be sure to deforest if you are in a hurry. On the way to the dock, the Boat will pick up 4 random Archers, who will still continue to attack things as the Boat gets pushed, such as Greed, Animals, and even Portals. Once the Boat reaches the dock, you can put up to 3 Knights and their squads on board by signaling your Knights to attack in the direction of the dock. If you send the Knights while the boat is still being pushed, they will simply escort the Boat until it reaches the dock, at which point they will board. Once you are ready to go, you must pay another fee of 10 Coins to depart. Departing resets the day count, sends you to the map, and unlocks the next island. Your mount, All of your Coins, anany subjects on board with you will be brought with you to the next island. If you have a Dog, or if a Hermit is riding your mount, they will come with you as well. All NPCs will lose any Coins that they are carrying, including Knights. You do not need all 3 Workers to depart, and can do so before all NPCs are onboard, but it is less beneficial to do so.
When you arrive on a new island, you will spawn at the shipwreck, and your subjects will run to protect your new Kingdom, even before you light the fire. Once you have the Boat built again, you will have the choice to continue to the next island, or to redo an island you have previously completed.
By bringing 2 Knights with you when departing, you will start the next island with 2 Knights (one on each side), but they will not have their own banners if you upgrade to a Tier 6 Kingdom. This means that if your Knights survive long enough for you to get more Knights, you can have a total of 3 on each side, which you can then board onto your next boat, giving you 3 Knights to start the next island with.

Map Fragment Signs can be used once for 2 Coins, and will give you a Map Fragment. Once you have the Map Fragment for your current island, you will not be able to reap its rewards until you either leave the island or get a game over, at which point your map will update to show a new unlockable structure on that island, symbolizing that it has now been unlocked, and has a chance to spawn during play on any island. The map can be checked from the pause menu, with an icon of a wrecked or fixed boat to show which island you are on, which you can use to determine whether or not you are missing unlocks for your current island. To unlock multiple structures from the same island, just play through the island more than once, and the order you unlock them in will be randomly selected. All unlockable structures and their islands are listed below.

Statue of Archery

Dog/Fallen Tree

Statue of Building

Wild Horse

Hermit of Tide

The Stag

Statue of Sithe

The Great Bear

Statue of Knights

Armored Horse

Hermit of Baking

The Unicorn

Hermit of Valor

The Obelisk is the most important structure in the game, and the sooner you upgrade it the better. It can be found in the forest and upgraded to a Stone Obelisk for 7 Coins. Before upgrading it, you can’t build anything better than Tier 2 Walls, Tier 2 Towers, and a Tier 4 Kingdom. This is one of the 2 structures in the game that can be upgraded without the use of Workers.
NOTE: The obelisk NO LONGER SPAWNS on the 1st island.

The Trees are what make up the forest, and block grass from spreading. The Trees closest to the edge of the forest can be marked to be cut down by a Worker for 1 coin each, and when cut down, they yield 1-2 Coins per tree, and provide more room for grass to grow.
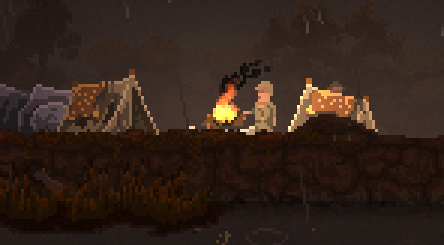
Vagrant Camps spawn a Vagrant every 2 minutes, and can hold up to 2 Vagrants at a time. As you get to further islands, Vagrant Camps become fewer and farther from your Kingdom. Chopping down any Tree directly next to a Vagrant Camp will permanently destroy it, so be careful!
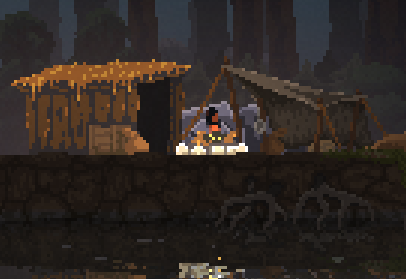
The place where the Merchant goes to restock his mule. Chopping down any Tree directly next to the Merchant’s Hut will permanently destroy it, so be careful! The Merchant and Merchant’s Hut will only appear on the 1st and 2nd islands.

Chests can occasionally be found when exploring the forest. They have a one time use of dropping 12 Coins when you walk past. They are less common on the later islands.
IV-II. Unlockable Structures
Unlockable structures are randomly generated things that you might come across in your adventures. The unlockable structures you get on each island will be randomly chosen out of the ones you have unlocked, so unlike structures, unlockable structures are not guaranteed to appear. To see where and how to unlock these structures, read “Map Fragment Sign” under the section “Structures”.

The Hermit Shack (AKA the NPC Shack) is an unlockable structure in the forest that, when found and paid 4 coins, will spawn a random one of the following Hermits (it will choose from the ones you have unlocked):
- Hermit of Tide
- Hermit of Valor
- Hermit of Baking
All Hermit Shacks will only ever spawn one Hermit, though it is possible to find multiple different Hermit Shacks on the same island.

One unlockable structure is the fallen tree, out from which a dog will occasionally pop his head! DROP a coin onto the tree to break it and free the dog! Once the dog has been freed, the fallen tree is useless.
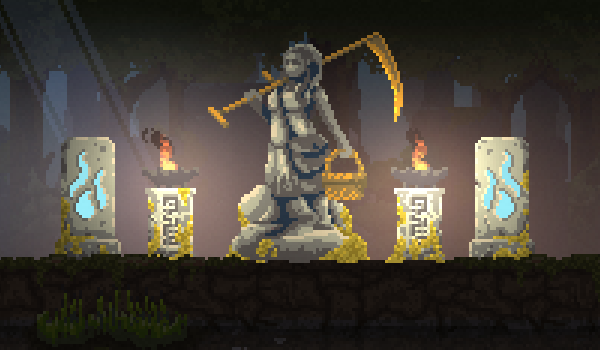
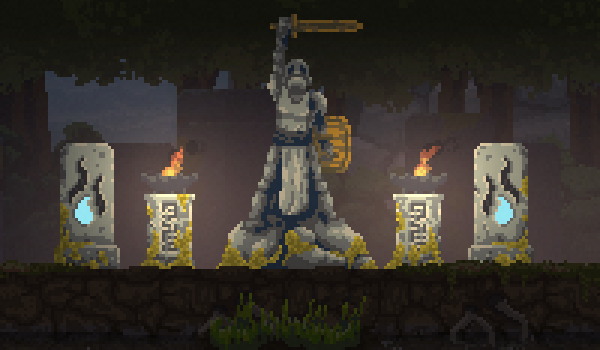
Statues are a type of unlockable structure, but function differently from most other structures. When a statue is paid, its effects will activate, lasting for one day. By paying it again, you can restart the countdown for that day while also adding an extra day of activation, with a maximum of three days before it runs out. The flames on the pillars to the left and right of the statues have three segments that will light up, telling you how much time the statue has left before its effects expire. Lit segments represent a full day, while fading ones represent part of a day. The more faded the flame, the less time is left before that day is up on the timer. The four types of statues are listed below:
The Statue of Archery can be activated for 4 coins per day. When active, your archers will never miss, both in hunting and defending. Your archer’s arrows will also do slightly more damage to high-health enemies. This is essential to late-game survival, and can make surviving early Blood Moons way easier.
The Statue of Building can be activated for 8 Coins per day. While active, it increases the maximum health of your Walls, making it extremely useful for Blood Moons or late-game survival.
The Statue of Sithe (yes, it is canonically spelled like that) can be activated for 4 coins per day. While activated, it increases the maximum amount of crop fields that can surround a farm from 4 to 8, as long as there is enough room. Any crop fields that are established while the Statue of Sithe is still active will stay established and usable even after the statue’s effects wear off.
The Statue of Knights can be activated for 8 coins per day. Activating this gives knights a new lunge ability, where they jump forward and stab with their sword, piercing through multiple enemies. They also use this ability when behind walls, peeking out for a second to damage enemies before retreating behind the wall. This ability will greatly increase the amount of damage that your knights can do against the Greed, but will also cause them to risk their lives, making them die a lot faster.
IV-III. Holiday Event Structures
Sometimes, the game has temporary content that is added for a holiday season, such as Christmas or Halloween. These structures will only appear during these holiday events, but will stay in your game afterwards so long as you stay on the same island after the event ends. Dying, starting a new game, or traveling to a new island will generate new structures for the new island, and will not generate these structures once the respective holiday event is over.
The Christmas tree is a massive tree with presents underneath that can only be found during the Christmas Event. It will spawn somewhere in the forest on (every island except the first?). It will be devoid of ornaments, but you will have the option to hang an ornament on the tree at the cost of 1 Coin. After hanging all 17 ornaments, a crate will fall from the sky next to the tree, and will contain the Sleigh.

The Snowman is a small structure that can only be found during the Christmas Event. It can be found somewhere in the forest on every island, and will be wearing a santa hat. If paid 3 coins, the player will take and wear the Snowman’s santa hat, which will completely replace your crown until you die, and will automatically change the color scheme of your blazon to make your character’s clothes red to fit with the santa hat. The santa hat will not seem to do anything at first, but if the player is also pulling the Sleigh, the Sleigh will drop presents for the player.

The Sleigh is a mobile structure that will follow behind your mount, but can only be pulled around if the character is riding the Reindeer. The Sleigh may appear useless at first, but if the player is also wearing the santa hat obtained from the Snowman, the sled will drop (3-4?) presents on the ground (at seemingly random intervals?). These presents function identically to Coins, and thus can be picked up or carried by you, your subjects, and Greed. The Sleigh will stop dropping presents and following you after (5 days?) of dropping gifts. The Sleigh is obtained through the Christmas Tree, and thus cannot be obtained unless the player is playing during a christmas event.
V-I. Mounts
This section is about all of the different mounts that you can ride on in the game, and how riding each one benefits you differently. Switching to a new mount always costs 3 coins. All mounts can run, but running will drain your mount’s stamina. If your mount runs out of stamina, you will need to wait until your mount fully regains its stamina before you can sprint again. You can tell when it is ready if it stops breathing heavily. To refill your mount’s stamina faster, stand still above some grass and let your mount graze for a bit. After your mount is done grazing, its stamina will be completely refilled, and it will get a stamina boost. These boosts give your mount unlimited stamina for a set amount of time, starting once your mount finishes grazing. Walking instead of running during this boosted period will not preserve this boost. You can tell when the stamina boost is still active because it will create white dust particles around your mount’s legs when it runs.

The Default Horse is the horse you spawn with whenever you start a new game. All calculations for the walk and run speeds of other mounts use this mount’s run and walk speeds as a base. To see where and how to unlock other mounts, read “Map Fragment Sign” under the section “Structures”.

The Stag is an incredible mount, which can be found near a big waterfall in the forest. When riding the Stag, not only will Deer no longer run away from you, but you can also “attract” nearby Deer simply by standing near them. When this happens, hearts will appear above the Deer, and they will begin to follow you!

The Great Bear is a fearsome and awesomely useful mount, especially early on. It can be found near a small cave in the forest. The Great Bear attacks enemies and animals that it touches while sprinting. Its attack does the same damage as a single arrow, so deer, for instance, still take two hits to kill. You can damage/kill Greed, but you will still get hit as well, so don’t go charging into a wave expecting to kill them all. Hunting Deer with the Great Bear is an excellent way to get the “On The Fourth Day, We Had A Feast” achievement.

The Unicorn is one of the most useful mounts in the game. It can be found under a special pink tree in the forest. The Unicorn “spawns” 3 Coins after eating grass, and can do so about every 10 seconds. This can be used to farm for money quite easily. When riding the Unicorn, the stamina boost’s dust particles become rose petals.

The Armored Horse (aka the War Horse) can be found standing on an open battleground in the forest. The Armored Horse will buff nearby troops when it begins running, and can use the buff again after about 15 seconds. While active, the buff makes your nearby troops take no damage from enemies for a full 10 seconds. This 10 second buff can completely turn the tides of a fierce battle, making it the best mount to use when attacking a portal or defending from a blood moon. The buff does not affect Dogs or Hermits.
Wild Horses can be found in a grassy clearing, where two of them are grazing near a fence in the background. There are four different types Wild Horses, each with different stats. One of the possible Wild Horses looks exactly the same as the Default Horse, and has the same stats. The ones with different stats are listed below.


V-II. Holiday Event Mounts
Sometimes, the game has temporary content that is added for a holiday season, such as Christmas or Halloween. These mounts are only available during those holiday events, but can be kept in your game afterwards so long as you are riding them when the update ends. Dying or starting a new game will, just like with other mounts, reset you to the Default Horse, and will make reobtaining these mounts impossible until the next year if the holiday event has already ended.

This exclusive mount can only be found during the Halloween Event, and will spawn in front of a haunted house, standing next to a noose. The Undead Horse is flat out the best mount in the game, as it can graze anywhere and has a 3 minute sprint duration. The “grazing” animation for the Undead Horse involves it sticking its head forward with its eyes flaring up, and keep in mind that this animation is actually too fast for the mount to graze, so be sure to wait an extra few seconds after the animation finishes to ensure you get the boost. The only real downside to this mount is that riding it will make your king/queen a ghost, making it impossible to change mounts.

This exclusive mount can only be found during the Christmas Event, and will spawn in front of a festive, workshop-esque structure. The Reindeer (AKA Rudolph) is a mount that functions nearly identically to the Stag, as it has the exact same stats, and can even attract deer by standing near them. The game, however, still considers them separate mounts, as you can find both the Reindeer and the Stag on the same island. The main difference between the Reindeer and the Stag is that the Reindeer is the only mount that can pull the Sleigh.
VI-I. Blazons
The blazon option can be found in the options menu on the pause screen. When used correctly, it will change the appearance of your coat of arms, and therefore the color of your aesthetics!
When you type the information into the text bar, use the following format, without the “<” or “>”:
Color1 = Color of coat of arms, cape/dress, & some Knights’ shields
Pattern = Pattern on coat of arms
Color2 = Color of pattern & some Knights’ shields
Animal = Animal silhouette on coat of arms
Color3 = Color of animal
So, for example, if I wanted a black-and-white checkerboard pattern with a green snake on it, I would type:
and get:

Things to note:
- Sometimes there are two names for the same variable, such as Cyan/Aqua.
- Some animals, such as “An Eye”, are exclusive to blazons, and cannot end up on your shield in any other way. I personally datamined for them, in order to be sure that they were all discovered and documented accurately for the community.
- Some colors, like “Aquamarine”, are broken, because if you use them as Color3, the game will stop reading after it sees any valid color, even if it is only part of the word you typed. For example, if you use “Orange”, it would see “Or” and stop reading, instead of seeing “Orange”.
- The list for colors is split up into 7 sections, one for each of the five tinctures in Heraldry, one for both metals[en.wikipedia.org], and an extra one for shades of brown.
- The colors that are listed are the aforementioned 5 tinctures and 2 metals, as well as all 140 named HTML colors[www.html-color-names.com]. This means that there are probably no more colors that need to be discovered.
All colors, patterns, and animals available in the game are listed in the following sections of this guide.
VI-II. Blazons: Red Colors (Gules)


VI-III. Blazons: Yellow Colors (Or)


VI-IV. Blazons: Green Colors (Vert)


VI-V. Blazons: Blue Colors (Azure)


VI-VI. Blazons: Purple Colors (Purpure)


VI-VII. Blazons: Brown Colors


VI-VIII. Blazons: Black & White Colors (Sable & Argent)


VI-IX. Blazons: Patterns


VI-X. Blazons: Animals


VII-I. Achievements (Part 1)


VII-II. Achievements (Part 2)


IX-I. Strategies (Info)
This portion of the guide will be dedicated to the best strategies we could find. Whether it be for surviving 100 days, or getting off an island as quick as possible, if you have a good strategy, even a glitchy one, we’d love to hear it! Just post about it in the comments to have your username and strategy featured here!
Edit: I may get around to finishing this section of the guide one day, but for now I am terribly busy in real life. If you need information about strategies in the meantime, definitely check out the comments below and the community discussions, people are extremely helpful with sharing tips and strats!
IX-II. Strategies (Survival) (WIP)
This section is for strategies that help you survive for as long as possible without getting overrun by Greed.
IX-III. Strategies (Speedrun) (WIP)
This section is for strategies that help you escape from an island as soon as possible.
IX-IV. Strategies (Tips & Tricks) (WIP)
This section is for tips and tricks that will help you out in general when playing the game.
(by KarmicChaos)
For the first few nights on any given island, you can easily bribe the small amount of greed that spawn. For the uninitiated, bribing is when you drop coins for the oncoming greed to steal. What I’d recommend is to play as you would normally up until nightfall, then go out deforesting at night. Be sure to always have a few coins in your bag, and while your workers are chopping, stand between them and the side the greed will attack from. Make sure to be far away enough from your workers so that the greed don’t get anywhere near them, and as the greed begin to show up, drop an appropriate amount coins as you fall back to your workers, being sure to stay ahead of the greed so that they don’t lunge at you instead of stealing the coins. By doing this every night for the first 3 or 4 nights, you will be able to expand a lot farther into the forest very early on, because you will have the safety to do so during the night. Just be sure you also have the appropriate amount of archers to defend the other side while you do this.
X. Credits
We would like to give a sincere “Thank You” to everyone who helped out in the comments! We never expected so many people would want to help out, so we were actually overloaded with information at first! You guys are great, and for those of you who contributed screenshots to the guide that were used for a significant amount of time, your names will be listed down below.
We’d also like to thank the following people for providing major informational breakthroughs while we were researching the new content:
As for writing the guide itself, these people helped significantly with the process.
Noio also deserves a special thanks for not only making this great game, but also for posting this nice comment that made my day!
Note that everyone here in the credits has a link to their steam profile if you click on their name, so if you are feeling extra thankful, go leave these guys some nice comments on their profiles!

