
Overview
This guide is a collaborative effort of the “Kingdom: Two Crowns” community to discover, research, and document everything that is in the game. Please follow the instructions below if you want to participate.
Guide Overview & How to Help Out
We’re back! If you would like to contribute to the creation of this guide, please read the entire guide first. Then, as you play the game, try to look into anything you come across that is not already in the guide. Run tests, crunch numbers, or do whatever you prefer to gather information. Then, leave a comment of your findings down in the comments section below, and the information will be reviewed and added to the guide. While grammar isn’t absolutely necessary, please try to word your comments in a way that is understandable, so that the information is not misinterpreted.
Update:
Winter update is here! I will be working to update the guide accordingly, so now is a great time to post any new information that should be included! Here are the update notes:
Update:
The next update has arrived! The game now has a new biome: Dead Lands, featuring tons of new content to explore!
I-I. The Basics
Once the game starts, the keys to control your monarch(s) are as follows:
The game runs on a day and night cycle, where you build and expand during the day, and defend the onslaught of enemies at night. The longer you survive, the harder it gets.


I-II. Biomes, Seasons, and Decay
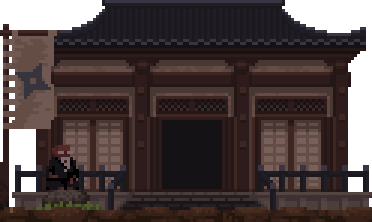
Biomes are what the developers refer to as the different themed lands, or different “skin packs” for the game. In the current version of K2C, we have three biomes: the default biome, the shogun biome, and dead lands. Biomes can only be selected on the loading screen when you first start a save. More biomes are continuously being added to the game.
The default biome is the normal biome for Kingdom: Two Crowns. The only difference gameplay-wise is that you can hire pikemen.
The shogun biome is a biome themed after feudal japan, available as a free DLC. Squires become ronin, knights become samurai, and coins become mon. The only differences gameplay-wise are that the forests are more densely packed with bamboo (trees), and you cannot hire pikemen, but can hire ninjas instead.
In the biggest update thus far, dead lands adds plenty of new features for the monarch to discover. Research and documentation of this biome are ongoing.
The game rotates through 4 seasons, each having their own effect on your kingdom. A season lasts for 16 days, with a full rotation of all 4 seasons taking a total of 64 days. The seasonal rotation persists between islands, and will only reset to spring if the player gets a game over. Blood moons will occur more frequently the more seasons that pass.
Spring is the starting season. During Spring, grass will begin to regrow, spawning anywhere it had been before winter came. This will allow rabbits and deer to spawn once again, and farms will also resume functionality.
In terms of gameplay, the only difference between Spring and Summer is that grass no longer spawns during Summer; it can only expand from already established patches of grass.
Fall and Summer are identical in terms of gameplay. (unconfirmed)
During Winter, all grass is gone, no more deer spawn, and farms are frozen over, leaving you with no easy way to make money for the duration of winter. The only sure forms of income are by having your pikemen/ninja fish, having your farmers go foraging for berries, and by killing the boar, which can only be killed once per winter.
For every day that the monarch is not present on an island that has already been visited, that island will experience a day’s worth of decay. This means that the effects of decay become more severe as time passes, so it is recommended that monarchs return to previous islands occasionally to keep them from decaying too much. There are only two parts of your kingdom that are affected by decay: walls and archers (note: decay effects are untested on squires). Each wall and archer have a resistance to the effects of decay, preserving them for a number of days before they actually decay. A table of these “resistance days” can be found below. The other way that an island can be protected from decay is through the construction of a lighthouse. Each lighthouse upgrade provides extra “resistance days” to every wall and archer on the island (see Lighthouses under section III-I. Campaign Structures for more details). The interaction between decaying buildings/subjects is untested (does everything decay at once, or does one thing need to decay for the next to start counting down its resistance days?).
II-I. Animals
 Rabbits
(outdated screenshot)
Rabbits periodically spawn from patches of tall grass. Because of the decaying grass, neither tall grass nor rabbits can spawn during winter. After spawning, each rabbit will wander around aimlessly, and will drop 1 coin if killed by an archer.
 Deer
DeerDeer will periodically spawn in the forest. Each deer takes 2 hits from an archer to kill, and will drop 3 coins when killed. They will run away from the player and archers in fear of being harmed, but by sprinting past them, you are able to slowly herd deer back to your kingdom for your archers to kill. This is the only animal that can be hunted by archers in towers, and at night. When it is winter, deer will stop spawning.
 Fish
FishFish swim in the river occupying the foreground, occasionally jumping out of the water. They will be hunted randomly by your pikemen/ninjas during the daytime, and drop 1 coin when caught. Fish are the only normal animal that can be hunted for coins during the winter.
 Dogs
DogsDogs can be found after breaking a fallen tree. It will follow the monarch that freed it around, keeping them company, and will occasionally bark in the direction of incoming enemies. It also runs away from greed, because when attacked, it will be picked up and carried away, so be cautious if you want to keep your dog alive. If you use a teleporter, the dog will not come with you, and instead will have to run across the island to reach you. Once kidnapped, the dog will be unobtainable until you either destroy the cliff portal on the island where it was kidnapped and escape alive, or free the dog again after getting a game over.
 Boar
BoarThe boar is a special animal that can only be found during winter, and once killed will not spawn again until the next winter. The boar spawns when a monarch approaches the boar den, and once provoked, will begin to charge down the player, forcing them to retreat. If the boar manages to hit a monarch, it will knock ALL coins out of their bag (gems are untested), or knock their crown off if their bag is empty. If the boar successfully attacks a monarch, it will immediately retreat to the boar den, but can still be spawned again that winter as it was not yet killed. If the monarch retreats enough to reach their subjects, the boar will knock the tools out of the hands of any subjects it touches. If the boar manages to hit a wall, it will slightly damage the wall, then remain in a stunned state for several seconds, allowing for easy damage to be dealt. Once it recovers from this stun, it will attempt to retreat to its den. Archers will still attempt to hunt the boar as it charges you down, and as the boar takes damage it will occasionally stop its charge to recover before continuing to charge. The boar has a high amount of health (undocumented value), but once killed, will erupt into a massive fountain of coins, spawning 29 coins.
II-II. NPCs & Shops


To learn about hermits, see section III-III. Hermits.
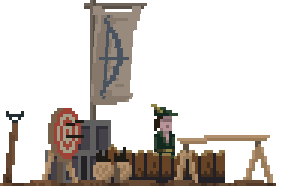
The Bow Shop
The bow shop spawns to the right of the fire once it has been lit. This shop allows you to purchase up to 4 bows, which your peasants can pick up to become archers.
The Hammer Shop
The hammer shop spawns to the left of the fire once it has been lit. This shop allows you to purchase up to 4 hammers, which your peasants can pick up to become workers.
The Scythe Shop
The scythe shop spawns once you have built 2 stone-age walls defending the same direction. This shop allows you to purchase up to 4 scythes, which your peasants can pick up to become farmers.
The Spear Shop (Default Biome)
The spear shop spawns once you have built 2 stone-age walls defending both directions (4 walls total). This shop allows you to purchase up to 4 spears, which your peasants can pick up to become pikemen.
The Dojo (Shogun Biome)
The dojo spawns once you have built 2 stone-age walls defending both directions (4 walls total), and replaces the spear shop in the shogun biome. This shop allows you to purchase up to 4 katanas, which your peasants can pick up to become ninjas.
 The Catapult Station
Sells: Fire Barrels (5 Coins)
The catapult station for a given direction spawns when there is sufficient room behind a stone-age wall defending that direction. The catapult station allows you to purchase a single catapult to defend that direction of your kingdom, which must be built, pushed to your outer wall, and manned by up to (2?) workers. The catapult will automatically be wound back by the workers to prepare another shot after every time it is fired, and is wound back faster the more workers are manning the catapult. When fired, the catapult launches a boulder over the wall and at the attacking enemies, barreling through any enemies it touches and killing all enemies aside from floaters and breeders instantly (unconfirmed whether they instakill crownstealers). Both the vertical and horizontal range of the catapult are nothing spectacular, so the boulders will usually miss floaters, and cannot hit greed too close to the wall. Boulders will take out the majority of a floater’s health, and will deal decent damage to any breeder they hit, and will also break on impact against breeders. Boulders fired recently will remain on the ground for (30 seconds?), during which a breeder may pick up the rock and hurl it back at you and your troops. If a catapult is already constructed to defend a direction, the catapult station can be used to purchase fire barrels for 5 coins. When a fire barrel is purchased, an available worker will roll it from the catapult station all the way to the catapult. There is no limit to the amount of fire barrels that can be purchased from a catapult station, and thus there is no limit to the amount of fire barrels a catapult can have ready to fire at any given time. If there is at least one fire barrel available, the workers manning the catapult will load a fire barrel onto the catapult and launch it the next time it fires. When a launched fire barrel hits the ground, it will burst into a fire trap, igniting all enemies that pass through it. The fire trap left by fire barrels is both bigger and longer lasting than the ones spawned by the lizard mount. Ignited enemies will stay ignited permanently, and will regularly take (1/2 ?) arrow’s worth of burn damage (every half second?) until they die. If the wall the catapult is defending falls, your workers manning the catapult will attempt to retreat, leaving the catapult behind to be destroyed by the greed.
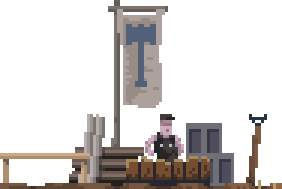
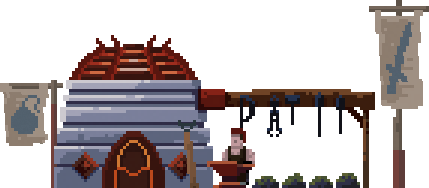 The Forge
(outdated screenshot)
The forge spawns once you have built enough iron-age walls in any direction. The forge allows you to buy up to 4 swords, which your squires can pick up to become to knights.
II-III. Subjects
 Peasants
Job: None
Coin Capacity: 2 Coins
When a vagrant is given a coin, they will become a peasant, and head to the center of your kingdom where they will await a job. Peasants are the denizens of your kingdom that do not currently have a job. When there are available tools, peasants will run over and pick them up to do the job associated with the tool. During the day, the peasants will wander near the shops awaiting a job. At night, the peasants will run back to the center of your kingdom and wait until morning. If chased by a greed, they run. If they get hit once, they drop their coin and become a vagrant.
 Archers
Job: Hunt & Defend
Coin Capacity: 11 Coins
During the day, archers will wander between the outer walls and the forest, hunting rabbits and deer. At night, they run back and hide behind the outer walls to defend your kingdom. They will run away from greed, but will occasionally stop to shoot at them, and when hit, they will drop their bow and become a peasant. Archers have a (1/3?) chance of hitting their target.
 Workers
Job: Build, Repair, Deforest, & Man Heavy Weaponry
Coin Capacity: 2 Coins
During the day, workers (AKA builders or engineers) wander around the last site they worked on. At night, they head to the outer walls and wander around there. They will run away from greed, and when hit, they will drop their hammer and become a peasant.
 Farmers
Job: Farm & Forage
Coin Capacity: 14 Coins
When a farm is available, a random farmer will be assigned to go there and create a crop field. During the day, farmers will grow and harvest coins for you (still seems legit). At night, they run back behind your kingdom’s walls for safety, or will stay at their farm if it is a tier 2 farm. During the winter, farmers will walk around the center of your kingdom, but will go out to forage during the daytime if the monarch finds and pays some berry bushes. They will run away from greed, but have the slowest run speed of all subjects, and when hit, they will drop their scythe and become a peasant. Farmers no longer discard their scythes after having no valid farm for a few days, thus the player is advised to not buy more farmers than is necessary.

Pikemen (Default Biome)
Job: Defend (Crowd Control) & Fish
Coin Capacity: 0 Coins
Pikemen (AKA spearmen) are a temporary unit, meant to be used as a way to turn the tides of a battle you know you may lose. During the day, pikemen wander around aimlessly, occasionally using their spears to hunt for fish, even during winter. At night, pikemen defend the furthest constructed wall on their assigned side, and stab enemies as they attack the wall. Their attacks pierce through all enemies they touch, and deal the same amount of damage as 1 arrow to each enemy they hit. After 2-4 stabs, the pikeman’s weapon will break, and they will turn back into a peasant. Only 1 pikeman can be active on any given wall; if there are extras, they will wait in line, getting ready to take the place of the active pikeman when his spear breaks. Only 3 backup pikemen can wait at each wall, so any extra pikemen exceeding this limit will guard the next furthest wall inward. If all walls are occupied by 4 pikemen, the remaining pikemen will guard your town square.
 Ninjas (Shogun Biome)
Job: Defend (Ambush) & Fish
Coin Capacity: 0 Coins
Ninjas (AKA shinobi) replace pikemen in the shogun DLC. They operate very differently than pikemen, and thus are listed separately, but are still a temporary unit that serves a similar purpose. During the day, ninjas will change into more casual clothes at the dojo, and will go fishing for coins, even during winter. As night approaches, they will switch to a traditional ninja look, and travel out to the forest to hide behind a bamboo chute near the edge. Once the greed pass the ninja’s hiding spot, the ninja will leap out to begin attacking the nearby enemies. If the ninja is unable to reach the bamboo forest before nightfall, they will meet the greed halfway and put up their usual fight. The ninja’s attacks consist of a ranged shuriken throw and a leaping slash attack with their katana. They are capable of fast and powerful attack combos, and thus are a force to be recokned with. Once struck by a greed, they will vanish in a puff of smoke and reappear by the dojo as a peasant.
 Squires
Job: Attack & Defend
Coin Capacity: 5 Coins
When a peasant picks up a shield to become a squire, they will be assigned a side of the kingdom based on which side of the kingdom the shield was purchased on, and up to 4 random archers will be assigned to become that squire’s squad. These archers will follow the squire wherever he goes, and will no longer hunt, so be careful about hiring squires when low on archers. During the day, squires and their squad will wait outside the outer wall in their assigned direction, awaiting orders to attack. At night, they will fall back behind the walls to defend against the greed. When a squire is attacked by greed, it will parry the attack, with a chance to lose their shield in the process, becoming a peasant. If the squire is carrying any coins, they will drop one of their coins instead of losing their shield, therefore it is recommended for you to give coins to your squires in order to buff them. If the banner outside the outer wall they protect is paid 4 coins, the squire on that side and their squad will be signaled to attack the nearest portal in that direction, and will head out to do so no matter the time of day or circumstances. Once they arrive at the portal, your squire will attempt to defend against the greed that the portal spawns, while your archers chip away at the health of the portal. If the portal is destroyed successfully, the squire and squad will immediately retreat back to your kingdom for the upcoming blood moon. If all of the archers in a squire’s squad are eliminated during an attack, the squire will call off the attack and attempt to retreat. If the squire loses their shield, their squad will revert back to regular archers immediately.
 Knights
Job: Attack & Defend
Coin Capacity: 11 Coins
After crafting a sword at the forge, the nearest available squire will retrieve it, promoting them from squire into knighthood. Knights fill the exact same role as squires, but have more than double the coin capacity, and thus double the health, and also have a lower chance to lose their shield upon parrying attacks. (unconfirmed)
II-IV. Enemies
 Greed
GreedGreed are the main enemy of the game. They are grumpy little thieves that, for some reason, are still bent on noodling your stuff away.[www.noio.nl] They will steal any coins and tools they can find, and then run back to the closest portal for safety. Every night, multiple greed spawn from the closest portal to your kingdom on each side. If they reach a wall, they will attack it until the wall gives way. If they come across a subject, they will attack them, causing your subject to drop their tool and then, if hit again, lose their coin, turning back into a vagrant. Greed will also attack you, knocking 1 coin out of your bag at a time. If you are hit when you have no coins, they will knock a gem out of your bag. If you have no coins or gems, your crown will be knocked off, and you will have an opportunity to recover it before the greed can steal it. It only takes one hit with an arrow to kill a greed, and they will drop any carried items or coins upon death. Early-game strategies usually include dropping coins for the small number of greed that spawn on the first few nights, giving you and your workers the ability to act with safety during the night. This tactic is widely known as “bribing”.
 Armored Greed
Armored greed are are distinguished by the masks they wear, and are just like any other greed that attacks walls and steals items, and thus can also be bribed. When armored greed get hit with enough arrows, their mask is destroyed, leaving them as vulnerable as any regular greed. The amount of hits required to destroy the mask varies. (unconfirmed)
 Floaters
Floaters are the only flying enemies in the game, and thus can completely ignore walls. When they swoop down, they will target up to 2 random subjects, knocking the tools out of their hands. Then, they will grab the subjects and literally attempt to steal them. Archers in towers are typically targeted first, and are thus the most vulnerable. Floaters have a good amount of health, to the point that they can survive a catapult or mighty ballista shot, though it will take out the majority of their health, and so long as it is killed before it flies all the way back to a portal, it will drop your stolen subjects and shrivel up into a ball of flesh. If a floater attempts to pick up a knight (or squire?), they will instead knock out (every?) coin the subject was carrying before floating back up to their usual height to try again.
 Breeders
Breeders are the strongest enemy in the game, taking multiple catapult or mighty ballista shots to kill. They are called “breeders” because every few seconds, they stop and spit out 4 greed to aid them with their assault. Breeders are slow and hard hitting, making you drop tons of coins with each hit. Attempting to run past them will cause your mount to rear back, leaving you vulnerable to being hit before you can run past. They can throw your catapult’s rocks back at you, which can deal heavy damage to a wall, knock a ton of coins out of your bag, and incapacitate any subjects it hits. Thrown boulders can also incapacitate archers in towers, even in towers that protect their archers from floaters, though this will only happen if the boulder happens to accidentally hit an archer in a tower. When your subjects are incapacitated, they drop their tools on the ground and just lie there, being useless for a while. Breeders will also punch your walls when they get close to them, and can take down most low tier walls in a matter of seconds. Sometimes they spawn with a crownstealer riding them for double the trouble! The worst part about breeders is that they cannot be bribed, and will never head back to their portal. They want your crown, and they are willing to die trying to get it.
 Crownstealers
Crownstealers appear late game, and are the bane of any monarch’s existence. They usually spawn riding on the backs of breeders, jumping off only if the breeder dies or reaches a wall, or if a nearby crown-wearer is out in the open. When on the ground, they ignore all subjects and go straight for the monarch, running on all fours at unmatched speeds and even jumping over any walls just to reach you. They are incredibly fast, to the point where they cannot be outrun, and if they successfully reach you, they will always knock your crown off immediately, regardless of whether or not you have coins or gems. Due to their extreme speed, the crownstealer is then guaranteed to reach the crown before you can recover it. They don’t have much health, so your best bet is to stay behind your walls, and get your troops to kill them before they can reach you and nag your crown.
II-V. Portals
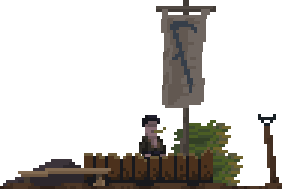
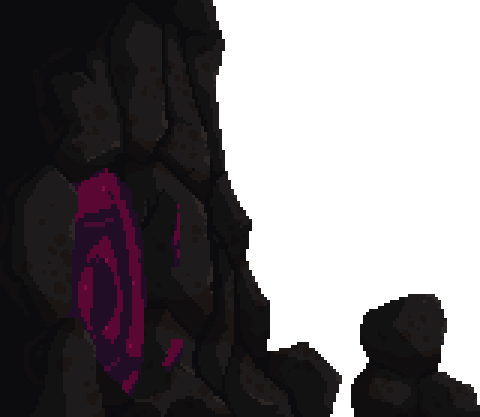
 Portals
Portals are big, rocky gateways found in the forest, and are the main spawn-points of your enemies. Portals are usually closed during the day, but open to let out enemies as night approaches or when attacked. While closed, portals can be safely passed by, but when open, they will spawn greed to attack anything that goes near it. They can be permanently destroyed by ordering knights/squires to attack them, but they will put up a fight. Once destroyed, the sky will turn blood red, and cries of anger will be heard. All your subjects will begin to retreat as if it were night time, and a blood moon will start mere seconds after the portal is destroyed. These blood moons caused by the destruction of a portal typically spawn a wave of enemies that is much larger than that spawned during a natural blood moon. After destroying the last portal on one side of the island, the cliff/dock portal will become active.

 Cliff Portals
Cliff portals, like dock portals, will start closed, but will only open when all other portals in that direction have been destroyed. The cliff portal can be attacked like any other portal, and it will put up a fight with its massive health pool, but upon its destruction, it will begin to reconstruct itself over the next three days. It will not spawn enemies during this reconstruction period. The cliff portal poses as the ultimate threat of each island, but can be permanently destroyed through a specific attack. If permanently destroyed before all other portals are eliminated, the other portals will become inactive. Something to note is that the dock portal will also be inactive, yet it can still use its tentacle attack for some reason.
To destroy a cliff portal, you must first buy a bomb from the banner on an Iron castle for 18 coins. Once the bomb is purchased, an attack squad will automatically assemble around the bomb. The squad will contain up to two knights/squires, the group of archers assigned to each knight/squire, plus up to 3 workers to push the bomb. From then on, the entire squad will follow you as you advance towards the cliff portal, stopping only if you move in the opposite direction. Upon reaching the cliff portal with the bomb, you must pay the bomb 5 coins to start the siege. Upon payment, your squad will enter the portal into the greed realm. Once inside, you must work with your squad to escort the bomb past a number of greed nests, which will each spawn 7 greed every few seconds. The amount of greed nests you must defeat is proportional to which island you are on. Once the bomb reaches the heart of the portal, you must pay another 5 coins to light the bomb, which will cause the heart to erupt, spawning an insane amount of greed. At this point, your troops will attempt to retreat, and you must run to escape back through the portal before the bomb detonates. Upon detonation, the cliff portal will be destroyed, and the island will be permanently safe from the greed. If you do not make it out in time, you will get a game over as well, making the victory bittersweet. If the monarch destroys a cliff portal and escapes safely, all gems, hermits, and dogs stolen on that island will be returned, and all subjects that accompanied you will spawn outside of the portal in whatever state they were at the moment of the detonation.
III-I. Campaign Structures
These structures are found throughout the game, and are necessary for progressing through campaign mode.
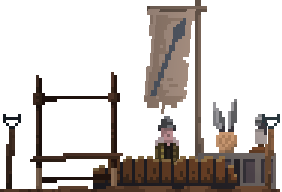
The boat spawns on every island, and must be constructed in order to leave that island and set sail for another. The boat shipwreck can be found somewhere in the forest next to the boat dock, and can be paid 10 coins to spawn the frame of the ship. After this, the boat can be paid an additional 2 coins to spawn an individual part of the boat on the ground, which your workers will use to slowly piece the ship back together. The boat allows up to 3 workers to construct it at once, which is more than the usual limit of 2 workers per building. There is no limit to the amount of boat parts you can have lying on the ground at once, and any greed that come across a boat part will attempt to steal it like any tool or coin. There are a total of (60?) parts that must be spawned and added to the boat for it to be completed, for a total of cost of (130?) coins to construct the boat. If the monarch is on island 1, the initial purchasing of the boat’s frame will also spawn all (60?) of its parts on the ground, while on island 2, the frame will spawn with (half?) of its parts on the ground. Once the boat has been fully constructed, the monarch can pay it an additional 2 coins to place the boat into the water in the foreground, at which point 3 random workers will quickly push the boat to the nearby boat dock. Once in the water, 4 archers will be assigned to man the towers on the boat, treating all 4 of them as if they were in tier 2 towers. After this, the wharf bell can be used to board subjects onto the boat. Once the player wishes to leave the island, all active players must stand on the boat dock behind the ship, and one player must pay the boat 10 coins to set sail, at which point all monarchs will board the boat, and any living dogs and hermits on the island will jump in as well. If this is the furthest island reached on that save, the next island will unlock, and the player must choose which island to visit next. All coins and gems carried by the monarchs will be brought with them to the next island, so be sure to fill up before departing.

 The Wharf Bell
The wharf bell will always spawn at the boat dock, and once the boat is in the water, the player can pay the wharf bell 2 coins, which will call over the 3 closest builders and 3 closest knights/squires with their squads to board the boat. If there are not enough subjects of a given type to fill the boat, like if you only have 2 squires, the ones that currently exist will board, and the wharf bell can be rung again later to fill the empty spots. Knights and squires will bring any carried coins along with them, so it is a good idea to buff them up before leaving. The 4 archers on the ship’s towers will still attack any enemies that come within range, acting the same as any archer in a tower, but are also vulnerable to floaters. Any other subjects aboard the ship will not attack, but will also not be targeted by any enemies.
 The Gem Bank
The gem bank will spawn on a given island when the kingdom on that island has been upgraded to a stone castle. It spawns on the boat dock opposite the wharf bell. By paying gems to the bank, players can store as many gems as they wish for safekeeping. During the daytime, as long as at least 1 gem is in storage, a hooded figure will appear next to the bank, from whom you can withdraw 1 gem for 1 coin each. During the night, if he is not safe behind a wall, the hooded figure will disappear into a blue flame, keeping your gems safe from the greed, only to return the following morning. Gems can only be stored and withdrawn one at a time, but repeated payments can allow players to store or withdraw gems fairly quickly. The gem bank, like the normal bank, has one gem pool that is shared between all players, but unlike the normal bank, that pool is also shared between islands. This enables monarchs to deposit or withdraw gems from any island they see fit. It is currently untested whether or not gems in storage are affected when the player gets a game over.
The lighthouse is a structure that can be built on every island, and is accessible only after the dock portal has been defeated. Once the lighthouse is built on an island, traveling back to that island will leave your ship intact, making the player no longer required to rebuild the boat every time they visit that island. Upgrading a lighthouse protects that island from decay for a longer period of time (see Decay under section I-II. Seasons, Biomes, and Decay for more details).


Flat Rock
Wooden Beacon
Stone Lighthouse
Iron Lighthouse
Age: N/A
Decay Protection:
None
Age: Wood*
Decay Protection:
10 Days
Age: Stone
Decay Protection:
20 Days
Age: Iron
Decay Protection:
30 Days
* Despite the tier 1 lighthouse being wood-age, the player must be in the stone age to construct it, as attacking the dock portal is not possible without squires, which can only be acquired in the stone age.
These structures, once upgraded, permanently allow you to construct buildings of the next age, even after leaving the island or dying.
Stone Mine

Cost: 10 Coins
Allows for the construction of stone-age buildings. This upgrade is required to unlock the spear shop, build catapults, and hire squires.
Iron Mine

Cost: 20 Coins
Allows for the construction of iron-age buildings. This upgrade is required to unlock the forge and iron castle, which are the only way to promote squires into knights or build a bomb respectively.
III-II. Misc & Natural Structures
Trees are what make up the forest, which can be distinguished by whether or not the background is populated with trees. If the background trees end somewhere nearby, then that area’s trees can be paid 1 coin each to be marked with an X, which will signal your workers to come cut it down. By deforesting this way, you can clear out more space for grass to grow and give you more options for places to build, but be careful, as deforesting certainly has its downsides. Not only will less deer spawn, it is more dangerous for your builders the further you deforest from your kingdom, and you can also permanently destroy a vagrant camp or merchant’s hut by cutting down a tree that is directly next to it on either side, so it is highly recommended that you deforest with caution.
Tall grass acts as a spawnpoint for rabbits. Tall grass can spawn at any time, as long as the area they spawn in is grassy, devoid of buildings and crop fields, and is beyond your furthest walls. Because of the decaying grass, neither tall grass nor rabbits can spawn during winter.
 Vagrant Camps
Vagrant camps spawn a vagrant every 2 minutes, and can hold up to 2 vagrants at a time. As you get to further islands, vagrant camps become fewer and farther from your kingdom. Chopping down any tree directly next to a vagrant camp will permanently destroy it, so be careful!
 Merchant’s Hut
The merchant’s hut is simply the place where the merchant goes to restock his mule. Chopping down any tree directly next to the merchant’s hut will permanently destroy it, and the merchant will leave soon after, so be careful! The merchant and merchant’s hut will only appear on the 1st and 2nd islands.
 Coin Chests
Coin chests are automatically opened when a monarch walks by, and will drop (12?) coins on the groud. The monarch can choose to keep the coins safe in the chest by always running past the chest instead of walking, which will keep it closed. Coin chests spawn in random locations out in the forest, but the number that spawn on each island is predetermined. Research is still needed on how many spawn on each island.
 Gem Chests
Gem chests are automatically opened when a monarch walks by, and will drop 2-3 gems on the ground. The monarch can choose to keep the gems safe in the chest by always running past the chest instead of walking, which will keep it closed. Gem chests spawn in random locations out in the forest, but the number that spawn on each island is predetermined, thus there is a limited amount of gems a player can obtain per save file. Therefore, one should be incredibly cautious about losing gems. Research is still needed on how many spawn on each island.
 Fallen Tree
The fallen tree spawns on island 2, and is the only way to obtain a dog. It is a one-time use, so it is highly reccomended to not free the dog if you are not certain you can protect it. In order to free the dog, you simply need to stand next to the tree and DROP a coin onto it to break the tree.
 Berry Bushes
Berry bushes only spawn during the winter, and follow the exact same spawning rules as tall grass, except they are much less common, and only spawn where there is NO grass. As long as at least 1 of the 4 bushes has berries on it, a monarch can pay the bushes 1 coin, which will summon up to 4 farmers to come forage the berries once it is daytime. Each berry bush will spawn 3-4 coins when foraged, and the berries will regrow about 24 seconds after being foraged, allowing the player to have a good source of income during winter if berry bushes happen to spawn right outside their walls.
 Boar Den
A single boar den will spawn somewhere in the forest a few days into winter. It acts as the spawnpoint for the boar, which will spawn if a monarch approaches the den. Only one boar can be killed per winter, so after the boar has been killed, the boar den can be safely passed by. Note that the den will spawn quickly once winter starts, but will not actually be able to spawn a boar until a few more days into winter.
III-III. Hermits
A hermit will spawn from their respective hermit shack, and can be carried with you for 1 coin. While carrying a hermit, they will enable you to upgrade a specific type and level of building into a new building with a totally different purpose. After buying a hermit’s upgrade, traveling past your outermost walls at night, carrying them for a full day, or switching mounts, you will drop the hermit and need to pay another coin to pick them up again. You can also force a hermit off of your mount by rapidly switching between walking left and right. Each of the hermits can be brought with you through a teleporter if they are on your mount, and all currently alive hermits will be brought with you automatically on the boat when you leave an island. All of the hermits will try to stay behind your walls like other NPCs, but unlike other NPCs, they are unable to run. As of v1.0.1, hermits no longer wander outside of your walls during the night time, so it is now much safer to leave hermits alone once they are safe inside your walls. When attacked, they will be picked up and carried away by greed like a tool or coin. Once kidnapped, that hermit will be unobtainable until you either destroy the cliff portal on the island where the hermit was kidnapped and escape safely, or repurchase the hermit after getting a game over.

Cost: 3 Gems
Spawnpoint:

The hermit of tide can upgrade tier 4+ towers into mighty ballistas, which are giant, powerful ballista towers that are manned by builders. See The Mighty Ballista under section IV-IV. Hermit Buildings for more details.

Cost: 1 Gems
Spawnpoint:

The hermit of stable can upgrade tier 2 farms into stables, which will automatically store 2 unlocked mounts for easy access. See The Stable under section IV-IV. Hermit Buildings for more details.

Cost: 4 Gems
Spawnpoint:
The hermit of baking can upgrade tier 4+ towers into bakeries, which give the monarch the ability to purchase bread, which summons vagrants from faraway vagrant camps to walk to your bakery, making hiring peasants easier. See The Bakery under section IV-IV. Hermit Buildings for more details.

Cost: 2 Gems
Spawnpoint:
The hermit of valor can upgrade tier 4+ towers into armories, which provide an extra slot for purchasing a shield, thus allowing an extra knight to be hired in that direction. See The Armory under section IV-IV. Hermit Buildings for more details.

Cost: 3 Gems
Spawnpoint:
The hermit of horns can upgrade tier 4+ walls into rally walls, which can be paid 1 coin to rally all troops to defend that side of the map temporarily. See Rally Walls under section IV-IV. Hermit Buildings for more details.
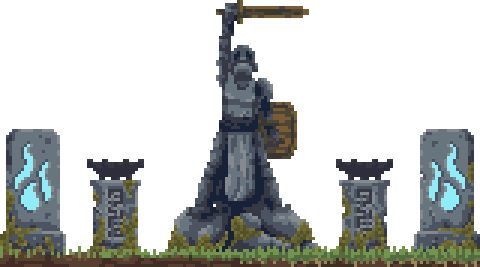
III-IV. Statues
Statues in Kingdom: Two Crowns are unlike statues in the previous games, as their effects are now semi-permanent. After paying gems to unlock a statue, the player must pay a one-time fee of coins, at which point the statue’s effects will be active for every island until the player dies.
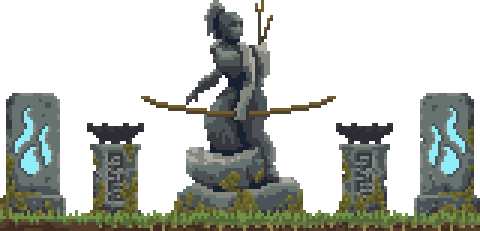
Statue of Archery
Unlock Cost: 4 Gems
Cost: 10 Coins
The statue of archery makes your archers have perfect aim, and is by far the most important statue to activate.
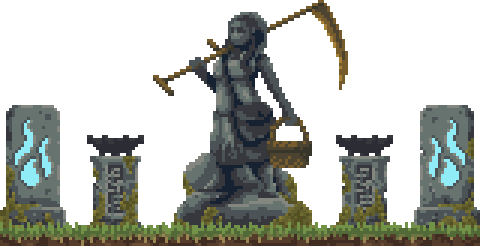
Statue of
Sithe
Unlock Cost: 1 Gem
Cost: 7 Coins
The statue of sithe [sic] simply increases the maximum amount of farmers that can create crop fields around any given farm by 2.

Statue of Building
Unlock Cost: 3 Gems
Cost: 9 Coins
This statue increases the maximum health of your walls. When active, this statue causes walls to emit white particles from their base whenever they have more health than their normal max health, helping you gauge if the extra health has been depleted. Workers can repair walls back to their upgraded maximum health if damaged.
Statue of Knights
Unlock Cost: 2 Gems
Cost: 9 Coins
This statue gives your knights (not squires) a lunge ability, where they jump forward and stab with their sword, dealing damage to any enemy they touch. They also do this when hiding behind walls, where they peek out from behind the wall to damage enemies before retreating behind the wall. This makes your knights much more effective against greed, but also makes them risk their lives, and die faster in the process. This makes the statue of knights a detriment in the long run, rather than a straight upgrade like the other statues, and players should think twice before activating it.
IV-I. Buildings – Kingdom
These sections of the guide will list all the various types of buildings you can make for your kingdom. Once you pay for a building, 1-2 random workers will be assigned to go build it, no matter the time or place, so be careful with your building requests late in the day or at night.
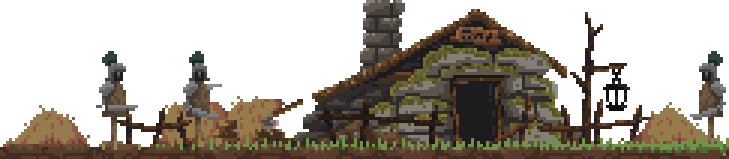
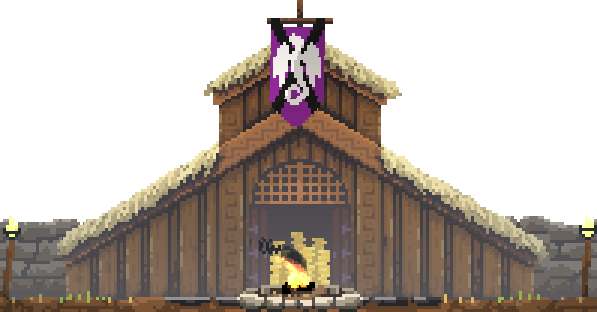
Your kingdom (AKA base or town square) is your main base of operations, and is the primary place where you can buy tools for your subjects. When you purchase an upgrade for your kingdom, It upgrades automatically, meaning you don’t need workers to upgrade it. Unlike other buildings, you cannot rapidly buy multiple upgrades for your kingdom; after purchasing each upgrade, you must wait anywhere from half a day to a full day before you will be able to purchase the next upgrade.
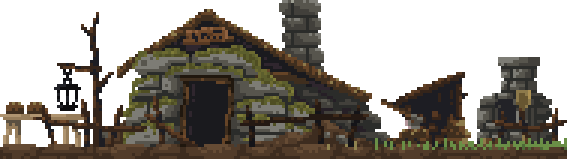
There is one of these in the center of each island. There are always two vagrants that spawn near it, and it always has two tier 0 walls and two tier 0 towers on both sides of it.

Cost: 3 Coins
Age: Wood
This upgrade lights the fire, and spawns a shop on either side of the fire. To the right of the fire is the bow shop, where you can buy up to 4 bows at a time for 2 coins each. To the left of the fire is the hammer shop, where you can buy up to 4 hammers at a time for 3 coins each.

Cost: 6 Coins
Age: Wood
This upgrade erects a few tents around the fire, but does nothing gameplay-wise.

Cost: 9 Coins
Age: Wood
This upgrade puts up wooden barriers surrounding your kingdom, giving you free tier 1 walls on both sides if you hadn’t already bought them.

Cost: 12 Coins
Age: Wood
This upgrade will construct a big, church-like building in the center of your kingdom and spawn the banker.

Cost: 15 Coins
Age: Stone
This upgrade puts up stone walls surrounding your kingdom, giving you free tier 3 walls and tier 2 towers on both sides if you hadn’t already bought them.
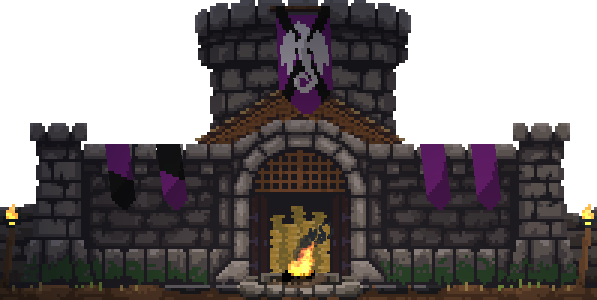
Cost: 18 Coins
Age: Stone
This upgrade constructs a castle in the middle of your kingdom, letting you buy a maximum of 4 shields for 4 coins each. This upgrade also spawns the gem bank by the boat dock.
Cost: 20 Coins
Age: Iron
This upgrade fortifies your castle with iron, giving you free iron walls on both sides of your kingdom if you hadn’t already bought them. It also unlocks a bomb banner on one side of your castle, facing the cliff portal. When paid, it will construct a bomb, which can be used to destroy the cliff portal.
(See Cliff Portal under section II-V. Portals for more details)
(Image coming soon!)
IV-II. Walls & Towers
These sections of the guide will list all the various types of buildings you can make for your kingdom. Once you pay for a building, 1-2 random workers will be assigned to go build it, no matter the time or place, so be careful with your building requests late in the day or at night.
Walls will halt the spread of grass, and delay the progression of all enemies except floaters and crownstealers. They are built to keep the greed at bay while your archers and other defenses kill them off. The higher tier the wall is, the more hits it can take from enemies before it falls. Archers and other units will defend your two outermost walls at night. During the day, damaged walls will automatically be repaired by workers who have no assigned duty.
 Tier 0: Dirt Pile
These are naturally generated in random locations on the island, and are the base for where you can build your walls.
 Tier 1: Barricade
Age: Wood
This wall will barely hold back the Greed before it gets destroyed.
 Tier 2: Wood Wall
Age: Wood
This wall will provide a significant defense against the greed, but will easily be destroyed late-game or during a blood moon. When destroyed, it can be rebuilt for 2 coins.
 Tier 3: Stone Wall
Age: Stone
This wall can provide a great defense against the greed, and will take many hits before falling. When destroyed, it can be rebuilt for 3 coins.
 Tier 4: Castle Wall
Age: Stone
This wall can provide an extremely solid defense against even breeders, because it takes tons of damage before it falls. When destroyed, it can be rebuilt for 5 coins.
 Tier 5: Iron Wall
Age: Iron
This wall is your best defense against the greed, as it has a ludicrous amount of health. When destroyed, it can be rebuilt for 6 coins.
Towers cannot be destroyed by greed, and will not stop grass from spreading. They are built to give your archers a height advantage over the greed. An archer stationed in a tower of any tier will be able to shoot with much higher accuracy (100%?), although this is made redundant if the monarch has activated the Statue of Archery. If there is a wall in the way of the archer’s aim, they will opt to arc their shots over the wall instead, decreasing their accuracy to that of a grounded archer. Archers in towers will no longer hunt rabbits (but will still shoot nearby deer). Once a tower is built, the archers assigned to it will be chosen randomly.
 Tier 0: Rock Pile
These are naturally generated in random locations on the island, and are the base for where you can build your Towers.
 Tier 1: Raised Platform
Age: Wood
This tower can hold one archer, but it barely gives them any height off the ground, so while greed will never directly attack them, if a greed lunges at something nearby, they can still gain enough height to accidentally knock the archer off the platform.

Tier 2: Watchtower
Age: Wood
This tower can hold one archer, and puts them high enough above the ground that they can only be directly attacked by floaters. Boulders hurled by breeders can sometimes gain enough height to accidentally knock archers off towers this high, but this is unlikely.

Tier 3: Defense Tower
Age: Stone
This tower can hold two archers, and it gives both of them the same benefits as a tier 2 tower.

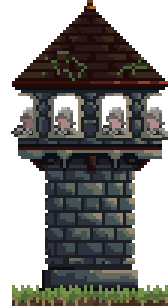
Tier 4: Castle Tower
Age: Stone
This tower can hold three archers at a time. The two archers on the lower part of the tower get the same benefits as a tier 2 tower, while the one at the top gets an even better height advantage.

Tier 5: Fortified Tower
Age: Iron
This tower operates identically to a tier 4 tower, except it also protects any archers inside it from floaters. This means the only way for the archers to be damaged is by a breeder accidentally hitting them with a boulder.
Tier 6: Iron Tower
Age: Iron
This tower can hold 4 archers, and places them all at the height of the top archer on a tier 4 or 5 tower, giving them all the same benefits. It also protects its archers from floaters, making it a perfect, self-contained unit that can be built beyond your farthest walls without risking the loss of its archers. The archers can still be accidentally knocked out by boulders thrown by breeders, though this is still very unlikely.
IV-III. Farms & Teleporters
These sections of the guide will list all the various types of buildings you can make for your kingdom. Once you pay for a building, 1-2 random workers will be assigned to go build it, no matter the time or place, so be careful with your building requests late in the day or at night.
Farms cannot be destroyed by greed, but will halt the spread of grass. They are built to give farmers a place to work. The amount of farmers that can occupy each farm depends on whether or not there is enough space around the farm for each farmer to create his crop field, with a maximum of (6?) farmers per farm given optimal space. Once a farm is built, the farmers assigned to it will be chosen randomly.
 Tier 0: Stream
These are naturally generated in random locations on the island, and are the base for where you can build your farms.
 Tier 1: Day Farm
Age: Wood
Any farmers working at this farm will retreat to your kingdom every evening, and will walk back out to the farm every morning.
 Tier 2: Farmhouse
Age: Wood
Any farmers working at this farm will stand idly by the farm when night falls, so make sure only to upgrade to this farm if it is well protected. Due to the farmers staying at the farm during the night, they don’t need to walk back out every morning, leaving them more time to grow crops. This, of course, gets you more coins, faster!
Teleporters cannot be destroyed by greed, and will not halt the spread of grass. They are built to provide you with a faster way to traverse across the island.

Tier 0: Portal Remnants
These will spawn where you destroy portals, and are the base for where you can build your teleporters. Be careful, as this usually means you will need to send your workers deep into the forest to construct this.
 Tier 1: Teleporter Gate(s)
Age: Stone
Once the teleporter has been built by your workers, you will be able to use it for 2 coins, which will give 15 seconds to look around and select a location on the island, and then teleport there using [S] or [Down Arrow]. Teleporting to an open field without any buildings nearby will spawn additional portal remnants at your feet, but they will disappear after 30 seconds. If you pay the 8 coins to construct the new teleporter gate, the two teleporter gates will become permanently connected, allowing you to teleport between them at your leisure for the cost of 2 coins per use.
IV-IV. Hermit Buildings
Hermit buildings can be built with the assistance of specific hermits, and typically serve totally different purposes than what they are upgraded from. Note that hermit buildings which can be upgraded from different building tiers will increase in price depending on the tier it was upgraded from. For example, using the hermit of baking to purchase a bakery costs 15 coins if the tower is tier 4, but costs 18 coins if the tower is tier 5 or 6.

The Stable
Upgraded from: Tier 2 Farms
Cost: 8 Coins
Usage: Mount Storage
Stables can hold up to 2 mounts, providing monarchs with an easy-access way to switch mounts. Once constructed, a stable will check if the current island has any valid mounts. In order for a mount to be valid, it must have been unlocked with gems and ridden at least once during the current reign (thus the default horse is always considered a valid mount). If any valid mounts are present on the island, then the mounts will walk over to the stable to be stored there. If there are not enough valid mounts to fill both spots, the stable will spawn two random valid mounts from other islands to compensate. This allows a monarch to theoretically store one of every type of mount on every island, but it would require them to build quite a lot of stables. Stables will never spawn a mount if it already exists on that island, including the default horse. If there is enough land nearby, a stable also has the capacity to support a reduced amount of farmers.


Rally Walls
Upgraded from: Tier 4+ Walls
Cost: 12 or 16 Coins
Usage: Rallying Troops
Rally walls function the same as a regular wall of that tier, but can also be paid 1 coin to rally all archers, squires, and knights to defend that specific wall temporarily. Squires and knights normally assigned to defend the other side of the map can also be sent out to attack in the rallied direction during this time. Rally walls are the only hermit building with multiple tiers; upgrading a tier 4 wall into a stone rally wall costs 12 coins, then upgrading the wall again for 16 coins (hermit not required) will turn the stone rally wall into an iron rally wall. Alternatively, the player can first upgrade from a tier 4 wall into a tier 5 wall for 16 coins, then upgrade the tier 5 wall into an iron rally wall for 16 coins, although this course of action is not recommended, as it costs an additional 4 coins to get the same result. If an Iron rally wall is destroyed, when reconstructed it will be rebuilt into a stone rally wall, and will need to be upgraded to iron once again.

The Mighty Ballista
Upgraded from: Tier 4+ Towers
Cost: 15 or 18 Coins
Usage: Crowd Control & Heavy Damage
The mighty ballista is a powerful defensive weapon manned by a worker, and essentially has the same job as a catapult. It deals the same amount of damage as catapult, but also has a longer range, requires only 1 worker to operate, fires projectiles that breeders cannot throw back, and has the height advantage of an archer tower, meaning it fires directly at the clusters of enemies, hitting more enemies than a catapult on average. Unfortunately, the worker operating a mighty ballista is just as vulnerable to floaters as any other archer in a tower. Like catapults, the mighty ballista must be wound back by the worker before each time it can be fired, and is done so automatically after each shot.

The Armory
Upgraded from: Tier 4+ Towers
Cost: 15 or 18 Coins
Usage: Extra Squires
An armory simply provides an additional spot at which to purchase a shield, giving the monarch the ability to hire one extra squire for that side of the map. These squires function identically to those that would be purchased from the castle, and since upgrading the squires to knights and building more armories are always an option, this building provides a convenient way to rack up an insanely powerful army.

The Bakery
Upgraded from: Tier 4+ Towers
Cost: 15 or 18 Coins
Usage: Easier Vagrant Hiring
Bakeries are the easiest way to hire new peasants. They can be paid 4 coins to bake a single loaf of bread, which will attract vagrants to the bakery, where they will eat the bread. A single bakery can hold up to 7 loaves of bread at a time. The vagrants might get confused if there is more than one bakery. Because of how far away the vagrant camps tend to be from your kingdom on the 5th island, the hermit of baking is basically required if you plan on having a chance at completing the 5th island.
The exact details on how the bakery summons vagrants is still unconfirmed, so for now, here is how the bakery worked in the previous game:
The Bakery calls out to the nearest Vagrant (that is not already moving to the Bakery) every 20 seconds. Once a Vagrant arrives, they will eat a loaf of bread for 4 seconds, and then wait around for 90 seconds. Once this time is up, the Vagrant will head to the nearest Vagrant Camp with less than 2 Vagrants. However, if there is more bread at the Bakery, instead of waiting 90 seconds, the Vagrant will wait 20 seconds, and then eat another loaf of bread, which resets the 90 second timer. The more Vagrants you have waiting at the Bakery, the faster you will run out of bread.
V-I. Mounts (Early-Game)
These sections are about all of the different mounts that you can ride on in the game, and how riding each one benefits you differently. Unlocking a new mount always costs 1-4 gems, and once unlocked, they can be mounted by paying a certain amount of coins. Switching to a different mount will require you to pay the same amount to switch back. All mounts can run, but running will drain your mount’s stamina. If your mount runs out of stamina, you will need to wait until your mount fully regains its stamina before you can sprint again. You can tell when it is ready if it stops breathing heavily. To refill your mount’s stamina faster, stand still above some grass and let your mount graze for a bit. After your mount is done grazing, its stamina will be completely refilled, and it will get a stamina boost. These boosts give your mount unlimited stamina for a set amount of time, starting once your mount finishes grazing. Walking instead of running during this boosted period will not preserve this boost. You can tell when the stamina boost is still active because it will create white dust particles around your mount’s legs when it runs. Any stamina cost from using a mount’s special ability is taken from base stamina, and does not interact with the stamina boost, which prevents the player from infinitely spamming a move while boosted. All mounts have been ranked with a tier representing their overall usefulness and ability, though please keep in mind that these rankings are opinionated to a degree. For quick reference, here are the tiers of all mounts currently in the game, also ranked within their tiers from best to worst:
2. The Wild Horse
2. The War Horse
2. The Default Horse

The Default Horse [F Tier]
The default horse is the horse that you are riding when you first start a new save. All speed comparisons for other mounts are based off of the default horse.

The Griffon [S Tier]
Island: 1
Unlock Cost: 2 Gems
Cost: 8 Coins

While riding the griffon mount, a stamina boost can be acquired while standing above any terrain, even during winter. This mount can also blow back and stun enemies with a short burst at the cost of about 15 sec. worth of stamina by standing still and pressing [Left Shift]. The griffon is certainly the best overall mount in the entire game, and is the only straight upgrade from the default horse in every way. This mount is your best bet for successfully escaping a cliff portal.

The Stag [A Tier]
Island: 2
Unlock Cost: 1 Gem
Cost: 3 Coins

The stag can attract deer by walking or standing near them for a few seconds, at which point hearts will appear above the deer’s head, and it will follow you, letting you lead deer back to your archers for easy hunting. With its insane forest speeds, the only thing keeping this mount from being S Tier is its severe decrease in usefulness during the winter, as there are no deer to charm and no places to graze.

The War Horse [B Tier]
Island: 3
Unlock Cost: 2 Gems
Cost: 8 Coins

The war horse can buff all nearby troops when it begins running. Buffed troops will flash white for 10 seconds, during which they will take absolutely no damage from enemies, easily turning the tides of a losing battle. The buff can be re-used after about 20 seconds.

The Wild Horse [A Tier]
Island: 3
Unlock Cost: 1 Gem
Cost: 4 Coins

The wild horse has no special abilities, but has the best stamina and boost out of all mounts, letting it run for very long periods of time, even during winter. This mount is your second best bet for successfully escaping a cliff portal.
V-II. Mounts (Late-Game)
 The Lizard [B Tier]
Island: 4
Unlock Cost: 3 Gems

The lizard (AKA the dragon) obtains its speed boost differently than other mounts; instead of grazing on grass, it is obtained by basking in the sunlight while laying on grass, making obtaining a speed boost impossible for the lizard during the night. At the cost of about 4 sec. worth of stamina, the lizard can breathe fire by standing still and pressing [Left Shift], or by attempting to sprint by double-tapping a direction. The lizard spends a second winding up before the attack, and it creates a small fire trap for a few seconds that ignites all enemies that pass through it. The low stamina of the lizard is compensated well by the great increases to its walking speed. If used correctly while retreating, this can allow the monarch to lay fire traps in such a way that it will kill all normal greed during a wave, while still keeping the monarch at a safe distance without ever running out of stamina. In multiplayer, this mount easily becomes an S-tier due to the fact that its ability can be spammed by a player without a crown.
 The Great Bear [F Tier]
Island: 4
Unlock Cost: 3 Gems
Cost: 11 Coins
During parts of its running animation, the great bear deals about 1 arrow’s worth of damage to any deer and rabbits it passes, making it possible to hunt without the assistance of archers. It can also be used to attack greed, although this is not advised unless the greed are retreating, as it is not only ineffective but also highly dangerous. Unlike the lizard, the upsides of this mount do not compensate for the abysmal stamina, and thus the great bear is easily one of the worst mounts in the game.

The Unicorn [C Tier]

Island: 5
Unlock Cost: 4 Gems
Cost: 12 Coins
Upon grazing on grass, the unicorn will “eject” 3 coins, and can do so about every 12 seconds, giving monarchs an easy way to rack up money. Other than this ability, the unicorn can be seen as a decent sidegrade to the horse, making it only a slight upgrade from the default horse overall.
VI-I. Blazons
The blazon option can be found in the options menu on the pause screen. When used correctly, it will change the appearance of your coat of arms, and therefore the color of your aesthetics!
Alternatively, the player may click on their coat of arms in the pause menu to bring up a screen that allows them to customize it via a button menu, though the color selection is randomized, allowing for less precise control over the coat of arms. It is recommended that the player use the text box in the options menu to set blazons if they would like a specific coat of arms that they can copy/paste to set on every new game. These sections of the guide feature instructions on how to use this text box properly.
When you type the information into the text bar, use the following format, without the “<” or “>”:
Color1 = Color of coat of arms’ background, monarch’s clothing, & some Knights’ shields
Pattern = Pattern on coat of arms
Color2 = Color of pattern & some Knights’ shields
Emblem = Emblem/Animal silhouette on coat of arms
Color3 = Color of emblem/animal silhouette
So, for example, if I wanted a black-and-white checkerboard pattern with a green snake on it, I would type:
and get:

- This game uses the same table of colors as Kingdom: New Lands, which can be found in this guide. If any blazon color options are discovered that are NEW, they will be added to this guide.
- Some emblems, such as “An Eye”, are exclusive to blazons, and cannot end up on your coat of arms through RNG or the customization menu.
- Some colors, like “Aquamarine”, are broken, because if you use them as Color3, the game will stop reading after it sees any valid color, even if it is only part of the word you typed. For example, if you use “Orange”, it would see “Or” and stop reading, instead of seeing “Orange”.
- Blazons are handled very differently when playing in the shogun biome; the available patterns go by the same names, but look totally different, and despite the requirement to include an emblem when customizing your coat of arms, no emblem is ever displayed on it.
VI-II. Blazon Colors
VI-III. Blazon Patterns
Patterns look different depending on which biome you are in, but still go by the same names.


VI-IV. Blazon Emblems
Despite still being required to type a valid emblem in order to customize blazons, your coat of arms will not actually display an emblem when playing in the shogun biome.


(Exclusive)

(Exclusive)

(Exclusive)

(Exclusive)

(Exclusive)

(Exclusive)

(Bugged*)

* An Xisuma is an exclusive emblem, but cannot be used due to a bug. The game will use the emblem of “A Tortoise” instead.
VII. Credits
Once again, we would like to sincerely thank everyone who helped out in the comments! Making a guide like this tends to be a long and tedious project, but it’s always made far more enjoyable when people are eager to pitch in with new information or give constructive criticisms to improve the guide. Here, we’d like to credit the people who contributed some sort of new or useful information, which helped shape the guide into what it is today. Every bit counts!
We’d also like to thank these contributors for going the extra mile in their efforts to discover some extra or exceptional data for the guide:
Lastly, we’d like to thank those that helped with the basic creation of the guide itself:
Note that everyone here in the credits has a link to their steam profile if you click on their name, so if you are feeling extra thankful, go leave these guys some nice comments on their profiles!
If you liked this guide, be sure to check out the one we made for Kingdom: New Lands!