Overview
This will document the community’s current meta strategy for aiming in WC, as well as list tips and tricks in general gunplay. It should contain something for both recruits and veterans alike.
Guide Introduction
NOTICE : FOR VETERAN PLAYERS. The main changes to the WC is the method of shooting (see Arc Firing) and the extension of damage falloff. The arc firing change destroys the meta of crouch shooting as it is now only 25% harder to shoot a crouched person than a standing one, and allows for actual long range play with the rifle. It prioritises FLEXIBILITY and COVER above all else.
This guide was written to address the playerbase’s generally shoddy skills of shooting in the game, and to describe the game’s current gun meta in a comprehensive written fashion. As such, it may be a bit too descriptive for casual players – but even so, casuals should be able to get a few tips from reading this guide.
This will contain what I have learned in this game in my 800+ hours of playtime, alongside my Foxhole Competitive League experience and having been an ex-FFL member + clan leader of CFC. As a warning, it may be Warden biased – this is because I am a Warden main and have zero experience fighting Wardens, only Colonials. It has also been modified to address WC’s new aiming strategy.
The titles of each section will also have labelled the ‘experience level’ it is intended towards. If you are a veteran, you likely already know the beginner sections of the guide. Furthermore, this guide is more tailored towards experienced players.
There are also some sections that may have been redacted, with the [REDACTED] indicator.
MAIN CHANGES FOR RETURNING WC PLAYERS
This will be kept short and simple.
- Crouch shooting is no longer viable as an ALL META strat, but it still reduces accuracy.
- Cover has been buffed to all hell and accuracy across the board has been increased – increasing the necessity of skill and strategy over R&G. Put yourself in cover and don’t recklessly charge (and crouch – I know all you vets did this combat classic, damn rushers)
- Due to all these changes, it is easy to shoot unprepared players and the value of a single player has been largely decreased due to the ruining of meta strategy by the vets. Numbers will overwhelm skilled vets now, unless you have serpentine players. Keep this in mind when organising operations.
- Pistols inflict bleed damage more on first shot? It seems across the board weapons cause more bleeding. Consider bandages, and solo play is lessened in importance.
- Good ♥♥♥♥♥♥♥ luck relearning all your skills. (Unless you’re a filthy serpentine snake)
- Damage falloff has been culled (but not non-existent!) so range play is much more viable.
- Ambushing behind players is scarily easy, or shooting at corners in weird angles.
Adjusting Camera and Long Range Aiming (Beginner)
One of the core mechanics that any decent infantryman must be aware of is the ability to adjust the camera angle. To do this, hold Middle Mouse Button (MMB) and move your mouse in the direction that you want the camera moved.
Provided by u/HeavyMetalFinland
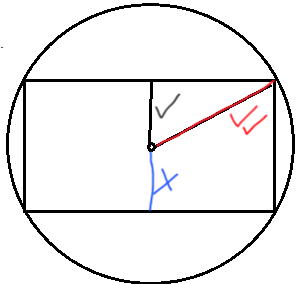
- An infantryman must always ensure that they are never aiming towards the bottom of their monitor – this limits your max range, and Foxhole is not designed for this. This is seen in the above image as the ‘blue line’ – please don’t do this.
- The optimal aiming angle is the red line – 45 degrees, positioned towards either the top left or the top right corner of your monitor. This allows for the maximum viewing range possible with Foxhole’s aspect ratio, as represented by the extended length of the line.
- The black coloured angle should only be used for short-range encounters, and situationally. While there’s nothing wrong with it in particular, you may be shot by players out of your sight who are using the red angle to fire.
‘Damage Falloff’ is a very real thing in this game – certain guns will inflict much less damage after you reach a certain distance threshold. If your shots aren’t killing, this is the reason why. To read about SPECIFIC details of damage falloff, please look at this guide.
However, for veterans before World Conquest, Damage Falloff has been modified so that max damage can be inflicted for further ranges. This makes rifle play more viable. The below guide should be used to reference, but hasn’t been updated for WC.
[link]The Types of Guns (Beginner)
This will briefly detail the different types of guns commonly used in the game. (Eg, not the storm rifle. Seriously ♥♥♥♥ the storm rifle.)
The most common gun you’ll find anywhere, due to free tech level. Best for long range, all purpose. Due to damage falloff WC nullification, it is the ONLY weapon for long range.
- One shot will injure with a 50% chance of bleeding, two shots will immobilise your opponent.
- Good to have, as friendlies and enemies typically have plenty of rifle ammo on their bodies.
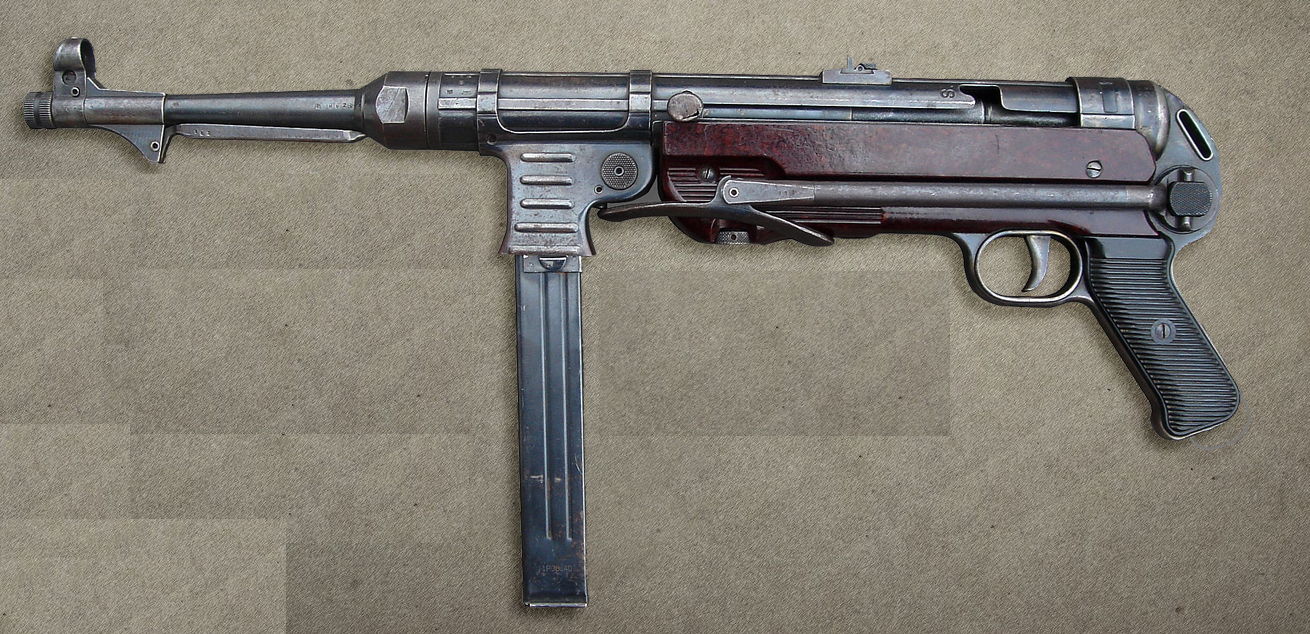
This should only be used situationally – at night or in short range combat. However, WC makes this amazing for short range, urban, or night situations due to the rapid fire nature allowing you have an edge over rifle players. Use in these scenarios.
- Three shots will immobilise opponent, the second having a chance to inflict bleed.
- Compared to the rifle, has a higher fire rate, higher clip size and poorer accuracy. Due to this, the carbine should only really be used in close/tight combat (eg urban) or at night, as the rifle will almost always outmatch this in long range.
Sub-optimal for infantry and should only be used in messes, best for short-CQC combat. Great for building destruction (Lt. Pillbox and Foxhole)
- Three to four shots will immobilise opponent. Very heavily RNG based – spray and pray.
- Terrible accuracy, good for destroying foxholes, short-CQC combat (eg in a component yard). You will get ♥♥♥♥♥♥ long range.

Amazing for crowd control, night combat and short/medium range. Low skill required.
- The amount of shots needed to kill vary from one to three depending on range.
- At short range, anyone that is not amazing at shooting will be hard pressed to kill you. The shotgun has an insane arc of fire, allowing you to shoot down large crowds in proximity.
- A famous meta tactic is rushing around during the night with a shotgun, ambushing squads or individuals and brutally murdering them. It is cheap and efficient.
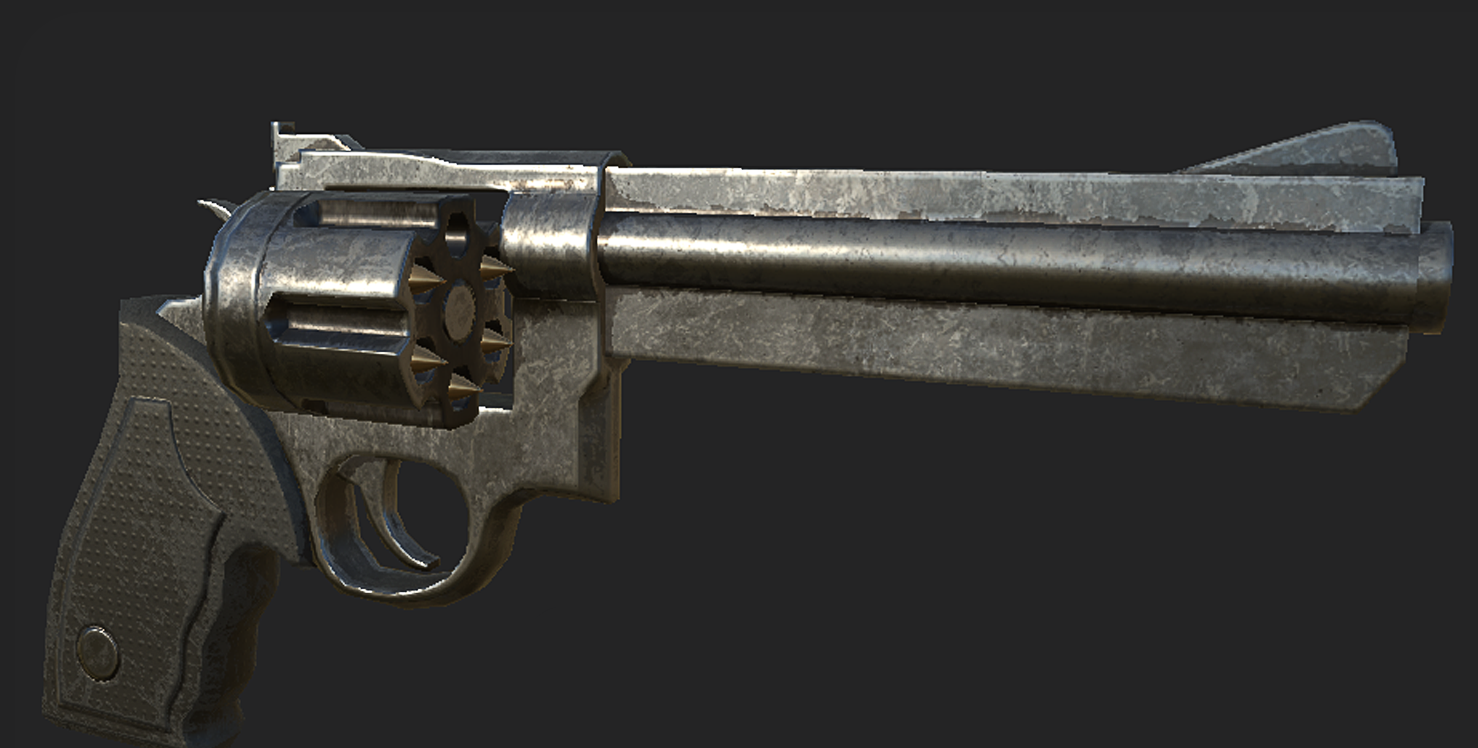
The best secondary weapon you can have. Replace your pistol if you use it if you find one of these.
- Two shot to kill – shoots a little faster than the pistol, and is very accurate. It works similarly to a short range rifle.
A picture of the Ballester-Molina, a WW2 Service pistol in lieu of a Foxhole image.
Using anything else is typically better.
- Three shot to kill, the second having a chance to inflict bleed. Don’t underestimate this, but don’t overrely on it either.
A note on secondaries – keep it loaded at all times. As soon as your primary runs out of ammo in the middle of a fight, pull it out and you will get an edge over your opponent if they need to reload. Do this when you are running to save time.
Also, note that I have not commented on the Storm Rifle. Use it only as a last resort – it is outperformed by almost every other gun. It is also very rare, and logi will typically not make any. ♥♥♥♥ the storm rifle.
Sidenote: Shooting out Foxholes and Buildings (Intermediate)
Foxholes are one of the core defenses that can be shot out early. One fully repaired foxhole takes 30 – 50 bullets of any kind as a benchmark from any gun to take out. HMGs and SMGs are most useful in shooting out foxholes. (0.70 boxes and 2 clips respectively on average)
One frag does the equvalent of 3-6 bullets’ worth of damage to one foxhole not counting damage falloff or misses, please refrain from using them against foxholes if you don’t want to waste munitions.
- If a foxhole is passively active, keep your distance (but not too far to avoid falloff). Proning is a meta favourite to maximise accuracy.
- If a foxhole is manned and active, the only way to shoot it out safely is during the night to minimise viewing distance. By running around and popping off occasional shots at the foxhole, the player inside will not be able to fix your position.
- If a foxhole is completely inactive, just prone right next to it and fire shots. SMG/HMG is preferred.
Watchtowers and Lt. Pillboxes also can be shot up and SHOULD be shot up. Be aware of the flags on the top. This isn’t a defense guide, but I will mention that white = inactive and gray + coloured = active.
Cursor Dipping and Shooting Moving Targets (Intermediate)
It is commonly known that Foxhole shooting depends on some extent of RNG luck (not anymore due to WC), due to the random offset of shots. However, there are general skills that a marksman can train in order to maximise the lack of offset in shooting enemies.
This is one of the fundamental mechanics that you must master in order to shoot well, as this nullfies the RNG aspect the most. If mastered properly, you can accurately shoot proning players from any range and be a badass sharpshooter.
When aiming towards an enemy, the cursor will ‘dip’ or lock on to your target. One of the indicators of this is when your cursor turns into a red dot on top of the enemy player. I demonstrate this below:
This is especially effective on proned players – once a cursor dips on a player who is proned, you will hit them most of the time and thus nullifying the RNG chance of the bullet flying above them. For this reason, proning in a firefight is only effective against newer or less experienced players who do not know of this mechanic.
The cursor dipping mechanic on a proned enemy.
Furthermore, the cursor dips even when out of sight of the enemy or in night time fog of war. Therefore, moving the mouse until the cursor dips into bushes or areas which you can’t see is a great way to scout out the enemy. (And even get you accused of cheating!)
Shooting moving targets (accurately) takes considerable more skill than utilsing the cursor dip mechanic. Due to the bullets taking time to travel across the map, players need to aim at the location a moving enemy is moving towards in order to hit them. This is generally done through snap shooting, which is snapping to the enemy’s location quickly.
While it is relatively easy to hit a enemy who is moving in a definite straight line, it is moderately difficult to shoot out a enemy who is moving in seemingly random directions. The serpentine strategy aims to take advantage of this, described below.
Utilising Cover in Combat (Intermediate)
There are three different types of cover and each should be used situationally. WC has prioritised ALL and ANY COVER in shooting, and when you are fighting a group cover will absolutely pull you through the engagement to a victory. While crouch-shooting is no longer the meta, utilising cover is now critical.
Soft Cover
- This involves using ‘half covers’ that enemies can still shoot through, such as sandbags, storage chests and tunnels.
- Standing up behind soft cover will almost completely nullify your defense and will get you shot. Be sure to be proned or crouched at all times behind it.
- Grenades are a favourite meta way to kill enemies behind soft cover. Take note: if there is a sandbag layer between you and the grenade, no matter how close you are to the grenade you will not take damage.
Hard Cover
- This involves cover that the enemy cannot shoot through – trees, rocks, stumps.
- Hiding behind it gives you a significant tactical advantage, as you can pop out, shoot and cover before the enemy can react. It allows you to also reload safely.
- Cover obscures both your view of the enemy and the enemy’s view on you. Thus, flanks are a viable tactic for both parties.
Sight Cover
- Walking into bushes (what this entails) will not give you any physical cover, but it will obscure your view of the enemy and the enemy’s view of you.
- It is common to use cursor dipping for both parties in order to shoot each other. Be wary not to shoot friendlies.
The Five Engagement Strategies (Veteran)
These Five engagement strategies should be used depending on the situation. Knowing what to use and how to use it is dependent on your quick thinking and situational awareness skill, which only comes with experience.
Crouching for some reason USED to be the most effective strategy in combat, but now it is completely nullified. If you see someone crouching in an open field, they probably are a veteran or read an older version of this guide.
- AGAIN – COMPLETELY USELESS. Only 25% reduction in accuracy from standing, and you need your flexibility in a fight.
Prone shooting should only be used for shooting out unmanned foxholes accurately, even for long range. This is due to the ease in having a cursor ‘dip’ over a proned opponent, making you very easy to shoot. It also makes you slow to get up, and you can’t shoot while unproning.
Most new or inexperienced players believe that prone shooting is the best way to go when fighting long range. However, if your opponent is within range of the damage falloff (<35m for a rifle – see the above linked guide) cover shooting is almost definitely the way to go if possible, else just snipe them – which is not the case for shooting a proned player.
If nothing else, take this away: avoid proning whenever possible when facing players.
A repost – The fallacies of prone shooting.
This skill involves quickly identifying your enemy and shooting them instantly without any time for aiming. This will generally come naturally with experience. Generally, snap shooters will not cursor dip – instead, they aim in the general direction of their opponent and fire. Good snap shooters will be hitting most of their shots.
WC prioritises cover completely to shoot enemies. Look for anything you can’t shoot at, because the more your body is covered by an object the less the enemy can get good shots on you. This includes wood stumps, component yard tanks, buildings, trees… anything.
(Master level strategy)
This is really a ridiculously hard skill to master, and only a few dozen players in the entire game can be attributed with mastery of this strategy. Only 2Lts (Second Lieutenants) or above, or lvl 15 players or above should even think about trying this due to the difficulty of it. If an unskilled player tries this, they will just die sadly.
Serpentine takes advantage of the difficulty in shooting a moving player who is constantly changing directions. There isn’t too much of a meta on how to do this, as most players who know this strategy have their own style of it including myself. Treat this section of the guide as informing and warning you about this strat – not an invitation to try.
If you are killed by someone with a skillful serpentine, be very scared of that person.
Extra Notes
- You can’t shoot enemies out of foxholes or any active defense. Gas them out instead.
- Shooting is never pure RNG – there are very objective considerations to keep in mind, and you can minimise RNG by putting the above strategies into practice.
- I haven’t covered considerations relating to grenades, defenses and medics in this guide – this is just regarding aiming.
- Practice makes perfect.
- List of players who can do serpentine – Nemesis (TK, Col), krowt9r (-), nedsvart (-), tm9dr (10CCE, Col), Escapin (27thFRC, Col), Arkan, Benuts(?), Lightning’s End
- All good serpentine players are currently Lt +. Most are Capt. +
- If I see you reported in the community as one who does a good serpentine, I’ll add you to the list. Or, you can ask me for a duel and I will evaluate your skill.
Current Bugs and Glitches
I will not explain how to do them, but saying that it is possible. Don’t ask me how to do them.
- Players can shoot when they are downed and bleeding out. You can see this when tracers are coming from a bleeding out soldier.
- It can be impossible to kill a player they are near a large wall which allows you to shoot above them. Even when hitting them (blood coming out of their body) it takes over twenty shots to kill them. This is a bug introduced in WC, and the only way to kill them is hitting twice with fists.
- For some reason, shooting the driver side of the HT emits blood. This does not mean you can shoot them out though.
Conclusion
If I’ve missed anything in particular, feel free to tell me or comment about it and I’ll edit the guide. I will not add anything regarding serpentine nor my personal strategies used in FCL/competitions.
As a closing note, I’m typically called [CFC-CO] DeltaNutmeg (Capt) in game, feel free to say hi when you see me serving. If you have any questions or want me to demonstrate certain aspects of the game, asking me in game is fine also.
This guide is gonna be a little outdated when shooting gets further updates in coming revamps to the game, so I’ll probably release a new one on a different format.