Overview
This guide, while not complete currently, will encompass everything in regards to playing Spiral Knights. Controls, gate creation, weapons and armor, shields, monsters, bosses, their stratums, shadow lairs, and even PvP. Written by Magnus.Warning: info may be outdated or not include new updates, as the game has become unplayable for veterans.
Introduction
The game has several depths to explore, and I don’t mean the levels. A proper guide would be composed of everything, but I’ve never seen one, only parts, so I’ve set out to make this complete. After a lot of discussions, I find that many people don’t even know why everyone gets Wolver line armor, or why Argent Peacemaker is a better general gun than Valiance, and most surprisingly of all, some peole don’t know teammates can revive you without the use of energy.
In this guide, I’ll be covering basic controls, armors, weapons, enemies, bosses, their lairs, shadow lairs, and PvP. I’ll break down each into what strategies apply to them. I aim to boil everything down to a point it would be impossible to argue any of these points.
How To Play – Controls
The default control scheme uses the mouse to move and attack, and X to block. Not everyone has the sense to change these, even though they limit your ability to move and aim to the pointer, and forces you to use the Strafe button when it could all be done much more easily.
Advanced is the control scheme to use, and is as follows:
- WASD as Move North/West/South/East (Not to be confused with Move Fwd/Left/Back/Right.)
- Action as Left Mouse
- Defend as Right Mouse
- Prev Weapon as Wheel Up
- Next Weapon as Wheel Down
- Auto Target as Left Shift
- Auto Target is unchecked (Found at the bottom of the Controls Tab.)
This control scheme allows players to move freely while aiming, be it sword or gun, and provides a much easier method of alternating between attacking and blocking, as well as completely removes the need for the Strafe button entirely. PC gamers will find they agree completely with these controls, or had one point come up with them on their own. People new to PC gaming while find this to be the most comfortable possible.
Some people will prefer controllers with Dual Analogue controls, but this can cost up to $60 for a good controller, and Keyboard/Mouse is generally what people already have, and if not, mice are very cheap.
How To Play – Auto Target
A lot of people will say Auto Target is only for scrubs, or some bad game feature, or a built in way to cheat in Lockdown. Those are all very childish views. Like all weapons, Auto Target has good and bad times for use. However, it should be off in your options, and only turned on using Left Shift when it’s time to use it. There are some points in time it’s simply stupid to not use with a sword, such as:
- Using the full combo of Flourish or Snarble Barb lines.
- Hitting a Lumber without a heavy sword.
- Hitting a turret without a heavy sword.
- Hitting a Trojan without a heavy sword.
- Hitting Vanaduke’s Mask without a heavy sword.
To be a little less specific, anything that doesn’t move (or move much) when hit, or is totally stationary, simply does not agree with weapons that lunge you forward. More often than not, anyone using a, let’s say for the sake of the argument, Winmillion will hit one of these targets with the first two swings without auto target, and then fling past them by the third, missing entirely. It could end people up in floor traps, another enemy’s attack, and Vanaduke’s lavaballs.
When you don’t auto target, you have an incredibly high chance of simply “rolling off” the target. You do less damage when this happens, and even if you don’t use auto target for non-heavy sword weapons and know you’ll do less damage… Why aren’t you just using the Sealed Sword line all the time instead already?
(If you haven’t gotten the hint yet either, it’s bad to use auto target with Troika or Sealed Sword lines. It hampers their primary ability of hitting multiple targets. Like a seven ten split, you’ll only hit one if you aim for one.)
General Gameplay Tips
Did you know…
- You can move vials around in their slots to keep Pills and Remedies to a familiar first two slots?
- You can hold Attack to Charge your weapon? Be careful not to overuse this!
- You can hold Defend, and then Attack, and when you let go of Defend, you will be charging your weapon without swinging/shooting first?
- Pushing Defend after Attacking will let you Shield Cancel the last part of the animation?
- Shield Cancelling can only be done the same number of times as the weapon can swing/shoot naturally?
- Defending next to an enemy will Repel them?
- Repel is stronger the higher star rating your shield is?
- You can revive defeated players by standing over them and pushing Action when prompted, and give them half of your health?
- Health revives give you 30% of the revived player’s heat?
- There are areas in the game that allow you or others to repeatedly revive/die to get/give heat, and heat equipment at much higher rates? (That’s Firestorm Citadel, by the way. End of last two depths with the Healpads.)
Gate Maps
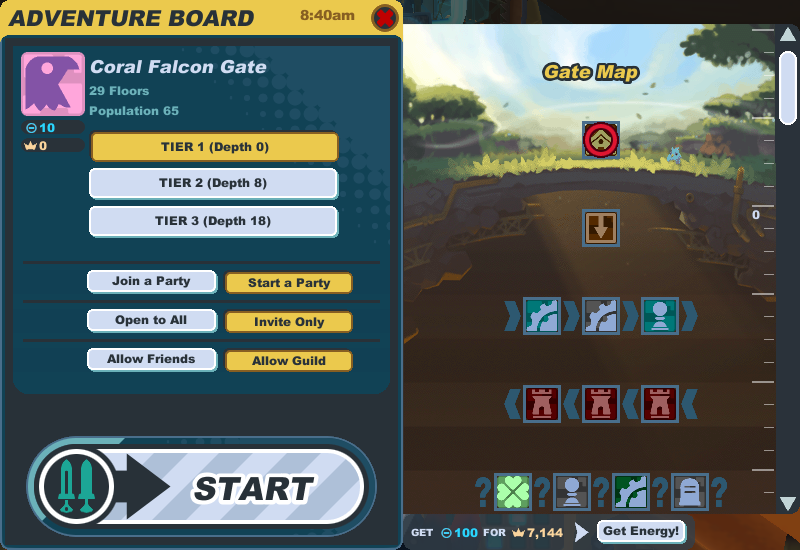
Boss Stratums, one of the most asked about stratums, are the easiest to find, as they are the only depths that are consecutively a single level per depth and are colored uniquely.
(Note: I will never understand why people ask ‘where is royal jelly’ when Hot Pink icons are so easy to spot in a Gate Map.)
Gate Creation and Minerals
This used to be a driving part of the game, but I will leave a bit of a history lesson in this guide nonetheless. If you don’t feel like learning a little history, here: Gate Creation and Minerals don’t matter, and Minerals are barely worth the crowns.
A certain number of minerals, based on how many players have been active during the previous’ gates standing, would be required to make the gate as deep as possible. If not enough were entered, boss areas would not be accessible at all. Players would have to work together and coordinate where and what minerals would go to which gate in order to make the most profitable runs possible, and many Arenas were often made. (The number of required minerals was also a very clear indication of how active the game was.)
This was taken out. Gates always reach the bottom now.
Minerals became much less important, but players would still need to navigate to boss stratums. Autosell was also introduced, which dumped every mineral in your inventory straight into a single gate and organized them in a way that would keep mineral amounts mostly balanced. Most players made no attempt to coordinate anymore, since no matter what, Firestorm Citadel would still be there, and pushing Autosell was much easier. What few players did coordinate still, often guilds, would wait just before a gate went live, and then dump specific minerals in to set a stratum of their choosing.
The most common choice was Dark City, right before Firestorm Citadel. It made the journey much more difficult than it would otherwise be, and often was complained about.
Missions were introduced later. This takes players straight to boss stratums.
Gate “creation” is still there, but is now entirely useless. Minerals are, essentially, larger and out of the way versions of crowns. Many people simply skip them, unless penny pinching.
Armor
There are, in fact, only three useful armor lines in the game. Why this is exactly, no one can say for sure as Three Rings does not like to comment on it. These armor lines are Wolver, Demo, and Gunslinger. Now you might ask why this is, or even say you don’t care and would rather get some armor that is unique so you can be an individual and a hipster. For the latter, let me say that that is the worse possible way to approach equipment. Equipment is mainstream for a reason. Get effective armor first, then you can worry about costuming. And for the former, let’s break it down.
This is the armor for players who focus on using swords. In other words, this is the most used armor. Wolver upgrades to Vog Cub, Skolver, and Snarbolax armors. Vog Cub boosts Sword Speed, and Skolver and Snarbolax boost Sword Damage. If you equip trinkets of the opposite bonus, you’re already granted Sword Attack Speed and Damage Very High. Adding to that is the Barbarous Thorn Shield, which gives Sword Damage Medium. And finally, swords with the Unique Variant of Attack Speed Increased: Medium are not rare at all, and aren’t extremely expensive.
In other words, the Wolver line of armor and some accessories will bring you up to Sword Damage and Speed Maximum. If you primarily use swords, then why not double your damage output? And as an added bonus, Sword Speed doubles as a defense. The faster you swing, the faster you can shield/shield cancel, allowing you to deal with much larger groups of enemies or awkward situations with ease.
As a tip, the best to get first would be Vog Cub, that way you can do FSC much more easily to save up for the shield and trinkets and other armors.
It buffs guns. If you’re using guns, why wouldn’t you want to buff your guns? And as a gunner, you should be keeping your distance anyway. You’ll rarely be hit already.
That’s really all there is to say on this.
This is for those brave and noble souls who can actually bomb. (It seems easy but it’s really a pain and often severely underpowered.) Demo armor buffs bombs, so if you use bombs primarily. I’m however not an expert in this field, but will say that Volcanic Demo seems to be the best to get first, as then you can grind FSC and get trinkets and the other armor types.
The previous armors all buff specific weapon types. These buffs can double your damage output, and the more dead something is, the less it can hurt you, Howlitzers excluded, which in turn prolongs your life. And the more things are dead and the more alive you are, the more a credit you are to your team.
All other armors give the illusion of having a lot more defense, but in reality, it’s not a major change from specialized armor. So why do significantly less damage for virtually identical defense?
Universal Damage Bonus, and Charge Time Reduction: Medium.
For Swordmasters, these robes let you attain the trinity of Maximum bonuses. For Gunners, put out oodles of damage to make ungeared Swordmasters green with envy. For Bombers, block out the entire screen constnatly with death.
For Hybrids, gawk at the sheer amount of things you can do.
This is all at a very high costs, however. It has very little defense, and is weak to every status ailment. Catching on fire is a death sentence. Getting cursed will block every weapon and vial slot, no matter how many you have. Be ready to sit forever in a pile of ice and hope a friend knows to break you out.
If you don’t get hit, though, you now have the power to match your evasive prowess. Of course, you can always buff said evasive prowess if it’s not up to par: take a Brandish and a Stagger Storm.
The glorious benefit of Universal Bonuses.
Weapons – Swords
Sealed Sword Lines
Divine Avenger. Gran Faust. These are the swords to get for anyone aspiring to be an avid sword user. The dual damage types make each at least effective against enemies that would normally be weak against one damage type, but their real power is much more.
The Sealed Line swings noticably faster than the Troika Line but covers the same amount of area. This makes crowd control a complete cake walk in the proper gear, shoving not just one, but groups of enemies away in a heartbeat, and further in a second. In harder areas, such as FSC or Shadow Lairs, you’re often swamped by enemies, making large swings ideal for keeping you safe.
Divine Avenger’s crowd control is far superior to Gran Faust because of its charge. Three Swords of Light spread out in a cone shape front of the player and surf enemies along with them, hitting them over and over for massive damage. While charging does slow your walk significantly, it’s more than often worth it if you’re facing down more than twelve slags, or even just one Almirian Knight.
Gran Faust’s charge is a single large Sword of Darkness that moves straight forward and can also surf enemies along its damaging mass, but every hit is given the bonus chance to inflict curse with each hit. Against a mass of jellies or gremlins, a good portion will often get cursed and slowly take care of themselves, leaving you to enjoy a fresh beverage. However, this charge has a small chance to curse its caster. If you have four weapons, though, you’ll be fine. If not, carry some Remedies and hope they don’t get cursed.
The only real drawback of Sealed Lines’ charges (excluding the Sealed Sword itself) is that performing them against a wall will immediately destroy any sword beams. This is easily overcome by simply watching where you unleash your charge.
Barbarous Thorn Blade
The first swing is as large as a heavy’s sword, except twice as fast and slightly less knockback. The second is small and forgettable, but the third is a large forward lunge, which with auto target makes it a nearly guaranteed hit.
The first swing is the most important, however. When used in conjunction with Shield Cancelling, crowd control without any need for charging in an extremely crowded area becomes the easiest thing in the world.
Its charge is also similar to Blitz Needle’s. While not as powerful or as far a range, your movement speed isn’t as severely as decreased, and you can still follow up immediately with two more swings.
Leviathan
Cold Iron Carver / Vanquisher
This little branch of the Calibur Line is often sought after for its much cooler appearance, but that’s where the benefits end. Although it does more damage to Undead versus its counterparts, the damage increase is very little for a much larger drop against every other monster type. And just as well, Brandish Line weapons do much more damage to Undead than CIV could.
People have claimed it is better for use in FSC than Leviathan, but truthfully, there are still Fiends, and a few Beasts and Jellies to contend with, but the biggest drawback is doing less damage to Vanaduke’s Mask. It’s more suited to Graveyards, but that is much to specific for any real good.
Flourish Lines
The main line, leading to Final Flourish, is not bad at all. The only reason that is included is because the Barbarous Thorn Blade, otherwise identical, simply has a MUCH stronger charge attack.
The other branches, Rigadoon and Flamberge, are even worse. For a very, very low chance to inflict random stun or fire, a huge chunk of damage per attack is simply gone. It’s not the worst mistake to make to get any of these, but you could be doing better.
Cutter Lines
There are two important parts of general sword usage: swing range, and stunlock. The Cutter Line shafts a player of both.
Cutters have a very, very long combo, and a very, very long charge attack. In the time it takes for many swords to reach the final swing, and stunlock an enemy momentarily, a Cutter won’t be halfway done with its combo or charge. The entire line also has very little range, requiring a player to constnatly be rubbing up against an enemy to maintain damage in hopes of getting to a stunlock.
Many players have argued in the past that the Cutter Line was designed as a poking weapon, except there are many swords, guns, and bombs that do a much better job of poking from a safer distance and for more damage.
Troika Lines
The Troika Line leading up to Sudaruska is not terrible. In fact, they can be good for a time, but they are entirely superfluous when compared to the Sealed Sword Lines due to slower swing speeds, lower damage, and simple charge attacks. However, the freeze-based upgrade branch leading to Triglav was designed by a complete imbecile.
Heavy Swords are, obviously, designed more towards crowd control. They are used defensively, and offensively in ways that keep enemies away. Triglav will, on a basic swing, freeze an enemy sometimes. Right in front of you. While possibly attacking. It completely defeats the purpose of having a Heavy Sword at all.
Spur Line
While the entire line isn’t horrible, the major issues with the Spur Line number in two: There is no five star version, dooming it to be subpar, and Winmillion is an absolute travesty of design.
Easily the worst sword in the game, the Winmillion is the only sword that will, in fact, make enemies harder to kill, even with auto target. The Spur Line not only has a massive lunge that can get you into all sorts of trouble, but Winmillion also generates a bullet on each swing. Wolvers, Mecha Knights, Almirian Knights and Devilites all hate bullets with a passion and will dodge or block all incoming attacks simply because of this little bullet, making enemies much harder than they normally would be.
Having this weapon can easily make you a laughing stock of the community.
Weapons – Guns
Antigua Lines
Blitz Needle
Supernova / Polaris
These two weapons are known to be the worst guns (and sometimes, worst weapons) for teamplay. One person using either can easily kill everyone they’ve teamed with.
Hypothetically, you are a gunner, and you’re on a team with a swordmaster. You have a Polaris, and both of you are fighting Slags. You take out your Polaris and start shooting it. The massive knockback from the gun starts flinging Slags in all directions. Slags are suddenly stuck out into floor traps beyond the Swordmaster’s reach. Each time the swordmaster swings at a Slag not lost to distance, the knockback from more Polaris shots pushes the Slags away from his sword’s reach. When the swordmaster finally does land a hit, Polaris had inflicted shock and he can no longer knock the Slag away from him, and he gets hit by it.
Do everyone you know a favor, and avoid these at all costs.
Plague Needle
While a good idea on paper, ultimately the damage from this weapon simply pales in comparison to the Blitz Needle. As it’s otherwise identical, what good could this possibly be?
Weapons – Bombs
Graviton / Electron Vortex
These two bombs are the ultimate support weapons in all of Spiral Knights because of their power to cluster. Anyone with a Divine Avenger, Gran Faust, or any Brandish weapon benefits greatly when a Vortex is dropped.
Strategically, Vortexes can be dropped just about anywhere, it doesn’t matter if it’s near enemies or not, and then players can simply use their shield to repel enemies into the created sinkhole. Of course, it’s much faster to place it in the center of a large group of enemies. If there are also turrets in the area, it can sometimes be a good idea to plant a Vortex on top of it, letting you take out enemies as well as the turret at the same time.
While it can handle enemies on its own with ease, it’s best used in conjunction with other weapons, the most effective being swords. DA and GF swings will easily encompass entire groups, and swordmasters with maximum attack speed will easily be able to effect the entire crowd with knockdown before they’re spread. However, Brandish users must instead use charge attacks to take full advantage of the cluster, and will even push them out of the Vortex.
The most notable of uses are the Graviton for Royal Jelly Palace and Ultimate Royal Jelly Palace, and Electron for Firestorm Citadel and Ultimate Firestorm Citadel.
Every good weapon has its downsides, of course. Charging a Vortex slows you down much more than any other weapon in the game, making it hard to plant at the center of a group instead of just at the edge. Catching a Lumber or Trojan in a Vortex can also lead to drastic (or hilarious) consequences, and if either is ever seen in a Vortex, the entire mob is best avoided.
It’s also important to note that Electron has one benefit over Graviton, and that if it shocks, enemies remain in that cluster for another second, letting Swordmasters really lay themselves into the mob. Shock here, compared to Voltaic Tempest’s, is very different, as it’s known exactly where the enemies will be when they get shocked.
Stagger Storm
Easily the safest Status Bomb, as well as the most obnoxious to actually get, the Stagger Storm spreads out Stun over a wide area. Without removing the ability to knock monsters, they become incredibly slow and more than easy to dodge and slap and block.
It’s essentially a bomb that slows times with no repercussions, and can work in unison with every playstyle. If you’re a bomber, why haven’t you gotten this yet?
This bomb was formerly on the What To Avoid list, as Stun once would cause enemies to invisibly instant attack if they were already in the middle of one. This horrible bug, now removed, frees up this bomb for spam.
Shivermist Buster / Voltaic Tempest
The removal of knockback is by and far one of the worst things that can happen, and these bombs do it in wide radii. You can easily get your entire team, and yourself, into a bad situation by freezing or shocking enemies directly on top of others, making it impossible to repel them in any way.
In terms of crowd control, there’s no reason to use either bomb. A Divine Avenger’s charge not only pushes enemies back, but also deals damage to monster without jeopardizing any teammates, and it’s also important to mention that doing more damage to enemies and keeping allies safe tend to be good things that you should want..
There are those who say these are good for holding Vanaduke. However, they don’t take the fact that the bombs do no damage into account. Where people do love Blitz Needle, why would they only use three instead of four given the option? All it would take is knowing when to move instead, and immediately, you’re doing a whole mess more damage.
Shields
There’s not much to cover in regard to shields. There are only three shields in the game that actually provide a bonus, and only two of them are useful bonuses.
- The Barbarous Thorn Shield, the must have shield for Swordmasters, gives Sword Damage Increase: Medium, and is an essential part to getting Sword Damage and Speed Increase Maximum, thus making it the best shield in the game for the majority.
- The Swiftstrike Buckler gives Speed Increase: High to all weapons, not just swords. It makes an excellent shield early on for Swordmasters and Gunslingers alike, but Bombers find no use for it. However, it is only 3* and can only take one hit normally before breaking, so forces users to dodge primarily.
The only thing other shields do is block, obviously. However, this isn’t vital when you’ve got four bars of connection, and are excellent at knowing your weapons’ timing and movement.
If you do find yourself with a worse connection, or just not cutting it with maneuvers, then Grey Owlite, Crest of Almire, Ancient Plate, Ironmight Plate, or Omega Shell are good alternatives to keep yourself alive more.
Monsters
Placebo!
Boss Stratum – Gloaming Wildwoods
There is nothing important to write on this entire stratum other than two things: bells can stun only beasts, and they can only be hit when the light beneath them is green.
The Gloaming Wildwoods are easy to navigate and have no real enemy threat until finally reaching Snarbolax. Writing anything in detail for the levels for levels prior to the boss would be a waste, so I leave videos of a quick walkthrough in place:
This giant six eyed black furred monster is pretty scary looking, and nothing more. He doesn’t take any special weapons or armor to deal with (though piercing would help), and the only challenge in this boss fight is hoping that the bell actually works; it bugs very often.
His attacks are…
- Dig; not really an attack, but it’s used to move to another part of the arena.
- Needle Line; Snarbolax starts by using Dig, but instead of popping out instantly elsewhere, he travels straight across the arena, creating a line of stationary needles. It’s very easy to sidestep.
- Emergence Needles; each time Snarbolax returns from Dig or Needle Line, he’ll shoot four needles horizontally and vertically upon reappearing. Very, very easy to block or sidestep.
- Needle Spread; hinted by an attack warning aimed at the center of the arena, Snarbolax launches a sparse wave of needles. Very easy to block, slightly difficult to sidestep.
- Homing Chomp; hinted by a long attack warning, Snarbolax goes prone momentarily before lunging three times towards a player while continually facing him/her. This is the one moderately dangerous attack he has. The best method to avoid taking damage is to quickly put distance between Snarbolax and yourself. Players with sturdier shields will have nothing to worry about.
- Intimidate; Snarbolax tries to scare you by sitting and roaring! It’s not very effective…
To damage Snarbolax at all, he must be stunned, and only the bell can stun him. This results in only two methods of dealing with him: waiting right on top of the bell, or playing some pong. The former is a cut and dry turtle method with the player(s) simply sitting on the bell and waiting patiently for Snarbolax to move within range of the stun. The latter is not something lower tier players can manage at all due to lower star shields having less Repel strength, but the idea is basically to try and move behind Snarbolax and giving him a shove towards the bell.
Warning: the pong method may produce hilarious results.
Stun turns his black coat to dirty yellow, and his defenses drop. It doesn’t last long, so it’s important to dog pile onto him quickly and, using auto target, click attack as much as you can. When his defenses go back up, any nearby player(s) will simply be shoved away by his own Repel, and the process repeats.
A few more times, you’ll have a Bristling Buckler and Snarble Barb (or maybe a Spine Cone if that’s your thing) and will never have to run this dull area again.