
Overview
You’re designing a freeform character, but don’t know where to start. 8 abstract statistic scores, and what do they even do? This guide aims to clear up any ambiguities about the stats, as well as their intended purposes and their spec trees. The guide also covers the role spec trees in detail, covering any special synergies or effects they might contain.
Superstat Layout and Trees
A character in Champions Online gets access to 1 primary superstat and 2 secondary superstats. The primary offers the largest buff of the three, as well as gaining the largest numerical gain. The secondaries gain half of this numerical gain and offer lesser buffs. Each stat has its own independent functions and buffs it offers, but regardless of what superstats you choose, they will always offer the following boosts:
- Increased damage output (all roles, varying effectiveness)
- Increased healing (hybrid and support roles)
- Increased threat (tank role)
- Decreased threat (any role besides tank or hybrid)
That’s where the congruencies between superstats end. Every superstat has its own distinct function tied to it, which can offer up specific buffs and bonuses that shape and augment your character’s overall role. In the end, however, the primary superstat dominates the overall role and function your character will fit.
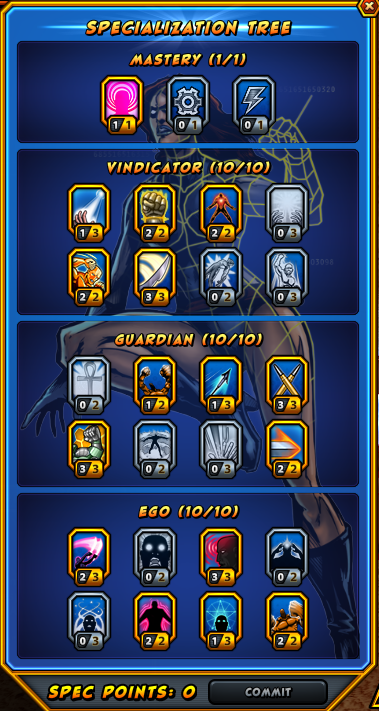
Starting at level 10, you gain access to Specialization Trees. Your first spec tree is based directly off of your primary superstat – the main reason why it’s so important to choose a primary that fits you is because the specialization trees laid out for them are crafted to achieve rather specific goals.
Every tree has 2 tiers, where you must spend 10 points in as you level. 5 points must be spent in the 1st tier before reaching the 2nd, but the next 5 points can be spent wherever needed. Every time you level up, you will gain an extra specialization point to spend, until the spec tree is filled. Thus, every 10 levels, you will gain access to a new tree until you hit 40, granting you a total of 3 specializations and a mastery.
Mastery, gained at level 40, grants you with a final buff to your character that pulls the build together for the endgame. These buffs can range from highly specific to quite generic, especially in the case of the Superstat spec trees.
To start, the guide shall go over the Primary Superstat spec trees, explaining what the base stat does, the strengths and weaknesses of their spec trees, and a final recommendation for each on where and how to use them.
Strength

Currently, the only ability that scales with Strength directly is Enrage – a global damage buff (with a melee bias) that stacks whenever dealing out knocks. Enrage can be obtained by taking either the Aspect of the Bestial or Enrage in the Brick tree.
Spec Tree Overview:
Offense:
Defense:
Energy:
Versatility:

Tier 1:
- Swole: Increases your health by a portion of your Strength stat. Combined with high Constitution, this can give you a huge HP buffer. Even discounting Constitution, Swole’s bonus can be pretty good to give you an edge in survivability. The only downside is that it costs a lot of Spec points to get a good health buff out of it – at level 40, the bonus is liable to be anywhere from around 900-1200 points of extra health; roughly enough to take an extra hit of burst damage.
- Physical Peak: Increases the efficiency of your melee attacks based off of your secondary stats. Part of the reason why Strength is good is because of this: You now not only hit harder with your melee attacks, but you can keep up the offense for a longer period of time before having to resort to your energy builder. Much like Swole, however, it requires some Spec-point devotion to get a good bonus out of it.
- Quick Recovery: The recovery stat offers you some extra health regeneration. This is worthless, even if you do have Recovery as a stat, because the amount of health it offers you is so tiny that you are likely much better off taking a dedicated self-healing power such as Conviction or Bountiful Chi Resurgence. If you’re an Archetype using this tree (devastator), it just might see some use for survivability.
- Aggression: Increases the amount of Offense your items grant you. In truth, a majority of the Offense you’ll get will most likely come from other means than items, so I don’t usually recommend this. A part of this includes the fact that offense items will serve you much better if you focus them on increasing your critical chance, especially concerning Strength characters.
Tier 2:
- Balance: Transfers a portion of your strength knock bonus to ranged attacks. First off, there’s scarcely a reason in either melee or ranged to knock your targets further. Just so long as they’re knocked and their attacks are interrupted, it’s all good. Second, this is literally the only thing in the Strength spec tree that attempts to mix in ranged tactics – and it ultimately is a lost cause. Most builds with a Strength superstat will never warrant the use of this advantage, and builds that do are likely to be better off using Dexterity anyway.
- Brutality: Increases your critical severity by a portion of your strength. Upper-level spec trees offer many alternative ways to gain Severity. Nonetheless, boosts such as these are often some of the most drastic boosters of critical severity, so they’re worth a look. Especially because this specialization only has 2 ranks, it can be very powerful, even with just 1 rank in it.
- Juggernaut: Constitution stat now offers defense. If you have Constitution as a secondary superstat, you know what to do. This is a great addition, since Defense is quite powerful and useful on non-dodge based characters. If you pour significant amounts of statting into constitution, you can easily get somewhere around 100 defense for your character – if combined with good defenses and heals, this can be enough to tank effectively without the aid of a defense passive (outside of cosmics).
- Overpower: Strength will now boost your melee critical chance. This only applies to melee attacks, meaning the crit bonus will not be applied to the crit chance shown on your character card. On the plus side, the bonus seems to be a flat application, meaning that if your base crit chance is already high, this advantage can throw it to extreme levels. Because of Overpower’s generally nebulous nature, though, and the other options available to raise crit chances, Brutality’s usually the better choice.
Mastery: A 20 point boost to Offense and your Strength stat. An OK choice if nothing better is available, but it should be noted that, unless these numbers are very low, these bonuses will not add much extra damage or performance to the character.
Bottom Line:
Take Strength as a primary if…
- You will be doing heavy melee hitting.
- You’re interested in melee tanking (CON secondary)
- You want to land critical hits with super-high severity
Dexterity

Dexterity’s main scaling is with Focus Forms in the Martial Arts tree, which, much like Enrage, increase all damage to a degree (with a melee slant). Dexterity also buffs the dodge bonus obtained from Parry’s Elusive Monk advantage. The Chilled Form toggle also scales with this stat.
Spec Tree Overview:
Offense:
Defense:
Energy:
Versatility:
Tier 1:
- Combat Training: Increases your critical chance by a portion of your Offense score. This bonus is best used to sub-out critical-chance mods in your gear out for more offense. Don’t stack crit chance mods on a crit-based character, as this causes this spec to quickly run into the diminishing returns curve of Crit stats – it’s nigh impossible to gain more than 35% chance roughly using Dexterity and gear alone.
- Gear Utilization: Boosts the amount of offense and defense items give by a flat amount. This gives a rather hefty boost, to be fair, and coincides very nicely with Combat Training to maximize both offensive output and damage mitigation.
- Brush it off: Gives a substantial dodge buff to you against AoE attacks. This should make you untouchable if you’re not a tank, as anything that isn’t aimed directly at you now has a much lower chance of doing full damage. Two warnings: one is that this spec is actually broken (i.e. doesn’t work), and the other is to make sure that you back this up with a good Avoidance score by using either equipment or Evasion.
- Power Swell: Makes the move following your next critical slightly more efficient. Useless, given that it’s quite hard to have a critical chance of above 40% without serious devotion to mods and items. In rough terms, this translates to getting a cost reduction only on par with something like rank 2 Physical Peak every 2 out of 5 attacks.
Tier 2:
- Evasion: Increases your Avoidance rating by a portion of your secondary superstats. Avoidance is generally a rating of how much damage your dodges reduce – without avoidance, Dodges do little to protect your health reserves. That said, if you don’t have any equipment or abilities that can grant you around 50-60% avoidance, you might be in need of this. An avoidance level of around 70-80% is good for tanking.
- Deadly Aim: Increases your Critical Severity by a portion of your secondary superstats. Much like brutality, this makes your critical hits very powerful if you take the time to devote points into it. If you are using the Dex. primary for any amount of dodge statting, though, you might not have enough specialization points to focus on this one.
- Expose Weakness: Every time you critical hit, you reduce your target’s defense by a small amount. The debuff stacks, has all stack duration refreshed with each crit, and can further augment your offensive prowess. Overall, this is the big offensive-player in the Dexterity tree, and is the strongest consideration if you’re designing for DPS. Depending on your focus, you will want either this or the dodge specializations.
- Quick Reflexes: Increases your dodge chance by a portion of your dexterity. The good news is that this can really help with survivability if you pair it along with proper equipment and powers. The bad news is that, on its own, the dodge buff is quite weak, and that it also requires some significant specialization to get a sizable boost.
Mastery: Increases both your critical severity and avoidance, as well as granting a Dexterity bonus. This one is excellent if you happen to focus on both dodging and critting, as the stats it offers are quite rare when it comes to equipment and mods. Note, however, that the buffs featured here become less useful the higher your dodge stats and crit chance become – diminishing returns and all that.
Bottom Line:
Take Dexterity as your primary if…
- You want to land criticals frequently
- You want to do dodge tanking (STR Secondary is recommended for knock resistance.)
- You want to balance survivability and offense via dodges.
- You want to utilize gear with high Offense stats
Constitution

Constitution’s major scalings include Spirit Reverberation in the Darkness tree, the mitigation offered by Defiance stacks, and the healing offered by various self-heals, such as Resurgence and Endorphin Rush.
Spec Tree Overview:
Offense:
Defense:
Energy:
Versatility:
Tier 1:
- Unyielding: Constitution boosts hold resistance. Given that you are basically held if you don’t block a hold, all this really seems to serve is to make holds shorter. Usually not worth it, as taking damage is pretty much enough to break you out of any hold on its own – and as a tank, there’s no shortage of incoming damage.
- Fuel my Fire: Every time you are hit, you get a percentage of energy back. There is an internal cooldown to this, and the values granted are fairly low, but if you’re taking a bunch of damage, it can actually occur very rapidly. Paired with other energy-generating maneuvers, such as Force Sheathe and Defiance, this makes it much more viable to run in the Tank role, with its reduced energy reserves.
- Tough: Causes your secondary superstats to also provide some extra health. A good general choice that serves to make you ultra-hardy to damage. The one problem with this ability, however, is its requirement for heavy spec investment for a good return.
- Resilient: Constitution boosts knock resistance. In direct contrast to Unyielding, Resilient is a must if you’re a ranged tank without Strength superstatting. The more knock resistance you have, the lower the chance there is of you being knocked out of range, or knocked prone and unable to draw enemy attention. Unfortunately, the boost this spec offers is minimal compared to actually statting Strength.
Tier 2:
- Deflection: Dexterity increases your dodge chance. If you are serious about tanking, especially against big-hitters like Gravitar, I highly recommend taking this one alongside Adrenaline rush.
- Quick Healing: Secondary Superstats aid in regeneration. Much like Strength’s Quick Recovery, the healing offered by this spec is extremely underwhelming.
- Adrenaline Rush: Every time you land a critical, you heal a small percentage of your own HP. This seems trivial at first, but after you realize that there is apparently no internal cooldown on how often you heal, it becomes a legitimately good way to recover health while holding an offense. Once again, pair this with a Dexterity Superstat and perhaps Crit gear to get the best of this. Goes well with rapidfire/maintain attacks.
- Armored: Vastly improves the amount of defense you get from items by a flat percentage. Since defense is fairly valuable, even to a tank that already has good base mitigation, you likely will want to devote at least 1 rank in this advantage if you’re serious about tanking.
Mastery: +20 to defense and Constitution. Not a bad choice, considering the extra health this offers, as well as the legitimate helpfulness the defense buff grants. In contrast, however, the tank tree specializations are much better for saving yourself (and your team by extension) in the 11th hour.
Bottom Line:
Take Constitution as your primary if…
- You will be doing heavy tanking.
- You don’t want to get held or knocked around.
- You want an extra defensive edge on your character.
- You want to be a heavy dodge tank (DEX secondary).
Intelligence

Intelligence scales with a load of moves. Quarry in the Archery tree gains extra Ego and Intelligence boosts via a high INT score. Molecular Self-Assembly also scales with Intelligence, which serves to make it perhaps the most intuitive Energy return in the game. It also scales up bonuses offered by Concentration and Manipulator: The former increases all damage, but focuses mainly on ranged damage, while Manipulator will increase damage slightly while also boosting hold strength and length drastically.
Spec Tree Overview:
Offense:
Defense:
Energy:
Versatility:
Tier 1:
- Preparation: Boosts equilibrium (resting level of energy) based on Endurance score. This effectively renders the Recovery stat moot if you have a good energy return, but is also mostly dependent on having Endurance as a superstat. Highly recommended if your build requires a lot of energy to run, and a very viable alternative to running Endurance Primary.
- Enlightened: Increases stat bonuses that your non-superstats offer. I.E., dexterity offers greater critical chance, while recovery sets your equilibrium even higher. This is only useful if you have significant statting in your non-superstats – something that’s exceedingly rare nowadays, thanks to most builds being able to reliably base themselves around superstats and nothing more. However, combined with the stat-boosting Aura of Primal Majesty, this effect could be put to good use.
- Tactician: Secondary Superstats grant offense. As stated before, the effects of Offense are somewhat underdefined, meaning the damage buff this offers is quite low. If you need the damage for your character (I.E. you’re an energy-heavy ranged DPS), this could be used to give you the extra edge you need, but in most cases, you’re likely better off if you just take Ego instead.
- Battle of Wits: Increases your hold strength by a portion of your intelligence. This is where the mezzer spec of Intelligence becomes apparent – reducing the recharge rates on your holding powers, this specialization ensures that your holds stay on longer and have a greater effect – combine with Sentinel and other support trees for maximal debuff alongside hold. If you want your holds to last as long as possible, however, the Presence stat is going to boost your hold duration way higher than this spec.
Tier 2:
- Revitalize: Each hit you land with an energy builder will reduce the recharge of your recharging attacks by a percentage, once every 6 seconds. This specialization, even after a nerf, still is borderline overpowered. Combined with recharge-reducing mods and a slew of active abilities, you can use this to effectively become immortal with Active Defenses, use your devices rapidly, or even keep up a strong offense with extended periods of constant Active Offense. Of course, be warned this playstyle is very micromanagement based, but it’s easily the most capable of getting the shortest possible recharges.
- Detect Vulnerability: Gives you a bonus to defense penetration based off of Intelligence. Since every enemy in the game does have some degree of defense, this bonus is perhaps the best shot Intelligence has at being a big DPS hitter. Combine it with crits and a good passive, and your character should be able to hit just as hard as the rest of them!
- Tinkering: Increases the offense and defense your items offer. Essentially a weaker version of Gear Utilization from the Dexterity Tree, this is notable for being the only source of actual defense for this set.
- Expertise: Increases the natural bonuses offered by your secondary superstats. This is the superstat equivalent to Enlightened, which already makes it much better. Combine with stats like Ego and Dex for super-powerful offense, or Con and Pre for defense or extreme control capability. It should be noted, however, that this advantage has no effect on the base role bonuses that the stats offer – I.E. it will not improve the threat reduction your stats offer under DPS roles. With smart usage of this spec tree and this spec, however, you can make some unique and deadly builds if you pour stats heavily into a secondary.
Mastery: Bolsters the scores of all your non-superstats by 10 points. Doing literally nothing to increase your offense, defense, damage boosts, or anything related, this is by far generally the worst of the Masteries from a Primary spec tree. If you’re clever or have a build that uses a wide-degree of stats, however, it could be put to use.
Bottom Line:
Take Intelligence as your primary if…
- You need a balance of ranged offensive prowess and energy management.
- You have a build with many recharges and active abilities.
- You want to try out a control build (Pair with PRE secondary).
- You want to utilize a wide variety of stats – for the natural benefits they offer.
Ego

Ego scales up the damage bonus gained from Concentration and from Chilled Form. It also scales up the energy return gained from Hunter’s Instinct and Killer Instinct, and scales up the damage on Ego Blade attacks, much like Strength would for any other melee attack.
Spec Tree Overview:
Offense:
Defense:
Energy:
Versatility:
Tier 1:
- Mental Endurance: Increases the amount of maximum energy granted by Recovery. Essentially, this makes it so that Recovery can stand on its own as a handler for Ego’s energy. In most cases, with a proper energy return and the benefit of Insight, you can easily get by without using this specialization, or the associated superstat.
- Force of Will: Secondary superstats now offer bonus defense. Given that Ego characters archetypically designed to be ranged DPS are going to be severely lacking in other defense departments, this is almost a requirement if you want to stay alive for more than 2 seconds.
- Insight: Offers a discount on ranged attacks scaling with your Ego. This here is essentially what makes this the ranged blaster tree: Combine Ego primary with Endurance and another stat, and you’re pretty much set to go on energy.
- Aggression: Increases the offense yield of items by a flat percentage. Given that Ego can get some rather high Critical chances without using Crit gear, this might be worth taking a look into. Otherwise, it should be easy to use a class spec-tree to get the offense you need.
Tier 2:
- Follow Through: Ego now increases severity, much like old times. Combined with Sixth Sense, Ego is perhaps the most capable of landing reliable, lethal critical hits (especially if Dexterity is a secondary.)
- Exploit Opening: After critting, your next hit will deal extra damage based off of a percentage of your severity. Essentially, you critical hit twice in a row, with the second one being slightly weaker. Even with one rank, this can make you a whole lot more powerful.
- Sixth Sense: Secondary superstats increase your critical chance. As stated above, when this is combined with a Dexterity secondary, things quickly get ridiculous. Thanks to this layout, an Ego character with significant Dexterity statting easily has a higher critical chance than a character with Dexterity as their primary.
- Mind over Matter: Ego now affects your melee knocks. The reverse equivalent to Strength’s Balance, and just as useless. To its credit, though, the generic criticals featured here do have some piecemeal compatibility with melee strikes.
Mastery: Raises your secondary superstats by 20 points each. This is the single largest boost to superstats in the game, meaning it can add a rather hefty bonus to damage and other scalings when used. Not to mention, it coincides with all the Ego specializations that scale off of secondary superstats.
Bottom Line:
Take Ego as your primary if…
- You want to do extreme ranged damage.
- You want to focus on powerful and frequent criticals without regard to defense (DEX secondary)
Presence

Presence offers bonuses to the forms of Compassion, which boosts all damage slightly and all healing to a greater degree, and Manipulator. The team effect of sorcery auras scale off this stat. Finally, Telepathic Reverberation bases its energy return on Presence.
Spec Tree Overview:
Offense:
Defense:
Energy:
Versatility:
Tier 1:
- Repurpose: Turns offense into boosts to healing power. While the percentage per offense-point offered seems low, it can add up super-fast with even decent offense scores: Rank 3 repurpose with 100 offense equals 30% extra healing strength. That’s equal to a Rank 7 sentinel mod!
- Selfless Ally: Any healing you do to an ally also heals you for a portion. This is an awesome survivability tool, especially if you have a healing aura and you’re on a team.
- Dominion: Severely increases the hold strength offered by Presence, on top of its existing control bonus. You can use this to create a powerful control character, which is a useful specialty for certain cosmic content pieces.
- Grandeur: Every 10 points of presence now offers extra offense. As stated before, there are more effective ways to rack up the offense score, but in this case (especially if building a pure healer, Sentinel and all) it might be the only place where an offense buff can fit in.
Tier 2:
- Brilliance: Scoring critical heals on friendly targets temporarily makes them get more healing from your moves. A nice bonus, but be careful – a lot of the best heals in the game do not have the ability to crit!
- Moment of Glory: Secondary superstats boost your ability to land criticals. For some reason, the boost offered by this advantage seems proportionally much lower than equivalents in other sets, such as Ego. This advantage is clearly meant to coincide with Brilliance, but is generally versatile enough to enable Presence characters to do decent damage.
- Force of Will: Secondary superstats boost defense. Identical to what Ego gets. It’s not quite as dire for Presence characters as it is for ego ones, since Presence usually has ample ability to heal itself and others.
- Vulnerability: Makes it so that targets that you attempt to hold temporarily take more damage. Note that this even works on targets that cannot be held to begin with, meaning it turns your holds instantly into defense-debuff moves.
Mastery: Heals now shield the target for 10% of the heal’s power, while shields will temporarily boost the healing the target receives for 6 seconds. This roughly translates to very weak shields all the time, but for a pure healing build, it is basically the cherry-on-top that maximizes a PRE character’s ability to defend their allies.
Bottom Line:
Take Presence as your primary if…
- You will be healing others.
- You want to try out a controller build.
- You seek extra defense via forcefields.
Recovery

All Energy Unlocks scale to some degree with Recovery. Overdrive and Supernatural Power get their primary boosts from this stat as well. Finally, Compassion can scale off of Recovery.
Spec Tree Overview:
Offense:
Defense:
Energy:
Versatility:
Tier 1:
- Gear Utilization: Increases offense and defense yield from items. It’s sort of a bad sign that this is the best that the Recovery tree has to offer – a slight but straightforward buff here beats many of the questionable bonuses offered by many of these other specs.
- Withstand: You gain extra crowd control resistance from your superstats. I still have no idea what this means, but I’m guessing it protects you from holds and other control effects? From my experience, regardless of what stats or specs you’re using, you’ll still be locked down by these things unless you actually block.
- Rapid Recovery: Recovery gives you passive health regeneration. Like every other regeneration spec out there, the healing this offers is pitifully low and infrequent, and shouldn’t be relied upon for survival. The only exception I can think for this is for Archtype characters without self-heals, but I’m not even sure if any of the ATs make use of the Recovery primary.
- Staying Power: Drastically increases the maximum energy offered by Recovery. This one is a good choice if you aren’t taking Endurance to back Recovery up, and makes it a viable tactic to focus your other two superstats on non-energy related things.
Tier 2:
- Supercharged: When energy levels are above 90%, you have increased critical chance. The crit chance buff is quite sizable, but you’re very unlikely to be sitting at the top of your energy bar for long. This is good for two things: Builds that specialize in huge burst damage (force cascade, for example), and builds that generate much more energy than they use (lightning arc and circle of arcane power).
- Efficient: Further bolsters the effectiveness of energy unlock abilities. Theoretically this could be used to make any energy unlock viable, regardless of superstat choice.
- Well Rounded: Non-superstats will increase your health and energy reserves by 0.1/0.2 per point in them. That is to say, you’ll be giving up damage output, healing power, and threat modifiers to get a little bit more health and energy for scattering your stats all over the board. To be fair, it could be viable under an AoPM build, but in most cases it will never be used.
- Second Wind: Secondary superstats decrease charge times. This one is actually really effective when combined with Intelligence, as the recharge reduction from the Intelligence stat and this can stack to make recharges much shorter. Pair it up with recharge reduction equipment and some offensive/defensive expertise for more active power shenanigans.
Mastery: Recovery’s Mastery increases all superstats by 10 points. Not bad, and melds with many of the other bonuses in the set, relating purely to bonuses reaped from higher stat values.
Bottom Line:
Take Recovery as your primary if…
- You need some extra energy.
- You need a fine balance of offense and defense.
- You plan on taking a wide variety of stats.
Endurance

Endurance affects the energy returns off of Thermal Reverberation and Ionic Reverberation. It also applies a small bonus to Overdrive.
Spec Tree Overview:
Offense:
Defense:
Energy:
Versatility:
Tier 1
- Readiness: Increases equilibrium by a portion of your Endurance. Basically, the inversion of Recovery’s Staying Power, and effectively accomplishes the same thing. If you specialize in this, you can skip Recovery as a secondary and take other, more useful stats instead.
- Withstand: Gives crowd control resistance based on secondary superstats. Once again, a questionably useful ability. If the skill does happen to actually work to not only resist holds, but also knocks, then I could see some value to this ability – especially for a tank.
- Gear Utilization: Increases the offense and defense yield of items by a flat percentage. Perhaps the most solid and standard choice for Endurance’s tier 1 specs.
- Kickback: The first attack you land after an energy builder will also return some energy to you. This thing is killer if you can fire your energy builder at the same time as other attacks (power armor). Otherwise, it’s a fairly effective way to make sure you keep using your standard attacks more frequently.
Tier 2
- Quick Recovery: Recovery stat boosts health regen. It’s even stupider here, because there’s scarcely a reason to even take recovery with such huge energy reserves.
- Outburst: When energy is above 90% full, the base damage, healing, and energy cost of your powers are increased. Veritably, this makes this a whole lot stronger than Recovery’s equivalent, Supercharged. However, thanks to a naturally lower equilibrium, as well as less energy return synnergies and raised energy costs at this level, this state usually doesn’t last long at all. Outburst is at least good for a guaranteed damage boost for a huge blast attack (such as force cascade or gigabolt).
- Power Overwhelming: Secondary superstats offer extra offense. A solid option that can allow you to put aside equipment for boosting critical stats.
- Hardened: Offers a sizable boost to health based off of your endurance score. With 2 ranks and a 4 HP per point rate at 2nd rank, this is the largest single-stat HP buff available, barring Constitution itself. For this reason, Endurance could be considered a pseudo tank primary.
Mastery: Endurance’s mastery causes you to basically constantly gain energy based upon highly generic circumstances, based off of your current role:
- Tanks can get 3% max energy whenever hit, once every 3 seconds.
- DPS can get 3% max energy whenever attacking, once every 3 seconds.
- Support can get this energy buff whenever they heal a target, once every 3 seconds.
- Hybrids get the energy boost every 5 seconds they’re in combat.
With this mastery, you basically become an unending stream of power. This technique is reserved only for the builds that go all-out with their techniques, using the most energy-heavy powers in the game, period.
Bottom Line:
Take Endurance as your primary if…
- You need a lot more energy.
- You want a decent mix of defenses in variety.
- You are not too concerned with dealing strong critical hits.
Role Trees
After reaching level 20, you will be able to select a Role Tree. These trees carry bonuses that tailor your character to have class-based buffs to their abilities, but usually do not carry the sheer influence or effect that your Superstat tree does. In essence, the Role Trees are character tweaks. Over the course of the game, you will get access to two of them; one at level 20, and one at level 30.
Role trees (and all trees for that matter) stack effects. This means that if you have two trees that buff the same type of characteristic (i.e. 2 trees that boost critical severity or recharge time), the overlapping effects will layer upon one another to provide a bigger boost.
Once you pick a tree to focus in, you cannot change it without spending resources or by respeccing your character, so choose wisely!
As with Superstat trees, role trees also have masteries that you can pick at level 40. Versus the Superstat tree bonuses, however, these are often very specific, and have select activation criteria. In some cases they encourage a certain method of play, which is summarized in a final writeup on each tree.
Avenger

Spec Tree Overview:
Offense:
Defense:
Support:
Versatility:
Tier 1:
- Ruthless: Increases critical severity by up to 10%. If you missed out on the severity-up buffs in your Superstat tree, or do not have them available to you, this is where you’d get your primary buff to damage. Combining this with Critical Chance equipment is perhaps the most reliable way to get a quick and effective damage boost to your character.
- Can’t Touch This: Your energy builder now slows enemies far away from you. Theoretically, this is to make it easier for your character to hit big mobs, but in practice it has almost no real effect due to its short duration, and also being relegated to your energy-builder for functionality (you want to use your EB as little as possible)
- Anguish: Adds a small piercing damage element to critical attacks. Anguish is very good for making armor-piercing characters, allowing for plenty of damage to leak through high-defense foes. The downside is that the buff offered by this spec is somewhat low, but it’s also offset by its very general application method, meaning it will basically work for any ranged build.
- Round ’em Up: Hitting enemies with your AoE attacks makes them more susceptible to AoE’s. This is one of the two things that turns Avenger-type characters into murdering machines – Especially on a rapid-fire maintain AoE, these defense debuffs add up very fast.
Tier 2:
- Surprise Attack: Enemies above 90% health will have a higher chance to be hit by critical single-target attacks (supposedly). Taking this essentially is for turning your character into a boss sniper. Against weak, single enemies, this can be used to methodically pick off each one with an unnaturally high critical rate. This spec is slightly bugged, in that it applies a general-purpose crit buff when it’s active, meaning your AoEs also crit more often (when it should only be single-target attacks – so in a way, it’s beneficial).
- Relentless Assault: Maintaining attacks gives you a huge boost to your offense stat. Anywhere from 50-150 extra offense is nothing to scoff at, and especially if your base offense is low, the effects of this can be readily seen.
- Offensive Expertise: Lowers the recharge times on active offense abilities, allowing you to make more frequent attack spurts with them. This spec is present in several other trees, and can be combined with other instances of itself to make for much shorter offense active recharges.
- Preemptive Strike: Landing a blast will increase your next non-blast attack’s base damage (This actually appears to be multiplicative – Preemptive Strike is actually VERY strong!). This essentially tranforms the blast into a auxiliary damage-increasing utility, versus a legitimate source of damage output. If you don’t plan on using any blasts in the build (which is a good possibility), then feel free to skip this one.
Mastery: Scoring 2 consecutive crits will cause your blasts’ charge times to become halved. As stated before, the set doesn’t very well consider the overall base buffing of the blast’s base damage, but the mastery will change your blast into a very deadly and surprising burst of damage. However, the mastery also will relegate the blast to this role, because Avenger generally lacks base buffs to blast attacks, and the mastery buff can be wasted on a tapped blast (what most blasts excel at when not under mastery). If you want to tailor your blast into a consistent assault against a single target, look to another tree.
Despite all this, a build that uses the Avenger mastery can be tailored to unleash powerful ambush strikes by using various other maintains or abilities to quickly score multiple crits in a row, and then following up with a blast. With specs like Relentless Assault and Preemtive Strike, the tree’s overall aim is to secure the basic Blast as a damage spike – a bridge move of sorts, that is activated via another attack with a high crit/hit rate, and then used to buff a single following attack.
Brawler

Spec Tree Overview
Offense:
Defense:
Support:
Versatility:
Tier 1
- The Glory of Battle: Every AoE you land grants you a stack of Glory. When you reach 30 of these, you gain a temporary buff to your Offense and Critical stats. The nature of this ability makes it much more viable for use by ranged AoE nukers, simply because many of the best melee attacks focus strength on a single target. If you do have a reliable melee AoE though (many pbaoes work quite well), then this specialization is right up your alley.
- No Escape: Energy builder hits now slow down targets nearby you. Essentially the inversion of Can’t Touch This, and just as useless – moving 20% slower will not stop enemies from escaping. And once again, energy builders aren’t great even with bonuses tacked on.
- Penetrating Strikes: Melee criticals will cause further attacks to ignore enemy defense. Easily the best Brawler options on the first tier, given that all enemies have some degree of damage mitigation on them, this will provide some powerful extra damage regardless of what attack options you’re using.
- Ruthless: This general Spec increases your critical severity by up to 10%. It reoccurs on a lot of other spec trees as well; pretty much any tree that has a melee or ranged DPS affinity.
Tier 2
- Finishing Blow: The intended inversion of Surprise Attack, Finishing Blow causes your single-target attacks to do increased damage to enemies below 35% health. Versus Surprise Attack, this one is very useful, especially against bosses in smash alerts and other timed missions. To add to this, this raises base damage, so there’s no fumbling around with Critical chances involved here. Counter point, though, is that it’s base damage – Percentage buff based on the attack before any kind of superstat or specialization bonuses are applied, which makes it much smaller than it might initially seem. It also might kick in a bit later than you’d expect.
- Setup: Melee Combo hits now have a chance to apply a next-hit damage buff to your next non-combo melee attack. Once again, a parallel can be drawn here between Setup and Preemptive Strike. Combos assume a supportive position in your attack lineup in order to fuel your final attacking power with your main hitters. Since the majority of combos are made to apply debuffs in the first place, this can be a logical extension to your fighting style. Plus, the damage boost is applies is big. Works very well with charges.
- Flanking: You deal up to 10% melee bonus damage to enemies when attacking them from behind. This spec is powerful, and a perfect choice for many melee builds (especially ones that will be in cosmic fights). It also is a good way to balance out your aggro, as if you manage to get it, that will reduce damage, therefore making you a slightly less attractive target to hit. Unless you plan on trying to steal a tank’s limelight, or really like solo-play, you’ll want this one to buff your damage up.
- Offensive Expertise: Reduces the recharge of active offense powers. Completely identical to the one featured in Avenger, and can indeed stack with other recharge reduction effects from other trees.
Mastery: After using a lunge power, your next melee attack gets an (unspecified…) damage boost. The boost only can occur approximately once every 3 lunges (10 seconds), and is essentially used to give you a good way to start up battles. Can be used to give lunges a legitimate role in mid-battle as well if they are timed well. If you’re not used to including lunges naturally in your rotation, you’ll likely be better off with a more global or accessible buff.
The mastery of this tree seeks to give the overall role very much an ‘assassin’ flavor. Lunge in, land a powerful charged strike, and don’t be the focus of your enemy. Use your combos and AoEs to further boost the power of your main melee hitters – which will likely be charges.
Protector

Spec Tree Overview:
Offense:
Defense:
Support:
Versatility:
Tier 1:
- Fortified Gear: Increases the amount of defense offered by items. As stated before, the Defense stat seriously works well, meaning you should probably get every opportunity you can to bolster it. A good, general buff that’s also fairly common among the different spec trees.
- Beacon of Hope: Increases the amount of healing you get from other team members. If you’re building your tank to focus on self heals by using abilities such as Bountiful Chi Resurgence or Conviction, the value of this will be fairly diminished. In addition, if your defenses are already sufficient enough, a dedicated healer’s abilities will usually be enough to restore your health to full. In contrast, if building a tank with extremely high health, this ability should be able to give healers extra strength to get you back to full HP in less time.
- Unrelenting: Taking any rank in this will make you immune to all slowing effects. In addition, you move slightly faster when not using travel powers. The implications of this ability are scary: You move at full speed while blocking and sneaking, for example, which can effectively cut out the need for a few advantages. Moving faster in battle, while not too much of a concern for a tank, can be used by a multitude of other character types in order to avoid AoE attacks. To top it off, this is the only tree that has a spec like this. If you want to focus on mobility in combat, Protector has the specialization you need.
- Bulwark: Increases your HP when running in a non-hybrid role. If you are running in hybrid, your superstats now generate threat, as if you were in tank role. If running in hybrid, this allows you to make a tank that not only does a decent amount of threat generation through attacks, but also does higher damage, has more energy to work with, and has much stronger heals. The downside is that Bulwark’s threat generation does not stand up to the threat buff that the tank role offers. If used under tank role (or any other role for that matter), Bulwark becomes a general survivability buff.
Tier 2:
- Debilitating Challenge: Crippling Challenge effects will now reduce the resistance of a target slightly. This is the only inkling of an offensive effect that the Protector Tree gets, and it’s only directed at a single enemy. Makes for a good way for tanks to get rid of their targets quicker, but little else than that – Crippling Challenge is a single-target taunt that will likely cause enemies to attack you. Especially if the character you’re using is offensively built and already has high base damage, you’re likely never going to want to use Crippling Challenge, because the enemies already are attacking you without it!
- Exhausting Strikes: Energy Builder hits now reduce the amount of damage enemies deal out. I only recommend this if you have a strong reliance on your energy builder, or are planning to combine it with other Energy Builder effects (such as Intelligence’s Revitalize or Endurance’s Kickback).
- Defensive Expertise: Decreases the recharge time of Active Defenses by up to 21%. The only one of its kind, and the biggest recharge reduction of all actives. This is a huge booster to survivability, and becomes a keystone to the tree due to its exclusivity. Yet another reason why the Protector tree can be useful to non-tanks.
- Resolute: Being knocked or held will restore a small portion of health to you over the next 5 seconds. The nature of tanks is that you want to minimize your downtime and maximize your threat by avoiding knocks and holds by all means possible. At the same time, it’s the game’s nature that it’s impossible to resist some holds or knocks fully without using a block. All this said, if you don’t mind flying around uselessly from waves of force and bombs or being locked down constantly, you could give this one a shot for extra survivability. Just keep in mind that gives enemies extra incentive to attack targets other than you.
Mastery: Any attack that drives you under 30% health will reset the recharges on all Active Defenses. This effect can only occur once every 60 seconds. Strictly an 11th hour power, combining this with an effect such as Resurgence can easily save you from the brink of death. In contrast, however, if your Active Defenses already have short recharges (40-30 seconds) then you might not need an advantage like this, and it would be more valuable to get a mastery in another spec tree.
In the end, a character with the Protector Mastery’s battle tactics become a lot different than normal: There’s now much less of a reason to be conservative with your Active Defense usage, as in practice, it will usually be available to you when you’re in peril. Combine this with naturally higher defenses, faster movement, and powerful situational buffs, and this tree will make you much harder to take down.
Sentinel

Spec Tree Overview:
Offense:
Defense:
Support:
Versatility:
Tier 1:
- Torment: Increases hold duration. A fairly substantial boost to their length, but given how useful holds really are in this game, it’s safe to probably skip this outside of a few high-level edge cases.
- Eternal Spring: Critical heals continue to heal after the initial effect for 6 seconds. It’s a bit unclear what is affected by this and what isn’t, but for actual targeted heal powers (Celestial Conduit, Psionic Healing, etc) this can be used to give some sustaining survivability to your heal target.
- Caregiver: Increases the strength of heals and shields on other players. This one’s a no-brainer and is one of the better choices that can be made, especially if making a dedicated healer.
- Sentinel Aura: Provides light healing to allies teamed with you. All auras work like this, providing a small buff to your team. Sentinel Aura, thanks to its very general effect, as well as its ability to stack Compassion, is still probably the best aura available from the spec trees.
Tier 2:
- Moment of Need: Increases critical heal chance. Especially if you have high severity, this will turn a lot of your heals (and self-heals) into lifesavers in a pinch.
- Rejuvenated: Active heal over time effects have a chance to grant energy to you. First, the energy offered by this is quite low. Second, the activation condition is very narrow, with only two or three heals that fall under the classification. Finally, if you’re running in support role, energy usage is not likely to be an issue, given the role’s vastly improved energy management abilities. If running a hybrid healer (it is possible) without an energy unlock, it could be of some slight use.
- Wither: Held targets have their defenses reduced. Unlike Vulnerability, which can last beyond the length of a hold, Wither seems to only apply for the direct duration of the control effect. Unfortunate, as this makes the effect completely useless against bosses, and the slow nature of many holds makes them unreliable to use against large mobs of enemies.
- Genesis: Reduces the energy cost of heals and control effects by a flat percentage. Much like Rejuvinated, Genesis is much more useful on a hybrid character without reliable energy generation techniques. In a sense, it could be useful to make some semi-expensive self heals (conviction) easier to use in dire straits.
Mastery: Anyone who attacks a target you attempted to hold will now receive 2% total HP back when attacking. The health restoration only occurs once every second, and the effect lasts roughly 8 seconds. Because the effect is completely independent of holds, it can be used against boss targets and hold-immune enemies. When it comes to a reliable stun or hold effect (Shadow Blast with Advantage, for example) it can turn such an effect into a legitimate way to help keep your allies alive against a boss. Also unusual is that the heal done by this mastery has no ‘source’ (i.e. It’s not attributed to you and thus will not cause green numbers to pop up over your allies, and it also will not stack Compassion), and that, because the heal is % based, high Presence makes no difference in its use.
Sentinel, on whole, doubles as both a strong healer and a supportive controller, utilizing high-power, low-cost heals to keep the team alive. On the offense, Sentinel can be used to both debuff enemies and provide even more supportive healing through them. When used creatively, such as with wide-area holds, it can be used to dole out bursts of healing extremely fast, even without any other explicit devotion into healing powers.
Commander

Spec Tree Overview:
Offense:
Defense:
Support:
Versatility:
Tier 1:
- Evasive Action: Increases pet resistance to AoE’s drastically. Pets already have resistance to AoE effects, but stacking this on top will make them nigh invincible when they’re not a direct target. Thanks to the mechanics of Aggro (as well as the fact that pet damage is relatively low), pets rarely are ever the direct target of enemy attacks.
- Rapid Response: Decreases the time it takes to summon pets. This is very good if your pets are disposable or have a limited duration (summon shadows, march of the dead). It also happens to work on unorthodox summons, such as sorcery circles and sigils!
- Create an Opening: When you land a critical strike, your pets get a temporary buff to their critical chance for a few seconds. This becomes proportionally more useful the more rapidly your pets can attack – basically, more pets are highly preferable here to maximize the chance that criticals occur.
- Multitasker: Reduces the energy penalty incurred by pet use. Not too much of a concern if you’re a pure support petmaster (a decent strategy, considering support auras affect pets, and the damage reduction associated with support role doesn’t), but it can be a valid utility if you need to attack reliably alongside your minions.
Tier 2:
- Well Trained: Reduces recharge time on pet abilities. The phrasing makes this a bit nebulous, but I’m fairly certain what it means is that it shortens the recharge periods of actual attacks that pets use, meaning it can be utilized to make your minions attack (or heal) faster. One of the better general buffs you can give to your pet, and especially a component in making them more effective on the offense.
- Durable: Secondary superstats now boost the health that pets have, as well as the healing they receive. General defensive buff to pets; a good idea if you have tanking pets (arcane golem, tyrannion’s familiar), or use sigils heavily (as they tend to be the target of much enemy ire), but if you focus mainly on disposable pets, you can skip this one in favor of the latter two.
- Relief: Secondary superstats now boost the healing that your pets can do. Only is useful if you use healing pets (support drones, radiant angel summon, and maybe summon shadows+advantage?)
- Savage: Secondary superstats now further boost the damage your pets do. This is perhaps the most likely choice of the three you’ll take, given that’s essentially what you’re using the pets for. To compound this, the above two only have a few specific subset of pets that can fulfill the roles they set. In contrast, all pets are made, in some part, to deal damage – and there’s no shortage of damage dealing pets to say the least.
Mastery: Further increases base damage of pets by 10%. If you’ve already got a mass army of pets, this mastery is easily the best choice you could make. As per much of the rest of the tree, the mastery becomes proportionally more powerful the more pets you’ve got out.
Commander is easily the least versatile of the trees, and requires a build that uses a lot of pets to pile on the damage. Due to how it works out, I unfortunately find Commander to be one of the less rewarding trees to use, simply because the more pets you have, the less responsibility and power that is left in your hands, making fights vary between helpless and boring.
Guardian

Spec Tree Overview:
Offense:
Defense:
Support:
Versatility:
Tier 1:
- Fortified Gear: Increases defense yield from items. Straight from the protector tree, as stated before, this general defense buff is quite valuable – especially considering a specialization we’ll see in tier 2 of this tree.
- Locus: Basically a ‘tank’ version of Brawler’s glory of battle: Stacks by striking or getting hit by AoEs, and when you reach 30 stacks, it turns into an eruption that offers a temporary buff to offense and defense. Fewer ranks means that it doesn’t require that many points to provide a sizable buff, but the problem is that, because it lacks the critical hit component, it doesn’t pack nearly as much punch as Glory of Battle does.
- Make it Count: Increases the damage output and energy efficiency of Blasts slightly. If planning to make a character who bases their single-target offense on blasts, this would be the way to go. To any other character type, however, this specific buff can easily be bypassed in favor of the other options in this tree.
- Ruthless: Same as the critical buff offered in Brawler and Avenger, this gives up to 10% critical severity.
Tier 2:
- Retribution: Single-target attacks made towards you have a chance to give you a temporary damage buff and slight health regeneration. Made much more for tanks than for anything else, Retribution is powerful, but has a narrow activation condition.
- Tenacious: Taking damage will raise your offense score temporarily. Given the nature of this tree, you can easily gain all the offense you need through other means, which hampers the usefulness of this specialization a bit. That said, it’s extremely easy to stack and activate.
- Find the Mark: Ranged attacks have a chance to expose the target, increasing your critical chance against them temporarily. So, in a way, it’s giving you a chance to make a chance to make a critical strike – yes, it’s convoluted. Since there doesn’t seem to be an internal cooldown associated with it, I recommend pairing this up with rapid-fire maintains or tap attacks to ensure maximal chance of applying this effect.
- The Best Defense: Provides a boost to your offense score based on your defense score from gear. This is recommended if you’re gearing heavily for your defense stat, and can provide a solid boost to your offensive power regardless – all pieces of equipment have defense.
Mastery: Blasts will grant you stacks of Alacrity, which increase your dodge chance slightly and reduce the charge duration of further blasts slightly. The effect lasts for about 10 seconds, and stacks up to 3 times. If blasts are your primary source of damage, I highly recommend taking this mastery; it makes blasts that much more viable to use (and also inverts their DPS curve so that charges are liable to do more damage than taps), and also grants a pretty good survivability technique to go along with it.
There’s not much more to say about Guardian – it’s one of, if not the most popular tree among freeforms. If a build had a battle plan strongly based around Guardian, it’d be a blast-slinging dodge-based tank, tailored for high-critical rates. In practice, though, it’s generally used to give the user higher defense, higher offense (via Best Defense) crit severity, and a bit of extra boost for soloing using a power like Locus or Retribution.
Warden

Spec Tree Overview:
Offense:
Defense:
Support:
Versatility:
Tier 1:
- Fortified Gear: Same as Guardian and Protector. Fortified gear offers a sizable boost to defense gained from items. A useful and general buff.
- Slaughter: Increases the critical chance of combos. Not as general as the pure damage boost offered in Guardian’s Make it Count, but still a valid buff – 9% extra critical chance is huge. Especially if you’re built to use Form of the Tempest, this advantage can come in handy to keep Focus stacks up and running, and if combined with other trees such as Avenger, it can be used in surprisingly effective unorthodox ways.
- Ruthless: Same as the critical buff offered in Brawler and Avenger, this gives up to 10% critical severity.
- Elusive: Grants increased AoE damage resistance. The buff is actually quite sizable, meaning that it can make you very difficult to kill if you’re not the direct target of an enemy. All this said, this seems to be much more a technique for secondary combattants and DPS rather than a tank.
Tier 2:
- Reactive Strikes: Single-target attacks made against you have a chance to reflect some of the damage back as penetrating damage. This, in contrast to elusive, is very much a tanking utility, and can be used to help keep attention on you if you manage to grab the aggro. The damage is somewhat low, but it ignores most defense, ensuring that even heavily-armored bosses and targets are sustaining damage.
- Tenacious: Taking damage will raise your offense score temporarily. Given the nature of this tree, you can easily gain all the offense you need through other means, which hampers the usefulness of this specialization a bit. That said, it’s extremely easy to stack and activate.
- Upper hand: Increases melee damage dealt to targets affected by common melee debuffs. Testing indicates that, as of August 25 2018, Upper Hand does not produce noticeable differences in DPS output, pointing to the possibility that the spec might very well be broken.
- The Best Defense: Provides a boost to your offense score based on your defense score, based on your equipment. Once again, this is a fairly solid boost to your offense stat if you have the gear for it, and focus more heavily on defense gear (opposed to dodge).
Mastery: Combo hits now do 10% more damage. In addition, landing combos grants stacks of grit, which increases damage resistance and stacks up to 3 times. If you’re planning to focus your attack lineup on combos, this is definitely the way to go, as it also applies sizable defensive benefits alongside a massive damage boost.
Warden is a bit more interesting than Guardian, simply because many of the combos can be used in such a way to generate more consistent damage than blasts, as well as the more general use of its mastery. Warden can also utilize the increased crit it can get on its melee attacks to set off other spec effects.
Vindicator

Spec Tree Overview:
Offense:
Defense:
Support:
Versatility:
Tier 1:
- Aggressive Stance: Increases your defense score by a portion of your offense from gear. Unlike the best defense, Aggressive Stance only offers maximum 20% offense converted into defense. If you place focus on increasing your offense stat, it becomes a fairly good source of defense on its own, allowing for ample space for dodge-stat gear.
- Merciless: An upgrade to Ruthless, Merciless offers up to maximum 15% critical severity. Perhaps one of the main reasons you’d take Vindicator is for this large severity buff, among other things. This said, because of the defensive nature of many of the other specs in this tree, you’re very likely to take all three of the ranks in this spec – or else you just have a variant of Ruthless under your belt.
- Initiative: Energy builder hits now reduce the damage resistance of your target. Useful if you either need to resort to energy builder usage, or have another spec that activates off of energy builder hits. The defense debuff on this ability is honestly very low compared to what other trees have to offer.
- The Rush of Battle: Killing an enemy restores health to you over time. When ranked up, this percentage can get really sizable. Problem is that you need to be the player who scores the killing blow, meaning that it loses some value when fighting on a team with other high-damage characters. To add to this, this technique is entirely useless against most bosses, with the only exception being the few ones that summon adds in mid-fight, and even then, this effect will not stack upon netting multiple kills.
Tier 2:
- Focused Strikes: Single-target attacks now have increased critical hit chance. Highly recommended for melee fighters. Because these chances are tied to specific attack types, they will not show up underneath the character sheet’s critical chance, instead piling on as a pure percentage on top. In a way, this means that the critical hit chance featured here ignores diminishing returns, allowing for extremely high critical chances to occur.
- Modified Gear: Drastically increases the amount of offense yielded from items. Natural pairing with Aggressive Stance. The only problem is that the base benefits of Offense are rather subtle, meaning Modified Gear on its own is not that useful.
- Offensive Expertise: Identical to what’s featured in Brawler and Avenger, this reduces the recharge times of active offense abilities.
- Mass Destruction: AoE attacks now have increased critical chance. A great choice for ranged nukers. What usually ends up happening is that a player will take a varying number of ranks in Mass Destruction and Focused Strikes to get a generalized critical hit buff.
Mastery: Strength now offers a ranged damage buff of around 1/3rd normal effectiveness, while Ego offers a melee damage buff of the same rate. If you’ve got both Strength and Ego as superstats, this could be a very powerful option to take. However, not many builds really permit statting or power choices that would warrant this mastery.
Vindicator is, like Guardian and Warden, a very popular choice. It’s also the most numerous tree picked out for many offense ATs, and for good reason, because it contains a lot of those ATs’ main sources of survivability, via Rush of Battle and Aggressive Stance, among other specs. That aside, the tree mostly speaks for itself – even if an actual melee/ranged DPS build is a bit difficult to set up, the tree remains globally useful to a lot of character types.
Overseer

Spec Tree Overview
Offense:
Defense:
Support:
Versatility:
Tier 1
- Administer: Increases the strength of blasts, heals, and shields drastically. Getting up to 9% extra strength on these techniques, this provides more attack power on blasts than provided by Make it Count under the Guardian tree, and a comparable buff to healing powers as provided by Sentinel’s Caregiver (without the other player clause, either!) This provides for very powerful offense and defense if you choose the right abilities.
- Ruthless: Standard 10% critical severity buff. Keep in mind, these severity buffs do indeed alter healing severity.
- Overseer Aura: Provides you and your allies with a slight buff to ranged damage. This, along with Arbiter Aura, are my least favorite auras, as there’s a good chance a portion of your teammates will not be able to utilize the bonus at all. This provides a good, minor damage boost to ones self, but there are better choices in the tree for this, to be sure.
- Impact: Critical strikes temporarily reduce enemy damage output for 5 seconds. Good defensive support maneuver, especially when using AoEs.
Tier 2
- Honor: Healing or shielding an ally will grant you a stacking buff that boosts the strength of your next attack. The damage buff offered from this is quite sizable (up to 30% extra if you fully stack), but requires some micromanagement to maximize the damage output of it. Unfortunately, this effect can only be activated by using explicitly targeted heals, so no heal aura damage boosts!
- Trapped: Holding, rooting, or snaring an enemy will cause the target to take extra damage for roughly 8 seconds. Since this debuff isn’t dependent on hold duration, you can apply the debuff simply by attempting a control move
- Conservation: Reduces the energy cost of support techniques and single-target attacks drastically. Perfect for low-energy hybrid support characters, though sort of a shame it doesn’t extend to AoE moves.
- Enhanced Gear: Provides a sizable boost to offense yield from items. Can be combined with Vindicator’s Aggressive Stance to provide a good buff to defense, but also somewhat restricts the use of critical statted offense items.
Mastery: Provides healing and damage bonuses to targets below 20% health. This is a neat maneuver that provides you with a way to both quickly finish off weakened enemies and provide strong healing in a pinch.
Thanks to the utility of Trapped, this is about the closest you’ll come to an offense-based debuff/control tree. That all said, Overseer tends to be one of the rarer trees to pick for freeforms, simply because its benefits are harder to measure than most. For blast-based fighters and attack controllers, though, it can have some surprising utility.
Arbiter

Spec Tree Overview
Offense:
Defense:
Support:
Versatility:
Tier 1
- Enforcer: Provides extra strength to combos and support abilities. For whatever reason, the buffs provided here are somehow less powerful than those from Overseer’s Administer, only capping out at 6%. That said, this is the only way to boost combo damage prior to Warden Mastery, and it isn’t too much of an issue, considering most Combos do actually hold up to do decent damage.
- Ruthless: As per any other spec tree with a DPS aspect in it, Ruthless is featured once again, granting up to 10% extra severity. If you haven’t gotten a severity buff from your superstat tree, get it here.
- Arbiter Aura: Much like Overseer Aura, Arbiter Aura is odd in that it only boosts Melee damage. A good portion of your team might not receive any benefit at all when under the effects of this, making it sort of a less than optimal choice.
- Rend: Critical strikes will now slightly reduce the damage resistance of hit targets. This allows for both you and your allies to make a good offensive foray upon the enemy. Note that there is no dependence here upon the triggering attack being melee, so you could use a ranged cone or PBAoE to apply this effect.
Tier 2
- Honor: Identical to Overseer, Honor causes you to get up to 15-30% extra damage for healing your allies. If the principles hold true here, this also means you could theoretically stack Honor from both Overseer and Arbiter to get up to 60% bonus damage for healing allies 3 times. Now how’s that for DPS?!
- Concussion: Stunning enemies (hold with unbreakable strength, but short duration) will reduce target’s attack power for 8 seconds. Much like before, this isn’t dependent upon hold length at all, meaning even an attempt to stun an enemy will trigger the effect.
- Preservation: Reduces the cost of support techniques and single-target melee attacks. Useful if running in hybrid role and lacking in energy support.
- Enhanced Gear: Provides a sizable boost to offense yielded from items. Much like before, this can be combined with Vindicator’s Aggressive Stance to provide a decent defense buff, but also somewhat restricts the user from focusing purely on critical hit offense items.
Mastery: Combo finishers heal you for 1% of your health, and heal nearby allies for 3x that amount. Becomes much more useful if you use a fast-hitting combo (I tried it on cleave – that was a mistake!), but ultimately is quite an underwhelming effect. 1% health every 3 melee hits is not likely to cut it for support. Keep in mind that it’s based on 1% of your max health, so it’s actually a heal that scales with CON, not PRE.
Arbiter’s the oddest tree, with a mastery that’s extremely hard to use effectively, as well as basically being nonexistent among ATs. That all said, with a bit of close examination of the tree, it can be used to some degree by crit-based melee support (without PRE, of all things), possibly making Martial Arts or Laser Sword its best match.
Sentry

Spec Tree Overview
Offense:
Defense:
Support:
Versatility:
Tier 1
- Fortified Gear: From the protector tree, the classic defense booster is featured here, and is still quite useful in general.
- Twist Fate: Energy builder hits apply stacks of Twist Fate, which boost your critical chance and dodge chance slightly, up to 3 times. Because a majority of the mechanics in this spec tree work off of criticals, this makes Twist Fate quite valuable, though there are certainly better choices for this tier (especially if you don’t use your EB that often).
- Precise: Boosts the strength of heals and single-target attacks by up to 9%. This is quite powerful, actually, and is roughly the equivalent of having an extra stack of a toggle form on yourself, making single-target big-hitters like Haymaker and Lightning Arc even stronger. Perfect for both survivability and taking boss targets down.
- Sentry Aura: This aura provides allies with a slight damage resistance buff. This one, in contrast to Overseer and Arbiter, is actually really useful – everyone can use extra defense, after all!
Tier 2
- Fortify: Every critical effect you get (be it heal or attack) will increase your heal strength and damage resistance by a small amount up to 3 times. A great damage resistance buffer, and (if combined with self-heals) a surprisingly good way to ensure survivability.
- Stalling Tactics: Boosts stun, sleep, and snare length by up to 15%. Unlikely to be used, considering the rest of the tree’s affinity for fighting single-targets (I.E. bosses, which are immune to the above effects). However, if making a melee crowd-control character (which heavily features stun use), this can provide.
- Persevere: Single-target attacks made against you heal you and nearby allies for a portion of the damage. If I’m reading right, there doesn’t seem to be a specific internal cooldown to this, so being pelted by a rapid-hitting maintain from an enemy could mean that nearby allies get a constant stream of healing. This said, Persevere essentially turns a normal tank into a beacon of healing for surrounding allies, as it has no reliance on Presence to scale its healing value.
- Reinforce: Critical healing an ally grants them extra damage resistance, whereas landing a critical on an enemy grants you extra damage resistance. If used on an ability that both damages an enemy and heals allies (life drain + vampiric sympathy, for example), you can apply this effect to your team very quickly.
Mastery: When an attack reduces you to below 50% health, you stun the attacker for 3 seconds (even if they cannot normally be stunned), and you heal nearby allies for 10% of your maximum health. This occurs only once every 60 seconds, making it a light “11th hour” ability. Very beneficial to your team, but you still will need to rely upon your personal abilities to get yourself back into fighting shape.
Like Arbiter, Sentry is a tree that’s entirely unused by ATs, leaving freeforms to use it to their own ends. Much like Arbiter, it’s a healing/support set that doesn’t require explicit use of Presence or other ‘healy’ tactics to get the most of it, and thanks to the features of precise and twist fate, it can be used to a surprsingly good effect when it comes to damage and combat, though not enough to make up entirely for the loss of the sheer buff of something like Warden or Vindicator.
Epilogue
Hopefully that should uncover some of the nuances and techniques related to spec trees. Having myself not used all the possible tree combinations out there, I encourage you to use the information presented in the guide to see what things work, and discover what unusual synergies you can.
At the end of the day, it’s not the powers alone that make a good character, nor is it the spec trees themselves, but how the two interact to create a coherent and effective duo that can get its job done!