A Long War Rebalance Beginner's Guide
Introduction
Welcome to hell!
The name Long War "Rebalance" is a huge misnomer at this point, given that several aspects of the game are completely reworked from their Long War 1.0 counterparts, and it can be overwhelming to new players. This is a guide that is intended to alleviate those issues where possible.
You will lose missions. You will lose most of the Council. You will lose many soldiers. However, the game is designed to be winnable even with massive losses, so always keep pushing on til the bitter end.
Most of this guide assumes you have a little bit of experience with vanilla XCOM and/or LW1.0, but even if you don't the information should be mostly relevant unless I'm directly referencing one of those.
Note, this isn't going to cover *everything* in LWR, but I'm going to do an overall rundown of how the campaign progresses and how to use some new features. The guide is mostly written from the perspective of a Brutal/Impossible player, but the advice tends to trickle down to the lower difficulties (with the possibility of being able to get away with some "suboptimal" strats that are called out due to the decreased pressure, and some missions showing up earlier or later than expected).
Also, make sure to download the Colored Aliens addon! You just unzip the folder into the Xcom/XEW/XComGame/CookedPCConsole folder and bam, you're good. It's not critical for the mod to function, but it makes the leaders pretty, and we like pretty leaders.
If you ever need more help, the LWR Discord at https://discord.gg/xUwtTKqQKh is a great place to go and it's pretty likely that I'll be the one directly offering said help :)
There's also plenty of LWR streamers out there playing the game at a high level (or not so high level), so take a peep at them too!
The name Long War "Rebalance" is a huge misnomer at this point, given that several aspects of the game are completely reworked from their Long War 1.0 counterparts, and it can be overwhelming to new players. This is a guide that is intended to alleviate those issues where possible.
You will lose missions. You will lose most of the Council. You will lose many soldiers. However, the game is designed to be winnable even with massive losses, so always keep pushing on til the bitter end.
Most of this guide assumes you have a little bit of experience with vanilla XCOM and/or LW1.0, but even if you don't the information should be mostly relevant unless I'm directly referencing one of those.
Note, this isn't going to cover *everything* in LWR, but I'm going to do an overall rundown of how the campaign progresses and how to use some new features. The guide is mostly written from the perspective of a Brutal/Impossible player, but the advice tends to trickle down to the lower difficulties (with the possibility of being able to get away with some "suboptimal" strats that are called out due to the decreased pressure, and some missions showing up earlier or later than expected).
Also, make sure to download the Colored Aliens addon! You just unzip the folder into the Xcom/XEW/XComGame/CookedPCConsole folder and bam, you're good. It's not critical for the mod to function, but it makes the leaders pretty, and we like pretty leaders.
If you ever need more help, the LWR Discord at https://discord.gg/xUwtTKqQKh is a great place to go and it's pretty likely that I'll be the one directly offering said help :)
There's also plenty of LWR streamers out there playing the game at a high level (or not so high level), so take a peep at them too!
What makes LWR different from LW1.0?
While there are too many differences to cover everything, here's a tl;dr on what to expect from LWR compared to LW1.0:
- Overwatch and Steady Weapon are reworked to be in-combat abilities rather than out-of-combat abilities. They're effective at fighting enemies in cover (with overwatch having Covering Fire by default) or that are hard to hit as they bypass several defensive benefits and have unique bonuses like staggering or applying Acid Tech at a 100% rate, but require enemies to be in line of sight to use at all and in the case of overwatch, will only work on enemies that were visible to the overwatcher. As a result, there's not much of a reason to creep through the map trying to get a perfect activation. You also get your own scamper move on any soldier that doesn't have AP when a pod activates, so revealing a pod mid turn isn't nearly as bad.
Overwatch shots from both XCOM and the aliens will only fire if the shot has at least a 30% chance to hit, so you can use this knowledge to avoid overwatch shots from enemies that don't have enough aim to hit you for one reason or another, and your own soldiers won't take shots that are awful (like a long range shotgun shot). When about to take an action, the alien will have a "!" indicator if this is the case. - Pods can chain activate each other; if an active alien sees an inactive alien, that inactive pod will become active. Usually pods activated this way will have debuffs based on how many aliens are already active, such as being out of ammo or entirely skipping a turn. As a result, tip-toeing around the map trying to get a perfect activation is even more discentivized, although it's still nice when you can manage it. Of course, several game mechanics are reworked to make firefights like this more reasonable, as you *will* be getting into firefights with this kind of activation system.
On the flip side, in the cases where you do manage to still isolate a pod, they're likely to be prepared on activation, giving them free overwatches or other defensive actions to make alpha-striking them more difficult. - Fatigue accumulation is based on how long the combat took and meld amounts decay based on how long you wait to collect them (and Abduction/UFO maps that don't have meld or have less meld than normal will have meld granted at the end of the mission if you were fast enough), so these are even more reasons to avoid playing slowly when it makes sense.
- Soldier progression is reworked, with most soldiers getting their strongest perks at LCPL and having a "complete" build by TSGT. There are also XTP OTS projects that auto-promote your soldiers to SPEC, LCPL, or SGT. As a result, soldier losses aren't nearly as punishing as you are always close to having a relevant soldier from the moment you first use them.
Promotions also do not grant stats own their own. Stats rarely change outside of equipment and perks in general, but each soldier does have a chance after each mission to naturally grow their stats, with each class having its own stat growth bias and low stats growing faster than already high ones. It's a fairly small effect overall, but it helps smooth out the power level of your soldiers as their weak stats will creep towards being average (or their average stats towards above average) with continued use. MSGTs have a multiplied stat growth chance and give some bonus EXP to the squad to compensate for no longer ranking up. - Weapon progression is reworked, with laser-type weapons being sorta like half upgrades over their ballistic-type counterparts. While they have more aim/crit (and mobility in the case of Pulse), they still deal the same base damage, and they also lose access to a lot of the fancy special ammos that ballistic and gauss can use (although lasers still have unique access to Reaper Rounds eventually). There's also different item and foundry upgrades for each weapon type: ballistic/gauss weapons get Alloy-Jacketed Rounds (that provide penetration) and Quenchguns (also providing penetration) while laser/pulse weapons get Enhanced Beam Optics (that provide aim/crit) and Beam Strengthening (that provides crit damage). Because of this and the special resistances that some aliens have to each type of weapon, you tend to have a split where ballistic/gauss are better against armored enemies while laser/pulse are better against unarmored ones. Plasma weapons are an exception and tend to be supreme in every way with their own special bonuses unique to each weapon type, but take much longer to actually research and build.
- The airgame (and strat layer in general) is vicious. You are not expected to control most of the world (most campaigns should not exceed covering 2 continents), and are in fact likely to lose almost everything by the end of the game. You only need a single country left to finish the fight, and while having more will help a little on the final mission, this is going to be a common outcome.
UFOs in general are harder to take down, especially armored ones, and you'll be sending entire squads up at a time rather than individual planes. Armored UFOs (the ones that "look like they're scanning for something") never crash when downed, while the unarmored ones always do. - Sell prices in the Grey Market fluctuate for anything that isn't the basic 4 resources (Weapon Fragments, Alien Alloys, Elerium, Meld). These prices can range from 66% to 133% of the normal price in intervals of ~17% and change each Council report. In general, avoid selling anything at a sub 100% rate and if you don't particularly need a cash influx, it can be worth holding onto stuff like damaged UFO components or alien weapons to get some free extra cash in the future.
Do note that the fluctuations round down, so if something costs $2 for instance, any decrease will result in a $1 sell price even though that's below the normal minimum of 66%, and it will never sell for $3. - Every few Alien Levels (depending on difficulty), an evolution will be added to the alien's evolution pool. Starting from AL4 onwards, some missions will have one of these evolutions added to them. The evolutions that are added to the pool are random but biased towards the tactics you've been using, and will be things such as adding DR vs explosives if you've been using a lot of explosives. You'll know in advance when an evolution is present on a mission, and you know what evolutions are in the pool, so be ready to adapt or die! When in doubt, the retraining button exists if you need to tweak your barracks to have an appropriate counter.
- Incursion Strength is a number that will go up or down depending on how well you're doing (or can be reduced with combat patrols), and will either increase or decrease the number of aliens that show up on each mission.
- The campaign effectively has a hard time limit as hitting Alien Level 15 (more info about that in the section below) results in massive stat gains that are nearly impossible to overcome. As a result, you don't want to sit around too long farming resources in the endgame lest you get farmed by the aliens immediately after.
What difficulty should I play?
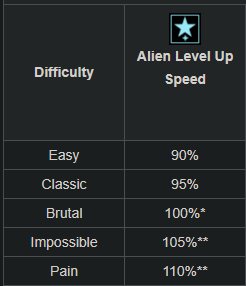
The difficulty settings in LWR are significantly different from how LW1.0 or vanilla treat them, so here would be my recommendations for what to choose:
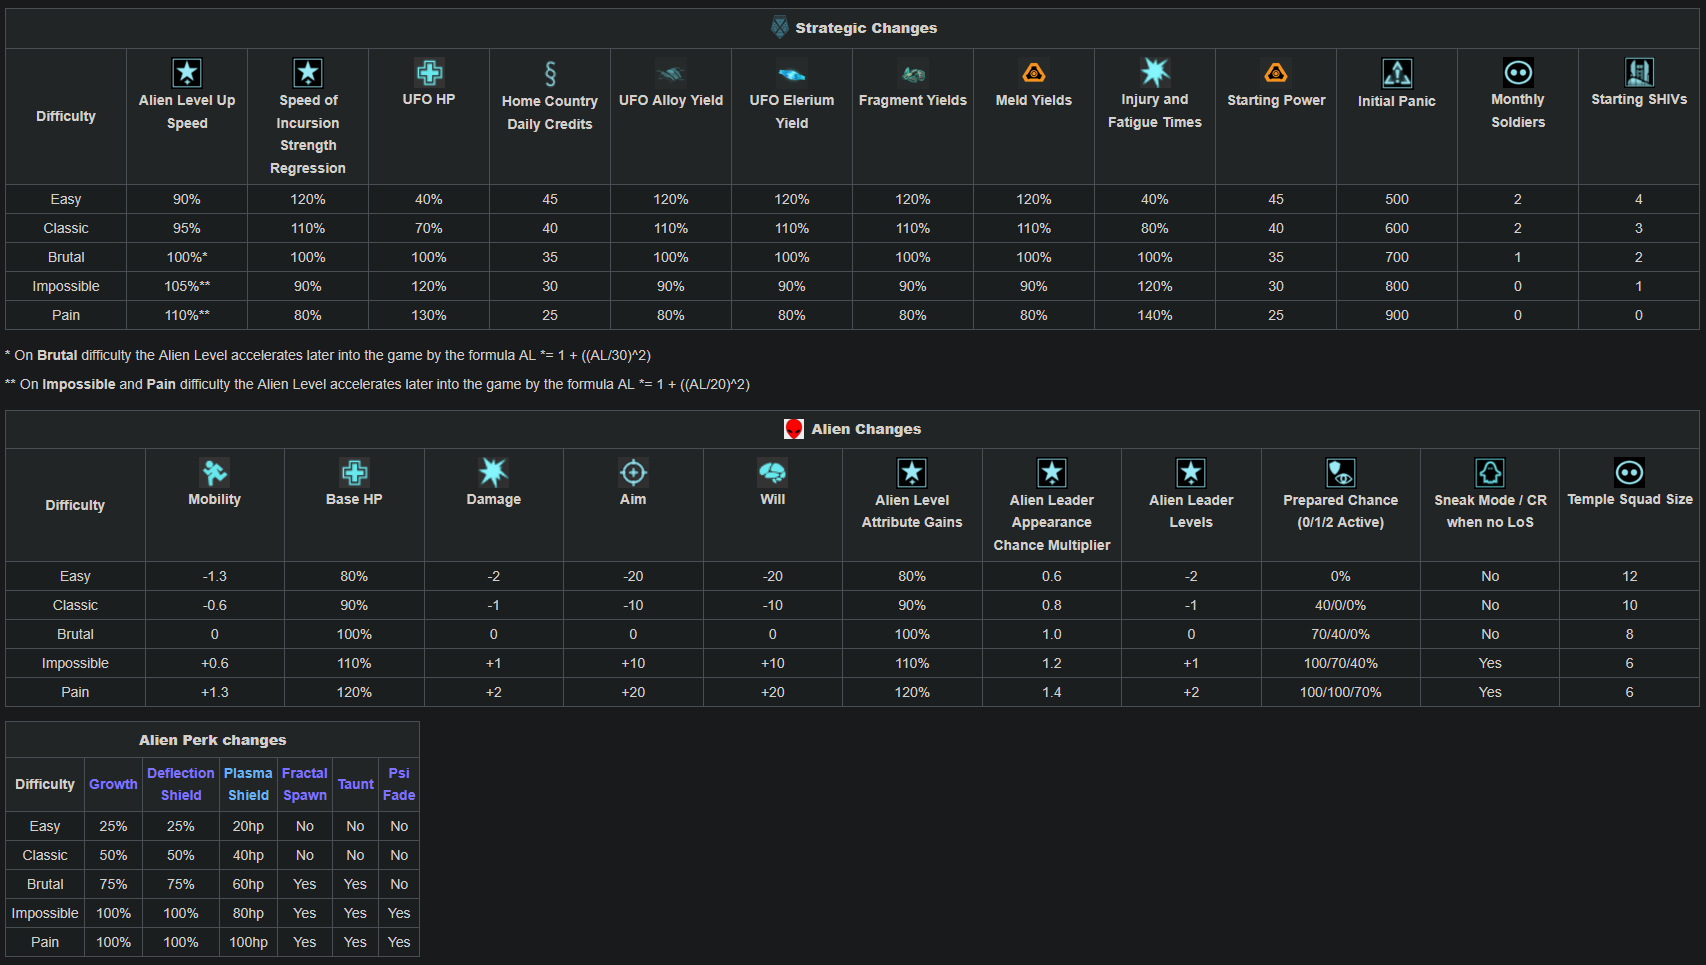
Beyond the difficulty options themselves, there's also Second Wave options that can help tune the difficulty:
Other options exist, but many of them I'd say are too game-warping to recommend to a new player that wants to learn how the game works, although some might be fine with ini tweaks (like Elite XCOM/Friendly Skies being dropped down to 5-10 or so).
It's worth noting that LWR has a very different difficulty curve than vanilla or LW1.0; the game starts off quite tame, and eventually gets much harder. Don't let an easy start to your campaign lead to a false sense of security!
- Have you never played XCOM before? Pick Easy.
- Have you played XCOM to completion or just think you're a solid strategy gamer in general? Pick Classic.
- Have you played XCOM to completion on a high difficulty or LW1.0 to completion on a high difficulty? Pick Brutal.
- Don't pick Impossible, or do if you want to suffer. I'd only possibly recommend it if you've beaten LW1.0 on Impossible with one of those difficulty increase mods out there like Beyond Impossible.
- Pain difficulty is a secret 5th option. I don't recommend this one even for LWR veterans, let alone a new player, but you can access it by hitting down while having Impossible selected...
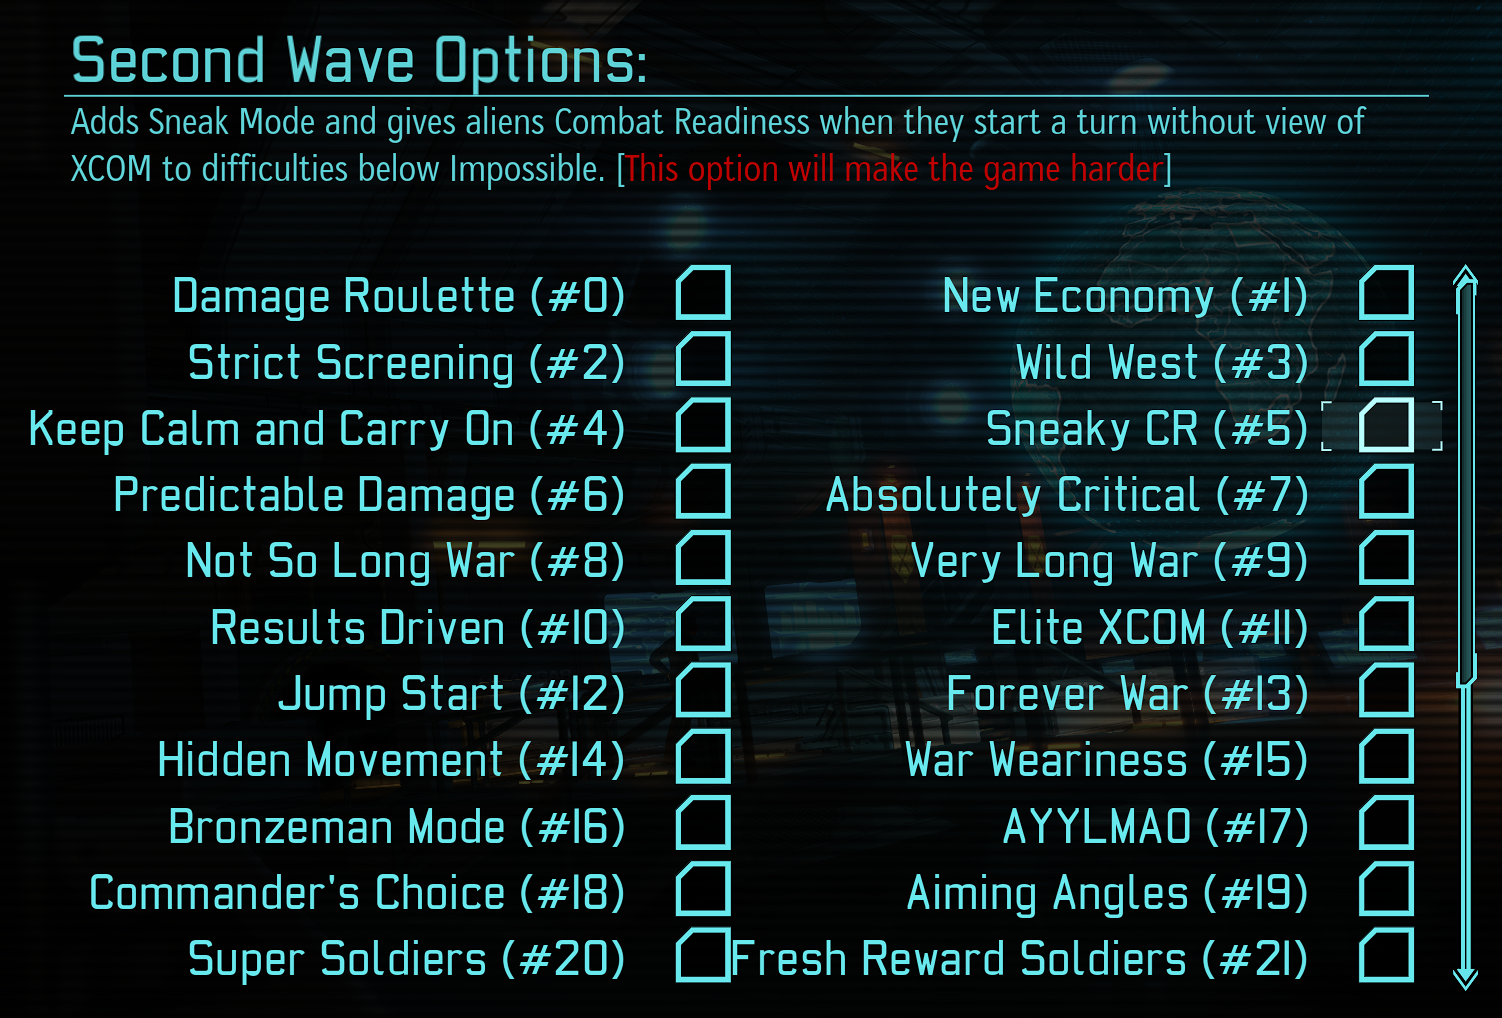
Beyond the difficulty options themselves, there's also Second Wave options that can help tune the difficulty:
- Need some more help in the strat layer specifically? Difficulty Drop will give you a little more resources and time to play with, and/or Keep Calm and Carry On will massively help with panic.
- Need some more help in the tactical layer specifically? Gentle Aliens will reduce the initial stats of aliens by a difficulty, and/or Commander's Choice can let you pick more of the soldiers you specifically want/need.
- Need a little difficulty bump in the strat layer specifically? War Weariness and/or Results Driven will mess with your funding in a way that typically becomes more punishing as the game goes on.
- Need a little difficulty bump in the tactical layer specifically? Sneaky CR brings some Impossible-only mechanics down to lower difficulties while keeping their current difficulty stats, and/or Blitzkrieg adds time pressure to your turns (use with caution if you don't know what an alien does!).
Other options exist, but many of them I'd say are too game-warping to recommend to a new player that wants to learn how the game works, although some might be fine with ini tweaks (like Elite XCOM/Friendly Skies being dropped down to 5-10 or so).
It's worth noting that LWR has a very different difficulty curve than vanilla or LW1.0; the game starts off quite tame, and eventually gets much harder. Don't let an easy start to your campaign lead to a false sense of security!
What start bonus should I choose?
Long War Rebalance significantly overhauls most of the start bonuses you'd expect to see from LW1.0 as well as adds new ones, and several old ones that are technically unchanged are now relatively different due to mechanics changes (e.g. gaining extra HP matters a lot more when your MEC augmentations depend on HP).
I'm not going to go over the start bonuses here as there's too many to briefly talk about, but I will go over some personal recommendations for new players. These are the starts that won't affect learning the game significantly while also providing a decent power increase, often through minimizing mistakes:
I'm not going to go over the start bonuses here as there's too many to briefly talk about, but I will go over some personal recommendations for new players. These are the starts that won't affect learning the game significantly while also providing a decent power increase, often through minimizing mistakes:
- My number one start I recommend to new players is Jungle Scouts; it provides a small mobility boost (that helps but doesn't render mobility increases redundant), a temporary item slot buff, and most importantly reduces injury times by 80%. This makes mistakes far less punishing in combat while still giving you a slap that you'll learn to avoid where possible.
- For the Sake of Glory does a similar thing, but it reduces both injury and fatigue time letting you do more with the soldiers you have. This can make you get used to having a smaller barracks than you'll actually need for most campaigns, but again makes using your soldiers a more lenient process. As a bonus you get to have fun with the quirks more too!
- Per Ardua Ad Astra is a small general stat boost and provides more stats as the game goes on and gets significantly harder. None of the stats provided will warp the game, but they'll definitely help ease you into things.
- Foreign Legion simply gives you a big chunk of extra starting soldiers as well as some extra money and XP throughout the game. If you're worried about the early game, this surplus of soldiers will keep you afloat, and you'll always be able to hire more competent soldiers with the extra money and XP you're getting.
- Cadre is similar to the above but instead of a lot of soldiers it gives you a few stronger soldiers that can also go on more missions. You won't benefit from the extra income, but you do get more XP to play with.
Combat basics (i.e. how to beat Gatecrasher)
Oh god, it's time for the first mission. This mission isn't a particularly difficult one (roughly equal to a moderate abduction or light abduction depending on difficulty), but it will test your fundamentals. Here's some critical tips on combat in LWR:
- Cover is key for both you and the aliens. Not only does cover provide a significant defense boost (lowering chances to hit), but it also provides an equal Damage Reduction boost that can't be bypassed in any way. DR multiplies the damage a unit takes, so shooting/being shot through light cover always reduces damage by 30%, and heavy cover 50%! This stacks with any innate DR bonuses a unit may have, making some enemies incredibly bulky in cover (such as the Outsider that may be present on higher difficulties). Cover makes just about any unit capable of taking some damage, on both teams.
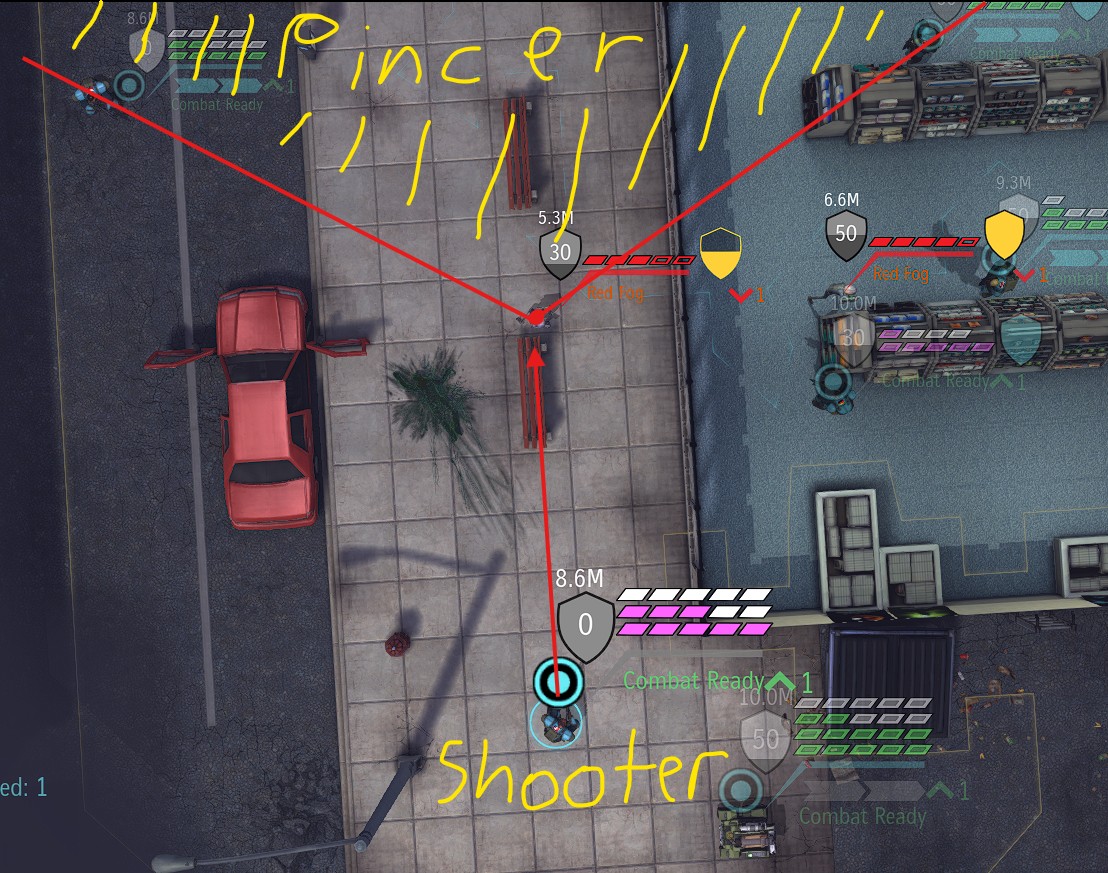
You might expect that this makes cover destruction stronger, and you would be right, so most sources of cover destruction have been significantly nerfed for both aliens and XCOM. Cover destruction is still possible as some cover is really squishy (press "I" to see the cover health of what you're looking at, grenades deal 35 at point blank), but you should rely much more on flanks or alternative ways of shooting like Overwatch or Steady Weapon where possible. - Pincer attacks exist, providing bonuses for shots that flank the target relative to where the last shot came from (regardless of if that previous shot hit or if the follow-up shot is an "actual" flank/against a unit that takes cover at all). Specifically, you have 120 degrees of wiggle room behind where the last shot came from to trigger a pincer. Pincer attacks are very powerful if you have to chance to use them, often nearly guaranteeing the follow-up shot, and setting up a pincer is a good way to use a soldier's turn that would otherwise not accomplish a whole lot.
Here's what the pincer angle looks like (any valid pincer attack is marked with a "P" on the sightline indicator when you're moving a soldier if you need to check):
In the rare situation that you can take three pincer shots at the same biological unit on the same turn and it's still alive afterwards, that unit will get disoriented. Most aliens won't survive that barrage, but tankier leaders or the Distortion aliens might just survive, or you might be in a situation where you're taking pincer shots through cover on both sides and thus don't do enough damage. - Red Fog is a core mechanic, meaning that any unit that loses base HP (not the white armor HP) will receive a significant stat debuff (and in the case of XCOM, be injured). This affects nearly all combat stats, up to a maximum of -50%, so weakened enemies don't necessarily have to be finished off right away. Tactically using red fog as a fancy form of concussion/smoke is a good move, and tactically using your soldiers' armor HP to take hits for more vulnerable allies is wise.
- Speaking of armor HP, any unit that has base DR (DR that doesn't come from perks or cover) can have that DR chipped away when losing armor HP. For nerds, it's a logarithmic reduction, but tl;dr if you lose all of your armor HP you'll lose all of your base DR and you lose it faster as the armor HP gets lower. This is critical to know for some enemies, as without removing base DR, they'll be nearly impervious to damage. For example, Outsiders have a tiny bit of armor HP but a lot of base DR, so they'll probably shrug off the first hit and then be vulnerable, whereas bigger robots like Sectopods are mostly armor HP and will need a lot of work to chip them down (and probably specialized tools like Acid).
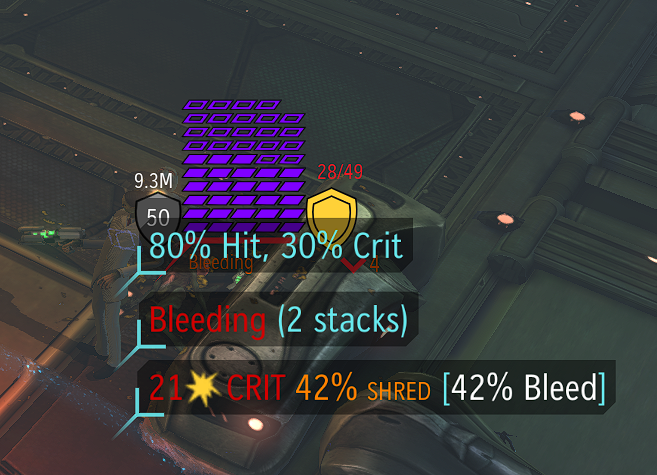
- Critical hits will cause bleeding on biological targets. The chance is based on the percent of health dealt in damage, and is halved if the unit had armor HP when they were shot. Bleeding can stack as well from multiple different hits. Bleeding is inevitably lethal for any unit, as it will damage them at the end of every turn if they take any action besides Combat Readiness or Hunker Down. On the bright side, it can be removed by any source of active healing like a medkit or restorative mist.
Bleeding is much more common on aliens than XCOM, and you can use it to finish off enemies without actually taking an action, although sometimes you still want to finish them off the hard way to prevent them from taking that last action or two. - Enemy overwatch is going to be a persistent threat throughout the entire campaign, with it being the default action of enemies that don't know what to do/aren't satisfied with their shots and an automatic action for every drop-in.
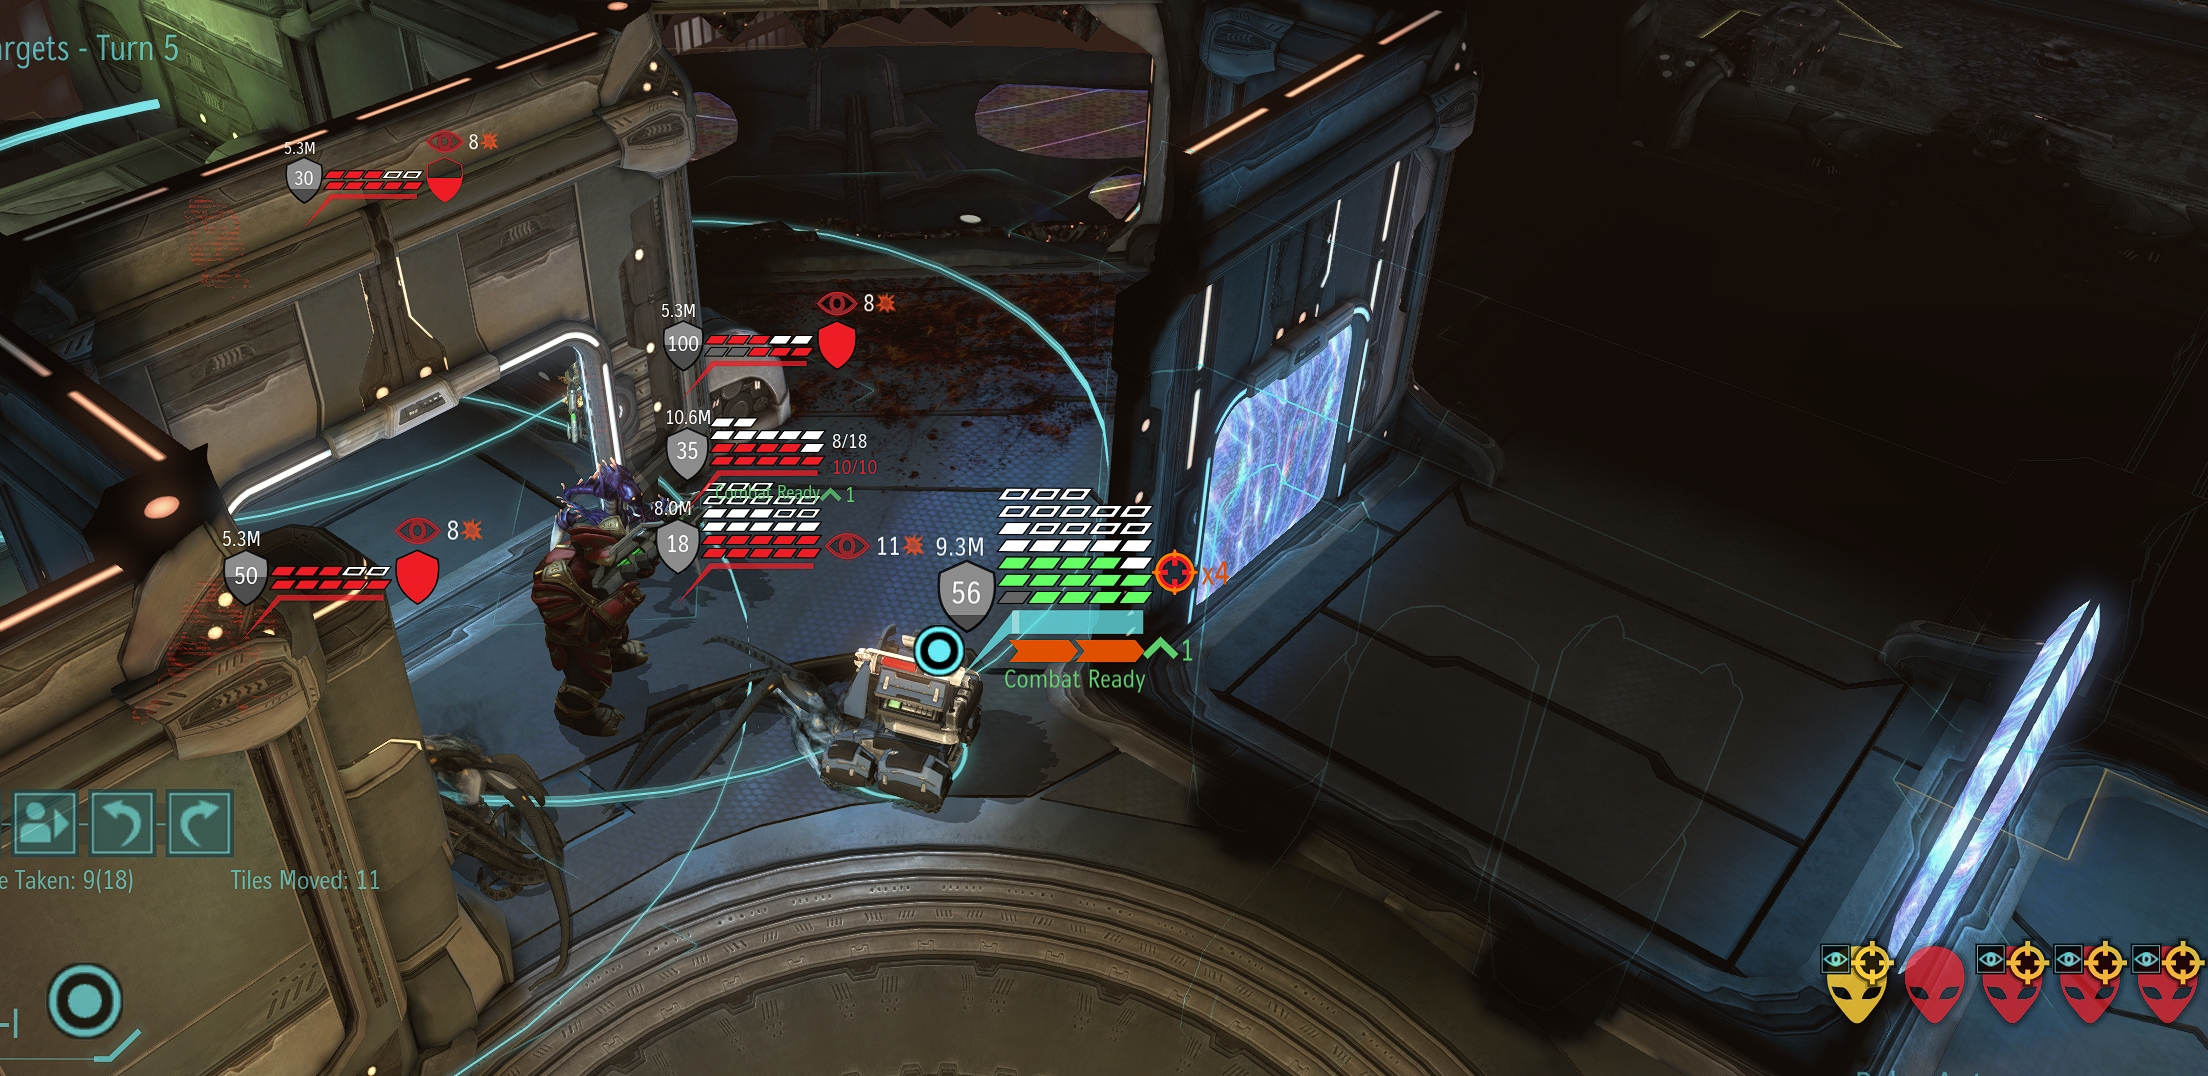
Remember that overwatch is only active on units that were in line of sight when they went on overwatch, so you can move someone in from out of their line of sight to take shots and kill them or damage them with a chance to break the overwatch if base HP was affected. In a pinch you can run an overwatch with a dash (which provides a defense boost) or take the hit with the (reduced) safety of cover or DR on a unit that can take the hit such as a SHIV. Steadied weapons ignore reaction fire entirely, so steadying is a good way to combat a stalemate. Explosives (and concussions) disable overwatch on anyone damaged by them, so someone that was out of line of sight can use grenades as a support tool. Finally, smoke doesn't trigger reaction fire when thrown and also makes anyone within immune to reaction fire from overwatch and any other source.
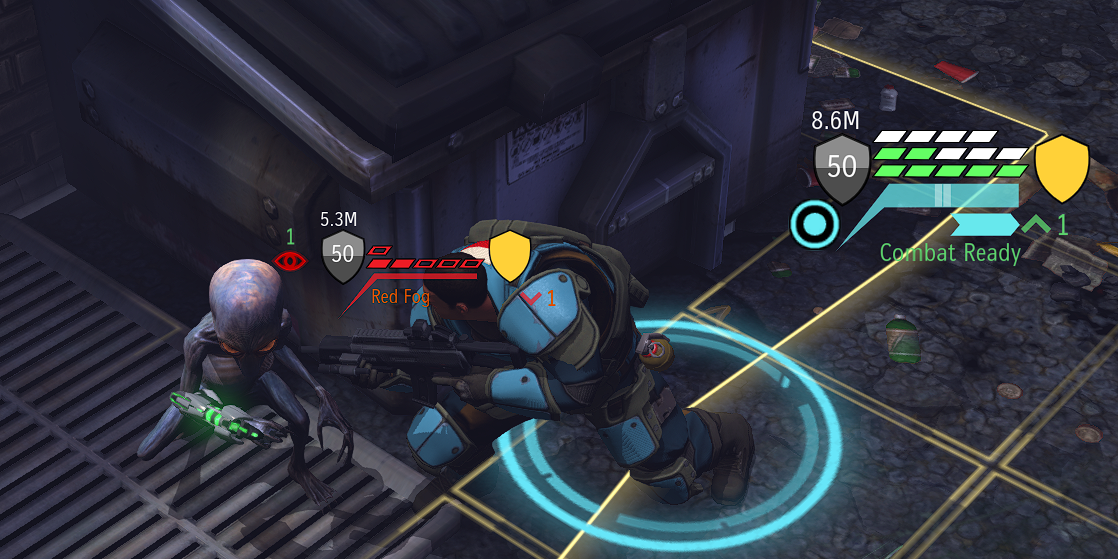
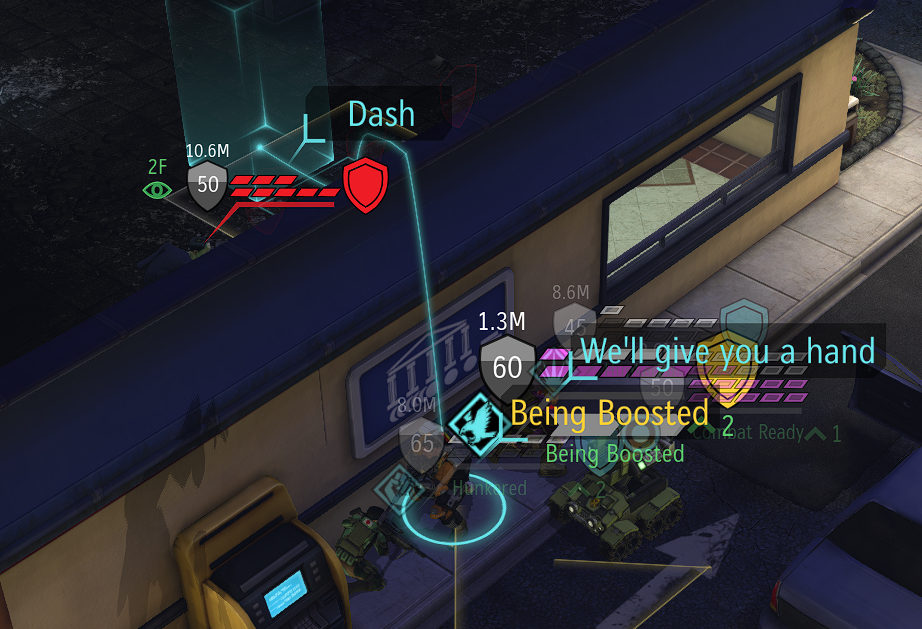
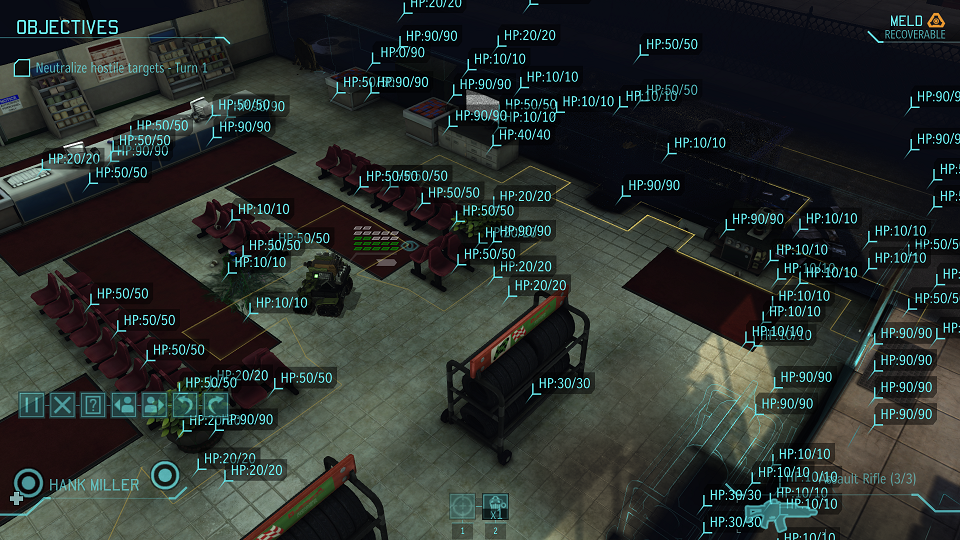
There are three indicators for enemy overwatches on your units: icons on the alien target heads (one for the enemy overwatching in general, and one for the enemy overwatching your selected unit), orange AP pips, and a crosshair above their cover icon (or beside their health if they aren't in cover) that counts how many enemies are targeting them with overwatch. CCS also counts as overwatch if they're within the circle. Here's an image that shows all of these in action: - Height advantage is a more granular bonus. Instead of having a strict threshold where you're considered at a height advantage, you get an aim/defense bonus based on the height of the other unit, +5 per tile above, capped at 30. As a result, it's not good enough to "just" be at a height advantage, you want to be at a higher height advantage where possible. The only exception is flying units, which always receive the max defense bonus (but still have variable aim).
- Hit chances for shots have a lower soft cap of 20%. This means that shots require more and more aim penalties to go below 20%, with a stronger soft cap at 10%. For the most part, this means that aliens are going to be hitting you a lot more than usual as you can't simply get them to a 1% hit chance and call it a day (and you are intended to be able to survive these shots with armor/cover).
XCOM does benefit from this as well, but if you're in a situation where you're taking a sub 20% shot with the intent to hit, I pity you.
AI tendencies
Knowing how mechanics work is one thing, but knowing how the AI is going to use those mechanics is another. This obviously won't go over everything and is much more nebulous as a whole given how many dice rolls are involved, but here's a list of common AI behaviors to keep in mind (some of which will show up again later on in the guide where relevant):
- Aliens put a high target priority on whoever they have the highest hit chance against, anyone that is flanking them or an ally, anyone that they have an overkill killshot against (damage being roughly triple what is needed for a kill), and anyone that is suppressing them or an ally. If you need someone to get shot/absolutely not get shot, try using some or all of these to divert their attention.
- If aliens have a really good shot (roughly 70% or above), they'll often just stay where they are and take that shot even if they could improve that shot or get themselves unflanked. This is why you'll often get shot in the face if you fail to kill someone with a point-blank flank.
- The aliens know where your entire squad is if they see any one unit, so don't think someone hiding in a corner is safe just because they've been creeping around.
- The aliens won't often play around the perks they have (e.g. not moving close to abuse Close Encounters), but they do have knowledge of some perks such as Shadowstep letting them not care as much about overwatch. In either case, if they accidentally trigger some effect, they will use it.
- Aliens *really* hate being flanked (some more than others, like Mutons caring less), and will almost never directly move to a tile that is flanked by multiple soldiers from a position that they aren't flanked in. They're fine moving into a mutual flank though, where the only unit flanking them is the one they're shooting at, so be careful around corners. Also, notably, point blank shots don't count as being flanked despite acting very similarly, and if they take cover on a SHIV, that SHIV isn't considered flanking them because "cover" is between them and the SHIV (despite that cover being the SHIV itself).
- Overwatch will often scare ranged aliens into not moving, so if there's a dangerous flank opportunity, a safety overwatch can prevent it. This is more likely to work with multiple overwatchers and less likely to work with tankier aliens.
- Melee enemies perform a delta split on reveal, but will tend to naturally clump themselves back up over time.
- Flying enemies are particularly flank-happy since they're never truly flanked and can fly directly on top of a soldier.
- Aliens have a chance to flee that grows with their allies dying and their health going down, and if they do, they'll simply leg it with dashes to the edge of the map or until they regroup with other aliens.
Niche combat tactics
Here's a list of some more niche mechanics that will come in handy:
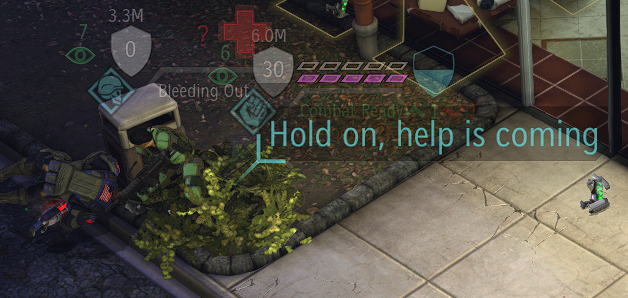
- If a soldier is bleeding out and you don't have a medkit, you can use Combat Readiness while in their radius to help them out. If the bleeding out soldier has a medkit, you will borrow it to stabilize them. Otherwise, you'll simply extend their bleedout timer by a turn. Bleeding out soldiers are automatically saved if the mission succeeds with them alive (barring missions where you evac and still succeed), so this is a high opportunity cost way to keep them alive if you can afford to win while being 2 soldiers down!
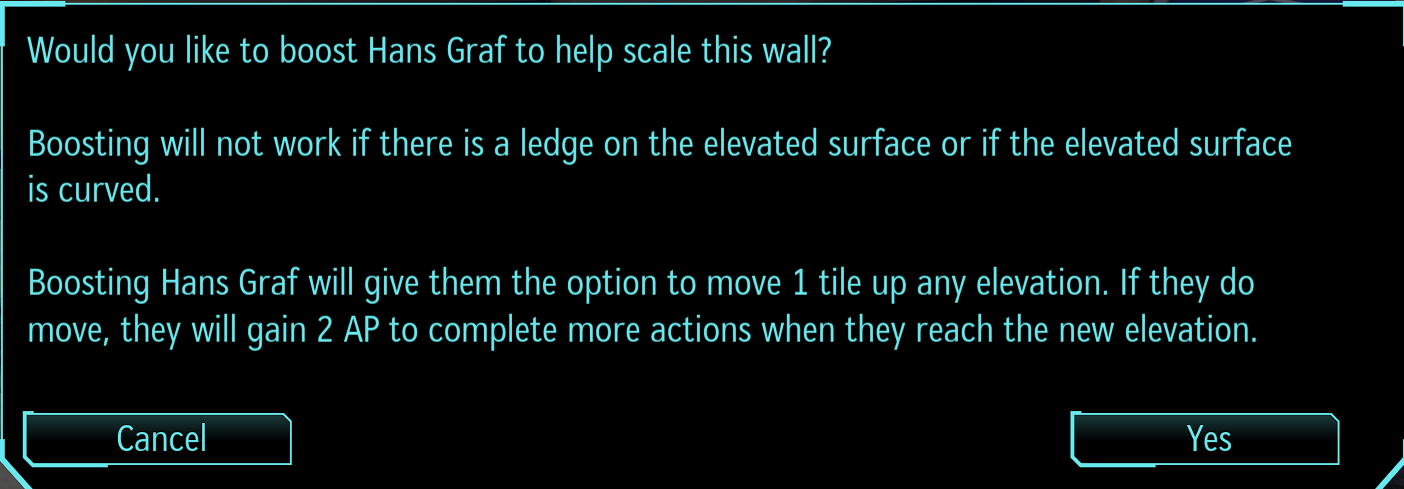
- Need to get to high ground for meld or to blast an annoying enemy? Boosting might be able to help! If you put 3 soldiers up against a wall and hunker the two units on the side while the middle unit still has AP remaining, you can boost that middle soldier up onto the high ground, letting them move a short distance while being refunded their AP.
This very rarely has mid-combat applications, but there are some niche uses since it sets their AP to 2, such as letting a Sniper Rifle fire after moving, giving a soldier 1 extra AP's worth of movement, or doing the aforementioned blasting of an annoying alien that's on its own. - Your soldiers have a chance to gain an automatic Combat Readiness buff based on how many enemies they see, showing a "Heat of Battle" popup when successful. Those adrenaline-fueled firefights have their benefits!
- Speaking of adrenaline, are your soldiers getting killed/critically wounded? That'll make the adrenaline really start pumping, and give your soldiers random Enrage/Berserk procs to even the odds!
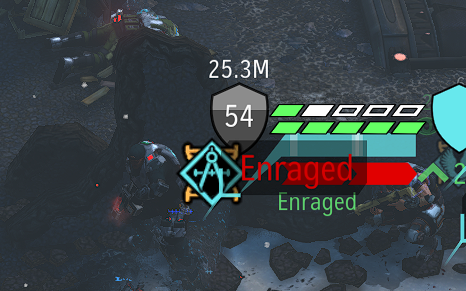
Enrage is a powerful buff that doubles several important combat stats (mobility, damage, throw range) while also giving them 1-AP reloads and making them immune to reaction fire. You can use this buff to go delete an alien or two of your choice and maybe keep the squad alive.
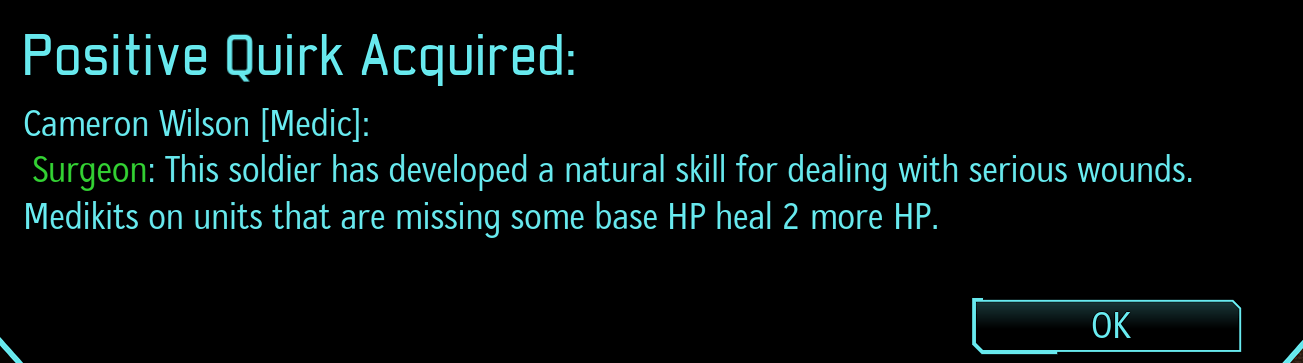
If the situation is even more dire, that Enrage might instead become a Berserk, which results in the soldier Enraging, reloading, moving up to an alien, and shooting, before being refunded all of their AP. This typically means an enemy dies and you're in a position to kill another afterwards, so go crazy! - Speaking of dead soldiers, soldiers may gain quirks after missions. These come in 4 varieties: positive, negative, death, and innate. When a soldier dies, all other soldiers on the squad may gain a death quirk with the chance based on the rank of the dead soldier(s). These are very powerful effects that further help making the loss of a strong soldier not game-ending.
Beyond that, all soldiers can roll a positive or negative quirk as well which are typically smaller effects that may or may not be impactful. Each soldier can only have one of each type of quirk, and MEC augmentation will remove everything except for innate quirks. Most quirks have a condition for them to be acquired, such as possessing a certain perk or performing a certain action during the mission, so they're usually at least somewhat relevant. - Numbers round down, and round after every calculation. This has lots of effects but the most important one is that even 1% DR will reduce incoming damage by a full point, no matter how big the damage number was (although damage always has a minimum of 1). You'll feel this the most when dealing or receiving small damage numbers such as with Suppression ticks in cover or units with Distortion.
- Shots at a target directly adjacent to you will ignore the default benefits of cover (but not perks that trigger when protected by cover). This most commonly applies when 2 units are hugging the same wall of a door or window on opposite sides, but also helps your SHIVs or MECs get corner flanks. The AI also doesn't see themselves as being flanked when moving to places like this, so be careful as they can and will just hit you with point blank shots!
Point blank shots also ignore innate aim bonuses/penalties that weapons have, so shotguns/LMGs will be particularly accurate at point blank while most laser weapons and carbines will underperform a bit. - Pistols have a "Maim" ability they can use that is non-lethal and stuns targets it would otherwise kill, letting them set up perfect 100% Stun Rifle hits against 1-HP aliens.
- In addition to breaking overwatch, explosives also have a chance to disorient based on the damage they do. Because of this, any boom you use has a chance to also be a support tool, particularly in cases where you just barely don't have enough damage to secure a kill.
- Dashes can move further than two blue moves (up to 240% of mobility specifically versus the 200% two blue moves would give you), and also provide a 30 defense boost against reaction fire. Taking multiple blue moves can still be useful if you want to take specific pathing or activate an ability like Recon or Shadowstep, but otherwise you get more out of your AP with dashes.
- Hit chances above 100% add extra crit chance per 2 points above 100. This tends to be most relevant for point blank shots (especially Shotguns), so go crazy!
On a related note, crit chances cannot exceed the hit chance. Any low chance shot that does happen to land is much less likely to also be a crit. - The innate DR of cover cannot be bypassed by penetration and effectively acts as a minimum DR with few exceptions (steady/overwatch/point blank). Similarly, DR has an effective maximum of 80%, meaning that if DR - pen > 80%, it'll instead be set to 80%. DR over 80% can still combat pen because of this, but any surplus DR after the pen is wasted.
It's important to note that effects that modify the DR of cover like Will to Survive or Low Profile do not modify its base value and the extra DR can still be bypassed with pen.
Fancy hotkeys
Most of these are available in the ingame tutorial window that shows up with ALT+T, but here's some of the more notable ones that aren't in vanilla:
- Pressing "L" will toggle the combat log, providing a ton of extra info such as exact AOE spheres for clouds like smoke, full calculations, a history of shots taken and the damage they dealt, etc. If you ever need to double-check something, that'll probably show relevant info.
- Pressing "P" will attempt to debug any "bad" positions units might be in (out of bounds, inside boxes, etc).
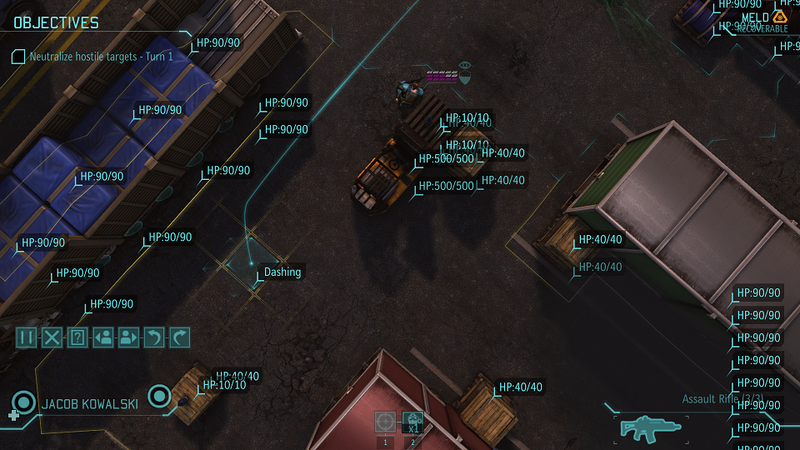
- Pressing "I" will show the HP of the cover object you're hovering over, although be warned that this can sometimes be misleading as some objects have an arbitrary health value and will instead do something when damaged rather than when "killed", like cars lighting on fire or plants getting shaved.
Most "durable" cover has 80-90 HP, while softer materials like boxes or building walls tend to have 20-40. Meld has 3 HP :)
A grenade's base damage is 35 (subject to falloff just like against units), and stray shots are a bit unpredictable as to when they cause damage but deal 15 whenever they do connect. Fire just straight-up kills cover regardless of HP (unless it's invulnerable) wherever it spreads. - Holding "F" will check movement from the selected soldier to the hovered tile to see if they'll trigger reaction fire. This isn't 100% accurate so don't rely on it too heavily, but it can give you an idea of if you should be concerned about an Outsider's CCS circle or a random alien's overwatch.
- Holding "." (period) will temporarily speed up the game while it's held, and go back to the previous speed when it's released. This is really nice for skipping through particular animations that are taking way too long, like Zombies moving.
- ALT+F7, ALT+F8, and ALT+F9 will lower the game speed, increase the game speed, and reset the game speed respectively. You can also permanently change the game speed in the game's Default Game Core.ini (XcomGame/XEW/Config, it's "REACTION_PENALTY=4f" where the number is the game speed, vanilla is 3, LWR default is 4, max is 10)
- F2 through F9 all modify the camera angle, which can be helpful for grenade targeting among other things. F5 is the default.
- The end turn hotkeys exist in vanilla as well, but notably in LWR they actually have a reason to be used, as any units that have AP left when using "J" or "Backspace" to end the unit's turn/the entire XCOM squad's turn will use the Combat Readiness action instead.
Bug workarounds
LWR is not perfect, and neither is vanilla or LW1.0. You'll come across bugs every now and then (which is also why I don't recommend running a "true" ironman save), but here are workarounds for some common ones:
- Is someone bleeding out and you can't seem to interact with them? Do a save + reload and God will send them down from the heavens so that you can properly save their lives. You can tell that you'll have to do this if the first aid circle isn't showing up around them.
- Did you save a civilian and they decided that they just want to stand where they are and get themselves killed while preventing you from moving there? The almighty save + reload will often make them realize they're being dumb and fwoop them out of existence.
- Is someone (friend or foe) stuck outside of the map or in something they can't get out of? Hit "P" and the game will attempt to debug any "bad" positions and get them out of there. Aliens will often attempt to do this themselves after a few turns of being stuck, so if you ever notice a random "Breaching Charge" go off, that's why.
- Is the game crashing when you attempt to do an Exalt mission? Tough luck... that's a vanilla bug that sometimes is just going to happen, albeit quite rarely. The most you can do is try and "regenerate" that mission by reloading a save before the mission popped up such that the map and enemies involved are reshuffled.
- Is the game crashing when you do any kind of load in a tactical mission? If so, you're probably on Linux, and need to use a different version of the game. Proton tends to work better than the native Linux port, and while I don't have a way to personally verify, users have reported that Proton 7-0.6 tends to do the trick.
- Did your Spec Ops start pretending that they need to be reinitiated? Go to their loadout and make sure they have the Leather Jacket equipped; everyone knows that every Spec Ops soldier is nothing without their trusty Leather Jacket.
- Did something else happen that isn't mentioned here? It's probably a good idea to check if the mod has been updated; it gets updates very frequently, including hotfixes for oopsies that Ucross makes. If no fix has been put out, it's probably worth reporting the bug on the LWR Discord so that it *is* fixed if possible.
AL by AL guide (AKA everything from this point on)
From now on I'll be going over what each Alien Level brings to the table in the campaign, including new mission types, new enemies, new mechanics, and more, starting with what you'll see from the very beginning of the game before you're even in the base.
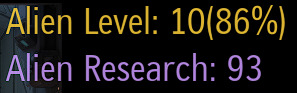
Almost all changes in aliens occur at strict AL thresholds instead of gradually over time at different rates per enemies, so every AL will bring something new to the table (that probably wants to kill you). Appearance of things that don't have a fixed timing are placed where they're likely to occur in an Impossible difficulty campaign, but these can vary on a campaign to campaign basis and especially with difficulty.
The enemy's AL progression does vary slightly between campaigns even with all external factors equal, but it is railroaded to an extent such that if they're too behind or too ahead their progression will speed up/slow down respectively. The Alien Research stat represents how many days ahead of schedule their AL actually is, with an "average" value being somewhere around 1 research per 3-4 days passed depending on difficulty. As AL progress changes significantly with difficulty, if you're playing on a lower difficulty, some of these new mechanics might come earlier than expected in terms of AL (for example, an Overseer UFO might get shot down at around AL6 or AL7 instead of around AL8 or AL9).
I did say "almost" all changes occur with ALs, but that means some things of course do not. For example, UFO missions gain fixed bonus enemy pods based on the month rather than the AL (usually a scary enemy like a Cyberdisc and 1 supporting unit like a drone, and in this case that starts from around July). Missions in general tend to occur based on the month rather than the AL, e.g. Exalt always shows up around the middle of May.
Almost all changes in aliens occur at strict AL thresholds instead of gradually over time at different rates per enemies, so every AL will bring something new to the table (that probably wants to kill you). Appearance of things that don't have a fixed timing are placed where they're likely to occur in an Impossible difficulty campaign, but these can vary on a campaign to campaign basis and especially with difficulty.
The enemy's AL progression does vary slightly between campaigns even with all external factors equal, but it is railroaded to an extent such that if they're too behind or too ahead their progression will speed up/slow down respectively. The Alien Research stat represents how many days ahead of schedule their AL actually is, with an "average" value being somewhere around 1 research per 3-4 days passed depending on difficulty. As AL progress changes significantly with difficulty, if you're playing on a lower difficulty, some of these new mechanics might come earlier than expected in terms of AL (for example, an Overseer UFO might get shot down at around AL6 or AL7 instead of around AL8 or AL9).
I did say "almost" all changes occur with ALs, but that means some things of course do not. For example, UFO missions gain fixed bonus enemy pods based on the month rather than the AL (usually a scary enemy like a Cyberdisc and 1 supporting unit like a drone, and in this case that starts from around July). Missions in general tend to occur based on the month rather than the AL, e.g. Exalt always shows up around the middle of May.
--AL1 (It begins)--
Wow, you survived! Now the real game begins.
Before anything else, it's worth noting that you will lose a country from the Council in month 1. There's nothing you can do about it; this happens so that you are guaranteed to have a way to progress the story with a Base Assault eventually.
AL1 of course brings in all of the enemies that don't have specific ALs they spawn at. This includes Sectoids, Drones, Thin Men, Floaters, and Outsiders.
Before anything else, it's worth noting that you will lose a country from the Council in month 1. There's nothing you can do about it; this happens so that you are guaranteed to have a way to progress the story with a Base Assault eventually.
AL1 of course brings in all of the enemies that don't have specific ALs they spawn at. This includes Sectoids, Drones, Thin Men, Floaters, and Outsiders.
- Sectoids are by far the most common threat at AL1, and will be a persistent threat throughout the game due to their psionics bypassing the almighty cover that your soldiers rely on to survive. They aren't particularly threatening with their guns, so any unit with good cover and/or high armor HP can shrug off their shots, but their psionics are always a problem. Psi Inspire, Alien Trophies, and Neural Damping can help mitigate this threat. On the bright side, Sectoids are quite squishy, so sometimes you can just kill them before they get a chance to do much of anything to begin with.
As always, Sectoids love to Mind Merge each other, and in LWR that's a pretty scary ability, providing aim, crit, will, mobility, bonus HP, and graze chance (causing you to deal half damage). Because of the bonus HP and graze chance, it's rarely worth attacking the mergee; prioritize the merger unless you have no other option. The mergee won't die instantly when the merger dies, but they will take significant damage (that may kill them if they were already injured).
Sectoids are the first enemy to have a "global" ability, which affects the entire XCOM squad. These globals have varying use cases, with some being used to punish retreating out of line of sight and others *only* being used if you're in sight. In the Sectoid's case, this is Psychic Storm, an ability that will damage anyone that fails a will check. If it succeeds once, it doubles in strength and attempts to activate one last time. It can be used automatically on activation, and its strength is based on the Sectoid's will (and gets upgraded with an allied Mind Merge). This can be disrupted by any form of damage or disorientation, and because of its ability to ramp up, this is a high priority (although it can be tanked in desperate situations if it hasn't scaled up much). - Drones become more of a support unit as the game goes on, but early on they're a significant offensive threat due to their Holo Targeting, Critical System Targeting, and Sentinel overwatches. The combination of holo and CST will absolutely shred your poor SHIVs; keep SHIV exposure to drones at a minimum unless you're prepared for the consequences. For your other soldiers, the holo application typically means that they'll all focus fire whoever the first target is, so make sure someone is present that can take the heat. Like always, Drones are capable of healing other mechanic units, but they typically will only heal the pod leader and not other Drones (unless that Drone is a pod leader). They also can technically still self destruct, but that happens once in a blue moon.
Drones are the second enemy with a global, in this case Orbital Ray. This ability can also be used on activation like Psychic Storm. At the end of the first turn, the entire squad will be holo targeted, and at the end of the second turn the entire squad will be damaged and shredded (and it counts as an explosion, which will remove things like overwatch and can cause disorientation). As the attack doesn't instantly deal damage, it can sometimes be fine to let this one run for a turn, but you absolutely do not want the explosive rays to hit you if you can prevent it; their damage isn't that bad, but the shred is nasty.
Their Sentinel overwatches can almost never be safely tanked; some sort of guaranteed removal for it is key. Like all fliers, they're pretty tricky to hit, so guaranteed hits or high accuracy shots help. LMG Mayhem suppression hits fliers particularly hard, so that can be invaluable for dealing with them. - Thin Men are common throughout the entire game, and are notable for their ability to spit acid, being particularly evasive with growths from ALs, and having Shadowshot (allowing them to dodge reaction fire while shooting and also dealing heavy damage to high armor HP targets). They also have Low Profile, making them particularly important to flank. Thin Man acid chips down armor HP over time, reduces base DR by half, and causes several combat stat debuffs, so it's debilitating for almost every soldier but especially for anyone that's trying to tank hits. Medkits can remove the acid, and Engineers can passively handle acid.
- Floaters are the most common flying enemy, and are notable for having Tactical Mobility and Launch (in addition to y'know, flying). Tactical Mobility gives them a strong defense buff against non-reaction/steadied shots until they're damaged or preoccupied, so it's important to have some sort of guaranteed damage (or very high hit chances), concussions, suppression (even without mayhem), or overwatch/steady to combat this. Like all fliers, LMG Mayhem suppression does a lot of work, and rockets are particularly effective given their lack of cover and tendency to clump.
Most of the time when floaters are around and at least one is out of line of sight, exactly one floater will launch into an aggressive position, usually on your flank. This is accompanied by them automatically using overwatch at the end of their turn (most of the time), so a flanking launched floater can be a real nuisance if you don't have a proper solution. Typical overwatch counters help here, especially "problem solvers" like Run and Gun Assaults or Bullseye Scouts that innately avoid reaction fire and also remove it (either directly or by killing them). - Outsiders are the boss of almost every UFO mission, and have several unique traits. Most notably, Outsiders will grow every turn they aren't engaged in combat, so taking too long to fight the Outsiders can result in them being huge. Quickly engaging them is advised, but also aliens will rally to their position once they are engaged, so balance engaging them quickly with not getting in an overwhelming firefight. Outsiders also have high base DR and several strong defense perks: Dampening Shield, Close Combat Specialist, and Regenesis. They don't have much armor health so their DR won't last long, but it'll eat the first hit or two you use against them. Outsiders regenerate health every turn and can't bleed, but fortunately they can't regenerate their armor HP. The combination of Dampening Shield and CCS makes engaging them tricky, as you want to be close enough to not lose damage to Dampening Shield, but far enough to not trigger a CCS reaction shot. Assaults and their ability to innately ignore reaction fire within 4 tiles helps a ton here, but otherwise you want strong flank shots from a moderate range if possible and a good way to chip down that initial armor HP like an AP grenade or Mind Fray.
Research progression
While your exact research order will depend a lot on the campaign and your personal preferences, here's some guidelines to keep in mind:
- Getting Improved Body Armor (and thus a reinforced plating for your tank(s)) quickly will make your life much easier, I promise.
- You have to have aliens autopsied to be able to capture them, so prioritize autopsies around the time that you've got a Stun Rifle and the Alien Containment ready to go.
- Speaking of interrogations, they boost the research speed of relevant projects, so they're often worth pursuing before the relevant tech if it won't set you back too far. Even if you don't complete them right away, it's often wise to get the captives sooner rather than later; some enemies become increasingly rare to see as the game goes on.
- Psionics, MECs, and (to a lesser extent) gene mods are a large time investment and their buildings provide a research speed/workshop adjaceny bonus so unlocking them sooner rather than later is wise.
- The "core" path to beating the campaign is Xenobiology -> Xenoneurology -> Sectoid Autopsy -> Sectoid Interrogation -> Xenopsionics -> Alien Operations -> Alien Materials -> Alien Circuitry -> Xenogenetics -> Alien Biocybernetics -> (after doing a base assault) Elerium -> Alien Communications -> (after building the Hyperwave Relay and downing the Overseer) Ethereal Autopsy -> Alien Command and Control -> Mind and Machine. You'll obviously want to do more to get to the end, but if you just need to end the fight, these are the projects that lead to the unlock of the Gollop Chamber and the Vortex Armor.
- As you might expect, scientists are quite important. Engineers tend to be more important until you get the satellite coverage you need, but otherwise you should be aiming to get enough scientists to build new labs for significant research speed bonuses. Scientists themselves provide a research bonus too, with each one being worth about 2% research speed (stacking additively, unlike labs and their adjacencies which multiply).
Facility management
Facility management is all about maximizing your adjacency bonuses while minimizing wasted expenses. There tends to be two main ways of organizing your bases:
Option 1: The 4 quadrants
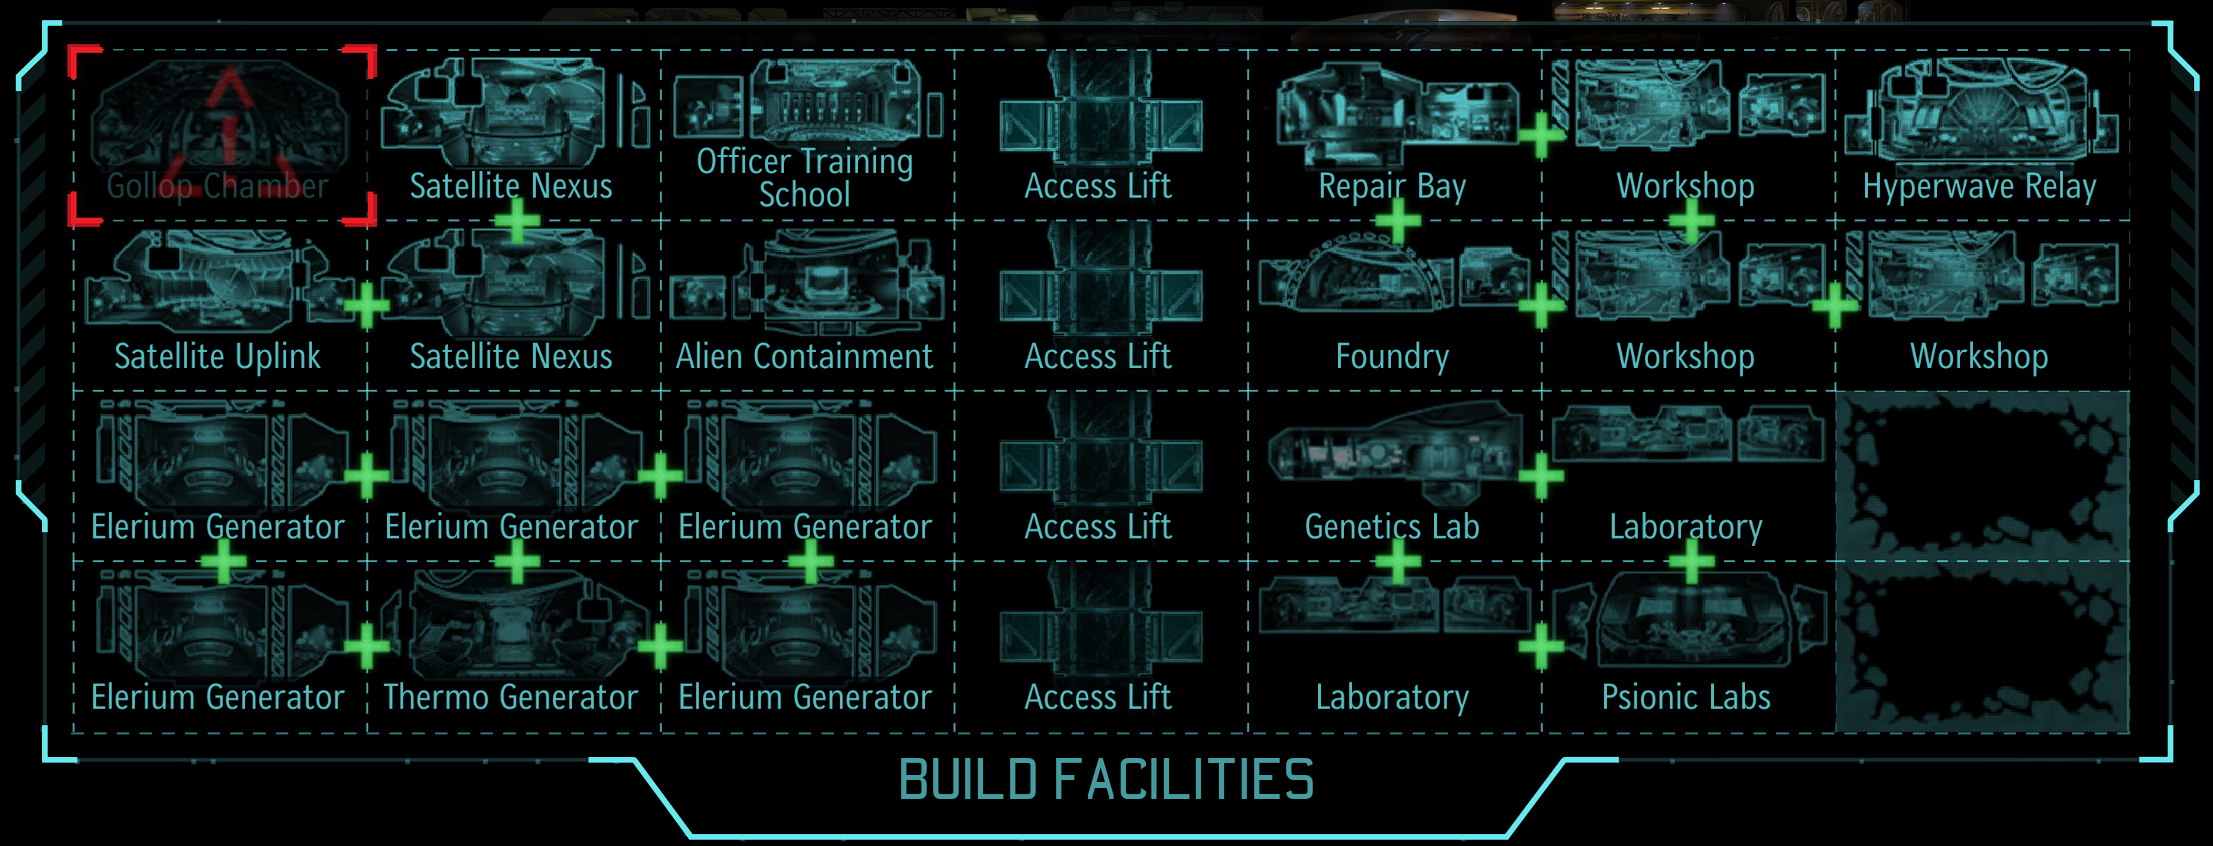
This option is very simple to set up and is the most efficient in the long run, giving you maximum adjacency bonuses, but as a downside it can be expensive to set up early.
Typically you'll start by rushing the digging of the first 2 columns beside the elevator to set up your buildings, with the satellites in the top left, the workshops in the top right, the labs in the bottom right, and the power in the bottom left.
The satellite buildings are in the top left because the starting uplink is there, and adjacencies are important. Because you rarely need more than 3 or 4 satellite buildings, sticking buildings like the Alien Containment or Officer Training School that don't have adjacencies in the extra space is often a good idea.
The workshops are in the top right because you start the game with the Foundry and Repair Bay unlocked, so you want to build those ASAP for their bonuses, and since they count as workshops you may as well build the other workshops beside them. In this particular screenshot I threw the Hyperwave up in the corner; you can pick and choose whatever space you want to sacrifice for it and I went with a workshop.
The power is in the bottom left because the steam vent is always in the same place every campaign, and again, we want to maximize adjacencies.
The labs are in the bottom right because there's nowhere else for them to go at that point. I have empty space because I needed to demolish some labs after I finished researching to have power for the Gollop Chamber.
Option 2: The V shape
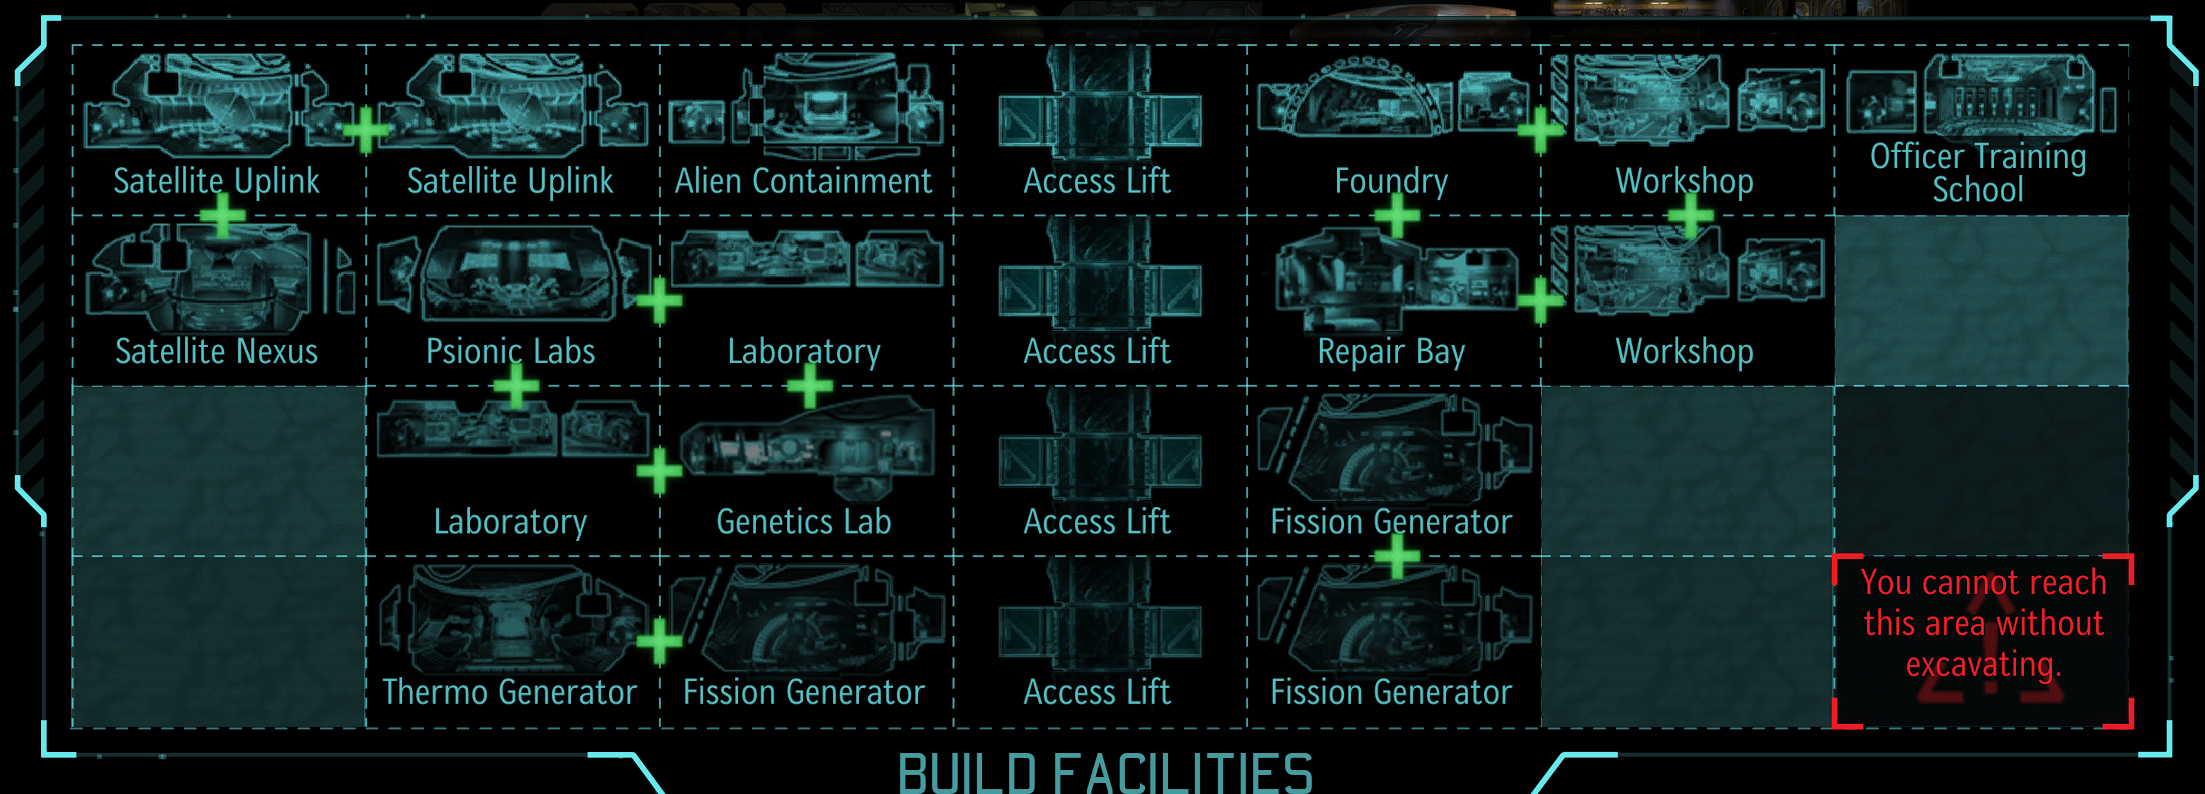
This option is all about minimizing the costs of digging in the early game at the expense of the long term. The money you save early can make up for the lost efficiency, but it definitely requires a bit more brainpower to manage.
The goal is to fit all of your buildings in the shape of a V, as digging gets more expensive for every tile from the first elevator so the bottom corners are the most expensive by far. To do this, we cram the labs into a little nook beside of the satellite buildings, as you rarely need more than 3 to cover what you want. The workshops still go in the same place as always; there's no real good reason to move them. The Alien Containment and Officer Training School can go in the empty spaces on the top row since they're the cheapest to dig and won't affect your efficiency for most of the game.
That leaves power, and this is the fun part; besides the steam vent, you just build power wherever there's an empty space, including where labs/workshops will go in the future. Power generators are mostly a maintenace cost rather than an upfront one, so you pay 40 credits for the luxury of not having to dig out a separate 200 or more credit space in the early game and can demolish it when it's getting in the way. Eventually having your layout set up like this is going to mean having to build extra power generators to make up for lost adjacencies, but early credits are worth a lot more than later credits.
This particular screenshot is from earlier on in the game, but since this configuration primarily benefits the early game, it seems fitting.
Option 1: The 4 quadrants
This option is very simple to set up and is the most efficient in the long run, giving you maximum adjacency bonuses, but as a downside it can be expensive to set up early.
Typically you'll start by rushing the digging of the first 2 columns beside the elevator to set up your buildings, with the satellites in the top left, the workshops in the top right, the labs in the bottom right, and the power in the bottom left.
The satellite buildings are in the top left because the starting uplink is there, and adjacencies are important. Because you rarely need more than 3 or 4 satellite buildings, sticking buildings like the Alien Containment or Officer Training School that don't have adjacencies in the extra space is often a good idea.
The workshops are in the top right because you start the game with the Foundry and Repair Bay unlocked, so you want to build those ASAP for their bonuses, and since they count as workshops you may as well build the other workshops beside them. In this particular screenshot I threw the Hyperwave up in the corner; you can pick and choose whatever space you want to sacrifice for it and I went with a workshop.
The power is in the bottom left because the steam vent is always in the same place every campaign, and again, we want to maximize adjacencies.
The labs are in the bottom right because there's nowhere else for them to go at that point. I have empty space because I needed to demolish some labs after I finished researching to have power for the Gollop Chamber.
Option 2: The V shape
This option is all about minimizing the costs of digging in the early game at the expense of the long term. The money you save early can make up for the lost efficiency, but it definitely requires a bit more brainpower to manage.
The goal is to fit all of your buildings in the shape of a V, as digging gets more expensive for every tile from the first elevator so the bottom corners are the most expensive by far. To do this, we cram the labs into a little nook beside of the satellite buildings, as you rarely need more than 3 to cover what you want. The workshops still go in the same place as always; there's no real good reason to move them. The Alien Containment and Officer Training School can go in the empty spaces on the top row since they're the cheapest to dig and won't affect your efficiency for most of the game.
That leaves power, and this is the fun part; besides the steam vent, you just build power wherever there's an empty space, including where labs/workshops will go in the future. Power generators are mostly a maintenace cost rather than an upfront one, so you pay 40 credits for the luxury of not having to dig out a separate 200 or more credit space in the early game and can demolish it when it's getting in the way. Eventually having your layout set up like this is going to mean having to build extra power generators to make up for lost adjacencies, but early credits are worth a lot more than later credits.
This particular screenshot is from earlier on in the game, but since this configuration primarily benefits the early game, it seems fitting.
Foundry/Workshop projects
You'll have a lot of options to choose in the Foundry, and you almost certainly won't be able to afford all of them so you're going to have to prioritize. It's not uncommon for several projects to be left incomplete and multiple items unbuilt by the end of the game, so take whatever seems like it will benefit you the most.
The bottleneck for most foundry projects is weapon fragments, but plenty of projects will also tax your other resources significantly too (especially alloys). This is also where most of your corpses and UFO components will be useful if you're not selling them.
The extra resource projects can be tempting to invest into early but be careful to make sure they don't leave you vulnerable in the meantime. Also be aware that the Grey Market is a foundry project that requires a Sectoid Captive to complete, so you will need to actually capture two Sectoids over the course of the game.
Most items are going to be bottlenecked by resources, but building speed will matter for some specific items such as plasma weapons. Having more workshops and workshop adjacencies will let you build more items at once as well as significantly reduce their costs and build times, so they're worth getting ASAP.
Engineers themselves are most significant for letting you build workshops, but do serve as a soft requirement for certain items/projects; going over the recommended engineer count for something gives you a small bonus but not one that scales particularly well, however being under the recommended engineer count will greatly increase the time it takes for something to complete.
The bottleneck for most foundry projects is weapon fragments, but plenty of projects will also tax your other resources significantly too (especially alloys). This is also where most of your corpses and UFO components will be useful if you're not selling them.
The extra resource projects can be tempting to invest into early but be careful to make sure they don't leave you vulnerable in the meantime. Also be aware that the Grey Market is a foundry project that requires a Sectoid Captive to complete, so you will need to actually capture two Sectoids over the course of the game.
Most items are going to be bottlenecked by resources, but building speed will matter for some specific items such as plasma weapons. Having more workshops and workshop adjacencies will let you build more items at once as well as significantly reduce their costs and build times, so they're worth getting ASAP.
Engineers themselves are most significant for letting you build workshops, but do serve as a soft requirement for certain items/projects; going over the recommended engineer count for something gives you a small bonus but not one that scales particularly well, however being under the recommended engineer count will greatly increase the time it takes for something to complete.
Soldier recruitment
Every campaign of LWR (unless using the Fresh Recruits SW option) starts with a mostly preset barracks that's designed to have all the tools you need to get your campaign off the ground. While these soldiers are a staple and may very well accompany you for the entire game, you'll need to hire more soldiers at some point. Soldiers get fatigued more and more as they go on more missions, and missions become more frequent and more dangerous over time, so you'll inevitably lose if you don't expand the barracks.
The cost of a soldier varies based on time passed and recent deaths, becoming more expensive over time while dropping sharply each time a soldier dies. It tends to be a good idea to hire multiple recruits at once when they're at a reasonable price, but don't skip hiring just because it feels too expensive.
Soldiers can also be retired, providing passive XP to all active soldiers based on their mission count. This typically isn't worth doing until they're in at least the double digits, and usually 20+, but it can add up over time. This is around the point where the fatigue multiplier from mission count really catches up with them and the XP per day is impactful. It's often a good idea to send retirees on a last mission to let them "skip" that final fatigue/injury timer.
As a general rule, hiring (or otherwise obtaining) about 3 soldiers a month tends to be a good idea to keep up with the pressure (although some start bonuses can affect this rule of thumb as can your difficulty of choice), and you should typically replace losses with an equal number of new soldiers. You also might need to hire more soldiers simply to get more recruits of a particular class/role if you've suffered casualties and are missing critical soldiers like Engineers or tanks. Overhiring will lead to paying unnecessary salary costs (each soldier costs more and more than the last per day), while underhiring will lead to missed/failed missions.
Sometimes instead of hiring more soldiers it can be enough to do meld injections in the barracks (after researching Xenogenetics). These injections use some meld to reduce a soldier's fatigue and injury times, getting them back in the fight faster. Do note that repeated injections become less effective, so don't use them willy-nilly. You can also just use fatigued soldiers if necessary; they only suffer a minor debuff in the mission (that scales with the amount of fatigue they have, something like less than 10 days is reasonable to deal with) and some extra fatigue afterwards.
The cost of a soldier varies based on time passed and recent deaths, becoming more expensive over time while dropping sharply each time a soldier dies. It tends to be a good idea to hire multiple recruits at once when they're at a reasonable price, but don't skip hiring just because it feels too expensive.
Soldiers can also be retired, providing passive XP to all active soldiers based on their mission count. This typically isn't worth doing until they're in at least the double digits, and usually 20+, but it can add up over time. This is around the point where the fatigue multiplier from mission count really catches up with them and the XP per day is impactful. It's often a good idea to send retirees on a last mission to let them "skip" that final fatigue/injury timer.
As a general rule, hiring (or otherwise obtaining) about 3 soldiers a month tends to be a good idea to keep up with the pressure (although some start bonuses can affect this rule of thumb as can your difficulty of choice), and you should typically replace losses with an equal number of new soldiers. You also might need to hire more soldiers simply to get more recruits of a particular class/role if you've suffered casualties and are missing critical soldiers like Engineers or tanks. Overhiring will lead to paying unnecessary salary costs (each soldier costs more and more than the last per day), while underhiring will lead to missed/failed missions.
Sometimes instead of hiring more soldiers it can be enough to do meld injections in the barracks (after researching Xenogenetics). These injections use some meld to reduce a soldier's fatigue and injury times, getting them back in the fight faster. Do note that repeated injections become less effective, so don't use them willy-nilly. You can also just use fatigued soldiers if necessary; they only suffer a minor debuff in the mission (that scales with the amount of fatigue they have, something like less than 10 days is reasonable to deal with) and some extra fatigue afterwards.
Classes (introduction & Marksman)
Your soldiers can become one of 8 classes, split into 4 supraclasses. Each class has 3 different builds, often filling very different roles on a team. In general, if you're unsure of what to do with a soldier, pick a LCPL build and then follow the column; up until MSGT, the columns are organized to generally fit what each build wants, but many builds have flexible choices for the more adventurous.
It's typically wise to assign soldiers to classes/LCPL builds based on their stats. You don't exactly want to turn 55 aim Joe into a Sniper and you don't really want to have 75 aim Chad using stuff like grenades that are already guaranteed to hit anyways. Health affects injury times and throw range so it can help to have high health supports/grenadiers or (to a lesser extent) tanks. Aim is obviously core for most forms of shooting. Mobility is much more important on flankers but is a relevant stat for everyone. Will affects whether someone will become psionic, which can have its own synergies with particular builds but otherwise affects fatigue.
Soldiers can be retrained at any time as long as they're unfatigued and uninjured. Doing so will fatigue them for a while based on their rank, but will allow you to change their perks (although not their class). If you make a mistake or want to experiment, the option is always there!
Marksman: Scouts/Snipers
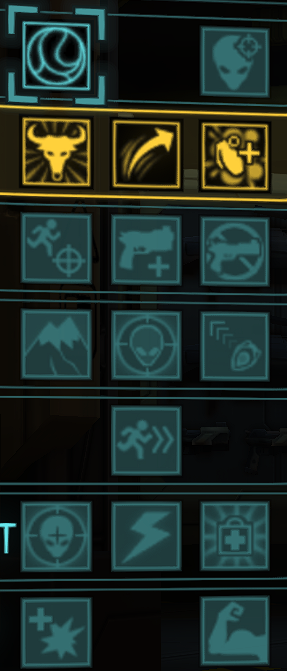
Scouts do as their name implies, and tend to be solid scouts. They can see where nearby inactive pods are after every movement action they take, and have access to battle scanners which reveal enemies and provide a hefty aim/crit boost against every enemy in the radius.
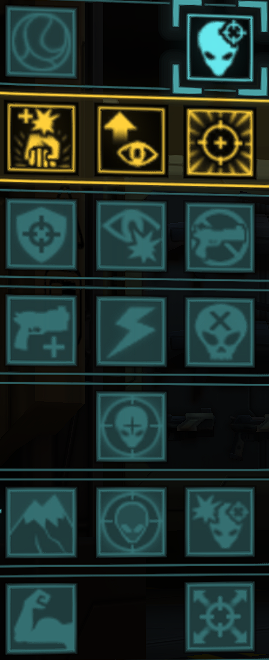
Snipers are the most one-dimensional class of all: they shoot things, and shoot'em real good.
It's typically wise to assign soldiers to classes/LCPL builds based on their stats. You don't exactly want to turn 55 aim Joe into a Sniper and you don't really want to have 75 aim Chad using stuff like grenades that are already guaranteed to hit anyways. Health affects injury times and throw range so it can help to have high health supports/grenadiers or (to a lesser extent) tanks. Aim is obviously core for most forms of shooting. Mobility is much more important on flankers but is a relevant stat for everyone. Will affects whether someone will become psionic, which can have its own synergies with particular builds but otherwise affects fatigue.
Soldiers can be retrained at any time as long as they're unfatigued and uninjured. Doing so will fatigue them for a while based on their rank, but will allow you to change their perks (although not their class). If you make a mistake or want to experiment, the option is always there!
Marksman: Scouts/Snipers
Scouts do as their name implies, and tend to be solid scouts. They can see where nearby inactive pods are after every movement action they take, and have access to battle scanners which reveal enemies and provide a hefty aim/crit boost against every enemy in the radius.
- Bullseye scouts are proficient at dinging enemy overwatches or following up on other soldiers that inflict preoccupied. They're also very good against enemies with a lot of DR. They tend to prefer using strike rifles for the job due to the 2 AP firing condition and having the Marksman Scope for Squadsight, but can also opt to be more aggressive with pincers and short ranged weapons.
- Hit and run scouts are good at...hitting and running. They deal high flank crit damage and can retreat to safety afterwards. SMGs and shotguns tend to work best, but distant strike rifle flanks are viable too.
- Smoke and Mirrors scouts are a standard support mixed with the scout tools, and notably have access to Tinker for shred/anti-shred and Disabling Shot for some crowd control.
As the first Smoke and Mirrors build, it's important to note that I'll be calling S&M builds "supports" most of the time, not to be confused with the actual Support supraclass that will only ever be addressed by their class names, Engineer/Medic.
Snipers are the most one-dimensional class of all: they shoot things, and shoot'em real good.
- Magnum Snipers are the simplest of the bunch, simply dealing lots of damage while having the ability to penetrate targets in a line for collateral damage. Strike rifles are better for focusing on the passthrough while sniper rifles deal more raw damage.
- On the Ready Snipers are the overwatch build of the class, with high accuracy and high damage but low shot count. They benefit extra from Combat Readiness. Strike rifles allow for a shot + overwatch shot for more overall damage while sniper rifles can move and then get overwatch from combat readiness for more ammo efficient damage.
- In the Zone Snipers are setup-oriented, taking several shots after steadying and having solid accuracy shots outside of that. They almost always prefer sniper rifles, but can make use of the "unlimited" ammo on a more mobile strike rifle.
Classes (Tactical)
Tactical: Infantry/Assault
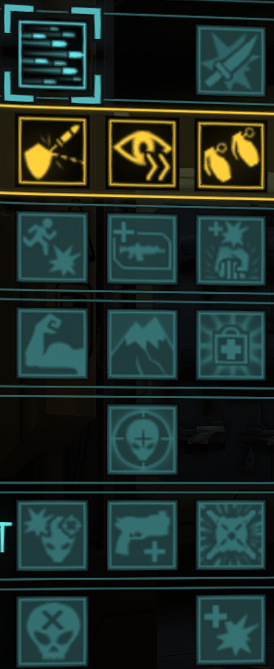
Infantries are about as close as you can get to a generic XCOM soldier. They can fire for 1 AP and gain bonus damage and penetration when shooting at something that has already been damaged that turn, so they're great at finishing off enemies.
Pretty much all Infantry want to use one of the rifles; carbines for accuracy, regular rifles for ammo, or battle rifles for damage. Shotguns can situationally work well in short range maps for their high damage. If Ranger is taken, a utility primary like the Arc Rifle or Stun Rifle can be used to good effect.
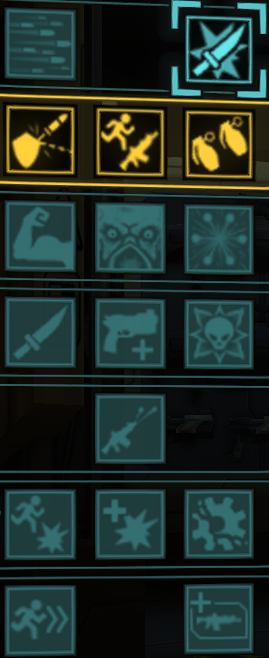
Assaults are close range specialists, pretty much always using either a shotgun or SMG. They're adept at getting close to enemies and tearing them to shreds.
Infantries are about as close as you can get to a generic XCOM soldier. They can fire for 1 AP and gain bonus damage and penetration when shooting at something that has already been damaged that turn, so they're great at finishing off enemies.
Pretty much all Infantry want to use one of the rifles; carbines for accuracy, regular rifles for ammo, or battle rifles for damage. Shotguns can situationally work well in short range maps for their high damage. If Ranger is taken, a utility primary like the Arc Rifle or Stun Rifle can be used to good effect.
- Tank Infantries are literally the most generic soldier XCOM can field. They get into position, get shot, and shoot. That's about it. They're good at it though; don't disrespect them!
As the first Will to Survive soldier, it's important to note that the enemies tend to target the soldier that they have the highest chance to hit, so that defense penalty on WtS is effectively drawing aggro to the guy that wants to be shot over other soldiers. - Overwatch Infantries are steady damage dealers on both the XCOM and enemy turns, usually firing a shot or two on their own turn before firing multiple more on the enemy turn. An Overwatch Infantry can shoot more than any other soldier.
- Grenadier Infantries mix strong long-range grenades with a solid ability to shoot when out of grenades or when grenades aren't needed.
Assaults are close range specialists, pretty much always using either a shotgun or SMG. They're adept at getting close to enemies and tearing them to shreds.
- Tank Assaults I would define as being more of a DPS unit that can tank rather than a tank that deals DPS. They have solid bulk to protect them while they close in on enemies and control areas with Pistolero, but don't really want to be tanking all of the damage, so usually you want to pair them with another tank.
- Run and Gun Assaults are the most "Assault-y" Assaults, as they are single-target problem solvers. They tend to dive in deep and kill a flanked enemy while taking plenty of fire in response if not properly supported.
It's important to note that the aliens put a really high emphasis on targeting soldiers that are flanking them, often even more than the soldier they have the best chance to hit. Keep that in mind or your Run and Gun Assaults will get focused down and murdered. - Breacher Assaults are very high burst damage but low range grenadiers. Very few soldiers can put as out as much damage in a single turn as a Breacher that throws a grenade, takes a shot, and throws another grenade. They can also situationally use support grenades when it makes sense (primarily smokes) as those also benefit from Breacher's 0 AP effect.
Classes (Weapons)
Weapons: Gunner/Rocketeer
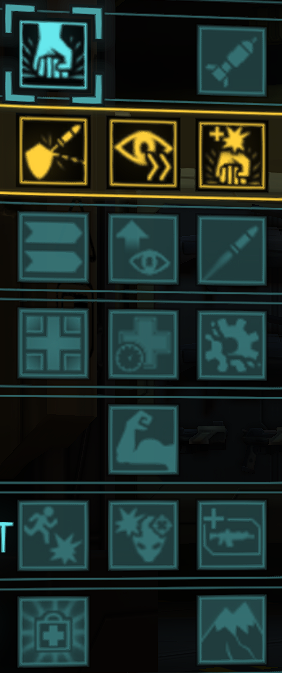
Gunners are all about using the big Gunner-exclusive weapons, the SAW and LMG. The SAW tends to be better when you're trying to hit your targets while the LMG is better for Suppression. Both weapons shred enemies and also have the Bulletstorm perk, a chance to get a bonus damage tick on top of their hit/miss for any enemies in a cone towards the target (at the cost of having lower accuracy overall).
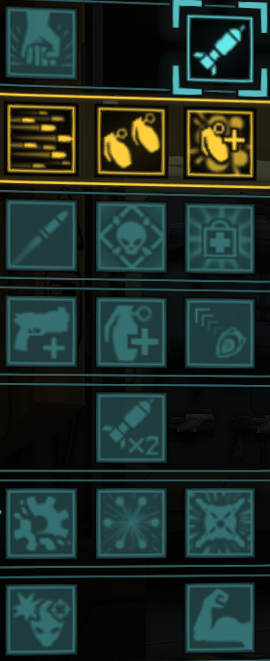
Rocketeers are all about healing their allies. Just kidding, obviously Rocketeers are all about their rockets with their LCPL build being whatever flavor of non-rocket stuff you want them to do.
Rocket scatter is a bit more predictable in LWR. The number you see listed is the absolute maximum scatter your rocket will have, and that will only happen 5% of the time. For the nerds in the audience, this cap is 2 standard deviations. For everyone else that wants a tl;dr on what that means, you have a roughly 40% chance to land within a fourth of the number, a 30% chance to land within half of the number, and a 30% chance to land within the full number. This means that roughly 70% of the time you can expect a reasonably accurate rocket that lands within half of the number or better tiles compared to the target, so sometimes those crapshoots aren't actually as unlikely as you'd think! There's still always that 5% chance of cataclysmic consequences though...
Rocket scatter is affected by a lot of things, but most importantly targeting distance, AP, and steadying; far shots have much more scatter than close shots, rocket scatter is tripled at 1 AP, and steadying your weapon reduces scatter by 75%. The Blaster Launcher is also completely unique in how it works and has no scatter but can only be used at 2 AP.
Gunners are all about using the big Gunner-exclusive weapons, the SAW and LMG. The SAW tends to be better when you're trying to hit your targets while the LMG is better for Suppression. Both weapons shred enemies and also have the Bulletstorm perk, a chance to get a bonus damage tick on top of their hit/miss for any enemies in a cone towards the target (at the cost of having lower accuracy overall).
- Tank Gunners put those big Gunner guns into the tank package, with an option to take either Double Tap for offensive pressure or Holo Targeting for support. They tend to make better use of Bulletstorm with more lenient positioning to fit enemies into the cone.
- Overwatch Gunners are pure volume of fire with a big shredding gun. They won't be using Suppression much and have poor accuracy, but they hit the hardest out of any overwatcher and can potentially deal a lot of AOE damage when enemies are clumped up. It's worth noting their poor accuracy comes from Bulletstorm and not a lack of aim, so they deal against evasive targets much better relatively than most OW builds.
- Mayhem Gunners are all about Suppression and spreading debuffs. They can apply holo and shred in an AOE and also deal especially high damage to flying units thanks to Danger Zone on the LMG.
Rocketeers are all about healing their allies. Just kidding, obviously Rocketeers are all about their rockets with their LCPL build being whatever flavor of non-rocket stuff you want them to do.
Rocket scatter is a bit more predictable in LWR. The number you see listed is the absolute maximum scatter your rocket will have, and that will only happen 5% of the time. For the nerds in the audience, this cap is 2 standard deviations. For everyone else that wants a tl;dr on what that means, you have a roughly 40% chance to land within a fourth of the number, a 30% chance to land within half of the number, and a 30% chance to land within the full number. This means that roughly 70% of the time you can expect a reasonably accurate rocket that lands within half of the number or better tiles compared to the target, so sometimes those crapshoots aren't actually as unlikely as you'd think! There's still always that 5% chance of cataclysmic consequences though...
Rocket scatter is affected by a lot of things, but most importantly targeting distance, AP, and steadying; far shots have much more scatter than close shots, rocket scatter is tripled at 1 AP, and steadying your weapon reduces scatter by 75%. The Blaster Launcher is also completely unique in how it works and has no scatter but can only be used at 2 AP.
- Light'em Up Rocketeers operate similarly to Infantries but trade raw volume of fire for supportive capabilities (holo and possibly Acid Tech) and a rocket launcher. They're the least likely to use their rockets out of the builds, but it's hard to complain about having it as an option for AOE and handling overwatch.
- Grenadier Rocketeers are all about booms, both big and small. Most of the explosive perks also affect the rocket launcher, so this build has the most dangerous rocket launcher in addition to plenty of smaller grenades to solve smaller problems on the go.
- Support rocketeers are a very solid all-around support unit, with good offensive and defensive utility. Their rockets aren't as powerful as a dedicated grenadier rocketeer, but they can still do good damage in a pinch and the flexibility provided by having support grenades to supplement the rocket is valuable.
Classes (Support)
Support: Engineer/Medic
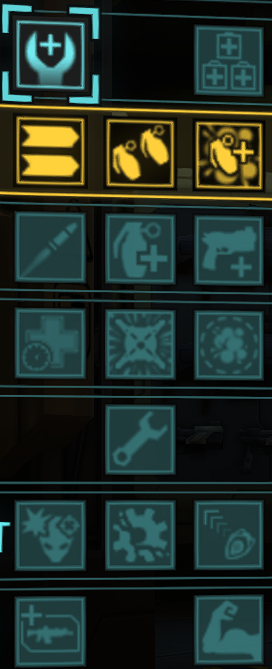
Engineers are notable for exactly three reasons: They can heal mechanical units, they are perfect SHIV buddies, and they can clear corrosion passively. Beyond that, their builds are often quite tame in overall power to compensate, but shouldn't be underestimated.
It's important to note that at CPL, all three builds have the option to take Firebase if they want to specialize into being better SHIV buddies. It makes them more reliant on said SHIVs than ever as the perk does literally nothing without one, but it's a powerful effect. If you're using your Engineers for anti-corrosion and MEC healing instead of as the SHIV backpack, Firebase won't make sense, but otherwise give it a go!
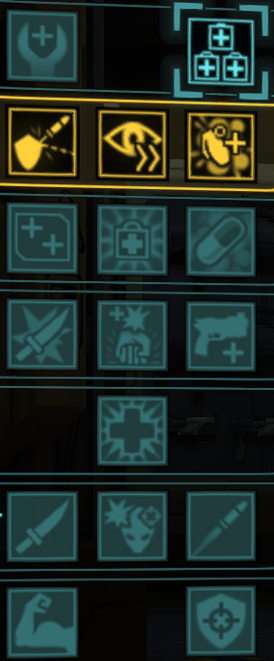
Medics, believe it or not, are good at healing your soldiers, and are especially good at stabilizing them when they're bleeding out. They're also the only soldiers that can reasonably heal themselves or others in the middle of a firefight without losing a lot of efficiency.
Engineers are notable for exactly three reasons: They can heal mechanical units, they are perfect SHIV buddies, and they can clear corrosion passively. Beyond that, their builds are often quite tame in overall power to compensate, but shouldn't be underestimated.
It's important to note that at CPL, all three builds have the option to take Firebase if they want to specialize into being better SHIV buddies. It makes them more reliant on said SHIVs than ever as the perk does literally nothing without one, but it's a powerful effect. If you're using your Engineers for anti-corrosion and MEC healing instead of as the SHIV backpack, Firebase won't make sense, but otherwise give it a go!
- Double Tap Engineers are decent at applying holo and are powerful anti-mechanical shooters that get access to CST. Their damage is nothing to write home about, but they are kinda like a variation on the LeU Rocketeer that trades the rocket for the Engineer gimmicks.
If they take Firebase over Holo, they trade the team support for very reliable shooting each turn that can also apply the enhanced effects of CST and Acid Tech. - Grenadier Engineers throw grenades. Wow. Their grenades are nothing special among soldiers, but they do get early access to Sapper + Tandem Warheads for reasonable cover destruction capabilities.
If they take Firebase over Sapper, they'll have much better throw range while they're around the SHIV and some decent shooting capabilities even if they run out of grenades or don't want to use them. - Support Engineers throw support grenades. Wow. They're a little more interesting among supports due to getting Dense Smoke, which is a very powerful defensive buff that also costs 0 AP to use.
Like with the Grenadier build, if they take Firebase their throw range gets a big boost and they gain access to a solid weapon separate from their consumables.
Medics, believe it or not, are good at healing your soldiers, and are especially good at stabilizing them when they're bleeding out. They're also the only soldiers that can reasonably heal themselves or others in the middle of a firefight without losing a lot of efficiency.
- Tank Medics are all about using their medkits on themselves to keep them in the fight for as long as possible. They also get exclusive access to Rapid Encounters, which gives them huge burst damage up close.
- Overwatch Medics are the best medics for healing other soldiers due to Guardian. They're also the best at healing soldiers during combat as they don't lose an action to heal, getting a free overwatch at the end of their turn after healing.
- Support Medics are about as "Support-y" as you can get, being all about its Combat Drugs smoke and having medkits and holo on standby. They can get roided up on their own Drugs though and do some serious damage in the right circumstances...
SHIVs
SHIVs are a unit that you should be including on almost every squad. They don't suffer from fatigue, have a highly powerful weapon, provide cover, are decently tanky at a baseline, are easily replaced, and are highly customizable, being able to swap their perks for every mission.
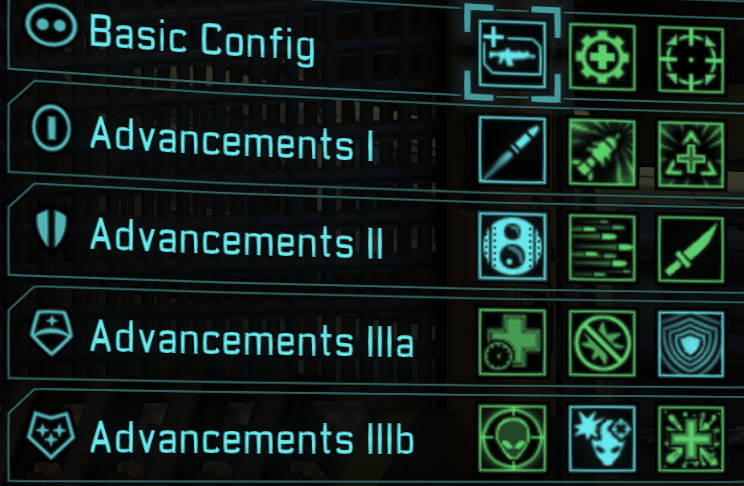
These perks unlock with foundry projects over time, but tend to provide a mix of options for offense, defense, and utility, letting you use your SHIV for whatever makes sense at the time.
All SHIVs also have the ability to ram stuff, as long as they move far enough in a single move and are moving in a "mostly straight line". Said "mostly straight line" is very dubiously defined, so you'll often have very surprising angles that it works at, but regardless, anytime a move would cause ram damage you'll see a pop-up telling you how much it'll do if you make the move, so it doesn't hurt to check! Rams are particularly good with LnL, letting you do a dash attack that also reloads. Be careful not to expose your SHIV to lots of pincer attacks however; those will tear it up quickly.
They also share any EXP they would earn with the squad since they don't have ranks. Neat.
You can technically bring multiple SHIVs on a single mission but only one can actually use AP each turn and the EXP sharing doesn't stack so it's rarely worth it; Big Sky is controlling them and can't multitask very well.
These perks unlock with foundry projects over time, but tend to provide a mix of options for offense, defense, and utility, letting you use your SHIV for whatever makes sense at the time.
All SHIVs also have the ability to ram stuff, as long as they move far enough in a single move and are moving in a "mostly straight line". Said "mostly straight line" is very dubiously defined, so you'll often have very surprising angles that it works at, but regardless, anytime a move would cause ram damage you'll see a pop-up telling you how much it'll do if you make the move, so it doesn't hurt to check! Rams are particularly good with LnL, letting you do a dash attack that also reloads. Be careful not to expose your SHIV to lots of pincer attacks however; those will tear it up quickly.
They also share any EXP they would earn with the squad since they don't have ranks. Neat.
You can technically bring multiple SHIVs on a single mission but only one can actually use AP each turn and the EXP sharing doesn't stack so it's rarely worth it; Big Sky is controlling them and can't multitask very well.
Squad composition
Hey look, it's time for your first mission that you have to actually outfit your soldiers for! Like most things in LWR, how exactly you want to do this will depend on a lot of factors as well as your personal playstyle, but here's a few important guidelines to go by:
My basic blueprint for every mission is having a SHIV, an Engineer, a tank of any kind, a support of any kind (which could be the Engineer from earlier), and fill in the rest with damage or an extra tank/support as needed. This often isn't the ideal squad comp, but it's enough to combat most threats with a little bit of tuning.
- You should always have a plan for dealing with enemy overwatches. Usually, this will be in the form of a Smoke and Mirrors support, but there are plenty of half-solutions like Bullseye Scouts, Run and Gun Assaults, Gunners, SHIVs, etc. A non-consumable answer is particularly helpful for longer missions where you'll run out if you always rely on the support(s).
- You should always have a way to protect the squad while it's killing enemies. Most of the time this is going to be solved by having a combination of tanks and supports to take the hits and lower the accuracy of hits on vulnerable targets. No matter how much damage your squad has, it won't be enough to stop every enemy from retaliating, and when they get that chance, these soldiers will save lives.
- You should always have plenty of damage. Yeah, damage can't solve everything, but also a lack of damage creates plenty of problems itself, such as letting enemies get multiple free shots off on your soldiers or increasing the amount of fatigue your soldiers suffer from longer missions. You always need to be making progress of some kind during the fight; when in doubt, include an overwatcher, a basic shooter like a Sniper or DT Engineer, and/or a grenadier.
- You should usually include a SHIV. SHIVs won't be good for all missions, but bringing one on every mission will ensure you're taking as little fatigue on your soldiers as possible, and early on they're likely to be stronger than any single soldier you have on the squad anyways.
Situationals: - When they're unlocked, you should always have an officer on your squad if possible. Officers make everyone else better, and can get you out of really tricky situations with free actions, commands, and an occasional air strike. Tactical Retreat can also prevent a bad situation from snowballing into an even worse one by saving a bleeding out soldier that otherwise wouldn't be able to make it to the evac with the rest of the squad or getting your squad out of a pin when they can't move without casualties.
- From AL3 onwards, you should almost always have a Proximity Scanner and/or a Scout on your squad. The moment you forget, the Seekers will come for you, and you don't want to take unnecessary injures just because you forgot an item. In a pinch, Combat Readiness can reveal seekers within 4 tiles of a soldier as can indirect damage from something like a rocket, but that's obviously not something you want to do regularly given how unreliable it is. Of course, if a mission is known to not have Seekers, then you don't have to worry about this.
- Once Pulse weapons are unlocked, you should usually still keep Gauss on hand. Laser weapons are quite powerful with their bonus aim, crit, and crit damage (with a foundry project), but some enemies will punish you hard for using lasers and you don't want to be caught with your pants down. That being said, Pulse can power through its counters if needed; the counters don't make the relevant enemies invincible, just much tankier. Arc weapons can replace somewhat replace Gauss for the purposes of handling Pulse's counters.
- When they're unlocked, you should usually have a Spec Ops on your squad if possible. Spec Ops require successful missions to rank up and get extra aim, and with their rank 6 being an incredibly powerful extra slot for the squad, they're well worth the effort. On any difficult mission, you should bring an appropriate rank 6 Spec Ops if you have one on hand, otherwise it should probably be a training mission for someone else.
- From AL8 onwards, you should usually have acid on the team somewhere, whether that's from Acid Tech shooting or Acid Grenades. Sectopods have a crazy amount of base DR and only acid will change that. Sectopods aren't invincible without acid, but you'll probably be doing the minimum 20% damage against them unless you're using arc weapons or super stacking pen on your Gauss weapons. From AL5 and onwards, acid helps against Mechtoids and Muton Elites too, but is much more important for the big bad itself.
My basic blueprint for every mission is having a SHIV, an Engineer, a tank of any kind, a support of any kind (which could be the Engineer from earlier), and fill in the rest with damage or an extra tank/support as needed. This often isn't the ideal squad comp, but it's enough to combat most threats with a little bit of tuning.
Abductions
Your first or second mission is very likely to be an Abduction, and these alongside UFO missions will be the most common missions you go on.
Abductions are very much the "default" mission type of LWR, with no special rules; simply get in there and eliminate all threats with a 6-man squad. They come in 4 sizes: lights, moderates, heavies, and swarming. Lights will typically have around 5 aliens, with each size upgrade adding about 3 more to that, and usually these enemies will be split into 2-3 pods. Some abductions will be "pack" missions, which are somewhere between heavies and swarming in size and will be filled entirely with one alien type ("boss" enemies like Sectoid Commanders or Cyberdiscs will be lower in number, but still the only alien present).
Like vanilla, the aliens will send out multiple abduction ships at once and you'll only be able to pick one to respond to. Abductions that are failed/skipped cause a lot of panic, particularly in the country that the abduction occurred but also some on the continent.
There's not much to say about standard abductions; just bring a squad that's appropriate for the threat level and don't bite off more than you can chew. For pack missions, you know exactly what enemies you'll be fighting so you can bring counters.
As a reward you'll either get staff for the base, credits, or a soldier. Early on you often want to prioritize getting 20 engineers so that you can build your first satellite building, but beyond that pick whatever seems most relevant at the time or pick wherever the panic reduction from winning would help.
Abductions are very much the "default" mission type of LWR, with no special rules; simply get in there and eliminate all threats with a 6-man squad. They come in 4 sizes: lights, moderates, heavies, and swarming. Lights will typically have around 5 aliens, with each size upgrade adding about 3 more to that, and usually these enemies will be split into 2-3 pods. Some abductions will be "pack" missions, which are somewhere between heavies and swarming in size and will be filled entirely with one alien type ("boss" enemies like Sectoid Commanders or Cyberdiscs will be lower in number, but still the only alien present).
Like vanilla, the aliens will send out multiple abduction ships at once and you'll only be able to pick one to respond to. Abductions that are failed/skipped cause a lot of panic, particularly in the country that the abduction occurred but also some on the continent.
There's not much to say about standard abductions; just bring a squad that's appropriate for the threat level and don't bite off more than you can chew. For pack missions, you know exactly what enemies you'll be fighting so you can bring counters.
As a reward you'll either get staff for the base, credits, or a soldier. Early on you often want to prioritize getting 20 engineers so that you can build your first satellite building, but beyond that pick whatever seems most relevant at the time or pick wherever the panic reduction from winning would help.
UFOs (and the airgame as a whole)
Oh boy, the airgame, the part of LW1.0 (and LWR) that is often despised. LWR's airgame isn't great by any means, but it is at least reasonably straightforward.
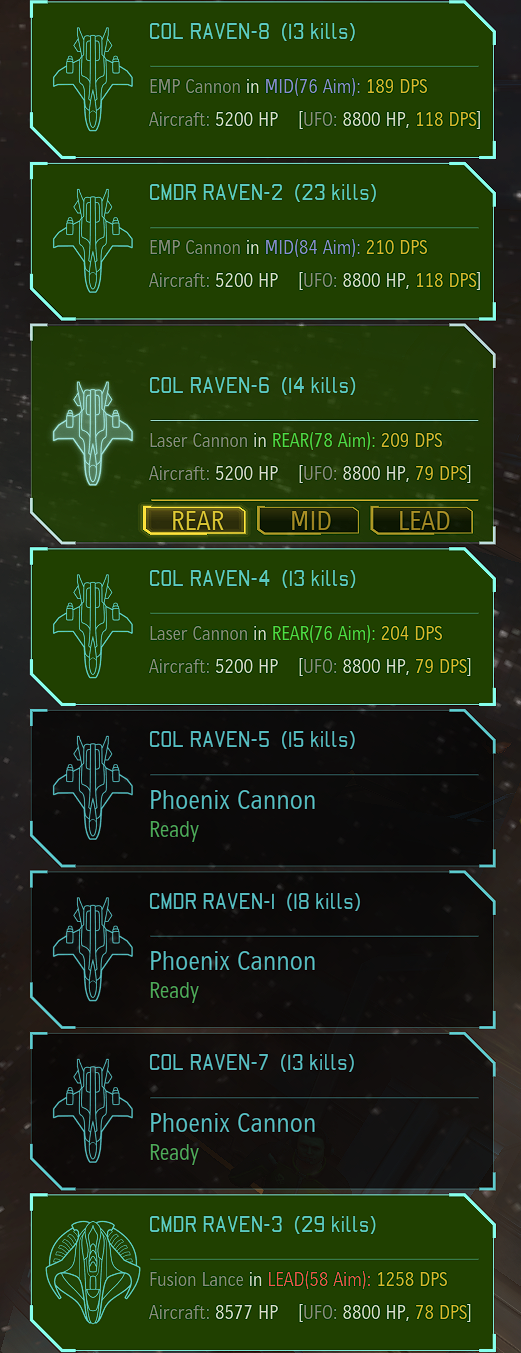
Planes are sent in a squadron, with 2 to 5 planes allowed at max (scaling with the rank of your highest ranking pilot in the squadron; ranks go up as squadrons destroy UFOs and also provide the pilots with aim). Light or moderately damaged planes can be a part of the squadron (indicated with orange damage text), but they'll reduce the overall time you have to shoot the UFO and also suffer an aim penalty. Sometimes the game will say "planes are unavailable", but hitting ignore and then reselecting the UFO will show the full list of damaged interceptors and let you use them normally. Each plane can be at the rear, in the middle, or in the front, with their aim and chance to be hit scaling appropriately. The boosters you can use depend on the front-most plane's position, and the front-most plane(s) take half of the shots from the UFO, so later on putting a tanky Firestorm in front tends to be a good idea.
UFOs come in two varieties: unarmored and armored. Your plane weapons have varying degrees of armor penetration, with the high AP weapons typically having lower overall DPS against unarmored targets (outside of the Fusion Lance, which is the ultimate in everything). You should keep a variety of weapons equipped to be able to combat both types of threats. The exact amount of planes you'll need per continent you cover can vary a bit, but aiming for at least 5 is usually a good idea, with at least 2 unarmored UFO killers (usually Laser Cannons) and the rest being the best armor-piercing weapons you have.
The Stingray is a special case when it comes to plane weapons, as it can only ever fire a single shot but has good armor piercing, accuracy, and burst damage. Early and midgame it's often a good idea to start UFO interceptions with a couple of Stingray planes to butter up the UFO (or even outright down it) with minimal damage to your planes. You will lose out on overall damage by doing this though, so make sure you have a strong enough hanger to follow up and down UFOs if you're doing this.
The aliens will retaliate if you attempt to secure 10 or more countries at once by sending nigh unstoppable very large Battleships to destroy the satellites (with the chance increasing for each excess satellite). Because of this, you should generally stop after covering 2 or 3 continents outside of exceptional circumstances (like being on a lower difficulty that pressures you less or having a surplus of resources/panic reduction to replace your losses).
For most of the game you'll only be tackling small and medium UFOs, letting the larges do whatever they want, but with an endgame fleet the larges are realistic and the very larges, while still absurdly difficult, can possibly be taken down with a full fleet of the best planes possible.
Unarmored UFOs are the ones that you'll actually be doing missions for, whether that's because they land or because you shot them down. Any unarmored UFO that is at a height of NOE will be landing shortly, and thus you should probably save your planes and just assault them when they land for better loot and no plane damage. Unarmored UFOs that are low are trying to scan for your satellites, and should be shot down before they cause a problem. The exception to this is large UFOs, which are almost always setting up for some non-landed-UFO mission like an Abduction or a Terror. It's worth noting that some of the bigger unarmored UFOs aren't truly unarmored, just less armored than actual armored UFOs.
Crashed UFO missions let you send a squad of 8 soldiers and the enemies spawn damaged to a variable degree based on how long you take to start the mission. Landed missions are the same but the enemies won't spawn damaged and instead of healing over time they'll cause panic over time. Outsiders are also always present as the "boss" units; for more information about them see the AL1 overview. Before getting the Hyperwave Relay you'll get a series of sightings instead to help you identify what's present; they won't always cover every enemy present and can be vague, but are never wrong. These will be your primary missions for capturing aliens, especially Outsiders.
If your soldiers are exhausted or you don't think you can win the mission, crashed UFOs can simply be blown up with an air strike for a small credit and tiny resource reward. You don't normally want to do this if you can actually tackle the mission, but it's far less bad to "skip" a mission by getting a tiny reward than it would be to skip a mission that penalizes you and progresses the aliens' research.
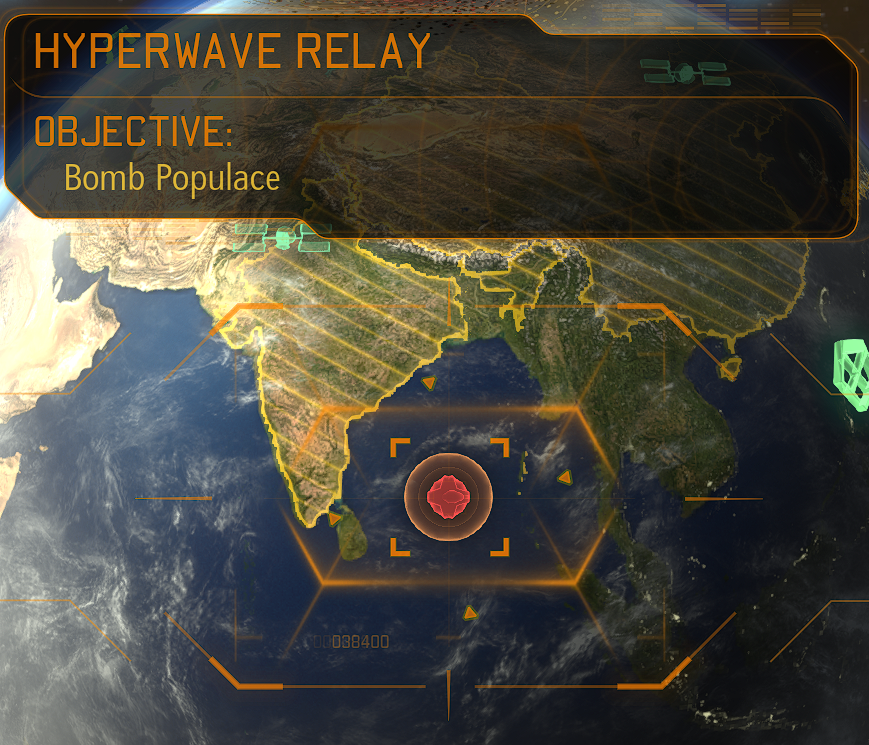
Armored UFOs are the ones with the big strobe circle around them and are primarily used for performing bombing runs and satellite hunts. The ones that are high in the air are going for satellites, while the ones that are NOE are trying to cause panic with bombing runs. These UFOs never crash land when shot down and will always blow up, giving you a smidge of resources and credits. The one exception is the Overseer, which doesn't really do much if you ignore it and always crash lands.
Even if you can't shoot a UFO down, damaging it is often worthwhile (unless it's way outside of your league like an early game large/very large). The chance of the mission failing (or its impact in the case of the bomber) scales linearly up to 50% health loss where it fails entirely. Many armored UFOs are too tough to destroy with an early fleet and don't provide a major reward anyways, so aiming for 50% health is often wise.
If you ever find yourself in a situation where all of your planes are significantly damaged, you can invest in a repair crew to instantly repair half of their damage at the cost of some credits. This is most useful in the lategame for your Firestorms, but can be relevant earlier too.
Planes also have a use outside of fighting UFOs: combat patrols. You can spend credits on a combat patrol and take some plane damage to reduce the panic in a continent and reduce incursion strength globally. This credit cost goes up each time you use one and will slowly trickle down over time, so you want to avoid spamming them, but if an important country is in danger of leaving the Council it's often worth investing in them, and you can also just use a combat patrol to make the game a little bit easier on the tactical layer if needed. The power of a combat patrol depends on the rank of the pilot, the power of their weapon, and if they're in a Firestorm.
As a final note, the aliens do actually have a pattern to where they send their UFOs: they try to take over "adjacent" countries to the ones they already control. The meaning of "adjacent" isn't always clear but here's a screenshot that shows the connections:
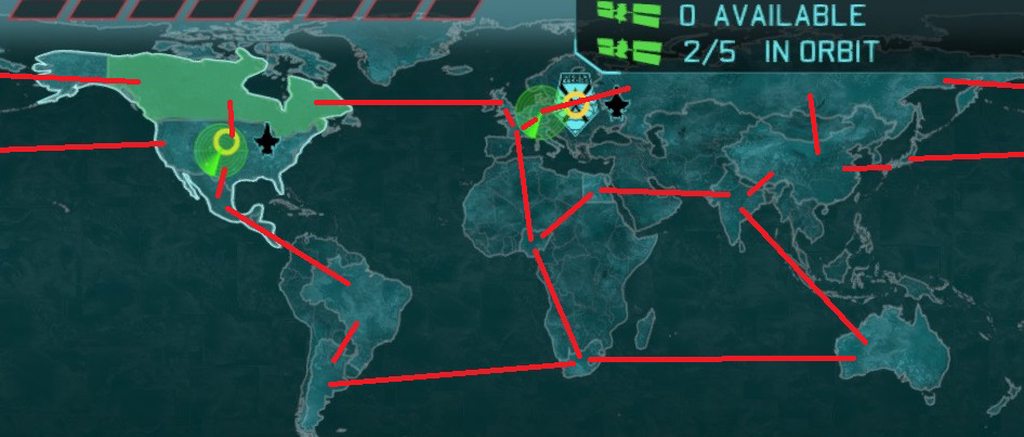
In practice there isn't a whole lot you have to do to play around this, but it does mean that the aliens will focus most of their panic increases on a small number of countries, so sometimes you can position your squadron with more anti-armor weapons in specific continents to handle the increased volume of armored UFOs looking to cause panic with bombing runs.
Planes are sent in a squadron, with 2 to 5 planes allowed at max (scaling with the rank of your highest ranking pilot in the squadron; ranks go up as squadrons destroy UFOs and also provide the pilots with aim). Light or moderately damaged planes can be a part of the squadron (indicated with orange damage text), but they'll reduce the overall time you have to shoot the UFO and also suffer an aim penalty. Sometimes the game will say "planes are unavailable", but hitting ignore and then reselecting the UFO will show the full list of damaged interceptors and let you use them normally. Each plane can be at the rear, in the middle, or in the front, with their aim and chance to be hit scaling appropriately. The boosters you can use depend on the front-most plane's position, and the front-most plane(s) take half of the shots from the UFO, so later on putting a tanky Firestorm in front tends to be a good idea.
UFOs come in two varieties: unarmored and armored. Your plane weapons have varying degrees of armor penetration, with the high AP weapons typically having lower overall DPS against unarmored targets (outside of the Fusion Lance, which is the ultimate in everything). You should keep a variety of weapons equipped to be able to combat both types of threats. The exact amount of planes you'll need per continent you cover can vary a bit, but aiming for at least 5 is usually a good idea, with at least 2 unarmored UFO killers (usually Laser Cannons) and the rest being the best armor-piercing weapons you have.
The Stingray is a special case when it comes to plane weapons, as it can only ever fire a single shot but has good armor piercing, accuracy, and burst damage. Early and midgame it's often a good idea to start UFO interceptions with a couple of Stingray planes to butter up the UFO (or even outright down it) with minimal damage to your planes. You will lose out on overall damage by doing this though, so make sure you have a strong enough hanger to follow up and down UFOs if you're doing this.
The aliens will retaliate if you attempt to secure 10 or more countries at once by sending nigh unstoppable very large Battleships to destroy the satellites (with the chance increasing for each excess satellite). Because of this, you should generally stop after covering 2 or 3 continents outside of exceptional circumstances (like being on a lower difficulty that pressures you less or having a surplus of resources/panic reduction to replace your losses).
For most of the game you'll only be tackling small and medium UFOs, letting the larges do whatever they want, but with an endgame fleet the larges are realistic and the very larges, while still absurdly difficult, can possibly be taken down with a full fleet of the best planes possible.
Unarmored UFOs are the ones that you'll actually be doing missions for, whether that's because they land or because you shot them down. Any unarmored UFO that is at a height of NOE will be landing shortly, and thus you should probably save your planes and just assault them when they land for better loot and no plane damage. Unarmored UFOs that are low are trying to scan for your satellites, and should be shot down before they cause a problem. The exception to this is large UFOs, which are almost always setting up for some non-landed-UFO mission like an Abduction or a Terror. It's worth noting that some of the bigger unarmored UFOs aren't truly unarmored, just less armored than actual armored UFOs.
Crashed UFO missions let you send a squad of 8 soldiers and the enemies spawn damaged to a variable degree based on how long you take to start the mission. Landed missions are the same but the enemies won't spawn damaged and instead of healing over time they'll cause panic over time. Outsiders are also always present as the "boss" units; for more information about them see the AL1 overview. Before getting the Hyperwave Relay you'll get a series of sightings instead to help you identify what's present; they won't always cover every enemy present and can be vague, but are never wrong. These will be your primary missions for capturing aliens, especially Outsiders.
If your soldiers are exhausted or you don't think you can win the mission, crashed UFOs can simply be blown up with an air strike for a small credit and tiny resource reward. You don't normally want to do this if you can actually tackle the mission, but it's far less bad to "skip" a mission by getting a tiny reward than it would be to skip a mission that penalizes you and progresses the aliens' research.
Armored UFOs are the ones with the big strobe circle around them and are primarily used for performing bombing runs and satellite hunts. The ones that are high in the air are going for satellites, while the ones that are NOE are trying to cause panic with bombing runs. These UFOs never crash land when shot down and will always blow up, giving you a smidge of resources and credits. The one exception is the Overseer, which doesn't really do much if you ignore it and always crash lands.
Even if you can't shoot a UFO down, damaging it is often worthwhile (unless it's way outside of your league like an early game large/very large). The chance of the mission failing (or its impact in the case of the bomber) scales linearly up to 50% health loss where it fails entirely. Many armored UFOs are too tough to destroy with an early fleet and don't provide a major reward anyways, so aiming for 50% health is often wise.
If you ever find yourself in a situation where all of your planes are significantly damaged, you can invest in a repair crew to instantly repair half of their damage at the cost of some credits. This is most useful in the lategame for your Firestorms, but can be relevant earlier too.
Planes also have a use outside of fighting UFOs: combat patrols. You can spend credits on a combat patrol and take some plane damage to reduce the panic in a continent and reduce incursion strength globally. This credit cost goes up each time you use one and will slowly trickle down over time, so you want to avoid spamming them, but if an important country is in danger of leaving the Council it's often worth investing in them, and you can also just use a combat patrol to make the game a little bit easier on the tactical layer if needed. The power of a combat patrol depends on the rank of the pilot, the power of their weapon, and if they're in a Firestorm.
As a final note, the aliens do actually have a pattern to where they send their UFOs: they try to take over "adjacent" countries to the ones they already control. The meaning of "adjacent" isn't always clear but here's a screenshot that shows the connections:
In practice there isn't a whole lot you have to do to play around this, but it does mean that the aliens will focus most of their panic increases on a small number of countries, so sometimes you can position your squadron with more anti-armor weapons in specific continents to handle the increased volume of armored UFOs looking to cause panic with bombing runs.
Council missions
Council missions all share one common factor: they tend to have lots of Thin Men in them. LWR varies the spawns more than usual, but Thin Men are still the most common enemy you'll see for most of the game, so you should always plan around those.
Most Council missions aren't all that much different than what you'd expect from vanilla or LW1.0 besides the enemies involved, although Bomb Disposals can get a little dicey if you have a long firefight and Asset Recoveries have a smaller squad of leaders instead of a lot of peons. There is one exception though: council missions can immediately be evacced from once the objective is complete and still be a success, with the exception being missions where eliminating the enemies *is* the objective. This lets you approach some mission types significantly differently:
Most Council missions aren't all that much different than what you'd expect from vanilla or LW1.0 besides the enemies involved, although Bomb Disposals can get a little dicey if you have a long firefight and Asset Recoveries have a smaller squad of leaders instead of a lot of peons. There is one exception though: council missions can immediately be evacced from once the objective is complete and still be a success, with the exception being missions where eliminating the enemies *is* the objective. This lets you approach some mission types significantly differently:
- A few of the VIP escort missions can be "cheesed" by dashing to the exit while avoiding enemies as much as possible. The two biggest examples are Dr. Marazuki and William Thorne (the scientist at the observatory and the traitor) because their maps have strong LOS blockers you can use as you run through. This strategy isn't 100% reliable, but does allow you to complete the missions with much less manpower than you'd expect, so they can make for good training missions if you bring 2-3 soldiers + a SHIV to complete the job.
- Officers have a Tactical Retreat ability that is normally pretty niche, but it can be invaluable for Bomb Disposal missions. Once the bomb is disarmed, there's no need to stick around, so your officer can call in the retreat. Sticking around will get you a few more corpses, but otherwise simply holding your ground until the retreat arrives is good enough.
- The missions where you go out and rescue someone to bring back to evac has the same clause that killing isn't mandatory, but Tactical Retreat is unavailable. In practice this means that out of the way drop-ins can often be ignored.
--AL2 (moving up in the world)--
AL2 brings in a lot of new mechanics, with many new enemies and the entire concept of soldier upgrade paths.
- Mutons are the tanks of the alien forces, possessing Will to Survive + Tenacious Defense and being a nuisance with Suppression. Will to Survive makes direct shooting through cover very inefficient unless you have a lot of penetration, so flanks and overwatch/steady are key. Mutons can suppress every turn as long as they have ammo and also have Mayhem so their suppressions will cause chip damage. Suppression is scary in LWR due to its ability to remove AP, but it's easily interrupted with any source of damage or crowd control effect (including overwatch, which can stop it immediately after it starts).
Mutons have a few situational tricks up their sleeves to be aware of too. The most generally applicable is their grenade, which they can sometimes use if you're very close to them (within 5 or so tiles). Keep this in mind as they can and will use it when they have a good target, and can do so even when they have no ammo. Mutons also have Deflection Shield, which will keep them safe on any turn they don't actually act; close range or overwatch/steady can get around this, but otherwise you can simply wait until they're vulnerable. Finally, Mutons have Blood Call, which is a significant buff and small amounts of healing for any nearby Mutons. Full Muton squads are rare until later on in the game, but if you come across one, keep this buff in mind as it'll make them a lot scarier all around. - Chryssalids and Exalt will be discussed in their own relevant sections...
Psionics
Around this time you'll probably be unlocking and building the Psionic Labs and thus gain access to Psionics.
Like vanilla, Psionics rely heavily on the will stat. You can only become Psionic at all if you have at least 35 will, and it's only guaranteed at 40+. The time it takes to train (and the success chance) depends on the will target of the skill you're trying to learn. Each rank has a target of 40/35/40/45/50 respectively, and for each will below the target you lose 10% success chance, and each will above the target cuts a day off the time to train, with a base time of 15 days.
Since this is the first soldier upgrade path, it's important to mention that soldiers can only ever undergo one "path" at a time, barring the use of second wave options. Your psionic soldier is never allowed to become gene modded and vice-versa. Your officers can't become MECs and vice-versa. Every path is mutually exclusive with the other paths, and as a result each individual path is made more impactful.
Psionics are characterized by their ability to use their will as an offensive stat in combat as well as the addition of new active abilities. They have plenty of offensive, defensive, and passive abilities as well as several unique items that only they can use, but of course you can only become psionic if you have the will to do so, unlike something like gene modding that only requires an investment. Becoming psionic also has no cost besides time, so generally someone should always be psi training when possible.
The best psions tend to be soldiers with builds that have downtime that allows them to use their psi abilities, or builds that can benefit heavily from the passive benefits on the tree (Countercharge, Inner Fire, items like Neural Scope, Psi Defender). Every build gets at least *some* use out of being Psionic, but some definitely make more use of it than others.
Inner Fire/TK Field and Psi Mastery require Sectoid Commander and Ethereal interrogations respectively to be unlocked. A psion that is wearing Vortex Armor and has at least Fervor is also required to activate the Gollop Chamber and assault the Temple Ship.
Like vanilla, Psionics rely heavily on the will stat. You can only become Psionic at all if you have at least 35 will, and it's only guaranteed at 40+. The time it takes to train (and the success chance) depends on the will target of the skill you're trying to learn. Each rank has a target of 40/35/40/45/50 respectively, and for each will below the target you lose 10% success chance, and each will above the target cuts a day off the time to train, with a base time of 15 days.
Since this is the first soldier upgrade path, it's important to mention that soldiers can only ever undergo one "path" at a time, barring the use of second wave options. Your psionic soldier is never allowed to become gene modded and vice-versa. Your officers can't become MECs and vice-versa. Every path is mutually exclusive with the other paths, and as a result each individual path is made more impactful.
Psionics are characterized by their ability to use their will as an offensive stat in combat as well as the addition of new active abilities. They have plenty of offensive, defensive, and passive abilities as well as several unique items that only they can use, but of course you can only become psionic if you have the will to do so, unlike something like gene modding that only requires an investment. Becoming psionic also has no cost besides time, so generally someone should always be psi training when possible.
The best psions tend to be soldiers with builds that have downtime that allows them to use their psi abilities, or builds that can benefit heavily from the passive benefits on the tree (Countercharge, Inner Fire, items like Neural Scope, Psi Defender). Every build gets at least *some* use out of being Psionic, but some definitely make more use of it than others.
Inner Fire/TK Field and Psi Mastery require Sectoid Commander and Ethereal interrogations respectively to be unlocked. A psion that is wearing Vortex Armor and has at least Fervor is also required to activate the Gollop Chamber and assault the Temple Ship.
Gene mods
Around this time you'll probably be unlocking and building the Genetics Lab and thus gain access to gene mods.
Gene mods tend to be highly selfish (with one exception), and also have no stat requirements, just a time and cost. As a result, anyone who can't or won't benefit from other paths can take some gene mods and be satisfied with the passive benefits.
Some builds definitely benefit more than others from the addition of gene mods, notably tanks and overwatch builds, but every soldier can appreciate the extra defenses and/or flexible movement.
Gene modding tends to be a pretty fast process so don't feel compelled to always keep the tubes full if there aren't good candidates.
Gene mods are unlocked through Muton family interrogations (and the Chryssalid autopsy), and you get a money discount for installing multiple gene mods at once, so it's often a good idea to wait for an upcoming gene mod before putting someone in the tube.
Gene mods tend to be highly selfish (with one exception), and also have no stat requirements, just a time and cost. As a result, anyone who can't or won't benefit from other paths can take some gene mods and be satisfied with the passive benefits.
Some builds definitely benefit more than others from the addition of gene mods, notably tanks and overwatch builds, but every soldier can appreciate the extra defenses and/or flexible movement.
Gene modding tends to be a pretty fast process so don't feel compelled to always keep the tubes full if there aren't good candidates.
Gene mods are unlocked through Muton family interrogations (and the Chryssalid autopsy), and you get a money discount for installing multiple gene mods at once, so it's often a good idea to wait for an upcoming gene mod before putting someone in the tube.
Officers
Around this time you'll probably be unlocking the OTS and thus gain the ability to make officers.
Officers are characterized by their ability to give teammates free actions through Commanding Officer and the active Command ability, as well as several passive benefits for the full squad and themselves. Command has a chance to not consume a charge based on the officer's will, but this usually isn't a significant part of choosing to become an officer, just a nice bonus.
They also get a few bonus abilities on top of that in some missions. The most commonly available one is Tactical Retreat, which is available on any mission that has sky clearance and doesn't have a fixed evac point, and it simply calls in the Skyranger to grab everyone in an AOE around the Officer and evac from the mission. This can even save bleeding-out soldiers, so it's good to keep in mind. Less commonly they also gain access to Air Strikes (with the chance scaling with the defense of the country the mission is in). Air Strikes do about what you would expect, and bomb all visible aliens for massive damage.
From a selfish perspective, officers almost entirely gain raw stats as compared to more "unique" bonuses like gene mods or psionics. These bonuses are broad enough to make almost any soldier appreciate becoming an officer, but some builds are better suited to positioning appropriately for Commanding Officer and actually use the Command ability. Ideally you want a soldier that can see many enemies and the squad simultaneously as well as one that acts later in the turn so that they have good opportunities to use Command. Good candidates include tanks, Hit and Run Scouts, most Infantries, and strike rifle Snipers, but almost every build can make it work.
After initially unlocking them you only get a few Lieutenent billets, and the number of billets you get for each previous rank goes up as you unlock new ones. These billets are returned immediately when a soldier dies or retires, so don't be too afraid to hand them out. There are no stat requirements for being an officer but you ideally want your candidates to be soldiers you actually want to bring on most missions, so high quality soldiers make sense.
Officers are characterized by their ability to give teammates free actions through Commanding Officer and the active Command ability, as well as several passive benefits for the full squad and themselves. Command has a chance to not consume a charge based on the officer's will, but this usually isn't a significant part of choosing to become an officer, just a nice bonus.
They also get a few bonus abilities on top of that in some missions. The most commonly available one is Tactical Retreat, which is available on any mission that has sky clearance and doesn't have a fixed evac point, and it simply calls in the Skyranger to grab everyone in an AOE around the Officer and evac from the mission. This can even save bleeding-out soldiers, so it's good to keep in mind. Less commonly they also gain access to Air Strikes (with the chance scaling with the defense of the country the mission is in). Air Strikes do about what you would expect, and bomb all visible aliens for massive damage.
From a selfish perspective, officers almost entirely gain raw stats as compared to more "unique" bonuses like gene mods or psionics. These bonuses are broad enough to make almost any soldier appreciate becoming an officer, but some builds are better suited to positioning appropriately for Commanding Officer and actually use the Command ability. Ideally you want a soldier that can see many enemies and the squad simultaneously as well as one that acts later in the turn so that they have good opportunities to use Command. Good candidates include tanks, Hit and Run Scouts, most Infantries, and strike rifle Snipers, but almost every build can make it work.
After initially unlocking them you only get a few Lieutenent billets, and the number of billets you get for each previous rank goes up as you unlock new ones. These billets are returned immediately when a soldier dies or retires, so don't be too afraid to hand them out. There are no stat requirements for being an officer but you ideally want your candidates to be soldiers you actually want to bring on most missions, so high quality soldiers make sense.
MECs
Around this time you'll probably be finished researching Ailen Biocybernetics and thus gain access to Cybernetic Augmentations (and by extension, MECs).
MECs take quite a while to make, and the success chance and quality of a candidate depends on their HP stat and their rank. Because of how long a chop takes, it's typically advised to always have someone being chopped when possible. Injured soldiers take longer to chop, but not too much longer, so they're often good targets to "heal" by amputating their entire body.
One notable aspect of MEC augmentation is that the soldier is effectively "reset" minus whatever bonus stats they get. This reset is for everything, including non-innate quirks and mission count; chops can be a way to get rid of bad quirks or to reset mission count on veterans to make them "like new" again in terms of fatigue.
The MEC you get depends on the supraclass the soldier comes from: Scouts/Snipers turn into Jaegers, Assaults/Infantries turn into Marauders, Gunners/Rocketeers turn into Goliaths, and Medics/Engineers turn into Shoguns. Each MEC has a distinct SPEC perk as well as a few different LCPL builds (although often the playstyle difference between these is less than for a regular soldier).
MECs take quite a while to make, and the success chance and quality of a candidate depends on their HP stat and their rank. Because of how long a chop takes, it's typically advised to always have someone being chopped when possible. Injured soldiers take longer to chop, but not too much longer, so they're often good targets to "heal" by amputating their entire body.
One notable aspect of MEC augmentation is that the soldier is effectively "reset" minus whatever bonus stats they get. This reset is for everything, including non-innate quirks and mission count; chops can be a way to get rid of bad quirks or to reset mission count on veterans to make them "like new" again in terms of fatigue.
The MEC you get depends on the supraclass the soldier comes from: Scouts/Snipers turn into Jaegers, Assaults/Infantries turn into Marauders, Gunners/Rocketeers turn into Goliaths, and Medics/Engineers turn into Shoguns. Each MEC has a distinct SPEC perk as well as a few different LCPL builds (although often the playstyle difference between these is less than for a regular soldier).
- Jaegers are glass cannons, with very few defensive perks but huge burst damage from Hunter and whichever LCPL perk they choose.
- Marauders are the ultimate in punching, and just generally close range domination.
- Goliaths are big dumb tanks that can also specialize in grenadier or anti-mechanical roles if needed.
- Shoguns inflict mass AOE damage with Collateral Damage and potentially grenades as well as being the best users of Restorative Mist. Their grenade build tends to focus more on quantity over quality compared to the Goliath's. They can also take on the role of an assassin with Hit and Run + VPT + Bullseye (or use Hit and Run to activate One for All and tank more).
Alien leaders
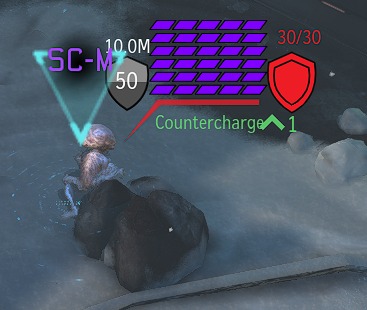
AL2 marks the first point where leaders can be encountered. These variants of aliens have purple health bars and a unique color (if you have the appropriate sub-mod installed), and also possess increased stats and special perks.
In most situations there will be up to one leader per pod, and that leader will be whoever the pod's main alien is. Some situations can result in extra leaders independent from that though, like high tier UFOs and the Temple Ship, and later on in the game you'll just see bonus leaders randomly from time to time.
Every leader has the Sprinter perk giving them defense and mobility, but their other bonuses depends on their leader level. The max leader level scales up as the AL goes up, and at certain thresholds leaders with new names, colors, and perks can show up. Most higher tier leaders will have a different set of bonus perks and more stats, so while usually they'll be scarier, they aren't always going to be. One example of this happens with Sectoids; the Prodigy is much better with psi attacks while the Executioner is much better with its pistol, but oftentimes those psi attacks will be the scarier ones to see.
Always keep an eye on these guys; they tend to be the most dangerous enemies you'll come across for one reason or another, especially the gold-colored champions that show up late in the game.
Exalt missions
Exalt will first activate almost immediately when entering the second half of May, hacking your credits and leaving you unhappy having to pay for a scan cost to find their cell. LWR will always tell you exactly when an Exalt cell exists on the globe (with a reminder while scanning as well as with an exclamation mark on the covert ops button), so you don't need to worry about remembering to pay a scan tax on a regular basis.
Covert Ops have a lot of special treatment. First, a Covert Op cannot be a Sniper/Assault/Gunner/Rocketeer; the technology (and balance) isn't there yet. Second, Covert Ops are limited to Leather Jackets but gain the Fast and Furious perk, giving them a 0 AP action anytime they make a blue move and letting them be a lot more active while still moving from relay to relay. Finally, Covert Ops can hack relays (and are required to hack them in Extractions), but these hacks take 2 turns to complete, so make sure to protect them. These hacks remove the ammo of all Exalt soldiers.
There are two primary mission types as well as the final Exalt HQ Raid: Covert Extractions and Data Recoveries. Covert Extractions are the simpler of the two; you send a small 3-man squad out to protect the Covert Op while they finish hacking a few relays. The map will spawn with a small number of Exalt, usually only a single pod, and more will come in over time. The amount of reinforcements ramp up every time they come, and are (mostly) unlimited; don't bother fighting them all, extract as soon as you can.
Data Recoveries are king of the hill missions where you need to protect the Encoder and Transponder from being hacked. The Encoder isn't necessary to win the mission, but you do get a credit bonus if it stays unhacked and letting it be hacked/destroyed also immediately spawns a wave of reinforcements at the Transponder. The Covert Op can still hack relays but it's not core to win the mission, and in fact the Covert Op doesn't even need to survive the mission to succeed. There are 3 total waves of reinforcements in addition to a larger initial squad of Exalt soldiers, and you get to bring a 5-man squad.
Covert Ops have a lot of special treatment. First, a Covert Op cannot be a Sniper/Assault/Gunner/Rocketeer; the technology (and balance) isn't there yet. Second, Covert Ops are limited to Leather Jackets but gain the Fast and Furious perk, giving them a 0 AP action anytime they make a blue move and letting them be a lot more active while still moving from relay to relay. Finally, Covert Ops can hack relays (and are required to hack them in Extractions), but these hacks take 2 turns to complete, so make sure to protect them. These hacks remove the ammo of all Exalt soldiers.
There are two primary mission types as well as the final Exalt HQ Raid: Covert Extractions and Data Recoveries. Covert Extractions are the simpler of the two; you send a small 3-man squad out to protect the Covert Op while they finish hacking a few relays. The map will spawn with a small number of Exalt, usually only a single pod, and more will come in over time. The amount of reinforcements ramp up every time they come, and are (mostly) unlimited; don't bother fighting them all, extract as soon as you can.
Data Recoveries are king of the hill missions where you need to protect the Encoder and Transponder from being hacked. The Encoder isn't necessary to win the mission, but you do get a credit bonus if it stays unhacked and letting it be hacked/destroyed also immediately spawns a wave of reinforcements at the Transponder. The Covert Op can still hack relays but it's not core to win the mission, and in fact the Covert Op doesn't even need to survive the mission to succeed. There are 3 total waves of reinforcements in addition to a larger initial squad of Exalt soldiers, and you get to bring a 5-man squad.
Exalt units
Exalt soldiers come in 4 main variants, with a bonus 5th: (Elite) Operatives, (Elite) Marksmen, (Elite) Vanguards, (Elite) Heavies, and SHIVs. With the Colored Aliens submod, each is color-coded to make them stand out more, and be similar to your own soldiers' class colors.
As a prelude, it's important to note that all Exalt soldiers barring basic and level 1 leader SHIVs have Lock N' Load, so while relay hacks are still effective at buying time, they'll just sit in their current position and reload + shoot if nothing compels them to move like a flanking soldier.
All basic Exalt soldiers are also capable of panicking for the same reasons as XCOM soldiers; use their panic as an excuse to ignore them and focus on non-panicked targets.
As a prelude, it's important to note that all Exalt soldiers barring basic and level 1 leader SHIVs have Lock N' Load, so while relay hacks are still effective at buying time, they'll just sit in their current position and reload + shoot if nothing compels them to move like a flanking soldier.
All basic Exalt soldiers are also capable of panicking for the same reasons as XCOM soldiers; use their panic as an excuse to ignore them and focus on non-panicked targets.
- Operatives are the simplest Exalt soldiers; they're basically Assaults. They're dangerous up close with Close Encounters and will resist the first hit they take with Repulsor, while also having decent overwatches with Opportunist. Individually, they're rarely a big threat, but they are powerful in numbers and can make contesting objectives difficult with the threat of a double flank shot.
- Marksmen are the second simplest Exalt soldiers; they're basically Snipers. They hit like an absolute truck but die to a gentle breeze, can barely move, and can't hit things up close. They're rarely a threat on their own, but with other Exalt soldiers in the way, they can become a big problem.
- Vanguards are a rebrand of support/tank Medics, and are experts at taking and holding positions. They are offensively lacking, with only a base assault rifle to their name, but they're very tanky and bring smokes and healing to the squad. They also have Brawler to punish close range flanks and Deflection Shield to punish staying at a range, because ♥♥♥♥ you. They're hard to take down quickly, but often don't do a whole lot in the meantime, using their turns to heal themselves or throw smokes that may/may not be effective.
- Heavies use the same tricks as Mayhem Gunners, including Danger Zone Suppression, Bulletstorm, and holo, and have Will to Survive on top to keep them alive in cover. They have a hard time hitting without holo, but if they do it hits like a truck.
- Exalt SHIVs are statistically similar to your own SHIVs and have most of the same perks too when they become leaders. They're the only mechanical units Exalt will field and are quite tanky and hit hard. You can also use them as cover, just like how aliens will use your SHIVs as cover! Probably don't do that though.
SHIVs can't spawn on Covert Extractions until very late in the game (AL8+). SHIVs are also particularly vulnerable to the Overload effect of arc weapons; a spare rifle/pistol can do wonders against them.
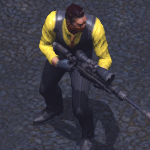
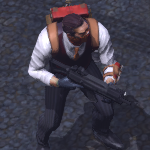
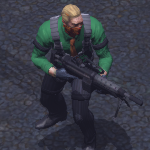
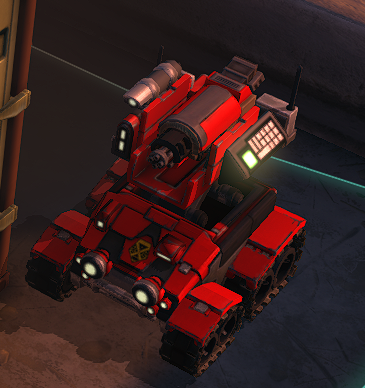
Terror missions
Lids. Lids everywhere.

Terror missions are terrifying in LWR for a few reasons. First and most importantly, they're the primary place (and likely the first unless you got an early Friends in Low Places) that you'll be fighting Chryssalids, which are a menace at all stages of the game. Secondly, they guarantee alien leaders in every pod, and even boost the leader level of said leaders, so you will always be fighting at least one particularly scary enemy (as well as scary leader Chryssalids). Finally, when a Terror mission shows up, you need to react to it *immediately* instead of letting the timer tick down; every hour it sits on the globe means more civilians will be dead by the time you get there.
One significant difference from vanilla and LW1.0 is that civilian deaths are no longer completely random. Civilians will only die if they are both out of your line of sight and inactive aliens can see them, so you can effectively control sections of the map with your squad to prevent civilian deaths without actually saving them. Civilians can still die if an active alien decides to shoot them though.
Terror missions give a hefty credit reward for completing them based on how many civilians are saved, and they have an effect on panic that varies with that too, doing nothing at 12 civilians and either raising or lowering panic based on how many fewer/more survive. Skipped/failed Terror missions or saving 0 civilians will result in that country immediately leaving the Council, but don't have much of a consequence if they already left.
Terror missions are terrifying in LWR for a few reasons. First and most importantly, they're the primary place (and likely the first unless you got an early Friends in Low Places) that you'll be fighting Chryssalids, which are a menace at all stages of the game. Secondly, they guarantee alien leaders in every pod, and even boost the leader level of said leaders, so you will always be fighting at least one particularly scary enemy (as well as scary leader Chryssalids). Finally, when a Terror mission shows up, you need to react to it *immediately* instead of letting the timer tick down; every hour it sits on the globe means more civilians will be dead by the time you get there.
One significant difference from vanilla and LW1.0 is that civilian deaths are no longer completely random. Civilians will only die if they are both out of your line of sight and inactive aliens can see them, so you can effectively control sections of the map with your squad to prevent civilian deaths without actually saving them. Civilians can still die if an active alien decides to shoot them though.
Terror missions give a hefty credit reward for completing them based on how many civilians are saved, and they have an effect on panic that varies with that too, doing nothing at 12 civilians and either raising or lowering panic based on how many fewer/more survive. Skipped/failed Terror missions or saving 0 civilians will result in that country immediately leaving the Council, but don't have much of a consequence if they already left.
- Chryssalids throw a wrench into many common tactics. The most significant is their Agile perk that negates all close range weapon bonuses against them; it's going to be hard to hit them at close range without extra help from something like pincers or battle scanners, even with normally specialized weapons like Shotguns. Guaranteed hits like the Kinetic Strike Module still work fine though. So, obviously you should run away from them right? Wrong (mostly). Lids also have Pursuit and will chase units that move away from them in most situations, so typically you want to stand your ground and gun them down before they close in. Lid attacks are corrosive (using the same acid as Thin Men) and they'll even corrode you on their moves (outside of Pursuit), so an Engineer to handle that tends to be helpful, as are concussions to stop them from reaching you in the first place or to mitigate their damage. Their attacks also penetrate all armor, because ♥♥♥♥ you.
As a bonus, Lid leaders have Skitter and will attempt to dodge AOE attacks you throw at them. They're not the best at it, but it's unpredictable as to whether they'll succeed or not so you should try to avoid taking that risk. On the bright side, they can't dodge what they can't see coming, so using them from out of line of sight or from within smoke prevents them from dodging. - Zombies are very simple; they have big health bars, they're slow, and they hit hard. They have zero special characteristics though, so as long as you have some damage and the ability to move away from them, they shouldn't pose much of a threat. If you do have to actually take some hits from them though, they don't have penetration so armor can do the trick, and concussions are universally helpful as is Red Fog given that they have no armor HP.
Zhang missions
It isn't explicitly listed anywhere I think, but Slingshot is an important DLC for LWR to function correctly; some resources that are used are contained in it, and mechanics like Spec Ops won't work without it.
Zhang's missions have the same objective as their base game counterparts, but LWR mechanics can throw a wrench into your plans.
Friends in Low Places is almost identical, down to the swarm of Thin Men and the funny Chryssalid drop-ins happening near the end. There's a chance this will be the first Chryssalid you see in the campaign, but for more info on those see my Terror mission section. FILP tends to occur pretty early in the campaign in that AL2-4 range, and is a prerequisite to see Confounding Light and Gangplank, both of which occur much later in the campaign, likely around AL7. It tends to be easier to hold the spawn point rather than pushing into the enemies, but your mileage may vary. Zhang will join your squad for your efforts, a soldier with terrible aim but great mobility and an aptitude for using pistols.
It's important to note that this is the only escort mission that doesn't allow evac after the VIP is safe; you still have to kill every alien. Why? Blame Firaxis.
Confounding Light can be a bit tough to handle given the need for speed and multiple muton drop-ins, but on the bright side if any soldier reaches the end after the transponders are active, the mission instantly ends. Usually the best plan is to fight through the first half or two-thirds of the map and then dash to the train controls. Confounding LIght's main reward is being allowed to challenge Gangplank, usually a few weeks or so after this mission.
Gangplank is a menace, as it's essentially a Very Large Landed mission (and this is definitely the earliest time you can do one of these) with drop-ins instead of an Outsider command pod. It doesn't help that said drop-ins can involve Cyberdiscs, and a Cyberdisc is guaranteed to spawn in somewhere around the halfway point. Sustain for the squad is really important; a long mission like this will grind you down without healing for your units, and the moment your tanks run out of health they can safely use, you're going to start taking casualties. You may also want to consider running a second support in the squad, or at least more alternative ways of handling overwatches; one soldier's consumables isn't going to cut it with the huge number of enemies and constant drop-in pressure. Unfortunately, unlike Confounding Light, killing every alien is a mandatory part of winning the mission, so good luck :)
If you do succeed, you'll get some incredible loot, including a very rare Fusion Core.
Zhang's missions have the same objective as their base game counterparts, but LWR mechanics can throw a wrench into your plans.
Friends in Low Places is almost identical, down to the swarm of Thin Men and the funny Chryssalid drop-ins happening near the end. There's a chance this will be the first Chryssalid you see in the campaign, but for more info on those see my Terror mission section. FILP tends to occur pretty early in the campaign in that AL2-4 range, and is a prerequisite to see Confounding Light and Gangplank, both of which occur much later in the campaign, likely around AL7. It tends to be easier to hold the spawn point rather than pushing into the enemies, but your mileage may vary. Zhang will join your squad for your efforts, a soldier with terrible aim but great mobility and an aptitude for using pistols.
It's important to note that this is the only escort mission that doesn't allow evac after the VIP is safe; you still have to kill every alien. Why? Blame Firaxis.
Confounding Light can be a bit tough to handle given the need for speed and multiple muton drop-ins, but on the bright side if any soldier reaches the end after the transponders are active, the mission instantly ends. Usually the best plan is to fight through the first half or two-thirds of the map and then dash to the train controls. Confounding LIght's main reward is being allowed to challenge Gangplank, usually a few weeks or so after this mission.
Gangplank is a menace, as it's essentially a Very Large Landed mission (and this is definitely the earliest time you can do one of these) with drop-ins instead of an Outsider command pod. It doesn't help that said drop-ins can involve Cyberdiscs, and a Cyberdisc is guaranteed to spawn in somewhere around the halfway point. Sustain for the squad is really important; a long mission like this will grind you down without healing for your units, and the moment your tanks run out of health they can safely use, you're going to start taking casualties. You may also want to consider running a second support in the squad, or at least more alternative ways of handling overwatches; one soldier's consumables isn't going to cut it with the huge number of enemies and constant drop-in pressure. Unfortunately, unlike Confounding Light, killing every alien is a mandatory part of winning the mission, so good luck :)
If you do succeed, you'll get some incredible loot, including a very rare Fusion Core.
Annette missions
Annette's missions are also pretty similar to their vanilla/LW1.0 counterparts.
Portent is a fairly standard rescue mission; get to the end of the map, grab the VIP, and get out. It tends to occur pretty early in the campaign in that AL2-4 range, and is a prerequisite to see Deluge and Furies, both of which occur later in the campaign; Deluge is usually somewhere around AL5, while Furies is somewhere around AL7. There's not too much to say about the mission, beyond the fact that success gives rewards you with Anton Smits, a strong-statted soldier with both leg gene mods.
Deluge can get a bit chaotic with LWR's focus on firefights, just like Confounding Light. Compared to Confounding Light, you get the ability to extend the timer with the valves but the drop-ins will eventually be much more dangerous. The first few you see won't be anything special (usually Sectoids and Mutons), but the last few are almost guaranteed to be Mechtoids, and they will almost always overwhelm you if you don't quickly rush to rescue Annette considering that you may have not fought even 1 by this point, let alone 2 or more. If you can kill some, their cores are valuable to have though. Annette's rescue ends the mission instantly (and can result in a funny cutscene if some living aliens are nearby). Annette is a very strong psionic as you might expect; her other stats are tame or bad, but her will is very high and gets even higher when multiple aliens are nearby, and she also has both tier 1 psi abilities.
Furies is equally chaotic with the time pressure and the much scarier enemies that show up at this point in the game. In most aspects this is a landed large mission with a soft time limit (that you can disable), drop-ins, and no Outsider pod. The drop-ins are mostly normal, but there's a few guaranteed Berserkers and a high chance of seeing a Commander or two as well. The longer you take, the fewer captives you'll save, but winning the mission before the first timer hits 0 will give you all 3 of the Furies, Tactical/Weapons/Marksman soldiers with mostly the same traits as Annette (mediocre non-will stats and both tier 1 psi abilities, but no will bonus near enemies).
Portent is a fairly standard rescue mission; get to the end of the map, grab the VIP, and get out. It tends to occur pretty early in the campaign in that AL2-4 range, and is a prerequisite to see Deluge and Furies, both of which occur later in the campaign; Deluge is usually somewhere around AL5, while Furies is somewhere around AL7. There's not too much to say about the mission, beyond the fact that success gives rewards you with Anton Smits, a strong-statted soldier with both leg gene mods.
Deluge can get a bit chaotic with LWR's focus on firefights, just like Confounding Light. Compared to Confounding Light, you get the ability to extend the timer with the valves but the drop-ins will eventually be much more dangerous. The first few you see won't be anything special (usually Sectoids and Mutons), but the last few are almost guaranteed to be Mechtoids, and they will almost always overwhelm you if you don't quickly rush to rescue Annette considering that you may have not fought even 1 by this point, let alone 2 or more. If you can kill some, their cores are valuable to have though. Annette's rescue ends the mission instantly (and can result in a funny cutscene if some living aliens are nearby). Annette is a very strong psionic as you might expect; her other stats are tame or bad, but her will is very high and gets even higher when multiple aliens are nearby, and she also has both tier 1 psi abilities.
Furies is equally chaotic with the time pressure and the much scarier enemies that show up at this point in the game. In most aspects this is a landed large mission with a soft time limit (that you can disable), drop-ins, and no Outsider pod. The drop-ins are mostly normal, but there's a few guaranteed Berserkers and a high chance of seeing a Commander or two as well. The longer you take, the fewer captives you'll save, but winning the mission before the first timer hits 0 will give you all 3 of the Furies, Tactical/Weapons/Marksman soldiers with mostly the same traits as Annette (mediocre non-will stats and both tier 1 psi abilities, but no will bonus near enemies).
--AL3 (avoid those tentacles...)--
AL3 is around the earliest time you'll consider doing a base assault, and also probably the latest you'll see your first terror mission if you haven't already. It also introduces the lovely Seeker to the pool of enemies.
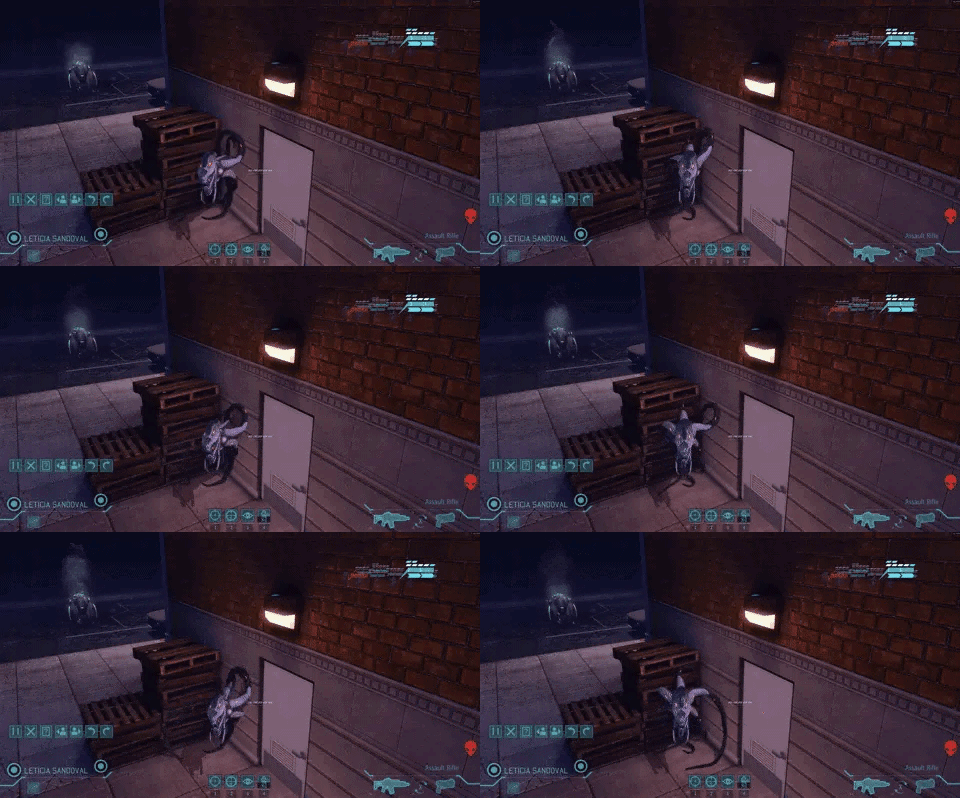
- Seekers are more of a support unit, and serve to distract and debilitate you, particularly when other enemies are involved. While they more commonly will beeline to look for a strangle, they can also shoot normally, so you do need to stay in cover when possible. Their gun tends to be pretty weak outside of leaders, but it can still hit pretty hard with high penetration and their tendency to shoot flanked enemies.
Obviously the core of Seekers is their stealth. While you *can* attempt to locate cloaked seekers with Combat Readiness, it's inefficient and you're much better off with a Proximity Sensor and/or Scout battle scanners. From now until endgame, it's highly recommended to bring a proxy sensor with you on every mission unless you know for a fact seekers won't be present, although having some battle scanners can suffice.
While strangling a soldier, Seekers become a lot tankier with more DR and crit immunity but are also a lot easier to hit, so high penetration weapons do better against them. Outside of that, high penetration still helps but it's important to have enough accuracy to be able to hit them too due to their flying defense bonus. LMG Mayhem suppression will tear into them like all flying enemies.
Also on a completely unrelated note, this mod is a critical addon for a complete LWR experience: https://www.nexusmods.com/xcom/mods/860
Base assaults
At least one Alien Base Assault is mandatory to finish the campaign, and your first realistic opportunity to do this will be somewhere around AL3 or AL4. By launching a satellite over a country that has left the Council, you gain the opportunity to assault the Alien Base that was set up there and bring them back into the Council. You should generally act fast, though; while the satellite doesn't actually have to stick around to assault the base after locating it, the aliens will quickly try to shoot it down if their base stays up with the satellite. You typically want to assault a base in the continent that you plan on expanding to to gain its continent bonus.
ABAs let you send 8 soldiers and have a big'ol number of aliens ready to ruin your day. There's nothing special about them besides the quantity; you'll be seeing 20+ aliens, with more for each base assault you've done, as well as guaranteed scary leaders. Initially this will just be a Lord or Magus at the end, but this can escalate into a guaranteed Atlas and Overmind if you do too many, so be careful about that.
ABAs give a chunk of benefits, including reduced Alien Research (reversing AL slightly), reclaiming the country, panic reduction, a fusion core, lots of misc alien sellables (some used for Advanced Surgery), and a lot of meld. Each assault requires a Skeleton Key, which becomes increasingly expensive to manufacture as they up their security. Most campaigns shouldn't expect to do more than 2, maybe 3 ABAs, and it's not unheard of to stop after the first.
Finally, this is one of the few missions you cannot retreat from; there's no special consequences for losing the mission but your squad will not be making it out if you do.
ABAs let you send 8 soldiers and have a big'ol number of aliens ready to ruin your day. There's nothing special about them besides the quantity; you'll be seeing 20+ aliens, with more for each base assault you've done, as well as guaranteed scary leaders. Initially this will just be a Lord or Magus at the end, but this can escalate into a guaranteed Atlas and Overmind if you do too many, so be careful about that.
ABAs give a chunk of benefits, including reduced Alien Research (reversing AL slightly), reclaiming the country, panic reduction, a fusion core, lots of misc alien sellables (some used for Advanced Surgery), and a lot of meld. Each assault requires a Skeleton Key, which becomes increasingly expensive to manufacture as they up their security. Most campaigns shouldn't expect to do more than 2, maybe 3 ABAs, and it's not unheard of to stop after the first.
Finally, this is one of the few missions you cannot retreat from; there's no special consequences for losing the mission but your squad will not be making it out if you do.
Site Recon
Oh no. Oh no. Not like this. AHHHH!
Remember that terror mission you probably did at some point before this? Now you get to have fun with a mission that's almost entirely Chryssalids! :)
This mission can occur at a very random time, but it's pretty much guaranteed to be at or after AL3. Having MECs unlocked will help, but sometimes you're going to have to do without.
You should still have someone who can take some ranged weapon shots, but the rest of your squad should be on DPS duty, ideally Lid-specific DPS. Agile makes this tricky, but anything with a guaranteed hit (Mayhem Gunners, grenades, MEC weapons, Kinetic Blast) is valuable, and otherwise you just want big guns, lots of shots/AOE shots, high penetration, and ways to boost your accuracy like Holo Targeting and Battle Scanners. It's also a good idea to have some amount of flashbangs on hand; they're invaluable for buying turns when your damage just isn't enough. Including a support can manage that, but also psi soldiers can bring a casual Psi Grenade and get solid use out of it.
There's exactly one pod of "regular" aliens that will shoot at you; once those are dealt with, cover is no longer a concern and you should focus entirely on anti-lid positioning. This usually involves funneling the Lids into a chokepoint where they can only hit you with a limited number of Lids, or positioning such that they can't jump past your soldiers and have to take a long way around, giving you more time to shoot at them.
Lids having Pursuit makes the retreat from the boat a lot more dangerous if you aren't prepared; have everyone in a position to gun down the first Lid or two until your "sacrifice" has successfully regrouped with the squad. The extra Lids that spawn from the sharks makes things even worse, but as long as you have enough firepower they shouldn't be too bad.
As a bonus, if you have some downtime, you can destroy the sharks before the retreat and nothing will spawn out of them. I'm not sure if you can do this with non-KSM stuff, but the KSM one-shots them at no consumable cost.
This mission always occurs in Canada and the reward is mostly just cash and soldier EXP, so it's not unreasonable to skip it if Canada has already defected or is close to it, although you do get *a lot* of EXP...
--AL4 (playing frisbee)--
AL4's claim to fame is the introduction of the Cyberdisc, which will also show up guaranteed on every UFO mission for ALs 4 and 5.
Notably, this AL is also the first AL in which evolutions can show up on missions. For more details about those, check out the "What makes LWR different from LW1.0?" section, but as a tl;dr, some missions will have defensive evolutions that affect every alien on that mission, with the pool of possible evolutions depending on the tactics you've been using throughout the game.
Notably, this AL is also the first AL in which evolutions can show up on missions. For more details about those, check out the "What makes LWR different from LW1.0?" section, but as a tl;dr, some missions will have defensive evolutions that affect every alien on that mission, with the pool of possible evolutions depending on the tactics you've been using throughout the game.
- Cyberdiscs start out as generic high damage flying units with explosive AOE shots (that can disorient and remove overwatch just like other explosives), but eventually turn into anti-tank monstrosities with very high pen growth per AL. They also have a high crit chance, so some sort of crit resistance helps a lot. A dedicated tank is not going to tank their hits very efficiently; strong cover is a must for survival. The sole exceptions are units with Absorption Fields (primarily Goliaths or Shoguns, but later on SHIVs), which will halve the amount of pen their weapon has and thus make them able to take hits pretty effectively.
When the disc is closed it's harder to hit and is crit-immune, but when it's open it has very little DR and is vulnerable to crits (it's not even Hardened like other mechs!). It will close anytime it takes more than 10% of its health in damage, so you want to hit it with a single strong attack when it's open and move on to easier hits while it's closed, particularly hits with high penetration.
While they won't do it often, they do have grenades they can throw, and they're more likely to throw them when someone is close and they're out of ammo.
--AL5 (when acid starts being useful)--
AL5 brings in the Mechtoids, how fun! You'll also see the occasional Berserker, usually accompanied by more Berserkers or Seekers.
- Mechtoids are the first true mechanical tank units the aliens field, and will also likely be the first time you find acid to be a significant help. They have a pretty high base DR stat as well as tons of DR from other perks, so a source of acid will more or less double your damage against them while also dealing lots of damage over time to their armor health. Mechtoids notably also have Absorption Fields, which make laser weapons significantly less effective due to reduced penetration; Gauss reigns supreme against them. You just generally need a lot of penetration to fight them effectively, be it from reducing their DR or stacking effects like holo, shred, Light'em Up, Quenchguns, pincers, etc.
Offensively, Mechtoids try to shoot twice per turn, often at different targets, and have the same explosive shots that Cyberdiscs have. They also have Sentry which will protect them from the first hit each turn as well as giving their overwatches much more damage; don't tank one if you can help it!
Sectoids can still Mind Merge Mechtoids, and it's terrifying for a Mechtoid to have those stat boosts, a bigger shield, and the graze chance; don't even think about attacking a Mechtoid that's protected by a Merge.
Mechtoids also have a global to punish you for retreating. Mortar Barrage is simple and to the point: if you retreat out of line of sight, it just blows ♥♥♥♥ up. The barrage will deal chip damage to several targets as well as annihilating cover, so be careful!
As a small final note, Mechtoids aren't really allowed to be on upper floors. Their AI borks in those cases and won't do anything so Ucross decided to make them simply drop down to the lower level on reveal, but this only happens after the actual reveal animation; do not be surprised to see them perform a short teleport! - Berserkers are big, dumb, simple, and effective. They want to walk at you and smack you, while also smacking you a little bit each time they move as long as they have enough health. They can move as a reaction to your attacks as well, which will trigger that same damage. Their attacks also penetrate all armor, because ♥♥♥♥ you. There's really not a whole lot to say about them; concussions are nice to have to buy you time and otherwise you just want to dump damage into them, especially with pincer attacks if they close in.
The only special aspect you need to look out for is Bloodlust. Berserkers will get faster and do more damage for every ally that dies near them, so if you focus on the Berserker last it's going to be a real menace!
Scuttle rushes
Scuttle Rushes show up rarely starting from AL5, and become much more common as the game progresses. These missions only allow you to send a small 4-man squad, but every alien starts out incredibly damaged and cannot be prepared on reveal (for more information about this, see the LW1.0 differences section), making for an easy-ish cleanup. On the other hand, the Outsiders are trying to scuttle (blow up viciously) the UFO, so you need to engage them within a certain number of turns.
Basically, these are fast-paced missions that incentivize the use of strong alpha-striking tools (notably most AOEs) to finish off the weak aliens before they have a chance to act. Enemies *can* regenerate if you act too slowly, but active heals from units like Drones are fairly ineffective due to heal fatigue.
--AL6 (big bad bosses)--
AL6 brings in two new threats, both of which being scary versions of existing enemies. Additionally, Mechtoids are now guaranteed to show up on UFO missions instead of Cyberdiscs (for AL6 and 7).
- Muton Elites are the simpler of the two, literally just being improved Mutons (although they lose the ability to use Blood Call). Beyond significant stat improvements, the most significant difference is the addition of Danger Zone, making them effective against clumped up squads (and particularly against the SHIV + Engineer duo, as you'll both be locked down and the Engineer will lose their ability to passively heal).
- Sectoid Commanders have a bit more complexity behind them. At their core they're still a Sectoid, but their Mind Merge now affects all nearby Sectoids rather than just one, and they can now use Telekinetic Field to protect themselves and nearby allies, as well as use Enthrall to force your soldiers out of position.
Additionally, they have Distortion, which makes them nearly crit immune and gives them a chance to negate any damage they receive that goes down each time they get hit. Pincer hits will deplete the chance two times as much, and ballistic/gauss weapons deplete the chance half as much. Usually the best strategy will be starting with smaller hits and pincers to reduce the negation chance before following-up with a strong finisher at a high chance if needed. Will reductions will lower their current negation chance if you can inflict any on them. Psionics (usually Countercharge, but Mind Fray can technically work if you can overcome their will) can't be negated so they can be alright as well. If you're using a ballistic or gauss primary, it may be worth carrying a laser pistol secondary specifically to help against distortion; laser pistols are dirt cheap and have no downside to equipping them beyond the opportunity cost of not bringing a machine pistol.
They also split any damage received among allies in vision range. Because of the split, you need to get rid of nearby allies first in most cases to deal any significant damage, but you can also use that split to your advantage for AOE damage in the right circumstances.
Oh, and they can use Psychic Storm too. Screw you.
Base defense
Oh. Oh god no. They're here.
The base defense can occur anytime between August 1st and December 31st, and will be signaled by a Battleship coming to destroy your home country's satellite. It's random as to how long the main assault will take to arrive, but expect it within a few weeks at most. If you haven't already done the security program projects in the Foundry, now would be a good time; they'll let your soldiers fight back against the aliens and preemptively damage them in the mission.

When the assault is about to begin, you will very obviously know by a message showing up on the geoscape. From there, you'll get the opportunity to outfit 12 soldiers for the mission. The first 5 are your initially spawned soldiers, the next 3 will arrive after turn 1, and the next 4 will arrive as reinforcements if any of your soldiers fall. The mission progresses similarly to vanilla, with swarms of aliens coming to ruin your day, although you don't have any blueshirts to use as bait keep you safe. Make sure to have your officer within the first 8 soldiers.
If you take too long turtling (50 turns) the aliens will gain control of the ventilation systems and start killing you with a toxic gas, so don't play too slowly.
After the mission, a huge number of soldiers in the barracks will be injured and fatigued, so you'll probably want to hire and/or retire soldiers to get the barracks back in shape. Notably, anyone in the last 4 slots that didn't get deployed won't get injured or fatigued, so if you have critical soldiers, you may want to "protect" them by adding them to the mission.
The base defense can occur anytime between August 1st and December 31st, and will be signaled by a Battleship coming to destroy your home country's satellite. It's random as to how long the main assault will take to arrive, but expect it within a few weeks at most. If you haven't already done the security program projects in the Foundry, now would be a good time; they'll let your soldiers fight back against the aliens and preemptively damage them in the mission.
When the assault is about to begin, you will very obviously know by a message showing up on the geoscape. From there, you'll get the opportunity to outfit 12 soldiers for the mission. The first 5 are your initially spawned soldiers, the next 3 will arrive after turn 1, and the next 4 will arrive as reinforcements if any of your soldiers fall. The mission progresses similarly to vanilla, with swarms of aliens coming to ruin your day, although you don't have any blueshirts to use as bait keep you safe. Make sure to have your officer within the first 8 soldiers.
If you take too long turtling (50 turns) the aliens will gain control of the ventilation systems and start killing you with a toxic gas, so don't play too slowly.
After the mission, a huge number of soldiers in the barracks will be injured and fatigued, so you'll probably want to hire and/or retire soldiers to get the barracks back in shape. Notably, anyone in the last 4 slots that didn't get deployed won't get injured or fatigued, so if you have critical soldiers, you may want to "protect" them by adding them to the mission.
--AL7 (poor SHIVs...)--
Oh boy, Heavy Floaters! They're like Floaters, but heavy. Beyond that, this is around the point in the game where you should expect to get your first few Spec Ops soldiers, and you also need to be prepared for the looming threat of a Base Defense.
- Heavy Floaters are a significant step up in strength compared to regular floaters, gaining improved offenses and defenses as well as becoming an anti-mechanical bully because of the addition of CST. MECs can avoid this problem by going into OfA, but SHIVs have no such luxury, and will be ripped to shreds by a swarm of Heavy Floaters, so be careful around them!
Heavy Floaters have a grenade that they'll use under similar conditions to Mutons; be careful when grouping up while close.
Handling Heavy Floaters is similar to regular Floaters in most ways, but do be careful as Sentry, Iron Skin, and their base DR can make them deceptively tanky. Heavy Floaters are still quite vulnerable to psionics, so you can debuff them at your leisure as well as disable their Tactical Mobility with them.
Spec Ops
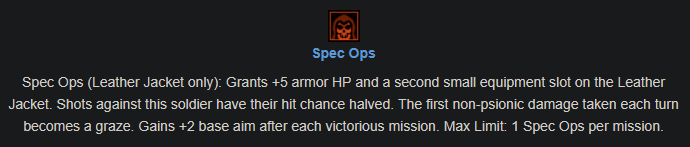
Spec Ops is a powerful upgrade path for soldiers that is unlocked after buying the OTS Colonels upgrade and Elite Recruits. Soldiers can only become Spec Ops if they are elite recruits (hired after the elite recruit OTS upgrade), and are forced to wear Leather Jackets. In exchange for this, however, they get massive benefits, with the most notable ones being aim scaling after every mission and becoming a free slot on certain missions at rank 6. You can only every bring one Spec Ops per mission, however; don't think about trying to turn the Skyranger into a clown car with rank 6 Spec Ops.
Because of this, you typically want to try and have at least one Spec Ops for every mission type by end game if you can help it. Every soldier build gets some sort of benefit out of being a Spec Ops, but ideally your candidates are soldiers you'd be happy to bring on every mission so that they can train as quickly as possible.
Spec Ops have "mastery" targets for each of their perks, which is a bonus effect that activates if they have a certain amount of aim. Because of this, higher aim soldiers make for better Spec Ops soldiers, but any soldier can become a good one eventually with training due to the passive aim growth.
Each rank past the first requires a successful mission as the previous rank to unlock, and is 1/10 the normal fatigue/credit cost (30 credits and 0.5 days of fatigue instead of 300 and 5). These are tiny costs but they can't rank up if they're fatigued, so they do have to wait until their previous mission's fatigue wears off before they can progress. Spec Ops get the all important Override perks at rank 6, so they're effectively free to include on those missions and will make your life much easier. Ranks 5 and before are a mix of offensive, defensive, and utility perks, so pick whatever makes sense for the given soldier.
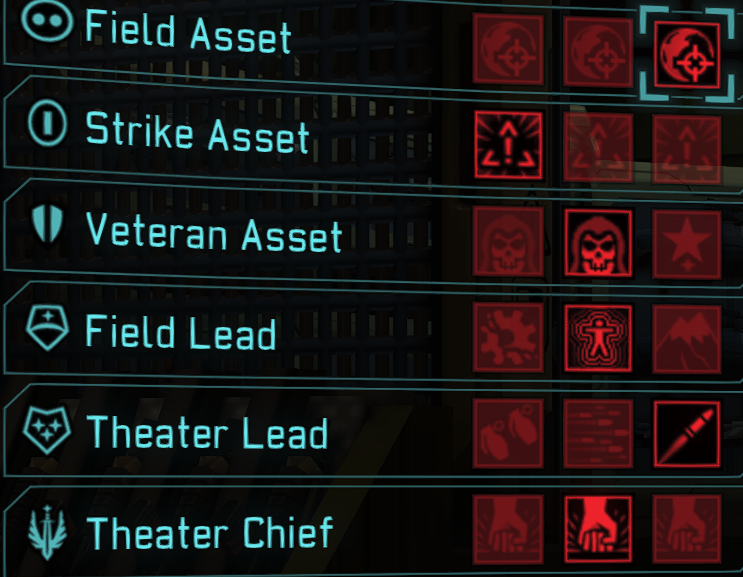
It's important to note that soldiers only get 3 options per rank despite 5 total existing for each rank; each soldier randomly sees 3 out of the 5 and the other 2 are inaccessible to them, so you'll have to adapt somewhat based on the options you see.
Overseer crash sites
Overseers will first show up after you build the Hyperwave Relay, and while Firestorms are not mandatory to take them down, the high DPS of the Overseer will tear into regular planes quite quickly, so you either need a Firestorm to tank in the front position of the squad or overwhelming firepower and boosters.
Once you've downed the Overseer, the hard part begins! There's some good news and bad news about the mission. The good news is that you know almost exactly what to expect, as there's only a couple different Overseer maps and the enemy layout is exactly the same every time barring random leaders and slightly different followers. The bad news is that said enemy layout is monstrous and wants to murder you.
There is always an Ethereal pod, a SectoPod, a Heavy Floater pod, a Sectoid Commander pod, a Muton Elite pod, a Cyberdisc pod, and an Outsider pod, each containing 4 total enemies, so especially if you take this down at an earlier AL, you'll be going up against some threats that you may or may not be ready to tackle.
Overseers do very little when left alone, so you don't have to do the mission if you aren't ready; you can simply ignore the UFO or shoot it down and blow it up for a little bit of loot if your air force is powerful enough.
Completing the mission eventually is mandatory to win the game as it'll give you the Ethereal device necessary to build the Gollop Chamber.
Once you've downed the Overseer, the hard part begins! There's some good news and bad news about the mission. The good news is that you know almost exactly what to expect, as there's only a couple different Overseer maps and the enemy layout is exactly the same every time barring random leaders and slightly different followers. The bad news is that said enemy layout is monstrous and wants to murder you.
There is always an Ethereal pod, a SectoPod, a Heavy Floater pod, a Sectoid Commander pod, a Muton Elite pod, a Cyberdisc pod, and an Outsider pod, each containing 4 total enemies, so especially if you take this down at an earlier AL, you'll be going up against some threats that you may or may not be ready to tackle.
Overseers do very little when left alone, so you don't have to do the mission if you aren't ready; you can simply ignore the UFO or shoot it down and blow it up for a little bit of loot if your air force is powerful enough.
Completing the mission eventually is mandatory to win the game as it'll give you the Ethereal device necessary to build the Gollop Chamber.
--AL8 (when acid starts being *really* useful)--
It's that time. They're here.

Beyond this, all UFOs now have a guaranteed bonus group of a couple Muton Elites on them and a guaranteed Sectoid Commander instead of the Mechtoid. The Muton Elites will persist for the rest of the campaign, but the Commander will be present for AL8 and AL9.
Beyond this, all UFOs now have a guaranteed bonus group of a couple Muton Elites on them and a guaranteed Sectoid Commander instead of the Mechtoid. The Muton Elites will persist for the rest of the campaign, but the Commander will be present for AL8 and AL9.
- Sectopods are the ultimate mechanical menaces in LWR, and will very quickly humble you if you don't know what you're doing. They'll always take two shots per turn unless they only see a single unit, in which case they'll fire a shot with a ton of penetration (aka it's going to kill you). They also have CST so your SHIVs and MECs are going to be very uncomfortable taking their shots. They possess a lot of the same perks as Mechtoids, including Absorption Fields, Damage Control, and Explosive Shots, but notably also add on Fortified for a crit immunity and Reactive Targeting Sensors for retaliatory fire. They also have high crit chance, automatic end of turn overwatches, and Mortar Barrage, because ♥♥♥♥ you.
Sectopods have a whopping 70 base DR, and because of their other perks, you will not be doing significant damage without acid or stacking a hilarious amount of shred. Their total DR is 110, so even with acid they're barely below the 80% mitigation limit and you'll need extra penetration or armor chip damage to get much done. Consider arc weapons, Battle Rifles, Sniper Rifles, Bullseye, pincers, Holo, breaching rounds, AP rounds, etc. Impact is particularly nifty due to providing penetration and also disabling RTS.
Only your tankiest units should attempt to bait fire from Sectopods, and even then you pretty much have to feed it two targets or you'll get punished. Alpha striking is the name of the game; you really don't want to eat fire from a Sectopod for more than a turn or two, as it will inevitably kill you with its raw damage numbers.
I'd also like to take some time to remind you that retreat is (almost) always an option. If a mission throws multiple Sectopods at you, that's often an indication to just cut your losses and run away.
Air base defenses
Air base defenses can only show up if you have a Firestorm on a non-home continent, so there's a very real chance your campaign will never see one of these. The Hyperwave Relay will say that these are "Retaliation" missions. In the unfortunate case that you do see one, it's a tough mission where you're in the middle of the interceptor bay while aliens are on both sides.
There's nothing too fancy about the mission besides being pretty difficult; simply kill all the aliens and secure your hanger. Failure will result in damage and/or destruction of multiple planes, so don't let them win!
There's nothing too fancy about the mission besides being pretty difficult; simply kill all the aliens and secure your hanger. Failure will result in damage and/or destruction of multiple planes, so don't let them win!
Exalt HQ raid
The exact time you'll see the opportunity to do this mission highly varies, but it's likely to be around AL8 or later, maybe AL7 at the earliest.
The Exalt HQ raid is a very simple mission with some special enemies. The objective is simple: send in your 8-man squad and wipe out everything. The enemy presence is what makes this unique, however.
Two boss enemies, the UHIV and Exalt Commander Iago Van Doorn, are always present. On impossible, the champion versions of every other Exalt enemy type are also guaranteed to spawn. There's also a bonus Muton Elite and Sectoid Commander chilling in the base, because ♥♥♥♥ you.
The UHIV is the simpler boss of the two, given that it's literally just a super SHIV. Just because it's simple doesn't mean it won't kick your ass though; it's got beefy stats and a ton of perks to ruin your day with, most notable probably being Light 'Em Up and Fortified. If it's allowed to sit there and take shots at you, they're going to hurt like hell (not to mention shred your armor and holo you).
Iago Van Doorn is a different story, as he is the culmination of a ton of unethical gene modding. Iago is an Elite Operative that possesses nearly every gene mod in addition to massive overwatch capabilities and immunity to overwatch himself. As a bonus he also has CST and Aggression, because ♥♥♥♥ you. Iago has massive stats to go alongside these perks so he may very well be the toughest enemy you come across in the campaign up until the Uber Ethereal. Concussion grenades are invaluable for locking him down, and a strong tank is necessary to take his hits.
There's no time limit for completing this mission once you've unlocked the opportunity to do it, and once you complete it, Exalt disappears from the game (although you'll still occasionally see their troops as backup for Sectoid Commanders).
The Exalt HQ raid is a very simple mission with some special enemies. The objective is simple: send in your 8-man squad and wipe out everything. The enemy presence is what makes this unique, however.
Two boss enemies, the UHIV and Exalt Commander Iago Van Doorn, are always present. On impossible, the champion versions of every other Exalt enemy type are also guaranteed to spawn. There's also a bonus Muton Elite and Sectoid Commander chilling in the base, because ♥♥♥♥ you.
The UHIV is the simpler boss of the two, given that it's literally just a super SHIV. Just because it's simple doesn't mean it won't kick your ass though; it's got beefy stats and a ton of perks to ruin your day with, most notable probably being Light 'Em Up and Fortified. If it's allowed to sit there and take shots at you, they're going to hurt like hell (not to mention shred your armor and holo you).
Iago Van Doorn is a different story, as he is the culmination of a ton of unethical gene modding. Iago is an Elite Operative that possesses nearly every gene mod in addition to massive overwatch capabilities and immunity to overwatch himself. As a bonus he also has CST and Aggression, because ♥♥♥♥ you. Iago has massive stats to go alongside these perks so he may very well be the toughest enemy you come across in the campaign up until the Uber Ethereal. Concussion grenades are invaluable for locking him down, and a strong tank is necessary to take his hits.
There's no time limit for completing this mission once you've unlocked the opportunity to do it, and once you complete it, Exalt disappears from the game (although you'll still occasionally see their troops as backup for Sectoid Commanders).
--AL9 (poor humans...)--
I recommend you quit at this point. The aliens have won. All hail the aliens. Wait...something came over me, no don't do that!
- Ethereals are entering the fray now, and I hope you're ready for their psionic dominance. They do nearly everything Sectoid Commanders do and more without the need for cover! Their Fray is upgraded to cause bleeding and disorientation, and their Panic chains to nearby allies. They can and will use Rift to decimate groups of XCOM units (including mechanical ones). Their basic attack still uses aim, but deals chain psionic damage to units that clump up, or double damage if they're isolated. They also have Regenesis, so they regenerate and can't bleed, because ♥♥♥♥ you.
Ethereals also have a few bonus tricks up their sleeves. First and simplest is Insentient Crush, which damages SHIVs that start their turn in line of sight of the Ethereal; no cheesing them. Next is Psychic Wave, which causes a big burst of damage around wherever they move to, so be careful if you end your turn out of their line of sight. Finally, they have Psychic Tether, which will deal damage to the first unit that tries to move away from them unless the Ethereal is damaged first; retreating from an Ethereal is difficult.
Ethereals will almost inevitably cause significant damage to your squad, and are incredibly difficult to take down due to Distortion and the inability to flank them (not to mention 70 base defense). Acid can help to disable their regeneration, and you really need high aim to hit them effectively (holo, battle scanners, shotguns, steadied shots, pincers, etc). Usually your best bet is to have exactly one or two units nearby that can pincer it while it shoots Psi Lances at them and the rest of your squad stays away from them and deals their damage, but really no matter what you do, you're going to eat some amount of ♥♥♥♥. Have fun!
--AL10+ (doomsday approaches)--
AL10 doesn't add any new enemies (although it does make Ethereals twice as common), but it does mark the beginning of AL acceleration on higher difficulties. Ethereals now also replace the guaranteed Sectoid Commander on UFO missions, so you'll never be able to get away from them.
From this point on, all that improves for aliens (besides evolutions) is their stats and leader chances, but each improvement occurs faster than the last if you're on Brutal or above. Additionally, level 15 serves as a super improvement; if the campaign reaches level 15, you may as well concede since it's as if the AL jumps up to 22 on top of huge DR/pen bonuses. Be aware that UFOs still get the stats of higher ALs, so as you get to AL 12/13/14, very larges/larges/mediums will be off limits respectively. Missions with AL15 aliens absolutely are not doable outside of very extreme situations, so stay away!
From this point on, all that improves for aliens (besides evolutions) is their stats and leader chances, but each improvement occurs faster than the last if you're on Brutal or above. Additionally, level 15 serves as a super improvement; if the campaign reaches level 15, you may as well concede since it's as if the AL jumps up to 22 on top of huge DR/pen bonuses. Be aware that UFOs still get the stats of higher ALs, so as you get to AL 12/13/14, very larges/larges/mediums will be off limits respectively. Missions with AL15 aliens absolutely are not doable outside of very extreme situations, so stay away!
Base defense 2
It's here again...
After you start building the Gollop Chamber, you will 100% get to play another base defense within the building time. This base defense is nearly identical to the first (with the obvious exception of stronger enemies being present), but with one major difference: every alien is a leader! And several will be those scary gold champions I mentioned in passing in the leaders section! Have fun :)
This mission is often going to be the toughest mission in the campaign, so give it all you've got.
Since the final mission is coming up very soon, you especially want to try and protect your most valuable soldiers by keeping them in the last 4 slots so that they don't get maimed, but that won't always be possible given how difficult this mission is.
The UFO this time around could maybe, *possibly* be downed if you have an incredibly strong air force with several Fusion Lances and other bonuses like boosters, the NA continent bonus, or a start bonus, but you definitely shouldn't count on it; Fusion Lances require precious Fusion Cores that you'll likely want to have on hand for MEC3s or Blaster Launchers.
After you start building the Gollop Chamber, you will 100% get to play another base defense within the building time. This base defense is nearly identical to the first (with the obvious exception of stronger enemies being present), but with one major difference: every alien is a leader! And several will be those scary gold champions I mentioned in passing in the leaders section! Have fun :)
This mission is often going to be the toughest mission in the campaign, so give it all you've got.
Since the final mission is coming up very soon, you especially want to try and protect your most valuable soldiers by keeping them in the last 4 slots so that they don't get maimed, but that won't always be possible given how difficult this mission is.
The UFO this time around could maybe, *possibly* be downed if you have an incredibly strong air force with several Fusion Lances and other bonuses like boosters, the NA continent bonus, or a start bonus, but you definitely shouldn't count on it; Fusion Lances require precious Fusion Cores that you'll likely want to have on hand for MEC3s or Blaster Launchers.
Temple Ship Assault
The epic finale has arrived, and boy is it a doozy. The Volunteer you select for this mission will be supercharged with a number of abilities including Distortion, Rift, all unlearned psi abilities, and most importantly an upgrade to Psi Inspire called Psi Surge that can heal and enrage your squad. Do note that Distortion prevents the Volunteer from being healed and Psi Surge costs health to use, and if the Volunteer dies the game is over.
The squad size of the mission depends on the difficulty, with Impossible having 6, and each difficulty below getting 2 more. Each soldier benefits from the Final Stand perk which doubles all charges of consumables (and Commands), so you can get more out of fewer soldiers.
Like in base defense 2, every alien will be a leader, so it's going to be a tough fight. For each country left in the Council, an enemy will be replaced by a worthless Thrall (a 3 HP Zombie), but the mission is doable even without Council support. Spawns are a mix of random and guaranteed, with every alien type in the game (except Seekers) eventually showing up. As a bonus, the infamous Sectopod room has a guaranteed Atlas spawn, so have fun dealing with its immense stats.
The Uber Ethereal is a menace, having a huge amount of health, Distortion, and being the only enemy in the game capable of using Mind Control. The Uber's Distortion lasts twice as long, shares all damage, and can't be pierced by pincers, so you're going to have to grind it down. Mind Control can be interrupted relatively easily with explosives or concussions, but it will always persist for one more turn after it ends, so make sure you are either positioned such that the controlled ally isn't a threat, or crowd control them to prevent that action from being taken. Gunning them down is also an option in truly desperate situations, but you probably shouldn't for obvious reasons. The Uber always spawns with a group of 4 random bodyguards; prioritize these enemies as you will not be damaging the Uber through Distortion with any allies present. At the end of the day, handling the uber is similar to handling other Ethereals, just with a lot more HP and no pincer solution, so as long as you're properly prepared and can fight through his bodyguards, he shouldn't be *too* bad.
Congratulations, you've won! Probably! Unless you died, which isn't entirely impossible either.
The squad size of the mission depends on the difficulty, with Impossible having 6, and each difficulty below getting 2 more. Each soldier benefits from the Final Stand perk which doubles all charges of consumables (and Commands), so you can get more out of fewer soldiers.
Like in base defense 2, every alien will be a leader, so it's going to be a tough fight. For each country left in the Council, an enemy will be replaced by a worthless Thrall (a 3 HP Zombie), but the mission is doable even without Council support. Spawns are a mix of random and guaranteed, with every alien type in the game (except Seekers) eventually showing up. As a bonus, the infamous Sectopod room has a guaranteed Atlas spawn, so have fun dealing with its immense stats.
The Uber Ethereal is a menace, having a huge amount of health, Distortion, and being the only enemy in the game capable of using Mind Control. The Uber's Distortion lasts twice as long, shares all damage, and can't be pierced by pincers, so you're going to have to grind it down. Mind Control can be interrupted relatively easily with explosives or concussions, but it will always persist for one more turn after it ends, so make sure you are either positioned such that the controlled ally isn't a threat, or crowd control them to prevent that action from being taken. Gunning them down is also an option in truly desperate situations, but you probably shouldn't for obvious reasons. The Uber always spawns with a group of 4 random bodyguards; prioritize these enemies as you will not be damaging the Uber through Distortion with any allies present. At the end of the day, handling the uber is similar to handling other Ethereals, just with a lot more HP and no pincer solution, so as long as you're properly prepared and can fight through his bodyguards, he shouldn't be *too* bad.
Congratulations, you've won! Probably! Unless you died, which isn't entirely impossible either.
Outro
Thanks for reading this lil ol' guide :)
I'm no expert at LWR, but the advice I gave should be sound enough for you to get your footing and surpass your master (which is me, of course) after training. Like I said in the intro, this mod will chew you up and spit you out, but once you've got a bite of it you won't want to go back. I've been playing on and off for about 7 years now, and it doesn't seem like that's changing anytime soon...
If you do want to see yours truly suffering, I am one of said LWR streamers from the intro (every now and again) and you can find me at https://www.twitch.tv/admiralbilly . My offline channel also suggests a lot of other high quality LWR streamers that can help ease you into things. If you want to see tip top premium quality master level LWR, stefan3iii is the way to go, wink wink https://www.twitch.tv/stefan3iii .
Also this guide is liable to be outdated fairly soon given how often Ucross updates the mod, but I'll keep it up to date for the foreseeable future and a lot of this advice should be relevant regardless of what changes. Unless Ucross does some bullpoop...
I'm no expert at LWR, but the advice I gave should be sound enough for you to get your footing and surpass your master (which is me, of course) after training. Like I said in the intro, this mod will chew you up and spit you out, but once you've got a bite of it you won't want to go back. I've been playing on and off for about 7 years now, and it doesn't seem like that's changing anytime soon...
If you do want to see yours truly suffering, I am one of said LWR streamers from the intro (every now and again) and you can find me at https://www.twitch.tv/admiralbilly . My offline channel also suggests a lot of other high quality LWR streamers that can help ease you into things. If you want to see tip top premium quality master level LWR, stefan3iii is the way to go, wink wink https://www.twitch.tv/stefan3iii .
Also this guide is liable to be outdated fairly soon given how often Ucross updates the mod, but I'll keep it up to date for the foreseeable future and a lot of this advice should be relevant regardless of what changes. Unless Ucross does some bullpoop...
More XCOM: Enemy Unknown guides
- An Unknown Enemy: The Optimal Strategy 2.0★ 5 (1.6k)73k views3k ♥52 minUpdated Mar 16, 2017
- XCOM: Enemy Unknown - In-Depth Class Guide★ 5 (2.4k)71k views3.6k ♥37 minUpdated Apr 6, 2013
- Useful Tips for the Average Player★ 5 (1.3k)61k views1.4k ♥14 minUpdated Jun 13, 2015
- XCOM: The Long War (Mod)★ 5 (812)58k views2k ♥49 minUpdated Jan 27, 2018
- (incomplete) Beginner's Guide to XCOM: Enemy Within★ 5 (648)51k views1.2k ♥26 minBulgarianUpdated Oct 22, 2015
- A Guide to Help you Play XCOM: Enemy Unknown: Now With Easter Eggs★ 5 (679)42k views1.2k ♥93 minUpdated Jun 9, 2018


This guide was created by its original author on the Steam Community. Are you the author and want it removed? Request removal.