![How to redeem '3rd Echelon' map - [DEPRECATED; GAMESPOT REMOVED THE PAGE] for Tom Clancy's Splinter Cell: Conviction](https://steamsolo.com/wp-content/uploads/2021/07/how-to-redeem-3rd-echelon-map-deprecated-gamespot-removed-the-page-tom-clancy-s-splinter-cell-conviction.jpg)
Overview
This guide will illustrate on how to export 3D models made in Blender using the Kenshi Blender Template and export plugin provided by the dev via the official Lo-Fi forum.Also includes a brief guide on how to prepare diffuse and normal texture, and how to put it all together in Forgotten Construction Set (FCS)
Introduction
A FRIENDLY REMINDER BEFORE WE BEGINThis guide was created when I was extremely new to Blender. I learned a lot over the year but unfortunately those additional knowledge is not reflected in this guide. I may rewrite it in the future but it’s not that high on my list of things to do. I’m still actively modding so that takes precedent over making guides with my limited time.
Having said that, please understand that this guide is not the best way to do things. Some of the instruction is incomplete or may not even work for what you’re trying to do. I suggest anyone interested in using Blender to mod Kenshi to first watch some Blender tutorial videos on Youtube to understand the basics that is not covered in this guide.
When I was learning how to create mod for Kenshi using the Blender Template, I had to learn the hard way since there is no visual guide on how to do it. I created this guide with the hope of maybe it’ll make it easier for others to try making new mods for Kenshi.
This is not a How to Use Blender Tutorial. Please refer to appropriate tutorials available elsewhere to learn how to use Blender properly.
As a disclaimer, I’m new to Blender with only about 40 hours of experience with it so far so I claim no expertise whatsoever.
Requirements
Blender – link here –
Kenshi Blender Template – link here –[www.lofigames.com]
Kenshi Blender Import-Export Mesh Plugin – link here –[www.lofigames.com]
also
Photoshop / GIMP / paintdotnet or any other image editor of your choice
NVIDIA Texture Tools for Photoshop – link here –[developer.nvidia.com] for diffuse and normal map
Part I – Blender – Mesh
Once you’ve downloaded all the required files and completed Blender installation, you will need to unzip Kenshi Blender Import-Export Mesh Plugin (io_mesh_kenshi.zip) to appropriate folder. For ease of use, you can unzip it to Blender2.79scriptsaddons folder.
Open Blender and go to File>User Preferences… and proceed to Add-ons tab.
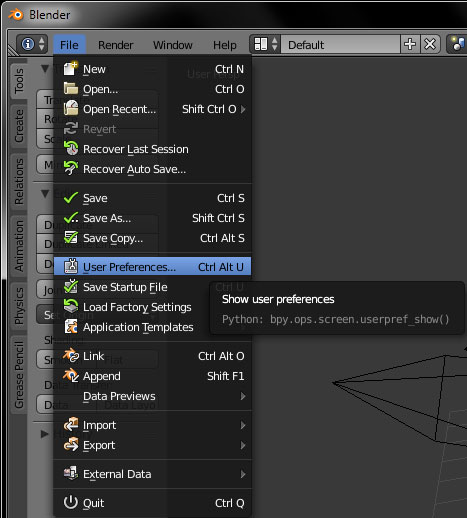
If you’ve unzipped the plugin in the appropriate addons folder mentioned previously, you will find Import-Export: Kenshi MESH format and you’ll need to tick the box next to it to install the plugin.
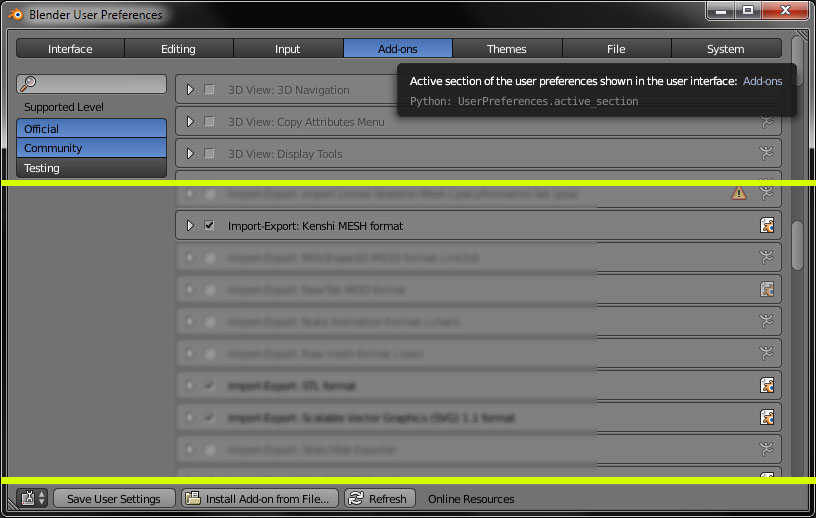
If you’ve unzipped it to a different folder, click Install Add-on from File and proceed as necessary.
Click on the Save User Settings button once you’re done.
You will also need to unzip the kenshi_blender_template.zip file that you’ve downloaded.
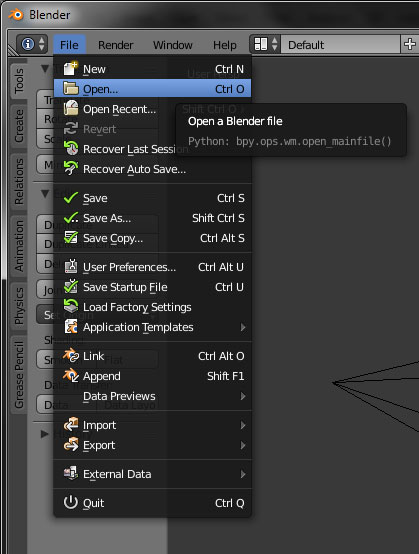
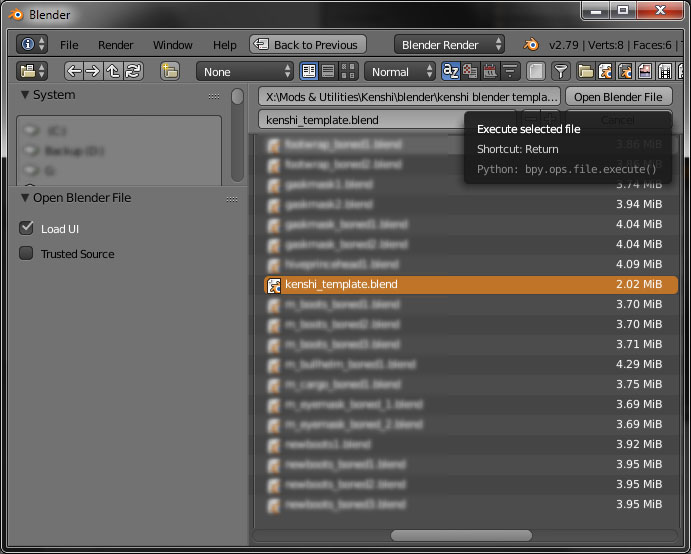
In Blender, open the Kenshi Blender Template file by going to File>Open… and select the kenshi_template.blend file.
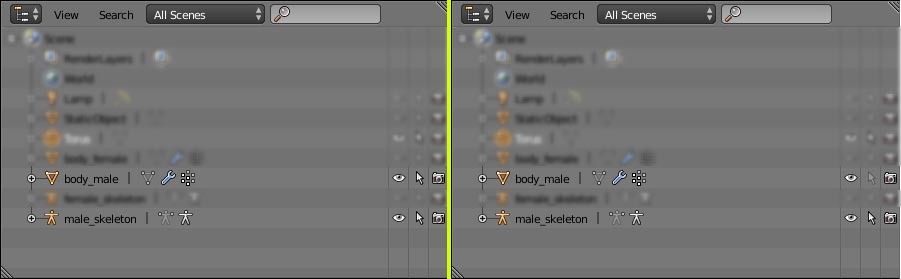
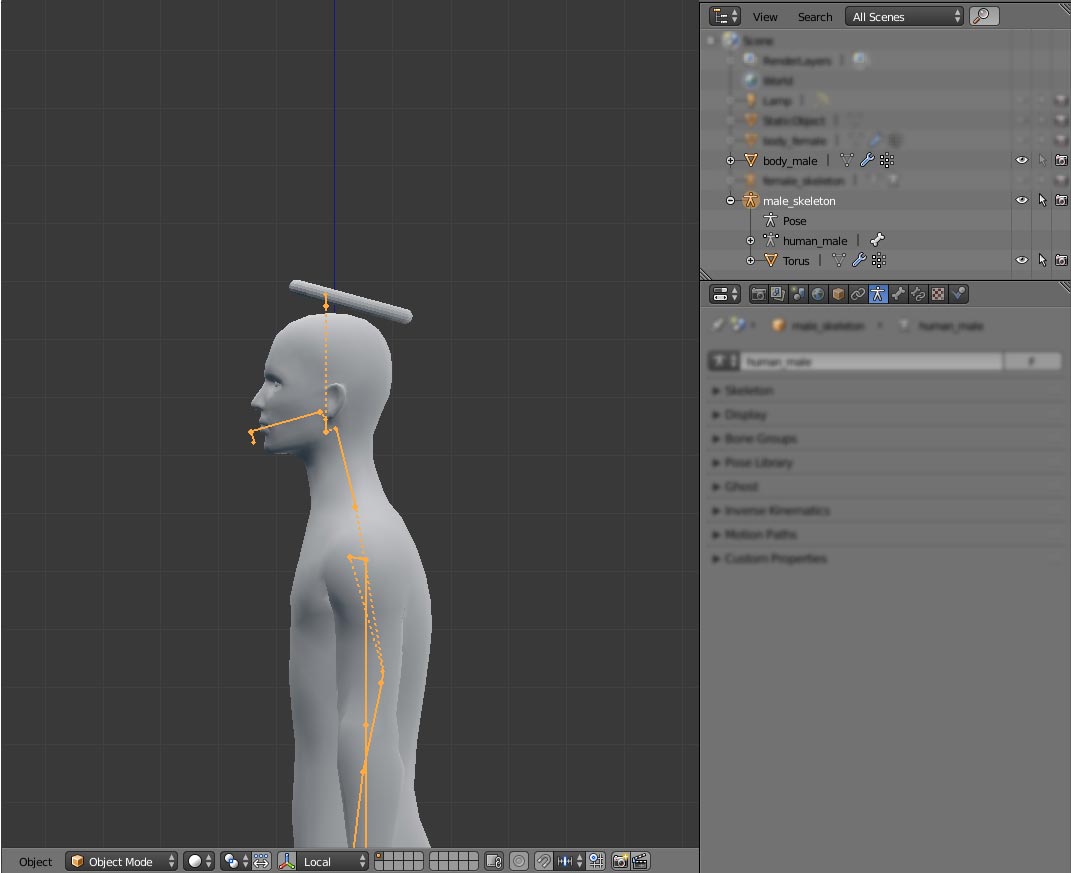
You’ll probably see something that looks like this (model of a female with skeleton, a sword and a male with skeleton).
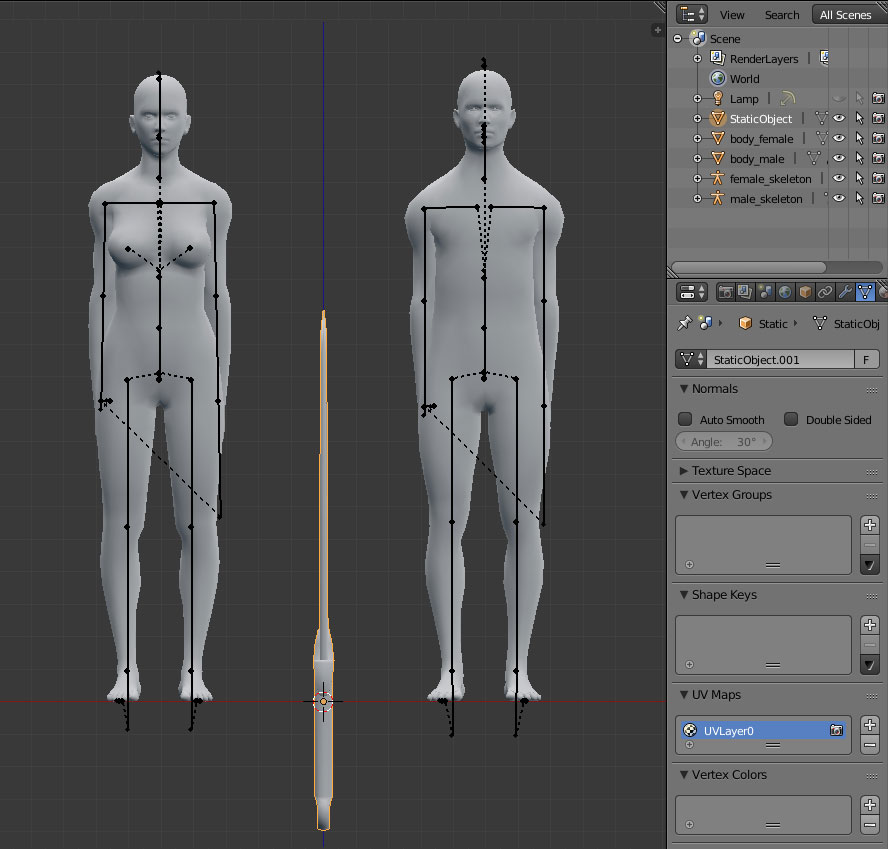
For the purpose of this guide, I will hide and disable selection for the female and sword model since I will not be working with any of them.
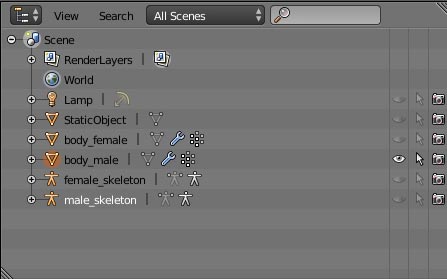
You can do this by clicking on the eye icon and the arrow pointer icon for the appropriate object on the Outliner area (top right of the screen). I did this to the StaticObject, body_female and female_skeleton.

Now I will move the body_male and male_skeleton to the center of the grid. Make sure that the Origin point (orange dot) is properly aligned with the center of the grid.

Now that the male body and skeleton is aligned to the center, we can start creating our 3D model.

For convenience, I’ve hidden the male_skeleton for the time being by clicking the eye icon and disable selection by clicking the arrow pointer icon next to it.
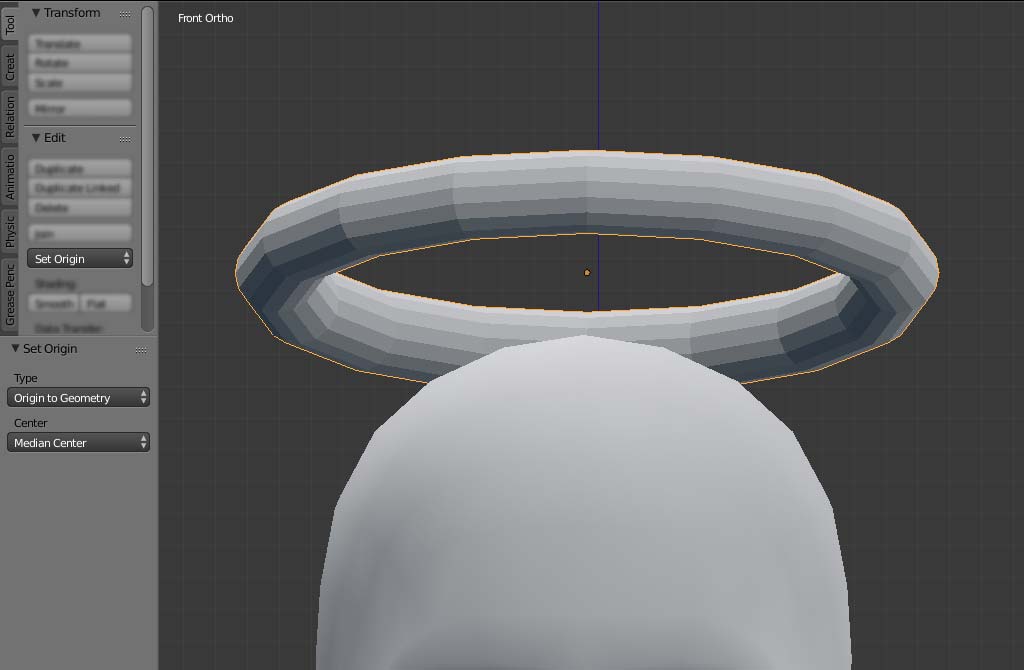
I made a floating torus above the head of the male model. Once I’ve added the torus mesh, I aligned it with the head and rotate it at an angle.

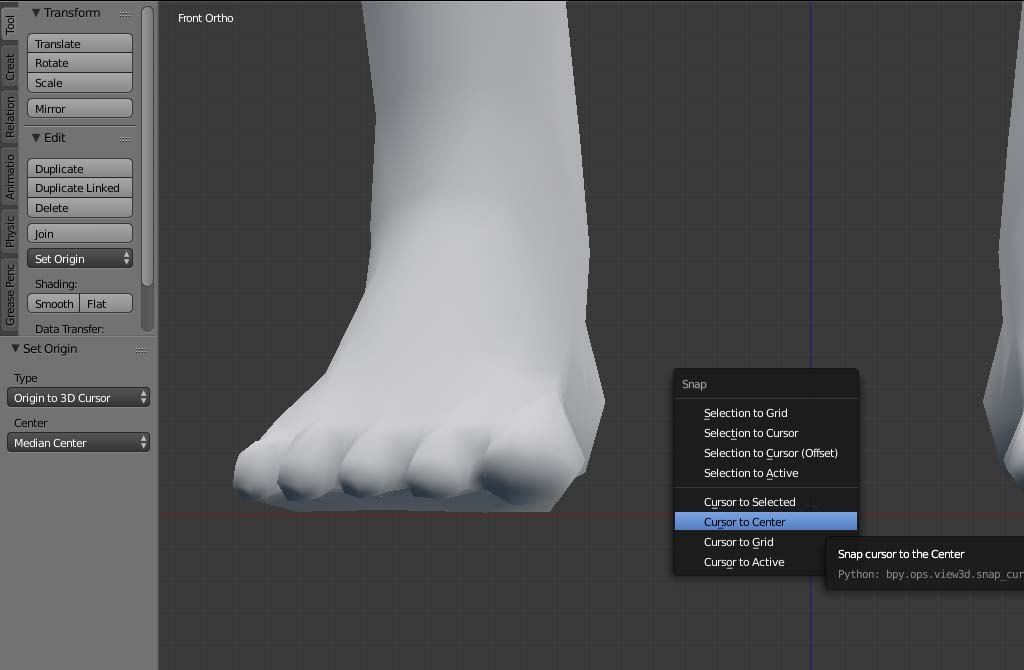
After you’re done with your mesh, please make sure that the Origin point (orange dot) for your created object is aligned with the center of the grid.
If it is not, you can align it by snapping (Shift+S) your Cursor to Center, then select your mesh in Object mode and Set Origin to 3D Cursor (Shift+CTRL+ALT+C).
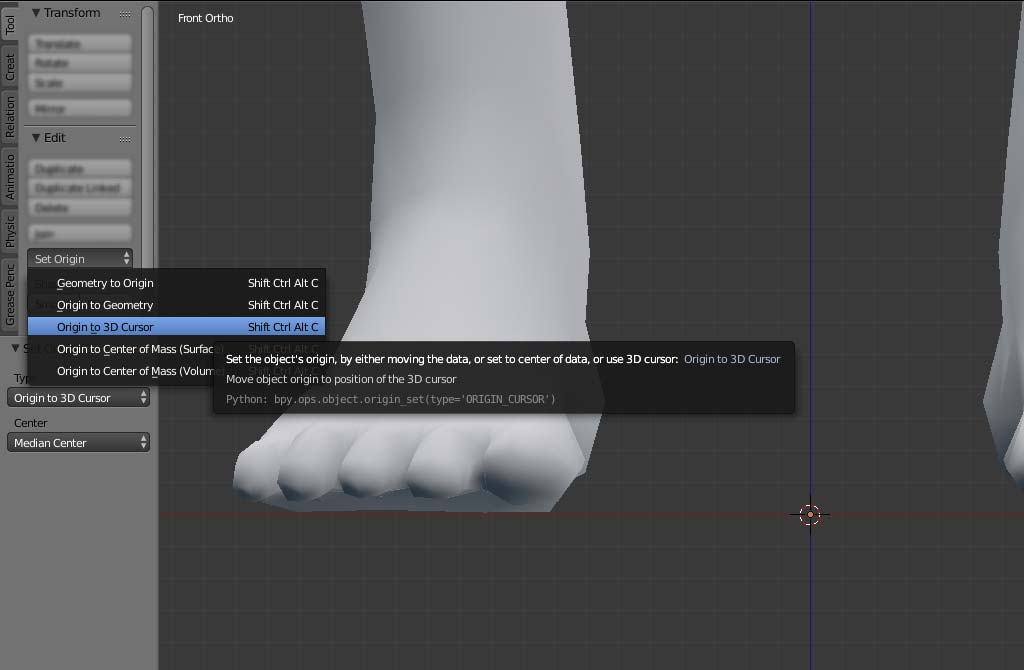
Apply the location, rotation and scale (CTRL+A in Object mode) as necessary once you’re done with the mesh. This is important in order to ensure all the transformation you’ve made is applied to the object.

Part I – Blender – UV
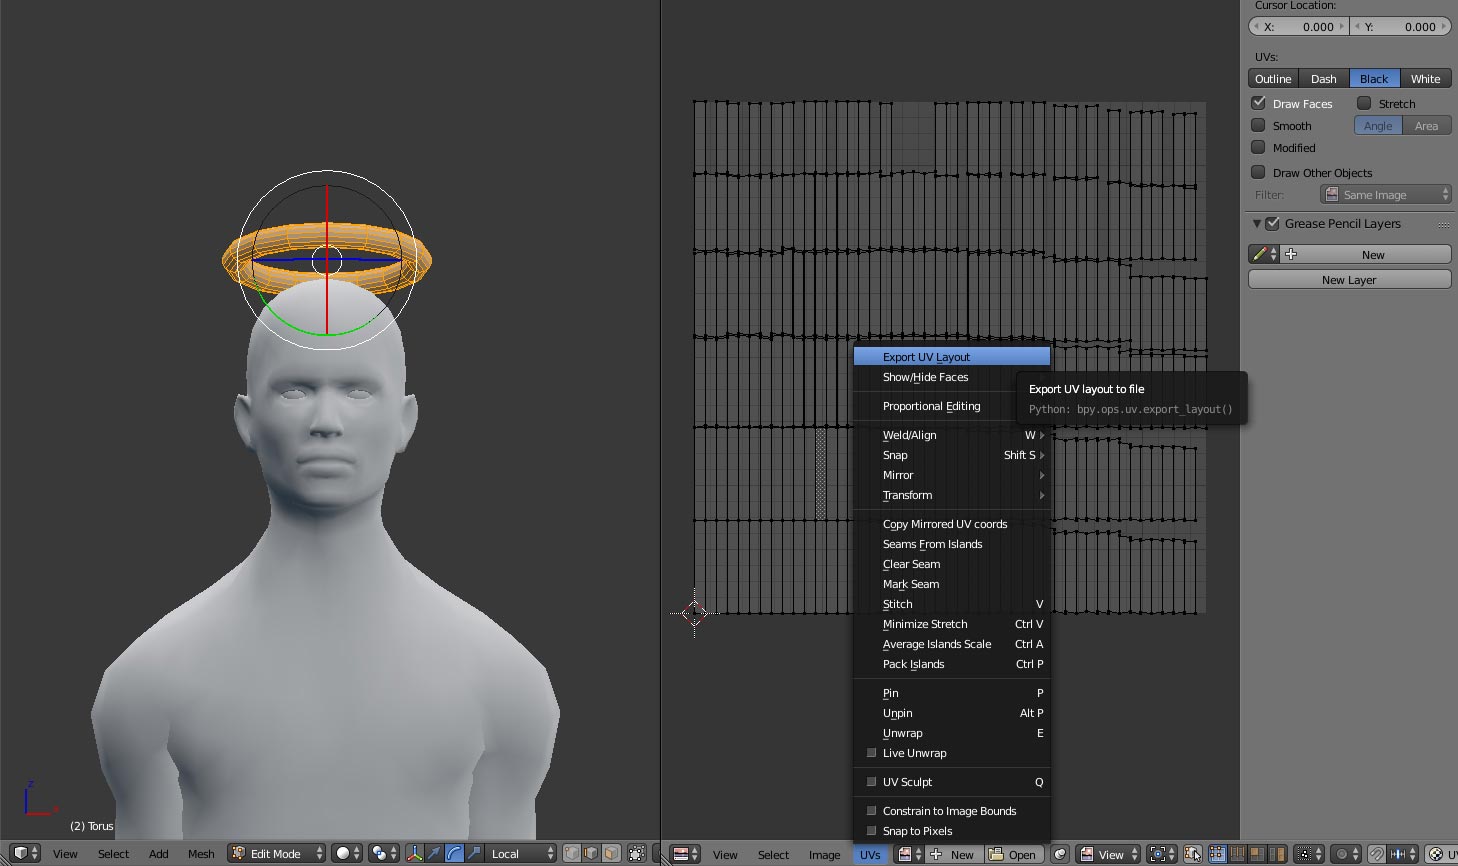
Now I will UV unwrap the torus.

Disclaimer: Please do this properly. I used Smart UV Project which is neither the best nor proper way to unwrap your UV since I’m lazy and this is a mediocre tutorial. Please, don’t be like me. Unwrap the UV properly. Do it right.
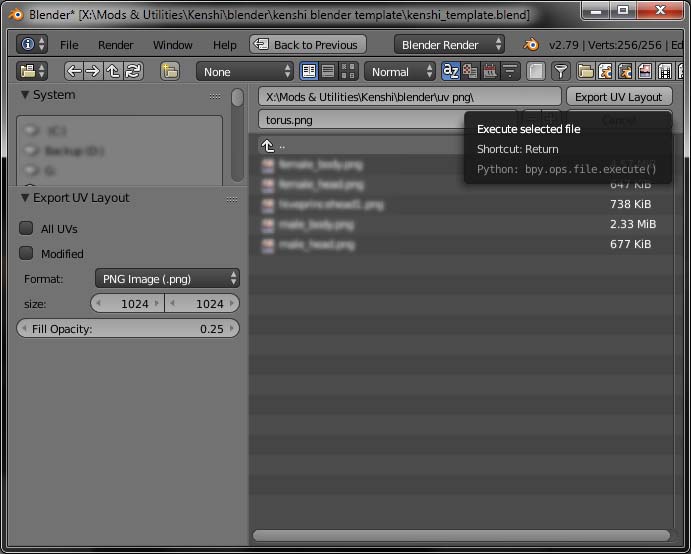
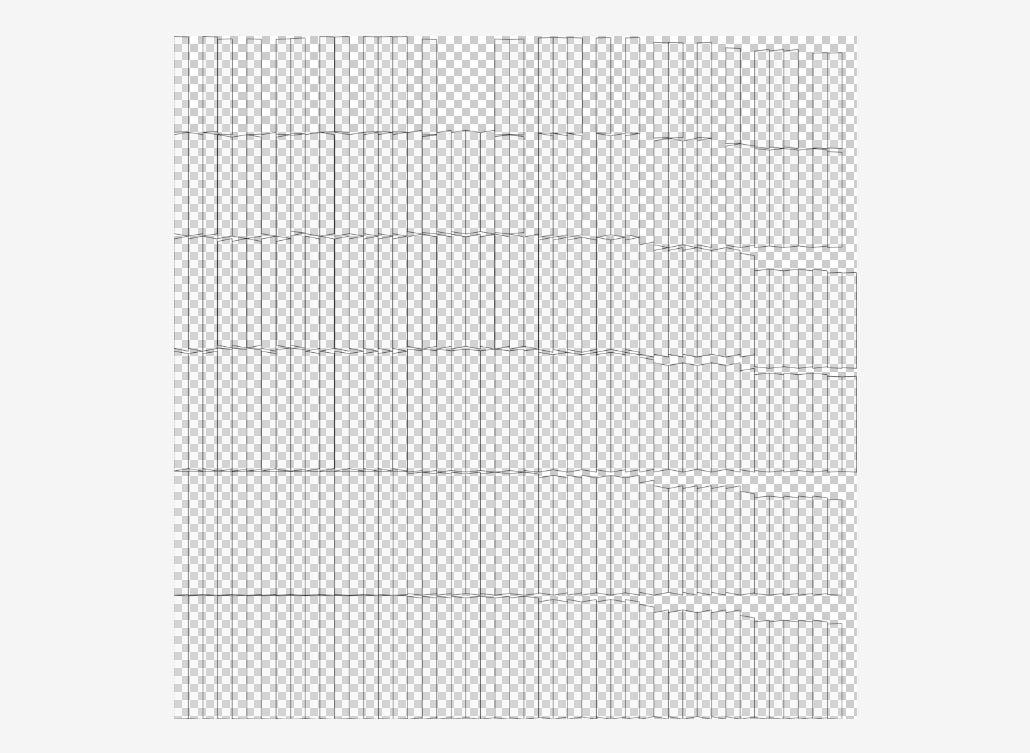
Since I’ll be creating the textures in Photoshop, I chose to export the UV layout as .png (torus.png) files as reference. You can do so by going to UVs>Export UV Layout on Header Region (the bottom half of the screen).
This will open the Export UV Layout window. I named it as torus.png and leave all the settings as default. You can change the size of the image if you want.
If you have yet to apply the location, rotation and scale (CTRL+A in Object mode) at this point, please do so to ensure all transformation is applied.
Part I – Blender – Rigging & Weight Painting
You will need to rig your mesh to the skeleton before exporting.
I made the male_skeleton visible and selectable again by clicking on the eye icon and the arrow pointer icon next to it.
Now, I’ll disable selection for the body_male by clicking on the arrow pointer icon to make it easier to select the skeleton for rigging.
I selected the torus first, then I selected the male_skeleton. Then I set the object’s parenting (CTRL+P) to With Empty Groups.
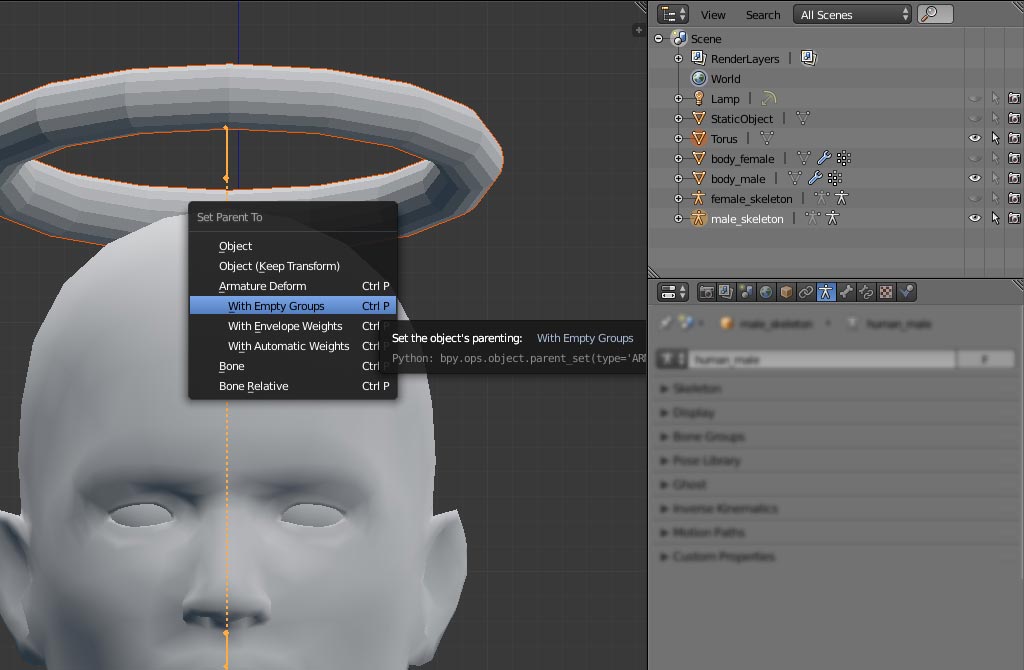
(I could probably make it work if I choose With Automatic Weight since the torus is floating above the head but we’re not going that route. This is how I did it for this tutorial. If you know a better way of doing this that works for you, do it that way instead.)
Now the torus is rigged to the male_skeleton.

Disclaimer: The method that I used for weight painting in this tutorial is neither the best nor proper way to do it. I did it this way because it’s simple, quick, lazy and mediocre way to get it done. It served it’s purpose for this tutorial.
Please do the weight paint the proper way. Look out for tutorials if you have to, but do it right.
Again, for convenience I disable selection for the male_skeleton by clicking on the arrow pointer icon next to it.
Now I made the body_male selectable again by clicking on the arrow pointer icon.
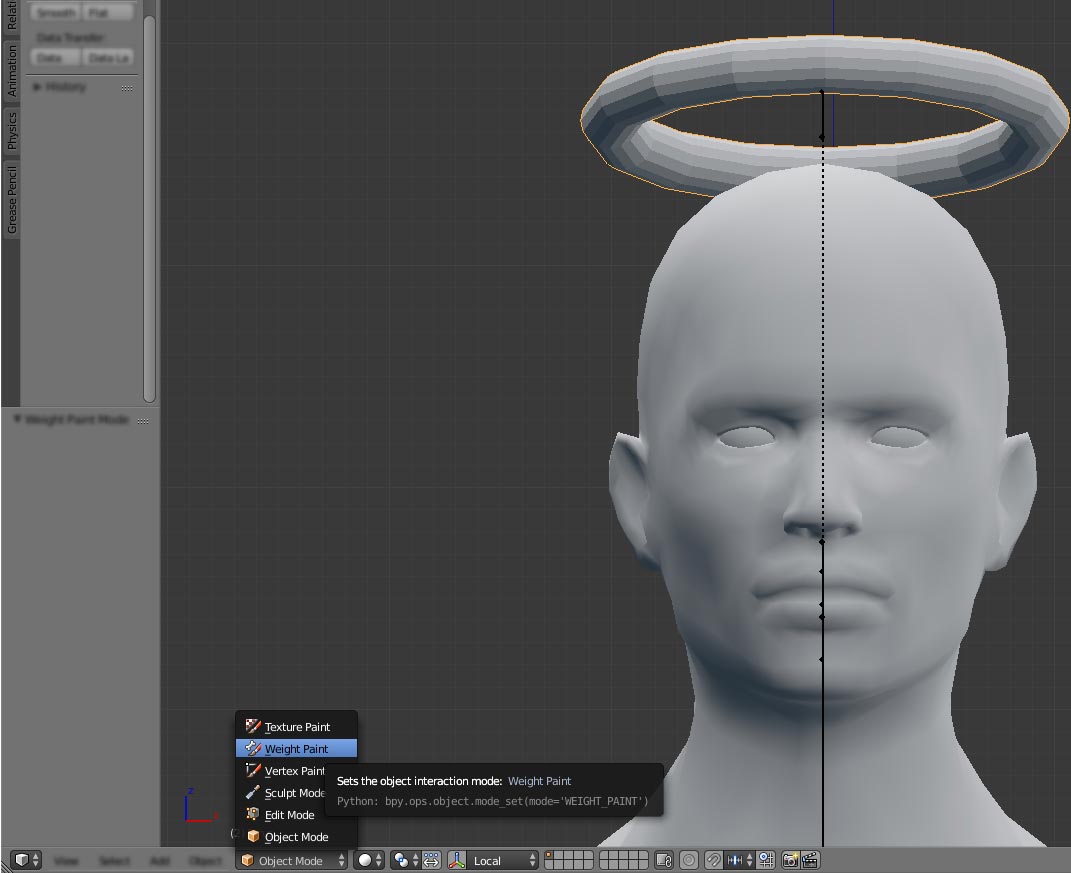
In Object mode, I selected the body_male first, then I selected the torus. I switched from Object mode to Weight Paint mode and then click on the Transfer Weights (Tools>Weight Tools>Transfer Weights) option on the Tool Shelf (mid left of the screen).


I change the Source from Active Layer to By Name. I keep everything else as default. You might need to change some setting to make it work for you. After that, I switched to Object mode.


Next, I deselect all and then selected only the torus and switched to Weight Paint mode.
In the Data properties (middle right side of the screen), I check to see if the torus is properly weight painted to the proper vertex group. In this case, it should be weighted only to the Bip01 Head vertex group.
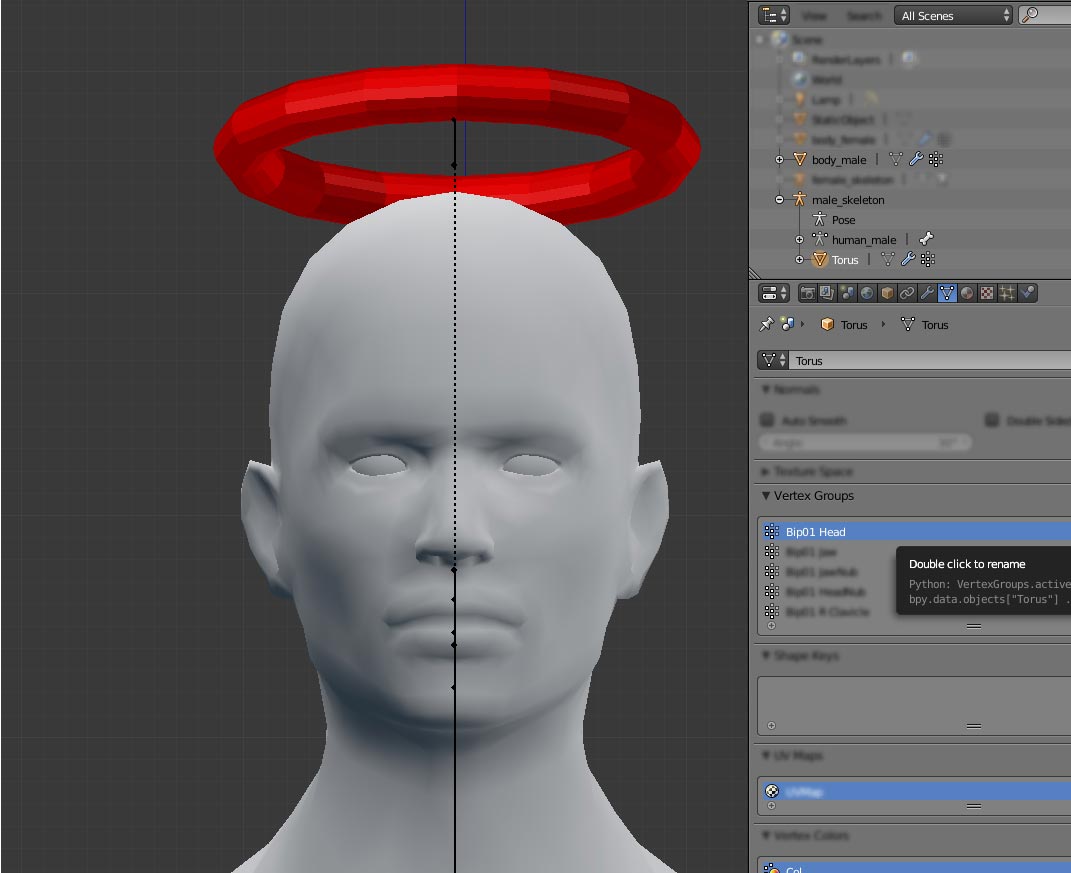
Now I switched back to Object mode.

To test if it is properly rigged and weighted, I’ve made the male_skeleton visible and selectable again by clicking on the eye icon and the arrow pointer icon next to it and disable selection for the body_male by clicking on the arrow pointer icon.
I selected the male_skeleton and switched to Pose mode.

I selected the Bip01 Neck bone and move it around. It appears to be working as intended and ready to be exported.

Part I – Blender – Export
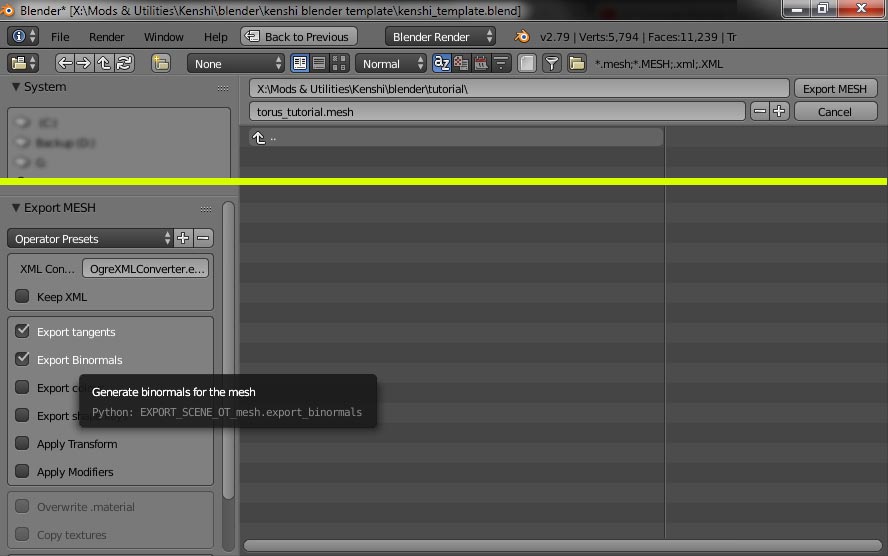
I selected the torus in Object mode. Then I go to File>Export>Kenshi OGRE (.mesh) which will take us to the export screen.

On the bottom left hand side of the screen, I make sure to select Export tangents and Export Binormals. I export the mesh as torus_tutorial.mesh.
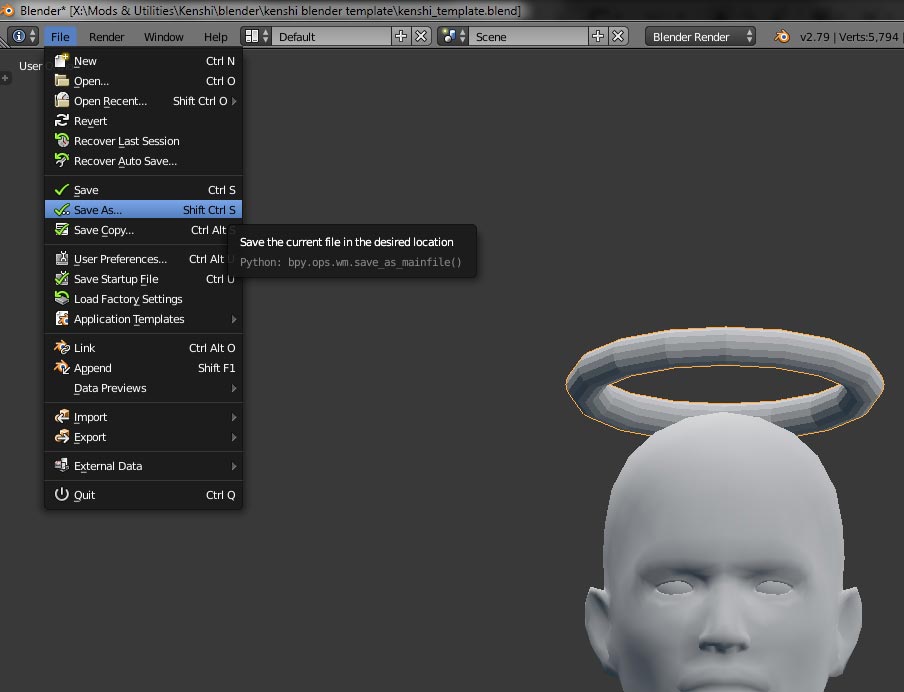
Then I save the files as torus_tutorial.blend for future editing.
Since I’m only planning on making a floating torus mesh for the male character, that concludes the first part of the tutorial.
You might want to repeat the process for the female model.
Part II – Photoshop
If you’re using Photoshop, make sure to download the NVIDIA Texture Tools from the link provided in the requirements section above and install it properly. Search for Photoshop tutorials if you need help with Photoshop.
If you’re using other software for image editor, please refer to appropriate tutorials elsewhere on how to make it work for you.
I opened the torus.png UV layout that I exported from Blender in previous part and use it as a base for the texture. Since the torus in this tutorial will be using a very basic uniform texture, I didn’t even refer to the UV layout.
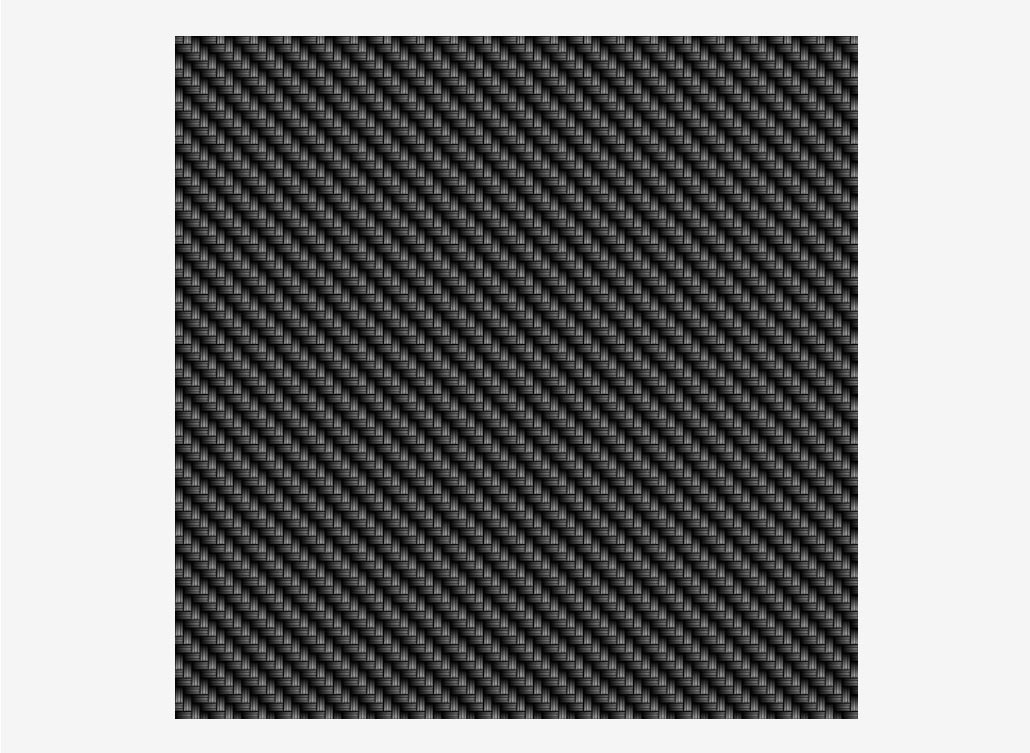
For the diffuse texture, I created a simple carbon fiber pattern and fill the whole canvas with it.
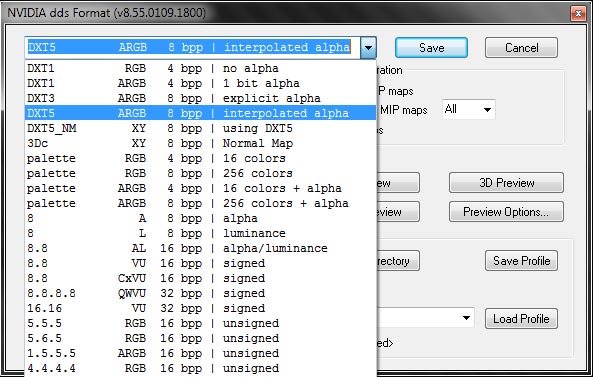
Then I saved it in NVIDIA .dds format (torus.dds).
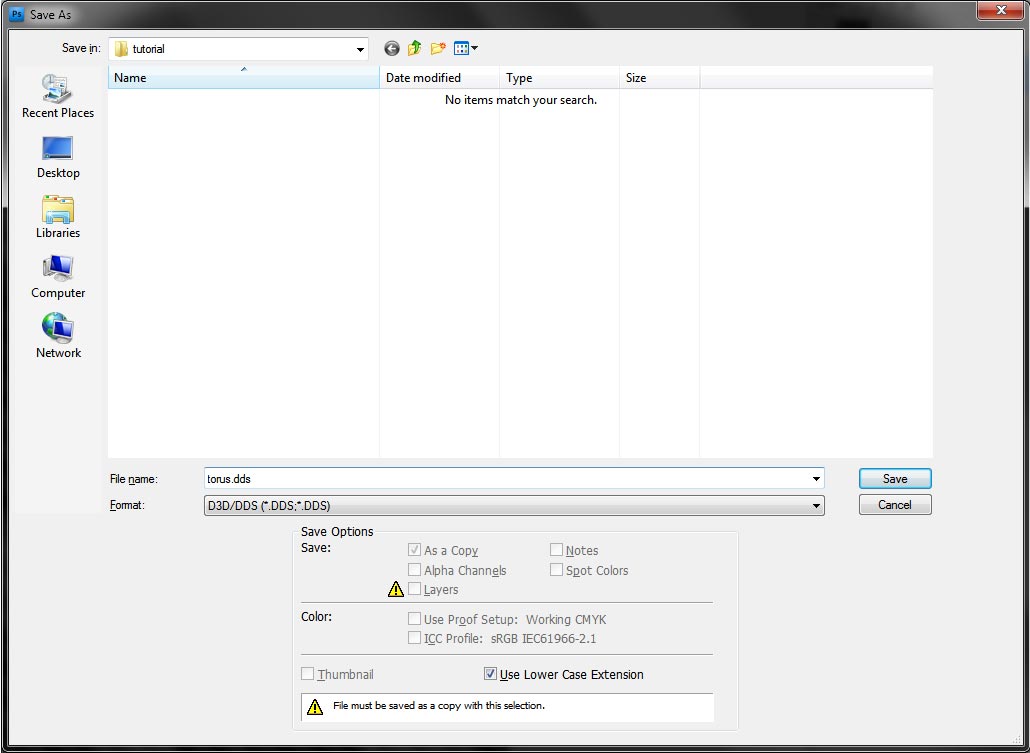
From the drop down menu, you can pick DXT1 RGB 4bpp no alpha if you don’t want to include alpha channel to the texture. I picked DXT5 ARGB interpolated alpha for mine.
TIPS: Alpha channel for diffuse texture determines the glossiness of the texture. If you make the alpha channel to be all black, the texture will be matte. If you make it all white, it will be glossy and very shiny.
For the normal texture, I duplicated the diffuse texture and go to Filter>NVIDIA Tools>NormalMapFilter to turn it into normal map.
NVIDIA didn’t recommend to do it this way. From the website[developer.nvidia.com]:
“For MIP-mapped normal maps, the NormalMap Filter should be used for preview only, and then the grayscale map exported via the DDS plugin with “Normal Map Settings…” enabled. This will create a normal map with maximal detail and fidelity for all texture levels, without undesirable filter aliasing.”
This is the settings that I used for this tutorial.
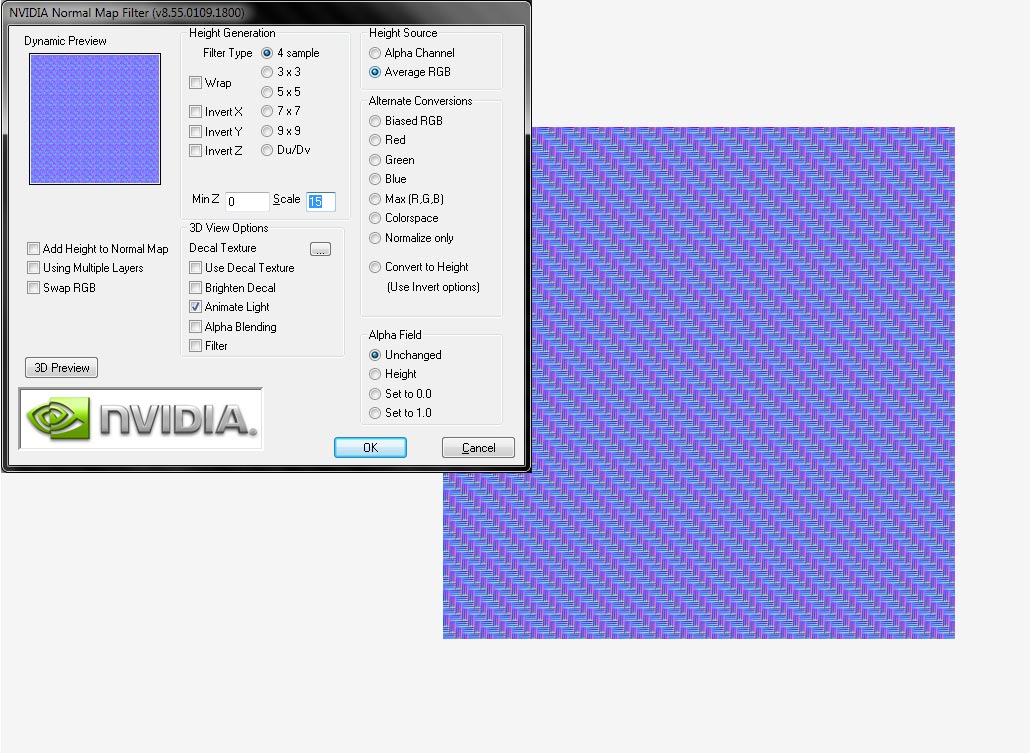
It’s a hit or miss for me. I’m not very good at making normal maps but for this tutorial it seems alright.
I saved the normal map in NVIDIA .dds format (torus_normal.dds). Again, I picked DXT5 ARGB interpolated alpha.
TIPS: Alpha channel for normal map determines the visibility of the texture. The texture for the parts painted white on the alpha channel will be visible while the ones painted black will be hidden. That’s how they made the grills for the police helmet: by painting the holes black in alpha channel.
That concludes the second part of this tutorial.
Part III – FCS
Forgotten Construction Set (FCS) is included with the game. If you need help on how to use FCS, please look for appropriate guide on how to use it. There’s plenty around.
First, open the FCS and create a new mod file. I named this new mod: torus_tutorial.
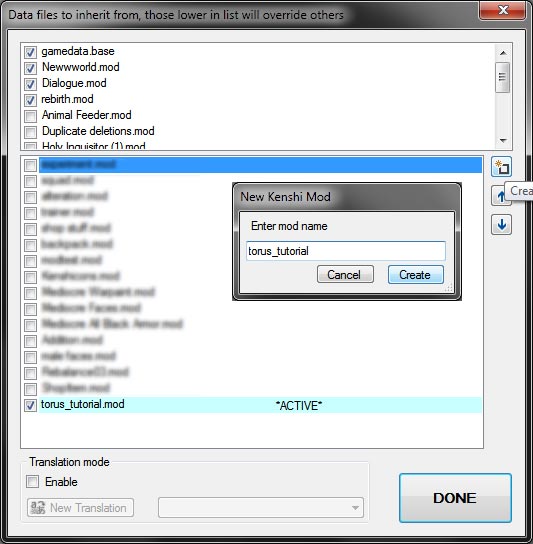
Click DONE and if you see this errors pop up, just ignore it and click Close.

Save the mod. This will create a corresponding folder in the mods directory.
In Windows explorer, I go to the mods directory (SteamsteamappscommonKenshimods). Then I go to torus_tutorial folder and created an items folder inside it.


Within items folder, I created armour folder.
Within armour folder, I created meshes and textures folder.
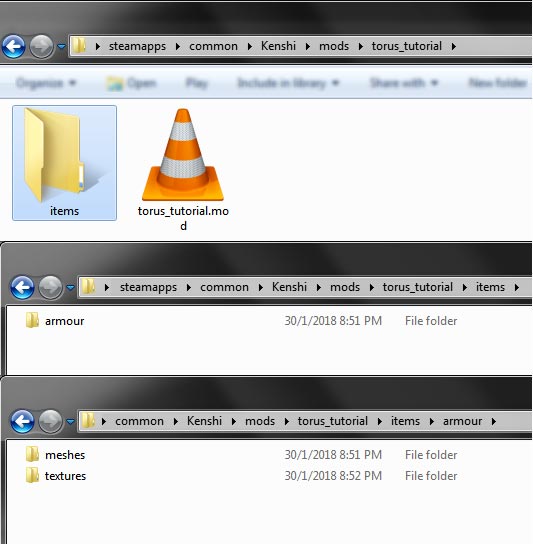
Please make sure that all folders are properly spelled otherwise the game will not be able to load your mod. You might need to create different folders than mine depending on your mod. Refer to appropriate guide elsewhere to learn more.
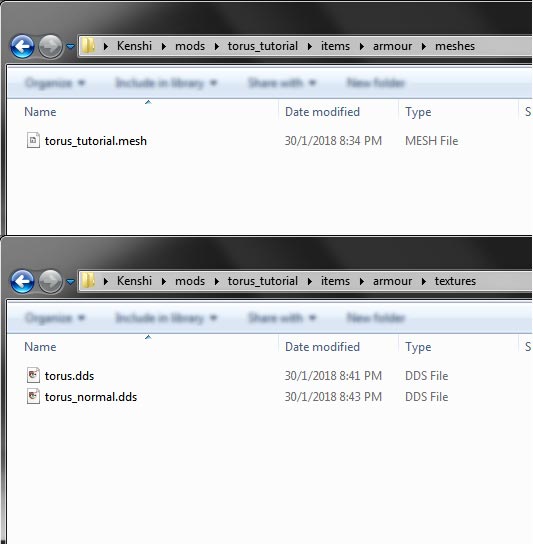
I moved the mesh previously created in Blender (torus_tutorial.mesh) into meshes folder.
I move the diffuse and normal maps created in Photoshop (torus.dds and torus_normal.dds) into textures folder.
Now I switched back to FCS.
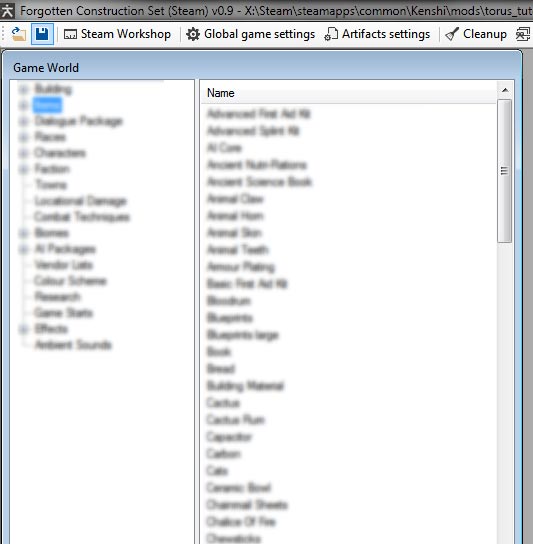
In FCS, after opening torus_tutorial.mod, I go to Items>Armour and I duplicated the Cap item.


I opened Cap copy and then change and fill up all the relevant details on the left side. I changed the mesh to point to .modstorus_tutorialitemsarmourmeshestorus_tutorial.mesh.
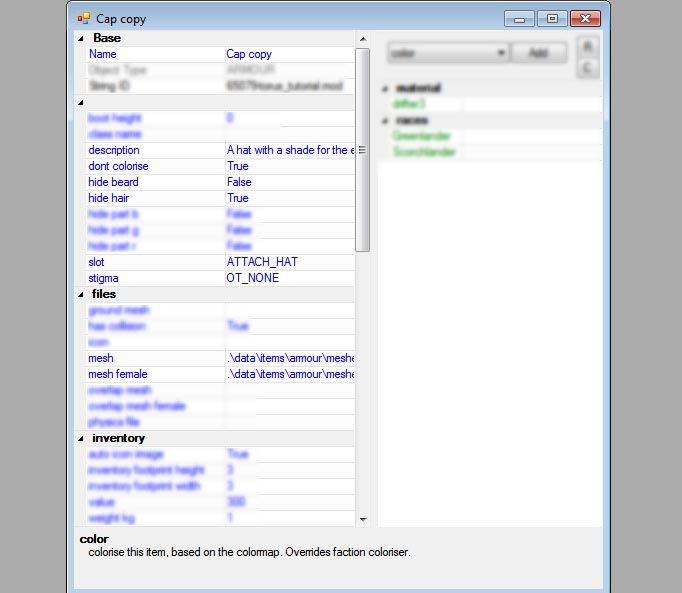

This is for male mesh. Since I didn’t create the mesh for female character, I will leave the mesh female part blank.
If you have the mesh for female model as well, make sure to change the mesh female part to reflect that.

On the right side, under material, I right click on the drifter3 and choose Replace with copy. After that I right click on drifter3 copy and choose Open.

I renamed drifter3 copy as torus and changed the normal map to point to the torus_normal.dds in the mod’s textures folder.
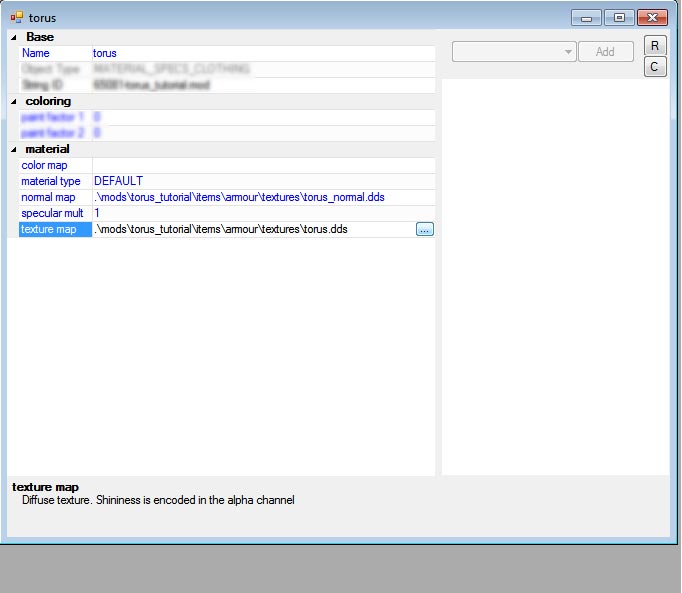
I also change the texture map to point to the torus.dds in the mod’s texture folder.
When I closed the material window, the material for the Tutorial_Torus still says drifter3 copy. It doesn’t matter since it’s just because FCS didn’t update in real time sometimes.
If I close the window and open Tutorial_Torus again, it will reflect the proper torus material.

Now I click save and the mod is completed. It’s time to test it in Kenshi.
Final Testing
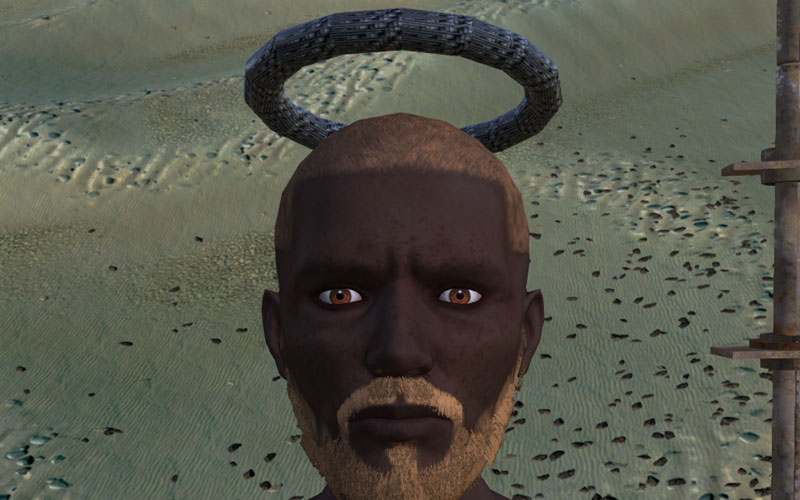
For mod testing, I made a little change in Wanderer start to include Tutorial_Torus as starting gear.

WARNING: This is not a proper way of testing the mod since I could crash the game if it generate female wanderer (since I didn’t have female mesh for the torus). Be safe and test your mod properly.
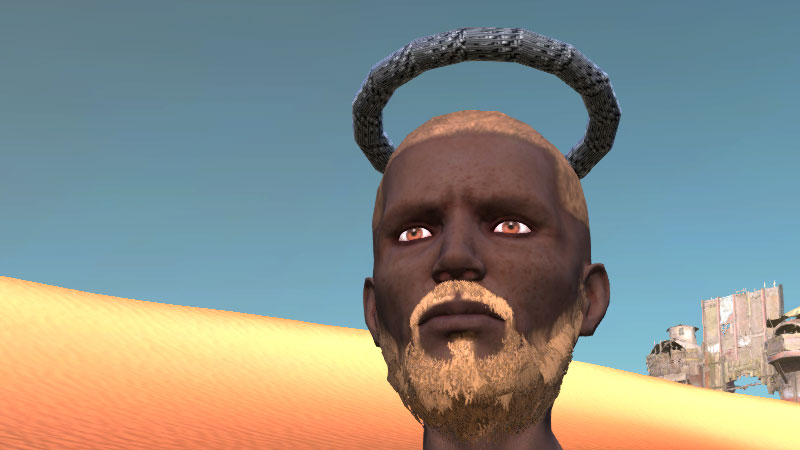
It appears that everything is all good. The mod works properly and as expected.
Now let’s proceed with different tests.
For normal map test, I did a little adjustment on the alpha channel of the normal map by splitting it into half black and half white.
This is what happen if I split the alpha channel of the normal map into black and white. The black part is hidden while the white part is visible.

It looks funky because the UV was unwrapped in a funky way. That’s why it’s important to unwrap UV properly. LOL
If the UV was unwrap properly, I expected half of the torus will be visible while the other half will be hidden.
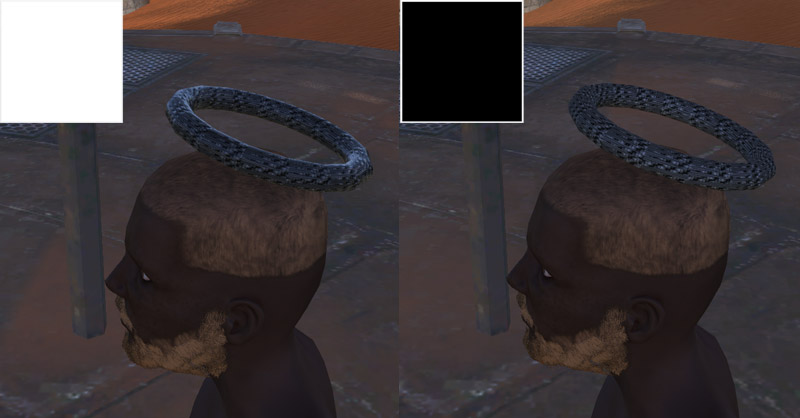
For diffuse map test, I created two separate diffuse texture files, each on opposite spectrum in the alpha channel.
One will be filled all white while the other will be all black on the alpha channel.
This is the difference between white and black in alpha channel in the diffuse texture. White is glossy and black is not. It’s doesn’t show it properly since the texture I made is pretty bad at showcasing the glossiness.

TIPS: For color map, Red is for Primary color, Green is for Secondary color while Blue is for Metalness. Color map doesn’t use alpha channel, so the color is applied as a mask on top of the diffuse texture.
You can refer to Monk_C_HI.dds in the Kenshidataitemsarmourtextures folder as a reference if you want to make faction based custom color for your armor/clothing mod. Just make sure the don’t colorise is set to False for the item in FCS.
…and that’s that! Thank you for reading this guide. Hope it helps a bit along the way.
I would like to give a special shout out to the wonderful modders that created the Potmod. It happened to be released at about the same time I started watching Blender tutorials for beginners on Youtube.
At the time I was overwhelmed at the prospect of trying to make something in Blender and that mod help me to come to realization that you don’t have to start with the most complex idea that pops in your head. You can always start practicing with something simple and goofy to begin with.
So thanks you guys for the awesome mod. It helps getting me started.
If you have any suggestion on how to streamline this whole process to make it flow better or if there’s any error that needs correction with this guide, plz show me da wei.