Overview
Fancy trying multiplayer for first time? Or perhaps finally you decided to improve your skill? You are in the right place. I proudly present first complete comprehensive guide about online gameplay.
READ ME!
Let logic exist and be in your mind.
Welcome, brave warrior. Hear us before starting battle. We worked hard on this guide. Ctrl + C, Ctrl + V method was not used here.
Respect it, reading this carefully, rating, sharing and commenting. Your input is appreciated and will be significant help in furher developement.
However, if you would like cross swords instead of reading words, go ahead and take on authors of this guide in pitch battle.
If you just started, we highly encourage you to check out this short guide before: [link]
It will help a lot in understanding what was wrote here. Now you are good to go.
Chapter 1. Introduction
Medieval 2:Total War was released in November 2006. It received mixed, but in majority positive ratings amongst either reviewers and gamers. Presently game is mature, and still providing enjoyable experience which proves that it was well-designed.
The gameplay forces you to think wisely before ordering your troops to fight. Obviously, you can attempt to charge cavalry right into archers covered by stakes, but considering you are reading this guide, we assumed that you want to learn how to play properly, not waste time of other players.
One mistake and you can lose whole battle in seconds. Therefore, read entire guide, not only first phrases. Improving skills is (pretty) hard task. However, it mostly depends on you how long it will take: few months… or years… or… never.
Revealing all tactics, tricks and ways to win isn’t purpose of this guide.
We won’t sell all secrets… (it doesn’t make sense at all) but in all seriousness, this walktrough should help you understand how to:
-fight against every unit type
– counter everything everywhere (maybe not at all, but overall)
-use right formations in different situations
– avoid mistakes and exploit enemy weakness
So basically, basic of knowledge and tactics needed to properly play online battles.
Enjoy reading!
Chapter 2. Unit types
Chapter 2
UNIT TYPES
Before you will get familiar with tactics and strategies, first you have to know are unit types.
There are several different classes of unit on the battlefield, and you have to understand the basic role that they play. Some types of unit are very effective against other types, some are effective only with support of other types etc.
Basically, there are 5 types of units:
A) Cavalry: light, heavy and missile
B) Infantry: light and heavy
C) Missile infantry
D) Spears/pikemen
E) Artillery
Let’s show off few facts about each type.
Basic principles you need to know:
a) heavy cavalry has thick armor, high mass and medium or high charge bonus.
The main tasks of heavy cavalry: blocking of enemy’s cavalry and charge on any units.
b) light cavalry has light armor, low or medium charge bonus and usually high velocity.
(A bit of physics. Momentum = mass * velocity. energy=1/2 mass * velocity^2 That’s why light but fast cavalry, charging, destroys a lot of troops.)
Anyway without good armor light horsemen can’t fight long time against heavy cavalry, they aren’t supposed to do so.
The main tasks of light cavalry: rear charges, harassing enemy lines, killing foot missiles, chasing down fleeing enemy units.
c) “horse archers” (ha) mean any mounted missile units. HA can be divided into heavy and light, equipped with bows, crossbows, javelins or guns. The best type of ha is mounted crossbowmen – cheap, fast, deadly unit in skilled hands. Primary target of ha is heavy cavalry. Secondary target – light missiles (charge them if they are unprotected!) or other ha. Third target – rear charges at already weakened enemy units.
Deploy your cavalry in front of melee infantry to protect them from enemy’s charge. Even armored sergeants can’t stop charge of heavy cavalry.
———————————————————————————————————————
B) Infantry is second most important part of army composition. Heavily armored dismounted knights are generally good at engaging other infantry.
Equipped with or without shields. Shielded units are protected better and usually last longer in fight. Non-shielded 2h units have good charge bonus and can crack enemy’s rows, causing massive casualties, thereby leading to chain rout.
In other words, inf is supposed to block enemy forces and support your own cav.
You have to find out how cav and inf co-operate though. Think of this like of building house: first you need is base (cav), later on walls (inf), roof (missiles) etc.
———————————————————————————————————————
C) foot missile are designed to play skirmish game. Soldiers with ranged weapons that can strike enemy targets at a distance. Usually weak in hand-to-hand combat, except short range ones (javelines) or either elite archers/xbows.
In pitch fights long range crossbows – pavise xbows rule the world. Archers have no chance to counter them. Equipped with big shields, long range pavise (or pavese) are deadly if used properly.
D) Spears/pikes are anti-cav troops.
Keep in mind that heavy cavalry charge beats spearmen easily. All spearmen and pikemen have anticav bonus +8 or +4, several 2h units have anticav bonus +4. Except pikemen several units with polearms can form phalanx formation.
Spearmen have shields so they are protected better than pikemen especially against arrows/bolts. Several 2h units have medium anticav bonus (voulgiers, halberd militia, croat axemen…). Most of heavy 2h units with AP bonus are good against cavalry and can kill a lot of charging horsemen though.
Bringing pikes is best way to secure your cav and protect missiles, Artillery or kill hostile cav quickly as well. We recommend hiring pikes instead of spears. Why? Pikes are cheaper, more effective and can counter rush instead of spears. In base game (vanilla) spears are just too weak. Even though pikes are bugged, you should know how play with them.
E) Artillery is rarely used in pitch battles. Expensive, usually inaccurate against troops. In sieges it’s much more important (This guide is at pitch battles focused though) .
Chapter 3. Choosing map, rules and money
New player who just started his career in multiplayer may find various things confusing. In this chapter you will find out how to host game, choose right map, set victory conditions, funds.
To host a online match, you need to launch game, go to Multiplayer, Online Battles and finally Host a Game button. Now, on right side you can see available maps. The ones with crossed swords are designed to be used in pitch battles, while on cross-free maps you can set up sieges – simply choose type of castle, level of defenses etc. Altough in this guide we are focused on field battles, so lets go back to them. Which maps are advised by veterans? Completely flat ones, which guarantee that none of player has terrain advantage. Tourney and competitive games are played on Grassy Plain. Other reliable relatively flat maps are Arsuf, Deathtrack and Sahara Sands.
……………………………………………………………………………………………………………….
We recommend you to keep default “medium” difficulty settings. Higher or lower ones will make gameplay pretty weird for you, since this affects stamina and morale of troops. ……………………………………………………………………………………………………………….
Time periods:
– early – pretty unbalanced, but fun to begin with
– high – arguably most balanced one, most of veterans plays it often
– late – barely used in multiplayer. Limits gameplay to faction which owns musketeers.
– all – most popular amongst new players. Makes some factions very powerful while nerfing few others.
Which period should you play? In my opinion, play all possible ones – it will help you in understanding each faction strength and weakness.
……………………………………………………………………………………………………………….
Rules, rules and rules
Its highly advised to write rules in game name, since lobby bugs makes sometimes player “invisible” to other, so he’s unable to ask host for rules.
Part of TotalWar Nethicet:
1. Never break rules. If you don’t understand something – ask host about it. If you are host – type all rules.
2. Host (1st team) must attack. Always. Hosting player chooses rules and map (Grassy Plain is the fairest map; anyway sometimes players want to play with relief) and picks faction first. 2nd team can defense or attack; defender can stay and wait when attacker will come. “Attacker” doesn’t mean “rusher”! Attacker can use any form of aggression: rush, shooting by foot missile units (cannons, if they are accepted) or by horse archers, forcing defender to counter-attack – or stay and die.
3. Being defender doesn’t camp. Usually minimum distance from army to red line is ~ 2-3 cavalry units. Attacker must have possibility to move some units behind defender. Moving along red line is accepted.
4. The fair method of faction picking on example of 2v2:
Host player picks 1st and declares his faction in gamechat. His opponent, 2nd player of 2nd team, picks his faction and declares it too. Then 2nd player of 1st team picks and last one 1st player of 2nd team picks. After declaring player can’t change his faction!
1v1, 3v3 and 4v4 schemes are similar – player from 1st team picks 1st, then his opponent picks, etc. It would be good do not repeat faction in team for higher diversity.
Basic rules-sets you should know and use:
a) early period: 6/2 cav no art 10k
[Lets break it down: x/y means normal cav/horse archers, so in rule-set above you’re allowed to bring either 6 melee cav or 4 melee + 2 missile. General bodyguard is ALWAYS included in max cav limit. You must not bring any gunpowder units, artillery or elephants. Does it makes sense now? Alright.]
b) high period: – 6/2 cav no gun ele art 12,5k;
8/3 cav no gun ele art 10k;
6 + 2 cav (so max 8 cav in total but only 6 normal + 2 ha or only 6 without ha), 12,5k
c) late period: If guns are accepted then factions with musketeers will slaughter others
d) all periods: 6/2 cav no gun ele art 15k;
8/3 cav no gun ele art 12,5k;
5/2 cav no gun ele art
……………………………………………………………………………………………………………….
Weather. To enjoy pitch, you need to ensure that weather is always clear. How to set it up?
Select map with crossed-swords, then switch to map without them, and finally revert to first one. This guarantee that you will enjoy plain weather. On non-crossed maps you can set it directly.
……………………………………………………………………………………………………………….
Chapter 4. Choosing faction – overview
In base game (vanilla) there are 21 available faction. All new players I met trough my multiplayer history always asked me which one is best, worst etc.
Let’s break it down. Basically, there is no best or worst faction. You just need to know which performs better in period set. So, lets break it down and show best ones, dividing it into periods.
At beginning, we encourage you to use strong ones – it will make game easier for you. (Later, if you’d want challenge, you can take weaker ones.)
a) early period:
– Bizantine Empire – powerful heavy cavalry – (Kataphtrotai), supported by heavy infantry (Varangian Guard) with AP piercing and high bonus charge, decent missiles (Trebizond archers), very cost-effective units
– Sicily – best heavy cavalry (Norman Knights) and fine infantry (Dismounted Norman Knights), good altough expensive archers (Muslim Archers) and various spears choice
– Denmark – well-known for their AP infantry and cavalry, although their best units in early are bit more expensive than should.
– Russia – cheap strong AP cavalry (druzhina) and decent infantry including medium-range xbows.
– England – amazing “Sherwood’s” archer unit
– France or HRE – practically same rosters, default for Western factions good cavalry (Feudal Knights) and infantry (Dismounted Feudal Knights) and unique unit – Religious Fanatics – very useful as support, they’re cheap and have high morale
– Turks – best light cavalry in this period (Alan light cav), Naffatuns and some cheap spears to protect them, mediocre heavy cav (Armenian heavy cav)
b) high period
In high period effectiveness of most factions depends of rules primarily. With ‘8/3 10k’ most of them are playable. The weakest factions are Venice, Milan, Timurids (if no ele ☺), the Mongols and Hungary, Aztecs
– Spain – fine heavy cavalry ( Chivalric Knights, Knights of Santiago) and inf choice (Dismounted Feudal Knights, Swordsmen militia), ha (mounted x-bows, Jinetes)and foot missiles (pavese xbows, peasant xbows)
– Poland – fine cav and ha choice, good inf – very cost-effective faction
– Moors – fearsome Camel Thuareg Spearmen, best 1-h infantry (Dismounted Christian Guard), supported by their mounted fellows (Christian Guard) and Peasant xbows, which are better than you may think judging from their name, various militia units available (Urban Militia, Sudanese Tribesmen)
– Scotland – supposed to be a rush faction, excellent light cav (Border horse), various pike units and 2-handers with powerful charge, decent cav (Feudal Knights)
c) late period – several factions have musketeers – extremely strong unit with the highest range (180m, more than any bowmen or crossbows unit), armor piercing and shield piercing bonuses, also they decrease enemy morale. We suppose that muskets are the main reason why most players avoid late period. Anyway it remain playable of course.
Worst faction in pitch – Aztecs. They have no cavalry or good missile, which restricts them to rush.
d) all periods
Well… In all periods you can go with all factions above. Worth adding ones are:
– Hungary
– Sicily
– Milan
– France
– HRE
etc.
Also, take look at this great guide made by vet:
[link]
……………………………………………………………………………………………………………….
Chapter 5 -5.1 – Cavalry
Cavalry units represent the capability of your army to maneuverer quickly, great to hit the enemy in the flank and in the back and cause an immediate rout of his frontal forces.
Historically speaking cav was dominating power on the the battlefield especially in early middle ages.
Cavalry in this game is consistent of:
– horses
– camels
– elephants
In general, cavalry is supposed to:
– counter enemy cavalry, including flanking attempts
– flank and hit enemy in the rear or exposed flanks
– be your strategic resource, to be moved easily and quickly where it is necessary to fill gaps,
– charge and smash into enemy melee infantry units and open a gap in the enemy line.
– catch enemy missile units,
– chase fleeing enemy units,
When you choose cavalry the factors to keep in mind are the same as melee infantry:
– Armour
– Shield
– Attack in Melee Factor
– Defensive Skill
– Morale (elite cav has 11, good 9, mediocre 5)
Look at these two stats additionally:
– Charge factor
– Speed.
A higher charge factor, if well used, can cause enemy charged units to have so many casualties that they start routing. That means that with a charge you can cause a rout without suffering significant losses.
Light cavalry is very quick (not all tho). Missile cavalry is fast. Heavy cavalry is relatively slow. Elephants and camels are obviously slower than heavy cavalry.
Before engaging your cav in melee:
Use your cavalry to protect your all foot units from charge by enemy cavalry.
Use your cavalry (preferably light ha) to chase unprotected enemy foot missile units.
During Melee fight
– Engage enemy cav with support of your heavy infantry
– Don’t stay long in melee if enemy has supporting inf, always try to stay mobile, after first charge pull back cav and charge again, again and once more
– Use your cavalry to flank enemy and hit him with a charge in the back.
– Use your cavalry to counter enemy flanking cavalry.
– Use your cavalry to exploit flaw in enemy line, to take opportunities and to fill dangerous gaps in your line.
– Try to surround and kill enemy general
After Melee
– Help rest of your army by hammer and anvil (hitting in back) to enemy army
– Use your cavalry to chase enemy routing units
The types of cavalry that can be used for all these tasks can be classified as follows:
– Heavy cavalry
– Light cavalry
– Missile cavalry
– Camels
– Elephants
Each of these types could be used to perform all of tasks listed above, but obviously some will perform it better than other one, an example its easier to do a hammer and anvil with heavy cav than with horse archers.

Chapter 5.2. Infantry
Infantry represents the main front of the army in the central part of the battle: the melee.
Winning the melee phase as well as cav phase is crucial point to win the match. Unless you are using tactic “hit and run” as Turks/Mongols/Egypt, which is difficult for new player, trust me. Something like that was usually done by Mongols and few easter factions speaking historically.
So, if you are going to win a melee phase, ensure which tasks they can perform and what are their weak and strong sides.
Typically, melee infantry beat spears, while cav beats… both. Pikes beat cavalry, but only from front.
The primary factors to keep in mind when choosing infantry units are:
– Attack
– Armour
– Shield
– Defensive Skill
– Armour Piercing (AP) weapon
– Anti-Cavalry bonus – only several 2 handers with high charge and AP
– Morale
– Pike Wall mode (pikes only)
Unit defense consists of 3 levels.
1. Armor. Armor protects from all sides. Armor decreases twice by armor-piercing weapon.
2. Shield. Shield protects from front and left (even if unit picture shows shield on the back). Shield protects in melee, catches arrows, bolts and javelins but absolutely useless against bullets.
3. Skill. Skill works in front melee only. Skilled soldier can’t catch arrow or protect his rear.
A bit of arithmetic. Chivalric knights have 8ar+5sk+4sh=17 full defense. Mounted crossbowmen shoot them in the back. So against light but AP bolt these knights have (8/2)ar+0sk+0sh=4 defense. 4 instead 17. Four, Carl! ☺
Before Melee
– Attempt to keep your expensive melee units away from cav charges and shots.
– Spearmen and pikes can be used to cover foot missile from enemy ha cavalry charges.
During Melee
– With more Defensive Skill + Shield + Armour your units will die at slower rate during hand to hand.
– The slower they die the longer they can last in the fight and kill more of the enemy units. If your units have armour piercing capability, armour and shield of the enemy will count less.
– With more attack in melee factor, your units will kill enemy units faster in hand to hand.
– With a good morale, your units will last longer on battlefield, giving you time to win cav fight.
Chapter 5.3. Ranged units
Ranged units represent the capability of your army to hit enemy from a distance, “soft” his army before proper melee and cav fight starts. Balanced army has always few missiles, even cheap – to counter horse archers when rushing an example.
Foot skirmishers units available in game:
– Archers
-crossbows
-arquebusiers. Handgunners, arques and musketeers are one gunpowder type.
The primary factors to keep in mind in choosing ranged units are:
– Range
– Missile attack factor
– Armour
If your units have AP ability, armor of of the enemy will count less (shield is counted in same way!)
Foot javelins are skirmishers as well, but due to limited range (55m), in vanilla they’re almost useless.
All crossbowmen have AP missile bonus. Most of archers haven’t AP bonus except English and French ones. Javelins have AP bonus except Aztecs. Mounted javelins are much better than foot, jinetes (Spain and Portugal) are the best of them. Range of both mounted and dismounted javelins remain same- 55m.
Having long range missiles can be deadly useful against enemy with weak missile roster – e.g. Scotland, Aztecs. Two or three volleys can easily kill loads of enemy cav/inf before he will touch your forces.
Better armor means that your units will die slower than the enemy unit under fire.
Higher attack factor mean that your units will strike enemies more effectively than his troops doing same thing against you.
In multiplayer, long range x-bows – pavese (pavise), rule the world. Archers cant beat their massive shields, and usually lose duel rather quickly. However, elite archers are generally better in melee combat than xbows (besides Aventuries). If funds are set at10k per player or lower cheap xbowmen may be more useful because they are cheaper. Player can upgrade main army instead of using costly pavise crossbowmen. (This is one of main reasons why Russian and Turkish clans prefer 10k – more factions are reliable, not only ones with great pavise.)
So, if you are new to multiplayer, always bring 3-4 pavese or 2 pavese and 2 peasant crossbows. Why peasant xbows are better than peasant archers? Because in contrary to archers xbows always have ARMOR PENETRATION, which means that they are effective against armored enemies – heavy cav, inf.
Gunpowder units are usually bugged and banned, but you need to know that muskets are best gunpowder long range units.
Table presenting range of units we are talking about.

Chapter 5.4. Choosing right faction&army to right tasks
You need to find out which faction is best choice for you. Some tips were wrote already above. Now its time to deal with army composition. This entirely depends on rules and game type.
No matter which period you are playing, you need heavy cavalry. First unit is always general unit – we advise to always hire generals bodyguard unit, they are pretty strong and have 2 hitpoints, which gives your general additional protection.
If you are rushing (focusing on melee units and attempting to meet enemy as fast as its possile), focus on cav and inf upgrades, bring few cheap missiles to counter enemy ha. Usually balanced army is best choice tho. Balanced army can cover wider range of tasks, and usually it pay off to use it.
Don’t play defensively. It simple does not work. Instead, play aggressively, thereby forcing defense on enemy.
Chapter 5.5. Special unit modes and abilities
Guard Mode – unit will try to hold the line and will not chase down fleeing opponents;
Fire at will – unit will shoot any enemy within range, by default turned on for all missile units;
Skirmish mode – broken feature, pretty much useless in mp. In theory unit with this mode turned on should ran away from enemy who is trying to engage them in hand-to-hand combat.
Loose formation – helps when your troops are under fire, reduces casualties from cav charges a little bit more than tight formation
Schiltrom – mostly available for spears, unit will form defensive ring. Formation utterly defensive and pretty has no use for casual player. Few veterans managed to use it as blockade against enemy infantry, but they are v e t e r a n s so…
Pike wall – successor of famous RTW’s “phalanx formation”. In this game bugged feature. To use pikes effectively, you need to turn this off, enable guard mode, and finally turn on pike wall when enemy is close
Wedge – useless formation where cav is forming triangle. I used it two times during my 1k online gameplay against noob box where I had to exploit tight holes
Rally ability – available only for general’s unit, temporarily boost morale of own units being nearby
Shooting Circle – similar to RTW’s Cantabrian Circle, here rather useless since it makes your ha tired really quickly
Chapter 5.6. Upgrades
Any unit can be upgraded with:
– armour
– weapon
– valour (experience)
Hire AP units against thick armor and swords against light-equipped units. Remember that cavalry is a main, leading force in game.
If enemy has army with many AP units (like Russia, HRE, England, Denmark, Bizantines) then its better to upgrade swords instead of shields. Keep in mind that some factions (Denmark, Byzantium) can hire either AP and/or non AP units. Moors can get camel cavalry without armor or Christian guard with good armor. Think wisely…
If enemy has no good, long range missiles (like Scotland, Egypt, Denmark, ) then horse archers would be good choice.
Experience (valour) = +1 attack, +1 defense, +1 morale. Usually upgrading weapon/shield is more effective in overall outcome. Experience upgrades are used when player wants to improve morale.
Chapter 6. First deployment and how to find out your location on battlefield before battle starts
All players have ended their unit selections.
Where are you on the battlefield? The game will start with your army deployed in your zone on the battlefield. But what is the position that you can expect for you and your mates? Who is left, who is right, who is center?
It is very simple find this out. Starting from the top in the faction selection screen:
Player hosting the game is always No. 1(Top or Highest)
– Highest player of your team will be left wing
– Lowest player of your team will be right wing
– Second highest player will be left center
– Third highest player will be right center.
Same rule apply for your enemy. So you can calculate what faction you will be facing in the beginning phase of the game. If you are the highest player of your team on the faction selection screen you will face the faction of lowest player among enemy teams. And so on.
Examples…………3 v 3……………..4 v 4
……Enemy team 6-5-4…………….8-7-6-5
……….Your team 1-2-3…………….1-2-3-4
The teams would be reversed if the game is being hosted by the opposing team.

Chapter 6.1 – Examples of good army formations
Front facing towards enemy – this is goal you need to achieve during deployment phase.
Optimal formation for balanced army should looks like:
—————————————————— foot missiles at front
^^^^^^^^^^^^^^^^^^^^^^^ heavy cavalry
…………………………………………………. heavy infantry

Horse archers should be deployed on flank(s), while rest of army would be sitting far away – it gives you time to kill rushing hostile cav.
There are few good formations, but the leading style must always be this:
– Missile in the front-lines – they have to shoot first
– Cavalry behind missiles, steady and ready to counter charge
– Light/Heavy infantry behind cavalry, few meters distance
– Pikes deployed either behind missiles (inflexible formation) or with heavy inf (flexible formation)
Use groups to make micro easier. Hold alt while selecting destination to move entire army in same formation.

Remember that your starting formation is built for playing the first phases of the battle: advancing on battlefield and skirmishing. Obviously, it will change in further stages of match.
In team battles, always deploy close to each other. Don’t let enemy double team either you or your ally. March and fight together. Teamwork is key to win team battles.
Chapter 6.2. Communication during battle – key to win
Always communicate with your team-mates. Coordination and collaboration is only way to actually play, enjoy and finally win team battles. Before battle starts, just consult with your allies what are you supposed to do – e.g. you’re rushing or playing balanced armies. Talk with your allies and decide an approach to enemy strategy.
When the battle starts, press T to chat with either allies or enemies. Don’t hesitate to ask for help if needed, ensure that you are actually working in team. You can also type some basics commands into chat line:
#p = gives you info about players names, factions and amount of money spent by each other
#kick(number) like #kick 2 – kick player with assigned number, showed by previous command.
Keep in mind that if you are host, kicking someone just because he’s winning will not resolve problem. Instead, many players will refuse to play with you in the future. Play, win and lose with honor. Be nice in face of either heroic victory and valiant defeat.
If you find default chat options confusing and time-wasting, in your preferences.txt file set the option use_quickchat=1. This tweak will let you use T for own team chat (text color will be green) and Y (yellow color) for communicating with all players.
Chapter 7. Beginning of the battle – First moves
Now its time to start the proper fight. “Finally!”, you would say. But you have to hold your horses now. Meanwhile we will explain how to properly start the battle.
Use text chat to wish everyone “Have fun!”, then hit Start. Deploy your troops by applying optimal formation we listed earlier.
Often, just after start, you need to move entire army. While doing it, keep in mind these principles:
Move your army to reach your allied armies. A team has always to act as one
Move your army as one, except for light cav or missile cavalry scouting/harassing enemy forces if needed
Steady walk, always when it’s possible. Running for long time makes troops tired. Tired soldiers wont last long in fight and will rout rather quickly. But if enemy is going to reach you and try to double team your army, don’t hesitate to run and get protection close to your mates and run
Move your army to get an advantage position, if there’s any nearby (e.g. hill). So in other words, try to win strategically even before fighting.
General concept
In online games all players usually start with the same amount of florins so none has an advantage, apart from personal skill and experience and location on map at start (if map its not flat).
What is an advantage position? It is a combat situation that allows your team to fight starting with an advantage. Just like you could have bought more men with your limited budget.
Example: 40 archers deployed on a hill can kill 60 archers shooting up to them suffering only few casualties.
There are two major types of advantage position:
a) Location advantage (hill, edge, river)
b) Manoeuvre advantage (2 v 1, 3 v 2, etc.)
If you can win the strategical part of the battle, tactical one will be easy to understand.
a) Location Advantage
This type of advantage is very easy to understand.
Taking the top of a hill, deploying on edge of a slope will give your army advantage.
This kind of situation positively boost either attacking from or defending point placed on high terrain.
Range of foot missiles is obviously increased, their AP ability will be improved a little bit too. So, if it is possible, entire team should move together to immediately take a location advantage position, preventing enemy’s attempt to do so as well.
Usually, if map is not flat, you have no big chances fighting uphill. The only smart thing you can do is sit and wait for enemy BUT if you hosted, you MUST attack. You chose this map with relief, so go and fight uphill. Or choose most fair Grassy Plain where nobody has hill advantage, as awe advised earlier.
……………………………………………………
HOW TO counter location disadvantage:
– you need superior skill and good micro;
– move quickly and smoothly to reduce missiles exposition time ;
– concentrate your strength on enemy weak side;
– put pressure on weak points of enemy defenses, such as flanks or rear;
– result: either success – chain rout or defeat – your army collapses.
……………………………………………………
b) Manoeuvre Advantage
That kind of advantage is little bit harder to learn and use, but lets break it down.
Manoeuvre advantage means that your team manoeuvres to concentrate more friendly combat factor on less enemy combat factor for a certain period of time. During that period this method will cause more casualties in numbers to enemy than enemy can cause to your team.
………………………………………………….
An example:
1. If you attack 1 enemy unit (40) with your own unit (40), then fight will be pretty even. But what if you send 2 units (80) against his one? Yes! His unit will get destroyed pretty quickly while your troops will lose only few men.
OR
You can also use 1 steady unit to block 2-3 hostile units. It will allow you to move free unit unstopped and charge enemy’s unprotected either rear or flanks
………………………………………………….
This rule obviously applies to both missile, cav and melee warfare.
So successful exploit of this advantage is based on doubling (2 armies v 1 army) or tripling (3 armies v 1 army, 3 armies v 2 armies).
If during the start of the battle you can see that the enemy armies are isolated from each other and distance between them is relatively big , you can run and catch one – as isolated they wont last long against 2 armies of your team.
Thats basically how to use this kind of advantage.
……………………………………………………
HOW TO counter maneuverer disadvantage:
– if you fall as team, it means that teamwork failed;
– if not everything is lost yet, run to reach your ally which is about to get surrounded
– regroup and strike as one
– learn how to play in team
……………………………………………………
When enemy is double or triple teaming you, attempt to:
– retreat and regroup nearby your allied armies;
– if its not possible, resist as much as you can to enemies attack trying to cause as much damage as you can;
– allied missiles and cavalry should arrive as quickly as they can;
– if your army is routing and enemy barely lost any forces, battle is usually lost;
– if you managed to hold the line and your allies helped you in time, in most cases you won battle; however try to improve teamwork in next matches.
Chapter 7.1. Skirmish phase
General concept and main targets for skirmishers
Skirmish phase is usually first contact with enemy forces.
Primary targets are listed as follows:
– enemy missiles, including missile cav
– enemy cavalry, both heavy and light
– rest of enemy troops
Winning skirmish phase should result in:
– eliminating few percents of hostile forces
– causing his formation to break, thereby making it easier to attack him or defend against rush
…………………………………..
How to properly play missile warfare
If you want to win the skirmish duel, you have to find out optimal formation which gives best performance
Follow these general rules:
– put your units in straight line in front of your army – veterans recommend 2,1 line instead of two, it gives best effects. Why? When men in lines die the whole unit regroups so they don’t shoot. If unit deployed in 2,1 lines then back soldiers stay instead killed but other don’t move and can shoot.
– use loose formation
– formation should be depth-in 2 rows maximum
– don’t overlap missile unit by another
– provide best angle as possible
Obtaining missile superiority (big advantage) means winning skirmish. You can achieve that by one or mix methods listed below:
by numbers
by quality
by location advantage
by maneuverer advantage
Let’s quickly explain most important ones:
– Missile superiority by numbers
Obviously, you can gain superiority in missile warfare choosing more missile units than enemy does. But it’s double-sided coin: exceeding in missiles unit number in attempting to gain missile superiority will make you vulnerable to rush, since you spent more money on missiles than on cav and melee inf
– Missile superiority by quality
In choosing best missiles quality three factors are most important:
a) range
b) AP ability
c) armor.
Range – longer means better ( ͡° ͜ʖ ͡°), usually player starting skirmish duel first wins
Armour lets your units stand longer. This mean that even if you lose the duel, enemy units surviving will have less stamina and ammo.
You may find yourself in trouble: quality or quantity? I would say that balanced choice is usually best – bring few pavese supported by peasants x-bows if you have no time for more pavese.
Consider which faction you’re about to fight: Scotland, Egypt, Denmark, Poland, Aztecs have only medium-range (120m) xbows or archers, so countering them with pavese ones will be rather easy.
– Missile superiority by location advantage
A hill, especially the edge of a slope, is fine location to achieve that. It’s really simple, we explained it already – few archers sitting on hill are equal to much more shooting up to them being on flat terrain. Thats is one more reason to play on entirely flat maps though.
How to counter location advantage?
By numbers, by quality, and obviously maneuvering.
A hill is a often a narrow place. See if it’s possible to concentrate all missiles on one side and try to shoot clustered enemies.
The advantage of the first shot is another location advantage. Even if you are on a plain, if you can shoot first at enemy missiles coming closer to yours you can get a “bonus”. Enemy archers will start shooting as fewer men.
Missile superiority by maneuverer advantage
In other words, you manage to shoot first and even better, with all your missiles while part of hostile missiles is not able to shoot you. So in practice, this advantage is barely possible to achieve, unless you are playing versus non-skilled very new players. Obviously, those skirmishers who move first in range will get shooted before they’ll shoot. So defender has a good advantage. To avoid a bad situation when both armies sit and wait we use an unpleasant but fair rule: 1st team must attack, always.
Other way to win skirmish phase is down to catching and harassing enemy missiles with all kind of cav you have. Quite risky for new players though, but why not try it?
Before you will attempt to realize it, look at these principles:
light cav is faster than heavy cav but more vulnerable to missile fire
heavy cav is slow, thereby more exposed to fire
try to catch archers with light cav/ha from wings or rear, NEVER from front-line!
If you are trying to stop enemy from doing exactly same:
use optimal formations we listed earlier
– if you have pikes, deploy them behind missiles
– keep rest of army ready to move and counter charges
– don’t chase enemy cav – it makes no sense, besides exposing your own at hostile fire
– don’t place pikemen/spearmen (and other units, of course) too close behind missile units. Enemy will not charge you – instead, he will shoot and get additional kills.
Use missile cav unit try to shoot right side or rear of shielded enemy if it possible. Being under attack do not put your right and rear against enemy.
And one thing more: weather. Always host clear 🙂 But just in case, you need to know that when its either raining or snowing, your archers and x-bows will suffer from that.
Chapter 7.2. Cavalry tactics
Heavy cavalry is leading force in whole game. Properly executed charge causes massive casualties in few second, usually followed by chain rout and easy victory.
Usually battle can be divided into four phases:
– Approaching enemy (usually skirmish)
– Initial cavalry charge, followed by charge of infantry
– Pulling back cavalry to flanks
– Flanking with cavalry, cleaning up rest of enemy cav, hammer and anvil.
– Initial cavalry charge is crucial part of battle. Even if you lost skirmish phase, you can easily re-gain advantage just by winning this phase.
-2,5 row is best option for cavalry usually – unit is pretty coherent and more soldiers are available in charge/melee.

Initial cav charge will be better if your infantry will run behind cavalry as closer as possible and attack enemy’s cavalry too. While your and enemy’s cavalry is pulling back, re-order infantry to fight against opponent’s infantry. Mix of cavalry and infantry against alone cavalry decreases their morale and can rout them before enemy will bring his lated nfantry.

It’s relatively hard for new players to get familiar with initial and all further charges mechanism, but you may find these principles helpful:
– Did you applied optimal formation? If so, you have edge over enemy. Most of players use weird formations which rather block their moves, which is helpful for you.
– Put your cavalry in straight line, tight formation deep at 2,5-3 rows. The more deep formation is, the easier pulling back after initial charge is. On normal unit scale you will be fine with 4 rows. – – – Don’t worry about wider enemy cav formation, usually it will break quickly under your strike
– Order your cav to charge when you’re close to enemy, order missiles to shoot approaching cav, thereby soft them a little bit, order infantry to engage too
– Don’t stay in one position, few seconds after pull your cavalry back to flanks
– Cav ready on flank? Perfect, outflank enemy, use hammer&anvil tactic
– Avoid staying in longer melee contact with enemy cav and inf, ensure that you have edge over them before striking
– Cav represents mobility. Charge, charge and charge again – eventually enemy forces will collapse.
……………………………………………………
HOW TO counter enemy cavalry:
– face them with your own cav – easiest way
– use missiles – few volleys of pavese fire can easily kill loads of charging cav
– use 2-handed inf with AP and great charge bonus as support
– use pikes
– use stakes – restricted for few units and pretty much forces you to play defensively
– charge from behind with either light cav or ha
……………………………………………………
Check out this great guide to find out more about cav:
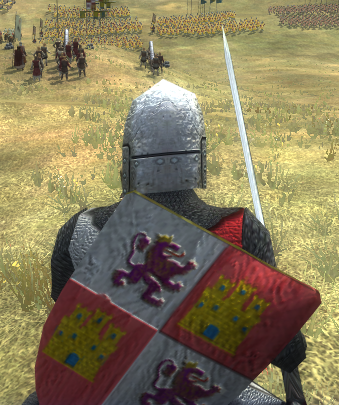
[link]Example of good initial cav charge:
Chapter 7.3. Infantry tactics
While your cavalry is fighting, inf cannot just sit down and watch this, somehow epic, engagement. They are second most important part of every army, so you need to find out how to use them properly.
Hand to hand with enemy inf
Finally you are launching your units into melee, charging at the approaching enemy.
As usual, bunch of tips you need to follow:
– Start it from save position if its possible
– Don’t overlap your units
– Know and exploit your and enemy weaknesses and strengths
– Know and use combat modifiers
– Don’t hesitate to run under fire
Safe position means that your forces aren’t exposed to either enemy missiles or cav. But if you are under fire don’t wait and push forward, thereby reducing your exposition time.
Combat modifiers in Medieval 2:TW:
– RPS (Rock-Paper-Scissors) system
– terrain
– unit types and their morale
– fatigue level
– special formations and abilities
Main rules of RPS system in online world:
1. Spearmen Pikes have bonus when fighting cavalry (horse, elephants, camels).
2. Cavalry has bonus in charging melee infantry and spears.
3. Melee infantry has bonus in fighting spears and pikes.
Terrain – it’s self-explanatory, come on. Obviously, fighting up to hill is much harder than defending it, right?
Unit types – AP units have bonus when fighting armored enemies
Fatigue level – exhausted troops have no chance in melee against fresh ones; the more tired unit is, the less effective their attack/def/morale factors are
Special formations and abilities – cav have no chance charging frontally at pike-wall
Morale:
Logic rules the world of pre-Warscape TW games. Units with higher morale will fight longer. Unit with lower morale, such as untrained militia, will be more likely to rout faster even without suffering much casualties
Low morale < 5 (militia)
Medium morale >5 (trained militia)
Good morale 9-11 (elite cav and inf)
Let’s quote game manual:
“Factors That Reduce Your Morale.
Morale will naturally fall over the course of the battle as units take casualties and become tired. There are some specific things that directly affect morale as well:
• Losing your General. • Being engaged in a losing melee battle. • Being outnumbered. • Being under fire from artillery, guns and flaming ammo. • Having allies flee nearby. Note that routing can work like a chain reaction in the worst-case scenarios. • Threats from enemies at the rear or flanks. • Frightening foes such as elephant cavalry and savage natives that practice live sacrifices, etc. • Being hit by a nauseous gas cloud from a cow carcass.
Factors That Increase Your Morale The best ways to bolster morale are:
• Being engaged in a winning melee battle. • Outnumbering the enemy. • Keep your forces concentrated so that units can support each other. • Keep your General near the action. • Use your General’s Rally ability. • Position high morale units at the end of your line, as this is the most exposed position.
Ways to Attack the Enemy’s Morale.
Your aim is to clear the enemy from the field of battle, so be sure to use some of these techniques to get them routing:
• Concentrate assaults in one place so you can overwhelm certain enemy units. • Concentrate missile fire on one unit to increase the chances of breaking it. • Look for ways to get several enemy units routing at once to create a mass panic. • Get units behind the enemy to undermine the morale of the whole force. • If the chance arises, kill or rout the enemy General.”
For more information about use of pikes:
[link]Chapter 7.4. Three main tactics used commonly in multiplayer
Last but not least chapter of this guide. In this one, you will discover most popular approach methods used in online battles.
1) Rush – rushing means priority on melee units, attempting to approach as quickly as it’s possible, thereby reducing or skipping skirmish phase. However, player using it must be ready to counter several horse archers (while remaining enemy’s army deploys far from the center), so it’s advised take 2-3 light cheap missiles or meat-shields to counter those evil ha. If rusher keeps his army undamaged before the main charge, he will win in most cases. Otherwise if player using balanced army manage to kill a lot of rushing cavalry, he usually wins.
2) Balanced approach means using more missile units, mounted or/and dismounted. Balanced army is more flexible in terms of available tactics and can cover wider range of task, but lacks in melee units (because missile units are more expensive and obviously have less melee skill)
3) Balanced with missile cav – similar to normal “Balanced” but with one exception – tactic used to counter rushes. Usually it’s down to bringing few ha and harassing enemy cav from rear and flanks, while rest of army is sitting far away – it gives time for ha to get their job done. This tactic requires pretty good micro since ha are tricky to use, but in most cases rusher don’t know how to react properly and run breaking formation straight into your steady, ready-to-kill soldiers.
……………………………………………………………………………………………………………….
Chapter 7.5. Improving your skills
How to improve your skill?
– Combine theory (guides) and practice (online battles)
– Play with all kind of players – beginners and veterans, each level provides new experience and new occasions to test new stuff
– Find a teacher – majority of vets is kind and friendly, unless you insult them
– ALWAYS save replays and analyze them later, when you will be calm
– Fight with honor and glory. Be nice when either losing or winning
– Play for fun – don’t be stressed or pissed off when losing
– Watch veterans games on YouTube – an example “PRO GAMES” series of mine:
Thank You very much for reading. We wish you all the best in online career. If something remain unclear, don’t hesitate to ask here in comments section. If you find this guide useful, please rate, share and post your opinion – your input is welcome and appreciated.
Best Regards,
Cyrus The Great & /NC/_Tetri
……………………………………………………………………………………………………………….
Cyrus The Great’s channel: https://www.youtube.com/c/CyrusTheGreatTW
/NC/_Tetri’s channel: https://www.youtube.com/user/TetriT3
……………………………………………………………………………………………………………….
Bibliography:
– Guide to Medieval II TotalWar Multiplayer by ^Marcus Cornelius^ [link]
– Official game manual for Medieval 2:TW [link]
– Basic guide for multiplayer by Cyrus The Great
[link]
– MP army composition + templates to download by Nameless Order
[link]