Overview
Basic guide to the advanced level editor and how to unlock it early (without needing to finish half of the game).
A few important notes
– You need to finish half of the campaign before you can access the level editor*
– You will need to play and solve your puzzle before you can upload it to the Steam Workshop.
– This was made in the Advanced Editor.
– Find the editor in the Resistance Campaign – “Custom Puzzles” on the left side.
There are many different blocks, decor, etc, in the editor. I am only using basic blocks in this guide.
*It is possible to unlock the level editor by altering your save file. See the section below.
Unlocking the editor using your save file
Run the game at least once to created the needed files and folders, then exit the game.
Browse to:
C:Users(YOUR USERNAME)DocumentsMy GamesInfinifactory(random long number)
Backup save.dat just in case.
Open your original save.dat in a text editor, like Notepad.
Find (Ctrl+F) the lines RewardSeen, and ADD the lines from the following that are not there already:
RewardSeen.r1 = True
RewardSeen.r2 = True
RewardSeen.r3 = True
RewardSeen.r4 = True
RewardSeen.r5 = True
RewardSeen.r6 = True
Save and exit the file.
Now you can use the editor before finishing half of the campaign.
1) Accessing the settings and play testing
In the editor you can see two buttons at the bottom right:

Edit Settings – Lets you configure certain things in the puzzle, including naming your puzzle, changing the environment, etc..
Test Puzzle – Lets you play test your puzzle at any time.
2) The mysterious floating block
In an empty level you will see this block. It is there to stop your factory from falling, build on top of this block.

3) Building a floor
Building the floor (using wall blocks here).

4) Choosing a player spawn point
Your starting location is where the player spawns when playing the puzzle. This can be rotated to make the player face a different direction.

It can be found in the object list here.

5) The input (where your product blocks will spawn)
This is your input platform, where blocks will continuously be produced.

It can be found in the object list here. Notice there is also an invisible input platform in the object list which can be seen on the left.

6) Choosing the product type for your input
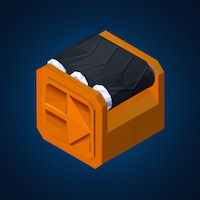
Place a product block you wish to use in your puzzle on top of the input block. Here I used ammo container.

Ammo container can be found in the object list here, as well as many other types of product blocks.

7) The output (where your finished product needs to be sent)
This is your output platform, where your finished products need to be sent.

It can be found in the object list here. Notice there are several types of output platforms.

They can be joined together like this to form different shapes required for output. Place your product blocks on top of the output blocks.

8) Testing your puzzle
This is the puzzle test as mentioned before.

9) Note about selectable areas on big objects
Some objects only have one or two selectable areas on them (for rotating, deleting, etc..).

10) Using a container to spawn product blocks
If you want to have your product block coming out of a cargo container (or similar), first place your input block on the ground.

Put the cargo container on top of the input block, but one square in front so it doesn’t end up sitting on top of the input block.


Place your product block at the back of the container, directly above where your input block is.

Cargo container can be found in the object list here.

That’s all.
The editor is quite user-friendly and this should be enough to get you started.
—-