![Age of Empires II: Def. Edition [+DLC] - 100% Achievement Guide for Age of Empires II: Definitive Edition](https://steamsolo.com/wp-content/uploads/2021/08/age-of-empires-ii-def-edition-dlc-100-achievement-guide-age-of-empires-ii-definitive-edition.jpg)
Overview
DLC “Lords of the West” required! – Online Play required (1) – NO once-per-playthrough Missables
Campaigns | Part 0
Alright, let’s start with the campaigns.


These are the unconditioned ones. Just play through said campaigns.
No further Achievements associated to them.
Campaigns | Part 1.1


Tamerlane mission “Sultan of Hindustan”.
- Posted by Youtuber T-West:


second Pachacuti mission “The Field of Blood”.
- Posted by Youtuber Norovo:


mission “Quetzalcoatl”.


Lend Me Your Ears
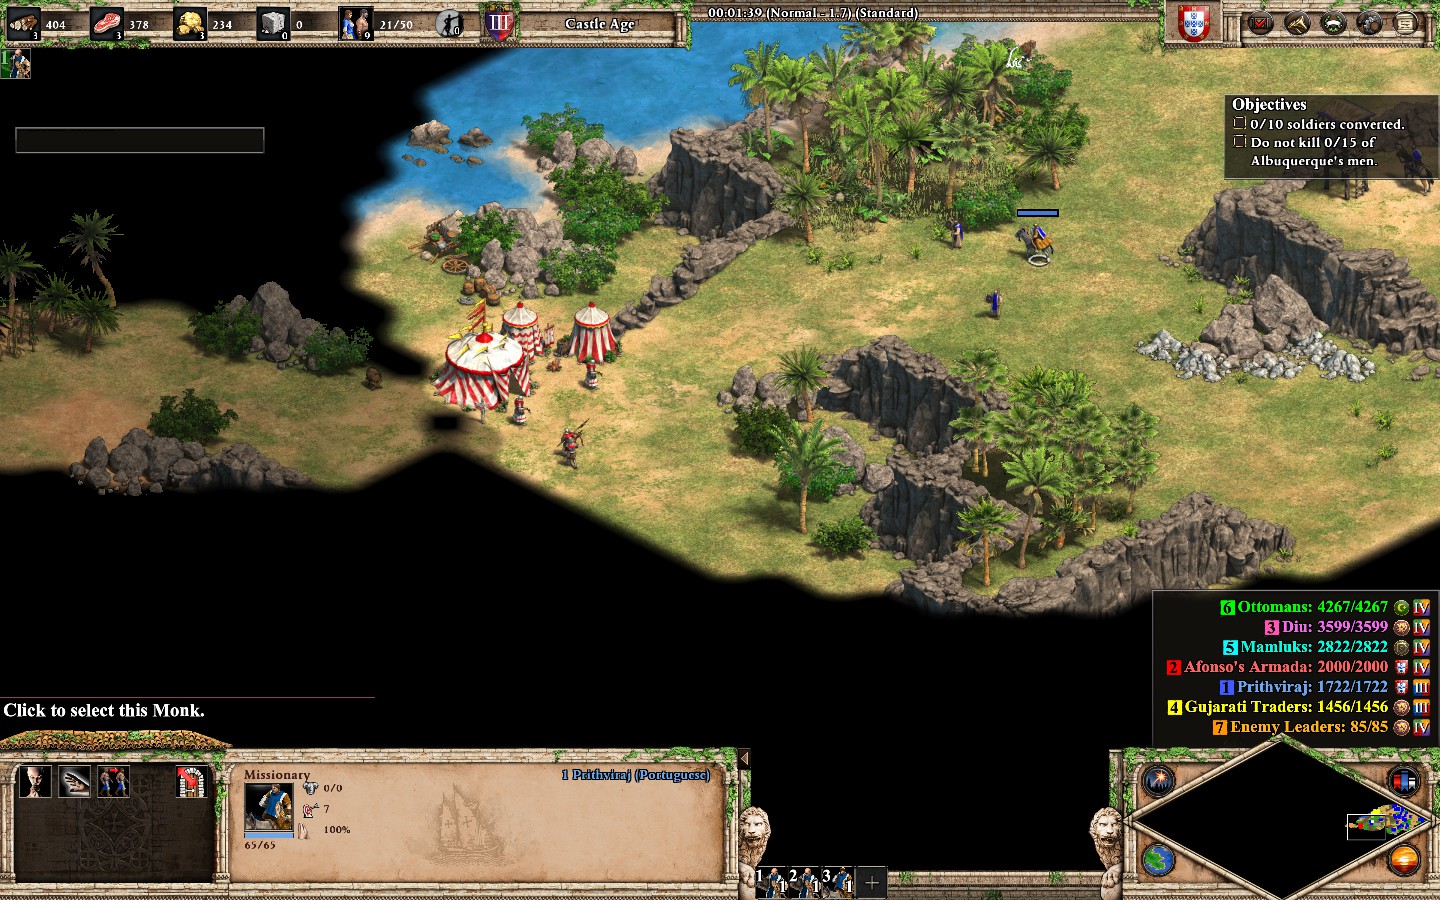
unit in the fifth Francisco de Almeida mission “A Son’s Blood”.
- First part: Converting 10 enemies.
It is quite easy to convert enemies. It does not require to play aggressively, you only need to explore the near surroundings of your base. With a little patience and time management, it can be done quickly.
Things that you have to keep in mind:
- Be careful when you wait with your monks, because the enemy units obviously tend to attack you, when you are in their field of vision.
- Take your time, dont make risky plays.
- It’s not necessary build walls / outposts or town center.
- There are exactly 10 enemies near your base, divided in 5 groups of 2:
- 2 Halberdiers in the northwest of your base (They don’t move)
- 1 Halberdier and 1 Hand cannoneer in the south of your base (They don’t move either)
- 2 Halberdiers, that patrol near your base in the south (Near the last two)
- 1 Halberdier and 1 Arbalester that patrol both areas, where the enemies are immobile
- 2 Conquistadores that patrol near the Halberdies (which didn’t move) in the northwest of
your base (Around min 6)
At the beginning, while Afonso is talking, try to move your monks quickly to the northwest and then spot the enemies. Don’t convert immediately. Wait until the group (Halberdier and Arbalaster) appears and disappears again from the area. When that happened, convert the Halberdiers quickly.
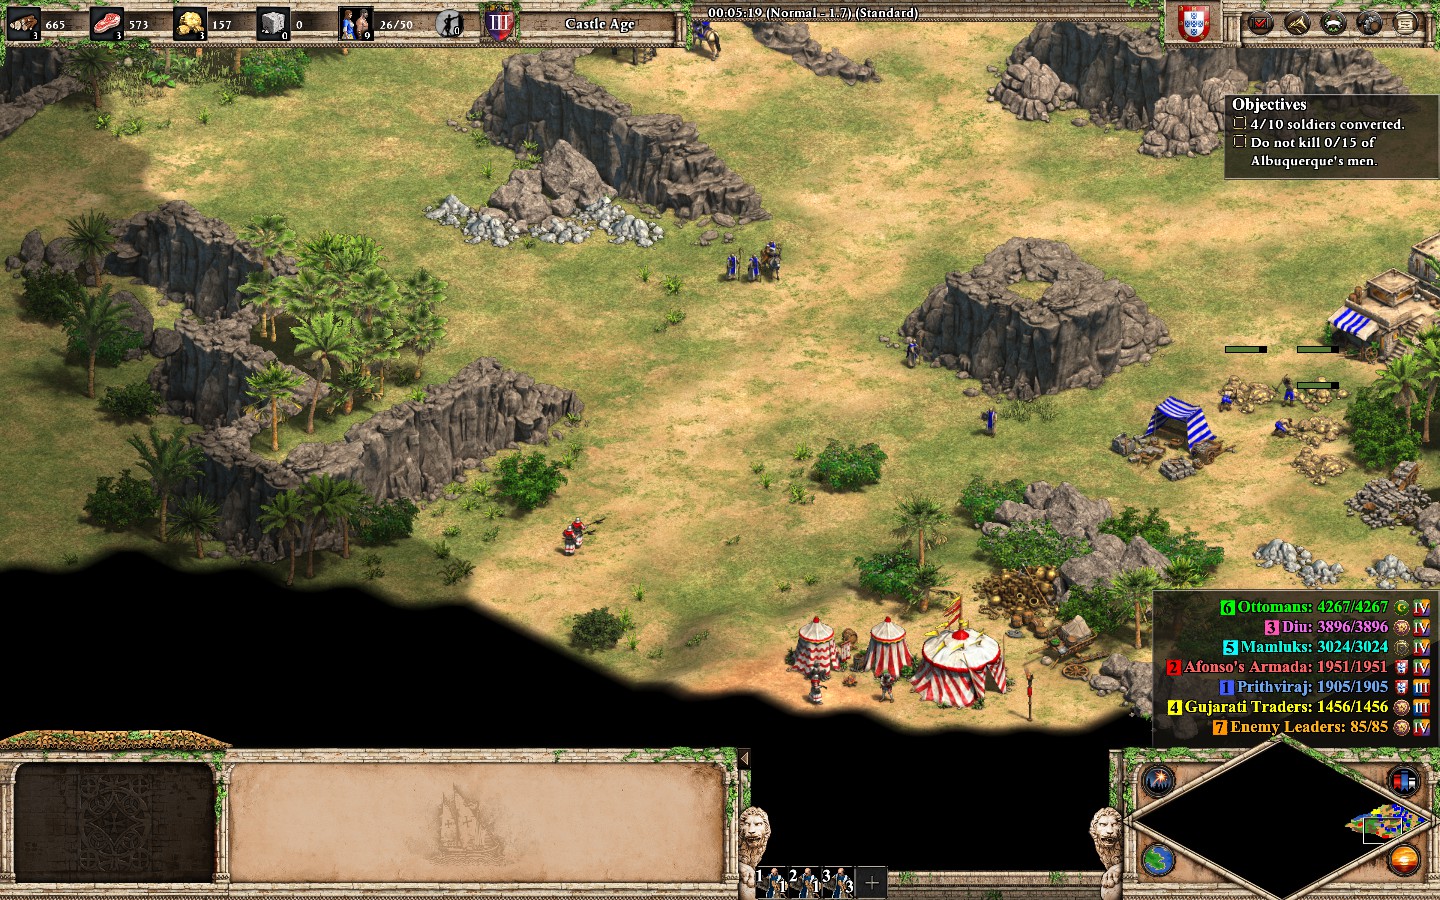
After that, go back until you recover faith, then convert the enemies who patrol that area (Use your missionary to heal the monk, that is receiving damage).
When you finished in that area, go to the south and do the same strategy – Spot the enemies and convert, when the group, that is patroling near the area, moves out of sight.
Finally, the last 2 enemies are in the northwest of your base. They appear after ~6 mins.
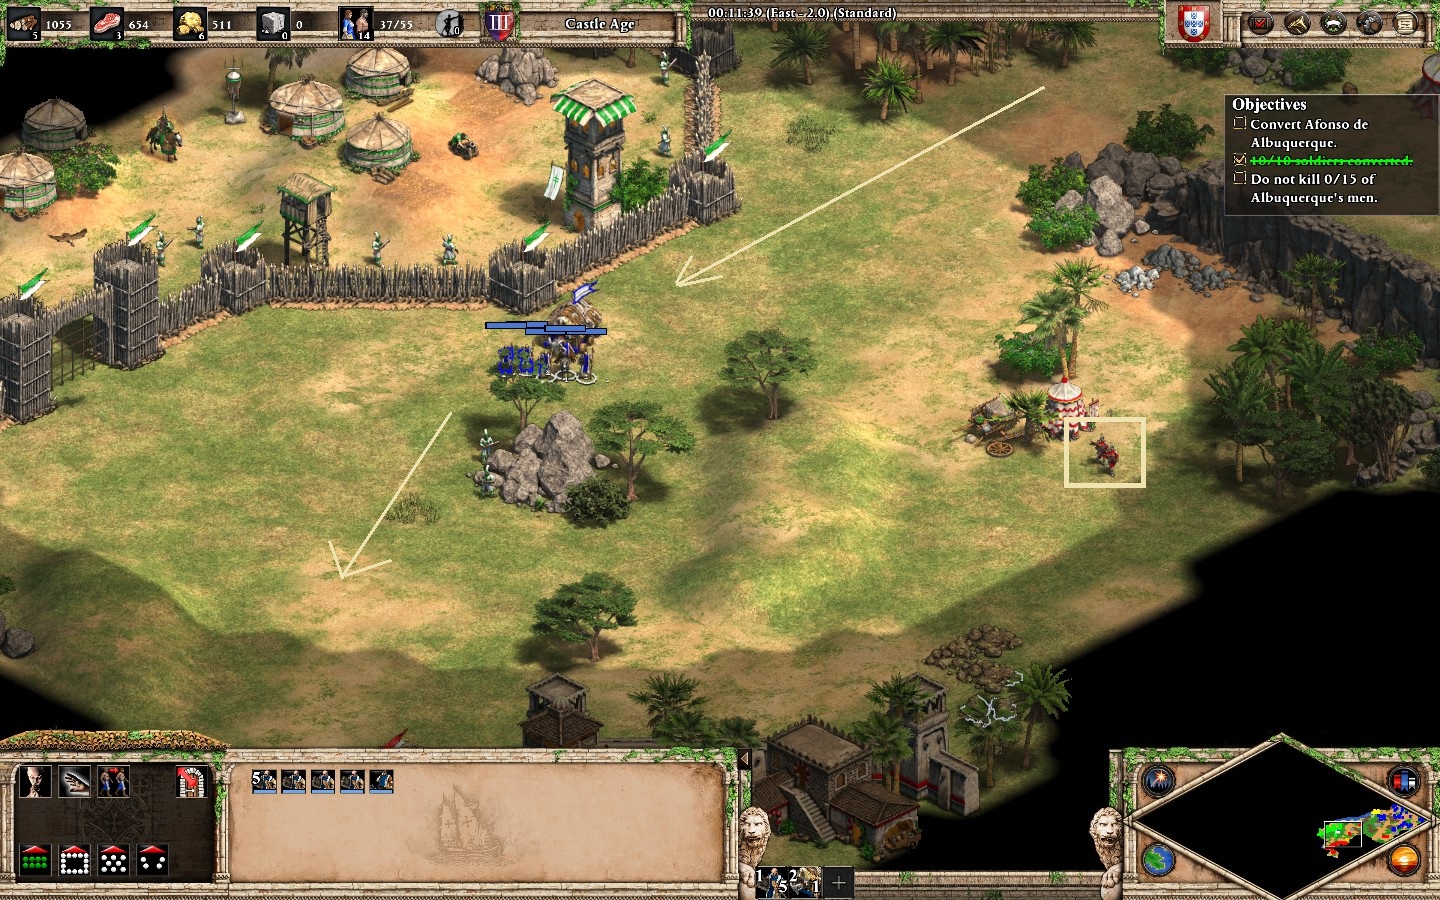
I recommend to create 2 more monks to heal (Conquistadores deal a lot of damage). Convert them and you finished the mission.Second part : Convert Afonso
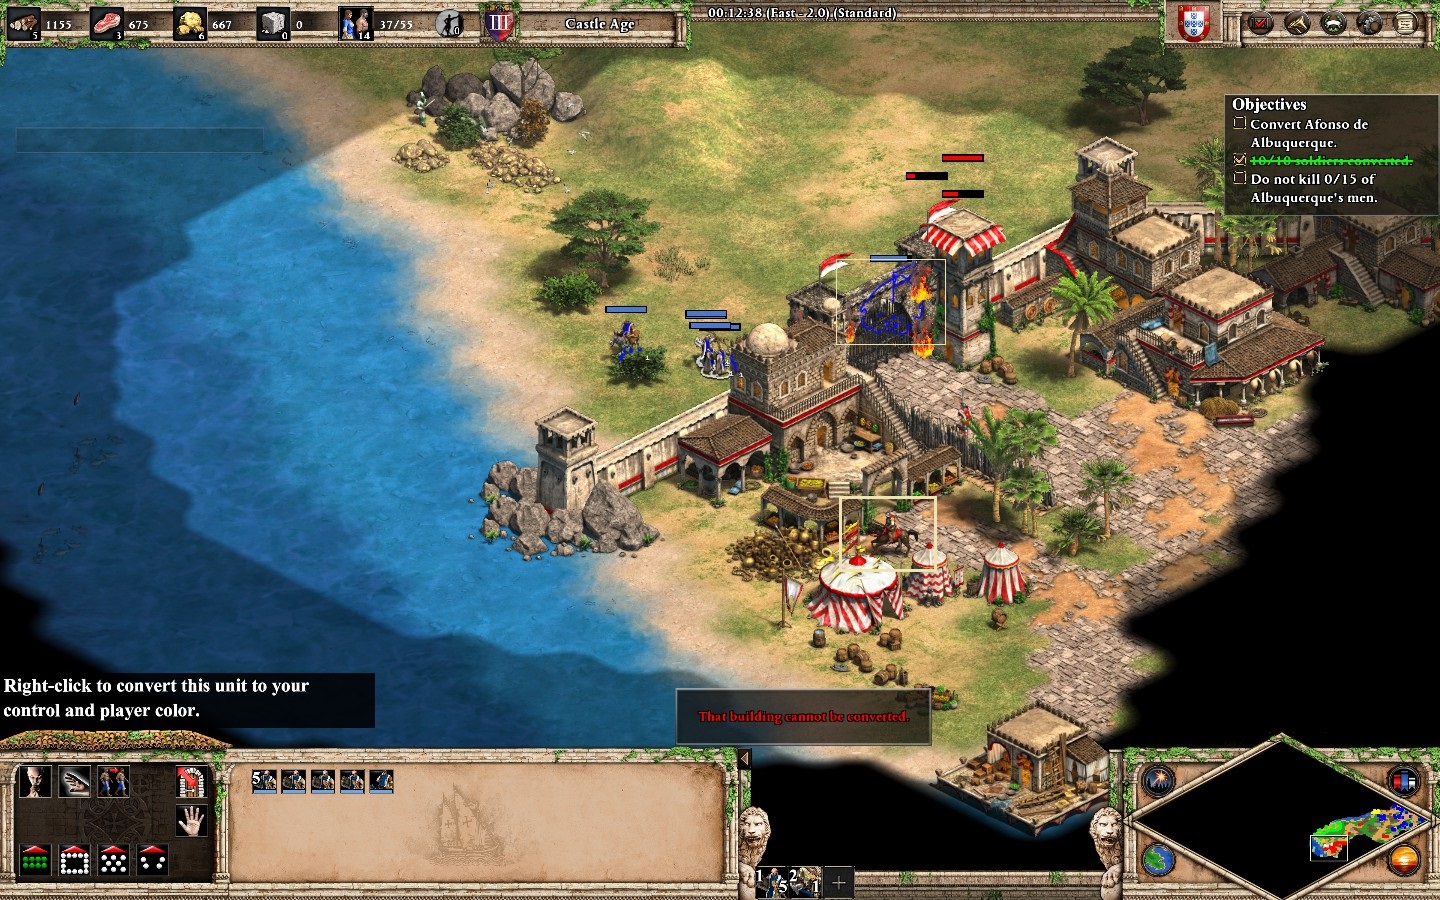
When you have completed the first mission, send your monks and your capped ram(with units) to the Alfonso´s base using the northwest way. Be careful, there are 2 arbalasters scouting the area (they only reach the pavilion).
When you reach the red base, send your capped ram to attack the north gate to tank the tower damage while your monks try to convert Alfonso (When you start converting him, he will move near to the gate to attack you). After finishing the mission, the achievement will pop up.


Saladin mission “The Lion and the Demon”.


Cannons in the fifth Dracula mission “The Night Falls”.
-
Originally posted by |Apache117X| on |trueachievements.com|:
After you kill the purple and blue team in the southern section of the map and liberate the town with the castle the game will provide you with a base.
– To the north of this base there is an Italian ally (Orange) who will provide you with Genoese Crossbowmen (50 Gold) & Condottieri (60 Gold), when you click the barracks or the archery range.
– Just to the west of the base there is a Craftsman (Yellow) who will provide you with a Bombard cannon once every 5 or so minuets. You must first provide the craftsman with 1,000 food and safety.
-
Originally posted by |Anticitizen 1| in the comments:
I got it by suiciding the crossbowmen and the anti-gunpowder infantry and then hiring them again. So yeah, a bit broken but achievable.
Campaigns | Part 1.2


on Its Stomach
before Dagnajan and his army march in the third Yodit mission “A Fallen Crown”.


mission “The Burmese Tigers”.
- Posted by Youtuber SiFly:


mission “Unconditional Loyalty”.
-
Originally posted by |Healtti| on |trueachievements.com|:
Tips:
Visit the Purple ally in the NW corner. He’ll can take out the Teal outpost and distract the Orange at the main gate. (Try typing 106 in chat to instruct him, not sure if it registers though.)Build a Siege Workshop and pump out Mangonels. You don’t need Rams for this one. Get a Stable as well and train a few Scout Cav. That’s all you need.
When you see the Purple ally bring in their siege equipment, that’s your cue to attack. You’ll want to break a 1×1 Stone wall section slightly to the north west of the middle gate.
When the wall is breached your scout cav can slip through and make break for the Yellow Castle. You should finish with plenty of time to spare.
-
Originally posted by |Flymypretties| on |trueachievements.com|:
This achievement is for reaching the king located in the middle of the map before 10 minutes has elapsed.
Upon reaching the king the player gets control over him and his units, unlocking the achievement.
Luckily this is easy because of 1 unit, the Siege Tower.Step 1) Once the game starts quickly move units to the top corner of the map to meet the purple ally
Step 2) Build a siege workshop (I built mine northwest of the spawn slightly)
Step 3) Build a siege tower in the siege workshop
Step 4) Load 10 troops (you can use starter troops) into the siege tower
Step 5) Get ready to send your siege tower to throw troops over the wall – best to wait until purple ally sends some distraction troops.
Step 6) Rush the main wall (I did the eastern wall in line with the central bridge), throw your 10 troops over, and run them right into the middle being careful not to stop. Only 1 has to make it to unlock the king.
This took me ~5 minutes.
Campaigns | Part 1.3


“A Three-Pronged Attack”.
You’ll start with 4 heroes, 2 bases (northwest & southeast) and a small camp in the north that is connected with 2 blue bases.
You have 2 heroes in the northwest base, 1 in the small camp and 1 in the southeast base.
Start by focusing on your economy, produce villagers and prioritize in stone and food for now. Try to build a castle in each base to keep your heroes safe.
If you deem it necesary, build an extra castle and, while you’re at it, even some walls in your base in the southeast.
Tips:
- Hide your heroes at the beginning (especially Le Trien behind the camp).
- Prioritize the southeast base. There are all the resources you need and you will be constantly attacked by purple and teal.
- The northwest base should only be used for farms and gold, if necessary. A single castle and a small army will be enough to defend it.
- Create small armies in each base to stop the attacks that happen constantly:
*Small camp and northwest base -> archers / elephants
*Southeast base -> knights / archers (Sometimes, purple attack with trebuchets and teal
with bombar cannons)
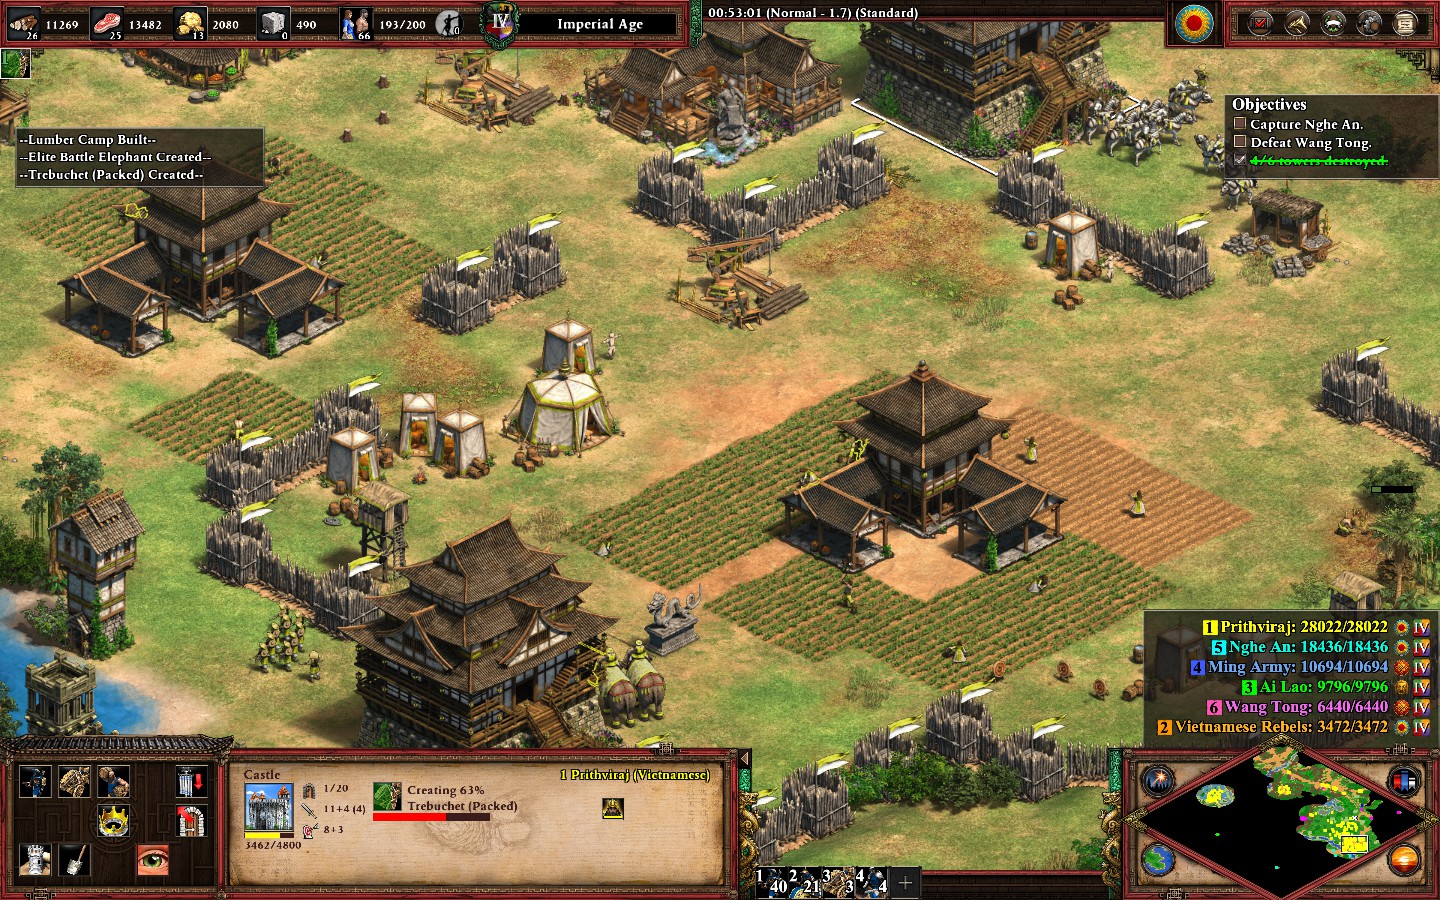
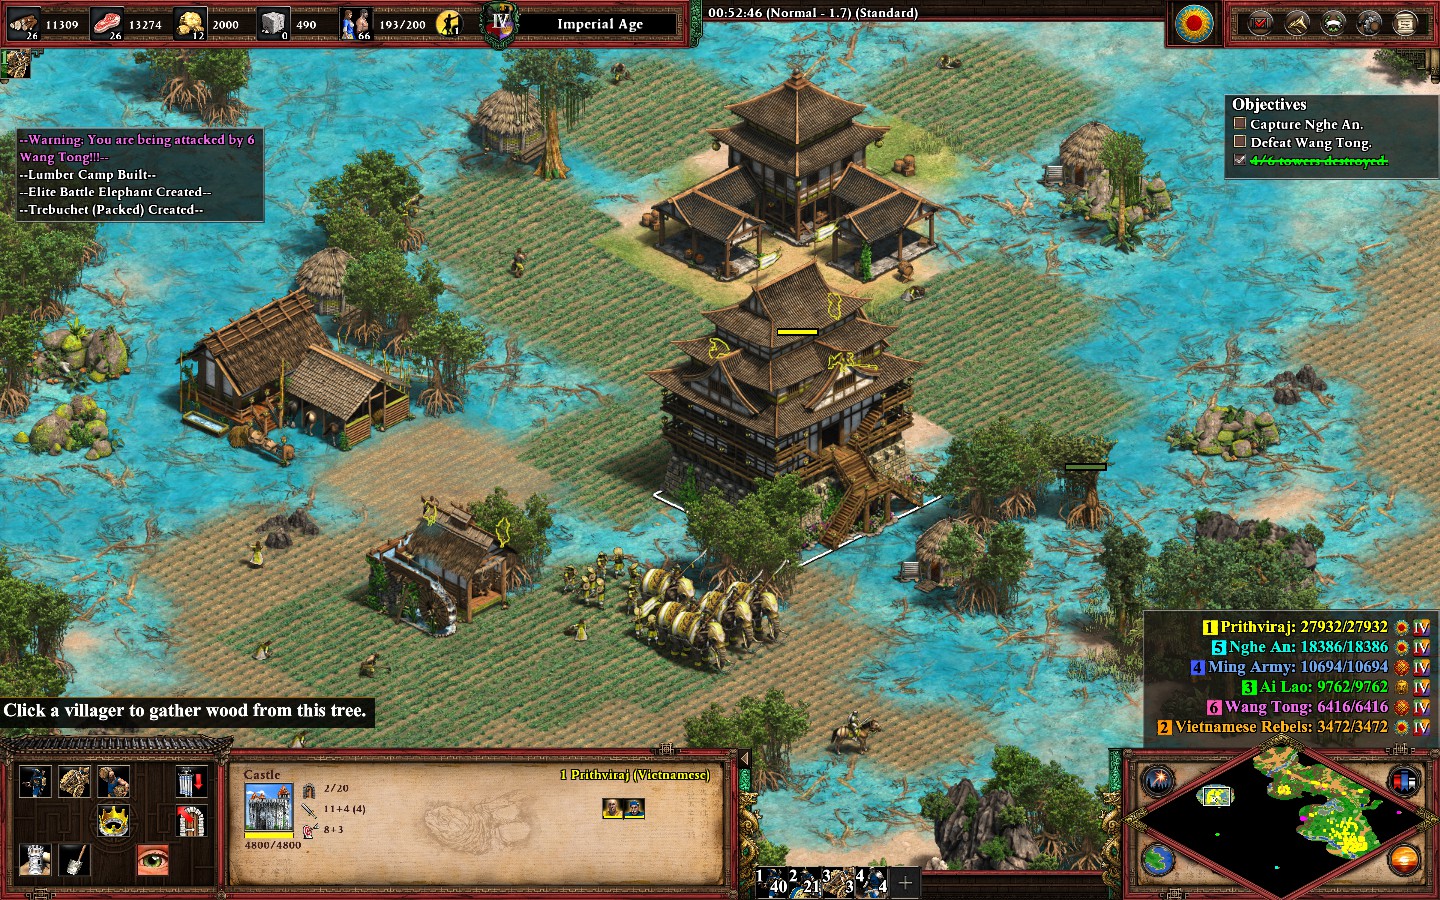

The safest way to win is to first destroy the ming army and then wang tong.
After that, you have to capture Nghe An (Teal).
You will obtain the achievement, when you win the mission.


You have to collect 9 relics in total.
- (0-4) You start with 4 of them in your bases (2 in each one).
- (5-6) 2 of them are near of your base, which has 2 castles. I recommend to use your light cavalry to defend the relics until you monks can take it (At the beginning, blue will send monks to collect the relics).
- (7) The seventh relic is near a purple base. You should go with a small army to defend your monk while he tries to take it.
- (8) The 8th relic is difficult to take, because it is surrounded by towers and castles. The blue monk will take it at the beginning.
I recommend to play safe until you have enough resources to create an army to destroy the blue base.
- (9) The last relic is in the east corner of the map on a small island. You should go with a fleet to defend your transport ship, because Purple tends to attack you with ships everytime.
When you finally have all the relics in your monasteries you will obtain the achievement.
Campaigns | Part 2.1


Barbarossa mission “Holy Roman Emperor”.

third Barbarossa mission “Pope and Antipope”.
Furor Teutonicus:
-
Originally posted by |Meneldil| in the comments:
For Furor Teutonicus, you can’t hire the cumans, as that will make you unable to get the achievement.
-
[link]
A Truly Holy Emperor:


mission “Blood on the River Bank”.

With the Help of My Sisters:
- You start with a base in the east, with a good quantity of resources. Split your villagers to build 2 town centers ( 1 close to the stone mine and the other close to the gold mine).
Keep creating villagers and focus on your economy. Use your light cavalry to explore the map, you will find more gold and stone mines near your base.
Build a castle and a few knights to defend your base. If you think, that you won’t have wood later, send your man-of-arms and a villager to build 2 towers in the small base near to the river (Build a castle if it’s necessary, later).
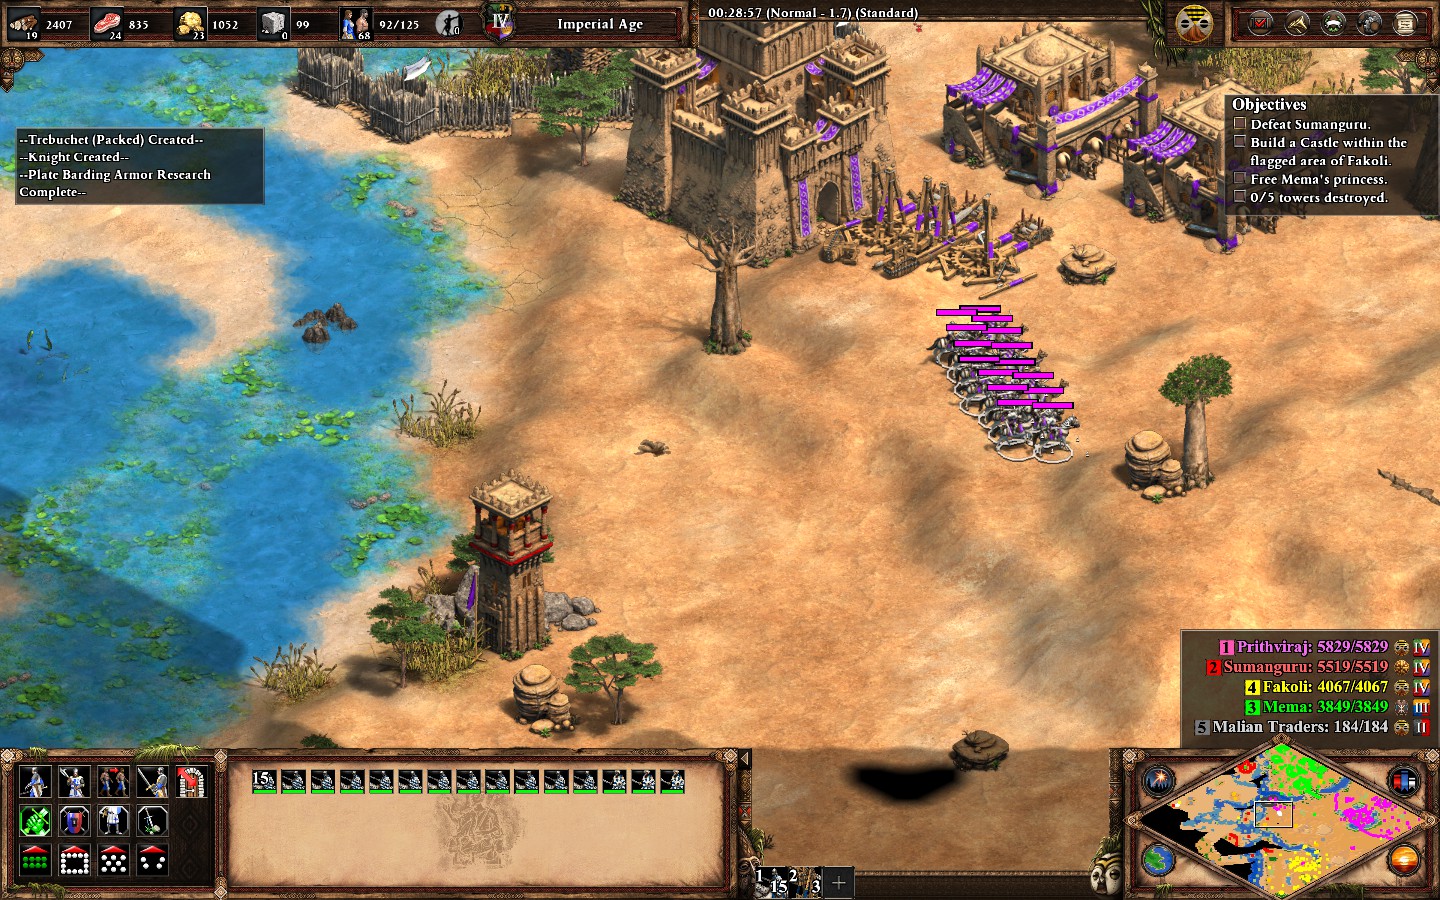
When you reach Imperial Age, start attacking his towers (5 in total) and then wait until you receive the other missions ( 22 – 28 mins).
- After some time, both Fakoli and Mema express their desire to break free from Sumanguru’s rule:
Around approx. min 22 – 25, Mema (Green) is going to be your ally, but he requires to rescue his princess. She is held hostage by Sumanguru in a fortress west of their base.
Be careful, when you are going to rescue her. Destroy the castle, towers and his army first, before rescuing her.
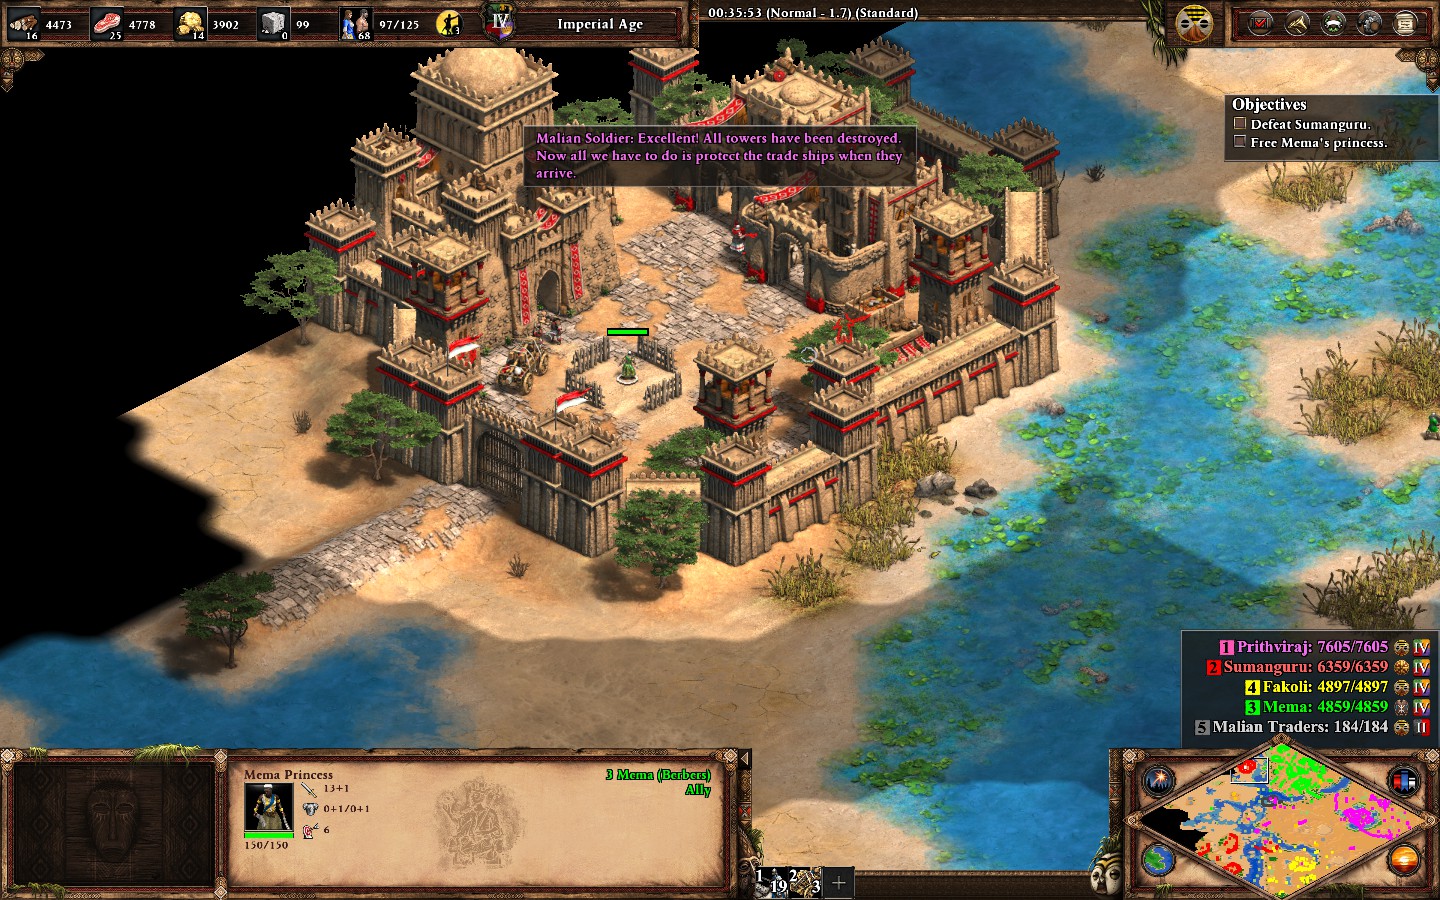
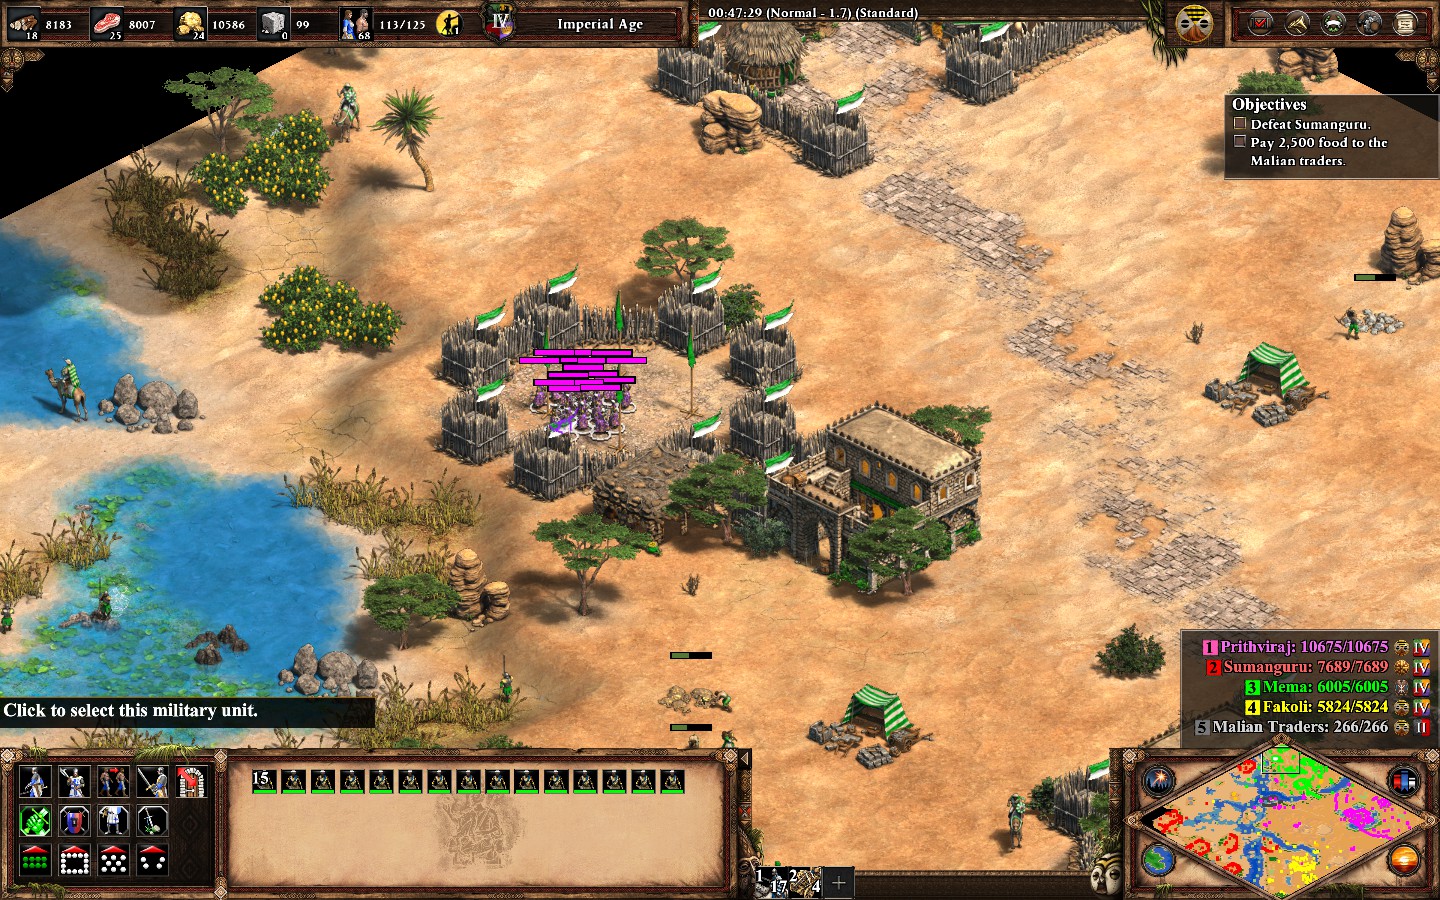
- Note: It’s obligatory to rescue his princess to obtain the achievement. When you complete the mission you’ll be able to create gbetos (She will gift you 15 gbetos).
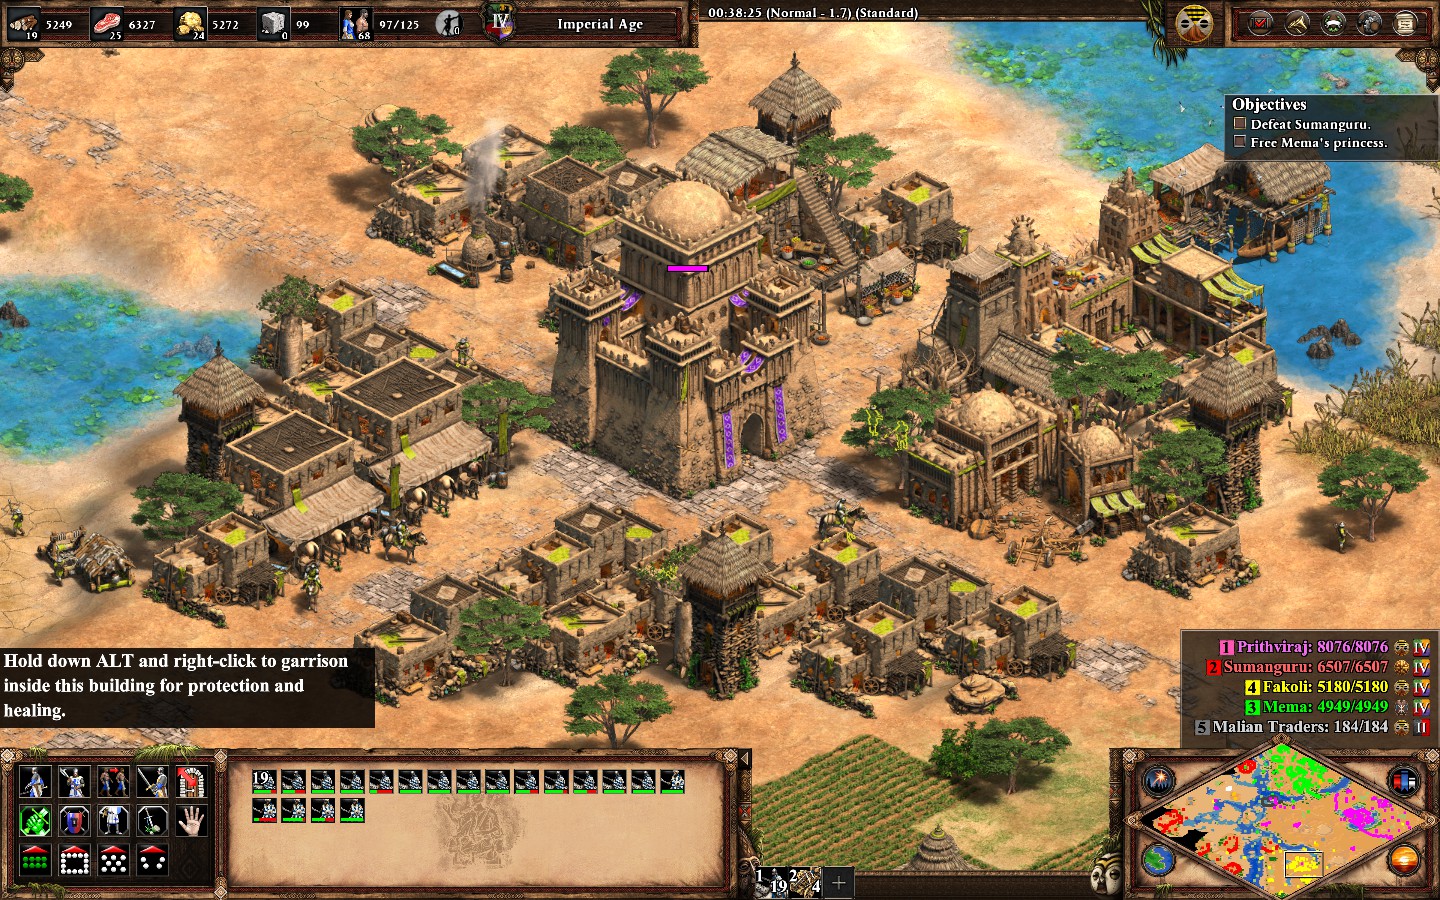
Around approx. min 26 – 28, Fakoli (Yellow) demands a tribute of 1000 gold and after that a Castle in his town to be protected. After that, he becomes your ally.
I recommend to do it first, before rescuing the princess.
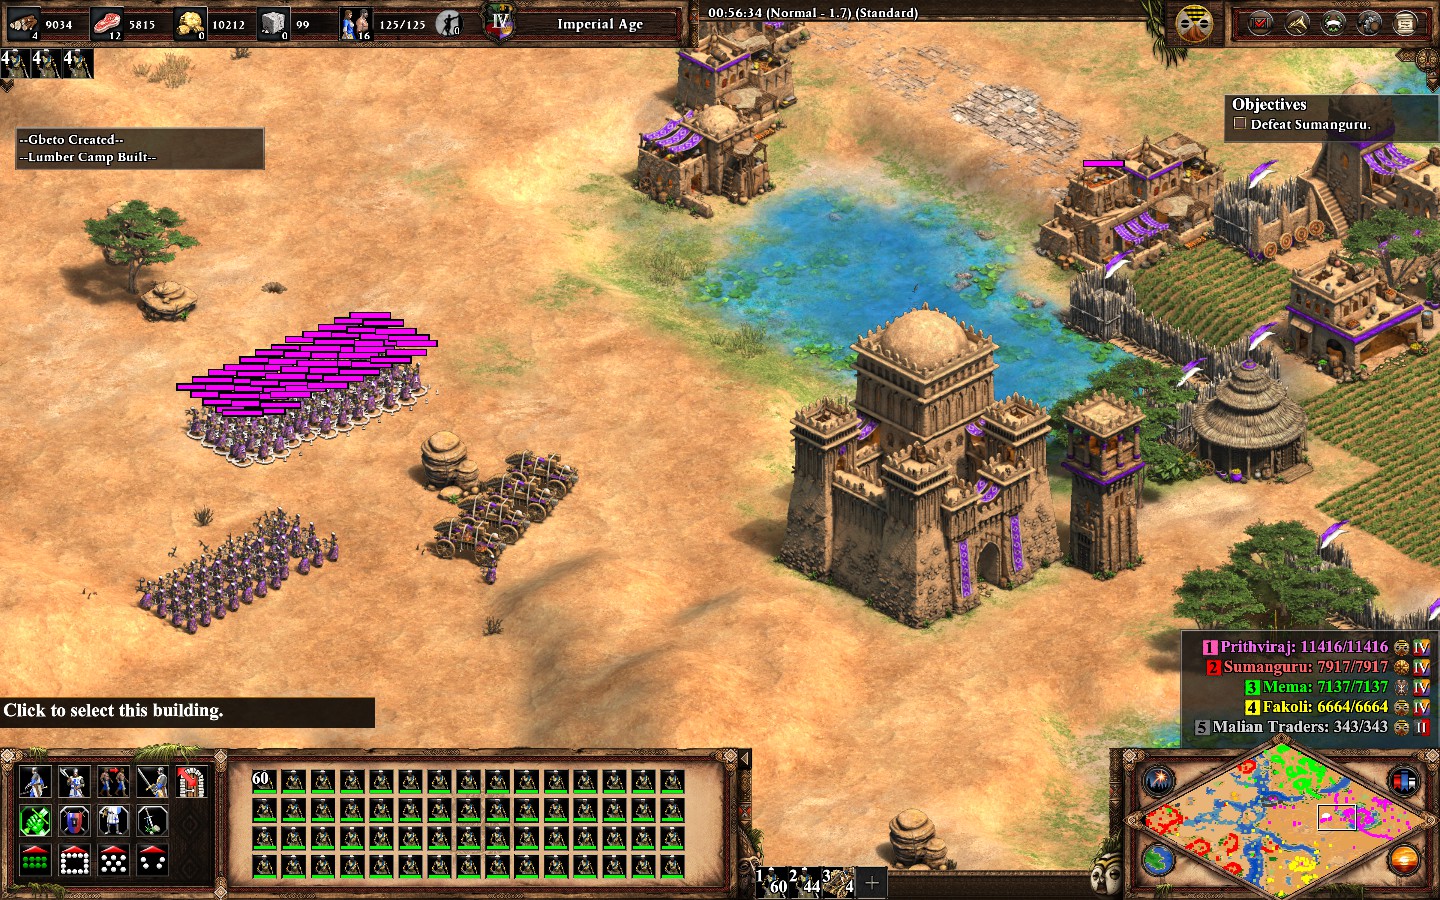
- When you finally completed the secondary missions, it’s time to create gbetos. It might be necessary to kill some villagers, if you dont have enough population, since only have 125.
The achievement will pop up mid-game, when you have 100 gbetos.
Roar like a Lion:
- Posted by Youtuber Apo Mind:


to the Castle Age.

“A New Home” before 45 minutes have elapsed.
Cuman Flush:
-
Originally posted by |Healtti| on |trueachievements.com|:
Quickfire tips:
– The Mongol (Orange) threat isn’t real. Ignore their taunts. You’ll have plenty of time.
– Immediately build two Town Centers (Cuman faction perk), keep cranking out Villagers.
– Focus on food and wood. You need much less gold than normal due to limited upgrades.
– Train Pikes and Rams, mix in a few Men-At-Arms with surplus food.
– Keep your Cav in reserve at first, until you need to chase down soft targets like Cav Archers or Villagers.
He Won’t Be Back:
-
Originally posted by |Itzz Sh0wt1m3| on |trueachievements.com|:
I won’t go into full detail for this. Just a small tip. Right at the start of the mission, don’t cross the river, but stay on this side of the water. Duke Frederick (Austrians/red) will be located on this side of the water, in the bottom left corner of the map. If you cross the water, it’ll be impossible to defeat him.
After doing so, set up a base, build up forces. Try to focus on red and not on orange.
Campaigns | Part 2.2

the Easier Mowed

Grains of Sand
aside from infantry.

in One Day
mission “The Giant Falls”.
Numerous As the Grains of Sand:
-
Originally posted by |ButchBrenda| on |trueachievements.com|:
Upgrade all your infantry techs in the blacksmith and barracks. Speed and arson are good. Sell all your wood slowly because the price seems to improve quickly in this mission. Buy enough food to use all your gold training huskarls. Attack red, kill the gates and kill the army. Destroy the town centre.
Train up more huskarls, sell your wood. Buy enough food to buy all huskarls with the remaining gold. Purple will attack soon, on one playthrough they actually destroyed my initial base which is very annoying.
Park your dudes in the exit of red, send 5 huskarls to attack the nearest yellow gate. Lure his scorpions and skirms out of their town. Kill the scorps and run through the gate when their skirms open it for you. Make a dash for the upper gate, destroy it and destroy the town centre.
Train more huskarls. Sell extra wood and make more huskarls. Keep 8 behind in case purple tries to attack yellow or red. Send 5 huskarls to attack the gate of blue. Wait for their army to come (especially the onager). Rush through the bottom gate when a crossbow opens it for you and kill their army. Kill their onager before it can kill your dudes. There is a monk worth killing. Once both are killed, kill the second gate and kill the TC.
[…] Free the gold markets with your huskarl ball.
Train more huskarls, sell wood, buy food. Move on cyan. Cyan has a smaller army but has a castle. Wait for their army to appear at the front gate. Kill it and run past the castle to the second gate on the right. Destroy the gate and kill the Town Centre.
[…] Send your huskarl ball to clear the mines. Lure them away from the towers for minimum casualties.
Sell wood, buy food. Train huskarls. Spam 60, send them to the gate of purple. Start attacking. When Purples army shows up, move inside and get into the second gate when some purple unit lets you in. Kill the town centre plus towers and move south to find the rest of the villagers. This will stop purple producing many units. Then move north and take out the production buildings.
Meanwhile, sell wood, buy food and train huskarls. Next 60 unit ball, send to kill the gates near the castle. After the gates go for the castle.
Purple might keep attacking your old towns. I find that 8 huskarls should be enough to kill these groups of rams.
Rome Was Destroyed in One Day:
- [link]
-
Originally posted by |Itzz Sh0wt1m3| on |trueachievements.com|:
The main tip I can give I guess is trying to avoid fighting enemies as much as possible and mainly focusing on the castles themselves. You have limited resources and units, and very limited time. Half an hour sounds like a lot, but blink your eyes once and you can be 15 minutes. Also, try to avoid destroying walls and evade the towers as much as possible. Only destroy walls if there are no/barely enemies/towers around, as it’ll be a waste of troops otherwise. Unless you have petards ready, which I used later on for some of the castles in the top left. 2 of them are surrounded by walls and towers, so you want to be in there quickly. Also, the gate opens when units from the inside want to get out, which can be a useful strat to bypass the necessity of needing to break a gate.
Also, use mainly the new /barracks/stables/siege factories/etc. that will become yours over time (once moving in the city and killing nearby units). These were really helpful as you could spawn new units close by and don’t need to spend the initial cash on making them
I mainly used knights as main mush to take the hits from the castles and take out infantry, then also elite huskarls for dealing with both of these. Had some crossbowmen and monks for healing and cover. Also used petards later on, purely for destroying castles. My initial assault with the units you get and some monks was along the right-hand side with the yellow ally. He should take down the gate. In that area, you can take down 3 castles (also the one which is right in front of you from the start, but now you don’t need to take the walls/gate down.
Also in the meantime, right from the start actually, start gathering food, gold and some wood. You have a 210 population limit, so spam 2 town centers and create a ton of villagers right of the bet, so that you can create a ton of extra units later on.
At some point, once you notice that light blue also has built up some units, send some units across the river, south of the hostile docks (only one hostile tower here that can damage you), which will initiate him to also starts attacking. This should hopefully draw a couple of the units from the city, making it easier for you to get rid of the castles. Later on for me, there were barely any units on the far left against the edge of the map. Could easily take out the castle in the bottom left, top left and with a little challenge of reaching the walled castle in between the 2 beforementioned also that one.
So after while sending a unit to signal light blue to attack, start attacking from the castle nearest to your spawn and move to the left. There is a lightly defended gate with only 1 tower. Also at all times, keep replacing lost/adding new units from the ‘captured’ building. Once through that gate, move north to take out the first castle that you reach, then move a bit to the left so that you can attack the 2 castles further to the top (both to the left of the coliseum and another wonder), while trying to avoid to get the units from the 2 wonders and the garrison in the walled courtyard to attack you. Once these 2 are destroyed, retreat south to around the area where you destroyed your 4th castle, heal up and get new units. Now there should be 2 ‘easier’ castles close to your left. These will be your next target. At around this time or a little before, I send a couple of villagers to this area to build 2 castles in places where I could lure some enemies to. Also, this enables you to create pretards close to the last castles. last ones are the 2 lightly defended in the bottom left and top left of the city, and the 2 walled ones. These walled ones can be a pain, but as mentioned, pretards and maybe a bit of luck that some units inside open the gate for you.
To conclude/some additional tips
-Try out a couple of ways/units. This worked for me, but there is definitely some luck involved. Being 1 petard short for example while trying to destroy one of the 2 walled castles, can mean the difference between entering the place quickly, or your troops getting killed just because they are still destroying the gate.
-SAVE SAVE SAVE!!!
– Try everything to minimize the units you need to replace, by only attacking what’s necessary, by keeping to heal your units with monks to minimize replacements and by trying to find the right path, luring enemies away from defended positions and taking them out ‘one by one’
– Know the locations of castles, enemy spawns and specific buildings that you need to create new units with.
Campaigns | Part 3.1


Khan mission “A Life of Revenge”.

Genghis Khan mission “Into China”.

Khan mission “Pax Mongolica”.
The Kushluk Assassination:
I Was in China Before:
-
Attention: After the patch from the 18th Dec 20, this achievement seems to be fixed now!
-
Originally posted by |Healtti| on |trueachievements.com|:
Warning! Glitchy!
—
All other achievements (so far) have popped with a notification, except for this one. Perhaps it was a coincidence, but as a result I can’t tell whether it should pop mid-match or only at the post match results screen. I even ended up repeating the win condition by re-loading my saves and messing around with it.My fastest kill was a few seconds over 45min on the game clock (scales based on your game speed setting). The previous attempts dragged on past the 50 min mark and I did not get the achievement that time. As to why I’m not entirely sure, since I did make sure that there were no wonder notifications in the log.
—
Strategy tips:
– Focus on gathering wood & food (get the rest from Market trades)
– Get to Castle Age asap for the important unit & eco upgrades
– Retrieve the free 6x Bombardiers from South of the wall, West edge
– Set up a staging area at Yellow’s island, pump out E.Skirmishers and Pikes
– Bombard their buildings while protecting your guns with your cheap counter units[…]
The key to this will be getting your economy going early. When in doubt train more villagers!
The Wonder “event” starts at around 40 min if Yellow is left alone. What happens is the AI deletes the conspicuous 3×3 set of Blacksmiths inside his base and builds a Wonder in or near that now open space.
You can double check the chat log for any wonder alerts. Make sure there’s none visible before completing the rather drawn out mission.
-
Originally posted by |TheChrisD| on |trueachievements.com|:
Got it on my first go just there. My tactic was to ignore the Engineers after getting the Vills, then quickly sailing to Jin’s island and setting up almost in the far right hand corner near the two boar.
Churn out a ton of vills (about 50) and try to boom on wood and food. Market trade to get enough gold and stone to age up to Imp, afford only necessary upgrades (Elite Skirm, range upgrades, Ballistics, Murder Holes), and plop a Castle near the north-east Jin gate. Garrison with a ton of Elite Skirms, and get out a Treb or two to start working on the towers. You want to be in Jin’s base and harassing their central eco by 35-40 minutes.
Looking through the replay, Jin seemed to start going crazy into Knights at about 20 minutes, and never really had too much of a stockpile; then once I broke in, they pretty much sunk all their Gold into more cav and archers. Replay available: [link]…
The achievement only popped upon completion of the mission, by defeating all four main Chinese factions. I left the Engineers alive and untouched to the end, and never picked up the Bombards inside the Great Wall.
-
Originally posted by |Itzz Sh0wt1m3| on |trueachievements.com|:
For the most part, I followed this solution by TheChrisD . Start off by going East, along the top of the screen, retrieve the villagers from the engineers. Move further along the top, to the top right and set up a base there. Build economy, units, etc. I got rid of Jin (Yellow) BEFORE they had removed the blacksmith buildings and started the wonder (obviously). While getting rid of him, make sure NOT to destroy the 3×3 block of blacksmiths. I tried an awful lot of times (also reloading saves) with the blacksmiths all destroyed, but never managed to get the achievement like that. Some of them were ablaze, but all intact. To get rid of yellow, also no need to destroy all buildings, just destroy their unit producing buildings, town center and kill all units & villagers.
After yellow resigned (with 3×3 blacksmiths intact), I got rid of green and red. I never retrieved the bombardiers from the engineers at the top! Afterwards, I started getting rid of light blue, but made a couple of saves while I was getting rid of the units/buildings, until I had a save where there were just 3 villagers left, garrisoned in a building. I reloaded this save like 5 times, but never got the achievement.
I THINK IT HAS TO DO WITH THAT UPON COMPLETION IT SAYS FACTIONS DESTROYED 3/4 AT THE TOP EVEN THOUGH YOU DEFEATED ALL 4.
This is something I noticed at my last few attempts, could be a coincidence.^
I moved my units away at this point (after reloading the save again), so that they would not defeat light blue. I sent some units over to the area of the engineers where you initially got your villagers and destroyed ALL buildings/units there which were left. I also created a couple of new units and let these guys attack the 3×3 blacksmiths (a bit later). By the time I sent my units back to defeat light blue, the engineers on the ‘villager area’ were all killed/destroyed, and 1 of the 9 blacksmiths was destroyed. I then clicked on one of the others to try to force the game to recognize the fact that the wonder event hadn’t started, I had this one highlighted by the time the victory screen appeared, at which point the achievement instantly popped (also it says factions defeated 4/4)
So to summarize:
-bombardiers not retrieved
– Great wall not breached/
– 8 out of the 9 blacksmiths intact at Jin, one of the 8 highlighted upon victory screen
– all 4 factions defeated, also says so at the top right (4/4)Hope this helps
The Go-Getter:
-
Originally posted by |Healtti| on |trueachievements.com|:
A good old fashioned 1v1 siege battle. Can’t go wrong with that!
[…]
Strategy tips:
– Use the first 20 min (in game) to get your economy booming. When in doubt, train more Villagers!
– Hungarians field Medium & Heavy Cav with some Scorpion and Skirmisher support (countering Cav Archers). Surprise them by massing Champions.
– Supplement with Siege Rams. The Mongols’ unique +50% move speed tech is a must-have!
– During the initial big battle at the bridgehead, send your Saboteurs into the big crowd that pours out of the gates. Time this maneuver right and it’ll swing the fight your way!
– Remember to keep a steady supply of reinforcements coming as you push into their base.Initially I thought Pikes would do well against all that enemy Cav, but they’re too squishy to withstand the incoming arrow fire from the Towers, Castles and whatnot. Champions stay in the fight longer and perform decently vs buildings, so they can fill in for Rams in a pinch.
Campaigns | Part 3.2


Attila the Hun mission “The Scourge of God”.

Attila the Hun mission “The Catalaunian Fields”.

Attila the Hun mission “The Fall of Rome”.
Diplomacy is for the Meek:
Truly Countless Bodies:
No Wonder on my Watch:
-
Originally posted by |Healtti| on |trueachievements.com|:
—
I let all four enemy factions start their Wonder construction before wiping them out. It’s probably not necessary but better safe than sorry, considering the Wonder achievement SNAFU in the Genghis Khan Campaign.
—Quickfire tips:
– Take a good 10+ minutes (in game) to set up your economy. No need to rush.
– Green player likes to raid your base occasionally. Leave a rear guard.
– Choose 1-2 units to mass produce, simultaneously max out relevant upgrades. Elite Tarkans are solid all-around. (I massed Cav Archer with Trebuchet support)
– The AI factions’ Wonder build order is randomized. You’ll have to choose your target based on the alerts.
– For max efficiency draw the enemy out and destroy their army in a field battle. Then push quickly into their base and target the Town Center, Villagers, and all military production.
– Keep your economy going and replace casualties as needed.The achievement will pop mid-game as soon as the fourth enemy faction has resigned.
Historical Battles | Part 1

[link]
Just to make it easier for you – here’s the list of historical battles without achievements to them:
- Bukhara (557)
- Dos Pilas (648)
- Tours (732)
- York (865)
- Honfoglalás (895)
- Hastings (1066)
- Manzikert (1071)
- Cyprus (1191)
- Agincourt (1415)
- Kyoto (1582)
And no, unlocking the achievements below is not required for this achievement.

…Oh, Never Mind
Point (1598)” mission of the Historical Battles.
-
Originally posted by |Segendary Ty| on |trueachievements.com|:
To get this you must complete the secondary objective of the mission. This isn’t fail condition so if you do lose it then you can still continue the mission.
However I dont really see how you could lose it… I mean I was on standard difficulty so I recommend that as well.
There are some cannon galleon in the beginning that could give you trouble but you start with a decent navy to deal with them. Other than that, purple attacked me once with 3 battering rams but that that was easily prevented as well as the towers to defend the wonder do a lot of help.
Admiral Yi can be reached in 3 ways
-Sail around from the west corner of the map
-Capture a transport ship to the north between the admiral and purple on the edge of the map
-Use an Onager to clear the forest around the gate (not Mangonel)He unlocks an army that you can transport off an island and kill purple with
He also unlocks Tank like ships that you can then also create from your docks.So to quickly do this scenario:
-Get a castle for defense and spy and HP upgrades
-Do upgrades from university to unlock bombards and upgrade the HP of buildings
-Fortify your docks with a lot of towers (10-12)
-Get Admiral Yi in the mean time
-Get a good navy of fire ships, Turtle Ships and Cannon Galleons and raid yellow docks
-Kill purple with the island crew

Transport Ship to unload on your shores.
-
Originally posted by |ButchBrenda| on |trueachievements.com|:
The key here is to build palisade walls all along the coast. The Turkish fleet will actually attack the walls but with a navy; they won’t live long enough to create a big enough opening for their troop transports. As you develop a stone economy, add castles where you feel vulnerable.
Although you might miss the odd transport, they just can’t unload when there is nowhere to land.
-
Originally posted by |Ramsay Bolton| in the comments:
Also, do not build wonder in Lepanto, just send villagers for stone and keep your economy booming, then create castles along the shoreline. After you star building wonder, the enemy will spam transports, so just defeating turkey without even starting to build the wonder is the best and the safest option to win the game.


factions without forming an alliance with any of them.
-
Originally posted by |Segendary Ty| on |trueachievements.com|:
First off put your Hero unit in the nearby purple castle and forget about him.
Make sure to not destroy the 3rd castle before killing all the Turkish factions. Just ignoring them and killing the castles won’t earn this achievement as it doesn’t fully satisfy all parameters as read from the description.
They will keep making units as long as they have military buildings. It’s trigger base, killing all their houses won’t do much. They also won’t restore anything you destroy but you’ll have to hunt their civilians to get them to resign.
You’ll keep getting reinforcements from your starting position. Speaking off, you can collect some units in the beginning, such as the 4 cav archers in the east corner.
Since they’ll spawn infinitely, make use of your 175 pop cap. Make 50 or so mixed cav units (back them up with cav archers) and put a handful or more monks nearby. Then pump out some Bombard Cannons / siege units.
Together you can wreck all military buildings but block all units from reaching them.
For the Byzantine castles, I recommend Cannon Galleons, they can reach all 3. Make sure to have a few Fire Ships with them to guard against the War Galleons.
Green can perhaps also be demolished by sea but I didn’t try that.As for eco, everything is pretty scarce until you go out of the middle. I recommend getting wood in the south near purple’s defense buildings. Good luck. Make sure to use 10 cav units for base defense.
Historical Battles | Part 2

-
Originally posted by |Lege vaas| on |trueachievements.com|:
The Hojo Clan is already your ally in game, but sometime in the game you will get the optional objective to send a trooper to their base. Simply don’t and defeat your enemies without them, they will simply remain in their camp.
This game can best be won with lots of archers, as the enemy mainly uses halberdiers and samurai. shield your archers with some samurai and infantry or pick them off one by one with cavalry archers. Raid the camps one by one and make sure to build some trebuchets for the castles at the end.

-
Originally posted by |Segendary Ty| on |trueachievements.com|:
Achievement:
To do this you’ll need to send 2000 Tribute to cyan. Not right away though, you have to find them at the north corner with a ship. To get there you will have to clear out some other ships.Note that you can send the tribute in fragments, however the achievement will not pop unless there are 20 dragon ships alive simultaneously. So if you’ve send more tribute but some ships die, you’ll have to fill up the amount with more tribute.
The achievement will pop mid-game upon completing the objective
Mission info:
To start this mission:
-Read the tips (middle tab of the mission objectives)
-Exploit your trebuchet to take down the towers 1 by 1. Be cautious to not aggro the war ships.
-build a dock and a couple more fire ships
-No need to do any kind of eco other then setting your villagers to work. If you can manage then get the Shipwright upgrade early
-If you lose your trebuchet before all 8 towers are down, start over. Unless you manage to get two Cannon Galleons out it in time then you have a chanceIF you REALLY need more time, then simply get the two towers down and form a body block / blockade with your ships. That way the transport ship cannot get across until you’re ready.
However at the 2nd part you’ll get more villagers and can start building an eco based on mostly wood and gold so using that little trick isn’t really recommended

-
Originally posted by |Sky Maniac| on |trueachievements.com|:
On the Main menu:
Select Historical Battles -> VinlandsagaOnce loaded in:
build a transport boat from the docks (already built) and place your villagers/berserkers in.Once the boat is occupied head north (follow the small island you start on around until your reach the edge).
Then follow the edge of the map up until a in-game chat message appears about finding Greenland.
Once you find the Ice, unload your ship and send you units north along the map edge until you reach a smull clump of trees.The penguin can be found on the edge of this wooded area – the achievement will pop as soon as you find it.
- [link]
Civilization Victories

Originally posted by |alicanuysal| in the comments:Set game mode to Deathmatch, victory condition to 4000 points and starting age to Post-Imperial Age. This makes you win immediately as soon as you start the game.
Repeat this once for all of the 35 base game civilizations and you’ll unlock:


And another 2 times for the DLC civilizations:


1v1 Extreme AI


First of all, you need to win 6 games. Winning against ‘Extreme’ does not unlock the easier battles.
But don’t worry, each game will only take a few minutes… and while we’re at it, I’ll give you such an easy method, that you’ll even unlock the following two achievements:


Okay, here we go:
0) Start your game with:
Civilization: Spanish
Location: Socotra
Map Size: Tiny
Resources: Standard
Reveal Map: All Visible
Starting Age: Post-Imperial Age
Victory: Standard
1) Select your villagers and build a Bombard Tower directly next to your opponent’s base:


2) Send your Scout Cavalry after your opponent’s Scout.
3 – Optional) Delete your Town Center for the Achievement.
4) After your Tower has been build, send your villagers to an area outside his Town Centers range.
5) If your opponent’s villagers walk outside the range of your Bombard Tower, either:
- Send your scout after them
- Build a stone mine, loot some stone and build a Keep in their range.
Alternatively:
Originally posted by |alicanuysal| in the comments:Set game mode to Deathmatch, victory condition to 4000 points and starting age to Post-Imperial Age. This makes you win immediately as soon as you start the game.
Infinite Resources & Arena Map
Now we’ll take care of creating troups, and destroying walls. A lot of walls… You’ll see.
To do so, we’ll play (or rather start) several games with the following specs:
Resources: Infinite
Location: Arena
Reveal Map: All Visible
Starting Age: Post-Imperial Age


These are the fast ones. You just need to create them and the achievements will pop.
On to part 2:


These are the achievements, which we chose the Arena map style for.
While neither the Keshiks, nor the Chu Ko Nu require any specific targets, walls are perfect for efficient farming, since they have a lot “health” and a high defense.
And even so, destroying them with Battering Rams and Tarkans is the fastest way, since the walls are there from the start and the AI won’t really try to stop you.
Start by building a handful of houses, so that you can recruit more villagers.
Use your town center to do so.
(Optional: Build a second town center or even a third, for faster villager recruiting)
Build a dozen Castles and after that build houses until you have enough population slots for the achievement you want to go for, while using your castles to create the required units.
And while you go for any of the latter four, just grab this one:

You might need to load an infantry unit into the tower.
Don’t know if it works without it, since I did it with.

This one is a little bit special.
You need to play any faction apart from the Italians, while you have an italian team member. Make sure to specifically assign the same team number. If that’s the case, you can train them at your barracks.
I did it while playing against an extreme AI. This enabled me to send all my Condottieri into battle and the AI took care of my population problems.
But you can also play against the easiest AI and just spam the [Del] Button on your troops.
Ludicrously Sized Map

-
Originally posted by |Segendary Ty| on |trueachievements.com|:
This should be somewhat self explanatory. However some tips to make this easier:
1) Go for the map Coastal. –> Exploring the sea is quite easy with Elite Cannon Galleons
2) Turn on grid in the Options menu and zoom out to the max, this will help see the shadows better
3) Shared exploration or Spy will NOT work
4) It is an individual statistic found in the Post-game under the tab Technology
5) This achievement will pop Post-game
6) Don’t send a ton of units everywhere. Take 2-4 on land and 2-4 on sea. Use the hotkeys to assign numbers to keep track
7) Uncover the map the same way you would mow lawns. That way you won’t get a scattered map and you’ll get a more cleaner approach to this, think gradual, not yolo
8) […]9) Building Outposts can help uncover those edges your Scout can’t reach
- To add onto Segendary Ty’s tips:
Play the game with:
Location: Coastal
Map Size: Ludicrous (obviously….)
AI Difficulty: Easiest
Population: 25
Resources: Ultra High
Game Speed: Fast
Reveal Map: Normal (<- !!!)
Starting Age: Dark AgeYou and 2 AIs, all in Team 1; no opponent.
Your civ: Berbers -> Ships move 10% faster
AI teammate 1 civ: Japanese -> Galleys +50% line of sight
AI teammate 2 civ: Mongols -> Scout Cavalry +2 line of sightStart by rushing to Imperial Age and just grab all possible technology upgrades from the docks and, while you’re at it, from the university.
I then went on by exploring the sea with a normal Galleon, before going for the land exploration, but that’s up to you.

- The fastest way to obtain this is by playing in Wolf Hill, because all the relics spawn in the middle of the map.
I recommend play as Magyars because there are a lot of Wild animals and Magyars can easily kill them in 1 hit with villagers.

Miscellanious

In this case, “eat” amounts to “loot at least 1 unit of food”.

In the options screen, choose the Dark Age to be the final age. Play against 3 easiest AI and this will be done easily.

Play on a tiny map, choose the Socatra map type and build 2 or 3 more town centers. Your enemy’s Scout won’t have a chance.

Choose:
Map Style: Real World
Location: Bohemia
Resources: Standard
Reveal Map: All visible
Starting Age: Dark Age
Against easiest AI, of course.
There are 2 reasons, why we play on Bohemia:
1) No starting Town Center.
And with our game options, the AI won’t be able to build one, therefore won’t know what to do and as such, actually won’t move a pixel.
2) Guaranteed 30+ sheep spawns.
Just send your 2 starting villagers around the area to gather the sheep.
The achievement might need a while to pop, I got it on my way to the 22nd sheep.
Alternatively:
Originally posted by |g4| in the comments::for the sheep hoarder achievement, its best to play in a ghost lake map, 1vs1 with a very easy ai in big size map (8 p). this way more than 20 sheep spawn on the middle of the map (ice area). just harvest them as usual and once you get a total of 20 sheep (harvested and alive combined) the achievement will pop.

Victory countdown.
Originally posted by |DickJustice| in the comments::You can get it in defend the wonder game mode. And if someone doesn’t know in order to make the ai have the wonder you must make yourself red(2) and the ai blue(1).


Well, win a regicide game by killing your opponent’s king with a Petard.
Petards can be created with a castle.


I think there’s nothing that need to be said about these achievements.
Among Several Games


I think there’s nothing that need to be said about these achievements.
Conversion & Ships

Finding an enemy Monk to convert shouldn’t pose a problem in the long run.
But if you want it as fast as possible:
Start a game playing as the Aztecs with:
Map Size: Tiny (2 player)
AI Difficulty: Extreme
Resources: Medium
The AI will start to build a Monastery basically immediately.
Do the same and create 3 Monks of your own. Wait for his Monk to go out for a relic and just, well, convert him.


Originally posted by |Xenos| in the comments:You can convert 500, save game, resign, then load the game and resign again and it will count it as if you would have converted 500 more. You could also convert a lower amount and resign more times aswell.
Note, that this achievement does NOT unlock mid-game!
It only unlocks on the statistics screen, so you’ll have to resign at some point anyway. Might as well do it after ~25-30min.
My recommendations for this are:
Players: You vs 2 AI
Game Mode: Regicide
Location: Highland
Map Size: Small (3 player)
AI Difficulty: Moderate
Resources: Infinite
Reveal Map: All Visible
Starting Age: Post-Imperial Age
Your Civ: (Spanish for the first 100, after that:) Aztecs, since they have by far the most potent Monks.
AI’s Civ:
Originally posted by |Falchion| in the comments:the best enemy to set is the tatars, as they lack both faith and heresy, allowing for easy conversion
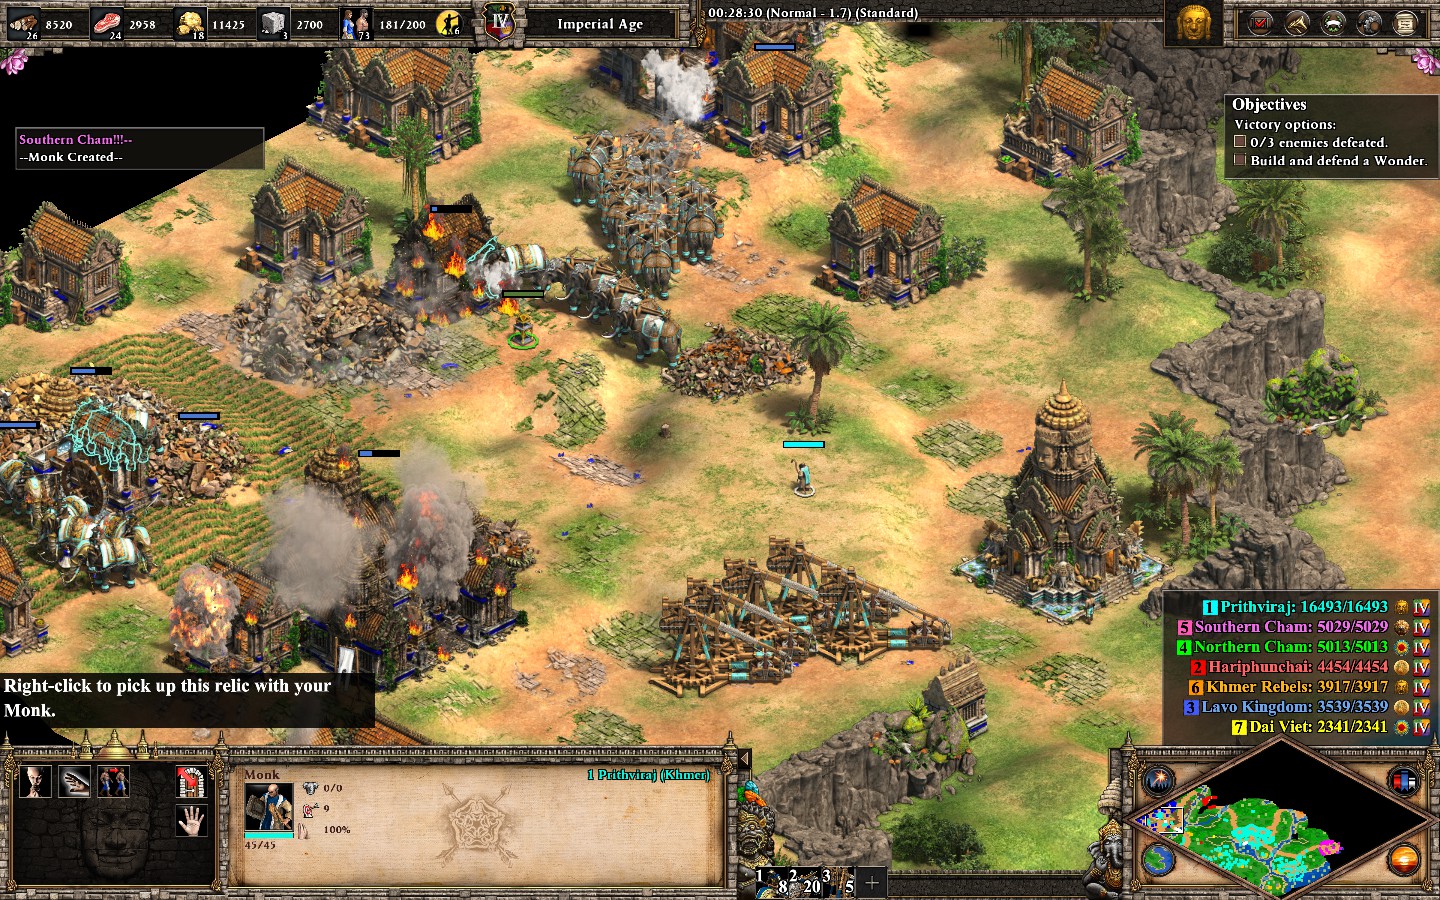
Just build 20-30 Monasties and position 100+ Monks close to the only ‘bridge’ over the Highlands river, where your opponents can send infantry and cavalry across. And then… just convert everything that comes close.
You have to manually choose a few monks for every unit of your enemy – You need to play pretty actively here.
Here’s a screenshot how it looked most of the time:


Originally posted by |iSeenUB4| in the comments:I got it naturally while playing the Saladin campaign.
The Mamelukes are ranged melee and there are missions where the AI keeps sending boats at you.
Originally posted by |DippyTheDM| in the comments:Another very fast and simple way to get [it] is by playing Barabarossa 5: Barbarossas March. Constantinople’s river has an enemy galley in it as you go to cross towards Constantinople. On standard difficulty, this boat doesnt move very much, so sending a couple cavaliers after it will kill it, earning you the achievement.

I think there’s nothing that need to be said about this achievement.

Originally posted by |Ramsay Bolton| in the comments:Barbarossa, 5th mission:) -> Get constantinople and you will get their navy along with demo ships (and enemy has several of them)

Players: You vs 2 AI
Game Mode: Regicide
Location: Highland
Map Size: Small (3 player)
AI Difficulty: Moderate
Resources: Infinite
Reveal Map: All Visible
Starting Age: Post-Imperial Age
Your Civ: Persians, since they create Heavy Demolition Ships 20% faster.
AI’s Civ: Both Aztecs, since their only combat ships are fire ships, which are weak against our Demolition Ships.
Put both AI in the same team.
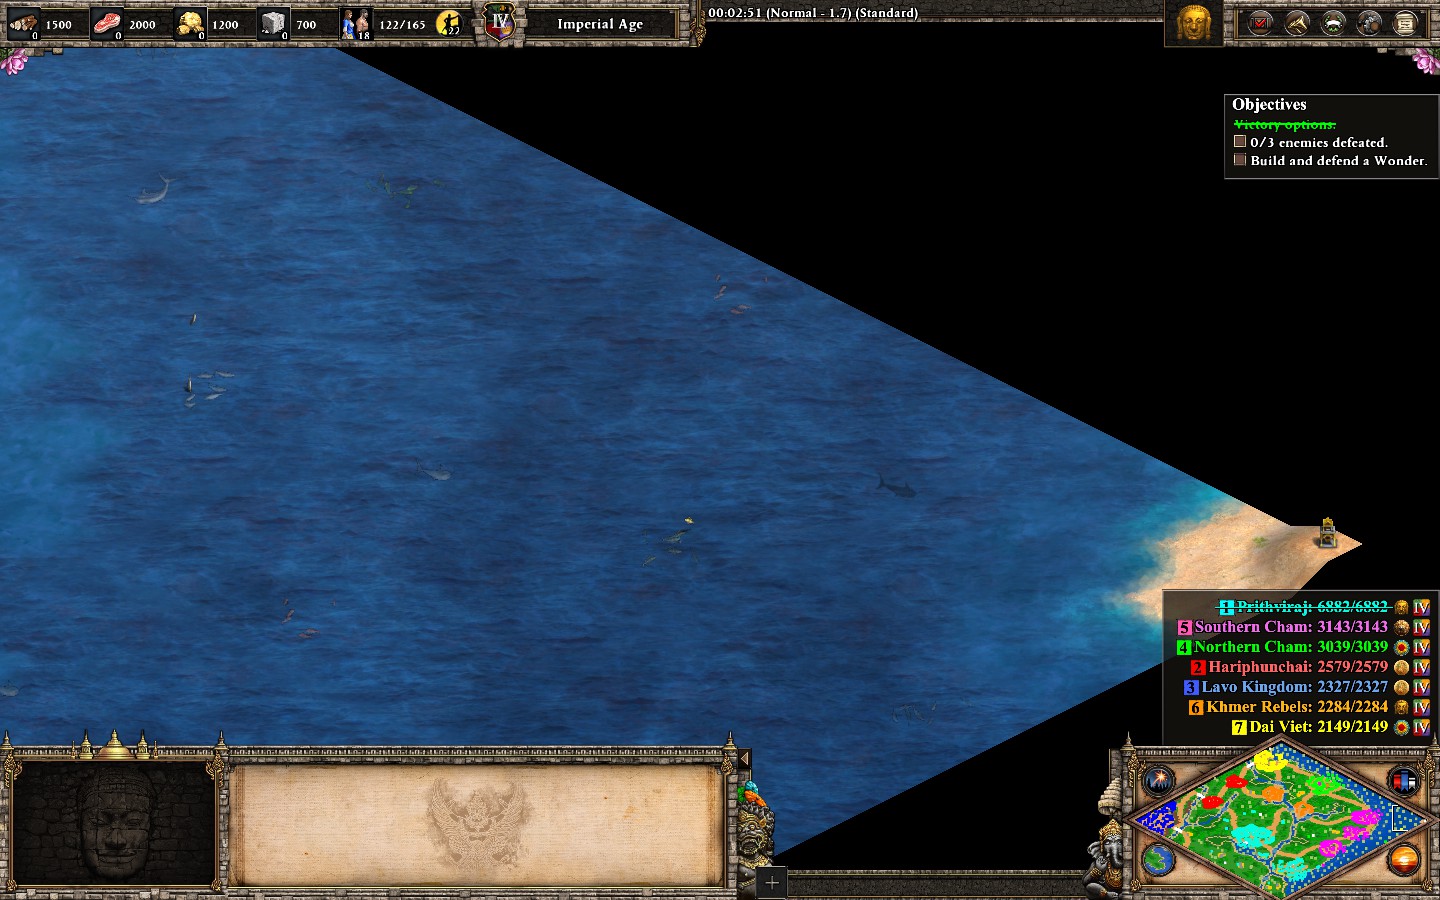
There are but 2 things you need to build: Houses, until a population of ~200, and Docks.
I decided to go against an moderate AI, since everything higher spammed out way too many Docks and fire ships for me to be able to keep up. Moderate is manageable, and so much so, that I played against 2 of them at the same time.
The Highland is divided by a river with only 1 spot to cross. Focus all your Demolition Ships at that point.
Make sure not to create too much ships (150+) too early, because if you do, the AI will ‘lose hope’ and stop moving & creating militia. That would be the point, where you’d win a normal game, which is why we went for Regicide.
If that happens, just use your [Del] button to delete as much ships as required for the AI to do stuff again.
The achievement will pop mid-game and should do so in less than an hour.
Here’s a screenshot of how it should look:


Originally posted by |IPokeTheWelsh| on |trueachievements.com|:The historical battle Lepanto (1571) offers a good opportunity to get this one.
You start of with numerous heavy demolition ships and the Turkish enemy will periodically attempt to land their forces to try and destroy your wonder. They will attempt to land just south of your wonder or to the north (south of your town center).[…] I would move your other naval units out the way, wait for the Turkish transports and then just swarm in with your heavy demolition ships.
Multiplayer

-
Originally posted by |Thindithron| in the comments:
Here’s the one I used, which should work most of the time unless people catch on:
Play 1v3 Capture the Relic as Lithuanians (Monasteries work faster). Start in Castle Age and play on a tiny map and with a 5 minute treaty so that they can’t snipe your monk. Train the monk, get the relic to your monastery, and garrison it immediately after the treaty ends (if you do it beforehand, you won’t get the achievement as you have no enemies).
Alternatively – Find yourself 3 people willing to help you.
Please do NOT ask about this in the comments. Rather, refer to this discussion:
[link]
————————————
DLC 1 – Lords of the West:
Campaigns | Part 4.1


Pragmatist


Unchivalrous Pragmatist
- “Vain Ambition” is the first Edward Longshanks mission
Throne Thief
- “Toom Tabard” is the fourth Edward Longshanks mission
There is not much to say about this achievement, a timer starts at the beginning, giving you 30 minutes(game time), enough to prepare your economy and army.
The relic, which it´s located in the north, only is possible to reach when the timer finishes (the game will show you the bridge and the monastery). Prepare a huge army and wait until the bridge is repaired, then cross and advance to the north (blue will attack you with his army).
You should send a villager to build a monastery after destroying the yellow base, which has the relic (Stone of Scone). You will receive the achievement when you stored it in your monastery.


⠀⠀
Malleus Scotorum
- “Hammer of the Scots” is the fifth Edward Longshanks mission
At the moment that you complete the third mission (defeating purple), you will have 15-16 mins (game time) to kill William Wallace. The first thing that you should do is create troops (knights/arches) and move your army to the south as fast as you can.
Use your special trebuchet to destroy the towers while your units protect him (teal will attack you in groups every time that you attack his units or buildings). Be careful, try to lure William’s troops before attacking him, these 3 onagers can easily kill your knights. After that, attack him with all your units (He has high damage and health). When he dies, you will obtain the achievement.
Note: At the beginning you can kill William Wallace without triggering the timer (Don’t defeat purple), use your trebuchet to destroy a barricade and move to the south, then play slowly luring the enemies (Use your monks and troops properly).


Campaigns | Part 4.2

and the Fearless


“The Hook and Cod Wars”.

“The Maid Falls”.
No Wheels
- “A Kingdom Divided” is the first Grand Dukes of the West mission

You have an ally that really helps at the moment that you attack the enemy base, specially their battering rams.
Cavaliers are you best option in this map, which have good damage and resistance, you can destroy teal easily with a big army.
Be careful, at minute 20 (game time), teal will send enemies to attack you constantly.
You should complete the sub mission (not sure if it changes something when you attack the base) before attacking teal. After that, you can kill the villagers and destroy the town center that is located outside in the south
Then you can start the attack, you might lose troops but is the only way. Focus on killing his army and one of the doors, so yellow can enter with their rams. Continue attacking with yellow until you complete the mission. If you manage to kill the villagers you can win quickly.
A Second Hastings
- This achievement was originally described as:
Ignore the armistice offered by the British and invade England by wiping out Humphrey’s base in the fifth Grand Dukes of the West mission “The Hook and Cod Wars”.

- The beginning
The first 10-12 minutes are important to prepare your defenses and economy. Red will attack you with boats from the beginning and sending troops by ships while green around min 12-13 will start sending troops to attack your base, especially your villagers.
Tips
- Fire ships are you best option to destroy quickly their ships, create immediately 2-3 fire ships when you start the map.
- Prepare walls, a castle and some troops as fast as you can, green is a bit annoying if it manages to kill your villagers.
- If you are going to send your villagers to mine far from your base, protect them with an army, green’s paladins can easily kill them.
- If you have a stable economy, start the mission which requires destroying 3 lumber deposits.
The way I did was using a fleet of fire ships(6-8) to clear the area and tank the damage while a group of petards(3 are necessary, but you can send more if you want to play it safe) blow up each building. After completing the mission, red instantly change as ally.
- Defeating The England

When you feel ready, change to enemy and destroy him. After defeating Red, you can finish the objective required to win. The achievement will pop-up at the end.
Shut Up La Hire!
- “The Maid Falls” is the sixth Grand Dukes of the West mission

The first thing that you should complete is the Soissons missions (Located in the East), which require build a market and give 1000 gold, after completing it they give you complete vision (Essential for map awareness).

When you defeated the French army, you can finish the last mission required.
Remember that the achievement will pop-up when you finish the map.
Campaigns | Part 4.3


brief candle!

First Crusade
Self-Made Man
“Guiscard Arrives” is the first Hautevilles mission.
A simple achievement, just don’t to enter in their main bases. Start attacking in the north base, then build a few knights and continue to the next red base (there is a route that you can go without facing the red army).

After completing the second red base you can change yellow and purple to enemies, then attack the purple village (don’t kill villagers) , located in the middle of the map. You will receive the villagers after killing the troops. Use them to prepare a small base for resources.
Finish the last red base when you have a good amount of resources. The last mission requires to destroy a castle (yellow or purple), yellow is the best option. Attack him with a good army and rams (also a castle if you want), you win the map after destroying the castle.
Haute, Haute, brief candle!
Inspire a rebellion in other words is using a relic in a specific monastery (2 in total in the map but only requires 1 for the achievement)

At the beginning you can choose 2 options (check the “hint” to know what happened in each option). I chose to stay and wait, the first thing that we have to do is explore the map. If you choose the option to stay, you have to find troops around the map.

After killing the purple emir/prince you will receive his base, then build a monastery and a monk to collect a relic, the nearest relic is outside the base. After that, with your army go to the special monastery (the safest is near teal´s base), When it is stored, the achievement will pop-up.
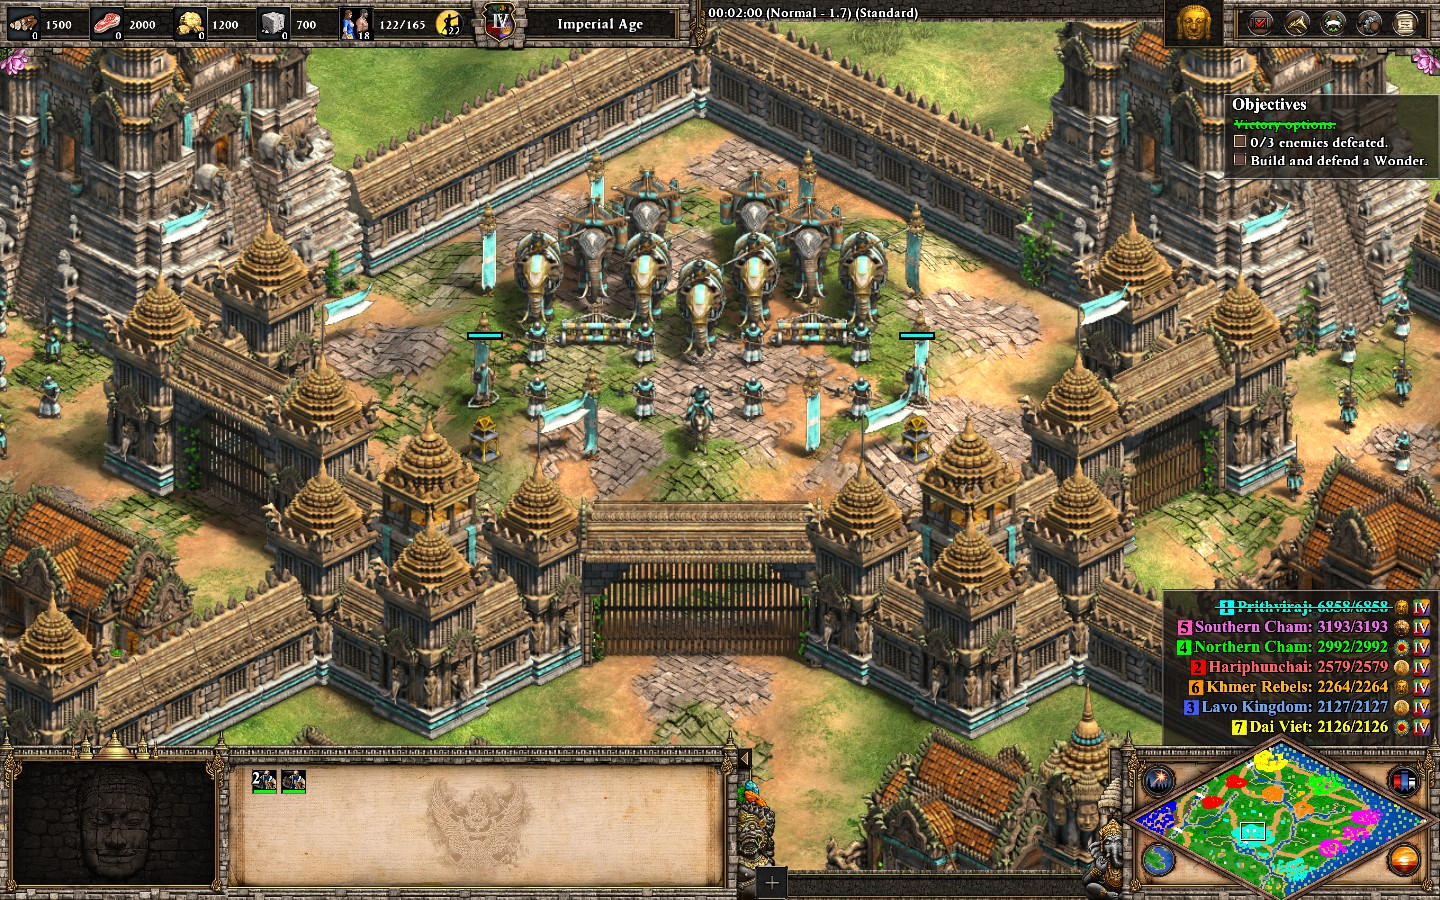
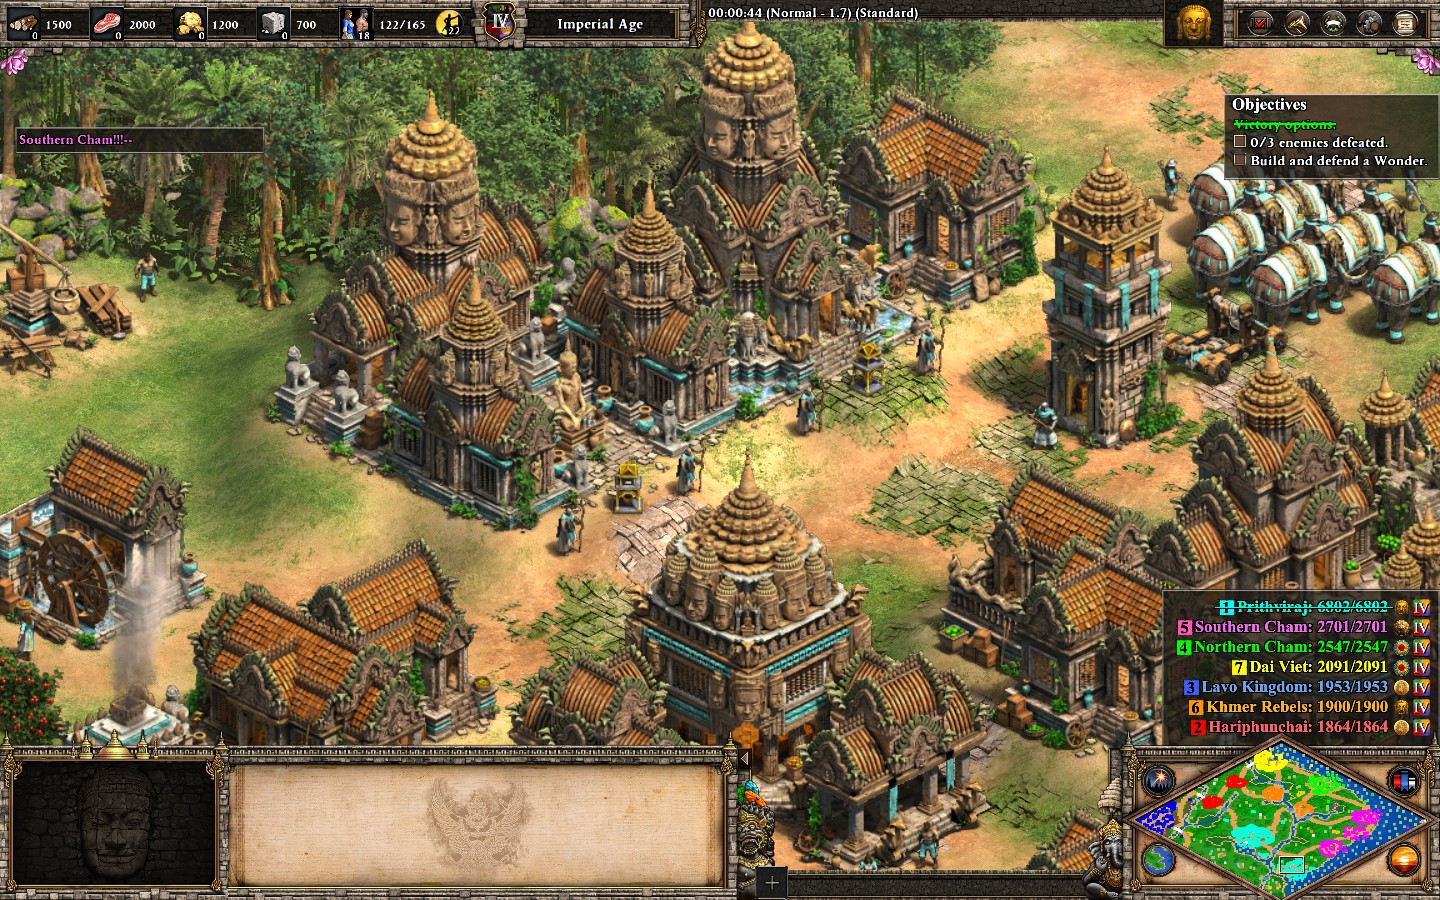
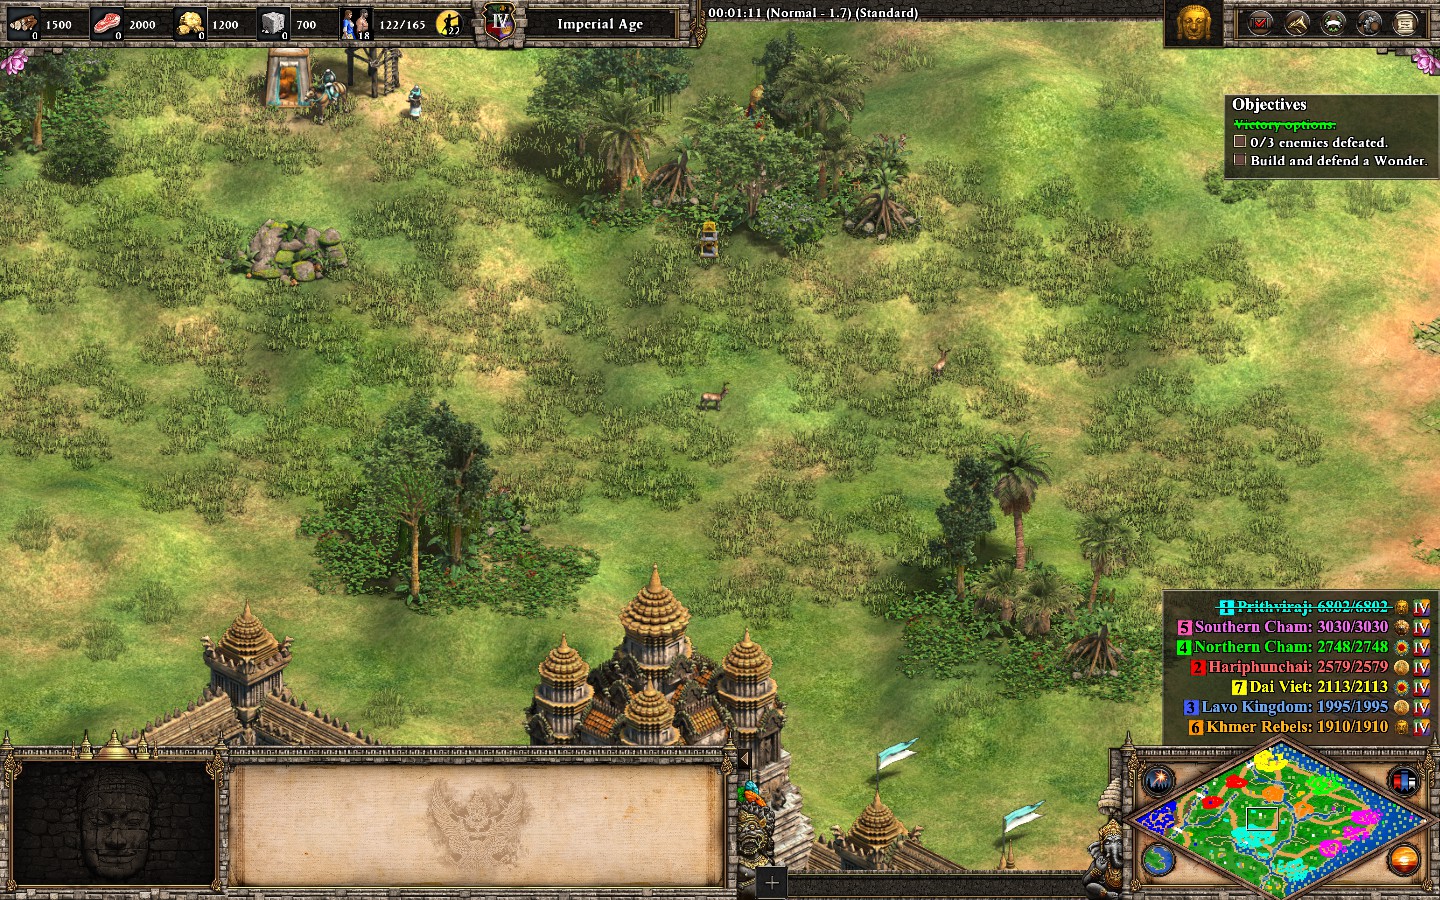
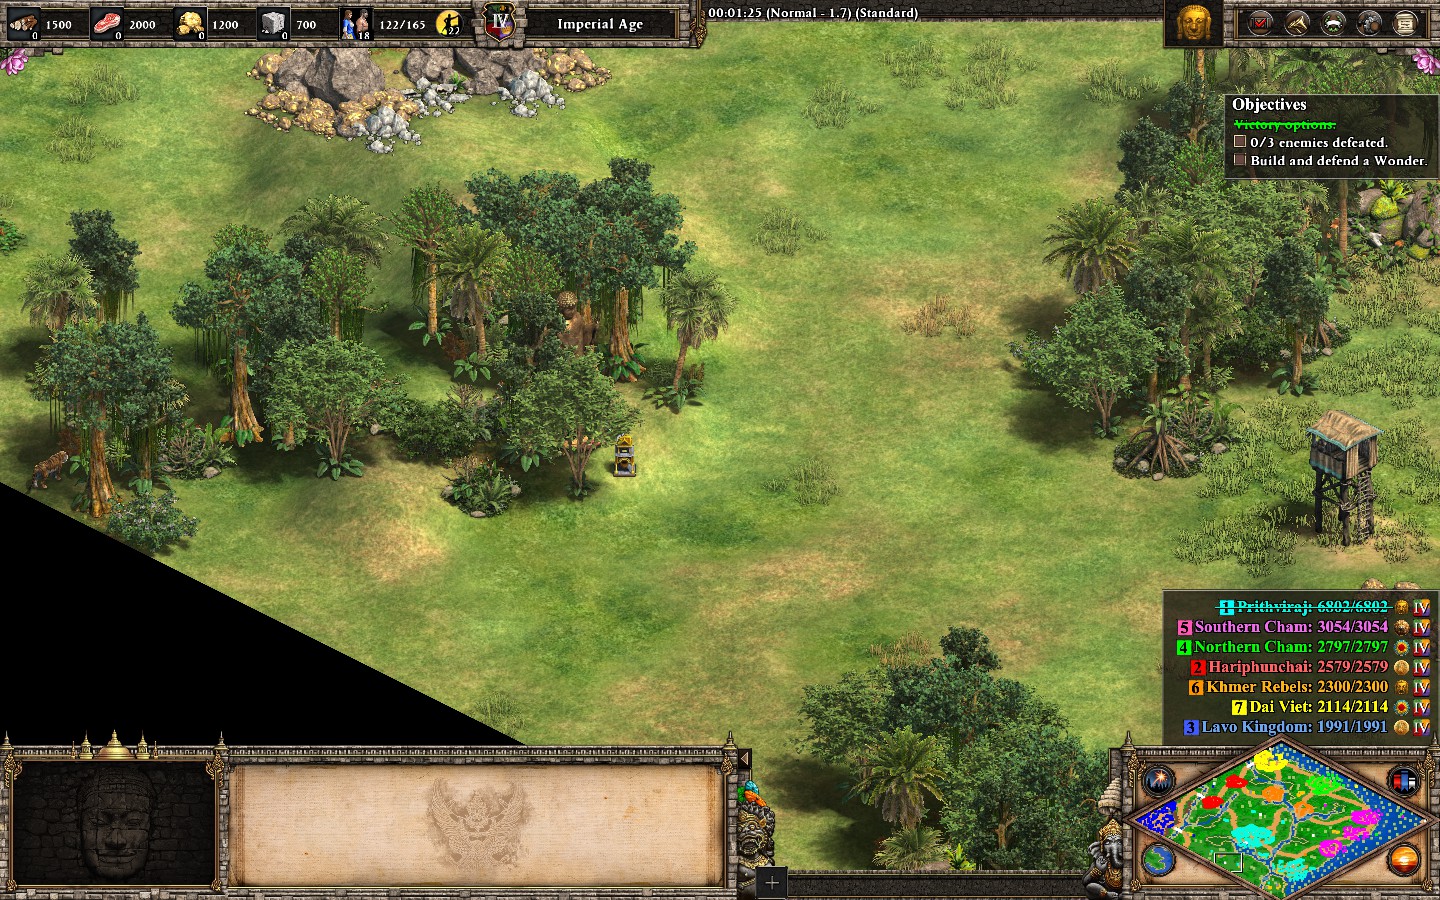
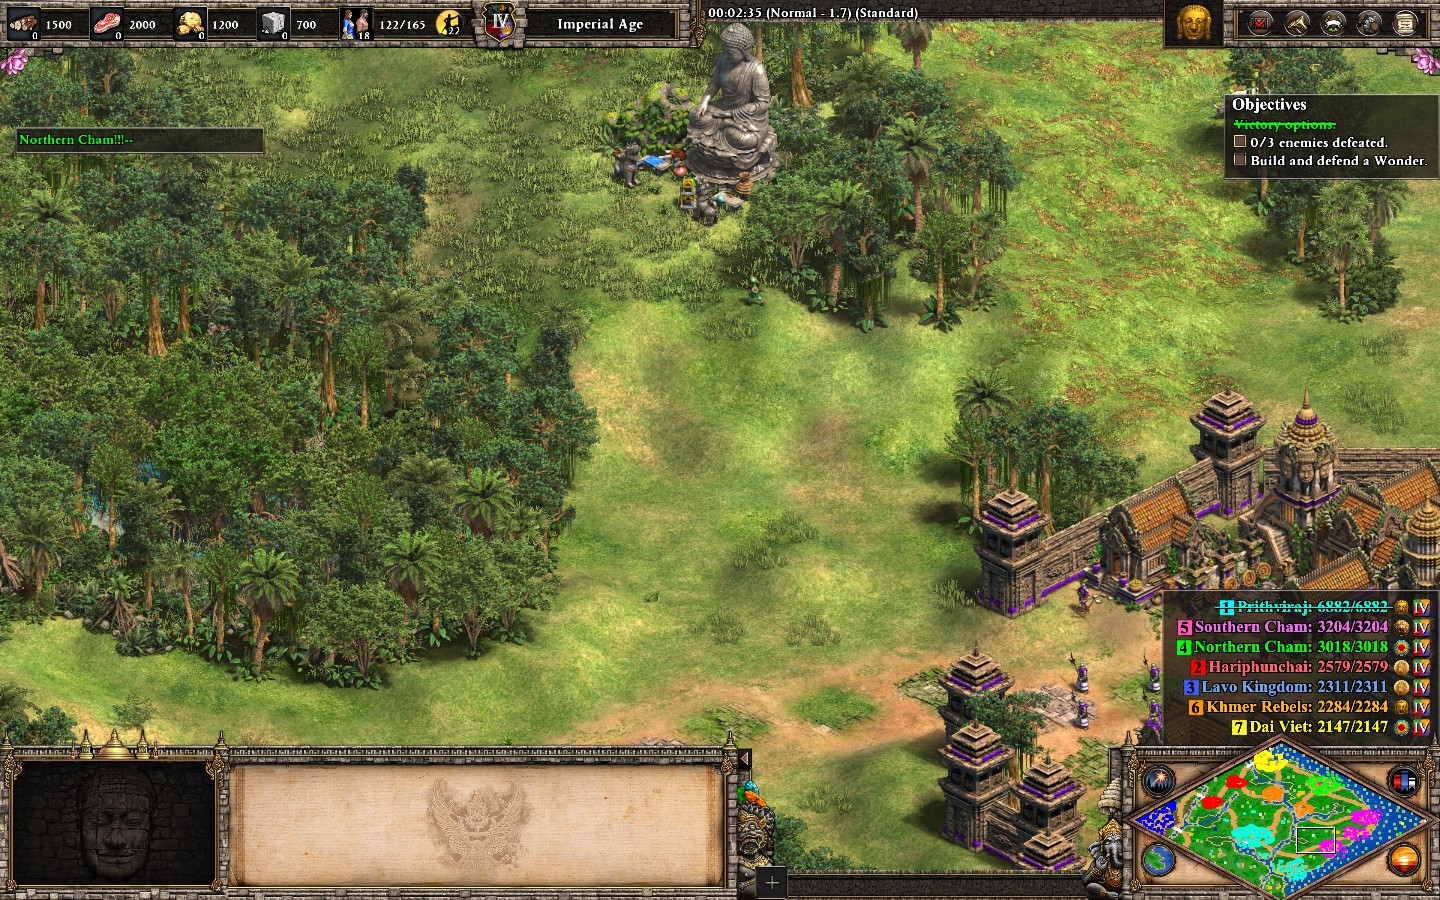
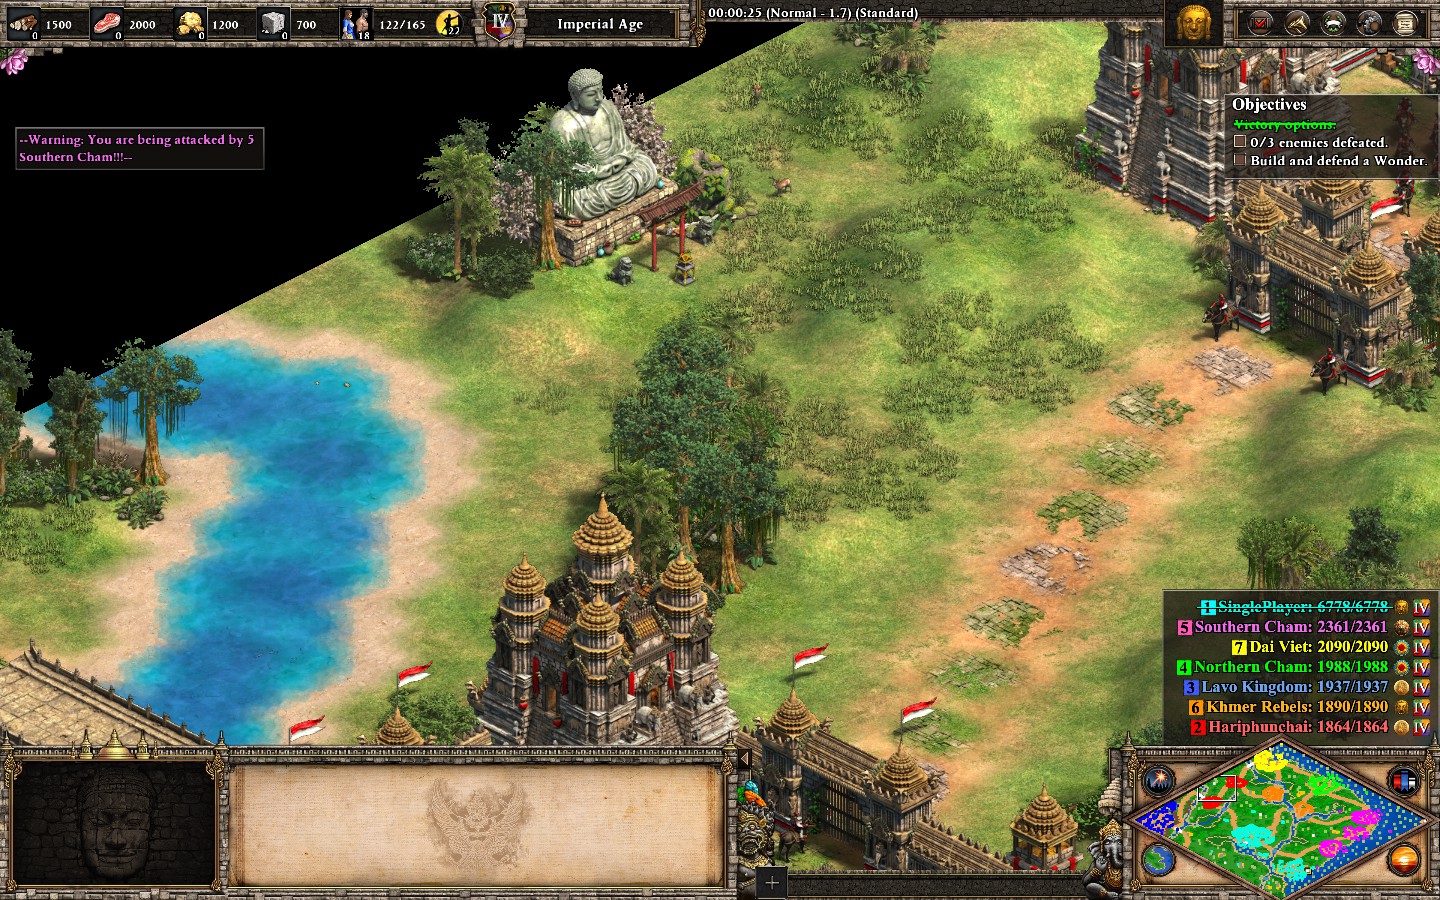
Italy Jones and the First Crusade
- I tested if is possible to rush his leader surrounded by his army(if you kill him you win automatically the map), and it worked(before the first timer ends).
At the beginning send ALL your troops (except the 6 heroes obviously) to the south-west bridge, then cross and go straightforward to the west (Check the images to understand the path).
Research the cavalry upgrades (furnace and stable) and create more cavaliers.When you reach west move along to the north (be careful) until you spot the enemy hero (you can use your light cavalry).
If you spot it, divide your army in 2 groups: trash units and cavaliers. Send first your infantry to distract his army and after that all your cavaliers against the hero.
You win automatically when the enemy hero dies.


Miscellanious

This achievement was originally described as:
Transform at least 50 Villagers into Flemish Militia by researching Flemish Revolution.
- Self-explanatory achievement, you can obtain it easily in skirmish with infinite resources + easiest AI or in the second map of the Burgundian campaign(before finishing the map).

- Self-explanatory achievement, you can obtain it easily in skirmish or in the first map of the Sicilian campaign.
As for the base game civilizations:
Originally posted by |alicanuysal| in the comments:Set game mode to Deathmatch, victory condition to 4000 points and starting age to Post-Imperial Age. This makes you win immediately as soon as you start the game.
————————————
DLC 2 – Dawn of the Dukes: (soon)
16 new achievements have been added to the game.
Neither their pictures, their names, nor their requirements are known yet, though.
This has been added as a placeholder.
More information will be provided, once available.
DLC’s planned release date: August 2021