Overview
Learn the basic functionality of pedestrian paths in Cities: Skylines, as well as some tricks that can be done using them to enhance gameplay, both modded and vanilla.
The Very Basics

As you might see, there are two varieties: pavement and gravel. In terms of functionality, they are for the most part identical, except that paved paths can be elevated like roads, while gravel paths cannot. The main difference is in aesthetics and in cost. Pavement paths cost ₡20 per cell and ₡0.4 per week to maintain, while gravel paths cost ₡10 per cell and ₡0.24 per week to maintain. For a booming city, the price difference is negligible, allowing you as a mayor to choose purely based on aesthetics. The pavement color is the same as that of sidewalks on streets, so most of the time the asphalt path will look better. You might also notice that pavement paths will intermittently place lampposts. With the After Dark expansion, these lampposts now emit light, guiding your Cims during the night. These don’t have a function since there is no day/night cycle implemented at the time of writing.


Functionality/Mechanics
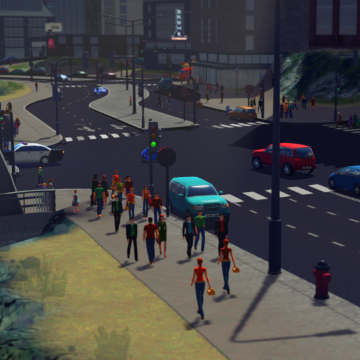
When present, cims will use pedestrian paths as a means of walking somewhere if the distance to use the path is shorter than using sidewalks and crosswalks. This can be used to your advantage by strategically connecting adjacent districts or zones with paths to encourage foot traffic rather than road traffic when a cim is willing to walk to his or her destination.
For example, a cim wanting to visit the commercial buildings on one street from the residential street might use the pedestrian path rather than walk all the way to the intersection and around.
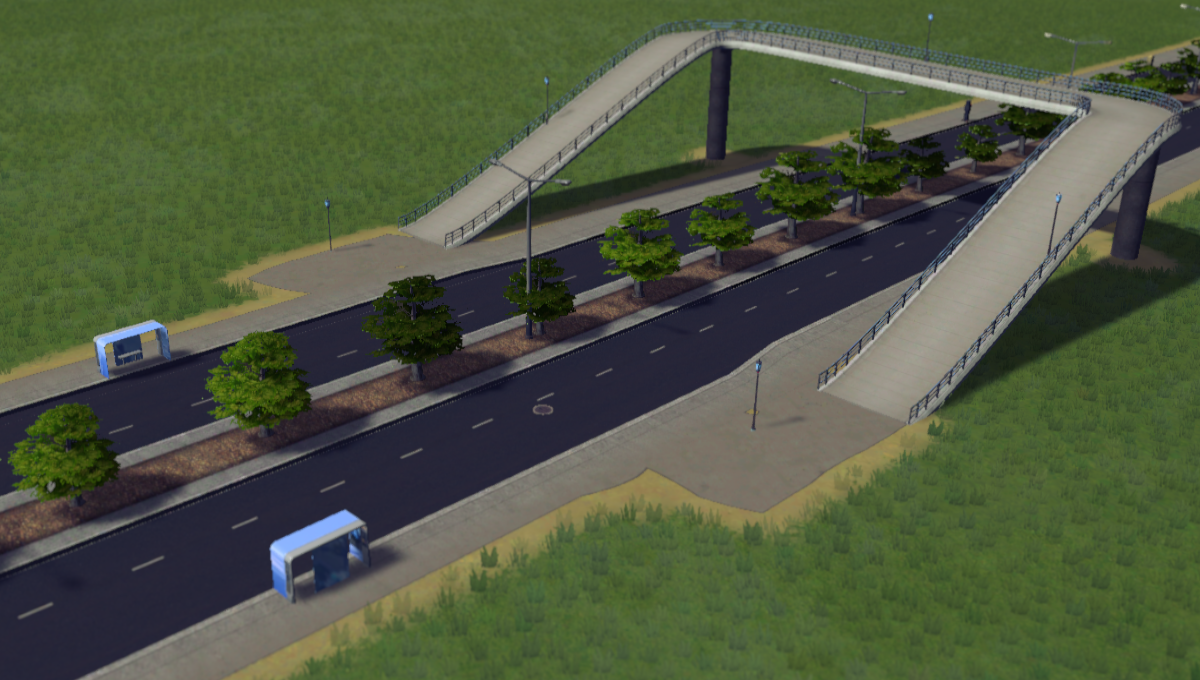
As with roads, paved (but not gravel) pedestrian paths can be raised off the ground. This is useful to prevent areas with heavy foot traffic (downtown shopping, around schools, around heavy-use transit stops, etc.) from slowing down road traffic by frequently triggering the crosswalk and disrupting traffic flow.
[Note] I can’t say for certain if pedestrians prefer bridges over crosswalks, but if a bridge path will be shorter than using a nearby crosswalk, the pedestrians will always use the bridge.
Pedestrian paths can also connect to a variety of buildings and structures. They will connect to:
- All roads (including highways and highway ramps!)
- Metro stations
- Train stations (Credit:
You can Make a pedestrian path on the back side of train stations. People will use it. from CitiesSkylines
)
- Parks with paths at or along the park border
- Roads as part of a park asset (Credit: TPB)
- Cemetaries (Credit: Empour)
These connections can be used advantageously to allow pedestrian access to areas that may be otherwise more difficult to access via car, and increase effectiveness of transit routes by providing better access to both the transit stops and to potential destinations around such stops.
Tips and Tricks
While the intuitive uses of pedestrian paths are fairly obvious and straightforward, there are some uses that you may not immediately consider.
Credit: While I noticed this as well, I think https://www.youtube.com/user/strictoaster really hits the nail on the head in properly executing the design I’m about to describe, so I’d like to mention him as inspiration.
Gravel paths do not fit in very well in a bustling metropolis with pavement and concrete everywhere. As such, you might not find yourself using them as much except maybe as additions to parks or in creating your own parks.

Credit: I’d like to give credit for this trick to https://www.youtube.com/user/xisumavoid. I learned it from his videos, though I’m not sure if he was the one to have “discovered” this technique.
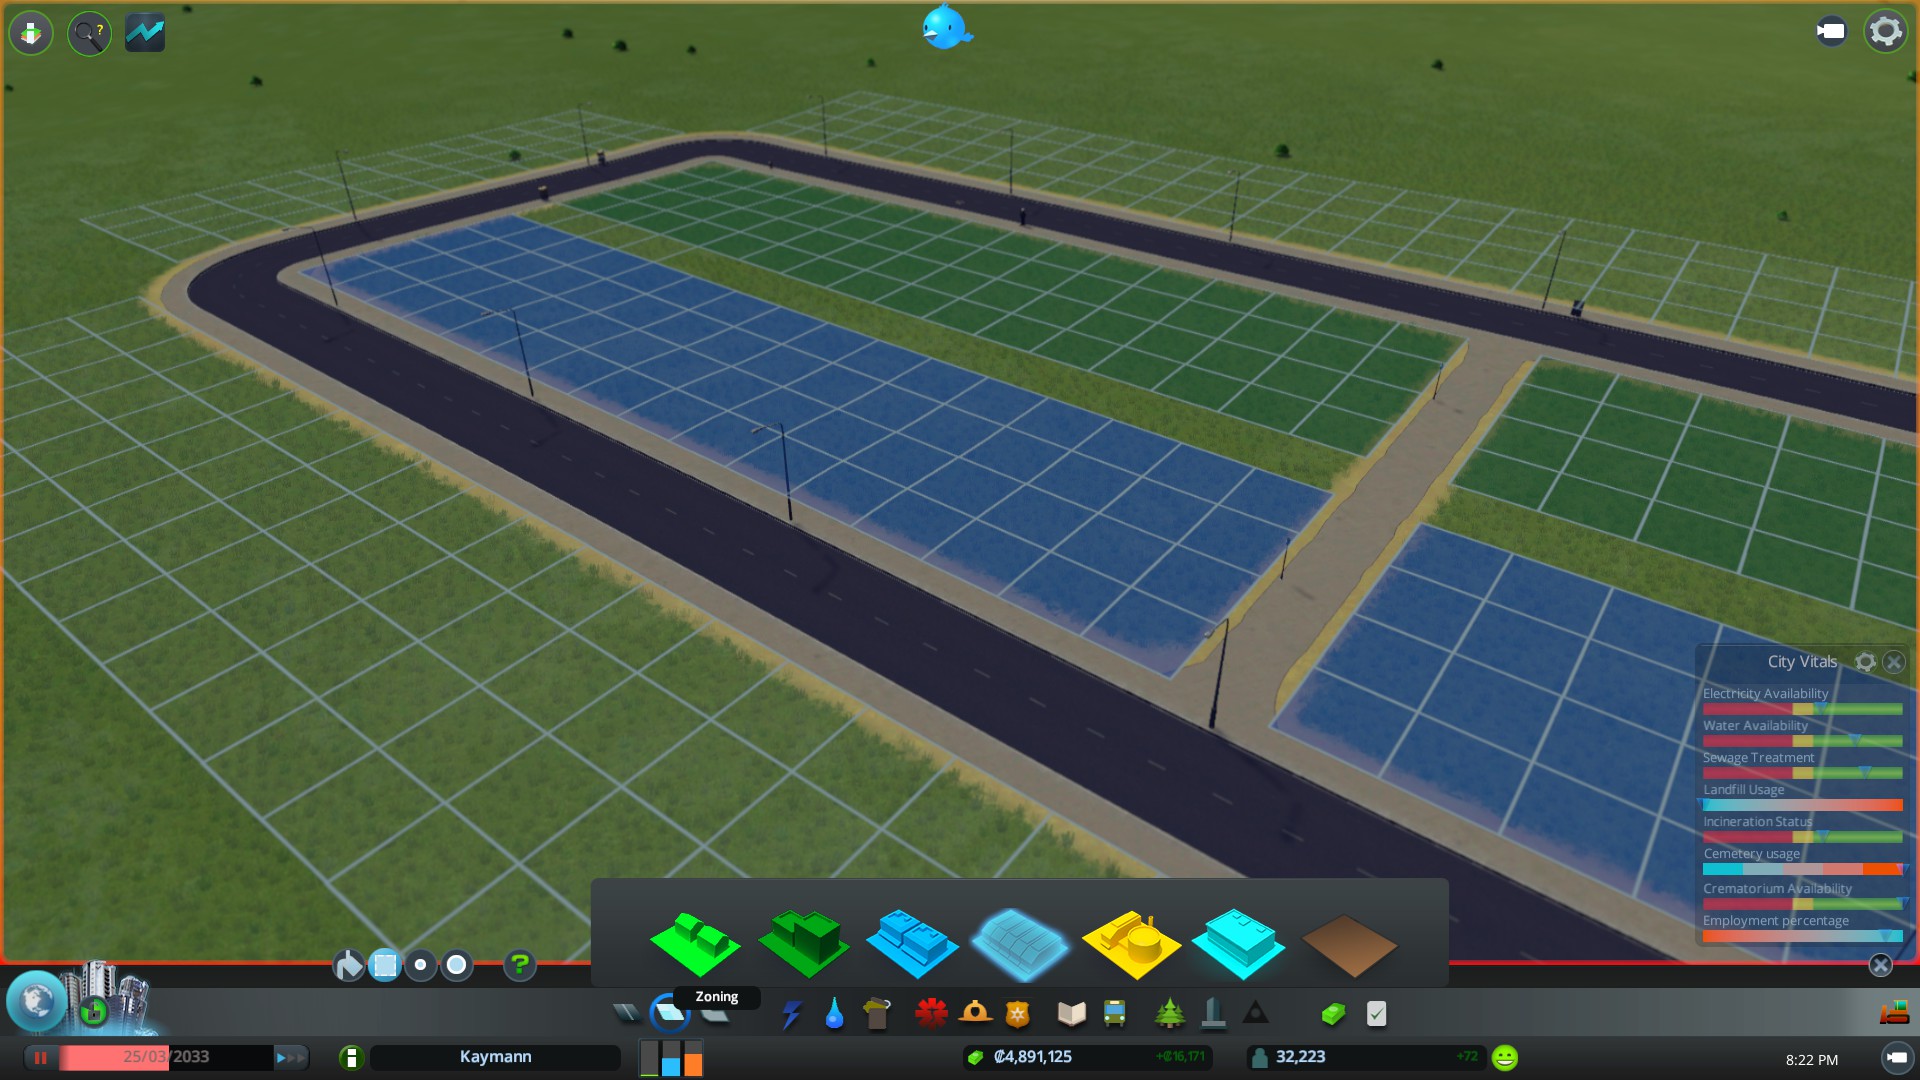
“Blocking” is as a way of deciding which roads can be zoned on in vanilla C:S. As of this writing, there is a mod available that allows you to choose whether a road can be zoned on at all, though I do not believe that there is a way of picking and choosing which individual sections or lengths of the road that can or cannot be zoned on.
This is very useful to maximize the area available to zone for large buildings; ideally, all 4×4 cell buildings. We use the path as a means of “blocking” the zoning on one road to allow the zoning spaces on the other to fill up the now-available space gained from the now-blocked road.
Example:

Left: before; right: after

As you can see, we’ve gained a few spaces on the branching road on the top. We lost two zoning spaces on the bottom branching road, but it is up to you and to each individual case to decide what to block and what not to.
We can also apply this same technique in the opposite direction to allow more efficient zoning on the street of our choice. Sometimes it looks nice to have some variation in your cities, and placing buildings on angled streets from the overlying grid can add some variety to sprawling skyscrapers.
