APB: Reloaded "How to draw"
Our guides
Links to another guides made by us, feel free to check em:
1. Game basics and first steps - APB: Reloaded "How to survive"
1. Game basics and first steps - APB: Reloaded "How to survive"
Begining
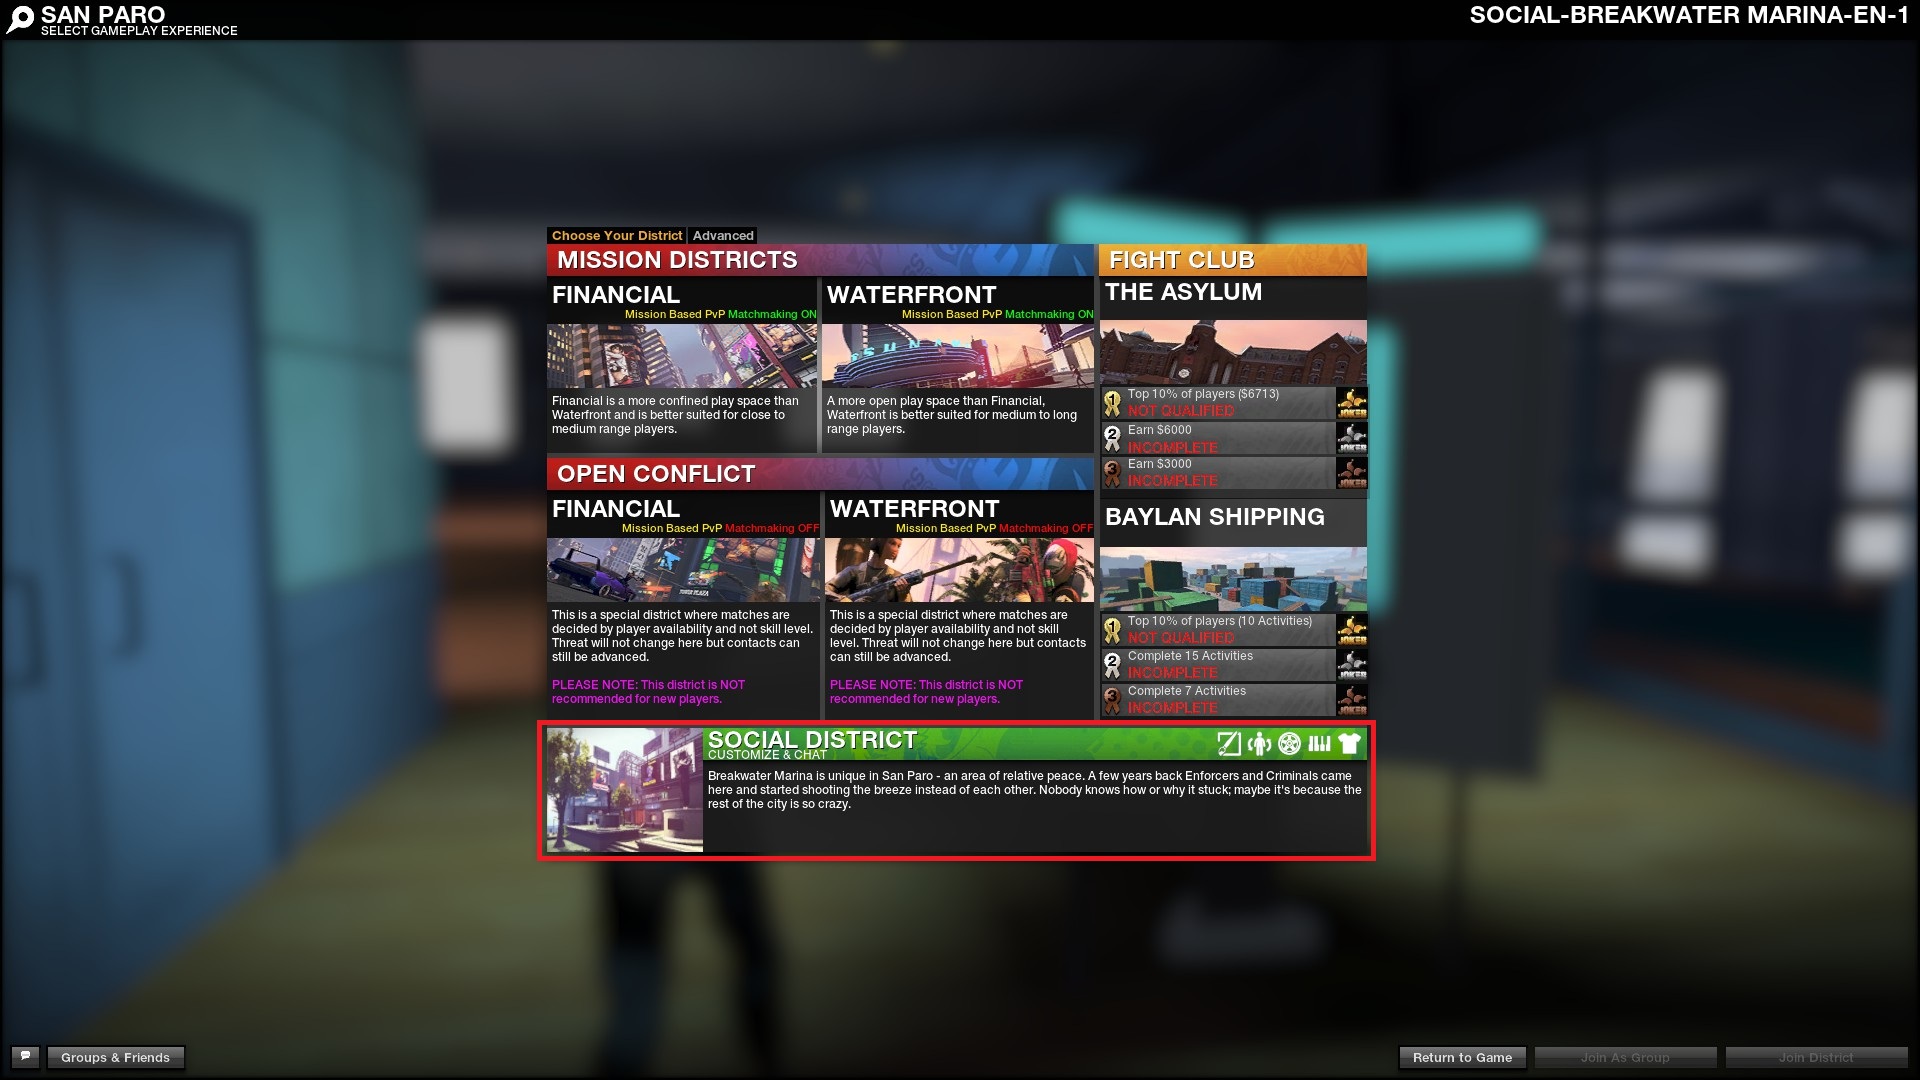 Before start create your awesome symbols, we need to start ingame designer. You can do it in special machines, placed inside social district "Breakwater Marina".
Social district it is a place for chatting and creating your own ingame designs. Also for AFK'ing 24/7.
A machine we looking for have blue screen with a white brush on it. Just press "M" and choose this icon from right. Every designer kiosk now appers on your map.
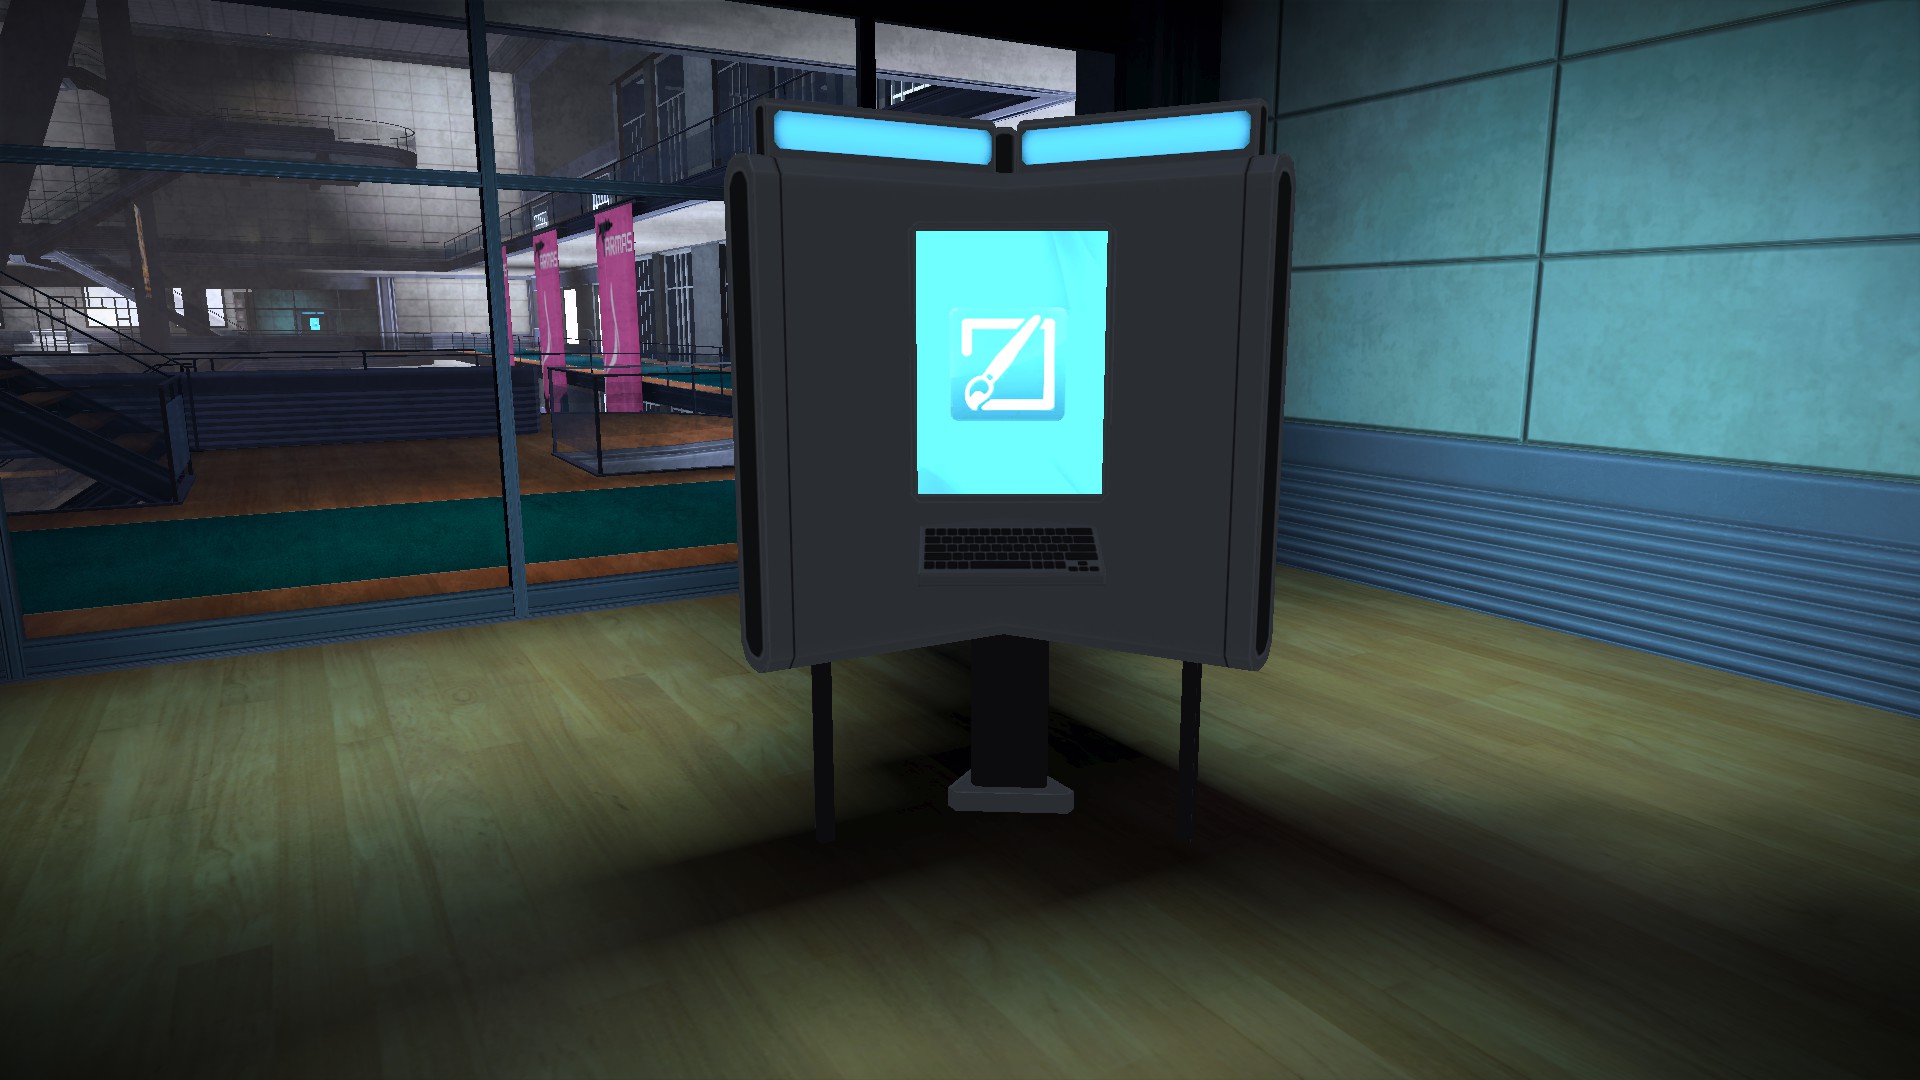
When you found designer, you just need come close to it and press "F". Now you finaly inside this machine, and can see your workplace. From begining it's looks pretty easy and nice, but not so fast. Creating a decent symbol it's a hard work, lot's times and tea. Lets check what we can see inside studio before starting draw something.
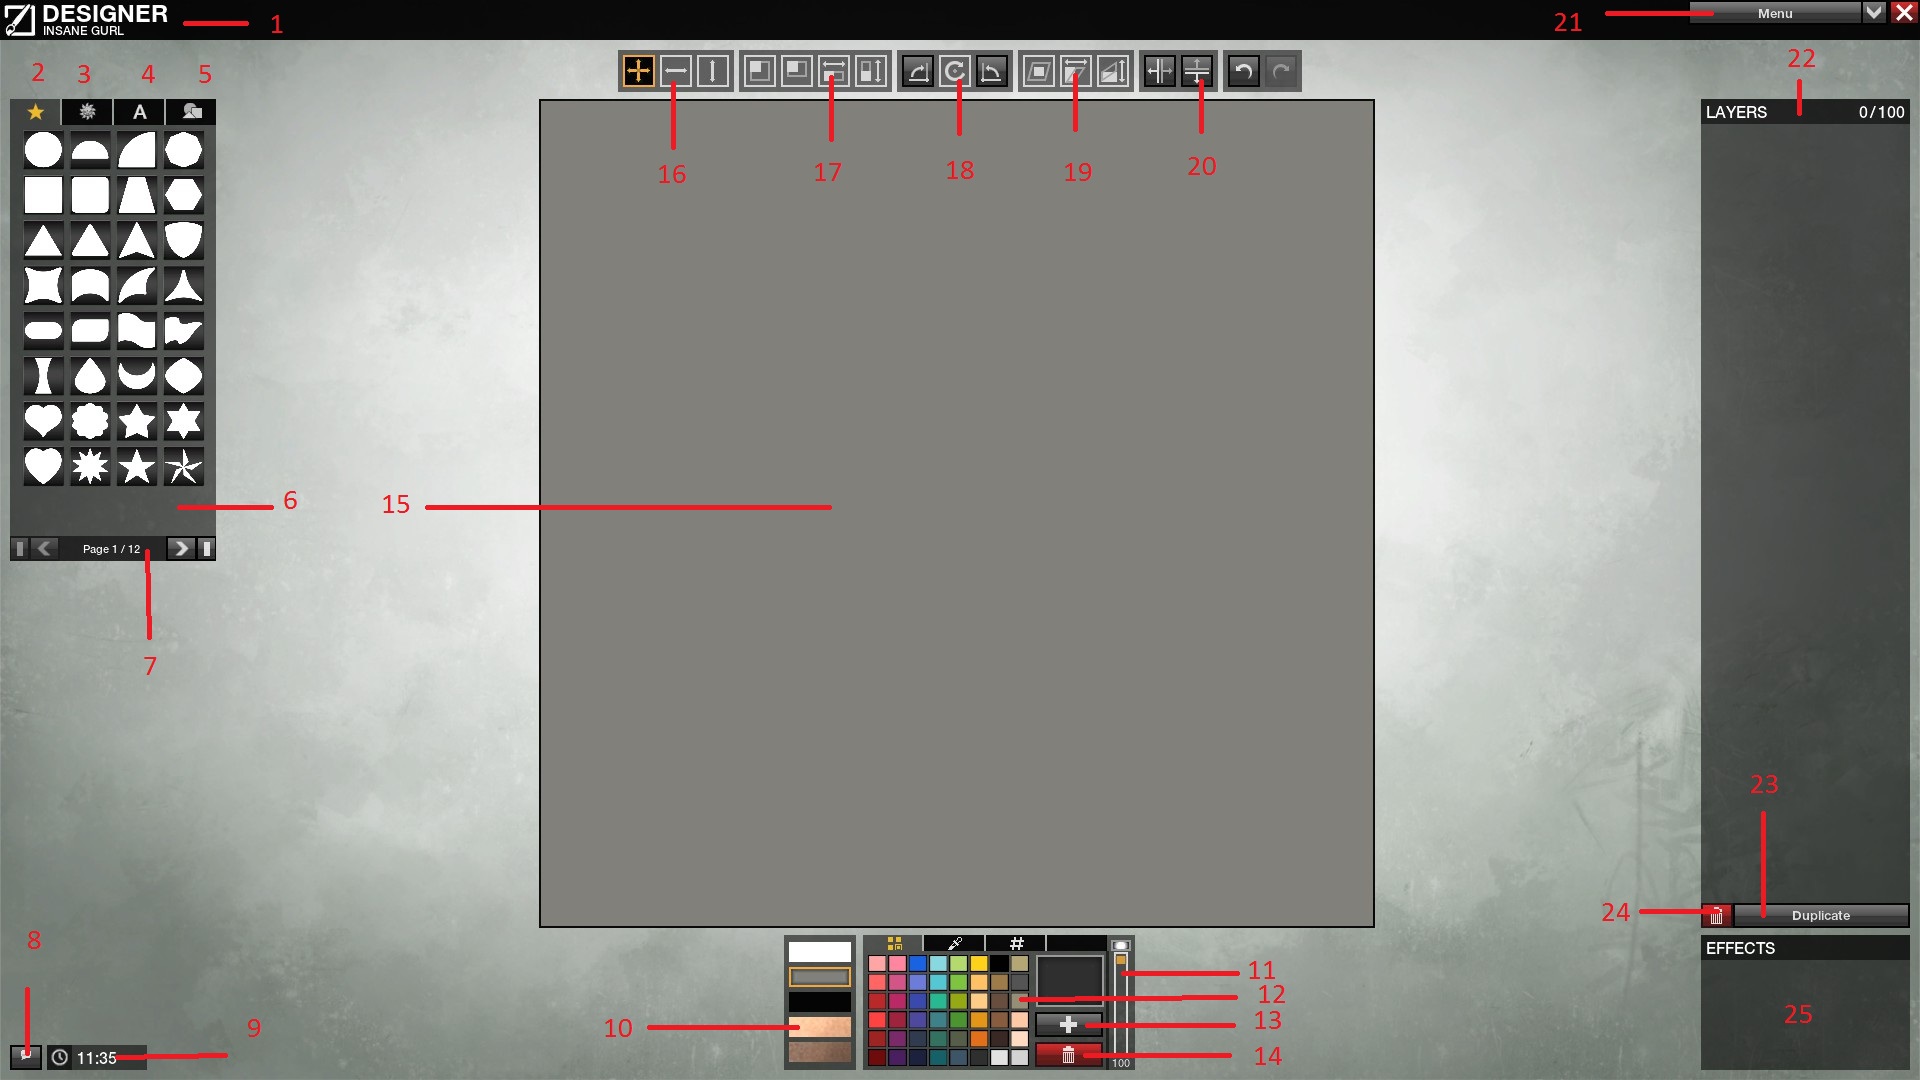
Below is a discription of the layout.
1. Name of machine + name of your symbol. This name will be show in your locker, and another players will see your logo under this name.
2. This is primitives. Pack of symbols without any effects. Just sumple symbols like Square or Circle. Every symbol is white by default. After playing more missions you will unlock more primitives like Skulls, Brushes, Bullets etc. 12 pages.
3. Painted symbols. This is already colorfull symbols wich you can't switch. Only change size and orientation. 1 page.
4. Fonts. Notfing hard here, just 10 different fonts, and 1 page of usual symbols ,!# . 11 pages.
5. Your symbols. Yes, you can import your already made symbols inside your new one. Every lauer from old symbol will count 1-1. So you can't add symbol if layers using by it more than avaible in new one. Every added layer can be edited.
6. Prewiev of opened tab, listed above.
7. Pages of tab. You can switch number of page by using | < and > | buttuns.
8. Chat window. press to open it ( or just use "Enter").
9. Current time on your PC.
10. Background preview. Helping you see, how your symbol will look on different objects. White/Grey/Black Background, and body skin previews.
11. Layer Opacity. Nothing explain here 100 - visible, 0 - Invisible.
12. Colours tab. You can use/add/delete yany collors here. Default colours already placed inside tabs. 2nd tab opening colour sphere, 3rd tab opening #color code.
13. Add previewed collor into selected square.
14. Delete colour square.
15. Main desctop. Here you place your primitives, and switching em, to create your own symbol.
16. Moving tabs. Free moving, Only horizontal, Only Vertical.
17. Size tabs. Free size 1/2, Size Horizontal, Size Vertical.
18. Rotate tabs. Circle rotating and move layer on 90 points.
19. Orientation tabs. Tabs helping you switch layer orientation x and y.
20. Mirror tabs, and undo/back.
21. Main Menu. You can save/ delete/ create new/ load symbols here.
22. Layers menu. Every layer you just added into desc appears here, "Layer 1" placed above "Layer 2" inside this menu, will be place above inside "Main Desctop" aswell.
23. Duplicate. You can Duplicate selected layer, and switch/use/replace him whatever you want.
24. Delete layer. Deliting selected layer. Can be "Undo"
25. Effects. Every layers you just added can aplied with some effects. Chose layer to see avaible Effects.
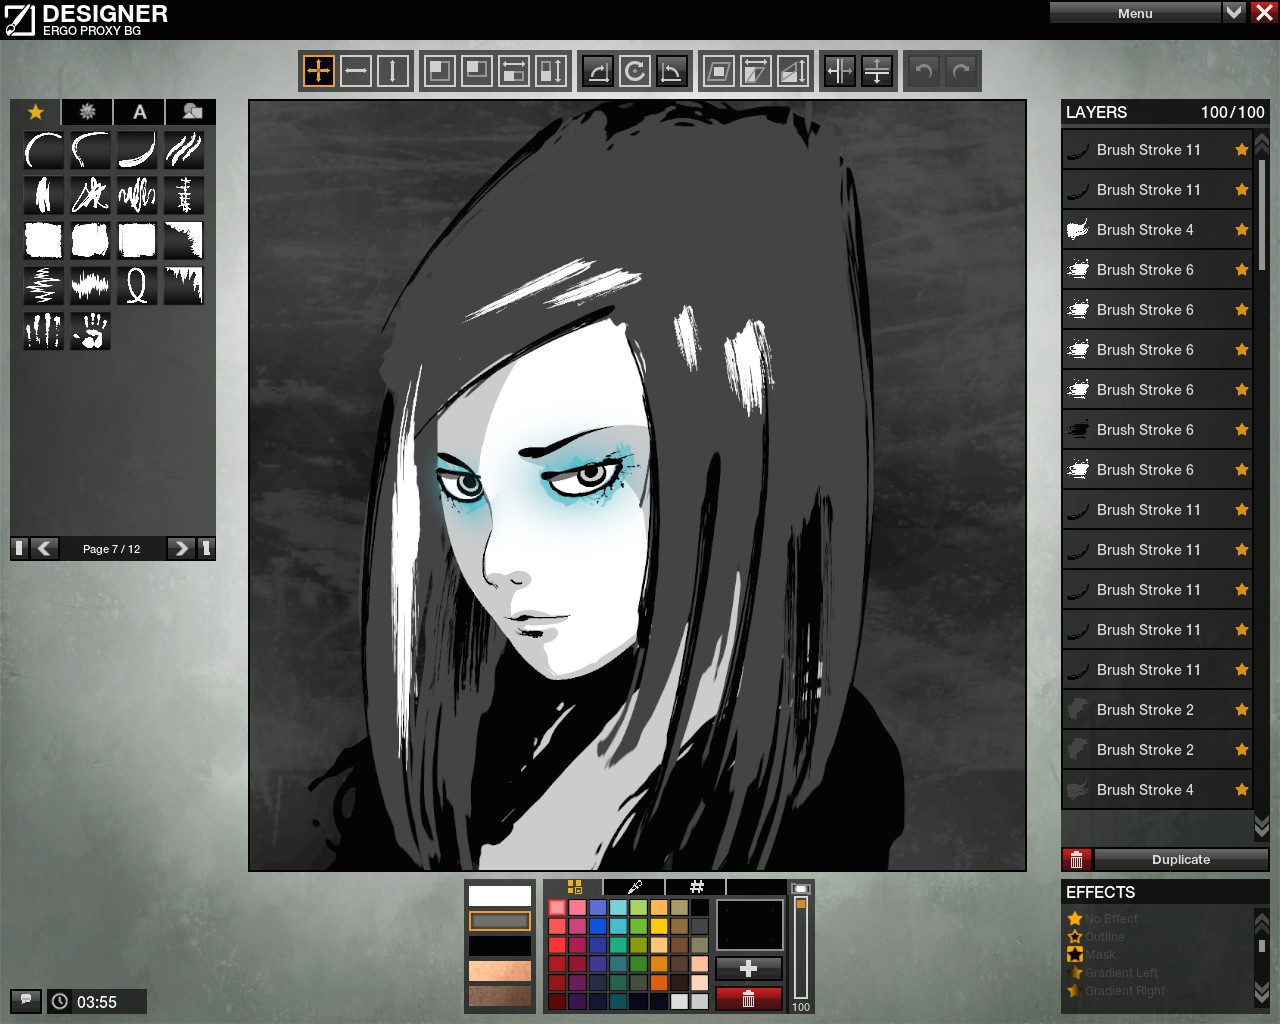
Preview of completed symbol.
My first symbol [+ Video]
For get better feeling of designer, we will start learn it by compliting "step by step" tuttorial. As example we are will use not much complicated symbol. If you drawing symbol from source, you can easy open it by steam ingame browser and "Shift+Tab" to check details of it fast. I have 2 screens, so source image always visible, if i copy symbol from internet.
Our symbol is:
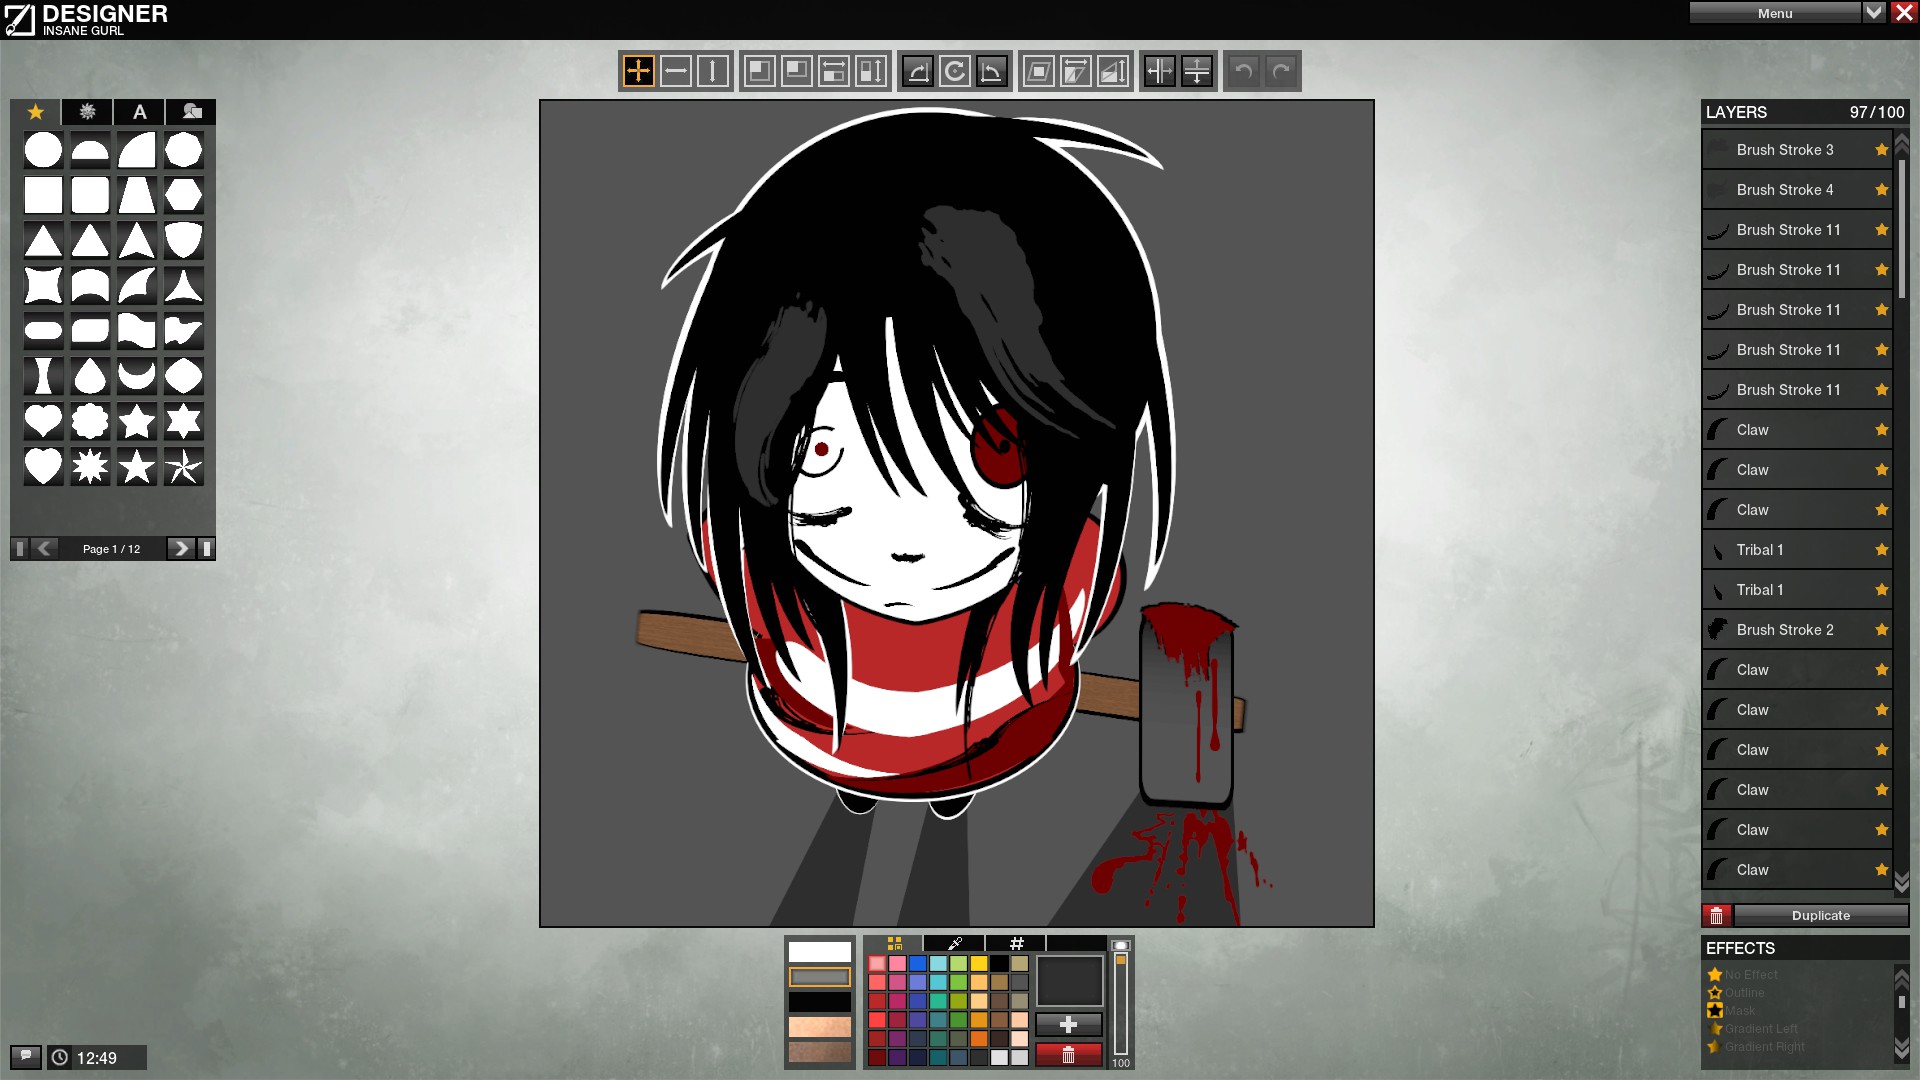
From first view it looks hard and evil, but not. This is super easy symbol, and you will see why.
1. This symbol not using alot of different primitives, so you can create it by using only 1st page and some from others.
2. Form of head, aka chibi, 1 of easiest to draw. No problem with proportions body/head.
3. Little amount of colours. Wich one is easy to release.
etc.
Here you can see step by step video how i made it.
Our symbol is:
From first view it looks hard and evil, but not. This is super easy symbol, and you will see why.
1. This symbol not using alot of different primitives, so you can create it by using only 1st page and some from others.
2. Form of head, aka chibi, 1 of easiest to draw. No problem with proportions body/head.
3. Little amount of colours. Wich one is easy to release.
etc.
Here you can see step by step video how i made it.
1st step. Head
Face Background
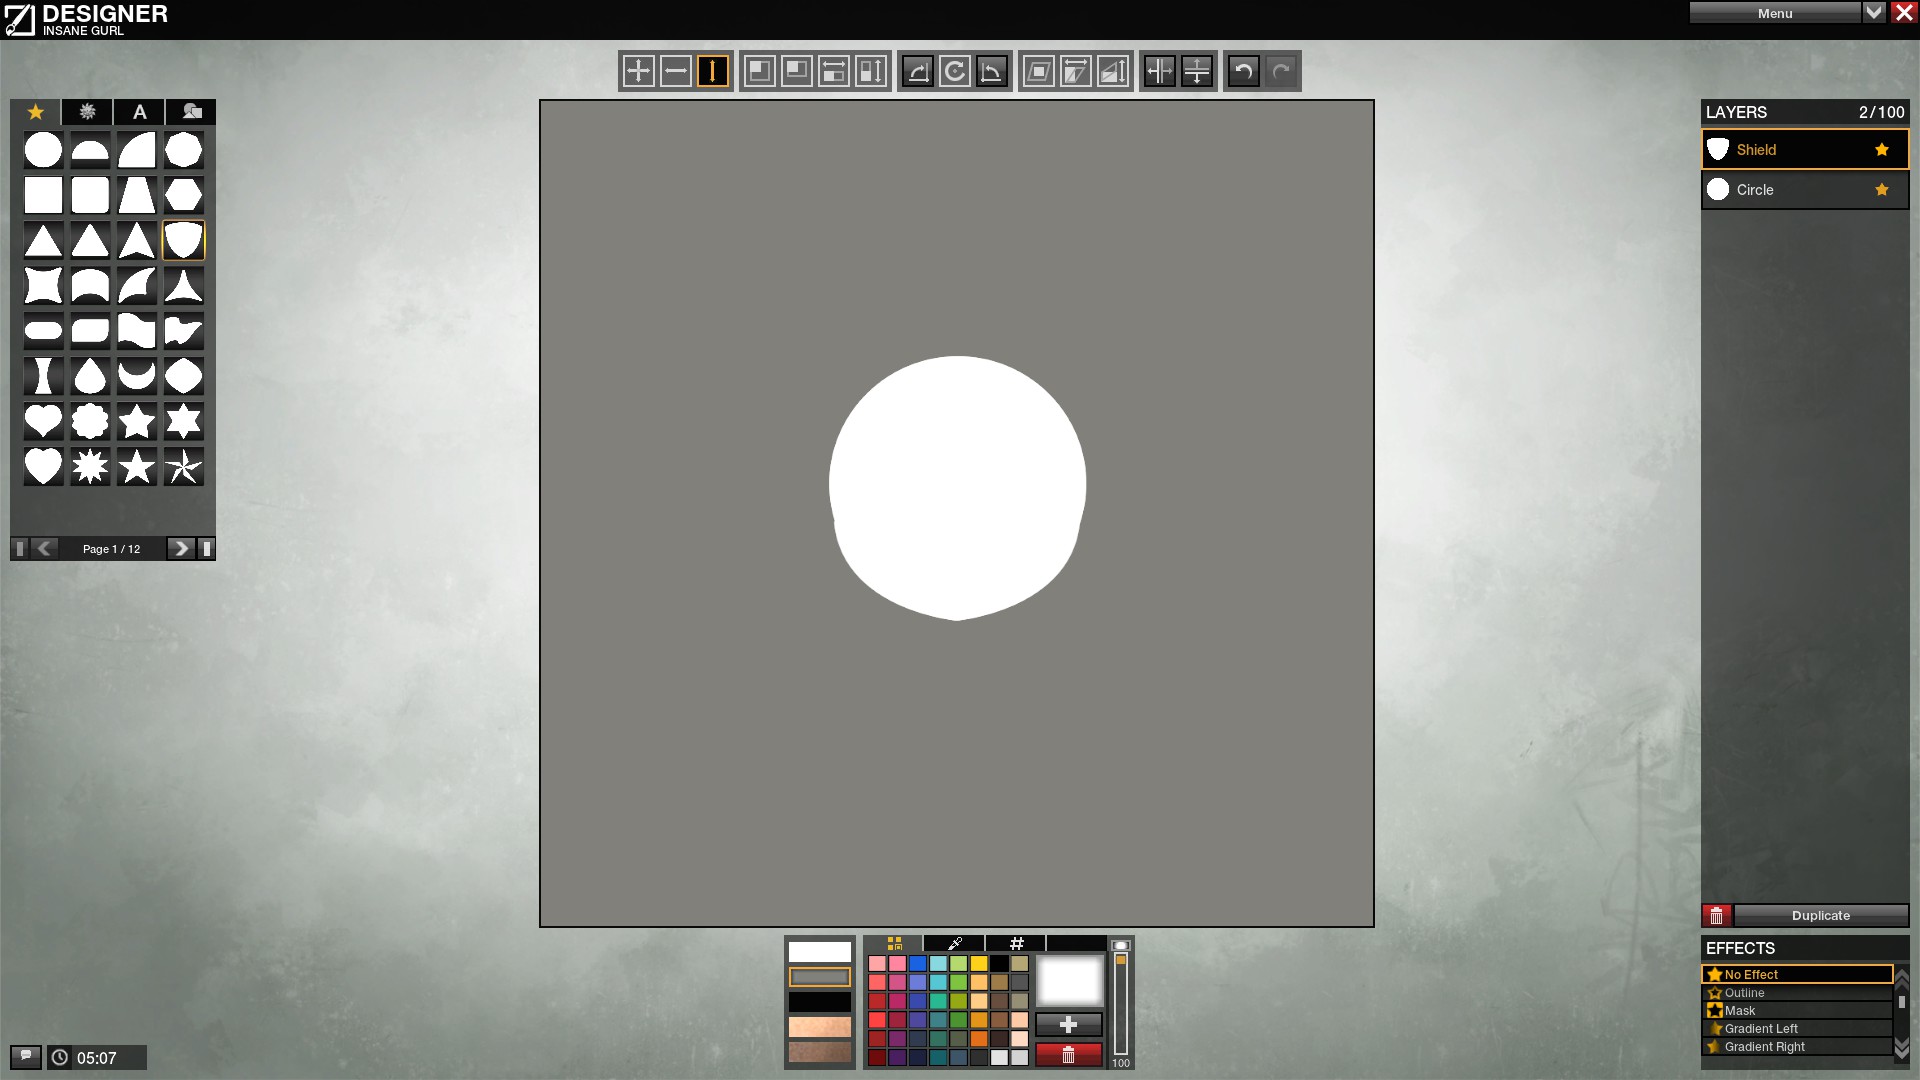 So let's see how was this symbol made. I started from head and face, because it was most hardest parts in this symbol. Head made by Circle and Shield primitives. I prefer use this two, because shield look like chin, and circle just hide empty places. You can duplicate shield, and black coloured copy of it just use to show borders. Wich one look very nice if you have, for example, same coloured neck.
Hair background
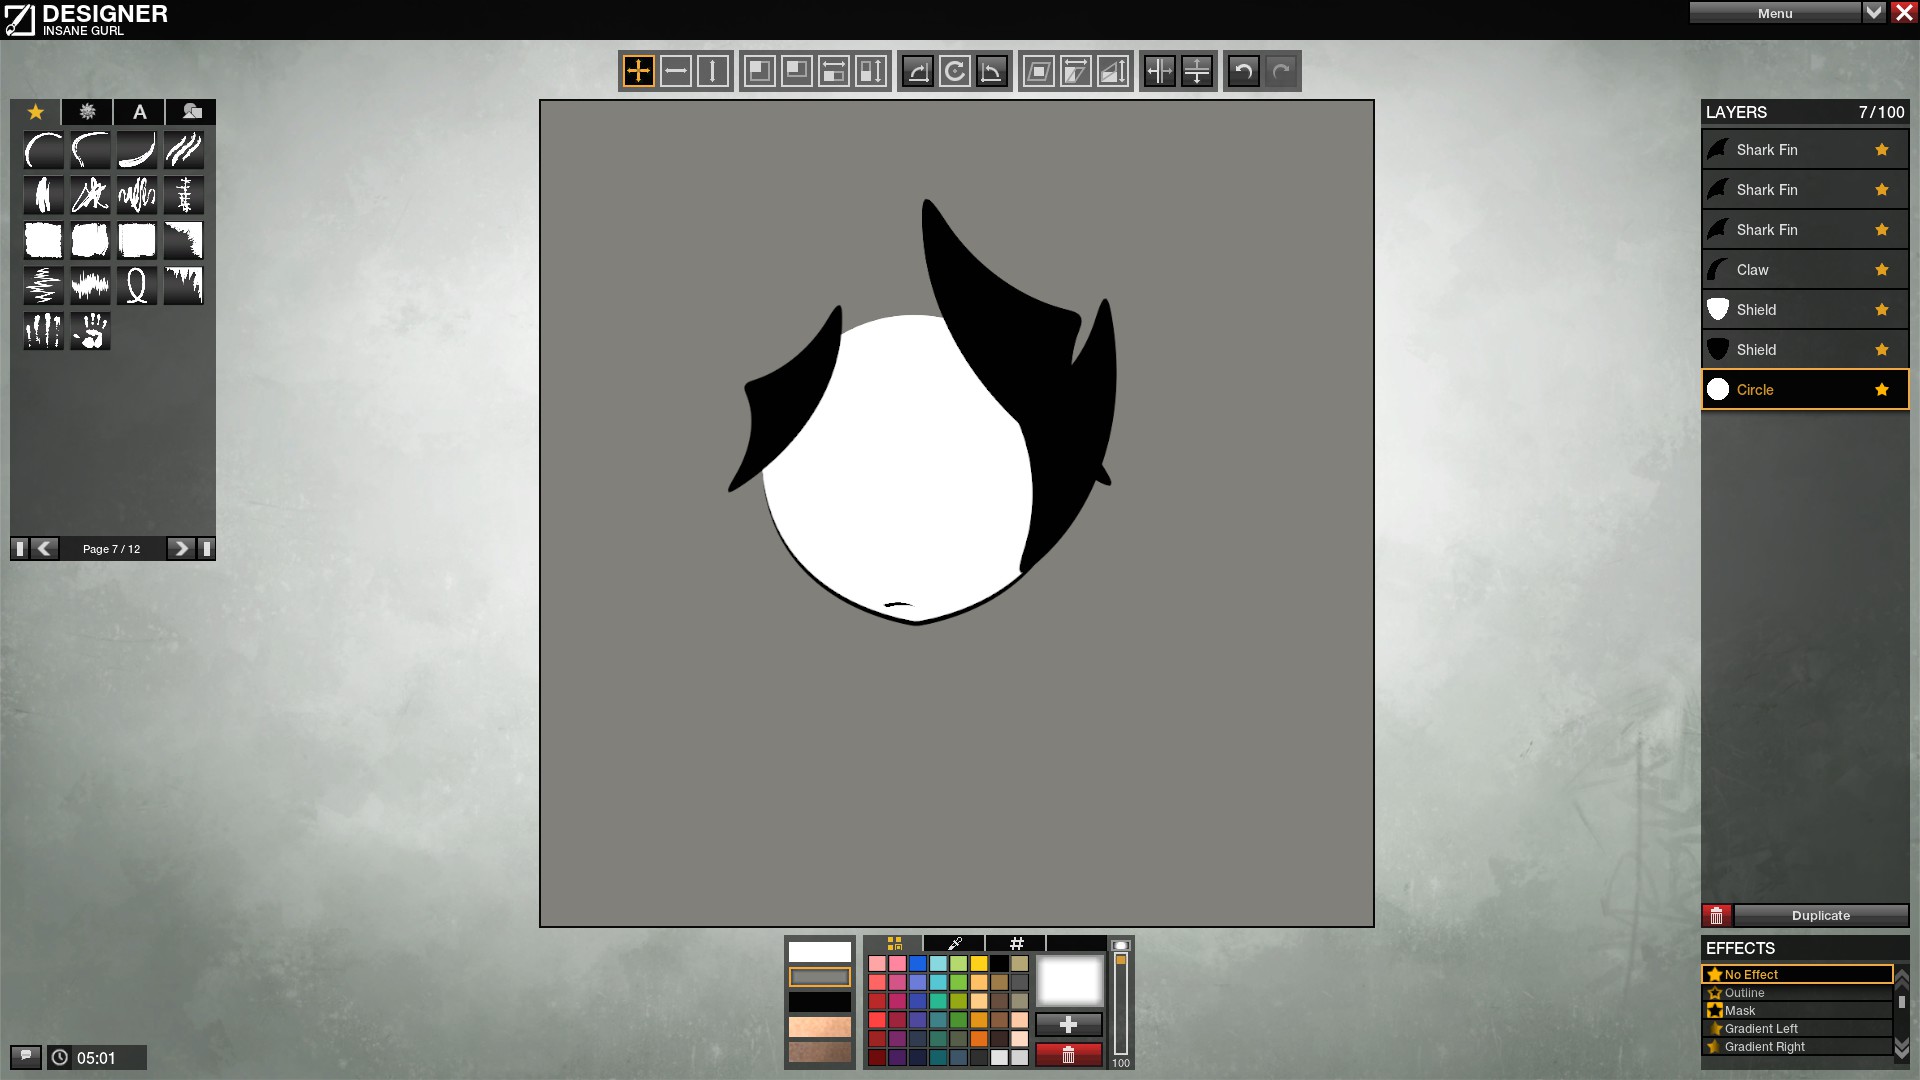
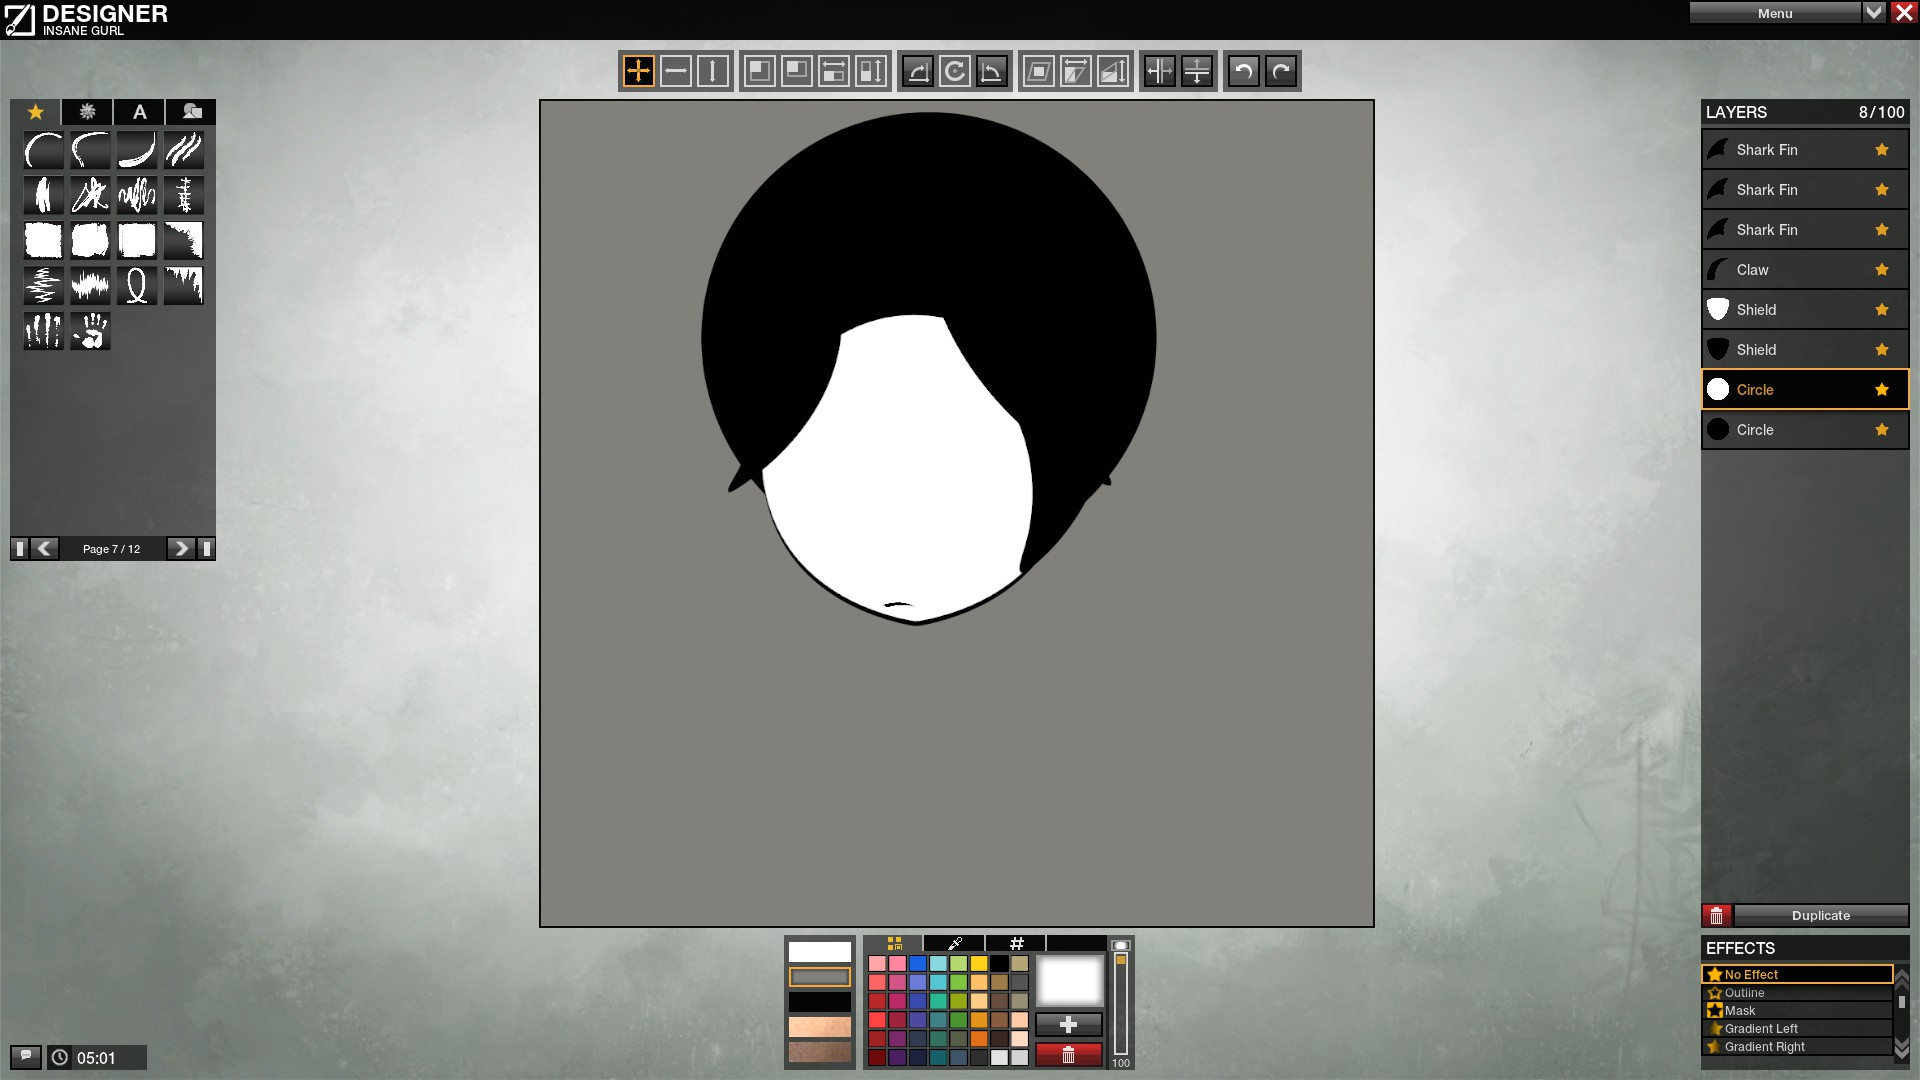
Black hair is most popular, because it's easy to draw ( you dont need spending lovely layers to create borders of it), and looks pretty nice. But for save your layers you dont need add every part so carefull. You can use just big circle below face and after add on it more detailed parts. Ofc layers used to hide face need to be place above it. Let's how will be looks our head with more customazed hair.
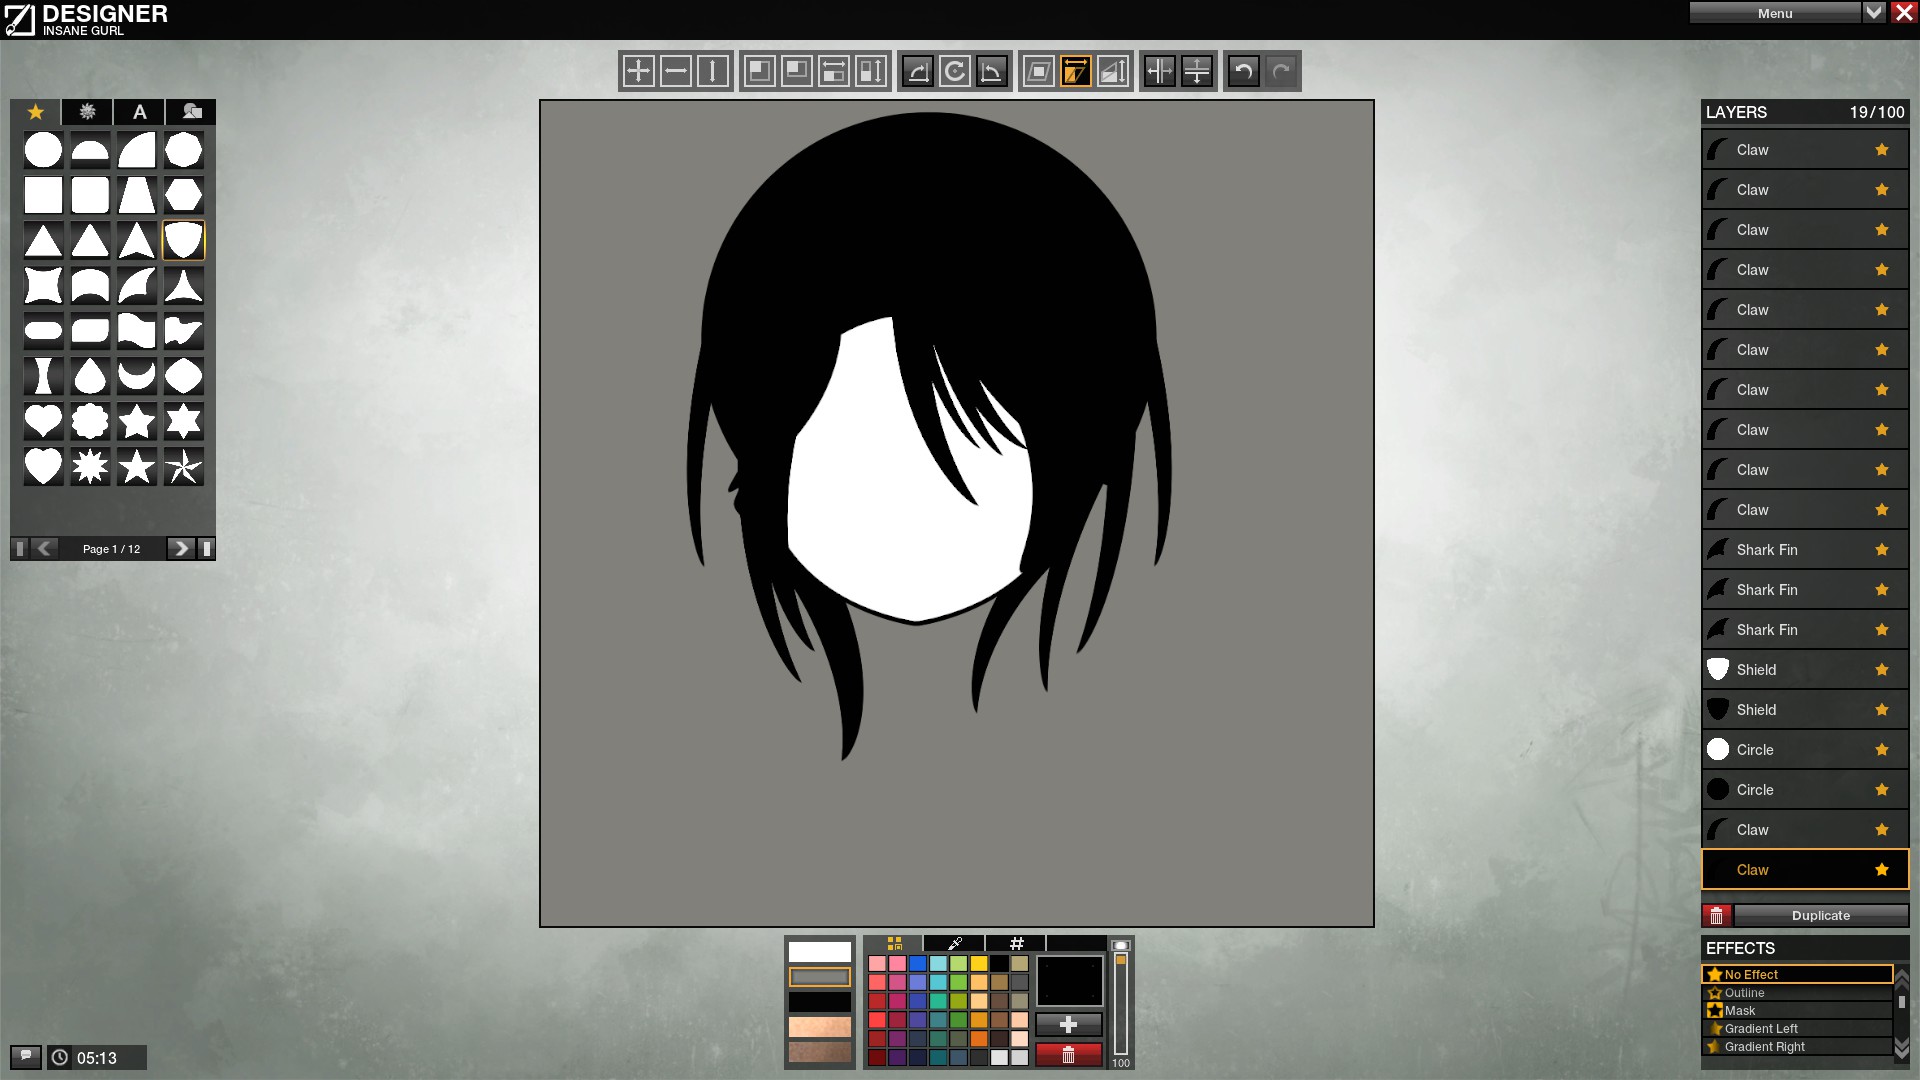 Hair Details
Now as we can see, it looks like head, but some part still missing. Hair not complited, still no face details as eyes, noice, lips. I prefer use most of my layers into hair and face. Most of em in eyes. And what left i using for body. But in this logo eyes just simple, so most layers i spent for borders and hair details. If you like more detailed body, you can sacriface head :D
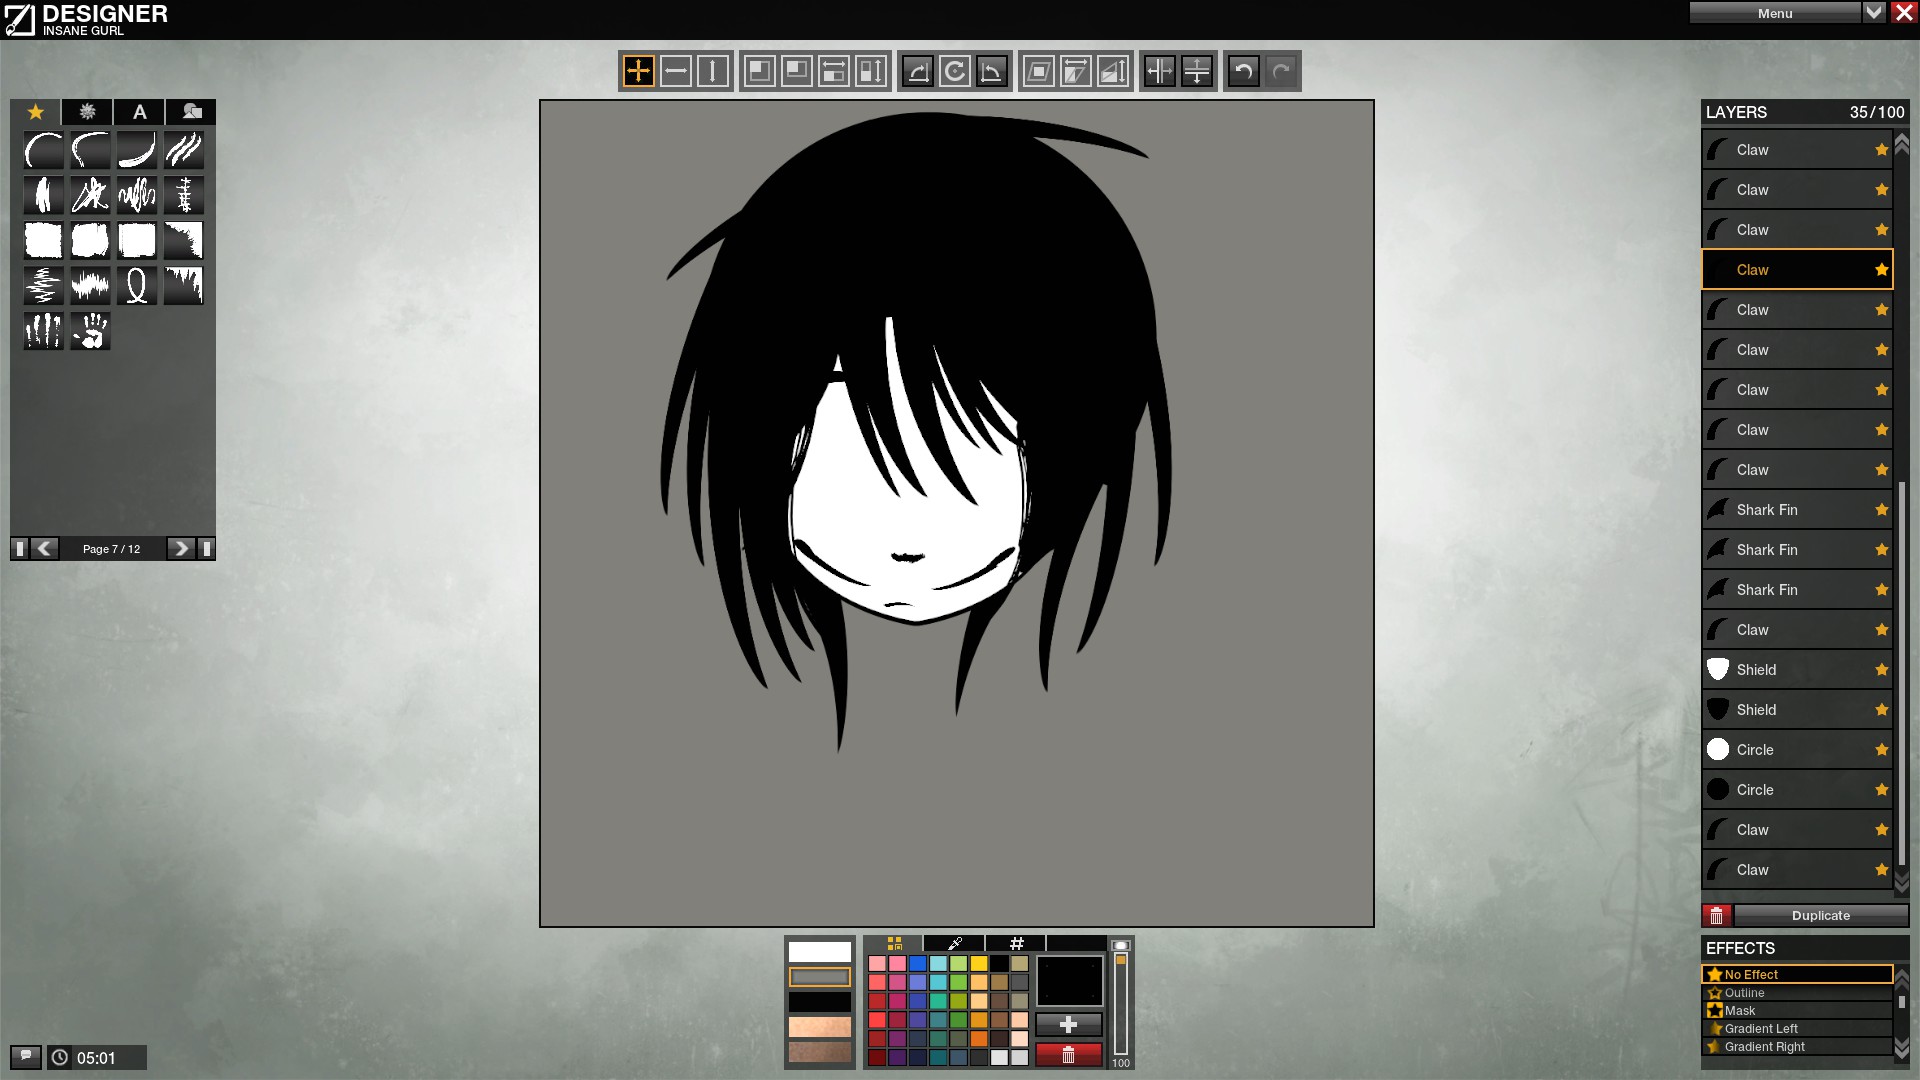 Finish
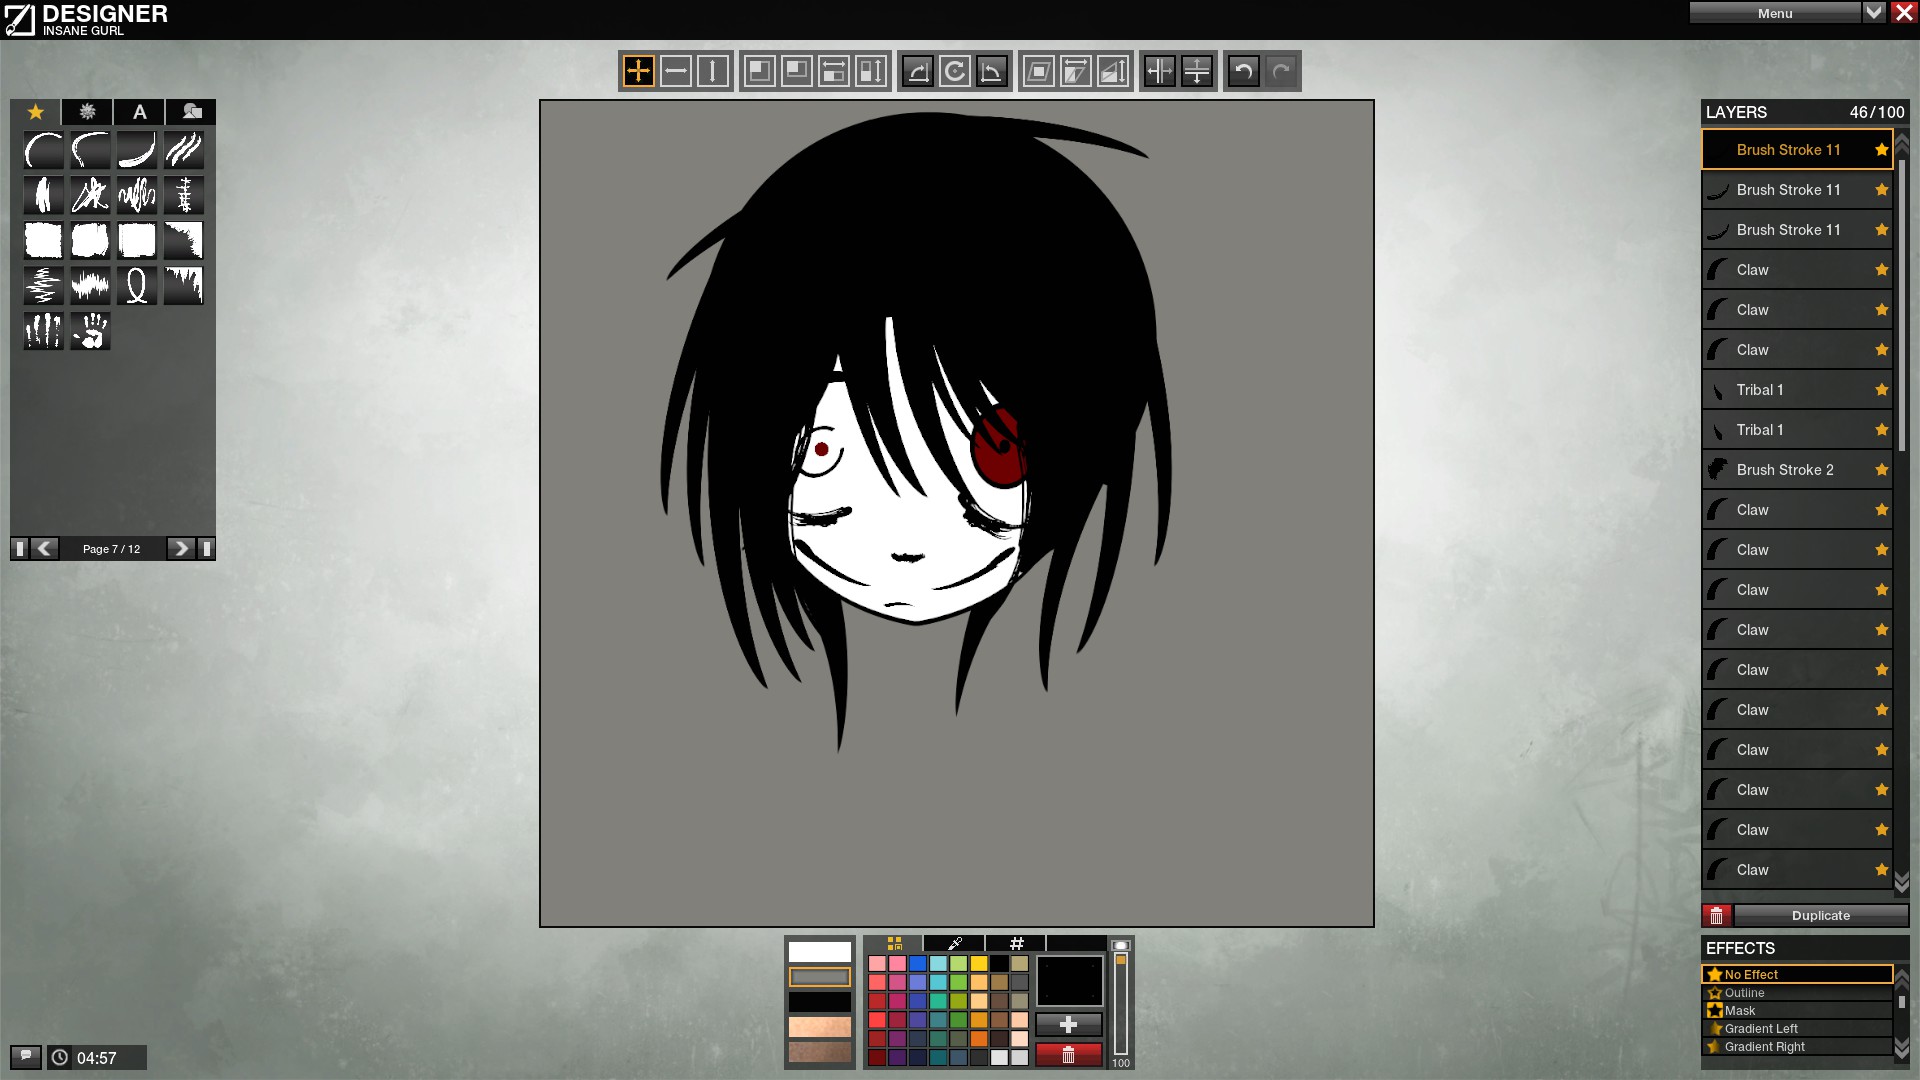
Let's finish our hair now, but you need to know, after you add eyes, you probably will need switch some details of your hair. So if you check video, you will see i made eyes before it. You can do whatever you want, but remaking it anytime just wasting of your time. So, as you can see we have made pretty nice face. Now we need check how many layers left, and can we get some more, if we remove useles parts. If not, use what we have.
So let's see how was this symbol made. I started from head and face, because it was most hardest parts in this symbol. Head made by Circle and Shield primitives. I prefer use this two, because shield look like chin, and circle just hide empty places. You can duplicate shield, and black coloured copy of it just use to show borders. Wich one look very nice if you have, for example, same coloured neck.Hair background
Black hair is most popular, because it's easy to draw ( you dont need spending lovely layers to create borders of it), and looks pretty nice. But for save your layers you dont need add every part so carefull. You can use just big circle below face and after add on it more detailed parts. Ofc layers used to hide face need to be place above it. Let's how will be looks our head with more customazed hair.
Hair DetailsNow as we can see, it looks like head, but some part still missing. Hair not complited, still no face details as eyes, noice, lips. I prefer use most of my layers into hair and face. Most of em in eyes. And what left i using for body. But in this logo eyes just simple, so most layers i spent for borders and hair details. If you like more detailed body, you can sacriface head :D
FinishLet's finish our hair now, but you need to know, after you add eyes, you probably will need switch some details of your hair. So if you check video, you will see i made eyes before it. You can do whatever you want, but remaking it anytime just wasting of your time. So, as you can see we have made pretty nice face. Now we need check how many layers left, and can we get some more, if we remove useles parts. If not, use what we have.
2nd step. Body and customization
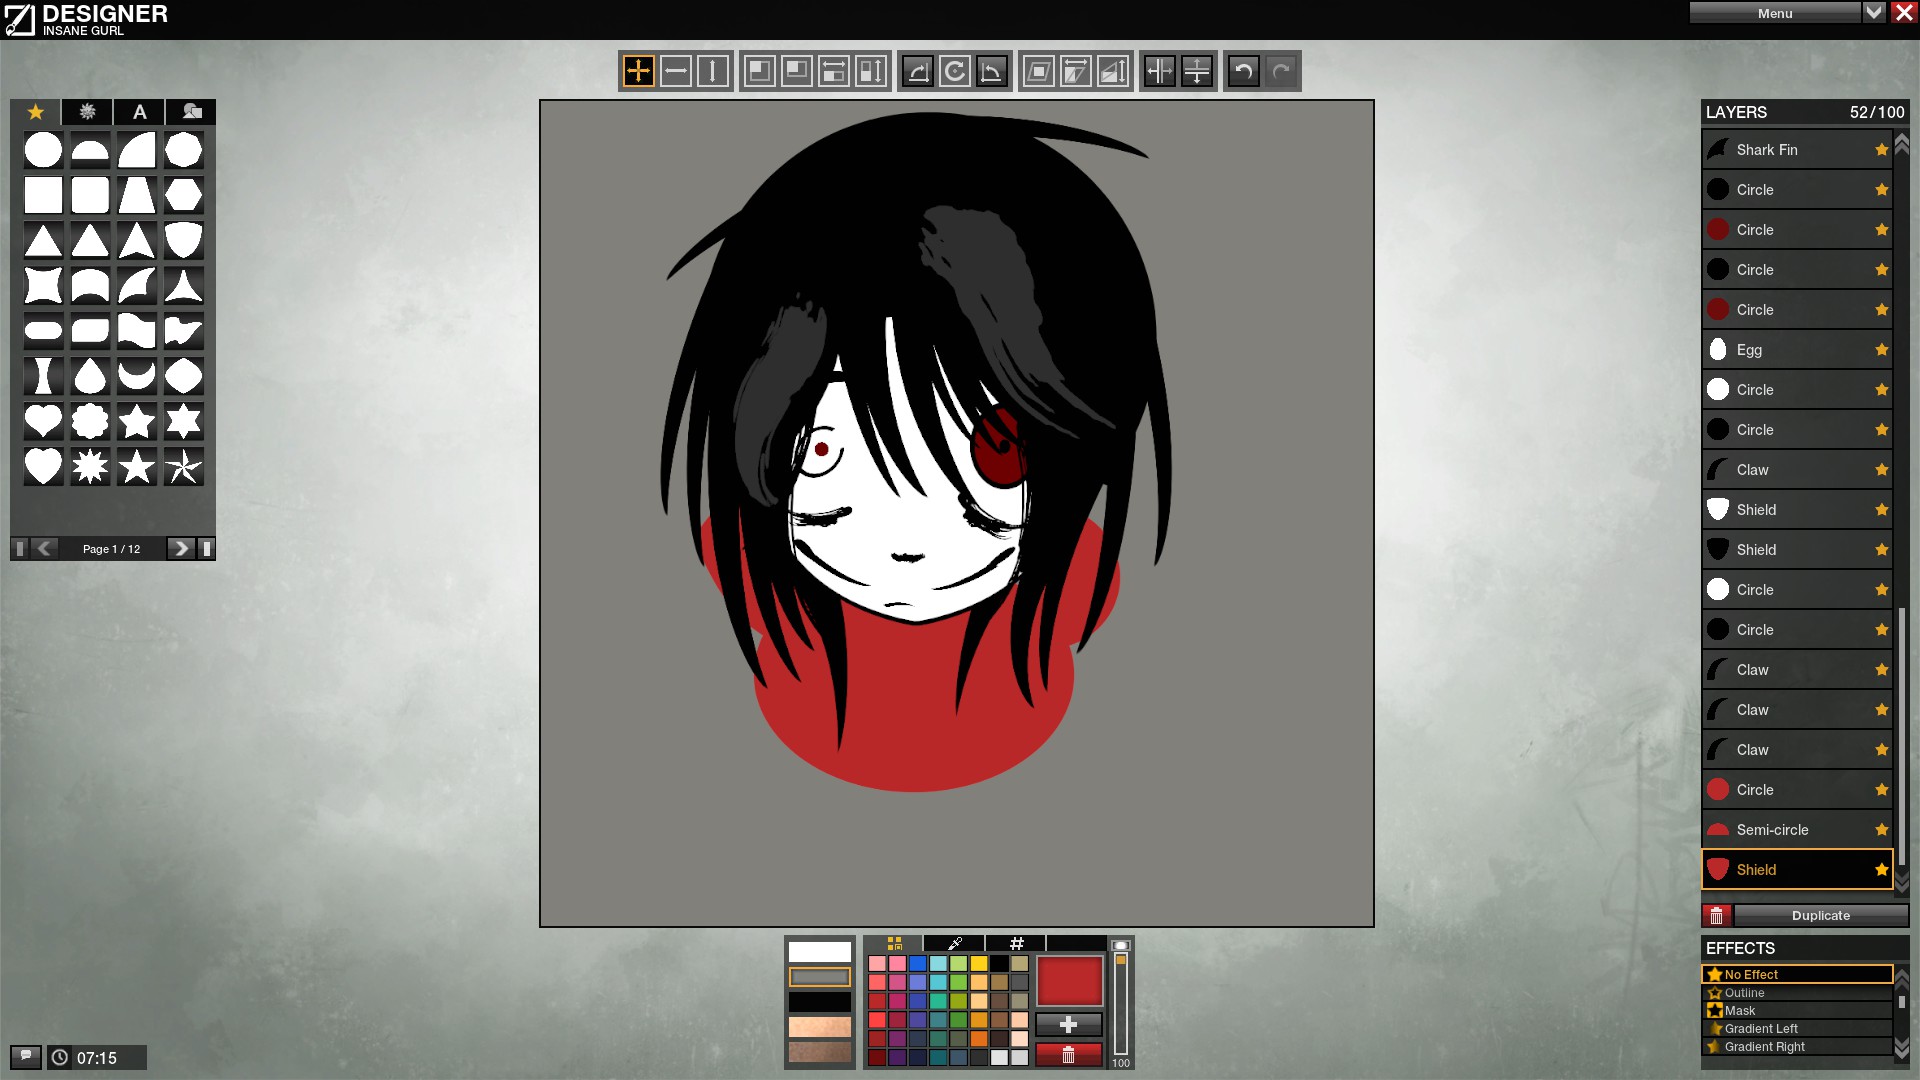
Now, when we have made decent head, we can start with body. As i said before, chibi style not so hard for drawing, so main work we did already. Body i made by 3 circles. 1 big circle used to be a body, other 2 is hands. I dont realy think i need to explain again what i just did. Just copied already made body, place it below, paint to black, and resized . So now we can see it with borders, what look kinda good.
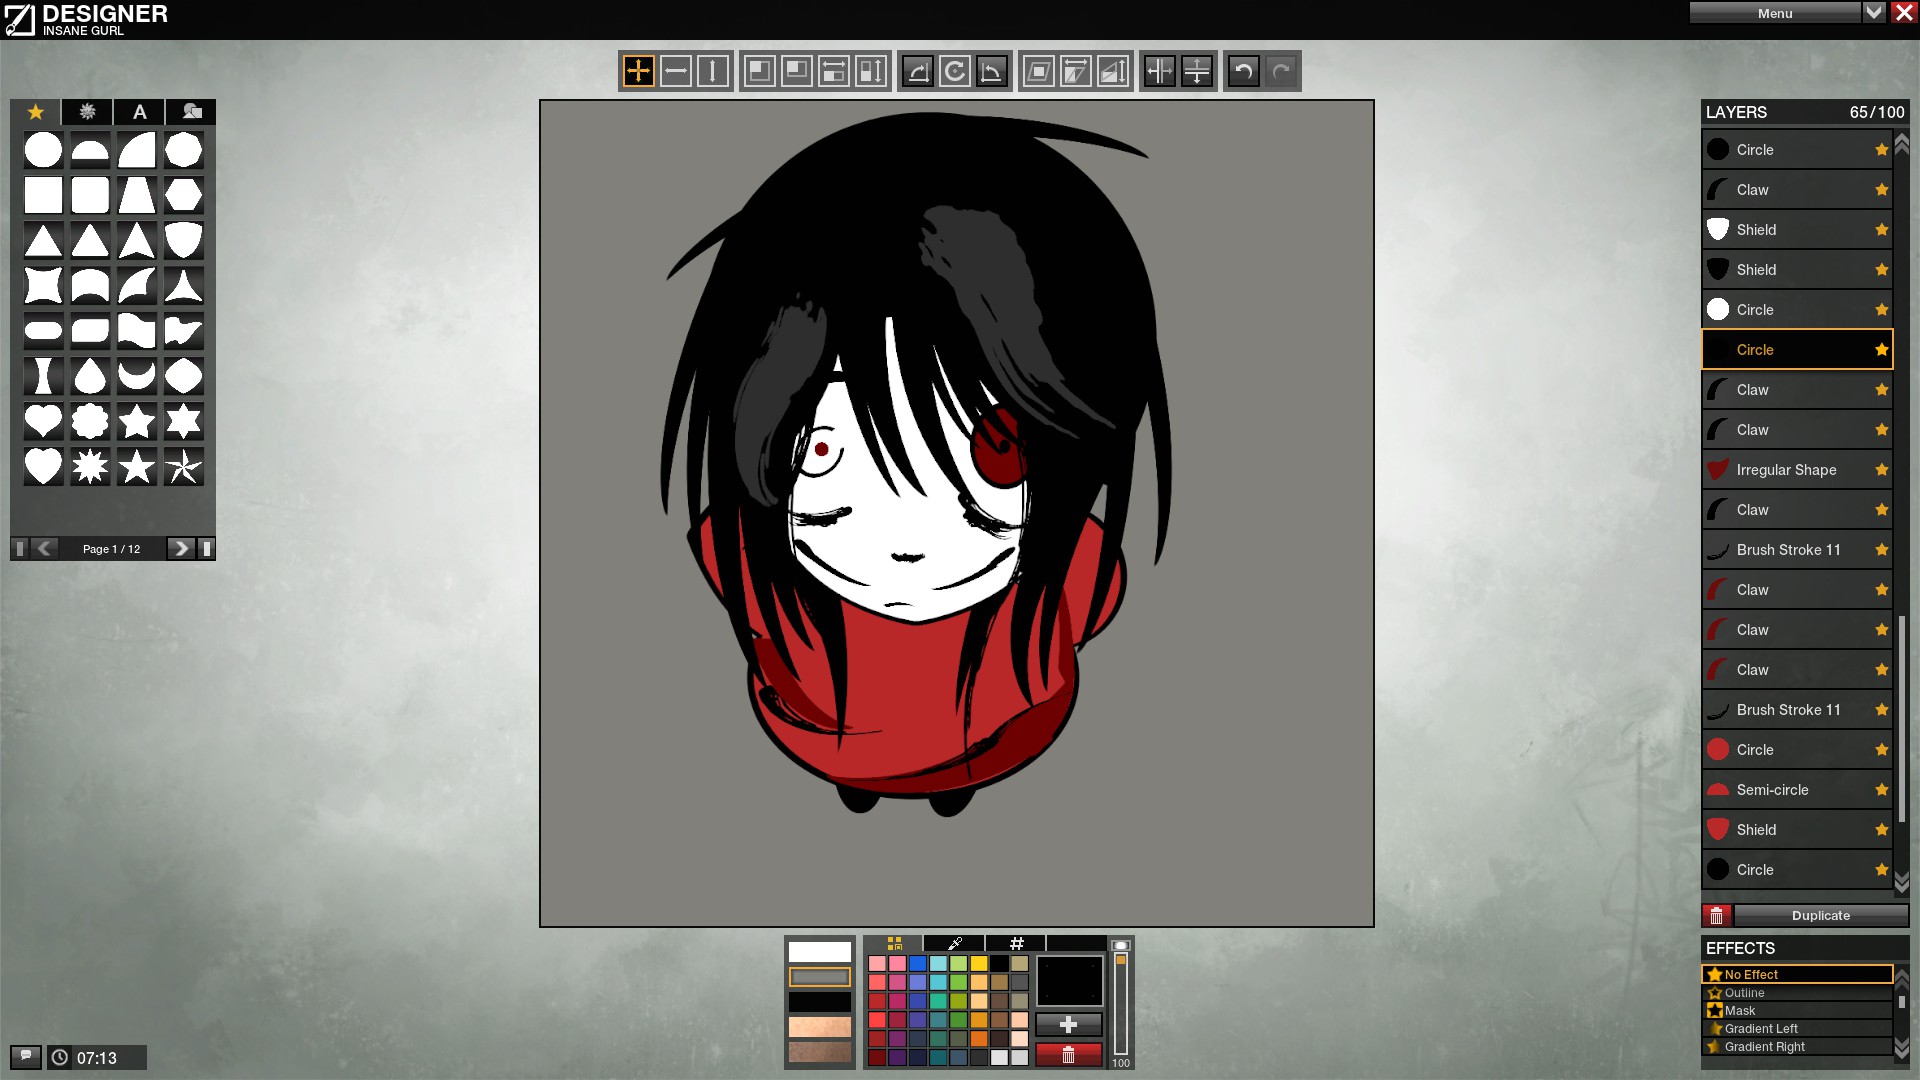
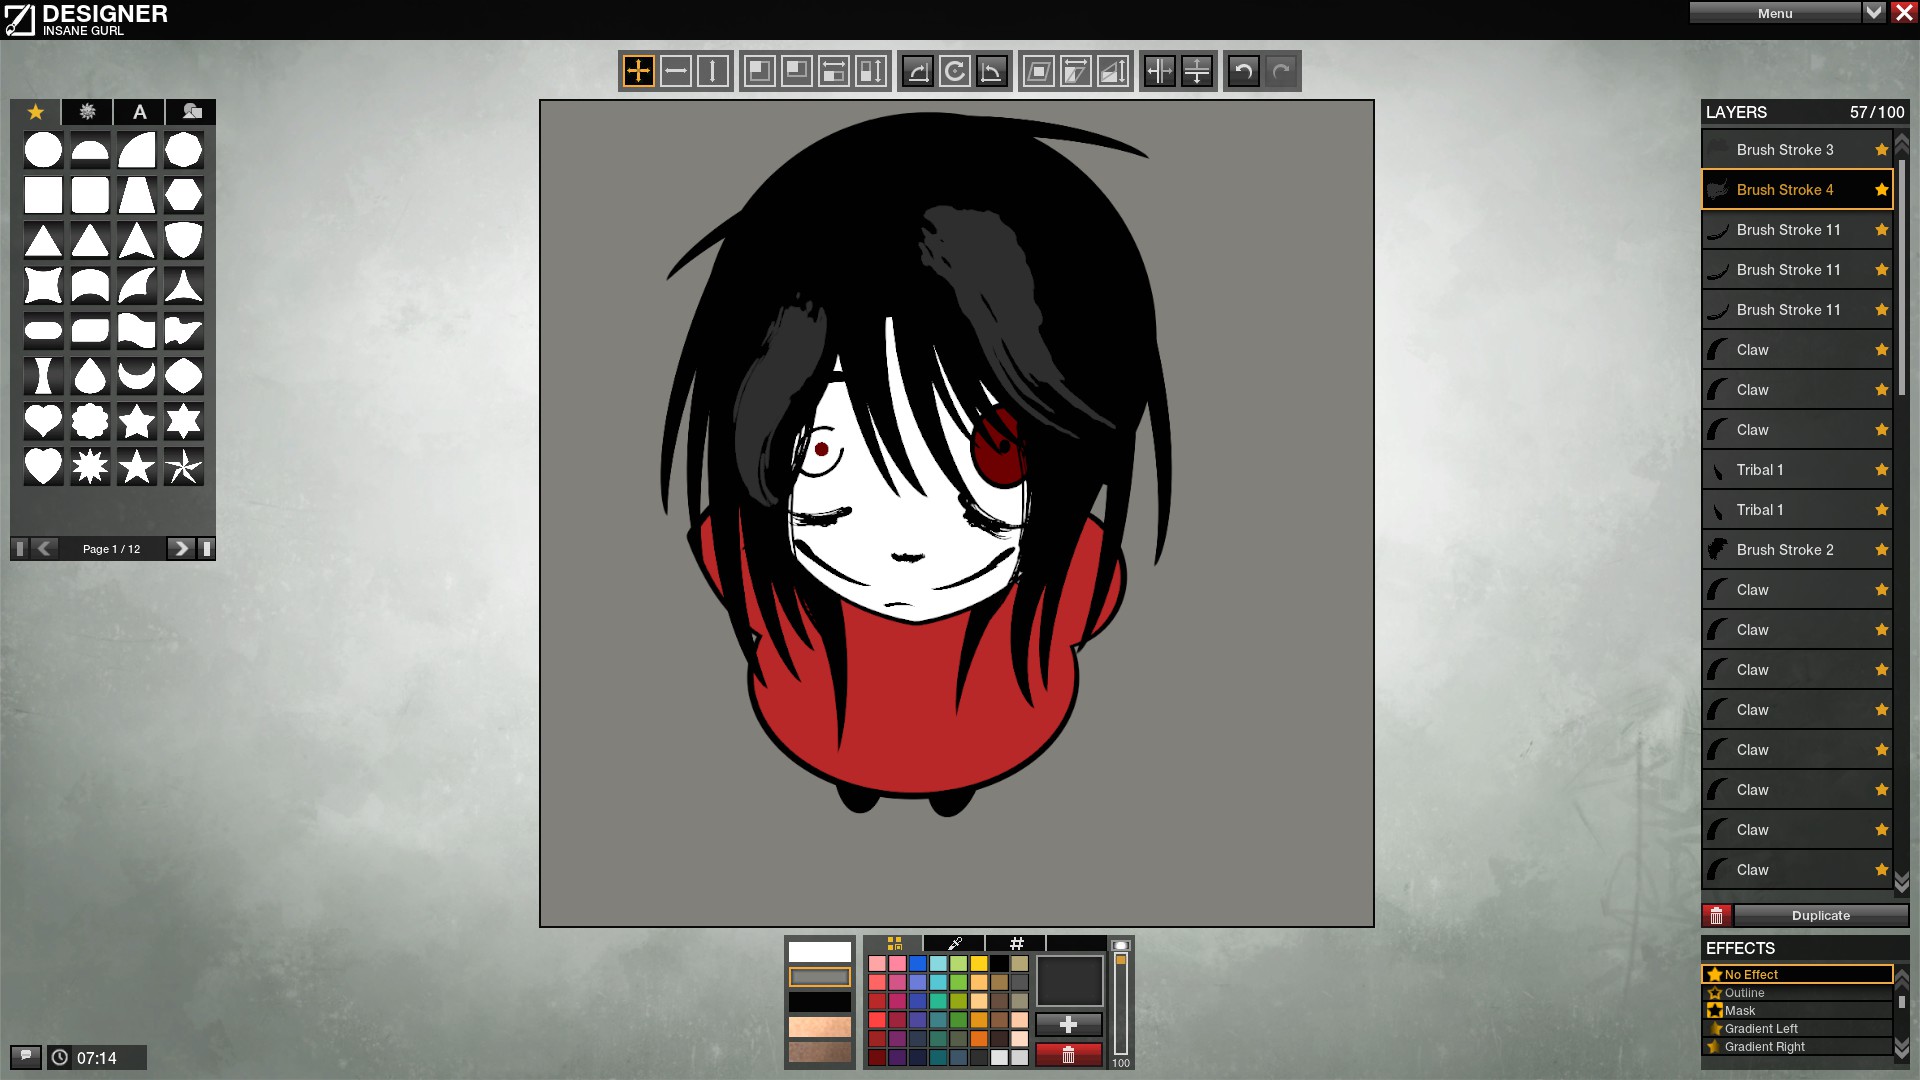
Ofc it is not good enough for selling it, or being proud of it. But it's halfway done. Now we can just add some details on our body. Just red dress looks too much simple. How about stripes? And shadows? As shadows you can use same colour but a bit darker, or just black with low opacity. But if you place 2 low opacity layers on each other it will show borders, what will destroy your symbol looks. That why i just using more darker version of same collor.
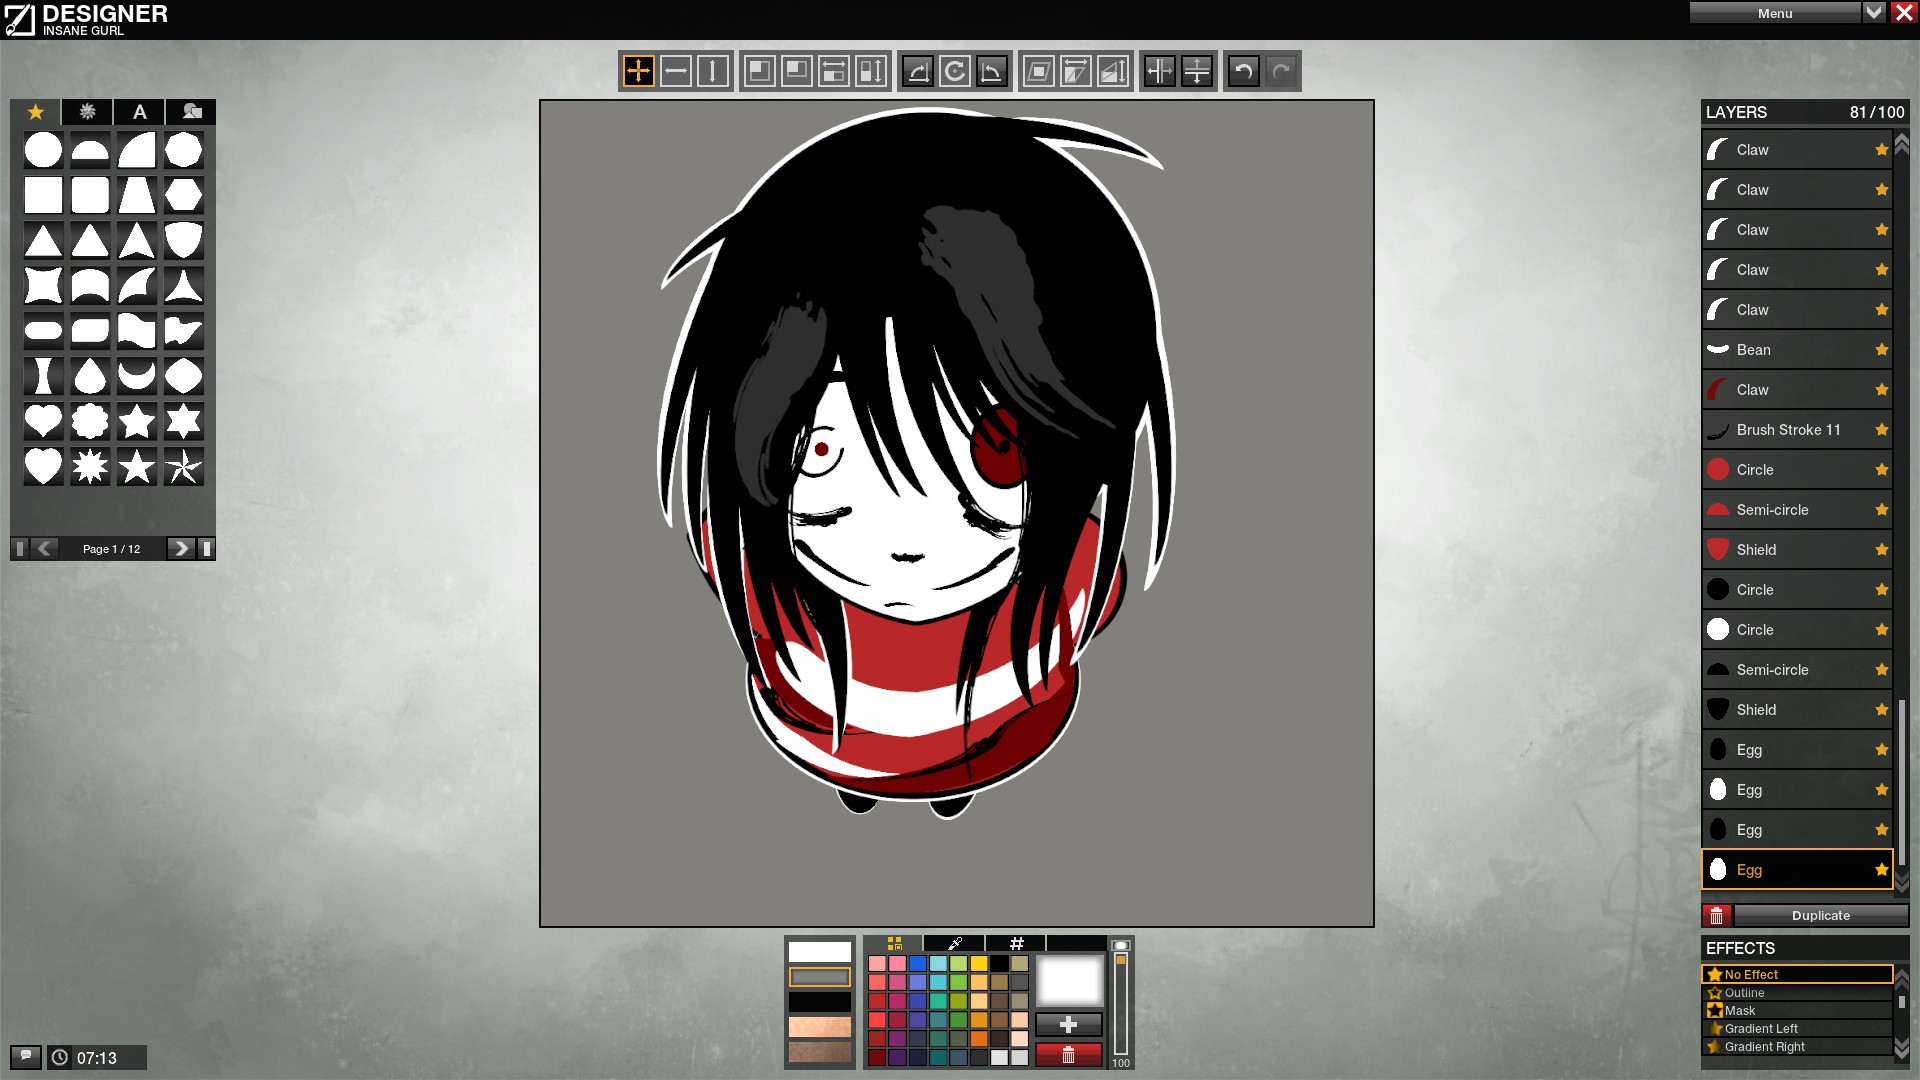 Actually work is done. You have head and body. Now you can just improve it, but remember, low details will not appears on ingame billboards. So, no point to create high detailed symbol. Some little parts can me missed :D But it's not that bad, so you dont need spending your layrs on em. And just can use more of it to customization. As example i just added hummer, because left too much free layers. Or just add some Fonts? Or spend it on background? Up to you!
Completed Symbol
After you finish your symbol, you can use it everywhere.
Body tattoo, Vehicle paint, Clothes decal. Yes. And ofc you can put your symbol on billboards, to show how awesome are you to others.
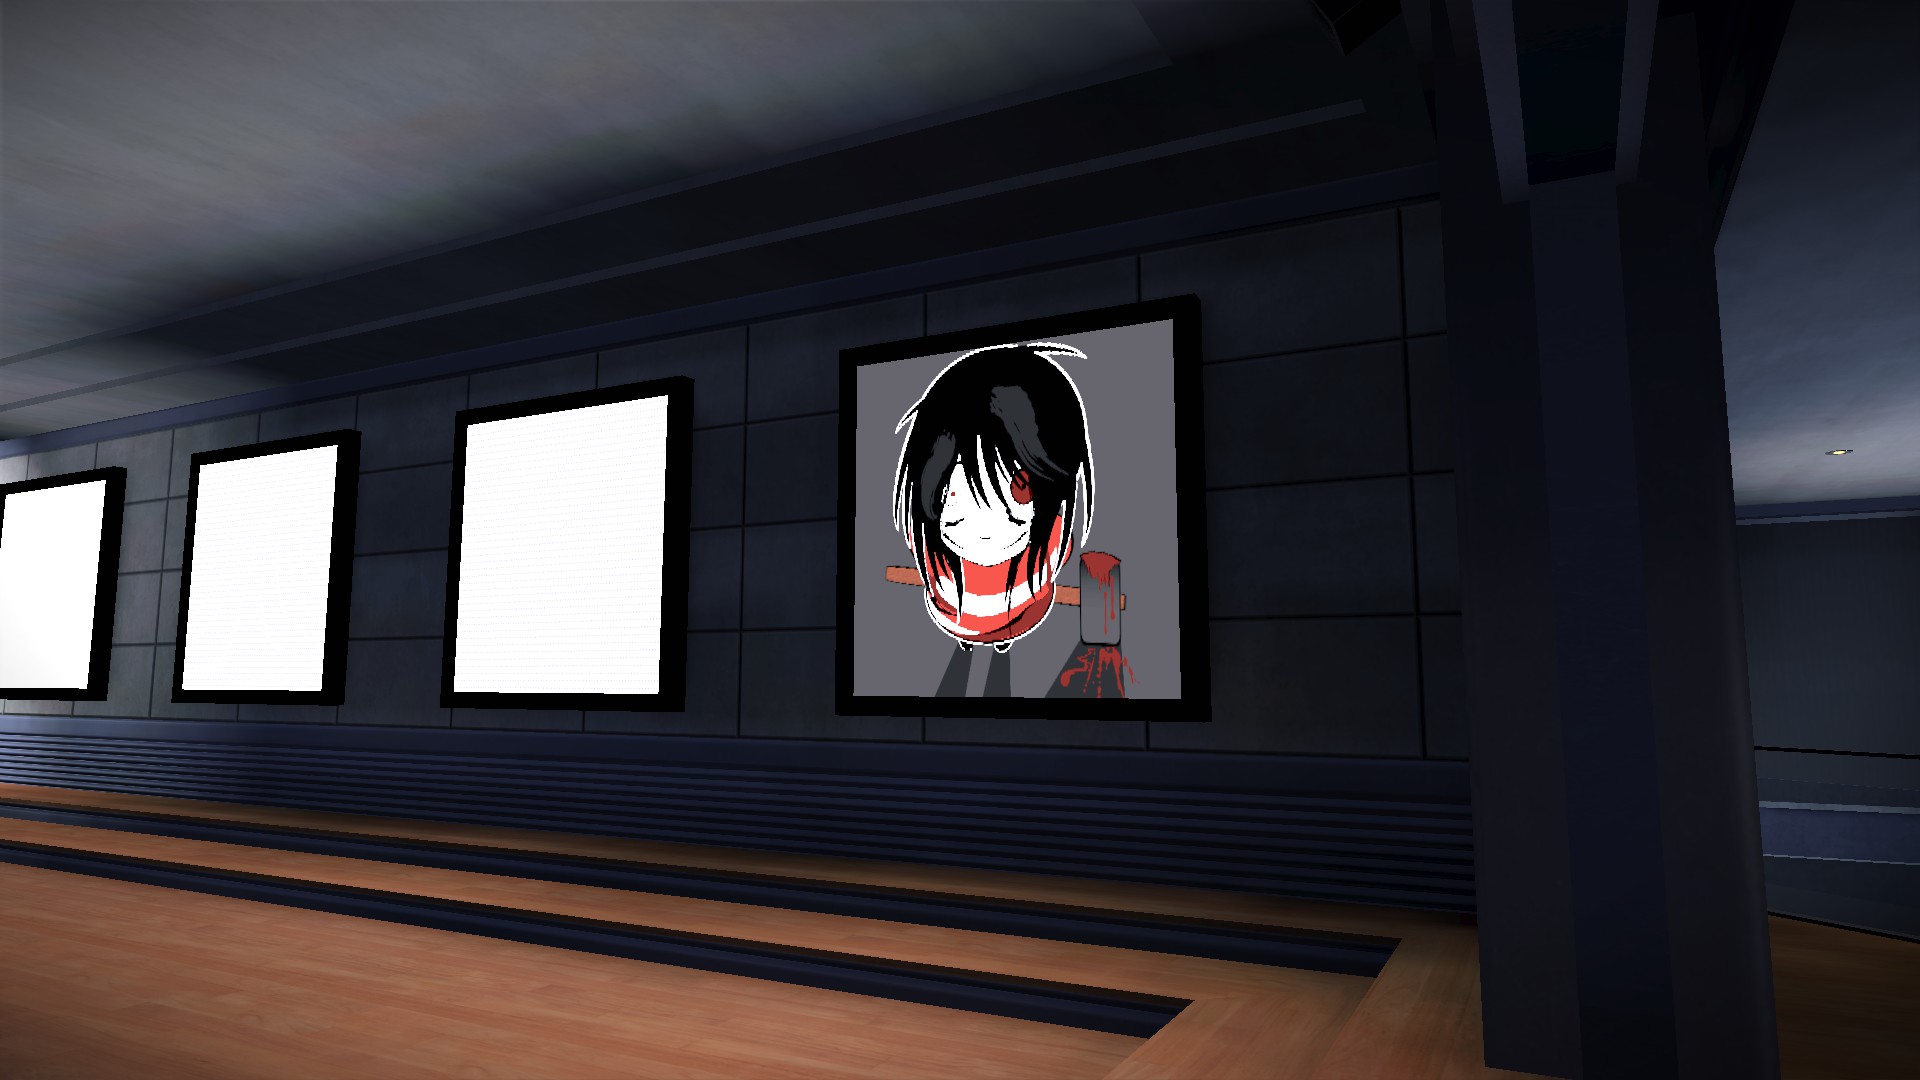
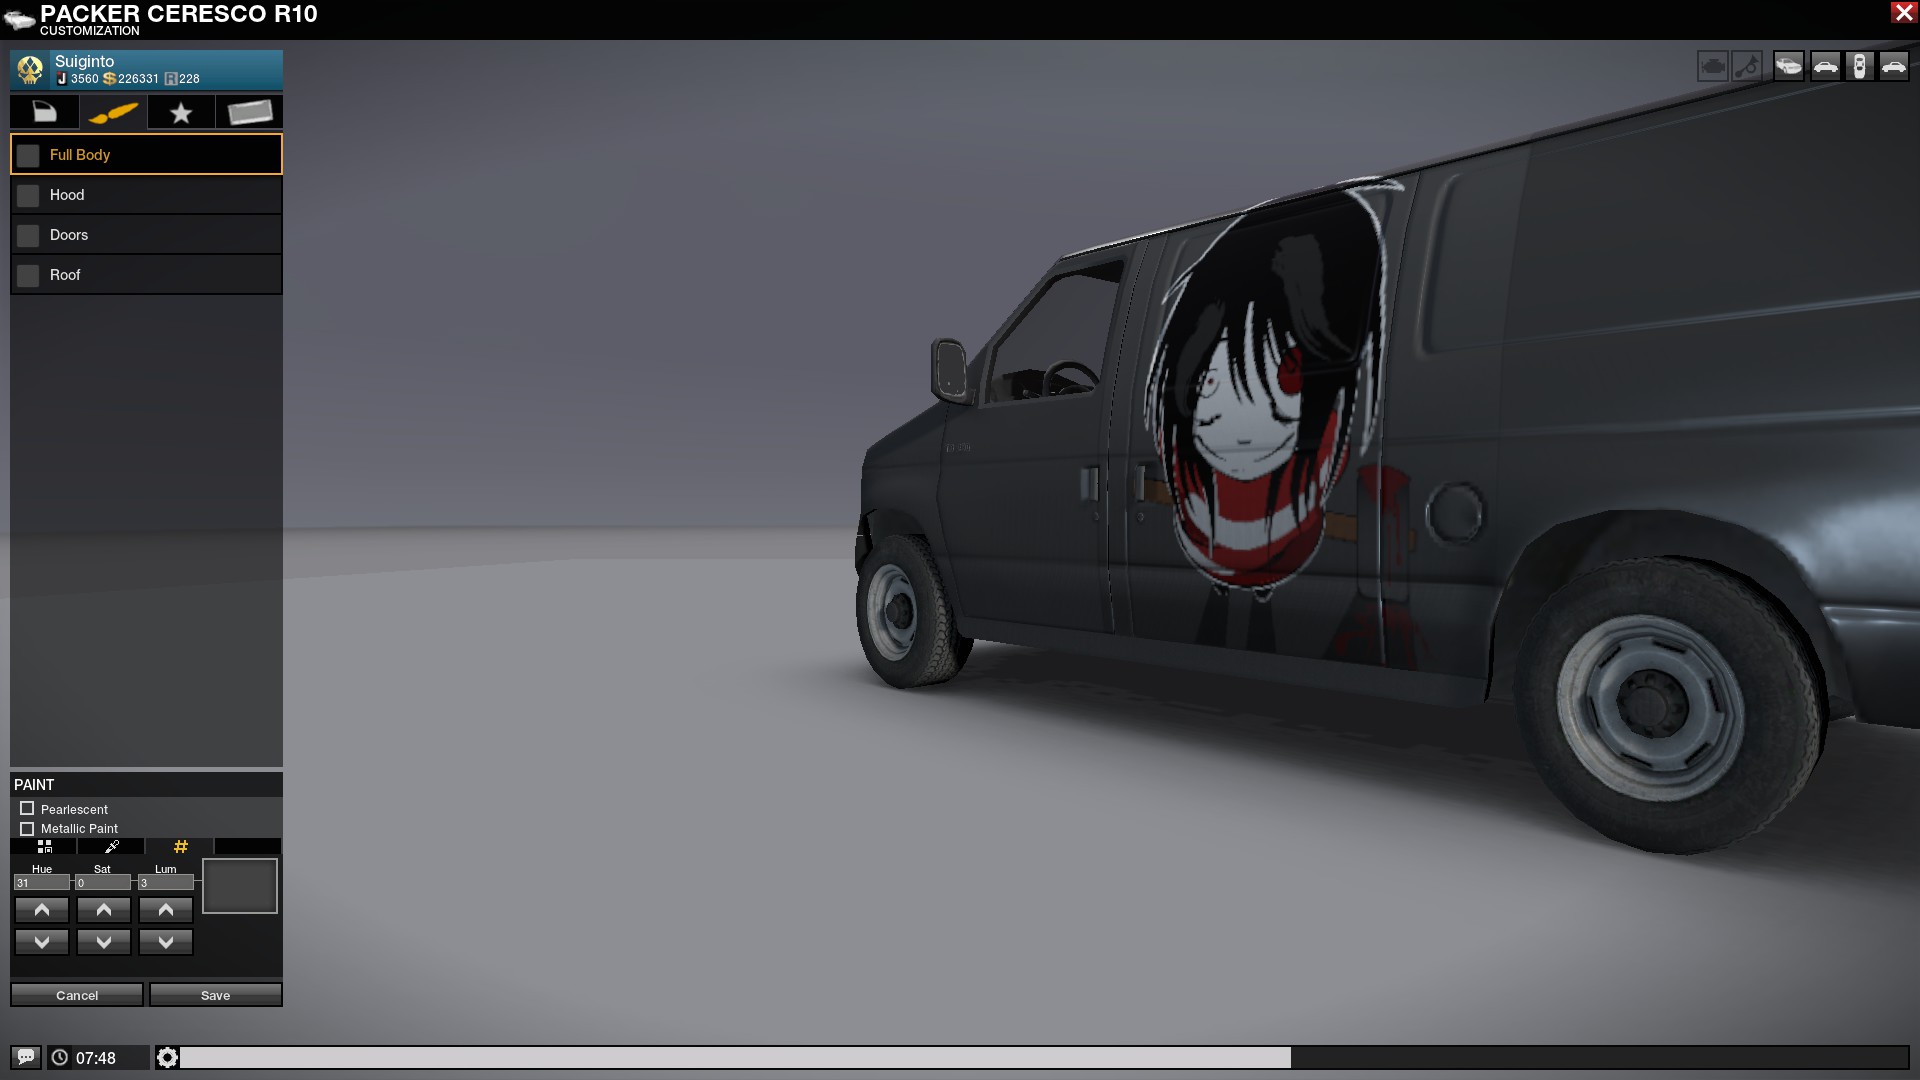
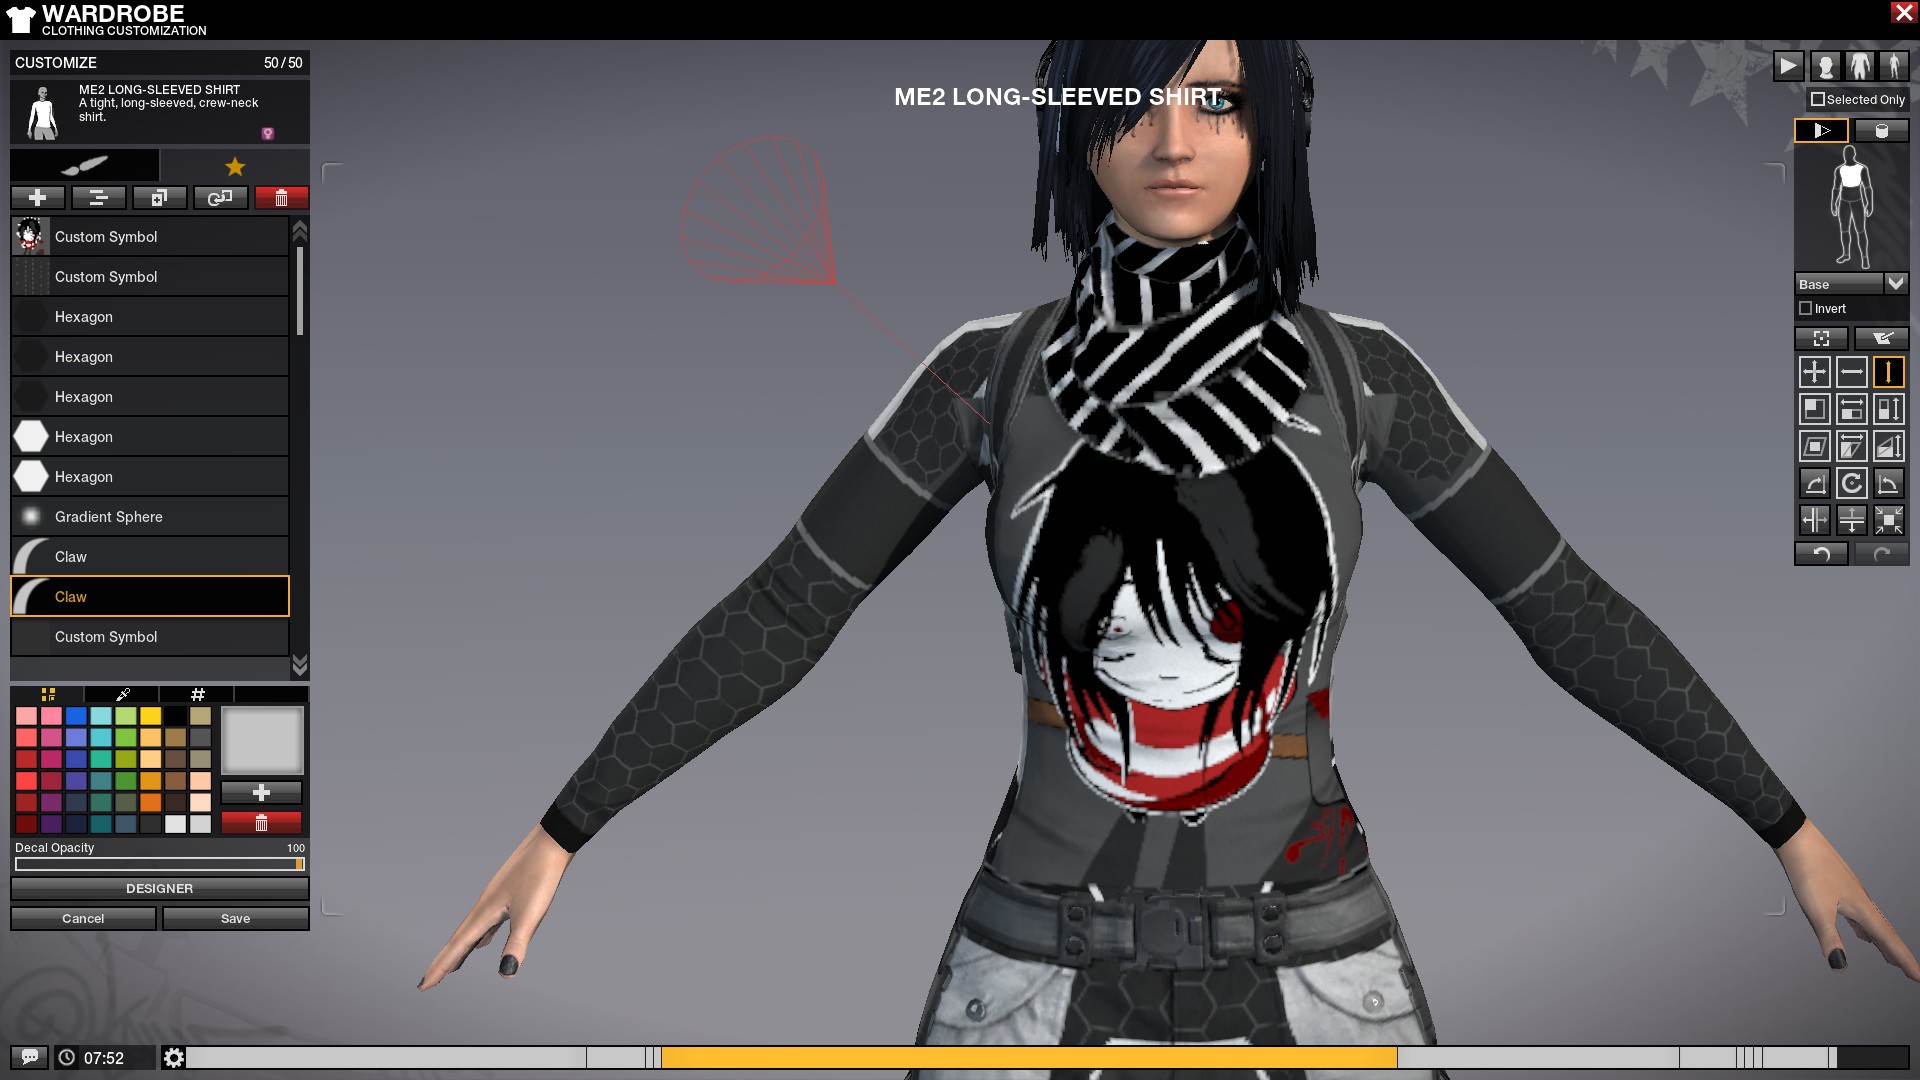
i hope it helped you, and now you can do your own awesome designs. Enjoy!
Body tattoo, Vehicle paint, Clothes decal. Yes. And ofc you can put your symbol on billboards, to show how awesome are you to others.
i hope it helped you, and now you can do your own awesome designs. Enjoy!
Credits
Thank all who was friendly and helped me with this. We are hope you will enjoy this game, as we did.
More APB Reloaded guides
- APB Reloaded - FREE CODES *2020*★ 5 (2.8k)57k views2.9k ♥1 minUpdated Apr 12, 2021
- (23rd January 2015 update) APB:R WEAPON GUIDE, TIPS, AND HOW TO AVOID NEWBIE TRAPS★ 5 (558)26k views637 ♥193 minUpdated Jan 25, 2015
- APB:R Vehicle Guide for the absolute dummy★ 5 (216)17k views236 ♥67 minUpdated Feb 4, 2015
- 「2026」Flaws' APB Guide★ 5 (431)14k views398 ♥59 minUpdated May 24
- Totally awesome guide to git better at APB! [Beginner to Advanced]★ 5 (228)9.9k views218 ♥47 minUpdated Aug 31, 2024
- Как получить "OCA Nano".★ 4 (84)9.4k views96 ♥1 minRussianUpdated Jul 6, 2016


This guide was created by its original author on the Steam Community. Are you the author and want it removed? Request removal.