Overview
Continuation of the Asset Creation guide series. This is part 4 which will cover file management, efficient practices, batch importing and hosting solutions.
Introduction
This part of the guide series will be focusing on managing your files, speeding up your work and using the better tools and practices. I will be covering how to work with local files, batch importing and hosting/uploading among other important game component topics.
Local Files
Working with local files before publishing can be greatly beneficial to your workflow, especially if your assets need to go through several revisions and changes. Files are grabbed and loaded in to memory when you load up the mod.
This is useful in building large sets of assetbundles, changing decks or sets of tokens, as reloading the save is far less clicks than re-importing hundreds of individual assets.
Since these files are now loaded locally, if we change the asset and overwrite it we can “refresh” the changes you’ve made by saving your progress, navigating back to the main menu then loading up the mod again. This requires the “Mod Caching” option to be enabled.
I believe the exiting to the main menu step is necessary due to the way the game handles assets loaded in to memory, keeping them cached until you exit.
Name and Folder Structure
Forward thinking is the key to efficiency, doing important things ahead of time can save you some serious headaches later down the road.
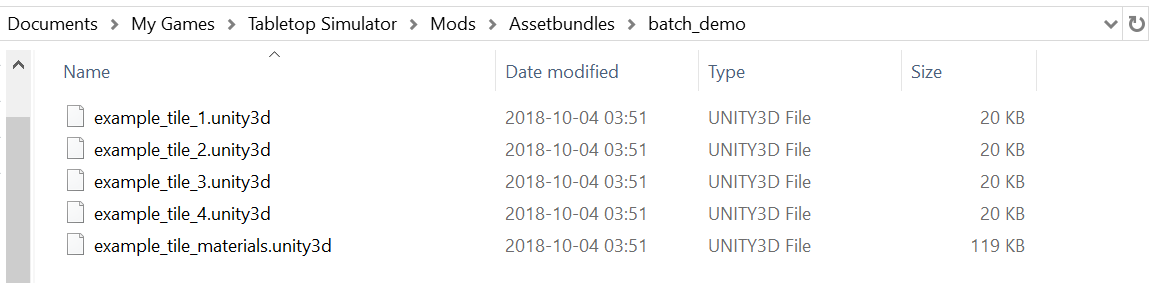
For both batch importing and your own sanity, using a sensible naming structure that you can also work with programmatically is highly beneficial. Make use of local files and subfolders, categorize files by types and number large sets of repetivie assets.
While you can copy and paste file names in to a list for your batch importer, it’s far quicker to have numbered your assets (myTile1, myTile2 e.t.c) ahead of time and let the LUA script handle incrementing the number for you.
In windows, without using any scripts you can select a group of files and rename them to automatically assign a number after the name.
Batch Importing [LUA]
Batch importing is when you programatically load in large sets of components in order to save you the time and hassle of doing it manually.
In TTS we will be doing this using LUA, and the following section expects you to have a modest grasp on the fundamentals of scripting. That said though if you really are clueless and unwilling to learn you can also just copy and paste the script.
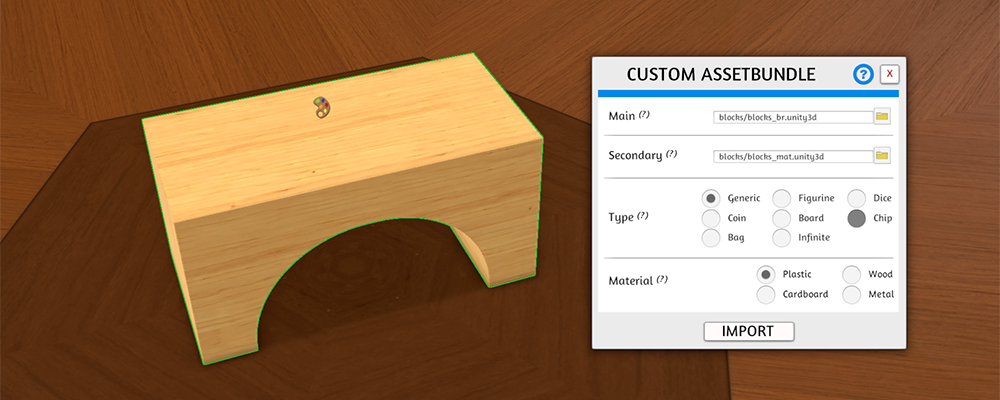
In my example I will be using Assetbundles (which are the main focus of these guides). You can modify the script to work with the .obj importer or generated assets.
The assets are in our local TTS directory so we don’t need to point to the full path.
We will be using a for loop with spawnObject() and setCustomObject() to import this set.

For modifying the code to work with other types of assets, refer to the TTS LUA docs:
This code is also available as a tool here:
[link]
Uploading and Compression
For other users to be able to access your files they need to be uploaded and hosted somewhere.
But not all filehosts are created equal and most are not made with the intent to upload high quality textures as much as they are for sharing facebook memes. Compression and optimization is important too, we only need to use up as much bandwidth as we need.
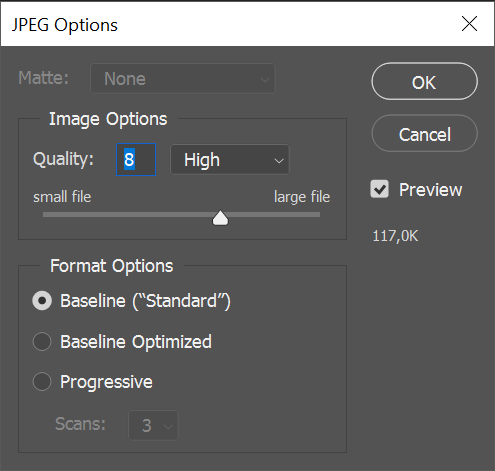
Compression doesn’t have to be rocket science, tools like Photoshop give you an easy to use slider with a live preview of the result and filesize. There is no strict right or wrong in which settings to use, a middleground between retaining quality and reducing filesize is typically what you’re looking for. An image in the tens of megabytes is probably a fair bit too large, but we don’t want to compress it to the point where the image looks substantially worse.
When it comes to hosting solutions, the main bad apples that I am aware of are Imgur, Pastebin and Photobucket. These sites were viable compromises before the addition of the Steam Cloud as they are free and sometimes “modestly reliable” but should be avoided if you care about the quality of your images or integrity of your data. On top of absolutely destroying your images with bad compression there are no benefits to using them when the option of the Steam Cloud is available to you.

A good option that is open and available to everyone with a copy of the game is the built in Steam Cloud. You can access it in game from the “Upload” button.

Conclusion
Modding doesn’t have to be a tedium, doing things properly the first time around will prevent many problems and lackluster results later on.
You can find the previous guides here:
[link]
[link]
[link]
[ PATREON ][www.patreon.com]
Thanks to my current and past Patreon supporters for supporting my work
- Jeremy. S
- Platypus
- Corrodias
- Ash Black
- Connor
Official Discord: [link]