Overview
A guide aimed at beginners. I try to just cover the basics without going into deep details but I fail fairly often. ;)Steam doesn’t allow sub-sections so I’ll try to group things with funky graphical characters in the section headers.
The Main Menu – Getting Started
Campaign Given that you’re reading this guide, this is where you want to go. This has the full story plus a little tutorial on how to move. When you start the campaign, you’ll be asked if you want the standard campaign or custom. The custom option lets you play around with difficulty settings. If you’ve never played squad-based, turn based tactical games before, you can use this to set up an easy mode. If you’ve played them a lot, you can use this to up the difficulty a bit. Just don’t go crazy as this game can get fairly hard even in normal mode.
Career This is for folks who’ve played the campaign already. It dispenses with the main story and gives you short stories, called Flashpoints, instead. (Flashpoints also show up in the main campaign after you’ve finished the story.) In career mode, the object is to get as many points as you can in a set number of days. You can play beyond the number of days just like you can keep going past the campaign but the score is figured at 1200 days.
Skirmish Skirmishes are quick battles where you can set up fights against the AI or other players. There’s also a “lab” where you can practice changing out weapons and armor for most `mechs in the game. It’s not a bad place to practice. But then, so is simply playing the game then re-loading when you mess up.
Save games are a little bit strange in BattleTech. You can save at any time and the game will also autosave before every battle, after every battle, and when your monthly financial report shows up. The thing that’s strange is that your saves don’t overwrite each other. If you make a save called “Got Lucky” after you got a lucky head shot, then got another lucky shot and tried to save over “Got Lucky”, you’ll find that you’ve actually made two saves with the same name.
The saves are sorted with the newest at the top of the list but, if you’re saving a lot, you can find yourself with a LOT of save files after a few dozen hours of play. You can wipe them out quickly by clicking the Load Game button, clearing the option at the top to not warn you, then using the X’s on the right to delete them. Just don’t go too crazy! I haven’t heard about any corrupted save game files lately but that doesn’t mean they can’t happen.
╔ The Battles
The battles are the heart of this game, so let’s get right to them.
╟ Who’s Turn Is It??
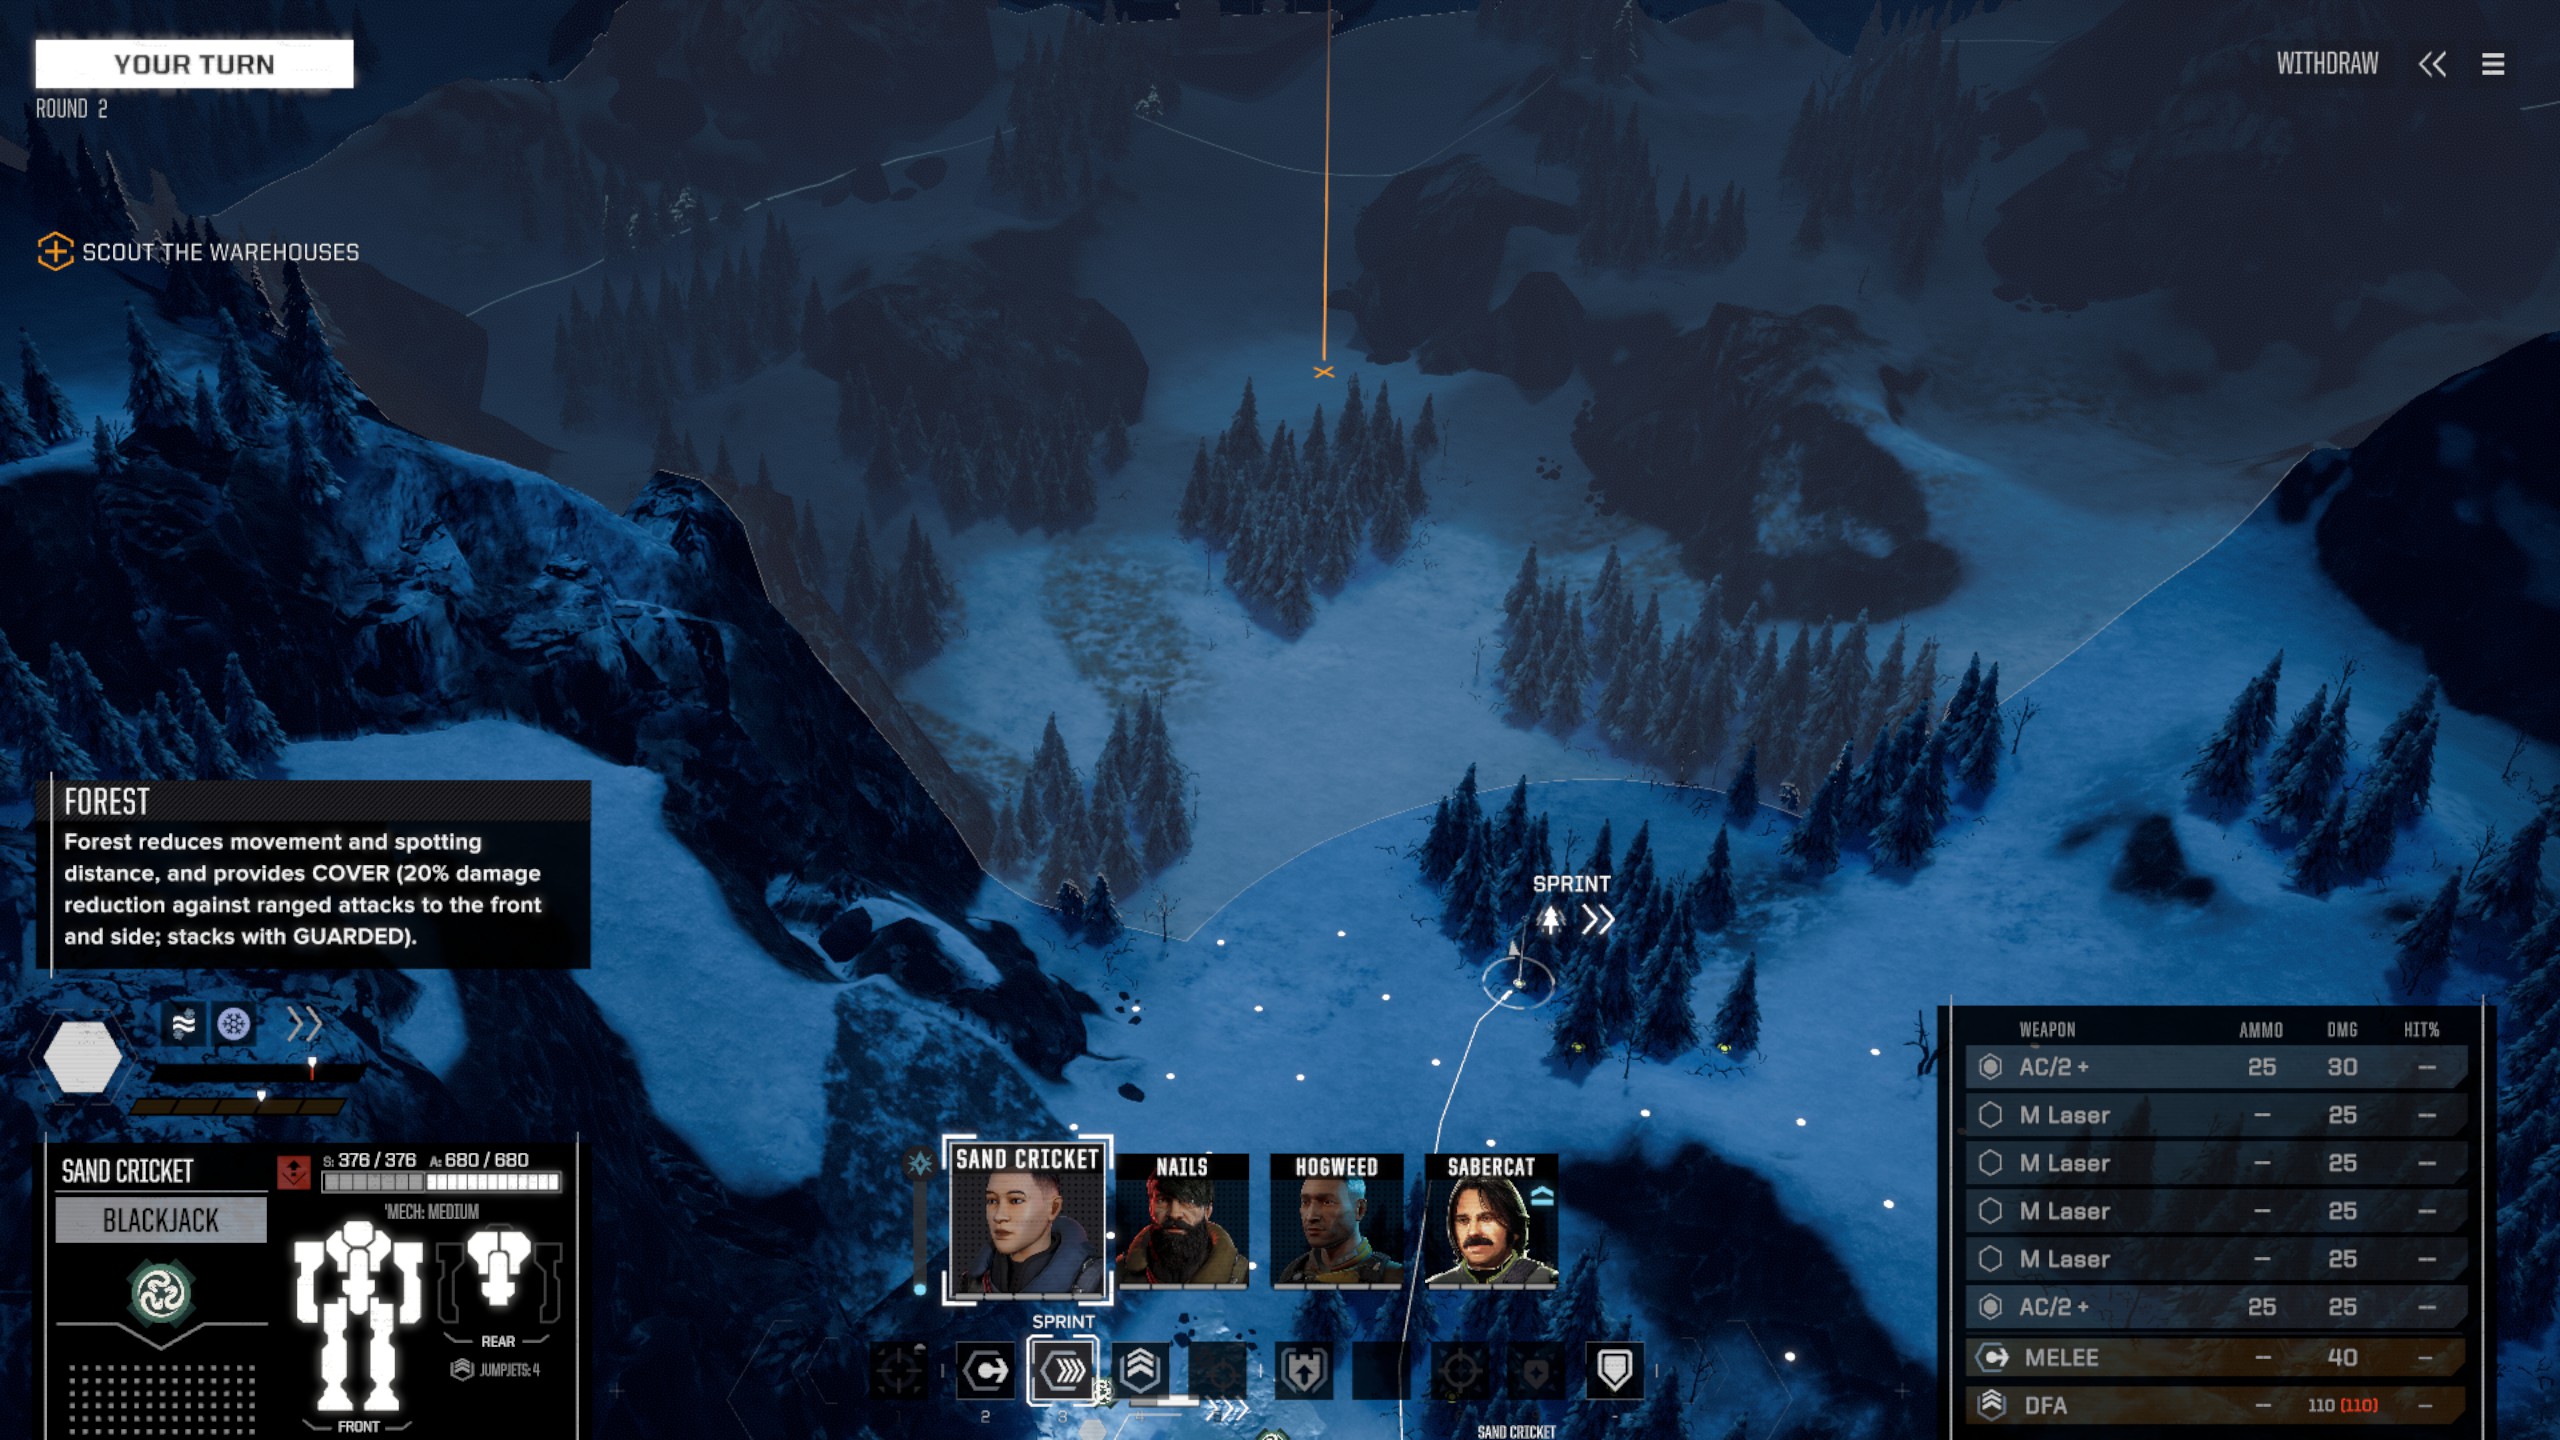
When you’re plopped down on a planet, you’ll start out being able to move any unit you want. You don’t even have to wait for each one to finish – you can have all four lumbering along at the same time. By default, each one will sprint. Even if you switch to a normal move, you won’t be able to use any special abilities when you finish moving. This will keep going until an enemy unit is spotted. Once an enemy is spotted, all units that haven’t moved will still be in free move mode but, as soon as all have moved, the game switches to phased mode.
The phases are divided up so that light `mechs go first, then mediums, then heavies, then assault. Turrets seem to always go in the assault phase. Nice, simple, and easy to understand, right? Well, there’s also a lot of modifiers. There’s a high level tactics skill that lets you go one phase early, getting knocked down makes you go one phase later, and so on. Keep an eye out for them as they can be quite helpful (or hurtful).
Being first in line doesn’t mean you HAVE to go first, though – it just means you can go first. You can click the “Reserve” button and have your units go later. Just keep hitting reserve and every unit that hasn’t done anything yet will keep waiting. (In the last phase, the button changes to Done. If you click that, everyone just stands still and uses the brace option.)
There’s a few reasons to do use the reserve system. One is when you’re out of range of the AI and you don’t really want to run into range to get blasted. Another is a bit cheesier: if a unit that would normally move first uses the reserve option to move last, then that unit can take its turn and then, because it’s first in line for the next round, it gets to take its turn again in the next round before the enemy can do anything about it. It’s like getting two turns in a row!
╟ Ways to Get Hurt
Damage
The most basic way to get hurt is obviously getting damaged. Your `Mech is divided up into several sections (legs, arms, head, torso sides, and center). Each of those sections has an armor value on it. Whenever you get hit with damage, it gets applied to one of those sections. Once the armor for the section is gone, it starts taking structural, internal damage. Once the structural points are gone, so is that part of the mech.
For the arms, destruction means the arm falls off along with anything mounted in that arm. For a side torso, that mean everything mounted in that part is gone, the pilot gets injured, AND the arm falls off! For a leg, that means the leg barely functions (sorry, no hopping, one-legged battlemechs in this game) and the `mech falls down. If the center torso or the head is destroyed, the `mech is destroyed and the pilot is probably killed. (Your main character can’t be killed. Your mechwarriors may or may not die, depending on their Guts stat and the luck of the dice.)
Stability
Some weapon types make your `mech go wobbly. This is represented by yellowish bar with a white outline around it located above each unit. Once this bar fills up, the `mech will fall over. A `mech that has fallen down will be in a world of hurt! Anybody shooting at it can pick what part they want to aim for (a “called shot”) plus the `mech will have to wait an extra phase before moving again. On the plus side, its rear armor is completely protected – all shots are taken from the “front”.
There’s also a little indicator about half way along the bar. If the stability gets past the little indicator, the `mech has become unstable. Unstable `mechs get a few penalties, like being unable to sprint.
Unlike damage, stability will “heal.” As long as you don’t use your jump jets, you’ll get one point back when you take your turn. If you stand still, you’ll get another point back. If you brace, you’ll clear out the whole bar.
Note that you can’t make a `mech fall over with one single attack even if you completely fill its stability bar. First you have to make the `mech unstable. Once that happens, filling the bar the rest of the way will make the `mech fall down. If you fill the bar all the way up on a `mech that is stable, it will just make it go unstable. You’ll need to hit it with an attack from another `mech to knock it over – even if it’s just one missile.
Heat
Flamer guns and Inferno missiles can do heat damage to you but you’ll mostly be doing this type of damage to yourself. Nearly every weapon generates some heat when fired. `Mechs can dissipated this heat through heat sinks but, in a pitched battle, most `mechs generate more than they can dissipate. The red bar (with no white outline) tells you how much heat you’ve generated. When it gets to its little marker, you start taking structural damage from the heat. If it actually fills all the way up, your `mech will shut down! That’s a lot like falling over, except you don’t have a planet protecting your back. You’re just a great, big, glowing target until your `mech can cool off and restart its engines.
One thing about heat damage is always a bit confusing: it doesn’t do any armor damage so, when you’re fighting in a battle, the only indication that you’ve even taken damage is in the little squares showing your structural points. However, when the battle ends and it shows you how all your `mechs did, a `mech that took heat damage will have every single part in red because every single part took some internal damage.
Pilot Damage
The little meatbags driving your glorious robot warriors are pretty easy to hurt. If your `mech falls down, the mechwarrior gets hurt. If a side torso explodes, the mechwarrior gets hurt. If the head is hit AT ALL, the mechwarrior can be hurt, too. The hit doesn’t have to get through the armor, it just has to hit the head and there’s a chance the mechwarrior may be hurt. These can really drive you crazy, especially in the early parts of the game where it takes four weeks to heal even one hit.
You can counter these with a very useful piece of equipment called a cockpit mod. You want these. You want these very badly! You can sometimes find them in the stores for planets with manufacturing but they can show up as loot, too. Just make sure you scroll down far enough to see them.
If your mechwarrior takes enough damage to lose every hit point, that pilot dies. Probably. There’s actually a chance you’ll find them seriously wounded back on the ship after the battle but don’t bet on it.
╟ Basic Weapons
Scattered vs. Concentrated
A central concept in BattleTech is weighing concentrated damage against scattered damage. Consider an AC/20, which does 100 damage vs. four medium lasers, which do 25 damage each.
- When the AC/20 hits, it’s going to hit ONE point on the target and damage it severely. The lasers will be lucky to do 50 points to one piece and could very well just scratch four different parts. (This is less of a problem when shooting at the back or side of a `mech, or at a vehicle because they have fewer parts to hit.)
- When the AC/20 misses, it’s going to do 0 damage (well, unless you get lucky with a stray shot hitting some other target). Even if there’s only a 50% chance of hitting, the lasers are likely to at least do something.
- If you’re trying to destroy a `mech that’s taken one big hit to the center torso so it only has 20 points left there while the rest of the locations are untouched, the lasers have a much higher chance of finishing the target. (Precise Shot can counter this somewhat, especially in the late game.)
- If you’re not trying to completely destroy a `mech (see the salvage section below), you have the option to fire fewer lasers if you want. Similarly, if you’re `mech is getting hot, you can fire just one laser.
- If you’re just blasting away and get a lucky head shot, the AC/20 stands a good chance of blowing the head off completely, leaving 3 `mech pieces behind.
Medium Lasers
This is the most basic weapon in the game. They are incredibly common and with good reason. They do OK damage, have an accuracy bonus, and never run out of ammunition. Range isn’t huge but it isn’t bad, either. They do generate a good bit of heat and do no stability damage at all.
Large Lasers
These actually only generate 50% more heat than a medium laser (18 vs. 12) but do more damage at longer range. They still don’t have a minimum range, either. They weigh 5 tons instead of just one, though.
Particle Projector Cannons (PPCs)
Half laser, half lightning! This does more damage at even longer range that the large laser. It doesn’t have the accuracy bonus but it does cause the target to lose accuracy. It also causes some stability damage. However, the weapons is heavy and generates almost twice as much heat as a large laser.
Short Range Missiles (SRM)
Missiles come in groups. An SRM2 shoots 2 missiles at once while an SRM6 shoots 6. Each short range missile does 8 damage. Each missiles is also treated as a separate attack so they scatter their damage in a pretty extreme way. They do quite a bit of stability damage and heat isn’t too bad.
Long Range Missiles (LRM)
These are similar to short ranged missiles. In exchange for their longer range, they do half the damage and less stability damage. They only generate half as much heat per missile as the short ranged variety. They can also use “indirect fire” which means they can shoot over buildings and mountains. (Somebody in your group has to be able to see the target, though, or scan it – you can’t shoot at the red blips.) There’s a pretty sever minimum range with LRMs.
AC/2
Autocanons are basically just big guns. They don’t generate much heat but firing them every round will give you a small accuracy penalty. The AC/2 does the same amount of damage as a medium laser but it has a huge range – even longer than the LRMs! They are fairly lightweight for an autocannon and even do a bit of stability damage. They’ve got a nasty minimum range but not as bad as the LRM’s.
AC/5
The stats for the AC/5 are actually pretty similar to a large laser. It does a little more damage for a lot less heat. Its range is longer but it has a 90m minimum range, too. Like all AC weapons, it has an accuracy penalty when fired over and over, too, while the laser has an accuracy bonus.
AC/10
Does more damage than a PPC while only generating as much heat as a medium laser! It’s a good bit heavier than a PPC, though, even before giving it some ammo. Firing it every round has a larger penalty than with the AC/2 and AC/5. Excellent in the later game when the targets move slower and your pilots are better shots.
AC/20
Does the damage of two PPCs! It weighs as much as two PPCs, too, even before you start loading ammunition. It doesn’t generate as much heat, though. One variant of the Hunchback can haul one of these around on its right shoulder so keep an eye out!
Melee
All the fancy weapons are fine but sometimes it’s best to just whack the enemies. Melee can do pretty good damage but be sure to check how much (it’s in the lower right, under your other weapons) because you may be better off simply shooting them. Melee attacks ignore 4 pips of evasion, which make them a nice way to deal with those pesky light `mechs in the early part of the game. They ignore the ‘guarded’ status and cover effects (like trees). They generate no heat, either, so mechwarriors will often use melee attacks when they need to cool down. Vehicles take double damage from melee.
The way you do melee attacks is a little confusing. Targets you can hit with melee have a yellow box around them which is simple enough. After you select the box, though, there may be a few dots next to the target. You can pick one of those dots to pick the direction you attack from. It’s a great way to kick some back!
Death From Above (DFA)
This is the crazy version of melee attacks. Fly into the air and drop right down onto the target! This does even more damage than a normal melee attack but all the damage done to the target is also done to your own legs! It also causes a lot of stability damage to both you and the target.
Make sure you’ve got a backup plan if you try this. It isn’t an easy thing to pull off and, if you miss, you still take all that damage.
Small Weapons
Support weapons are very short ranged but they have a special property: they can fire after doing a melee or DFA attack. The small weapons count as a second attack, too, so doing a melee attack plus shooting a support weapon takes away two evasion points from the target. Of course, they also could hit completely different parts than the melee attack.
Small lasers provide straightforward laser attacks. Flamers are much like small lasers but they do a lot less damage and add heat to the enemy. Machine guns don’t do a lot of damage but, if they hit a part that has no armor, they have a much higher chance of doing critical damage.
╟ Moving – Speed IS Life!
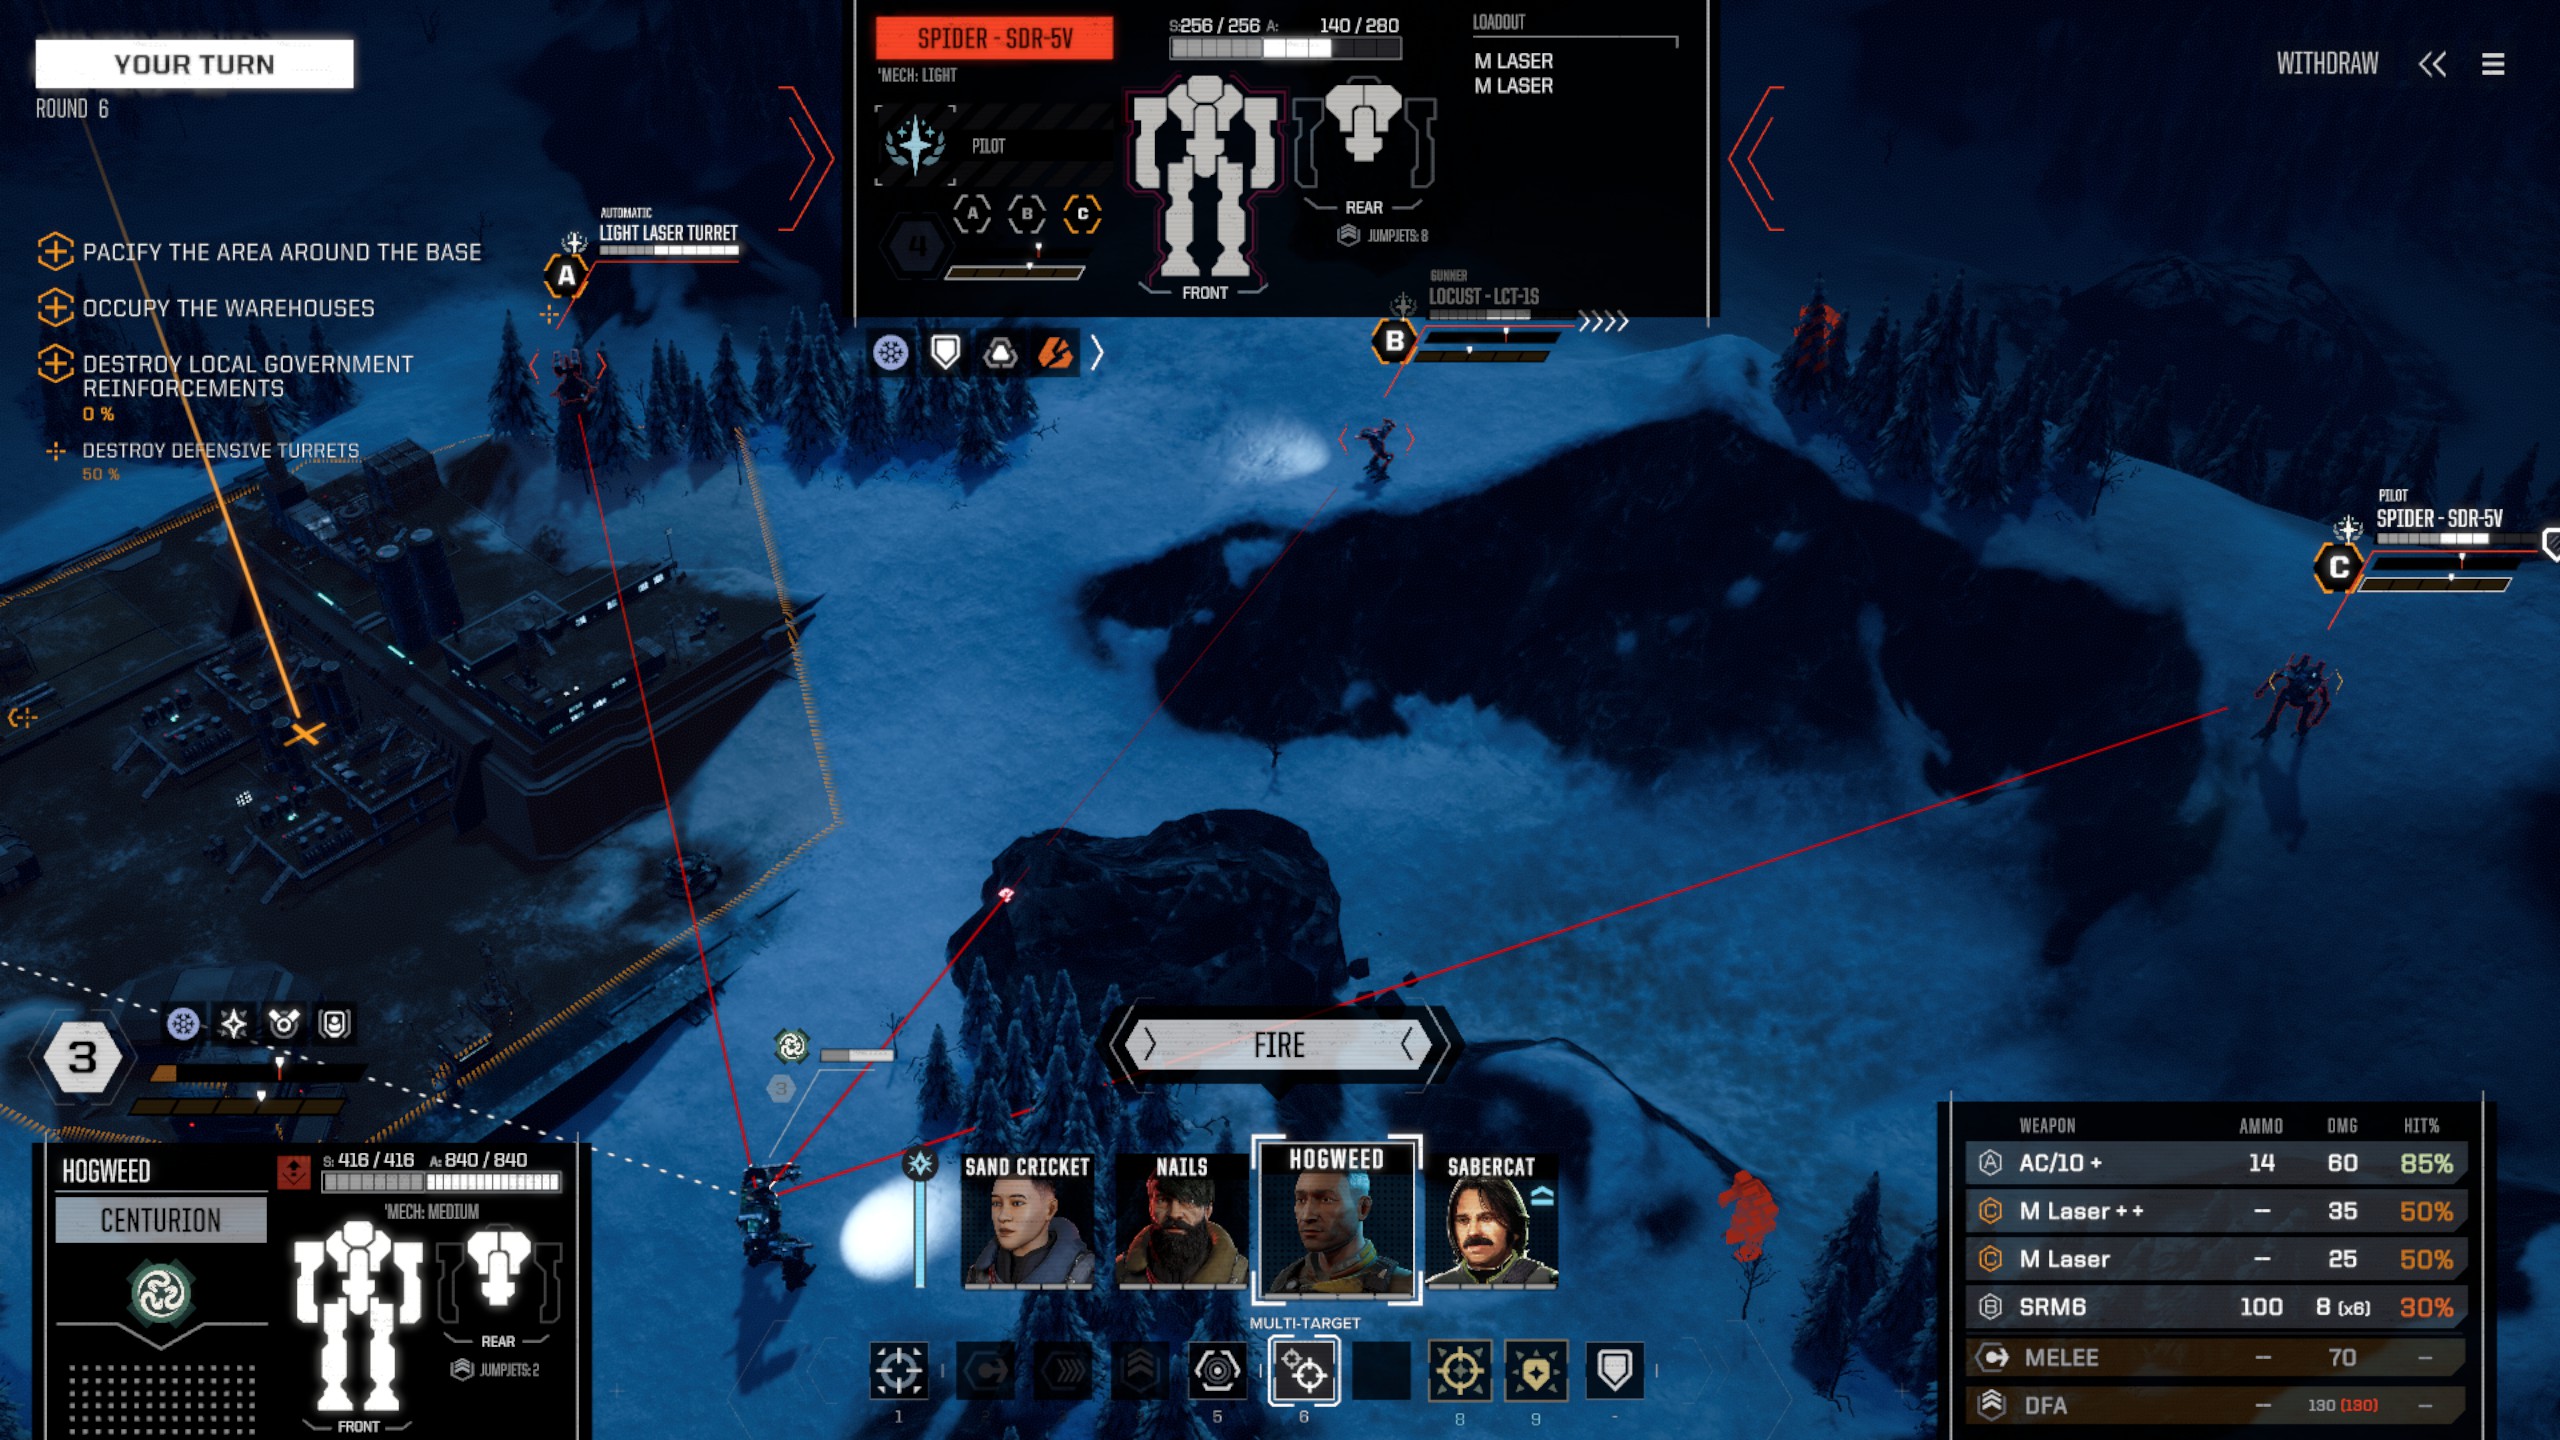
When it’s time to move your `mech, you’ll be given the option to move to many different locations. As you move your pointer around over them, little red lines can pop up between you and an enemy, indicating that you can shoot at that enemy. You might also see white dotted lines, which means you can’t shoot at an enemy (either because your weapon range is too short or you can turn far enough to get them into your firing arc) but they’ve got a shot at you. You’ll also see the terrain description, if any, on the left side above your `mech stats. Be sure to read those descriptions as some types of terrain can make a big difference.
When you click a location, movement switches to facing mode so you can decide which way you want your `mech to point it’s weapons. Typically, you’ll want to face toward as many enemies as you can. That way damage will be scattered over 8 locations. If one side of your `mech has taken more damage than the other, you might want to turn and try to force the enemy `mechs to shoot the less damaged side. Some `mechs have very little of value on one side and will try to use that side as a shield to protect the more valuable weapons/equipment.
Another, more subtle thing that happens at this point is a display of your weapons and sensor range. Sensor range is a blue arc that’s pretty far from your `mech which indicates its max range, assuming your pilot can use the sensors skill. Weapon ranges are harder to interpret as they show all the ranges for all your selected weapons all at once.
Here’s the ranges for medium lasers. The light grey area is optimal range. The barely visible grey area is long range – you can shoot at that range but there’s a penalty on your aim. The light blue line way out in the distance is the sensor scanning range.
Now here’s the ranges for an AC/2 – quite a lot further than the medium lasers! There’s also a clear area close to the center. That’s the minimum range of the AC/2. You can’t shoot within that range.
Then there’s both put together.
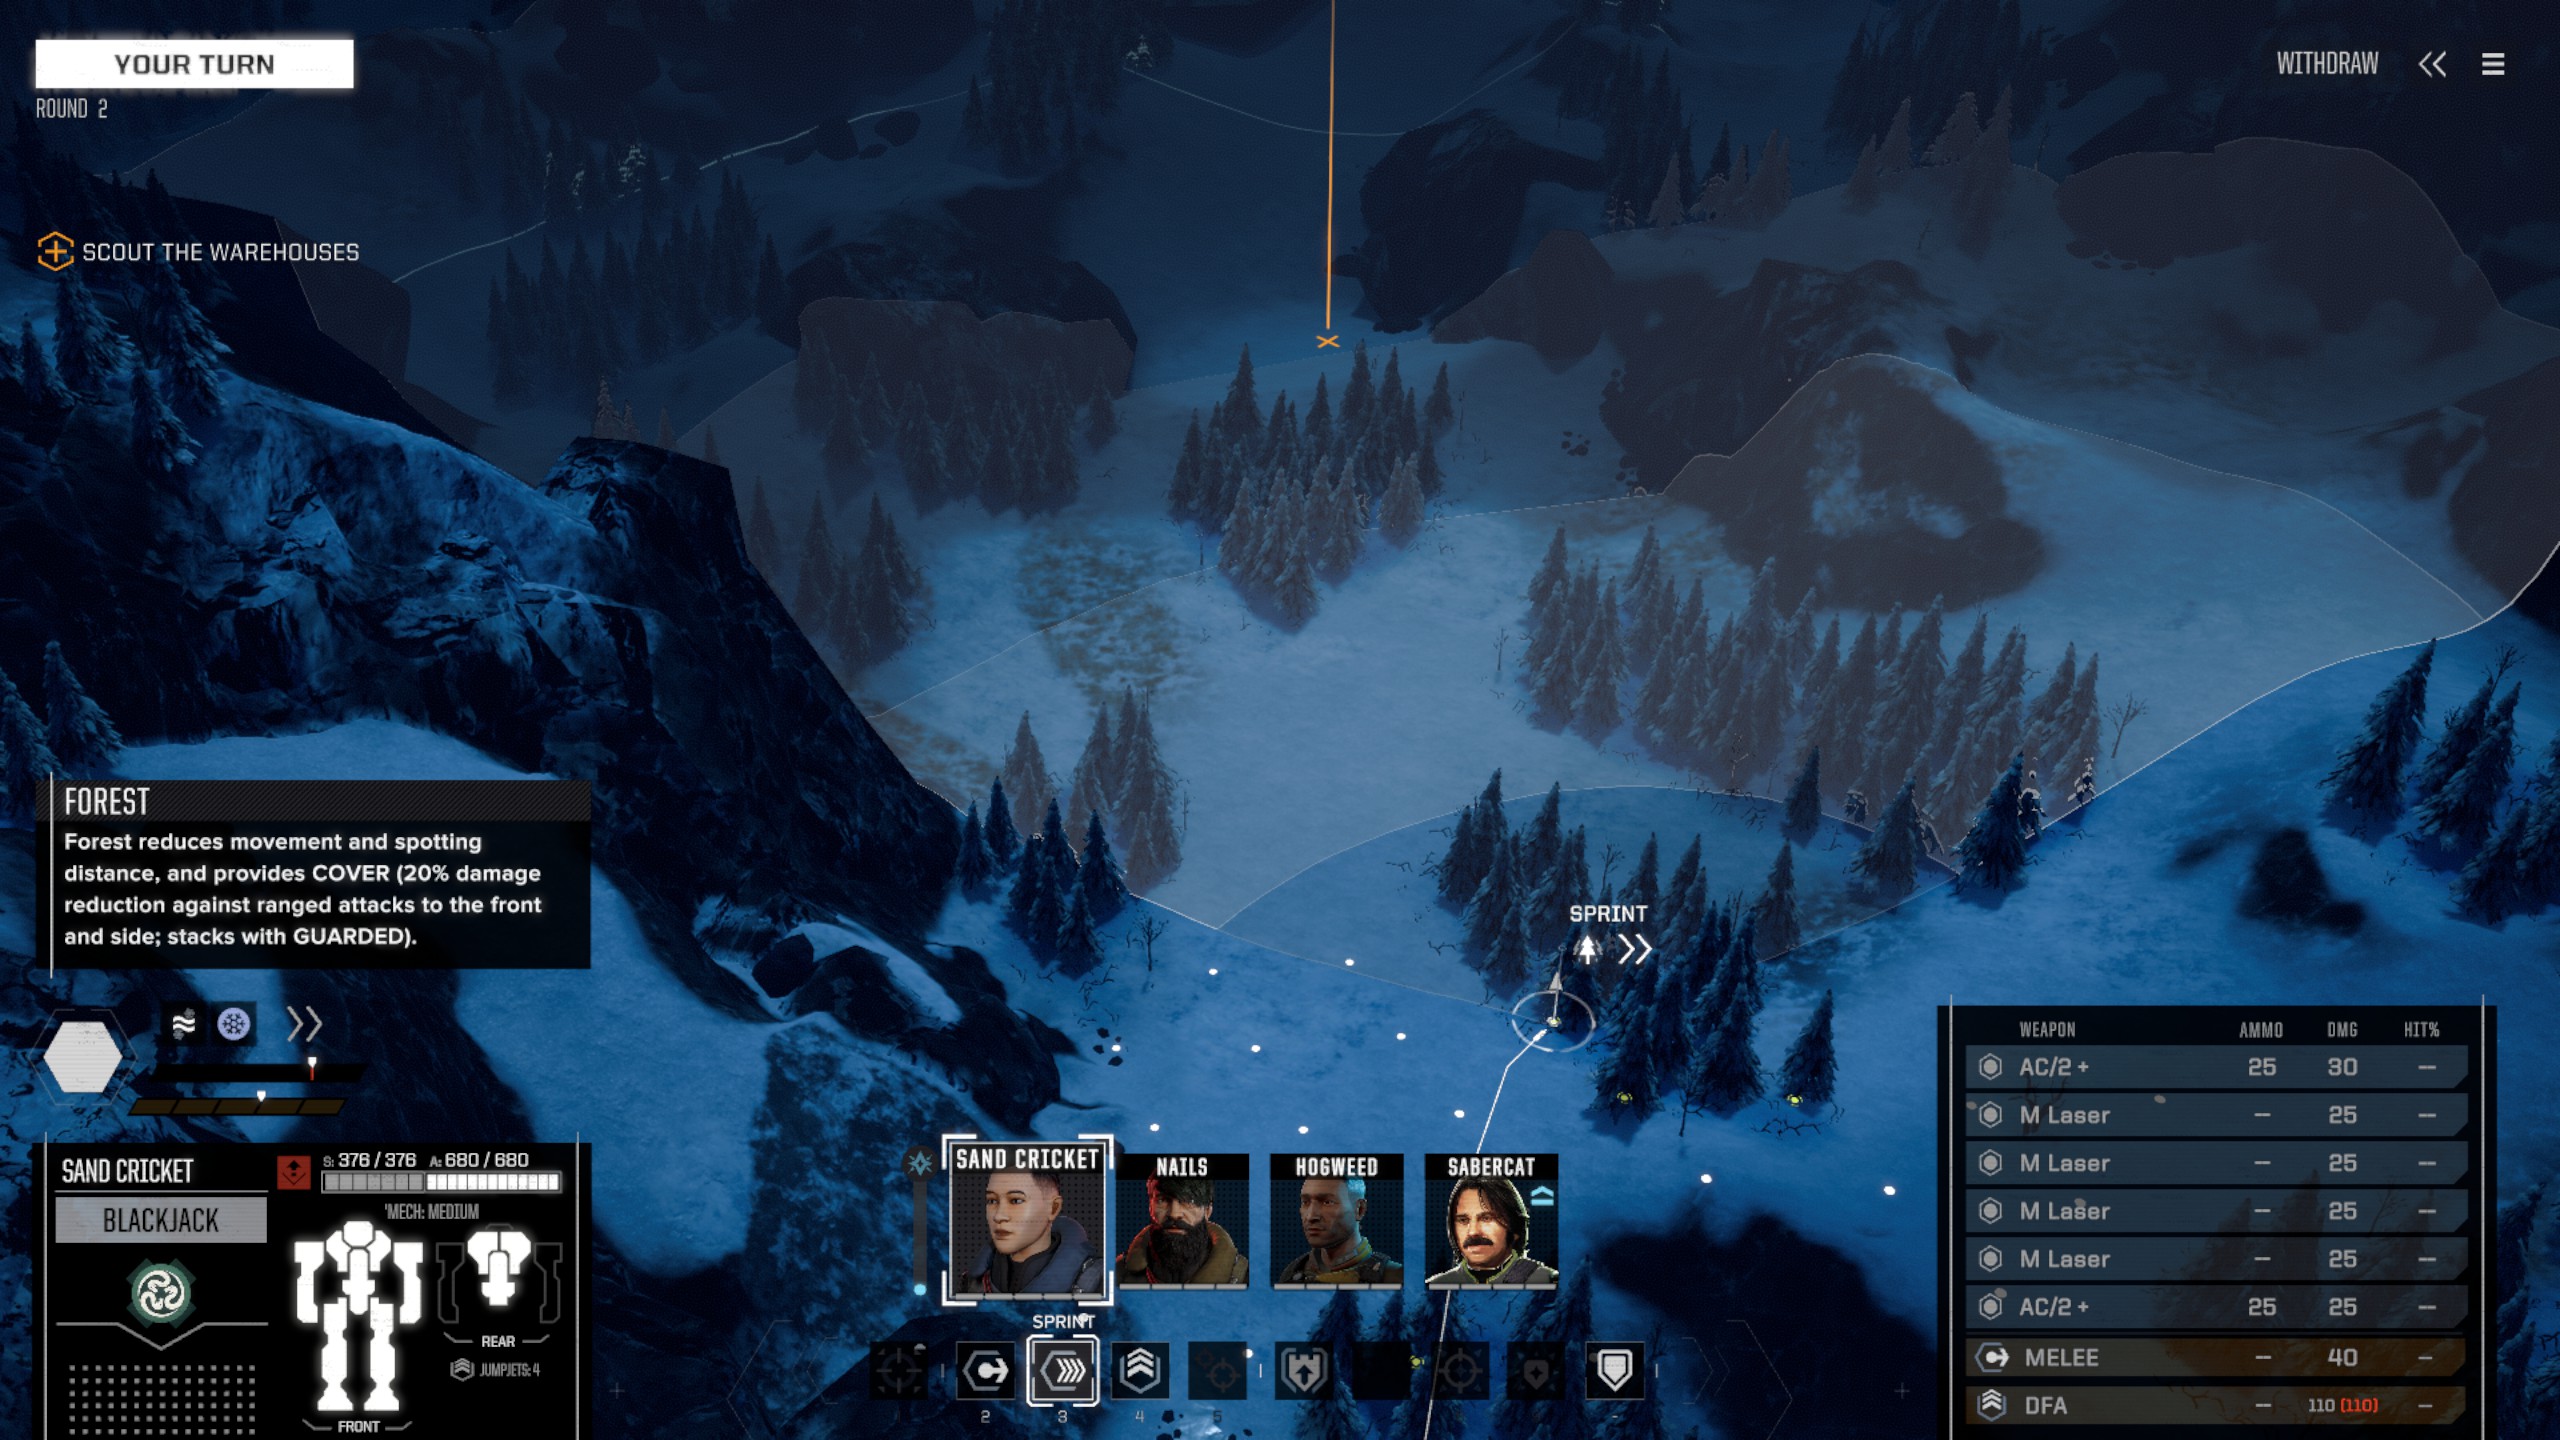
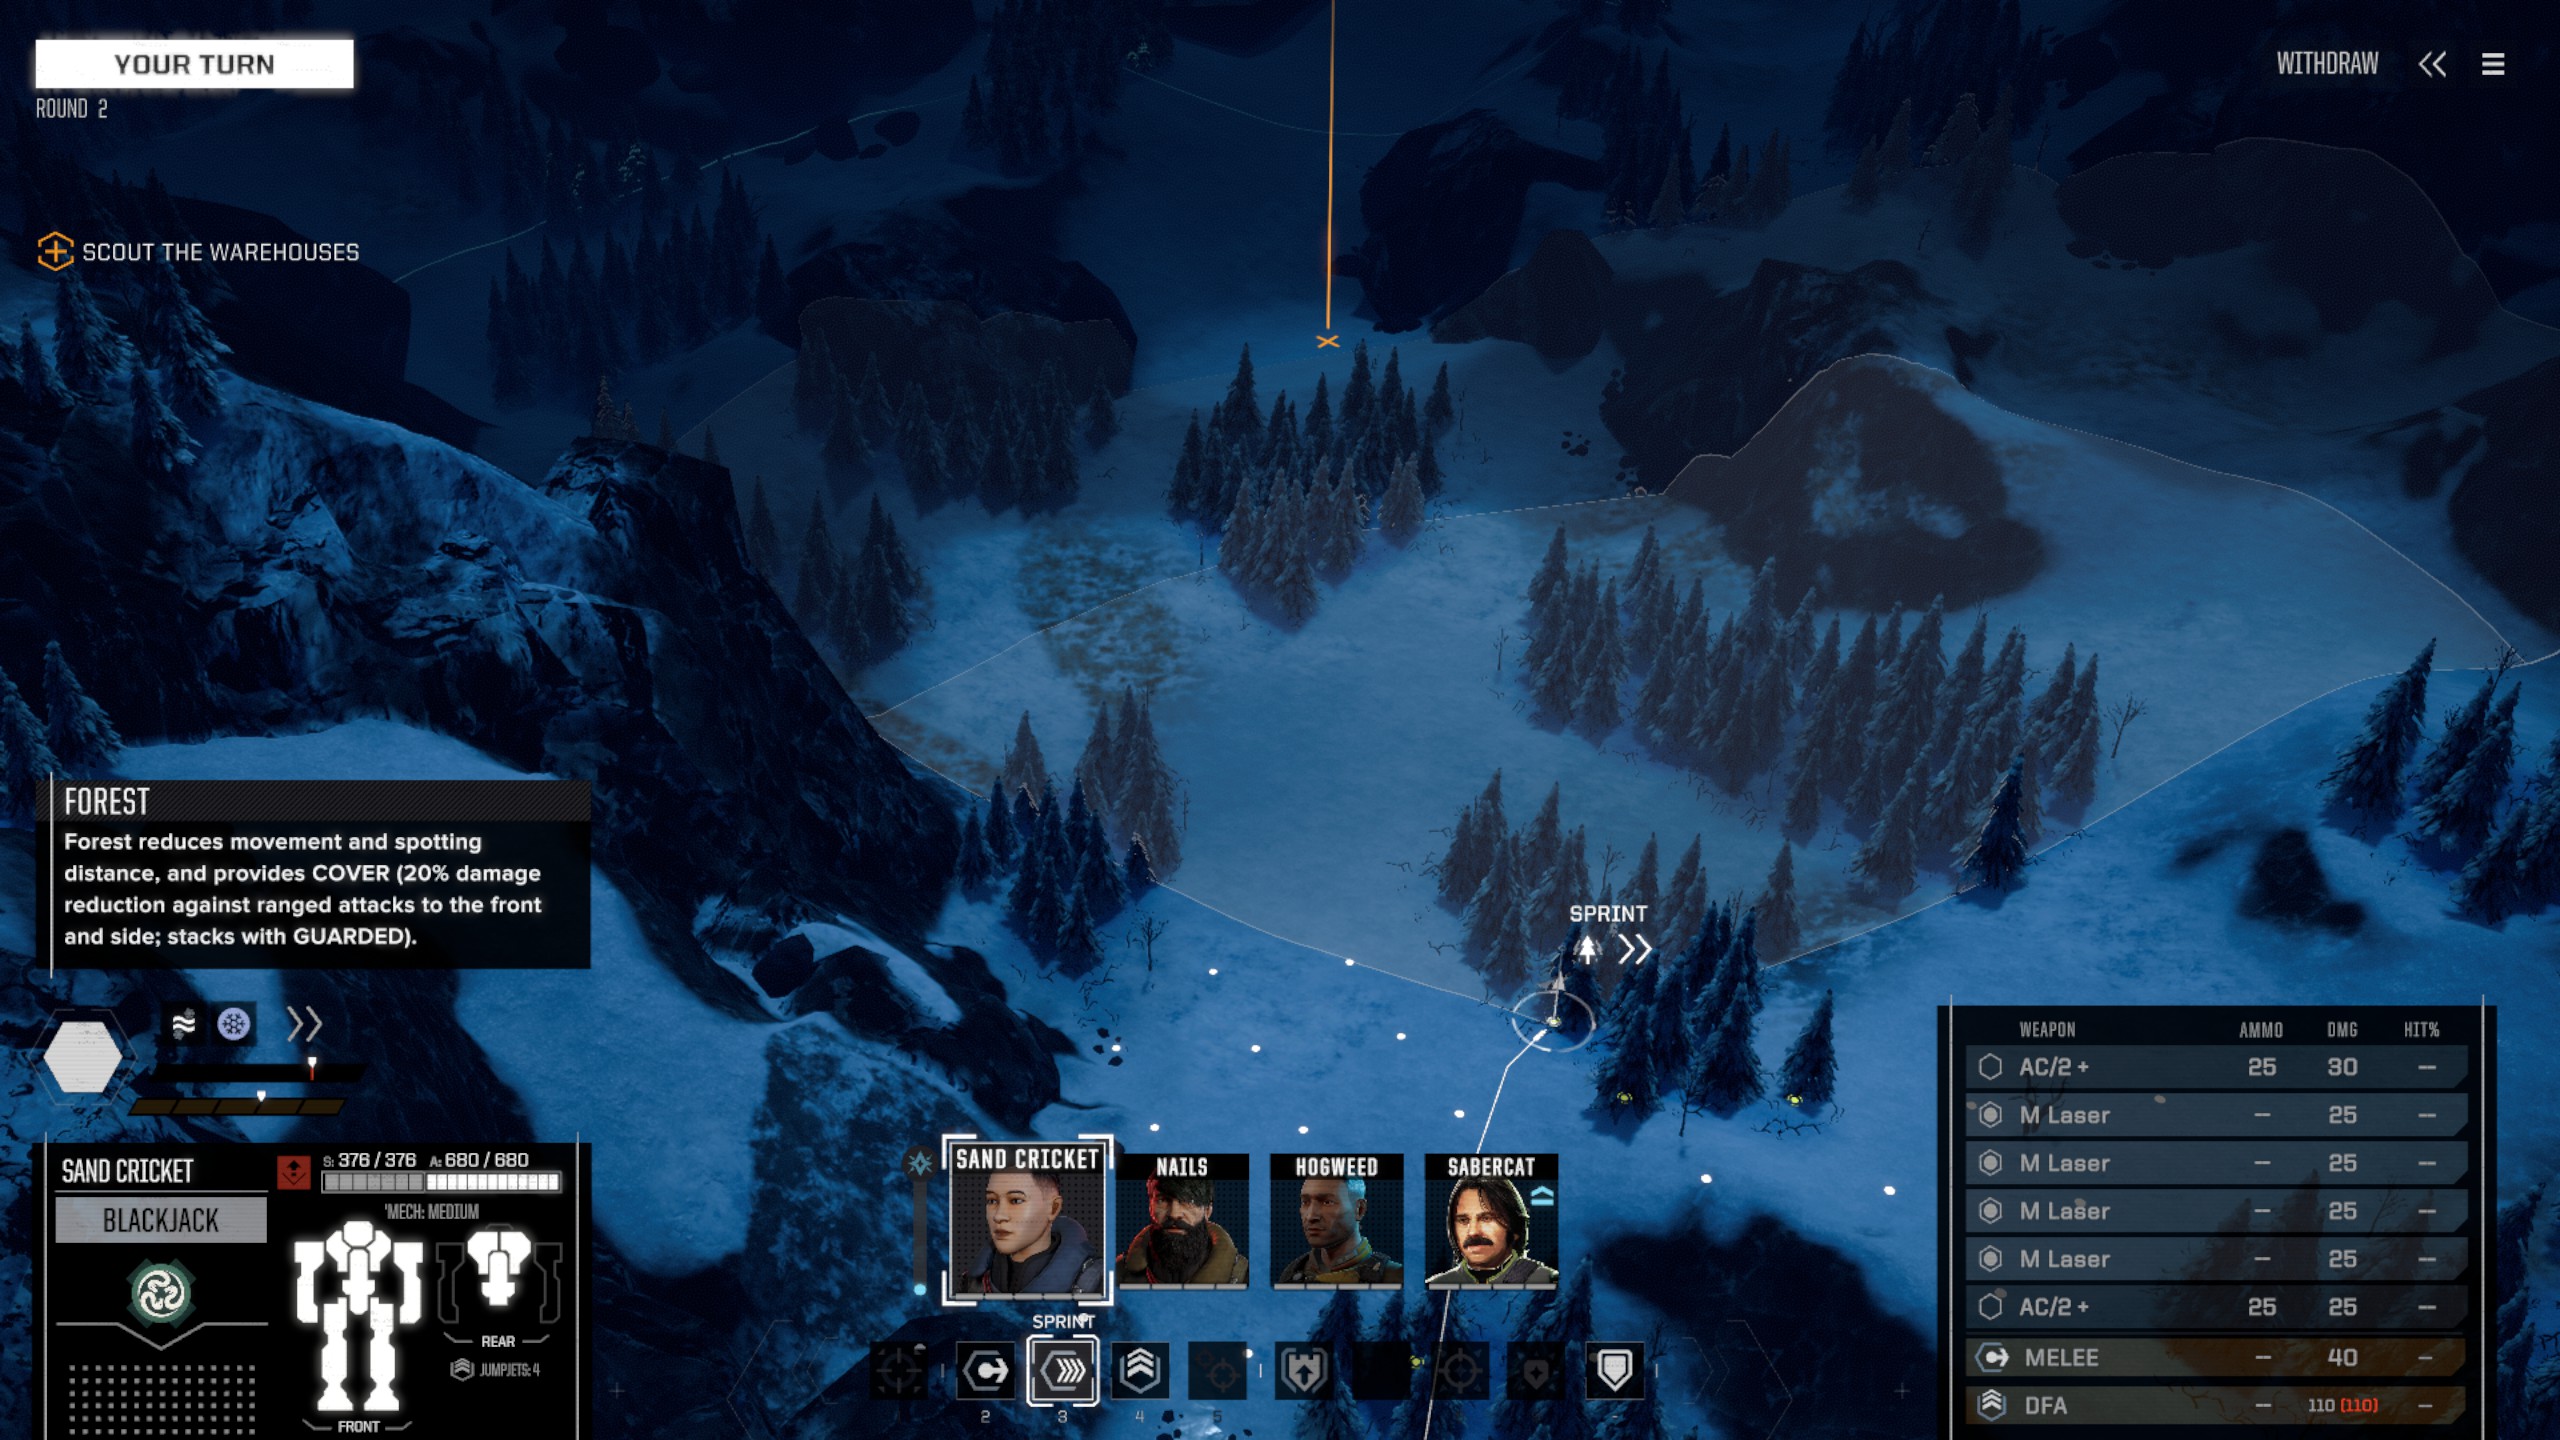
Evasion
The more you move, the more little “>” pips show up above your mech. (There’s two of them for my move in the screenshots above.) These are a BIG DEAL! If you don’t believe me, there’s dozens of light `mechs at the start of the game that will demonstrate that fact to you. You’ll want to try to get as many of those pips as you can. Note that they don’t help so much against melee attacks (which ignore 4 pips) or small weapons and going unstable will remove all of your pips immediately.
You can change facing without moving if you want. Just click the location you’re already standing on and you’ll be able to point your `mech in any direction you want. Standing still lets you remove two instability points instead of just one but I think that’s the only benefit now.
So here’s a little checklist for you. Every time you move you want to:
- Move as far as possible in order to get as many evasion pips as you can
- Move into some sort of favorable terrain like trees or water without crossing over nasty ground, like geothermal vents
- Move to a location that puts the weapons you most want to shoot into their optimal range
- Get your facing the way you want – either facing directly at the enemy or facing in such a way as to protect some part that is in danger of falling off
Naturally, you’ll rarely get to satisfy all four of these things. You’ll have to make choices about which items are most important at the time and sacrificing the others.
Jumping – the Wundermove
Jumping allows your `mech to cross any sort of terrain, leap over cliffs, face any direction they want, gain quite a few evasion pips, and still shoot! A `mech with several jump jets may be able to leap further than it can walk. Of course, there’s a price to pay. Jumping means your `mech will not “heal” any stability points. Jump jets are pretty light but, if you’re putting 5 on a `mech, the mass adds up. Worst of all, the things generate heat. It’s not bad if you’re just jumping along and bracing wherever you land but you’re probably going to be firing a lot of weapons which also generate heat.
So use jumps but keep in mind that you’re going to be paying a price later on as your `mech gets closer to overheating. A few `mechs (like the Spider) are particularly good jumpers and some (like the Vulcan) can be turned into great jumpers but, for most `mechs, it’s a move that needs careful thought.
╟ Turrets and Vehicles
You’ll mostly be fighting against other `mechs but these two things are very much worth a mention.
Turrets are mostly a nuisance. The sniper and LRM turrets can be quite a pain as they hit you from very long range and some turrets are able to scan you, too, which ensures that those long range turrets can target you. Many, however, have mostly medium or even short ranged weapons, making them easy pickings. Just be sure to pick them before getting too close.
Turrets are also special in that they have just one single “part.” They never get guarded or terrain bonuses, either, nor do they ever take critical damage to weapons as far as I known. If you do enough damage to get through its armor and internals, it dies. If you don’t, it keeps on shooting. There’s no point in flanking them because they haven’t got a flank. The whole “scattered vs. concentrated damage” question is irrelevant, too, which makes turrets a favorite target for `mechs with LRMs.
Vehicles do have a few parts but nowhere near as many as a `mech. They also take double damage if you stomp on them. The first vehicles the game throws at you have pretty weak weapons, too. And then, suddenly, a vehicle drives in from red-blip distance to medium range and fires off SIXTY short ranged missiles! There’s plenty of vehicles out there that can wreck a medium sized `mech in a single round.
╟ Aiming
Many things can affect your aim. Better pilots aim better, moving `mechs are harder to hit, `mechs below you are easier to hit, autocannons give an aiming penalty if they were fired in the previous round, and so on. Instead of trying to list them all, I’m just going to recommend hovering over your percentage chances to hit to see what effects are in play.

╟ Resolve
Resolve lets you use to special skills: vigilance and precision. Vigilance is the same as bracing (fix all stability damage, become guarded and entrenched) but it doesn’t end the pilot’s turn and lets the pilot start one phase early in the next round of combat. Precision increases the accuracy of your shot, let’s you pick out a specific body part to target, and pushes the enemy pilot’s turn back one phase.
At the start of the game, neither is very good. Getting into stability trouble is really rare in the early game and the precise shot only gives a slightly better chance of hitting the body part you want to hit. As the game goes on and the missiles start flying, though, vigilance can be a life saver. As pilots gain more tactical skill, ‘called shot mastery’ starts showing up, too. That causes the percentages to swing even more toward the part you’re aiming at. Making these surgical strikes is the key to defeating `mechs by destroying their legs or head.
Resolve is displayed as a vertical, blue bar at the bottom of the screen. Assuming your morale is good (see the “Just Cruising” section), you’ll gain a little resolve every round. You’ll also gain resolve when an enemy `mech is destroyed and even when some critical hits are made. If your team’s resolve is over 50% then everyone will get a +1 to hit.
╚ Getting More Salvage
If you destroy a `mech by destroying the center torso, you’ll only get one piece of salvage from it at the end of the mission.
If you destroy both of a `mech’s legs without destroying the center, you’ll see two pieces on the salvage list.
If you destroy a `mech’s head (which is a very hard thing to hit), three pieces of salvage will drop – enough to make a whole new `mech, assuming you’re playing at the default difficulty. Three pieces will also drop if you kill the pilot. You can do that by causing injuries and removing all the mechwarrior’s hit points (see Pilot Damage above).
At the start of the game, you’ll be blowing up center torsos almost every time. As your mercenaries’ tactical skills increase and their called shots get better, you’ll be able to get two or three salvage pieces more reliably.
Back on the Ship
The game isn’t all battles all the time, though. Let’s go through all the things you can do back on the ship.
Picking & Negotiating Missions
The first thing you must understand is that the skulls lie! Well, OK, maybe it’s more of a fib than a lie. You won’t be fighting any assault `mechs on 1-skull missions. Well… OK, maybe a couple of assaults, but there’s every chance they will be shooting at each other instead of you! (At first.) Seriously, though, you never know quite what you’ll find but you do know vaguely what you’ll find.
When you pick your mission, you’ll need to decide how much money you want vs. how much salvage you want. If you’re short on cash, push the cash slider up. If not, snag that salvage! If you want to gain better standing, reduce the sliders. It pays to keep an eye on the actual reputation number, though. The game doesn’t award fractions of a reputation point so sometimes lowering a slider won’t make any difference at all.
There’s a few mission types to watch out for:
- Assassination missions: the assassination target is typically bigger than most of the `mechs you’re facing and is often isolated. There will be two lances protecting it so try to wipe them out without waking up the target. Once that’s done, try to get as much salvage as you can from the assassination target. Once you get your pilots’ tactical skills up, these become excellent missions for getting salvage.
- Attack a convoy: these, on the other hand, are death incarnate. I guess they aren’t too nasty in the earliest parts of the game but once the bigger vehicles start showing up, they become very difficult. The escorts will be right next to the vehicles so don’t expect to face all of them at the same time.
- Three way battles: you’ll have to read the descriptions to sniff these out until you learn the titles. Two enemy lances will be fighting each other (hopefully) and you’re supposed to pick up the pieces. When this starts, you’ll be facing an enemy lance that’s probably heavier than your lance. Soon after, another lance (that’s also bigger than you) will drop in someplace close by. You’re going to need them to fight each other instead of you so you’re going to want to back off or otherwise make your `mechs into difficult targets. These missions are another great source of salvage.
- Training: these are just plain fun. Most of the ones I’ve seen (“The B Team”) have had me helping three young mechwarriors to attack a base, though one had a straight up battle followed by an optional, bigger `mech at the end of the fight. I don’t think they are particularly profitable or deadly, but they are a great change of pace.
- Escorts: these are a bit dubious but don’t seem nearly as bad as they were at launch. Some folks seem to have issues with the escort vehicles getting stuck but I haven’t seen it myself. I find it best to place my `mechs a little ways ahead on the road then move into the start-the-convoy area with a `mech that has long range weapons. It’s important to keep a `mech fairly close to the vehicles or they will stop moving![/ul]
A few words on faction points… you won’t ever gain or lose faction points with planetary governments so doing missions for them will just annoy the real factions. Also, the pirates have some excellent stuff in their black markets. You don’t have to be a pirate stooge but you might want to avoid doing lots of missions against them so they don’t learn to hate you.
Finishing Up a Mission
Picking what you want is pretty straightforward. Pick the stuff you want most. I just want to warn you off of a bad habit I picked up when I first played: ignoring the bottom half of the list of salvage. You’ll play many missions where the list ends with a whole bunch of heat sinks, jump jets, and ammo – none of which you’re going to want to pick. Eventually, though, more interesting things will start to show up down there. Things like gyros, leg mods, and maybe even some heat banks. So try and keep that habit from forming!
If you’ve gathered enough pieces to make a new `mech, the `mech will be built immediately and placed in your `mech bay. If there’s no room in the bay, you’ll be given the choice of putting the new `mech in storage or one of your existing `mechs in storage. However, only fixed `mechs can be put in storage so, if you’ve left every `mech in the bay in need of repairs, I expect you’ll be forced to put your new `mech into storage.
The Campaign
When you start the campaign, you’ll get a nice little tutorial mission that will teach you how to move around, shoot, and hate the baddies. Then you’re released into the galaxy… but only a small corner of it.
The first order of business is to get a feel for what you’re doing. Take some half-skull missions. Enemies will be few, lightweight, and often times will have less armor than normal. In other words, they’re push-overs… or at least they are once you manage to hit the fraggin’ things. You also won’t get paid squat or even earn much experience. Luckily, your mechwarriors don’t need much experience to advance their skills at the start, either, so be sure to pop in to the barracks to advance their skills at least every other mission.
Once you’ve got the basic ideas down, move up to one skull missions. The enemies won’t be quite so easy but you’ll be getting double the experience and enough pay to actually make a little profit, assuming you don’t get your `mechs too terribly beat up.
When you’re comfortable with one skull missions, you’re ready to take on that dodgy customer that wants to send you on a mission outside of the mercenary review board’s official list. Be aware that this takes place on a lunar surface so heat is going to be a BIG deal. Make sure you understand it before you dive in! The pay-off is great, though, and you also get a bonus medium sized `mech to replace one of your light `mechs.
You’ll continue to get missions from your now-not-so-mysterious customer from time to time. Typically, the mission are quite a bit longer than average missions. One of the difficult things about this game is trying to guess when you’re ready for the next level. They do not scale to your current level or anything like that. Basically, if you’re fairly comfortable with the skull level the mission is at, you’ll probably be able to manage. If it gets to the point where the payout is looking a little weak, you’ve waited too long.
Other than slowly opening up more of the galaxy, completing campaign missions has another effect: increasing the difficulty of the galaxy. There’s lots of one skull and half skull missions around at the start of the game but, by the end of the campaign, you’ll be hard pressed to find missions anywhere near that easy. That’s fine as you’ll be roaming the galaxy with a bunch of assault class `mechs fitted with all sorts of rare, deadly technology by that point.
One special note about the final missions in the campaign: when the game tells you that you should be able to field “multiple, fully equipped lances,” don’t take it too seriously. I thought the game was going to have me run multiple missions without being able to use the same `mech twice in any of them so I put together over a dozen strong `mechs for the final series of battles. That was massive overkill. Two full lances and 8 good pilots should be more than enough.
╔ Menus in Space
You’ll be spending a good bit of time in your ship. Let’s go over all the screens you can get while out in space.
╟ Character Chat Screens
You can chat with all the mannequins… ooops, I mean characters on your ship. There’s flavor text there that develops the characters but the main gaming purpose for them is as a tutorial. You can get a lot of the basics of how to play from those tutorials so definitely read them!
╟ Ship Screen
The main screen lets you stop time and resume it again. It displays your morale, mech tech skill (governs how fast `mechs are fixed), medical skill (governs how fast pilots are fixed), and a time line. Unlike pilots, only one `mech can be worked on at a time. The “Manage Tasks” button will let you change the order of `mech work or even cancel the work. There’s no cost to switching but you’ll only get half your cash back if you cancel.
You’ll be watching this screen as your ship travels from planet to planet. If you’re on a long trip that requires multiple jumps, your ship will stay attached to the jump ship for a few days between jumps. It’s a real good idea to pause at that point and check the planet stores on those lay-overs! If you see something there that you really want, you can use the button in the lower right corner of this screen to detach from the jump ship and head to the planet.
╟ Stores
You can buy all sorts of weapons, equipment, and even entire `mechs at stores. What’s in a store is determined by the planet’s statistics. (For instance, planets with a chemical industry are more likely to sell flamers.) If you’re liked by the faction that owns the planet, you’ll get a discount at a store. If you’ve done a lot of missions against them, they might not let you in the store’s door.

You can also sell your stuff at the store using the tab below the list of things to buy. Believe me, you’ll have plenty of medium lasers and heat sinks to sell! While faction level affects buying prices, it doesn’t seem to do anything to selling prices.
One big note on selling – `mechs in storage sell for a higher price than `mechs in your bay! To get put into storage, though, a `mech has to be fully repaired. If a `mech has been badly damaged, you might be better off just scrapping it from the bay rather than fixing it up so you can put it in storage and sell it.
Stores, missions, and hiring halls are randomized every time you visit a planet.
The Black Market
The black market is run by the pirates. They aren’t a very discerning bunch so, unlike those uppity major houses, they will let in anyone who can pay. However, they will charge more if they think you’re going to use those weapons against them.
At first you won’t be allowed into the black market at all but eventually an event will pop up asking you if you want to join. The nicer you’ve been to them, the cheaper it is to get access. If you refuse, they will ask again after a few months. If you refuse yet again, they probably won’t ask again any time soon unless you become friendly with them.
In the current game, you definitely want in. Even if they hate you. They’ve simply got too many rare items to blow them off. Plus the price increases are a percentage. Sure, buying a complete `mech from them may cost more than you would make if you played the whole game through twice but that S Laser++ or cockpit+++ can still be worth it.
╟ Hiring Hall
I don’t know what the devs are thinking with an achievement for hiring 100 mechwarriors but I got through the whole campaign and just hired three or four. The warriors based on Kickstarter backers can’t be customized but the rest can so don’t worry if the one you want to hire has the same voice as one you’re already using.
╟ Barracks / Training Mechwarriors
Oh look, there’s a little RPG’ness in here! Only a little, though. After every battle your warriors get some XP which can be spent on gunnery, piloting, guts, or tactics.
Gunnery is pretty straightforward. Every point you spend adds 2.5% to your chance to hit. That’s a 25% chance if you get all the way up to level 10. Piloting adds to the mechwarrior’s ability to melee, avoid getting hit, and take stability damage. It also allows faster sprinting. Guts adds to the mechwarrior’s hit points, ability to deal with overheating, and helps with AC weapon’s recoil penalties. Tactics helps with the indirect fire penalty for LRM weapons firing over obstacles, lowers minimum ranges, and, most importantly, improves called shot percentages.
By the end of the game, many of your pilots will likely have 10’s in every skill. What still distinguishes them are the choices made with the special skills picked within those statistics. Each person can have just two of the lower level skills and only one of the higher skills. Here’s the list:
Multi-Target: this lets you target up to three targets at once. The interface is a tad confusing, though. Click the button for multi target first then select three targets. The first one will be target A, the next B, and the last (if you pick 3 instead of just 2) will be C. Your weapons will now have letters by them. You can click those letters to cycle through targets. Click the A and it will switch to a B and shoot at your second target. Click it again to shoot at C. Click it again to turn the weapon off. Naturally, if a target is out of range of a weapon, it won’t be one of the options. Also, you can’t do called shots on targets when using multi-target, even if the target is lying on the ground.
Breaching Shot: attacks with a single weapon (meaning one entry on your weapons list in the lower right while in battle) will ignore cover and guarded – giving you better damage against those targets. You can use this with the multi-target skill to hit a target with just one weapon without having to turn your other weapons off. Just shoot them at a different target!
Sure Footing: one extra pip for your evasion! Also, for typical moves, the `mech will take half damage from stability attacks.
Ace Pilot: first you move, then you shoot – unless you’ve got this skill. Then you can shoot first and then move! (That also means the game interface has to add a ‘done’ button just in case you want to shoot without moving.) Remember that trick of having a fast `mech reserve until the end of a round so it can shoot at the end of the round then immediately shoot again at the start of the next round? Ace pilots make that even better. Then can run right into the middle of enemies and shoot at the end of the round, then shoot again and run/jump away at the start of the next round! (I sure hope the AI enemies never learn to do this.)
Bulwark: makes the cover (hiding in trees, for instance) and guarded (using brace instead of shooting) situations twice as effective. If you’ve got both (using brace while in the trees), damage goes down 60% as long as you don’t get shot in the back! [Note this used to be even more powerful when the game was first released.]
Coolant Vent: poof! 50 heat vanishes from your heat bar (which typically only goes up to 100)! 24 heat comes back again over the next three turns but that’s a lot easier to manage. You can only use this once every four rounds.
Sensor: you can use this take away a couple of evasion pips and to reveal an enemy target that’s just a red blip. There’s a blue circle way out in the distance that indicates the max range of sensors – don’t assume you can sensor lock everything you can see. Like the description says, this only lasts until the end of the round. If you put a sensor lock on an enemy at the very end of a round, you’ll briefly see what the target is and then it will switch back to a red blip!
Master Tactician: this lets mechwarriors have their turn one phase early. So a pilot with this skill driving a medium `mech will move in the same phase as the light `mechs, assuming nothing else has sped him up or slowed him down.
Memorial
You can also see a list of the mechwarriors you refused to save by re-loading in the Barracks area.
╟ Mech Bay / Bays
This is where all your active `mechs are stored. At first you’ll only have room for six `mechs, which is a little tight, but you’ll eventually have room for eighteen! Remember that `mechs in the bay cost you some money every month so don’t leave things in there that you aren’t going to use.
When you select a `mech in the bay you can send it into storage, which takes all the weapons and equipment off the `mech and puts it… umm…. somewhere very large because you can store hundreds of `mechs there. You can also scrap a `mech instead of storing it which takes all the weapons and equipment off then sells the `mech. Do not scrap a `mech unless it is in need of repairs! `Mechs in storage actually sell for more than one that’s active in your bay! You can repair a `mech if it isn’t too badly damaged and you can use the refit button to customize a `mech (see the customization and repair section below). Oh, and you can change the `mech’s paint job, too.

The same box for changing the work schedule that was on the main ship screen is also here.
The Storage tab will show you what `mechs you have in storage. If you want to bring a `mech out of storage, it will take Yang about a day to pull it out of whatever trans-dimensional warehouse he’s got it stored in. Mostly this tab will be used to see how far along your salvage is toward creating a new `mech.
The components tab will show you what weapons and equipment you have but, honestly, I never use that tab. I just go to the `mech customization to see that list.
╟ Engineering / Ship Upgrades
You won’t get to go to this screen until you get about a third of the way into the campaign. When you do, you’ll be given the ability to improve your ship’s engines, recreation areas, med bays, `mech bays, and even add some virtual training rooms. It’s all pretty self-explanatory, really. Some items require other things before being built (you can’t improve your engines until you improve the superstructure, for instance) which is shown on the screen that lets you purchase the upgrade.
Quite a few of these updates will play into the various choices that pop up as the game progresses.
╟ Navigation / Star Chart
This is where you pick where you want to go. At the start of the campaign, you can barely go anywhere but that will slowly change as the campaign progresses. You can also use the filters to quickly search for certain kinds of planets.
Travel costs are pretty straightforward: 30,000 for every jump made. It doesn’t matter what territory you’re going through, who hates you, or how far the jump is – you’ll pay 30K every time.
Travel times, however, are a lot stranger. You’ll spend 3 days attached to the jump ship for every jump, which is easy to figure out. However, you’ve also got to travel between the planet and the jump ship. That’s liable to be a fairly long distance. You’ll find plenty of cases where a planet that’s three jumps away will actually take less time to get to than one that’s right next door!
Note that you can change your destination when you’re attached to a jump ship. Just pause time and select your new destination. You can’t do that when you’re headed to/from the system’s planet.
Don’t fret the missions with free travel too much. They’re good early in the game but it won’t take long before the 30,000 they save you will be far less important than where you’re going.
╚ Captain’s Quarters
Finances
This shows you where all your money is going.
Reputation
This shows all the factions and what they think of you. You’ll eventually be able to make alliances with factions here but that’s end-game stuff.
For now, factions are mostly about their stores and missions. The more a faction likes you, the better prices you’ll get when buying from stores. (Buying only – everything sells for the same price regardless of faction.) If they don’t like you, items will cost more.
Company Customization
This is a fun screen that lets you change your `mech colors, company name, and company logo.
`Mech Customization & Repair
This is what really separates this game from other turn based strategy games, IMHO. You can and definitely should tinker around with your `mechs! Take that Blackjack, for instance. Sure does overheat a lot, doesn’t it?
Try going to the Mech Bay from the main menu (under Skirmish), select the BJ-1 and make a copy of it. You’ll be taken to a bay where you can tweak it without paying Yang a dime. You don’t get to use any of the rare or improved (+) weapons but it’s good enough to try out some basic ideas.
In the very upper left corner is the “<<” button that will go back to `mech selection. Just under that is a blue question mark. If you haven’t already, click that and read it. It will tell you all about hard points and dragging things around.
Now look in the upper left where your `mech is summarized. The bars themselves are all a little dubious, IMHO, because they try to convey a bit more than they should in a single bar but you can hover over them and get some great information. You can see that, when the BJ-1 is firing all of its weapons (an “alpha strike”), it’s generating 23 more heat than it’s able to remove. It will also tell you how much extra heat you’ll generate when using your jump jets.
So what can we do about the heat? Well, add more heat sinks of course! Click the “Equipment” tab just under the bar charts and you’ll see the heat sinks. Drag one over and put it in the right torso. (Remember, the `mech is facing you so the right torso is on your left!) Well, that helped a little but you’re still generating 20 more heat than before. Plus you’re now one ton overweight. Maybe it would be better to remove the sources of heat? Grab the M laser in the right torso and drag it back into the list on the left to get rid of it.
OK, so now you’re a little better off heat-wise, though it cost you some damage. Let’s play with it a bit more. Those two AC/2’s are 6 tons each. The AC/10 is 12 tons. Let’s pull off the AC/2’s and put an AC/10 on there. There will be two icons at the top telling you that you’ve got a weapon with no ammo and ammo with no weapon. Yank that AC/2 ammo out and put AC/10 ammo in. Do NOT put the AC/10 ammo in the center torso, though. That’s a terrible place to store ammunition! If a critical hits ammo, there’s an explosion that destroys the body part completely. If that part is the head or center torso….

Now, if you’ll check your heat, you’ll see something special: your heat sinking matches what your alpha strike generates. If you really hate dealing with heat (or if you’re going to be doing missions on a hot planet), this is a great thing. In general, though, it’s not needed. Let’s drop one of the heat sinks.
Now you’ve got an extra ton! I would suggest dumping that into armor. I always like to have at least the center torso at maximum front armor. You can do that easily now and even add a bit to the side torso armor. The end result looks something like this:

So is this a better `mech? Sometimes. It’s got better armor, it handles heat a lot better, it doesn’t blow up on a lucky center torso hit, and it concentrates damage well. However, it doesn’t do as much damage and can’t do long range sniping now. Also, that AC/10 loses accuracy more quickly than the AC/2s did if you fire every round. Ironically, because your heat is a lot better managed now, you’ll probably want to fire every round!
There’s a lot of other things you can do, too. Maybe two AC/5s would have been better than a single AC/10. Maybe drop the autocannons and lasers completely and put in a pair of PPCs plus a lot of heat sinks.
Figuring out what works and what doesn’t made for a lot of enjoyment for me so I want to be careful about giving too much advice. I will say, though, that you’ll probably need at least a couple of jump jets on almost everything you build simply because Harebrained really likes mountainous terrain. Without them, your `mech can be stuck trying to find a pass over a mountain instead of just using jumps.
If you want to try out the `mech you’ve created, just give it a name in the upper left corner and save it. Go back to the Lances tab in the Mech Bay and create a custom lance that has your `mech in it along with a few others of similar weight. Go back to the main menu and pick the single player skirmish. In the center-top of the screen, set the battle to unlimited then select your custom lance for both yourself and your opponent, then off you go! Not only can you practice with your new `mech, you can watch the computer use it, too, and see if it gets any bright ideas.
When playing the main game, you’ll also need to use this screen to do extensive repairs. Simply replacing armor is done automatically, instantly, and for free. If a `mech takes a little internal damage then that can be fixed with the “repair” button back in the `mech bay screen. If a weapon has been destroyed or a limb completely blown off, though, you’ll need to use this screen to repair the part and replace the destroyed weapons.
Random Bits
There’s always things that never quite fit under my headers…
Light & Dark Blue Water
Your `mechs can only travel in shallow water. The game depicts shallow water as light blue and deep water as dark blue.
Local Pirates Aren’t Local
The pirates say they are a totally local organization but don’t you believe it! Every mission you do against any pirate gets communicated to all the pirates – even if you leave no survivors. A local government, on the other hand, never even communicates your affront to the rest of the planet you’re on, never mind other local governments.
Paradox Away!
If you right click while the Paradox logo is fading in while the game is starting, it will quickly vanish. It can work with the Harebrained logo, too.. The Unity logo can’t be dismissed and you have to wait for the starting cinematic to start before you can hit ESC to get out of it.
Screenshots
You can turn off the HUD (or GUI or whatever you want to call all that interface stuff you click on) with control-shift-U. Type control-shift-U again to turn off even more HUD. Type it again to bring the HUD back.
Screenshots 4K
You can also take a 4K resolution screenshot with no GUI by typing control-K. For whatever reason, you have to use the control key on the left side of your keyboard. The screenshot gets saved in a strange place, too: C:Users[USER]AppDataLocalLowHarebrained SchemesBATTLETECH where [USER] is whatever user name you use to log in to Windows.
K-Com
If you enjoy games like this one and X-Com, you might like Troubleshooter: Abandoned Children. It’s more of a JRPG but with an X-Com’ish battle system and a crazy level of depth – plus its cheap!