Overview
A basic guide that covers every placeable defense block and what each of them do. This guide prioritises simplicity does not go too in depth. While this guide is made for beginners, I tried to include some more advanced tips for both the beginners and the advanced.
Introduction
This guide will cover every single placeable defensive block as well as every resource in the game, from the Duo turret to Surge Wall, from Lead to Phase Fabric, and give some simple information regarding each one. This guide will give a basic summary, common uses, and a few special tips and tricks for each and every block. This is by no means an in depth guide, and does not include any complex strategies. I’m planning on updating and revising everything based on the comments on this guide, in order to get many perspectives on all of the blocks.
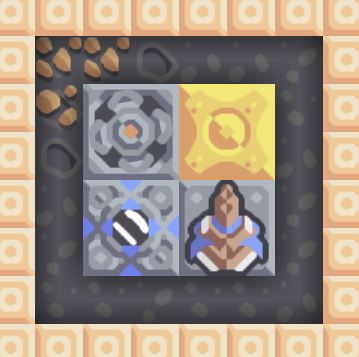
Every block will have a number next to it. This is the position that block is in, reading from top to bottom, left to right. The top leftmost block is one, and the rest count up from that
IMPORTANT: This guide is not yet finished, and is being worked on right now. Leave a comment if you have something to add or if you spot a mistake. Each section will be worked on and released individually in the order of the in-game tabs. Please be kind as this is my first guide, and again, leave any advice in the comments.
Resources
What you’ll be using to build, fuel, power, and defend your core

From left to right, and top to bottom,
- Copper: The most basic resource. Used to make almost everything you can build. Required for basic building
- Lead: A basic resource. Used almost as much as copper, it’s used to make many things
- Metaglass: Made from Sand and Lead. Used mainly for liquids, it’s also used rarely for other blocks. It adds a frag effect when used as ammo.
- Graphite: Important material made from coal. Used to make many various things, notably Pneumatic Drills and other drills.
- Sand: Can be found naturally or made from scrap. Used only to make Metaglass, Silicon, Pyratite, and Phase, and cannot be stored in the core.
- Coal: A basic resource that can be found naturally or synthesised from oil. Used only for making Silicon, Pyratite, and Graphite, and being burned for power, cannot be stored in the core. Burns units when used as ammo. Is very flammable and will set things on fire if destroyed.
- Titanium: An important basic resource. Used to make all sorts of things, notably for Laser Drills and Cryofluid. Required for intermediate building.
- Thorium: An important basic resource. Used to make all sorts of things, notably Aeroblast Drills and Phase Fabric. Also used as a fuel for generators. Required for advanced building.
- Scrap: A basic resource usually found near wreckage. Used to make sand or slag, and cannot be stored in the core. It is a popular resource, being the subject of many schematics.
- Silicon: An important resource made of coal and sand. Used extensively for making your own units and a wide variety of advanced blocks, notably the Laser drill. It homes in on enemies when used as ammo.
- Plastanium: A resource made of oil and titanium. It is used to make various intermediate and advanced things. It adds a frag effect when used as ammo.
- Phase Fabric: Often shortened to just Phase, an advanced resource made of Thorium and Sand. Its used to make various advanced things, notably Phase walls and Phase conveyors.
- Surge Alloy: Often Shortened to just Surge, an advanced alloy of Copper, Lead, Titanium, and Silicon. Used for only the most advanced of blocks. Electrocutes units when used as ammo. Will electrocute nearby things if destroyed.
- Spore Pod: Made with just water at a cultivator. Can only be used to make Oil or Blast, or burned for power. Notably, it makes more power when burned than coal. It cannot be stored in the core.
- Blast Compound: Often shortened to just Blast, a volatile resource made from Spore Pod and Pyratite. Used only as ammo and for Impact reactors. Notably, it can be burnt for power, but is not efficient and damages generators. It does large area damage if used as ammo. It is very dangerous and will explode if destroyed. It cannot be stored in the core.
- Pyratite: A volatile resource made from lead, sand, and coal. It is only used as fuel, ammo, and for making Blast. It can be burned in normal generators for less power than coal, but can be great for power when used in a Differential Generator. It sets things on fire when used as ammo. If destroyed, it sets things around it on fire. It cannot be stored in the core.

From left to right,
- Water: A basic yet versatile liquid used in everything from easy liquid cooling drills and turrets making them faster, to the production of other resources. It can be found naturally in pools in some maps, but can always be reliably made with a Water Extractor. It poses no direct danger to anything, only making units wet and susceptible to electricity, as well as pushing them back.
- Slag: The product of melted Scrap, it can be used as an offensive ammunition to damage and set fire to anything it touches. It cannot be found naturally, and needs to be synthesized from Scrap, making it absent on some maps. Notably, it can be used in the separator to make Copper, Lead, Titanium, and Graphite all at once. This ability has made Slag and by extension Scrap the subject of many schematics. It is very dangerous, damaging and setting fire to everything if it leaks out.
- Oil: A liquid used mainly for industry, it can be sprayed at units to tar them, making them more susceptible to fire. It can be found naturally in pools, as well as being reliably produced by pressing spore pods or extracting it with an Oil Extractor. It is very useful for making large amounts of coal, as well as Plastanium. It poses no direct danger to anything, but makes fires much more dangerous if they manage to light the oil.
- Cryofluid: A very useful liquid used for advanced industry and defense. It cannot be found naturally and must be synthesized from Water and Titanium at a Cryofluid Mixer. It can be used as a more expensive but more effective way to cool turrets than water, making them fire even faster. It can also be used in the Differential Generator and Impact Reactor to make power. It can be fired at units to freeze them, though is not very dangerous.
Turrets 1
This section will cover some basic information on each turret, how to get the maximum offensive power out of that turret for the point in the game which you are most likely to use it, then a few simple tips for best use. For more specific stats, see the in-game Core Data Base

The Duo turret is the most basic of all turrets, firing many common resources like Copper. It is likely the first turret you’ll use, and the one you’ll use the most. It’s cheap, only requiring 35 Copper to make, and versatile, with a decent range and the ability to hit ground and air. Duo can be set up almost anywhere on the map, as copper is one of the most common resources. In single player and multiplayer, it serves as a first defense against the oncoming units. However, its low damage means it is quickly replaced by stronger turrets as soon as a chance is given.
For maximum power, Use Pyratite to burn the enemy, adding more damage over time, while water cooling it with extractors. You might not have water at his point, if so it is not a big loss, as the extra space from a lack of piping can be used for more turrets.
Tips:
- Use early game for a cheap and simple way to protect yourself from both air and ground
- Don’t underestimate its anti-air capabilities early on
- Small turrets can be spammed for easy defense
The Scatter turret is invaluable when it comes to easy and early anti-air, being easy to supply, having large range, and doing enough damage to quickly take out bothersome air units. Only being made of some Copper and Lead allows for many scatters to be placed in key locations where air units tend to go, but don’t go building too many early game, as 85 Copper and 45 Lead is significant early game and could be used on infrastructure. For some maps, Scatters are all you need to take care of air units, but most of the time they need to be replaced before taking on pesky Revenents. In multiplayer pvp, Scatters prevent enemy players from freely attacking your base and disrupting your supply chains, a must have for any pvp match.
For maximum power, use Metaglass for a large damaging radius and an added frag ability for groups of air units. Scatter’s simplicity usually means they are not cooled, but water extractors work well for the short burst they need to destroy air units
Tips:
- Use early game for a cheap and simple way to protect yourself from air units
- Scatters can only see air units, but can still hit ground units if the air and ground units are next to each other.
- They only need to fire in short bursts early on, so putting a ring of Scatters around a single drill works very well
Close range, rapid fire, and good damage, Scorch can easily take out any ground unit that gets close enough to it. Not to mention damage over time by setting enemies on fire, ensuring that even when a unit leaves its range, its still taking damage from Scorch. But, with the shortest range of any turret, and a moderately expensive build cost and fuel, Scorch falls a bit short practically. Coal is very valuable early game for Graphite, Silicon, and power, so using so much resource on an army of Scorches seems a bit wasteful. However, if you can mange the coal cost, Scorch is a force to be reckoned with in early game choke points, with its large damage and incendiary effect.
For maximum power, use Pyratite for a little more damage over coal, increasing its already high damage even higher. While difficult to cool many Scorches, using water will even further increase the fire rate for ridiculous early damage. If you don’t use water, the extra space from a lack of piping can be used for more turrets.
Tips:
- Build around the short range to maximize the amount of units it can hit, like at choke points
- Small turrets can be spammed for easy defense, but don’t build too many and waste Graphite
- I’m not sure if this is still true, but Scorch may still fire faster if your frame rate is higher
An extremely long range yet small turret with good AOE (area of effect) damage. The massive range makes Hail very easy to fit into any defensive wall while maintaining its ability to hit ground units from very, very far away. The shot does no direct damage when hitting, instead exploding near the target and hitting it with its large AOE damage. However, Hail is decently expensive to make early on where it is most effective, and it uses exclusively Coal products like Graphite and Silicon, which can be more useful in making Infrastructure. Hail can be very useful if you have the infrastructure already and can afford the Coal, allowing for units to be destroyed before they can even damage your walls. In pvp and attack, long range turrets like Hail can be used to attack at enemy structures without them attacking back. Oddly enough, long range turrets can also be used to defend against this strategy, making the problem and solution both having long range.
For maximum power, Silicon or Pyratite can be used in different situations. Silicon is better for longer range fighting, making sure the shot always hits, and Pyratite is more rounded with less initial damage but an incendiary effect for DOT (damage over time). Either can be used in addition to water for a slightly faster firing rate. if you don’t use water, the extra space from a lack of piping can be used for more turrets.
Tips:
- Hails can be easily incorporated into many different designs due to their long range
- Small turrets can be spammed for easy defense, but don’t build too many and waste Graphite
- Very useful for early attacks on enemy structures
Turrets 2
Wave is a moderately ranged, but somewhat gimmicky turret that can only fire liquids. Its main uses are to put out fires on your own buildings while setting fire to enemy units and structures, and it does this job very well. Supplying with Water or Cryoflud will almost guarantee safety from any fire in its range, very useful against Eruptors, who oddly enough also shoot liquid Slag. Offensively, Oil can be used for making fire much more dangerous, and slag for setting things on fire in the first place. Overall, good for weakening and annoying enemies with debuffs like frozen and DOT, but not strong enough to defend from waves all on its own.
For maximum power, simply use Slag, as it is the only damaging ammo. Wave can’t be cooled like other turrets, so only 1 liquid ever needs to be supplied. Remember that wave takes a decent amount of liquid to fire, so make sure it has a good supply of slag so it doesn’t ever have to pause for liquid.
Tips:
- Make sure to supply Wave with a good amount of liquid, as it uses a lot
- Don’t underestimate the power of water + electricity, as well as water’s cheap cost and knockback
- Always have a Wave present if you think fire will be an issue
Medium range, high damage, and to top it all off only requiring power to run? Do I really need to explain why this is good? Most likely my most favorite turret in the game, Lancer packs a combination of 2×2 size, a high damaging and wide hitting pulse laser, and the extreme simplicity of only needing power to run, for a turret that is a force to be reckoned with at any point in the game. The only negative that comes to mind is that each turret takes 45 Silicon to make, which can be difficult in the early game where it really shines, and even later if you’re not good with making Silicon. Lancer is just amazing at taking care of any line of units if you position the turret properly, most likely taking out the entire line in one shot. They are also good for cleaning up enemy structures on attack maps or PvP matches, as you can usually just put a couple down near the debris and let them do their thing. The size of the turret makes for easier liquid cooling as well, meaning even faster firing of that sweet, sweet pulse laser.
For maximum power, supply Lancer with power. In most cases, that’s all you need, and the extra space from no liquid or solid transport open up more room for more turrets. liquid cool with Cryoflud, as by this point in the game you should have the ability to make some.
Tips:
- Lancer is useful an many points in the game, especially in the beginning
- With no need for conveyors, more turrets can be made, but watch your Silicon
- Watch how enemy units move, and take note of places where they walk in a straight line. Aligning Lancer with this line can make for quick and efficient defense.
For some reason, Arc is listed after Lancer, despite being generally weaker and coming earlier in progression. Not to say that Arc is weak, of course. Like lancer, Arc needs only power to fire, shooting curved bolts of electricity that penetrate through enemies. It has great damage and range for what it is, as well as being very small and cheap. It is a very reliable and powerful turret in the early and mid game, used anywhere where you can’t run a conveyor through, or for just quick and easy setup. Arc also works well for cleanup, being even cheaper than Lancer, but a bit slower at destruction. Arc also is good for PvP, as power infrastructure is much harder to take down than a single conveyor line to your turrets. The only fault of Arc is that it can only target ground units, though it is very good at dealing with them.
For maximum power, I’d recommend just spamming a lot of these without worrying about cooling, as the benefit from cooling Arc does not make up for the space and resource used. It only needs power, so no infrastructure there either. If you want to cool some for some reason, water is most likely what you’ll have access to at this point. The water is better used, in my opinion, with a wave to wet enemies, as electricity plus water is very deadly.
Tips:
- Small turrets can be spammed for easy defense
- One of the best early game turrets out there, combine with water for devastating unit destruction
- Very cheap and easy to make and supply, good as the first turrets when moving up the front line
Swarmer is a very interesting turret, in my opinion. It automatically applies homing to all 3 of its ammo types, so no need to supply silicon for that effect. Additionally, It has high area damage, making it ideal for crowds and enemy structures. To top it off, it’s only 2 by 2 in size, making for simpler placement in already existing structures. You wouldn’t think these factors would work well together as large area damage is usually reserved for less accurate turrets, but it really does. Swarmer has great area damage, better secondary effects with shock and fire, and never misses its mark. It’s a small fast firing machine, ideal for fast targets like Ghoul Bombers or Wraith Fighters. That is where I believe this turret does best as a solution to fast flyers, and also as a deterrent for enemy players in PvP who want to fly into your core. The main negative i can say is that Swarmer needs a decent amount of material to build, and that the ammo it uses tends to be more difficult to make early or even mid game. Overall, my personal choice for quick air defense in the mid to late game.
For maximum power, use surge alloy to overwhelm the enemy with exploding sparks. Make sure to use water if you are using Surge, and to keep water away if you are using Pyratite. Additionally use Cryofluid to cool them, as the Plastanium used to build them can be too expensive if improperly managed.
Tips:
- Swarmer works well even into the late game as an accurate anti-air
- If you are already using Blast, Surge, or Pyratite as ammo, Swarmer fits well into those defenses
- Don’t pursue too many Swarmers early game, as the resources used for them are usually better allocated elsewhere
Turrets 3
As stated in ins in game description, Salvo is basically an upgrade of Duo. Salvo fires like Duo, uses similar ammo, looks the same, and targets both ground and air just like Duo. The main differences between the two turrets are that Salvo has higher range, higher damage, is bigger, and is more expensive. Salvo gets all my praise from Duo as well, with its vast array of ammo types ranging from measly Copper all the way to Thorium, and its ability for ground and air coverage. Its main downside is the expense, costing around 100 Graphite to make per turret, difficult to maintain mid game where it is most useful. Despite Salvo being fairly good, I find myself only using it for niche air defense in the later game, where i just so happen to already have one of its ammo types going someplace else nearby. I feel it gets outclassed by other turrets in its tier, Ripple for example is only slightly more expensive, and made of the exact same resources, but has superior range and damage. Salvo shines mainly in accessibility, as you are required to have Copper, Graphite, and Titanium to progress, you will always be able to build at least some Salvos. With all of the downsides, Salvo is unique in its tier as the primary antiair and ground turret, but just tends to be outclassed by strictly air or ground ones.
For maximum power, use Thorium for maximum damage, or Pyratite for DOT. Salvo is small enough to be spammed, but I recommend Cryofluid cooling a few of them instead.
Tips:
- Watch your Graphite and Titanium while building, as its not cheap
- Great antiair capabilities, but tends to miss. Try aligning them with the enemy path
- Uses so many different ammo types, its easy to supply
This guide is being worked on every day and will be updated with new information from your comments. Make sure to check back every so often to see whats new.