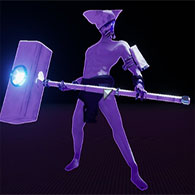
Overview
This is a guide for players who are struggling with the final boss. Now I will start off by saying that if you don’t want to fight him you can always interact with the side of teleporter on stage 5 and start looping.
Phase 1
Durring phase 1 Mithrix has 2 attacks that he does frequently and 3 attacks that are less frequent.
His 2 frequent attacks are
He will teleport twice and will swing his hammer on the second teleport, this attack will do around 50% of the players health for most Survivors. The key to dodging this attack is that the first teleport will indicate where the second one will be. He has a tendency to teleport in sort of an L shape. If you have no vertical mobility you can run towards his original location and he should not be able to hit you. If he is too far away then you won’t have to worry about dodging.

His second attack has him swinging his hammer on the ground causing an AoE explosion that will kill the player if they do not have One Shot Protection and he will normally teleport near the player before doing this attack. This attack can be avoided simply by running away from him and he does this attack after the teleport attack which makes it more predictable.
His 3 infrequent attacks are
He will fire a volley of projectiles at the player while running toward them, he only does this attack when the player is far away from Mithrix so if you don’t want him to do this attack you should stay close to him. This attack can be dodged by strafing left or right of the projectiles or by using a utility skill.
He will dash toward the player and strike them with his hammer then afterward he will taunt the player by twirling his hammer. This attack is incredibly difficult to avoid since it is extremely fast and their is no clear indication of it but the good news is that this attack only does 30%-20% of the players health. The only way you can tell when he will strike is if he runs at you and does not teleport or attack for a couple of seconds. The taunt that he does afterward opens up for a couple of hits for melee classes.
Once he takes enough damage, he will slam into the middle of the arena and create a shockwave that the player can jump over.
Phase 2
This phase of the boss fight is pretty much a “DPS check” since it goes by quickly if you have high damage output.
During this phase you will fight 2 different lunar Chimeras
The ones on the ground will rarely hit you if you are constantly moving and should be taken out last.
The ones in the air should be killed first since they are a much bigger threat to the player. They can gun you down similar to clay templars and they have a fast orb attack similar to the Wandering Vagriants.
I would recommend hiding behind the pillars because the flying ones have an attack that can one shot the player.
Phase 3
His attacks in phase 3 are roughly the same but with a few changes.
His smash attack will create a flame pillar that can hit you in the air and creates a shockwave in front of him. Note that it is possible for this attack to bypass one shot protection because you get hit several times.
He gains an attack where flame pillars spin around him. This attack is easier to avoid while grounded, after each burst the flame pillars will spin in the opposite direction and speed up.
Chimeras will spawn during the fight, I would recommend not killing them as Mithrix can actually get stuck on them and he will have a hard time hitting you.
Phase 4
This phase sucks but there is a consistent way to get through it.
You want to play very defensive until you get most of your items back and the rate which the player receive their items is based on the amount of hits not damage. In the four corners of the arena there are these ramps where the player can stand up on, the player is unable to get hit by the blue ball attack on top of the ramp and Mithrix’s projectile attack has a hard time hitting the player from far away.
If Mithrix stole Tesla Coil is is advised to keep your distance from him until you get your Tesla coil back. If Mithrix stole dios best friend it is advised to get that item back before killing him since he can revive himself.