Overview
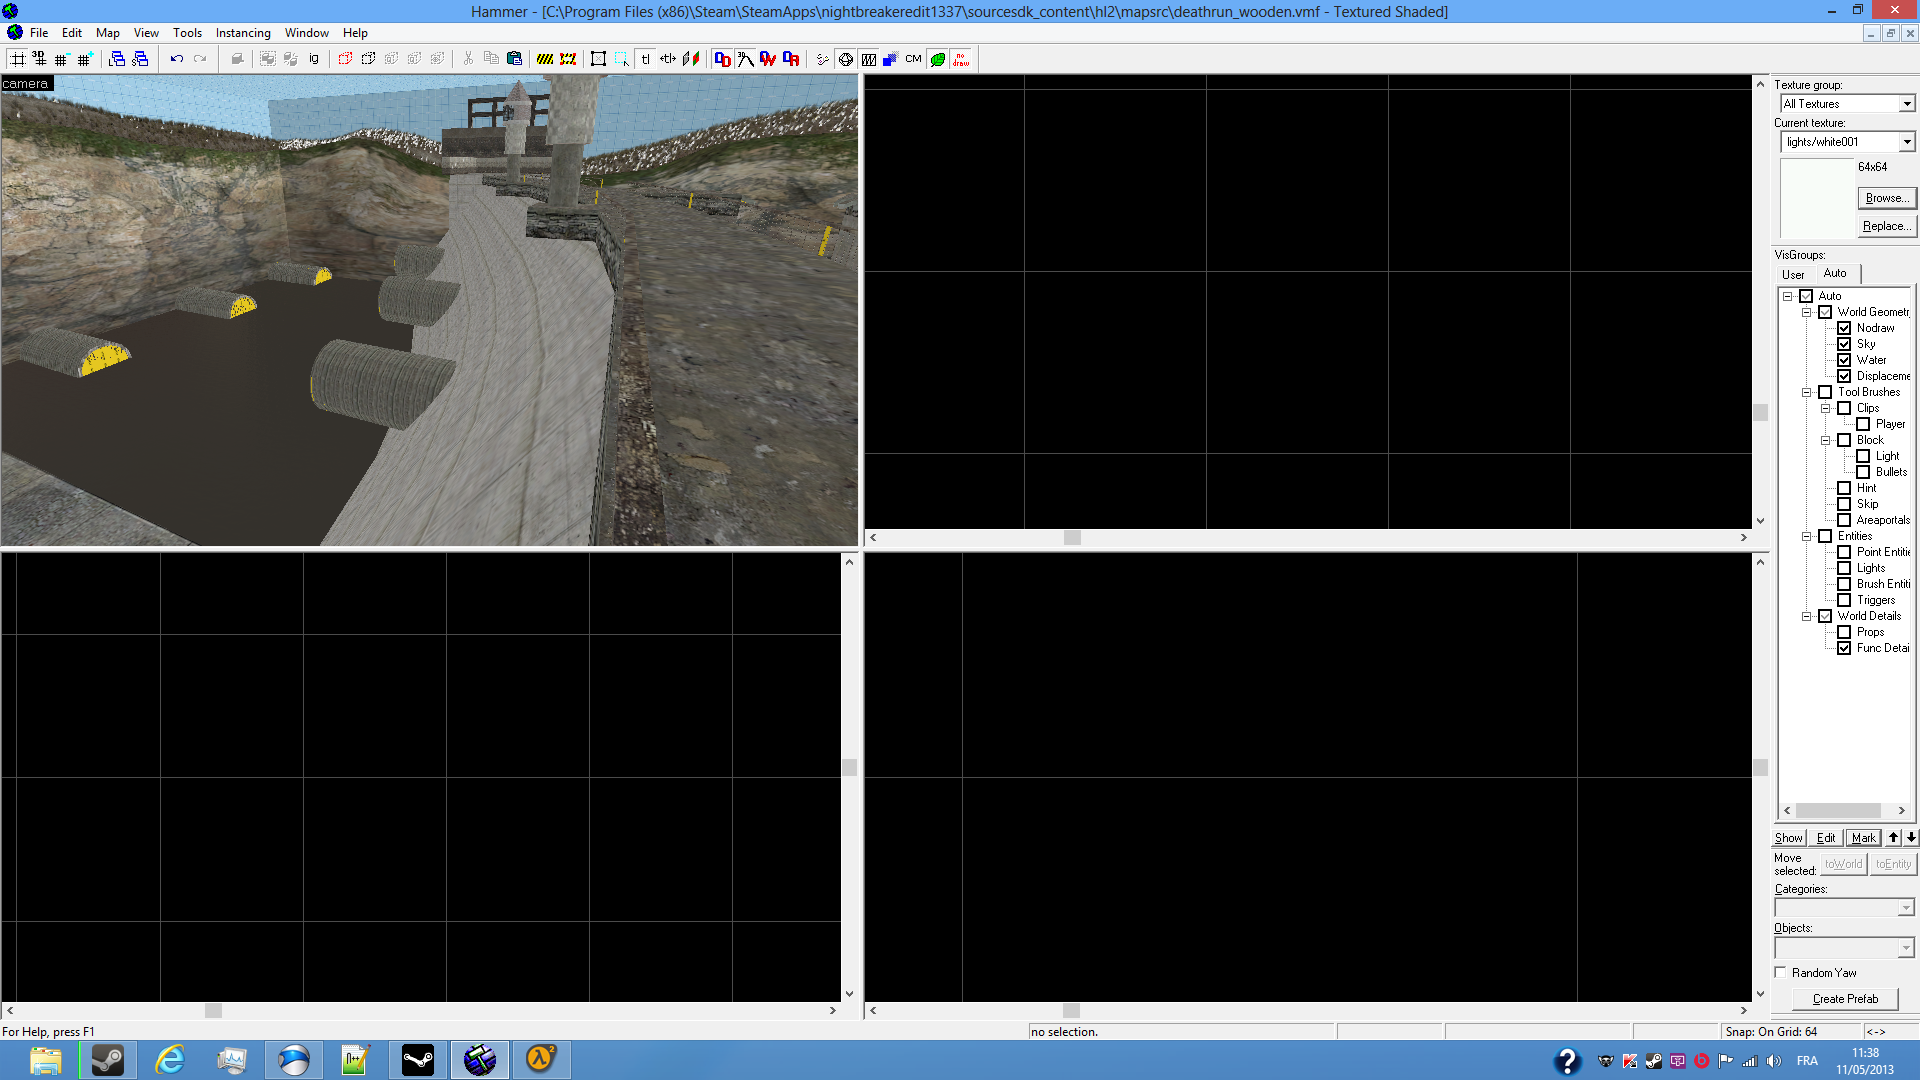
Basic mapping After making a bhop tutorial, I’ll make a Source SDK/Hammer World Editor tutorial. This tutorial is for people who has never made a map or doesn’t know how to work in the source engine. As you have seen in the pic, I made a water tower, this is me who made it but we ain’t going to make that today.First off, the reason I make it here is because we’re going to make a map for HL2DM.Yes, Steam pipe has broken Source SDK for the MP engine, but use 2009 with Half-Life 2 and use the hl2mp fgd.In this tutorial, you’ll learn: The way you use the tools on the left and right of the screen. How to create a small map. How to use the entities.I. ToolsIf you have your Hammer ready for use, then continue reading.Also, if you have never configured Hammer, configure it like so:Press “tools” “Game configurations” then remove base.fgd is there is and add hl2.fgd and hl2mp.fgd.Then press ok and restart Hammer.Once ready, press File, New.From here, you’ll have 4 different view ports:The top left is the 3D view camera. It allows you to navigate through your map. Your map is in 3D.The top right, bottom left and bottom right represents the 2D view.This is where you create blocks and place entities in it.Top right is the Top view, this is the one you will use the most.The bottom right is the side and bottom left is the front.Side and front are used to raise or lower walls or move objects/blocks up or down.On the left, you have a tool bar.This tool bar has:Selection tool: used for selecting objects.Magnet tool: used to zoom in or out. This tool is not commonly used, so can ignore it since you have your mouse wheel already.Camera tool: Personally, I don’t use it. It’s used to navigate in the 3D camera, but you’ll see later why I don’t use it.Entity tool: One of the tools you’re going to use the most. It is used to create different entities in the world.Block tool: You will be using this tool the most. It is used to create blocks, shapes and more. This is a powerful tool.Face edit sheet tool: It is used for applying textures, changing them, or select a side of the block to change its texture, scale or lightmap. With this tool, you can also create displacement, you’ll use it alot.Apply current texture tool: Similar to face edit sheet tool, it is used to apply a texture to the whole block only.Decals tool: This is used to apply decals on a surface, it is very useful at detailing.Overlay tool: Similar to decal tool, it also apply a decal on a surface. The difference it has with its brother is that the overlay tool can be resized, rotated and can apply its texture to multiple surfaces while the decal tool can be applyed to only once face.Some textures used with decal tools will appear to be much bigger that if you use the overlay tool; so if it happens, use the overlay tool, it will appear less bigger.Clipping tool: Used to cut shapes, very powerful tool, you will use it for different purposes. With this tool, you can cut, or clip out a surface in 2 or more.Vertex tool: Very powerful and dangerous tool. It allows you to make advanced shapes that the clipping tool can’t do.Be aware that moving vertices in wrong places will result Hammer to detect the solid as “Invalid solid construction” in Hammer error window (Alt + p), so you want to be careful while moving your vertices.II. Making a small map to begin with.Mapping is almost a game for me tbh. In my case, I started mapping in 2007, so I pretty much know how mapping works.In order to create a map, you want to select the block tool, go to the top view, it’s the best thing to start with.Click somewhere on the grid and, while holding the left mouse button, drag a box (do it 256 x 256 to start with) and then, release the mouse button. When you’re happy with your block, press Enter.Now, your block is created.In order to see your work, move your mouse over the 3D camera view, and press Z, then use WASD to move around.And this is where I told you the camera tool is pretty much useless, I use Z and WASD to move, so I never used camera tool.But you’re free to do it.While your moving your camera into the 3D view, you’ll see a block, if it happens to have lines, usually yellow on its perimiters, it means your camera is set to Wireframe mode.If it happens, press Z to exit the 3D camera and click on where it says “Camera” (top left of the view port) and press 3D Texture shaded polygones). Now you can see your block.Your block will appear with one texture, to change the texture,select the block, press the Face Edit Sheet tool, and press the Browse button; select one of the texture you want, you can also do a research in the filter box.For instance, let’s say we want a metal texture (yes, I’m a fan of metal textures), type metal in the filter and select a texture you want.Once selected, press apply, it will apply the texture on the whole face.If you want to change a texture on a single face only, open the Face Edit Sheet tool again (if you have closed it, otherwise, keep it opened) and select a face, then change its texture.Well done, you have learnt the basics on creating normal blocks, also, I forgot to tell, if you want to create walls, use one of the 2D view ports, Side or Front depending on which side your 2D top wall is.But it doesn’t really matter since it’s a first map.When making a map, you want to spend a little bit of time making the map.Thanks for reading, any questions will be answered as quick as possible.
Source SDK Mapping
Mapping with Hammer World Editor.