
Overview
In this guide you’ll learn the basics of Source SDK Hammer: how to create a simple map, add light, add props, weapons and other entities.
Introduction
You’ll need 1 of the 3 tools and Source SDK (the main base): Source SDK 2006 for 2006 Source engine (this is quite old), Source SDK 2007 (CSS, TF2, HL2, basically Orange Box) or Source SDK 2013 (L4D2, CSGO). This guide is for Half-Life 2, so we will use Half-Life 2 SDK. You should not open Source SDK from Tools directly, instead go to SteamsteamappscommonHalf-Life 2bin and find file “hammer.exe”, then open it. Then choose the game you want to edit, then, once opened, press “File”, then press “New”.
GUI

When you press “New”, it should look like this. You will see buttons in the left, right and in the up.
1. Selection tool – it is used to select anything in the map, to resize objects in 2D view.
2. Magnify tool – it doesn’t mean much, since you can zoom in/out with any tool you select.
3. Camera tool – this tool allows you to move freely in 3D view, but, for quicker way, you can just press Z in 3D view to move around freely.
4. Entity tool – used to place entities (such as props, player spawn point, light and other things).
5. Block tool – used to create brushes, brushes are walls, some doors.
6. Toggle texture application – used to select more options for applying textures.
7. Apply current texture – selected object will be replaced with another selected texture by pressing this.
8. Apply decals – used to place a picture or something onto other object, this is not same as texture, decal example could be bullet marks, graffiti.
9. Apply overlay – overlays are more expensive (longer to load) decals that offer level designers more control.
10. Clipping tool – allows to cut object in half or to cut something in the object, f.e. make a hole in the wall.
11. Vertex tool – allows to control (change) the size, shape of solid object in 2D view. You can also change size of object with Selection tool by pressing on it in 3D or 2D view.
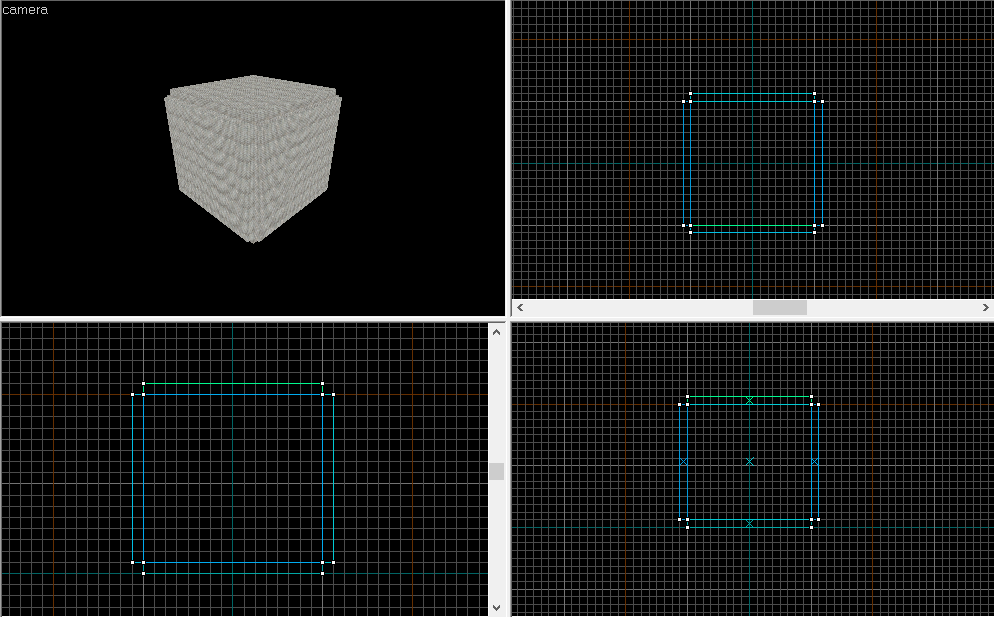
There are 4 views: 3D view (camera), 2D top view, 2D front (y/z) and 2D side (x/z). You use 2D views to place objects and entities, change size of objects, etc. Camera view is to explore the world and see how it’ll look in-game (without lights). You can also see all objects, entities placed in-game with it’s wireframes.
In the right panel you can select texture group, texture to use for objects. Selecting Entity tool will allow you to choose category and entity object. Not all entities are visible in final product, but things such as props, items will be visible.
In the upper panel there is nothing much for you to know, but most important are buttons to make bigger and/or smaller grids.
Making a room
To make a room, we will use Block tool. Press on the Block tool icon, then, if you want, you can change the texture of the block in right panel, by pressing “Browse”. Now, in 2D view, left click and drag to make a shape. Then, press Enter or right click inside the object and press “Create object”. If you don’t see the object in 3D view, press on “View”, then press “3D Textured Polygons”. Now, you should see that object is bright red. It is because it’s selected. Select Selection tool and press somewhere else. Let’s change it to something better, f.e. (optional, skip if don’t want to), click on “Browse” in right panel, and in the textbox “Filter”, type in “floor”, then choose your prefered texture. Now, with Selection tool, double click on the objective in 3D view or 2D view. If you click more on the objective in 2D view, you can see that resizing points change – 1st is to resize, 2nd is for rotation and 3rd is for yaw. Now, press Apply current texture tool while selected the object. The object will change it’s texture. You can also select multiple objects by holding LCTRL and left clicking the object. Now let’s make walls and roof. Make sure that there are no leaks – holes to see that black space, because the map won’t compile properly and will have errors. This is what I made:
If you prefer, you can change texture of walls and roof too.
Adding spawn point
To spawn in the map, you must add spawn point. It is added trough Entity tool, so select it. Now, on the right panel type in “Objects” type in “info_player_start”. Now, go somewhere INSIDE your box and press somewhere in 3D or 2D view. If you want to make it more accurate to center or somewhere else, make the grid smaller or/and bigger. Now you placed a spawn point. If you want to test the map, head to “Compiling and playing the map” section, or continue through sections to it.
Adding a static, physics props, light entities, doors and some items
There are 3 prop types:
- Static prop – it will always be stationary and they can’t be interracted with, such as large debris or a some wall details.
- Dynamic prop – a prop that can be animated to move or can be made to move with another object.
- Physics props – a prop that has physics.
Once again, we’ll use Entity tool. In the “Object” textbox, type in “prop”, and select “prop_static”. Now, click somewhere in 3D or 2D view INSIDE your room. You’ll see red box, take Selection tool and double click on the red box. These are the object properties, which can be accesed from any object. Find line “World Model”, then press “Browse” on right. It may take some time to load the panel. We will use fence prop as example. Find “props_c17”, and click it, now, in the “Filter” box type in “fence”, and select “fence01a” model. Then click “Apply”. The fence will be stuck in the ground, you can allign it with the floor by making grid smaller.
Now let’s add physics prop. Select Entity tool, and in “Objects” select prop_physics and do same steps as above, but, in “Filter”, type in “oildrum”, then select “oildrum001”.
Select Entity tool, in the “Objects” textbox type in “light”, and press somewhere INSIDE the box. Now, double click it with Selection tool. There is nothing much to edit for it in properties, except if you want to make HDR lightning or change light color. To see the light effect in-game, open up console and type in “mat_fullbright 0”.
Doors aren’t entities, instead, they are being made with Block tool. We gonna make a door that will slide up when triggered. Select Block tool, then make a thin object with it (make grid smaller). Then move the object to entity, press “toEntity”. This will bring up properties window, select “func_door” from “Class” box, then hit “Apply”. Then find “Move Direction” line, press it and from dropdown box select “Up”.
Items are added trough Entity tool, so select it. We’ll add HEV suit, and some weapons. Type in “Objects” “item_”, and you’ll see objects that can be picked up. Find “item_suit” and place it somewhere. Now let’s place some weapons: in the same “Objects” text box type in “weapon”, and select your prefered weapon then place it somewhere. Ammo can be placed by typing in “item_ammo” and selecting the right ammo.
Compiling and playing the map
To run the map you need to compile it. First you will need to save it, to do so, press “File”, then “Save as”, into “File Name” textbox type in the name for your map, do not include any spaces, instead write _ . Now, press “File” again, and press “Run map…”, then leave everything on Normal, and in the textbox type in “-toconsole -dev -console +sv_lan 1” (without “). Then press OK and it will start the game after it compiles the map into .bsp. If your map is not very big, try making some complex brushes (like pyramids, slopes) func_detail.