Overview
How to build a functioning basic planetary mining rig. When it comes to expanding your mining beyond your hand drill on a planet that has gravity and an atmosphere the new player usually finds out that it’s a more difficult task than you’d think. If that player has already discovered the Basic Small Mining Ship and how big an advantage such an easily built vehicle gives over the hand drill, the difference is even more obvious. There seems to be no equivalent obvious early-game vessel for planet-side mining that can handle the different environment of a planet. This guide attempts to show that, while perhaps not obvious, there are solutions for the early-game mining problem. This guide is written with the new player in mind but might give inspiration to more experienced players as well.This guide is the second one in the “Basic Vehicles” series. If you haven’t already read it, take a look at the first one: “Basic Vehicles: Small Mining Ship” found in: http://steamcommunity.com/sharedfiles/filedetails/?id=824690653
Introduction
Having landed on a planet, and perhaps already dismantled your ship and built a rudimentary base, your next issue is usually the gathering of resources, and that means mining for ores. At first, your hand drill is pretty much the only option but once you have mined enough ore to get your production running, the next step arrives: how to go beyond the hand drill when it comes to mining on planets, and especially on those with an atmosphere?
You’d think there’s an easy answer similar to the Basic Small Mining Ship that can be put together quickly, with very little resources, but that’s still a huge step in increasing your efficiency at mining. The problem is that there isn’t such an obvious answer to this. At least, not one that would handily tackle all the inherent problems that come with the planetary environment: Gravity, Atmosphere, and Lack of Surface Deposits.
Not So Good Solutions
You need a vehicle that can overcome the constantly pulling force of gravity, that can’t use ion engines, and that can do the “surface scraping” of removing the 10-30 metres of dirt, rock, or ice to get access to the ore deposits. None of these problems are impossible. The difficulty lies in that they are more easily solved by *big* vehicles and *big* rigs. There are plenty of large builds that do planetary mining and that do it well. However, what do you do *before* you have the resources to build those large rigs?
In a pinch you could adapt the Basic Small Mining Ship type vessel for planetary conditions by changing the engines to atmospheric thrusters and adding more thrusters to counter gravity. However, the result is usually unstable and riddled with problems and you are likely to flip over or crash.
You might think that switching over to wheeled vehicles would solve the problems but that’s a whole different bag of problems. In the Space Engineers game universe wheels are currently notorious for being buggy and erratic. Again, you could do it that way but sooner or later, probably sooner, your wheels end up pointing skywards.
So, let’s build something different.
Design Considerations
Let’s think about what we actually want to do: We want to remove surface junk that’s covering our deposits, we want to do it on a large scale, we want to mine the ore beneath that junk, and we want to carry the mined ore back to our base.
Basically, we want to do the same thing as we’re currently doing with our hand drill and backpack, but supersized.
So we do that. We build a Big Honkin’ Drill. That’s the whole idea of “The Rig”.
Foundation
Start by putting down a Small Light Armor block on your platform.

Add Small Light Armor blocks to create a 5×5 square with a 3×3 hole inside it.

Legs
Build 4 blocks upwards from a corner so that your build is now 5 blocks high counting the foundation. You may want to build scaffolding on your platform to reach higher.

Do the same for the other 3 corners.

Connect the two pillars on left and the two pillars on right with a horizontal 3 block bar of Light Armor blocks. These will be the left and right sides of The Rig.

You have now a 5x5x5 cube with two edges at the top missing (front and back).
Cargo Bay
Add a Medium Cargo Container to the legs so that the top row of the armor blocks is at the same level as the middle of the Medium Cargo Container.
Place the Medium Cargo Container so that the large access doors face forward and back, and the small access doors face up and down. The sides without doors are attached to the horizontal leg bar.


Connector
Add a Connector to the large access door at the front.

We have now secured the two leg structures on the left and right sides by having them attached to the Medium Cargo Container so we no longer need the connecting horizontal blocks at the bottom. Remove them.

Our build now consists of two upside U-shaped structures that support the cargo container and the connector.
Lifting Power
We need lifting power. Add four atmospheric thrusters to the insides of the 4 legs. The thrusters must point down i.e. thrust you upwards.

We want the Rig to fly even when fully loaded with ore so we need 4 thrusters for that.
Retractable Landing Gear
Add four pistons to the outside of the 4 legs. The pistons must point down i.e. they extend towards ground.


Movement
Add forward and backward thrusters on top of the two horizontal leg bars. At this point you probably want a scaffolding on the other side of the build, too, to place the other thruster.


Add left and right thrusters on top of the Medium Cargo Container. Leave a space between them. The Cargo Container has a small door there and we need to be able to access it later.

NOTE: The thruster setup here is minimal. When you only have an adequate number of lifting thrusters (up) you have to be careful to keep your ship upright when you work and fly it or you’ll tip over. Especially when you’re carrying a heavy load of ore. This is one of the problems inherent in minimalistic small ships on planets. Their stability tends to be not that good. When you have the resources to build additional thrusters, increase the number of forward, backward, left, and right thrusters, preferably also to 4 each but all additional ones help to make it more stable. You might want to add additional gyros, too.
Power and Equipment
The rig needs power. Put a Small Reactor between the left and right thrusters on top of the Medium Cargo Container. Place it so that the access door of the Small Reactor matches with the access door of the Medium Cargo Container. This will connect the Small Reactor to the conveyor network of the ship.
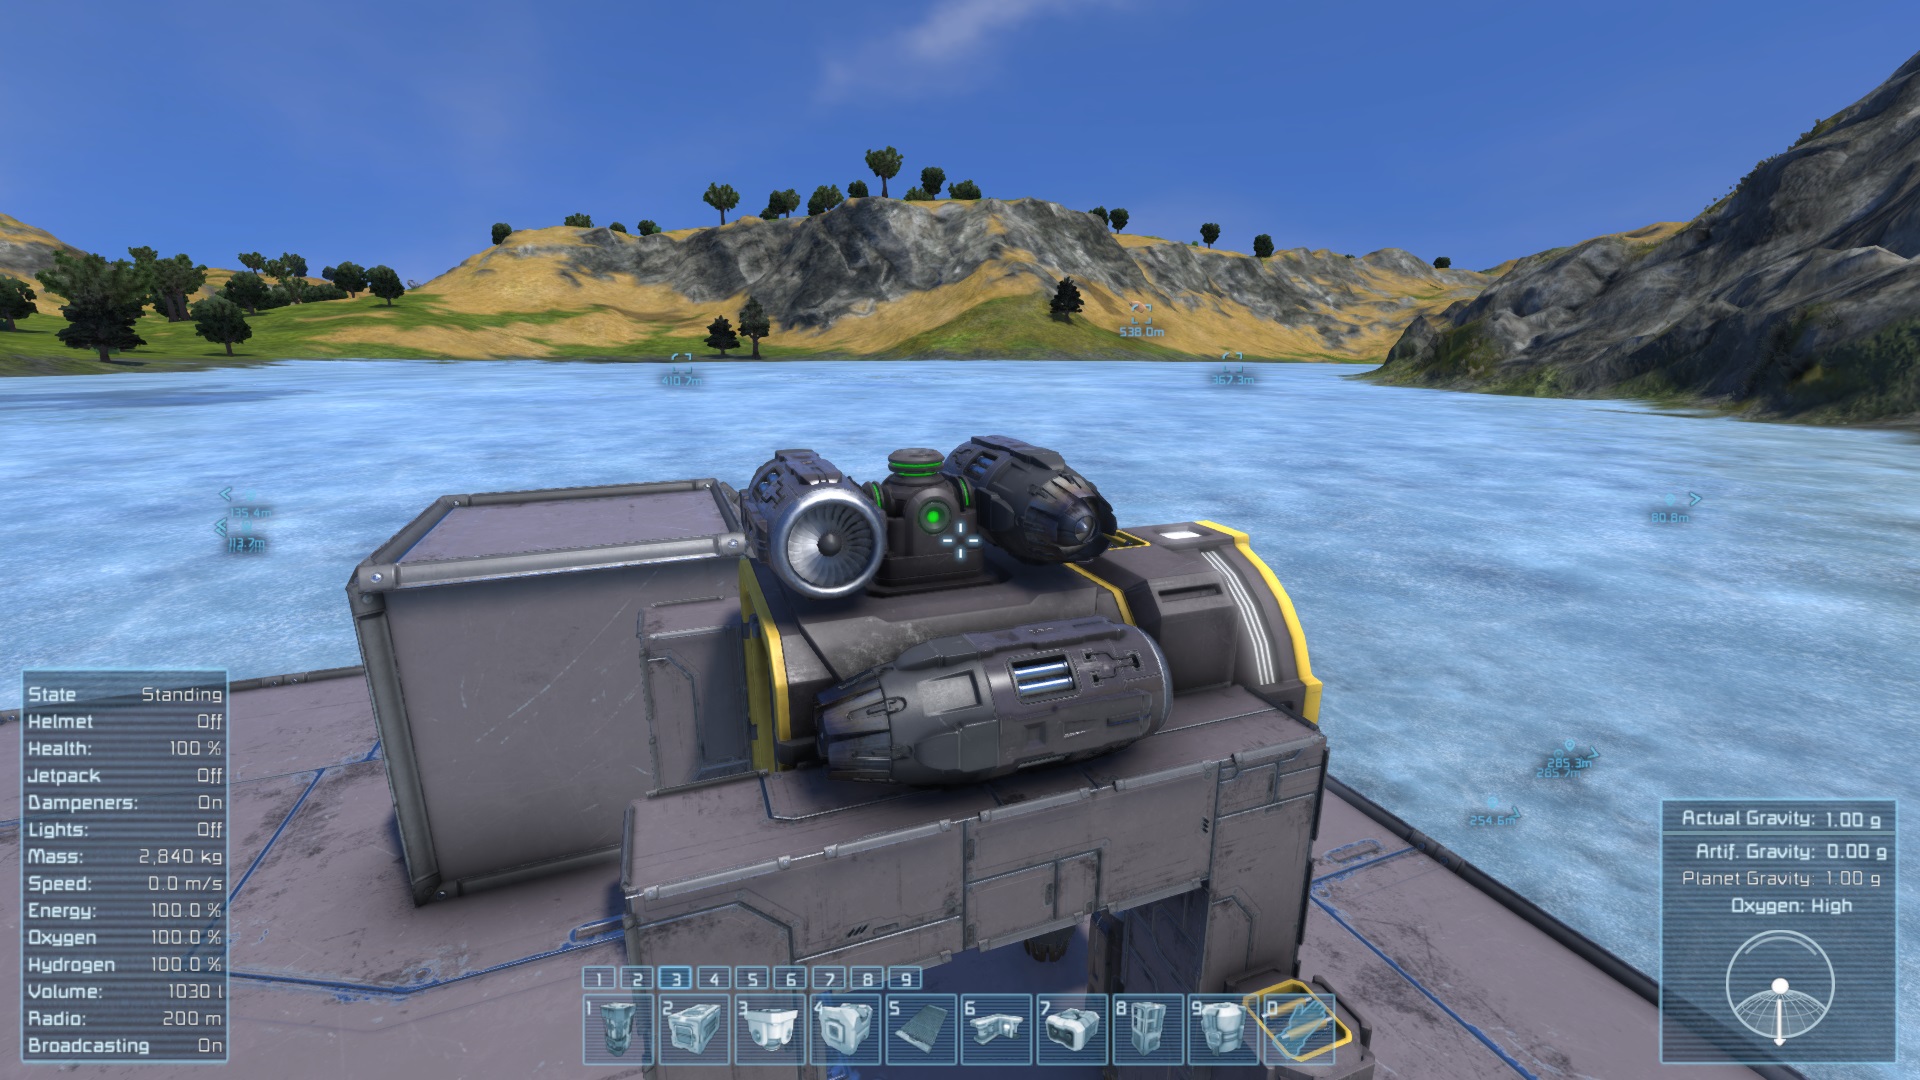
Put a Gyroscope between the left and right thrusters, next to the Small Reactor.

Go to the other side and add an Ore Detector to the remaining empty place between the right and left thrusters, next to the Small Reactor. Put it horizontally so that you get a nice flat surface.
On top of the thrusters, reactor, gyro, and detector, put a battery. Align it with Medium Cargo Container.


Cockpit
Add a Cockpit on top of the battery. The front of the Cockpit is on the same side as the Connector.
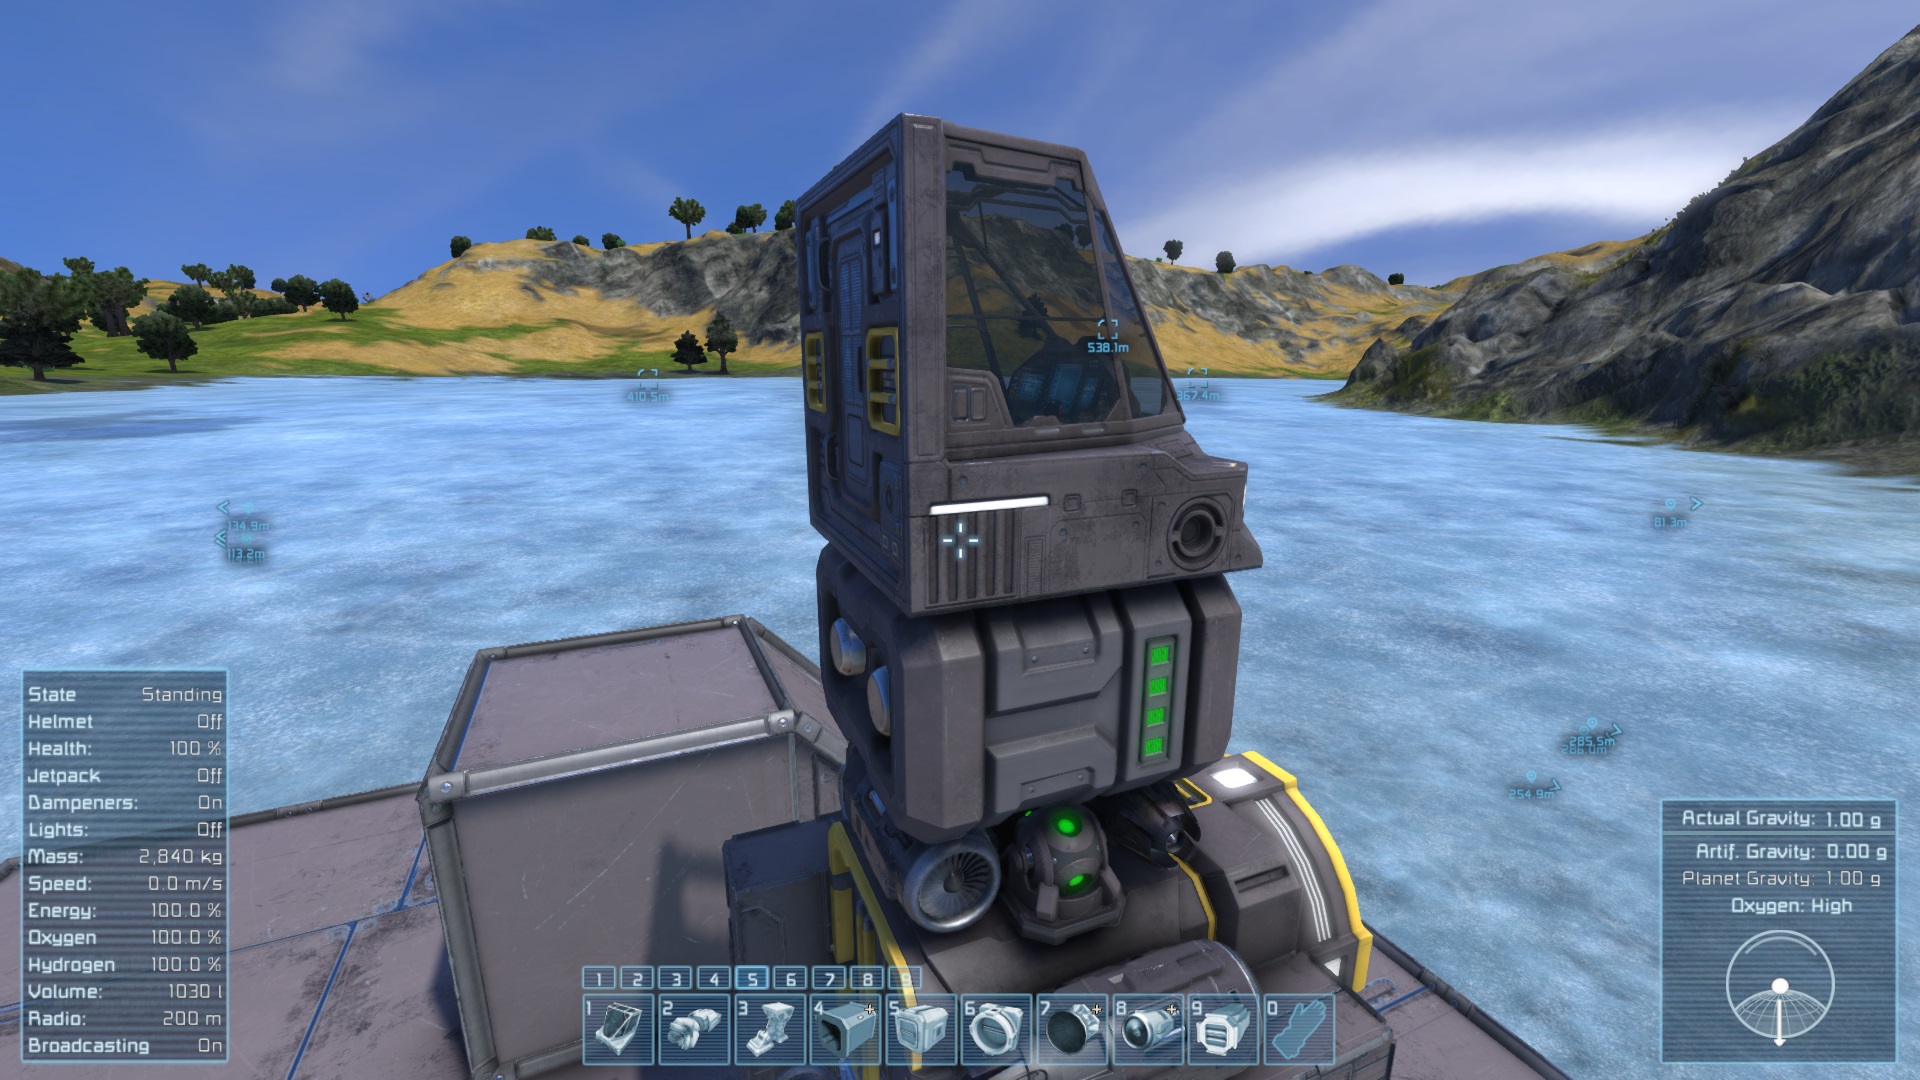
More Power
The Small Reactor we placed earlier won’t be enough. Add two more Small Reactors. There are two small access doors at the back of the Cockpit. Place the reactors so that the doors again match and you can access the reactors from the conveyor network.

However, our Cockpit isn’t yet connected to the other parts of the ship. At the front you can see the small access doors of both the Cockpit and the Connector and how they are nicely lined up.

Connect those two doors with a conveyor tube. However, use a conveyor junction block as the first element connecting to the Cockpit.

The junction provides more attachment points for later use. You might want to add 1-2 additional Small Reactors if you have the Uranium for it. The 3 Small Reactors and the 1 Battery we already have there are just barely enough for this ship. Adding more reactors will allow you to recharge the Battery while the Reactors are powering the ship and thus keeping the Rig working continuously.
You can use the rig with just the 3 reactors but you need then to keep the Battery discharging, too, and recharge it at your base between flights. If you try to fly with just the 3 reactors without the battery you risk overloading and plummeting down.
And about “plummeting down”: Now that we have added the Cockpit we have a place for our remaining thruster. Add an upwards pointing thruster i.e. one that pushes you downwards, between the two reactors.

You might be wondering why add a down thruster when you have gravity that pulls you downwards for free. The reason is that your “down” may not always be down. Having this thruster will add stability and allow you to recover if you happen to end up in an awkward position.
Nearly There
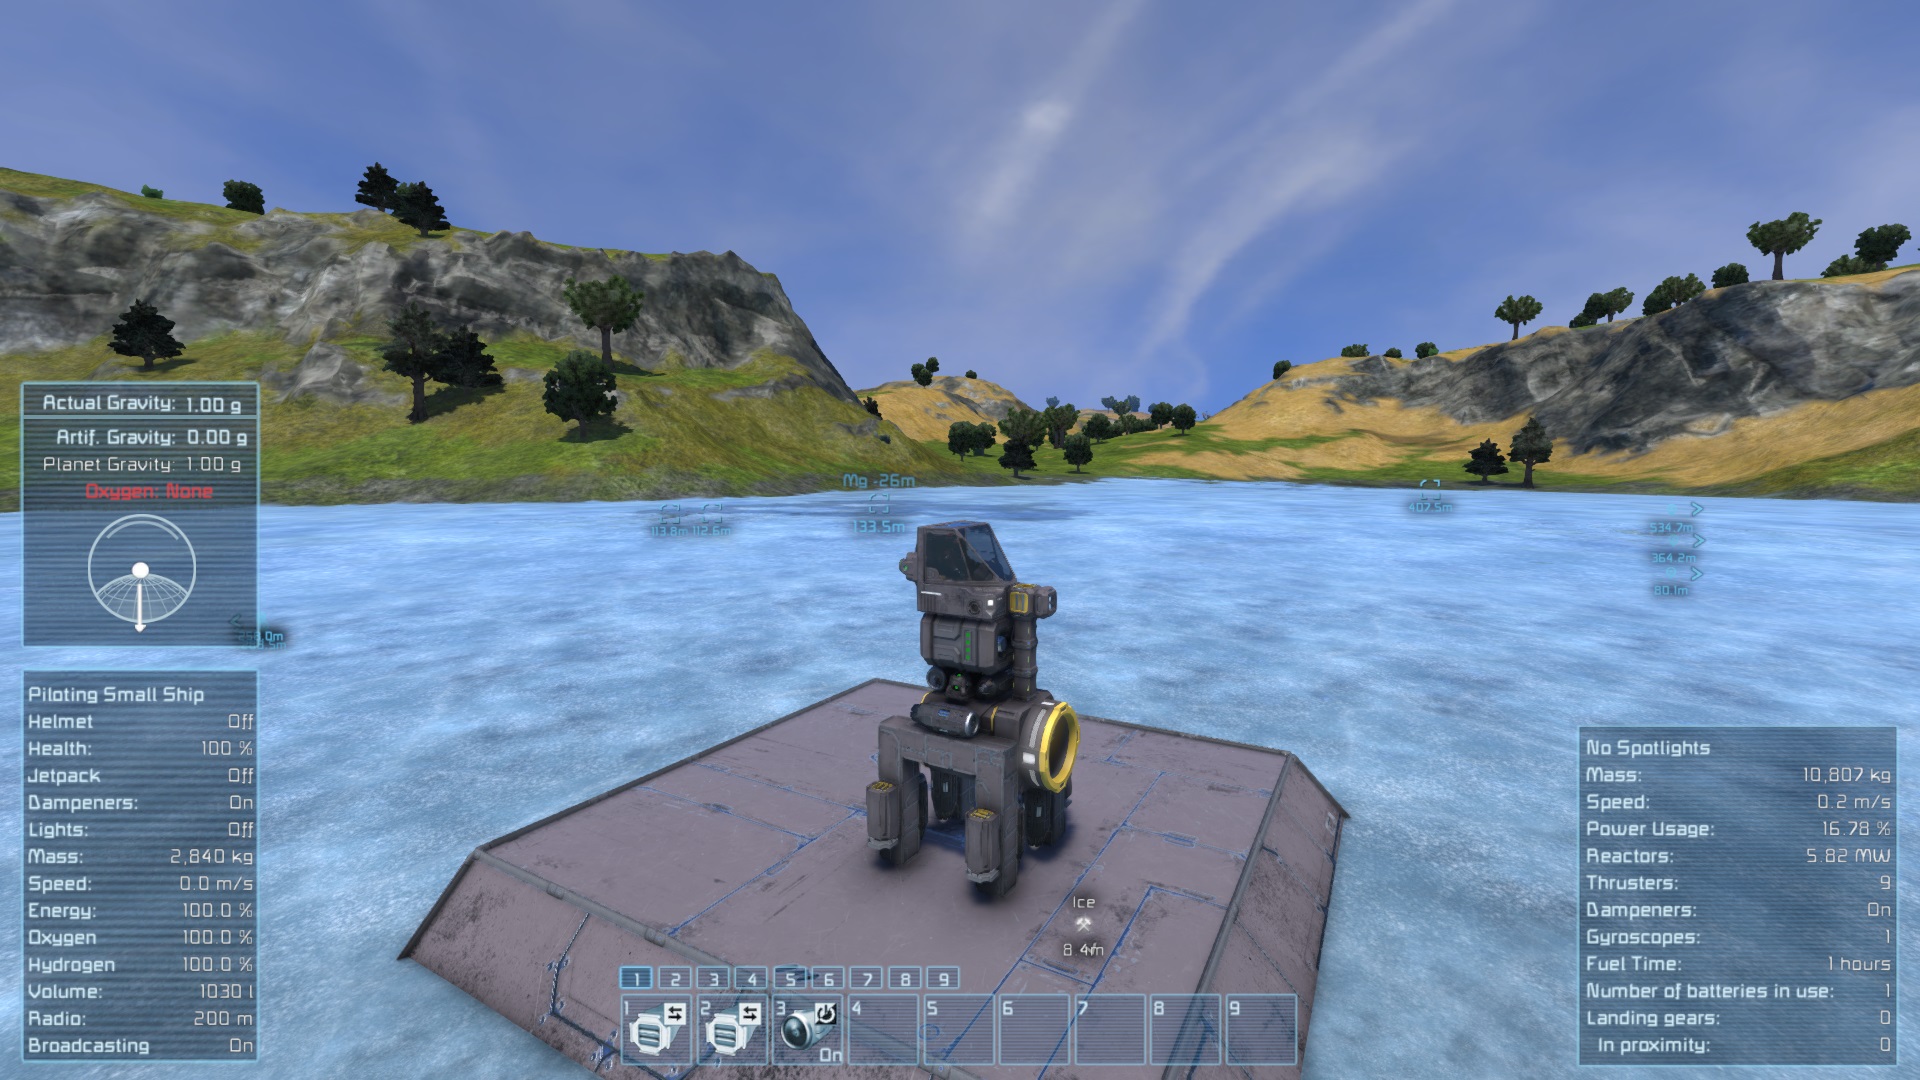
We’re almost done. Let’s remove our scaffolding to get a good look at our ship.
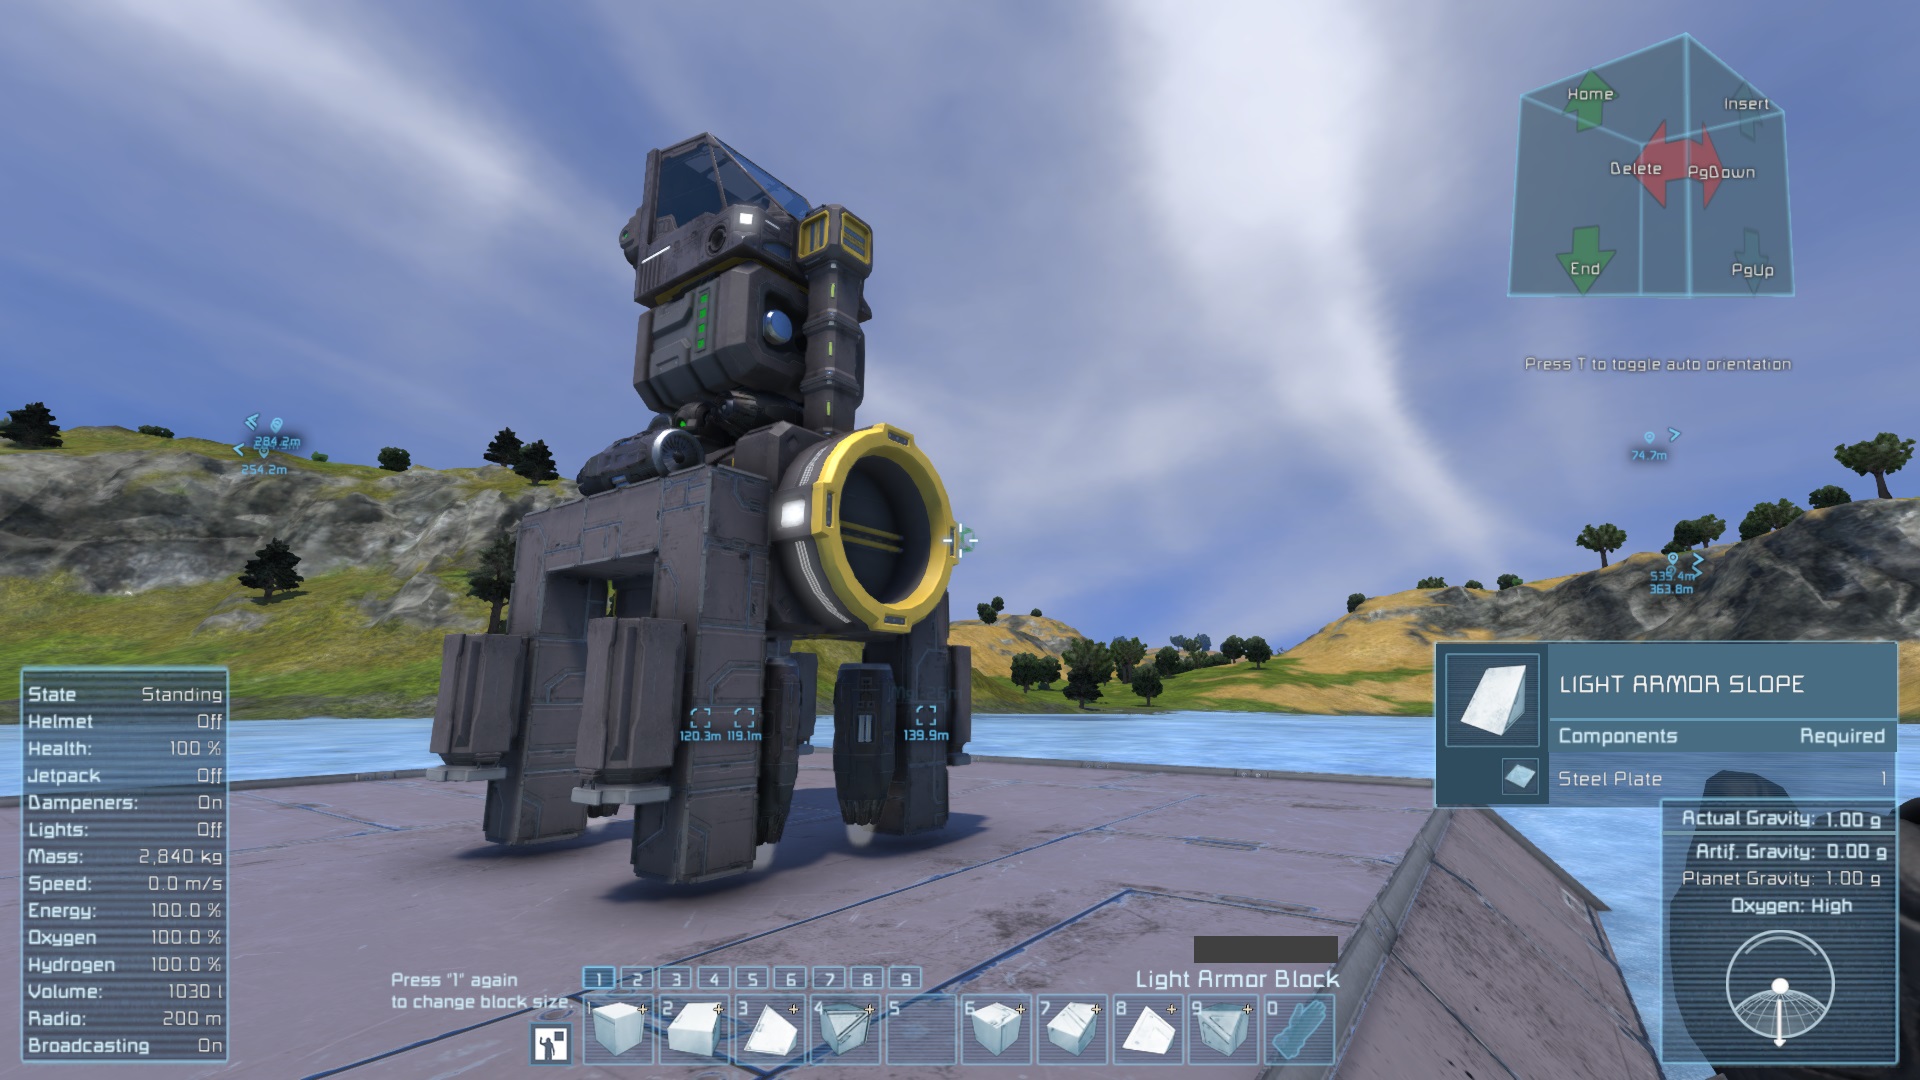
Quite a monster, eh? Well, we wanted a “Big Honkin’ Drill”. 🙂
Fuel, Block Groups, and Toolbar Actions
Put Uranium into your pockets and enter the Cockpit. Have enough for 3 Small Reactors.
Press “I” to open the inventory of the ship. Put the Uranium into the Medium Cargo Container. If the conveyor network works the Uranium will start flowing into the 3 Small Reactors evenly distributed.

Press “K” to open the control panel. Choose all thrusters CTRL+Clicking them and group them together into a block group named “THRUSTERS”.
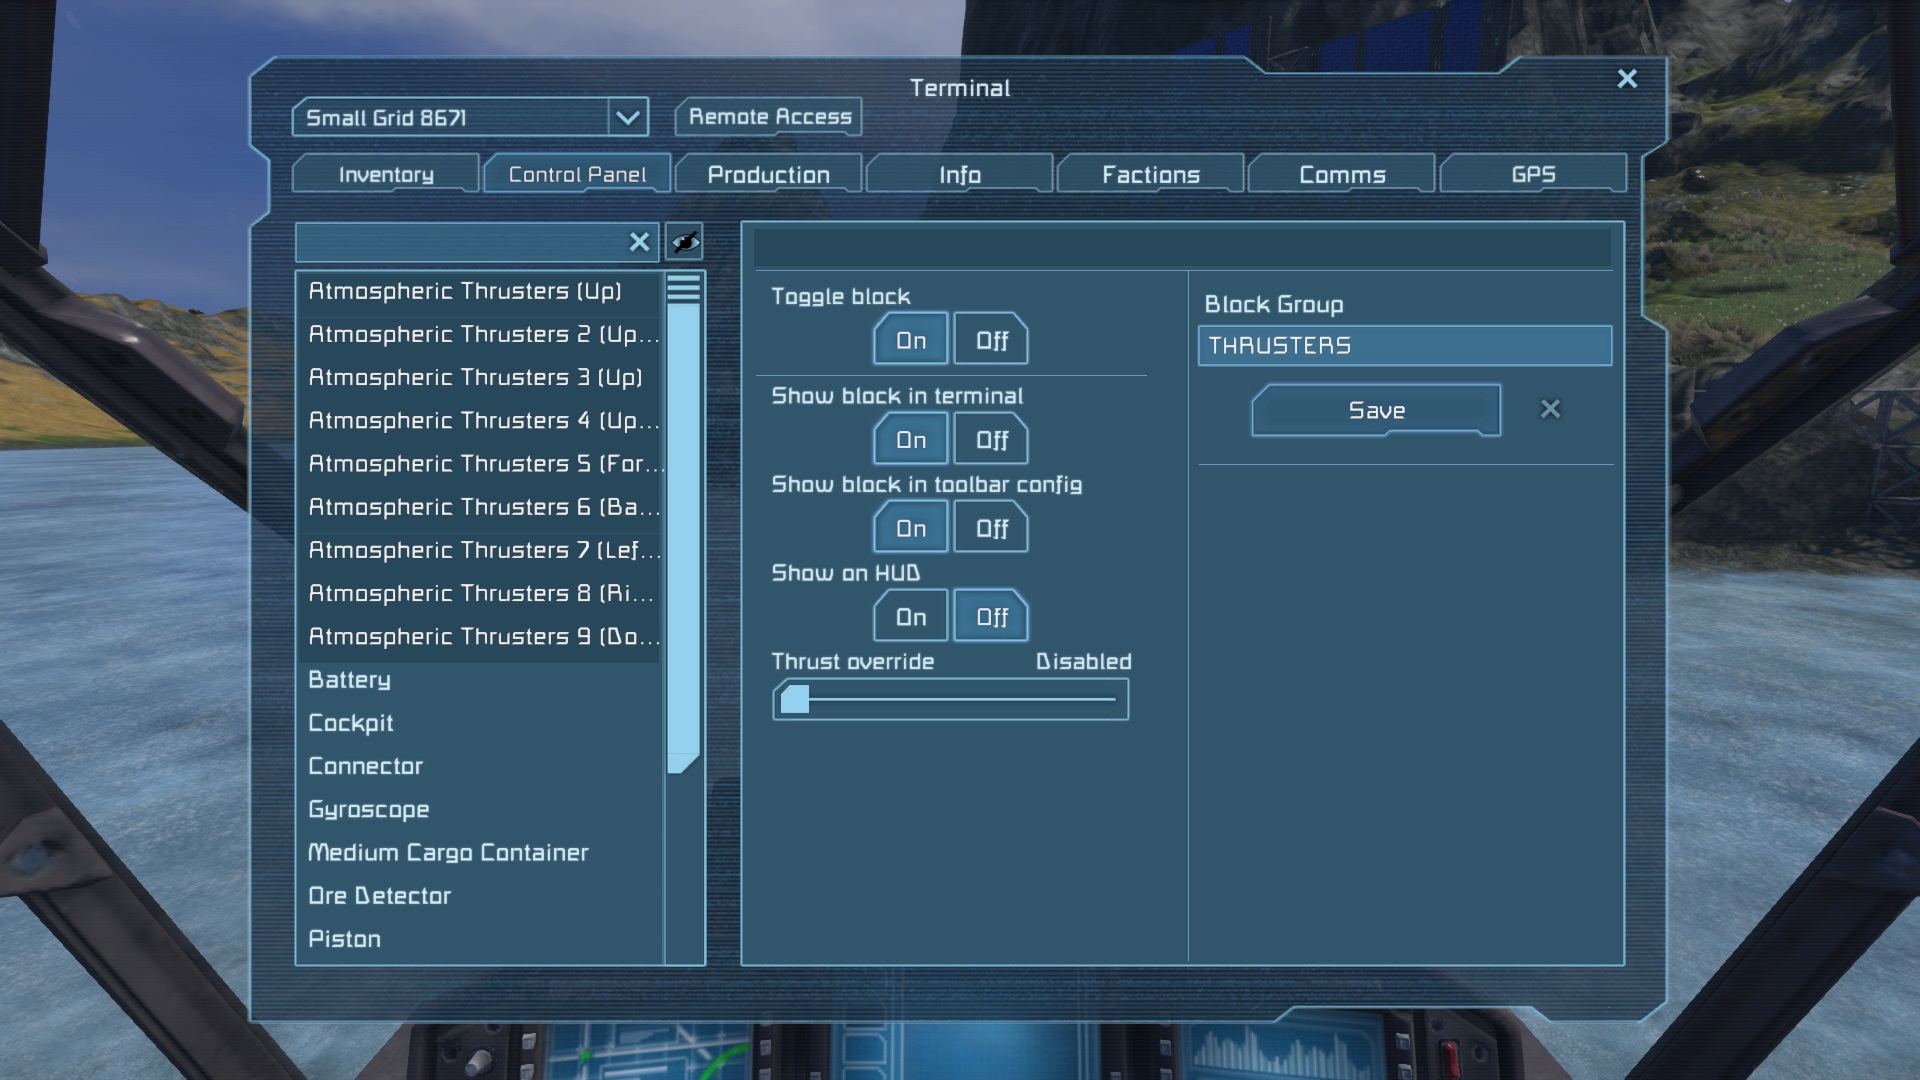
Then choose all pistons and group them into a block group named “PISTONS”.
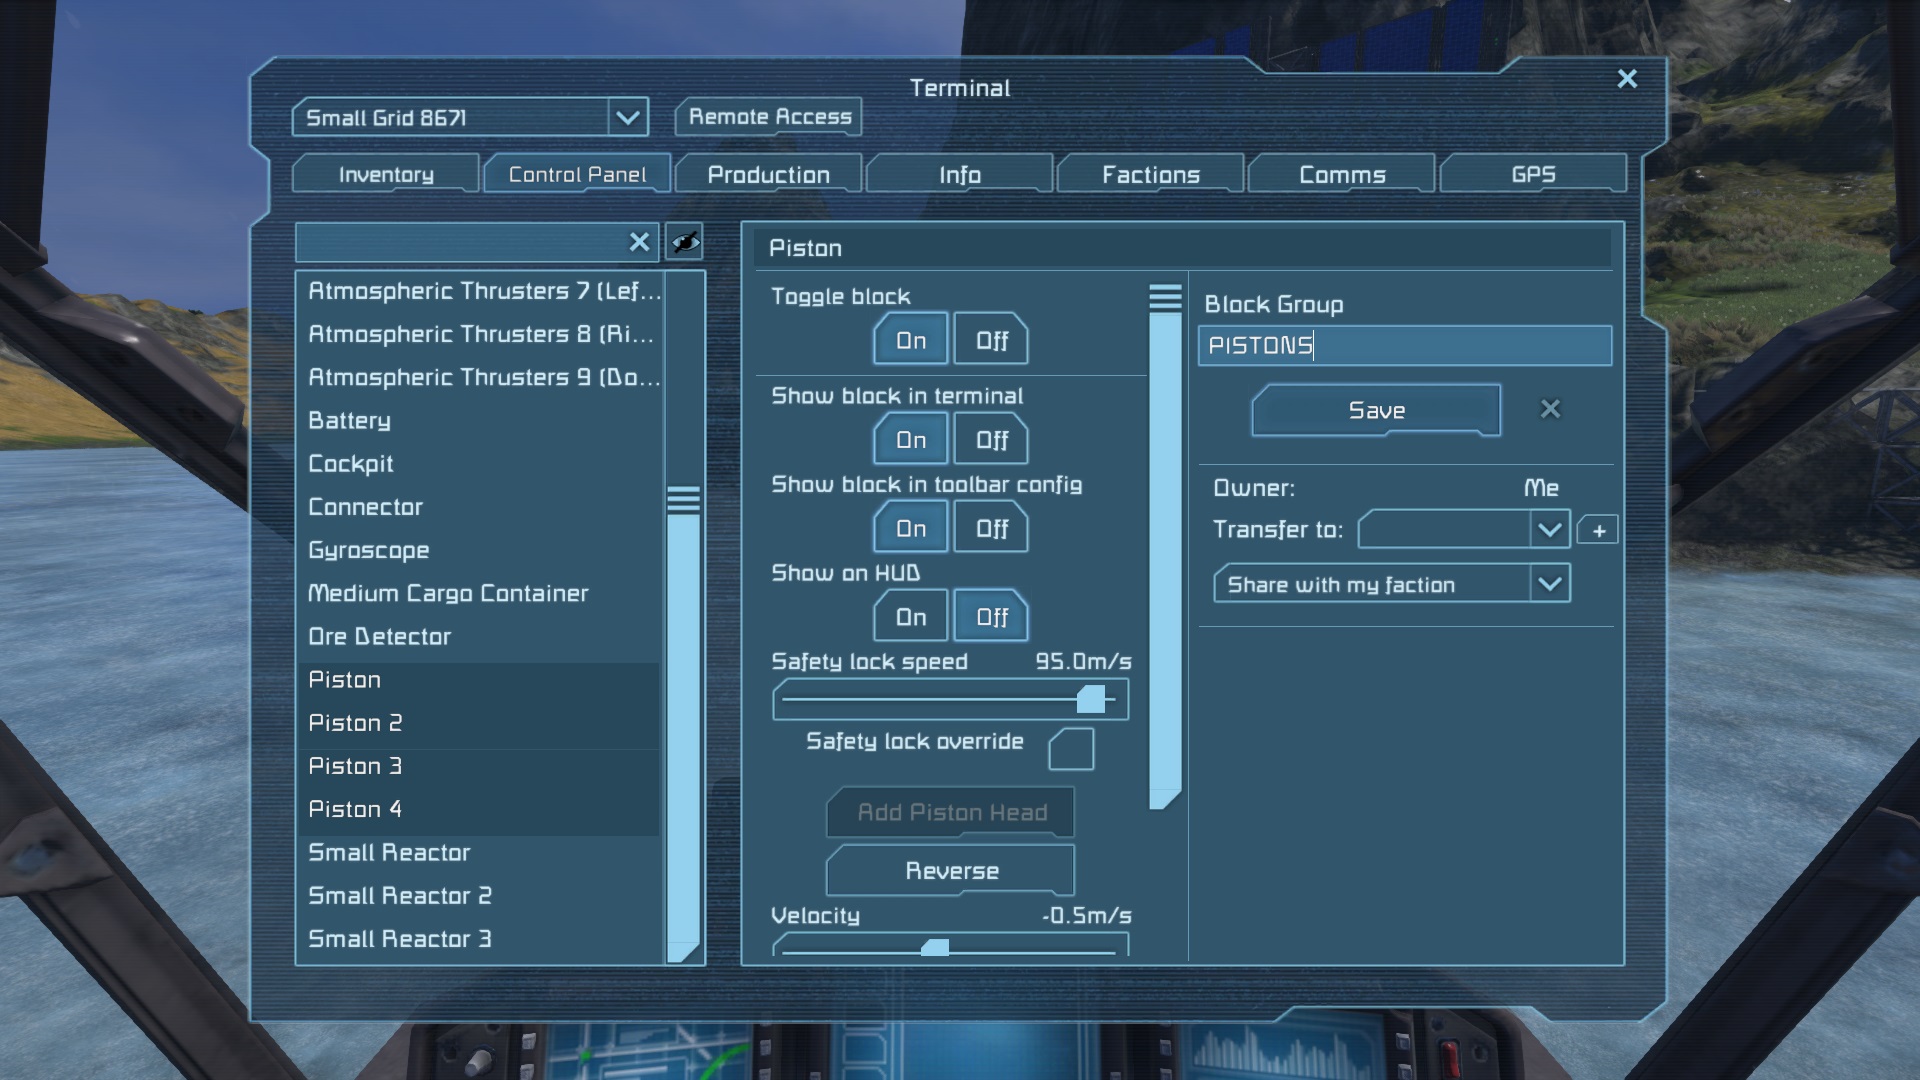
Finally, press “G” to open the toolbar config. Choose “Groups” and drag “PISTONS” into the ship’s toolbar and choose “Extend”. Drag “PISTONS” a second time to the toolbar and choose “Retract”. Then drag “THRUSTERS” to the toolbar and choose “on/off”.

Now you have controls to extend and retract the pistons and to switch your thrusters on and off.
Missing Airvent
If we hadn’t been using “Creative” mode to get all these screenshots we’d have noticed our health dropping while we were sitting in the Cockpit. That’s because the Cockpit is airtight and we forgot to add an airvent. Let’s add the missing airvent now. Our junction block is a good place for it.

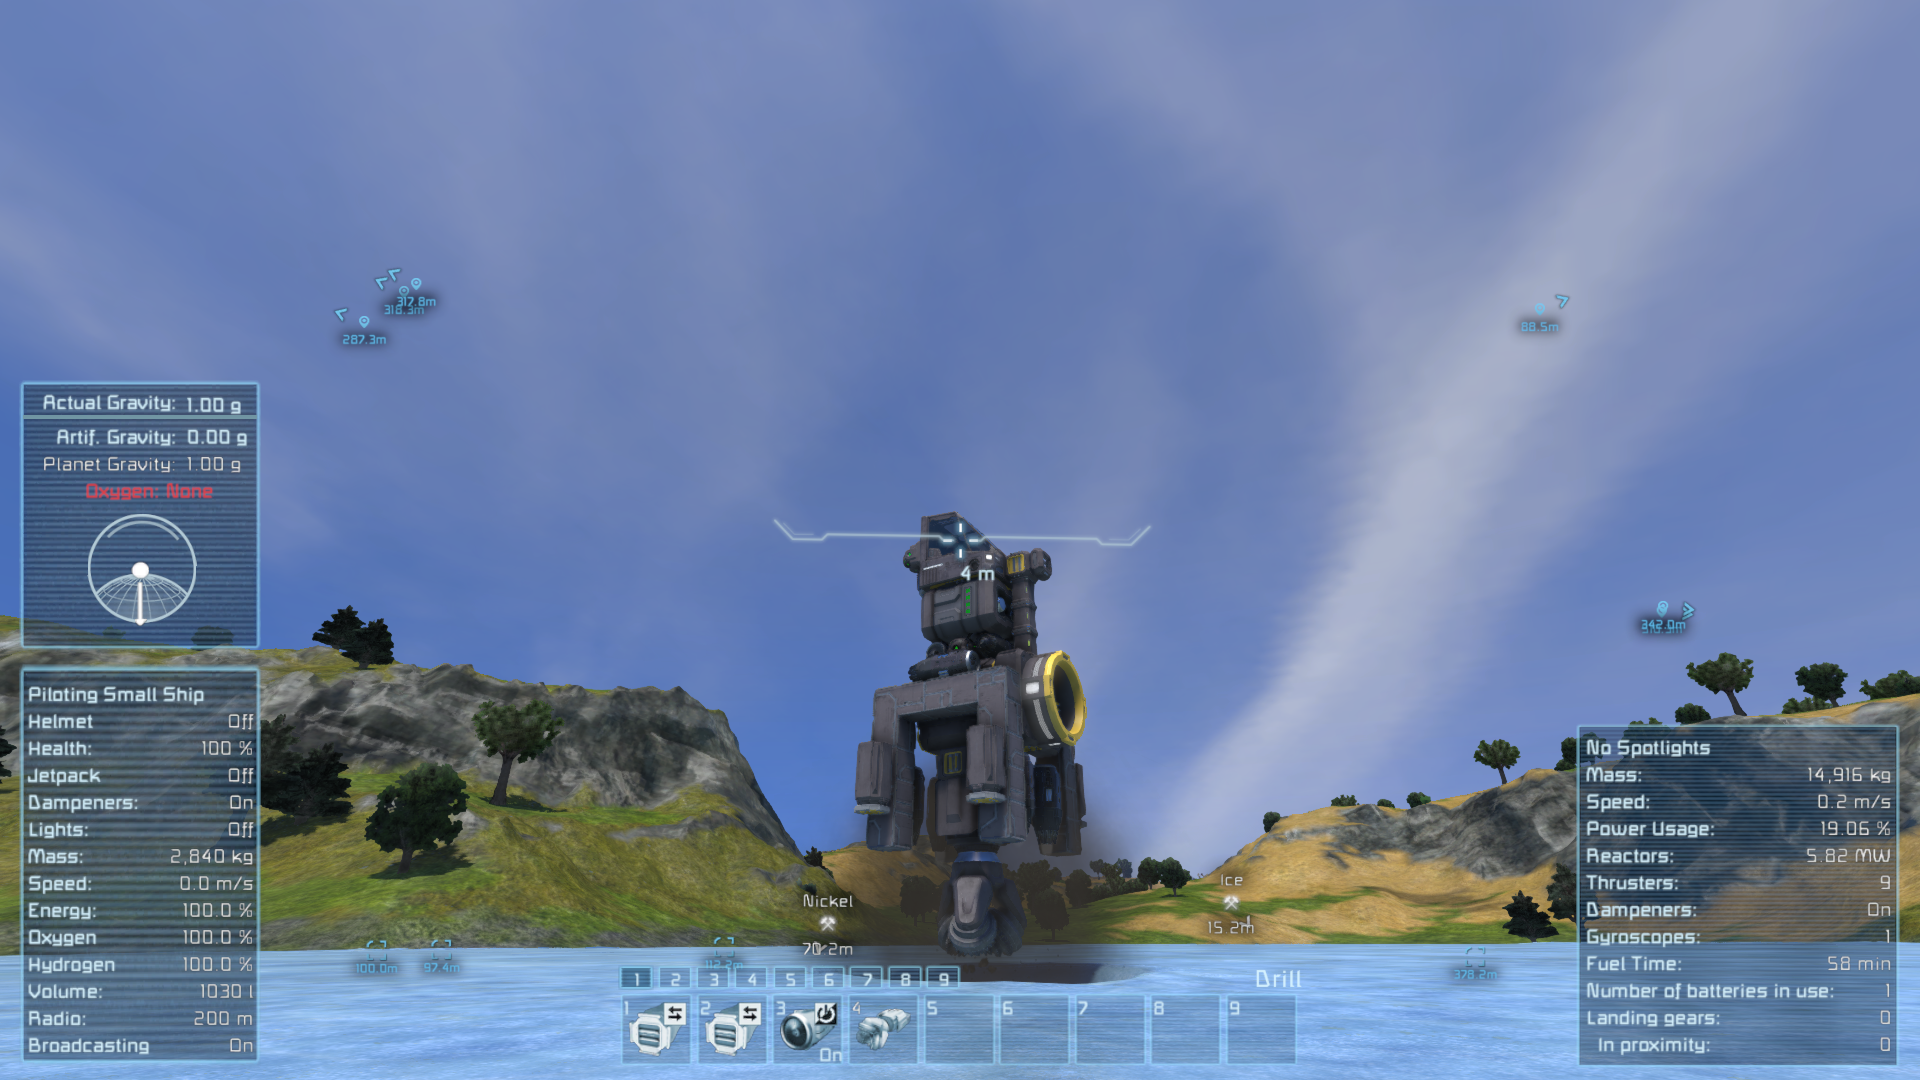
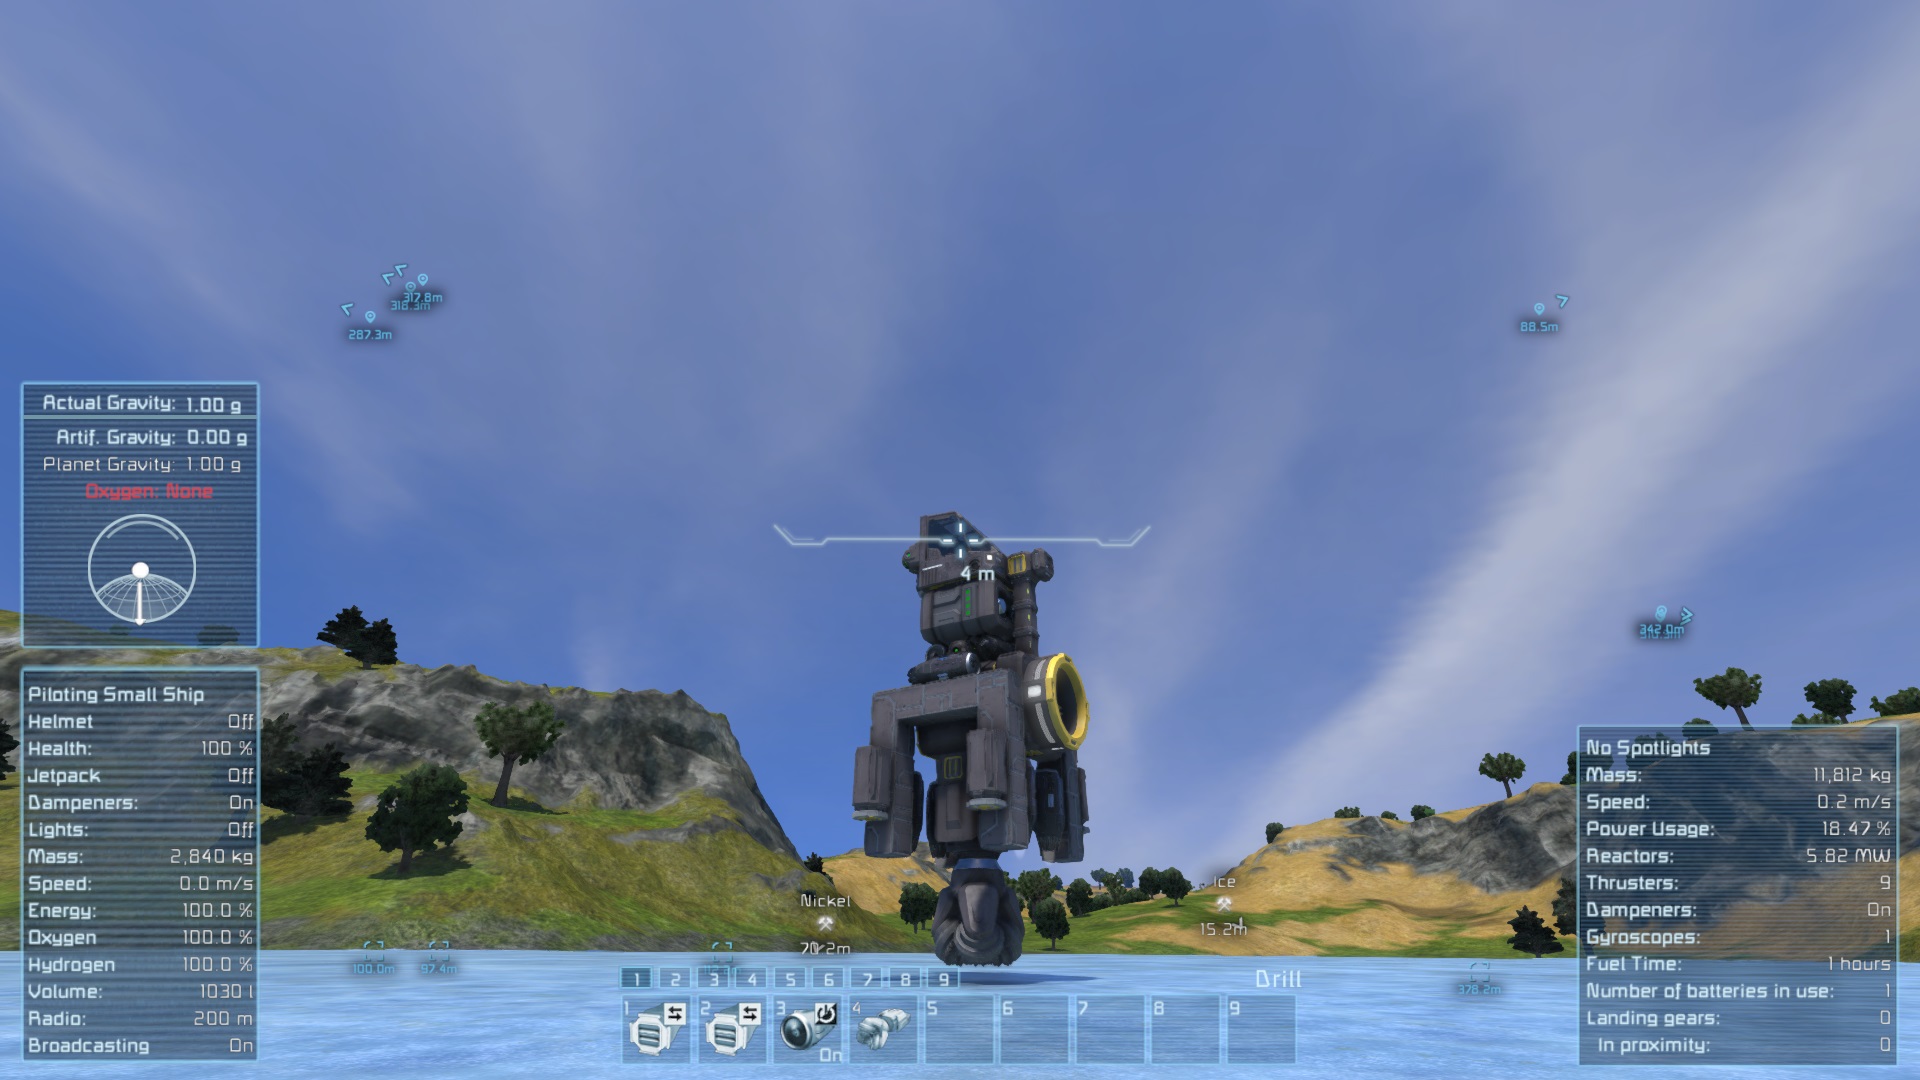
Drill
We are still missing the Drill which is a very essential piece for our “Big Honkin’ Drill”.


Now that our ship has risen to its full legs we can add the Drill. Look at the bottom of the ship. There’s the small access door of the Medium Cargo Container.


Now you need to add the Drill to the ship’s toolbar so hit “G” again and choose “Weapons and Tools” and drag the Drill to the toolbar.

And we’re done! Our ship is ready.
Test Flight
Let’s test our Rig. Give a light touch of “space” to lift the ship upwards. Very light. Your Cargo Bay is empty and you have 4 thrusters providing lift. Don’t shoot off into the heavens.

When in the air retract your landing gear.

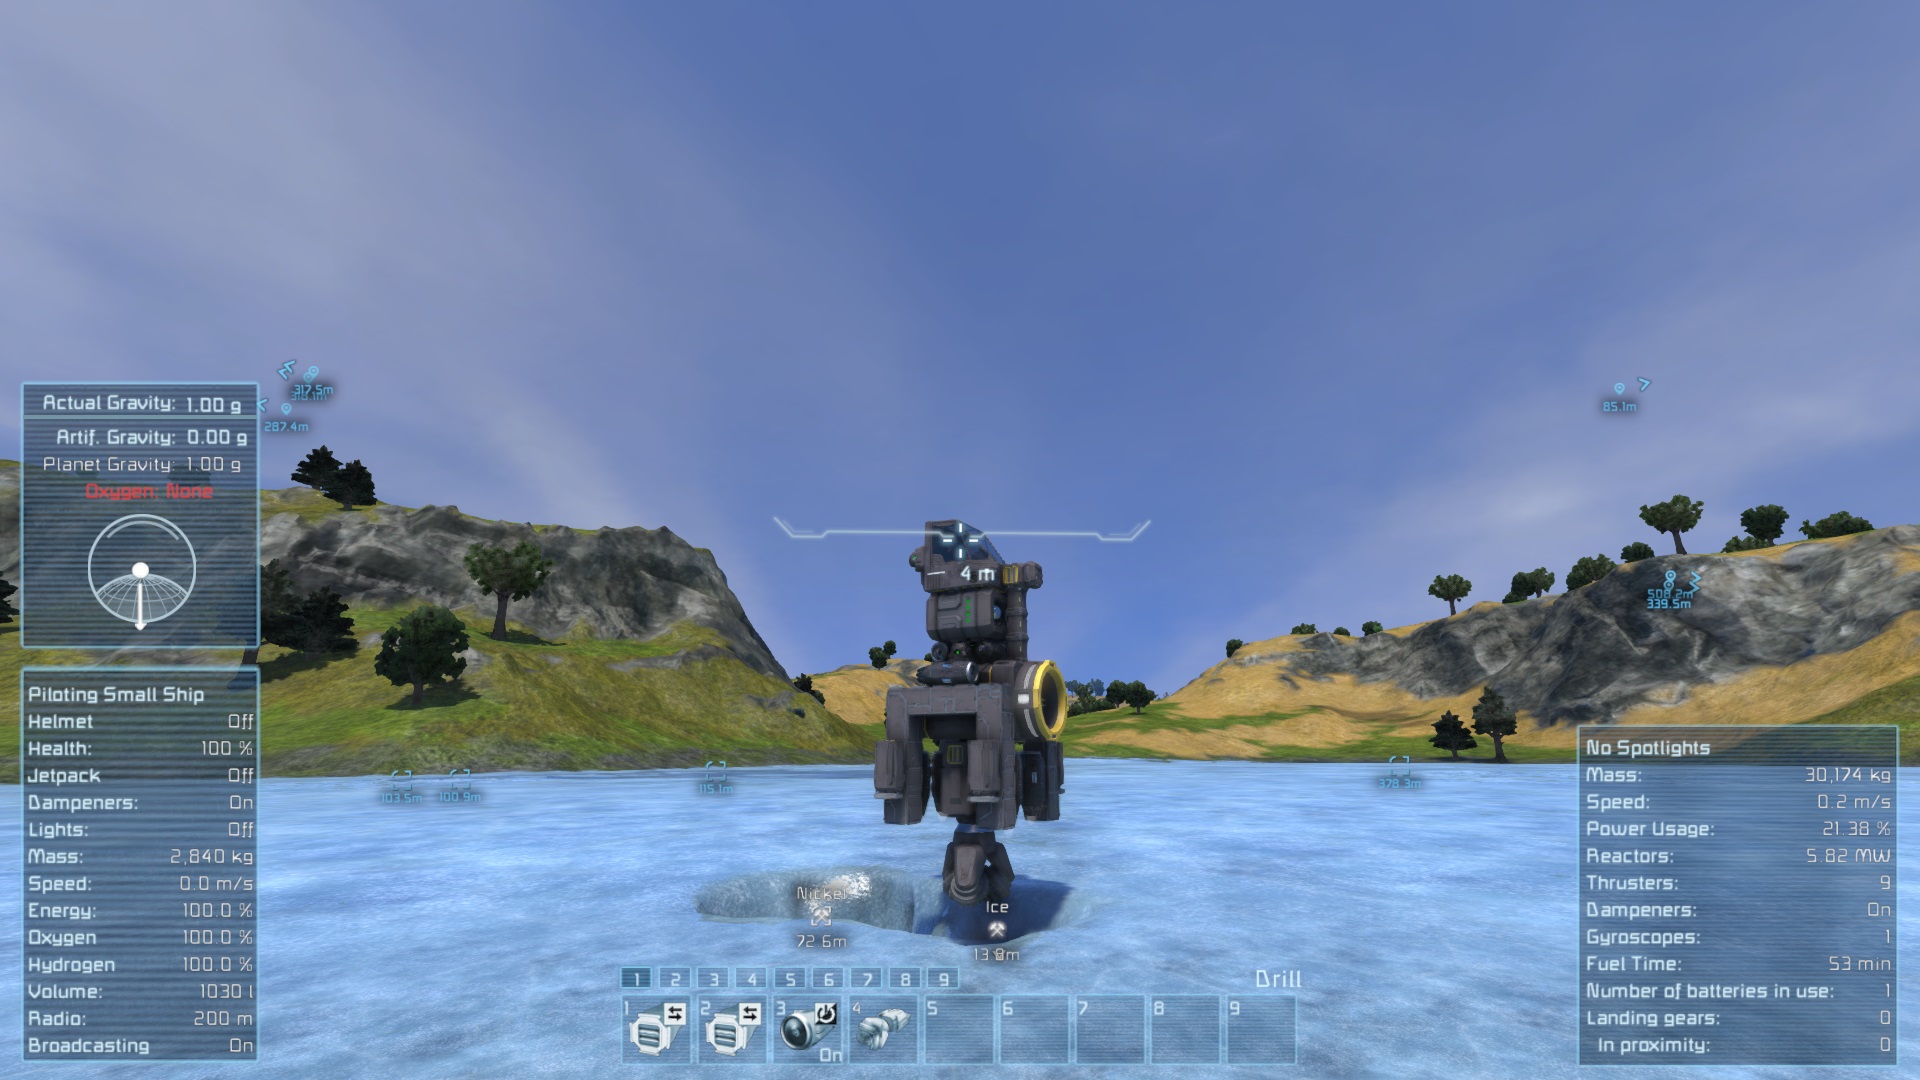
Move towards a suitable mining ground. This lake will do. We can always use more hydrogen so Ice is nice.

*Carefully* descend with “C” so that you hover just above the ice. Try to keep upright.
Give a short Drill burst. A hole starts to appear and your Cargo Bay starts to fill up with Ice.
Keep drilling. As the hole widens lower yourself carefully downwards thus drilling deeper.
A bit more…
But don’t overdo it. Once you reach the point it starts getting tight just rise up again and move a bit sideways to get to the edge of the pit.
And repeat the process.
You can keep on drilling and widening the pit. If the location had ore at some depth you’d continue mining the pit ever wider and ever deeper so that you get access to the pay dirt. Then just mine the ore using the same procedure as with the Ice.


When done fly back to base and unload the ore with the Connector.
Landing
When you want to land simply choose a suitable spot, usually on your base, but this ship can land anywhere flat enough.
Extend your landing gear.
Gently lower yourself downwards.
And finally shut down your thrusters.


Operation
The main improvement that this rig brings is the ability to quickly remove the overburden covering the paydirt. Here’s a screenshot from my actual game where I have opened a quarry for Iron ore (also have already added more thrusters to the ship):

When removing overburden use RMB to “drill and destroy”. This way you don’t load your vehicle with the heavy and useless stone but more importantly the RMB drilling destroys ground quicker and from a larger radius than the “drill and collect” of LMB. Specifically, its radius is larger than the width of the rig meaning that when destroying ground you don’t have to constantly pop up and down but can simply slowly go forward and sideways to cut a hole to any depth you need.
Just be careful to stop the RMB drilling as you start getting closer to the ore deposit or you risk destroying it, too.
When you have opened a nice, open, wide hole uncovering the ore then just start drilling and loading it. It’s 100K+ of ore per trip so certainly beats drilling by hand. 🙂
Blueprint
Here’s the blueprint for the vehicle:
[link]This variant has the additional thrusters and reactors included. Also painted it for a more finished look.
Ending Notes
The Planetary Mining Rig desribed here is, by no means, the only option for dirt side mining. There really is no single optimal minimalistic assembly for the early game stage where you want more than the hand drill but haven’t yet got the resources to build the industrial size mining vehicles.
The design presented here is meant to give you ideas and to show that planet based early mining needs a slightly different approach than when mining asteroids.
The basic concept of “The Rig” can be scaled up to get bigger and more efficient vehicles and you can build even this smallest model in different variations. Their structural idea is what defines their archetype: It’s basically a “drill shaft” moving up and down when drilling, and that has the capability to move horizontally to get to the mining spots and to carry the ore back to base.
I hope this presentation gave you some ideas. Have Fun Engineering!
Appendix: Bugs You May Encounter
Bugs That You May Encounter When Operating This Vehicle
Eternal Phantom Piston Force
There seems to currently (0.168.006) be a glitch in using pistons mid-air. Retracting pistons when flying may sometimes impart a small but lasting force in the opposite direction that continues to apply to your ship even when you have stopped moving the pistons. Addition: This may not be related to the pistons after all but to the connector. I occasionally encounter this after disconnecting from the connector of the base.
Workaround #1: This is actually helpful when mining as the force pushes you gently downwards so enjoy it while it lasts and just occasionally hit space to get higher. 🙂
Workaround #2: Exit to main menu saving your game and reload the saved game. The force has disappeared and you’re back to normal until you use the pistons again.