
Overview
Anyone and I mean Anyone can beat Legendary or any difficulty as a Greenskin. Easy ready step by step guide, with Screen shots of battles. We also focus on strategy with no auto resolve cheese, but its ok if you do. No judging here.
Updates
6/4 – Updated battles in Turn Section
6/5 – Added Overall Map Strategy, Fix a few errors in Turn section. Updated Units
If you enjoy this guide please check out my Dwarf Guide here:
[link]6/6 – Goblin Workshop and Goblin Tinkerer Bench, Dwarf Power
6/11 – Update turn walkthrough
6/23 – Patched fix demolish a Military Building and allowing to recruit the same turn.
Auto Resolve
I want to emphasize this guide is designed to not use auto resolve for high difficulties. The reason why is the AI does not give any bonuses to enemy armies when you auto resolve. Meaning you can prove this to yourself by playing on easy and auto resolve your first fight and then switching to legendary and doing the same. You will notice the same % win rates. So if you choose to play on legendary and auto resolve most of your fights you are really playing on normal. I am not against anyone using auto resolve to save time but you will almost always lose more casualties fighting the battles yourself then auto resolve. My hope is they will fix this in the future.
What this Guide will do for you
It will give you a smooth solid beginning of expansion, alliances, threats and being able to advance your armies in a way to not only expand but defend your borders. You must play a difficulty on either Legendary or a higher difficulty you can not beat for this guide to be effective to you. The reason why is the hardest part of playing warhammer on a high difficulty is not the late game but the early/mid game.
Early Setup and Turns 1 – 5
This guide can be use for the lower difficulties especially if you enjoy pausing on the battlefield. It is also explained for players who can’t finish the game on hard or lower difficulties. You don’t need to be the fastest clicker to win your battles.
I. Picking your Legendary Lord
Grimgor Ironhide is much easier to use then Azhag due to just fire him into the enemy and forget. For this guide I will assume you picked Grimgor because we are focusing on any skill level player can be legendary! However if you don’t mind a weaker start and/or have fast finger targeting pick Azhag.
Azhag key advantage is he he a decent fighter with spells. Never charge him in alone but he can fight on the front line with your other units. What makes Azhag special is Spirit Leech. This simple spell that you get at level 1 can weaken enemy heros so much that are basically taken out of the fight before they get going.
*Warning, the turn by turn is for Legendary Difficulty* Playing on other modes will have different outcomes such as gaining Waaagh faster, obedience bonuses and campagin AI but it will work but things might progress faster for you.
Turn 1
Look at the lord list and recruit an orc warboss with the trait you want. If you don’t see one, restart the game. Move your lord inside Black Crag.
Build Boss Tent. Yes Boss Tent. Obedience is your biggest enemy.
Move Grimgor south of the enemy army at the very SW corner of your territory. Recruit 3 Orc Boyz. The key is forcing the enemy to attack you because the battle is easier.
First Battle:
In this battle I only move the Orc Boar Boyz because you guess it, anyone can beat legendary!


Turn 2
After you end your turn 1 the enemy army will attack you. You don’t need the money and you are building fightiness so don’t ransom captives. Eat the captives….
You shuld have 10 units in Grimgor.
Train route marcher.
Go after the weak enemy army and finish it off. He will run but you will be in range to attack it again. Use your extra movement to move back into your sw corner of your territory where you ended your turn 1 if you can. If not then move as close as you can back to your territory.
There is a 2nd enemy army. Sometimes it roams out and sometime it stays in Iron Rock. Just ignore it for now.
Recruit 3 Orc Boyz on Grimgor if you are inside your borders and move your Lord toward Grimgor. If not then move your lord toward Grimgor and recruit 3 Orc Boyz.
Turn 3
Move Grimgor to the SW corner of your territory. Recruit 3 more Orc boyz. Transfer any units on your Lord to Grimgor.
Turn 4
Look for the last enemy army. It should be in Iron Rock. Grimgor has 16 units.
Attack Valaya and Encircle it. Move your Lord beside Valaya so he can help you with the fight. This will make this manual battle 10x easier. This will be your hardest manual fight. Screens below.
Be sure to have your army setup far enough away to bring your Lord to your army. I have 2 flankers, one Black Orcs and one Orc Boyz. They are on my strong side (left). I will be using them to flank around the left behind the enemy. I have 1 goblin (spear flag) that I will use to charge forward after the front line engages.


Once your army is setup slowly move forward. I suggest setting up hotkeys to easily pick units. With your catapult highlighted you will see the range. Once the range is close to the enemy front line, they will start moving forward toward you. Once they are in range of your catapult have it attack an archer unit or the Goblin Wolf Chariot unit as shown above. Your catapult will route that unit once the front line engages.
Look for the enemy lord, and make sure Grimgor and your lord is directly in front of him right behind your units. When they are halfway to you, start moving your cavalry unit out to the right. Once the enemy front line is in charge range, start with the left side and charge one by one your unit into a separate enemy unit. Then move your 2 flank units to the left. Have Grimgor and your Lord attack the enemy lord.
Now pick your cavalry unit and charge into the nearest archer unit. Part of your frontline on the right will start to blink. This is when you pick your goblin unit and charge there to support. Go back to your flank units and start circling around to attack from the side and behind. The enemy lord should start fleeing. Once this happens click on your cavalry unit and charge at the enemy lord. Grimgor and your lord should help your front line now. You will have units that flee so just bring them back into battle after they recover.
Retarget another range unit with your catapult and support it with your archers. In a minute or two you should win the battle, but don’t end it. Your cavalry unit is still beating up the enemy lord. Allow them time to kill it.
Turn 5
Transfer Black Orcs, the most damage Orc Boyz and Orc Boar Boyz to your Lord. Grimgor should have 16 units.
Move Grimgor to attack and Sack again Valaya. Do not make a mistake and click the enemy army. Always attack the settlement to force the enemy lord to assist. If you click on the enemy lord he will flee away. After you sack the settlement move Grimgor back to your south border. If the enemy lord runs finish it off with Grimgor.
Recruit 3 goblins on your lord.
Turn 6 – 8
Turn 6
Transfer units to your lord so it has 17 total units. Keep the catapult, orc boar boyz, black orcs, archers and one other unit with Grimgor. Grimgor has 6 units. Move Grimgor as close as you can to your NW border toward Iron Rock. Recruit 3 goblins with Grimgor.
Move your Lord toward Valaya. Sometimes you cant attack it. If you can you are 1 turn ahead. I will assume you can’t in this guide.
Turn 7
Move Grimgor toward Iron Rock. You shouldn’t be able to attack it this turn. If you can you are 1 turn ahead. I’ll assume you can’t in this guide.
Attack Valaya with your lord and Sack it. Move back to your border and merge your Orc Boyz one at a time until you have 14 units. Then recruit 3 goblins with your lord. Pick Route Marcher with your lord.
Turn 8
Look at your Lord. He should be ready for a Waaagh Army (80+ in Fightiness). You have 17 units on your Lord.
Attack Valaya and Raze it with your lord. You won’t be able to move your army afterwards.
Attack Iron Rock with Grimgor. It should be undefended and easy to occupy. Build a Musta Fieldz and upgrade your Greenskin Camp at Iron Rock if there is not one already. Demolish your Musta Fieldz in Black Crag.
Turn 9, The Turning Point

Bring up your diplomacy screen. Normally the Crooked Moon and Scabby Eye are friendly and just about everyone else isn’t. You want Crooked Moon to protect your south border while Scabby Eye protects your west. This means we are going to declare war on Bloody Spearz to secure our providence bonus.
You now have a Waaagh! Army and some big decisions to make.
Depending on your game your hope is you don’t have an dwarf army attacking Karak Eight Peaks as shown here. This is the hardest start on legendary. If you don’t have this problem you can move your lord north toward Iron Rock. Just skip ahead if you don’t have to save Karak Eight Peaks. After you end your turn your Waaagh! army will automatively attack the dwarf army. This should be an easy large battle for you. Let the Waaagh Units take most of the casulties.

Build Cave of Shrines at Black Crag.
Turn 10
Now you’re objective is to capture Karaz-a-Karak, The pillars of Grugni and Mount Squighorn. So you need to declare war on Bloody Spears when you get near.
Move your lord toward Iron Rock. Clear your Waaagh Target. Your Waaagh! army will follow you.
Turn 11 +, Time to Waaagh!
Turn 11
Build a Boss tent at Iron Rock. Move your Lord toward Iron Rock. Declare war on Bloody Spearz and order your Waaagh! to attack it. This is key to keep your Waaagh army from disbanding. You have to decide now to build 3 goblins at Iron Rock to help with Obedience if your upkeep isn’t to far negative.
Turn 12
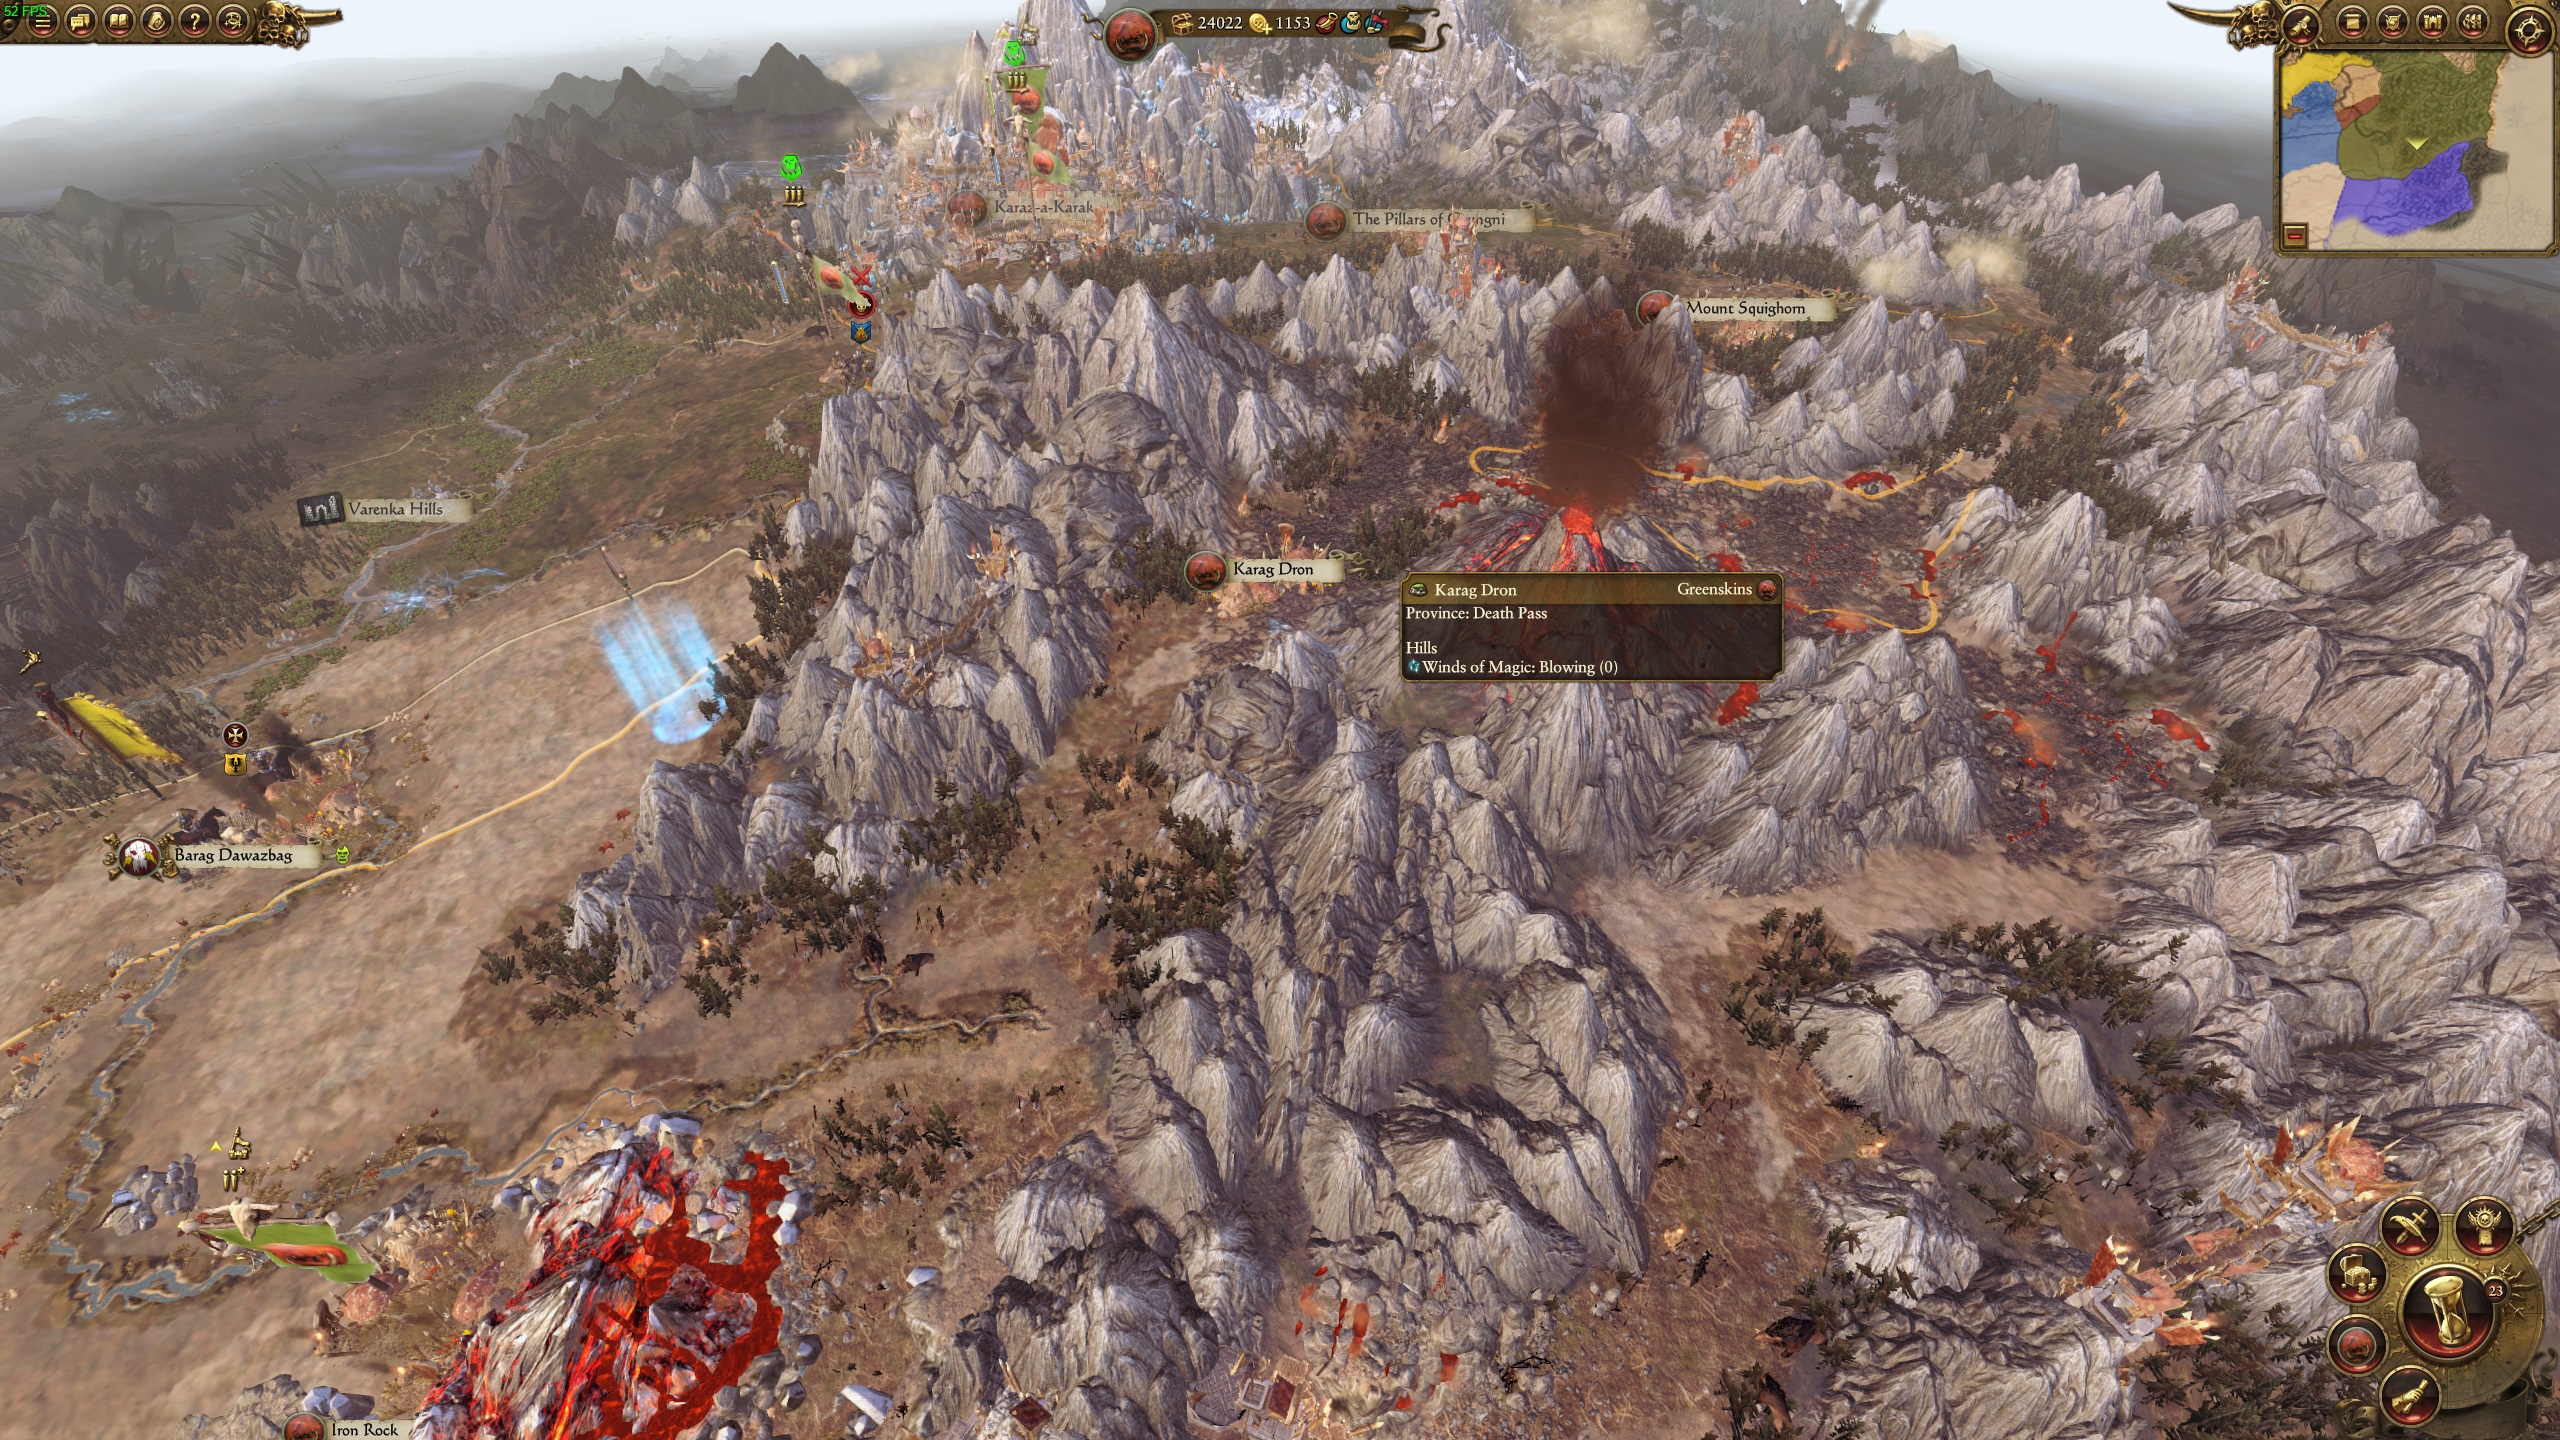
Move your Lord unit into Iron Rock. You an still control your Waaagh! from inside Iron Rock without moving. This will help with your obedience problem. Move Grimgor toward Karag Dron. Recruit 3 more units for Grimgor if funds permits. You will gain a lot of gold when you sack your next settlement.
Use your Waaagh! army to defend your SW if needed. If not command it to attack Pillars.
Turn 13
Attack Karag Dron with Grimgor and Sack it. This should be for a lot of gold. You can now see Kazaz a Karar. Retarget Kazaz or a Thorgrim army if your SW border is secure.
Your lord should be able to protect all of the south west area. You can tunnel to get inside Black Crag if needed from Iron Rock
Turn 14
Attack Karag Dron and take it. Upgrade the greenskin camp. You also want a idolz inside Karag Dron. If it is not one demolish the other building. Recruit 3 units in Grimgor.
Choose Camp Ruckus for your providence bonus.
Turn 15
If your SW border is still secure then continue ordering your Waaagh army to attack Karaz a Karar or a Thorgrim army. Your goal now is to either Sack Pillars of Gungni, or Mount Squighorn and wait for an opportunity to take Karaz a Karar. If SW border is not secure then order your Waaagh army to attack that enemy army.
You have a choice now to either build up a 17 unit army with Grimgor or tunnel towards Pillars to sack or attack Karaz a Karar. Either way you will gain another Waaagh! army and use Grimgor and the army to take over Kazaz providence in the upcoming turns.
Turn 16
This is a good time to look at your followers and items and shuffle them around. Continue whatever your choice was on turn 15.
Turn 17+
Build a Boss tent at Karag Dron. To many things could happen by now that I can only guide you on your next steps however your obedience should start to stabilize. You can now finally move Grimgor after the final boss tent is finished. You will still need to upgrade all the boss tents when you are able to.
If you are unable to attack Kaza a Karak because a dwarf army is to close than tunnel towards Mount Squighorn, sack then take it over. Be sure to built a Boss tent. You have tons of gold so be sure to recruit better units to your lord army even though it 2x the cost. Upkeep is your only concern. At some point your Waaagh! Army will die, or you will be able to get another one by attacking and sacking The Pillars of Grungni. When this happens you can finally make a push to take over Karaz a Karak. You will also want a watch tower at Mount Squighron to protect your NE flank.
Next turn upgrade your main city to level 3. You have a choice in building Wolf Den or Troll Cave. I would suggest Troll Cave especially if you are slow at clicking. Trolls are the best front line leave it alone afk early game unit. If you choose to pick the Wolf Den the cheap flanking speed will win you the battles. I’ll go more into troops in the next section.


Warhammer Map

Advantages to Exploit
Tunnels aka Teleport
I can not stress enough the advantage to ignore map terrain anytime you wish. I always train deft from below to level 3.
Waaagh! Armies
This broken mechanic is the bread and butter of Greenskins. Combine with tunnels you will be able to smooth sail beating the game with this faction. The basic concept is every time you win a fight, sack a city, etc you gain Fightiness (Green bar at the bottom left of your screen). Once it reaches 80 or more and you have a 17 + man army you gain a 20 unit AI army that follows you around. If your Fightiness goes below 80 for that Lord the army will disappear. A cooldown will trigger before you can gain another army. The main reason why this is broken is every Lord can have a free 20 unit army!
Cheap Strategy
Recruit a level 1 lord, build 17 cheap goblins. Using the map above you can plan a route to tunnel your army behind enemy lines and sack/raze settlements.
Example: tunnel under a mountain, sack city until you see an enemy army, tunnel back. Repeat.
This forces your enemy to retreat away from your front lines or you will build up enough Fightiness and gain a Free 20 man army. Even with your crappy goblins you can now take a settlement and hold it long enough while your main armies pushes inward. Worst case scenario is you get caught and this army dies, but do you really feel bad for goblins?
Overall Map Strategy
Crooked Moon: Your best ally and he is also your weakest. He may not even make it to turn 15. This means Karak Azul will only become a threat if Crooked Moon falls.
Red Fangs: You destroy their early game by using the turn 1 to 9 guide. You won’t hear much from them after you wipe out their first 2 armies and raze Valayas. Your hope is Crooked Moon resettles Valayas and claims it for its own. Try and get a peace treaty if it becomes an option.
Scabby Eye: Your 2nd ally. They should be able to hold their own early on. They will become a key in protecting your west border.
Thorgrim: He is your key enemy. You need to push north and even start a war with Bloody Spearz so you can secure your providence and take the capital of Thorgrim.
Bloody Spearz: They will be fighting with other dwarfs to their north and west. They will offer little problems for you and you can even get a peace treaty after you secure Kazaz providence.
Once you secure two providence of Kazaz and Black Crag you should be able to make peace with anyone to the north and now you can focus west and stop at the Empire/ Scabby Eye border. Than start marching south.
Units
Goblins vs Orc Boyz
This matchup is actually much closer than you think. Goblins are so cheap and low in upkeep that if you can’t afford a 20 man army use Goblins instead of Orz boyz. The only weakness of Goblins is they can not take a charge but since you will only be using them in the early game this shouldn’t be an issue.
Goblin Archer vs Orc Arrer Boyz
This matchup isn’t even close. Goblins Archer are far superior. They are cheaper, you get more of them, and don’t have the poor accuracy debuff.
Orc Arrer Boyz tries to be a hybrid melee/range but their melee defense of 12 which is less than Goblin Archers. So these guys are only good at a melee flank. Don’t build them, don’t use them, ignore them.
Goblin Wolf Riders Archer
These guys are so fast that nothing but gyros can catch them. Always have skirmish mode on. They are so mobile that you can always get behind the enemy army and shoot them in the back. A very useful unit..
Goblin Wolf Riders
Only use these early game. They die very easy to anything but archers unless the enemy unit is already fighting something else. Even if you charge into the back of 1 unit of dwarf fighters you will still lose. These guys are very good at cleanup once the battle is over.
Forest Goblin Spider Riders vs Orc Boar Boyz
Only use the Forest Goblin Spider Riders if you are just switching them out for Goblin Wolf Riders. They fill the same role of the Wolf riders but they are not real Calvary and still have the same weakness of dying to normal infantry units.
Orc Boar Boyz will smash infantry units from the side or back. Their armor pierce and charge bonus will make short work of infantry. Do not fight other heavy cavalry with this unit.
Forest Goblin Spider Rider Archers
Now these guys are needed in every army. You are fast enough to flank and pepper the enemy front line from the side. The reason why they are so powerful is the poison attack debuff. Even though they have good armor try to avoid using them to kill another archer unit that fires back. You actually have better result charging the enemy archer unit first and then finishing them off with range.
Goblin Wolf Chariot vs Orc Boar Chariot
Pretend you never click on these units.
Night Goblins
They were suppose to be design as your melee flankers. The problem is they gave them 15 armor. So they die to everything. They have 12 charge so their first attack from a flank is pretty goblin like. Don’t build these unless its early game and you using them instead of goblins.
Orc Big ‘Uns vs Trolls
Both are great units and you will need to use both in your early mid/mid game.. The setup will be an Big Un’s beside a Troll, beside a Big Un’s, beside a Troll and so on. The reason why you are doing this is to combat the weakness of Trolls leadership. You do not have a shield front line so always charge these units into the enemy front line. The main weakness is a dominating enemy archer force.
Orc Boar Boy Big ‘Uns
I’m not a big fan of these. They are ok. You lose a shield for a little more damage and bonus damage to other cavalry or larger units. The problem is you don’t want to fight other cavalry or larger units because general they still lose. If you have extra upkeep then get these to replace your Orc Boar Boyz but don’t be in a hurry.
Arachnarok Spider Vs Giant
Spiders all the way. Terror from giants in mid/late game is a non factor, while the superior armor and extra range poison debuff wrecks the enemy front line. Replace your trolls with spiders ASAP.
Black Orcs
Nice upgrade to your Orc Big ‘Uns. The upkeep gets expensive so replace them after spiders.
Goblin Rock Lobber vs Doom Diver Catapult
I have a newfound love for the Doom Driver Catapult. With a great deal of testing vs dwarf range units the increase pinpoint accuracy of Guided Projectile makes the Catapult King of killing any range units. One Catapult will damage 50%+ units health before they are even in range of your front line. If you are playing on legendary being able to right click attack, forget about them for a minute and then notice hey they routed the unit already is a very nice luxury.
Lords and Heroes
Heroes
One of the weakness of playing greenskins is you only have access to 2 heroes. Due to the obscene lack of obedience/chaos stabilizing options your heroes are key to mobile stabilization than buffing their combat stats.
Night Goblin Shaman
The safest way to train your Shaman is to repeatedly damage buildings in a nearby settlement.
Train 3 levels of Thumped by Gork, 1 level of Adept, than work your way into gaining 3 levels in Counsellor. Depending on your play style you can abuse damaging enemy armies if you finish leveling Adept, or you can finally start on combat spells.
Goblin Big Boss
You have a choice in either spamming block army or finding a settlement with a wall and repeatedly damaging its walls to level your Boss up.
Train 3 levels of Slapped by Mork, 1 level of Assassin, 3 levels of Propagandist, than finish 3 levels of Assassin. Use this hero to kill off other annoying heroes in your area. The rest of the leveling is up to you.
Once Chaos starts invading you will not be able to expand easily without using one of both heroes to help stabilize obedience.
Legendary Lords
Grimgor Ironhide
Three levels of Deff From Below, one in Ravager, than one in Lightning strike, three in Really Green and last three Mob Boss. He will be leading your main army so you will rarely use Waaagh! Path. Lightning strike will allow you to attack an enemy unit and give you the option to not allow reinforcements. Since Grimgor will be leading your main army you should always have the advantage on one on one army matchups. I know you hate me telling you to train Really Green but chaos corruption is so broken when they arrive. The rest of Grimgor training is up to you.
Azhag the Slaughterer
Get three levels in Deff from Below, Ravager, and one level in lightning strike. You are now level 8 and you should get The Crown of Sorcery. This will allow you to train Spirit Leech, Life-Leeching and one more spell. I like Doom of Darkness because you can force the enemy to route faster. As much as you want more spells I switch back to the bottom skill line.
In battle I spirit leech lords or any strong unit. It’s very powerful damage over time. Once the front lines engages, whatever side you feel you are stronger on, Doom the corner of the enemy unit front line. This will cause them to router sooner so you can flank that side faster.
Continue with one in Lightning strike, and 3 in Really Green. The rest of the leveling is up to you but since you pick Azhag you should focus finishing out his spell line. Being able to ride a Skullmuncha (You can FLY!) you can drop down some nasty aoe before the battle starts.
Lords
Goblin Great Shaman
These guys suck. The key problem with Shaman is he has no mana regen until you finish his spell tree. This means you will just cast 2 or 3 spells in battle and hide. He is so weak in battle that he would lose a fight vs a goblin unit.
Orc WarBoss
Lucky for us the WarBoss is not as crappy as the Shaman. Route Marcher but then get War Boar. You are a mean cavalry unit now. Don’t be shy and always flank the enemy front line and smash into it.
Three points in Deff From Below, one in Ravager, Lightning Strike, and three in Really Green. It’s your choice on how to finish leveling your WarBoss as long as you don’t forget to get your Wyvern.
Special Buildings
When planning your building build path its good to know nearby special providence buildings so you don’t waste money double building for the best units. Use the map above to find the locations.
Varenka Hills: Beast Lairz, -20% cost, +3 exp for Boar, Wolf and Spider Rider units.
Iron Rock: Black Orc Forge, -20% cost, +3 exp for Big ‘Uns, and Black Orc units.
Karag Dron: Goblin Sawmillz, -20% cost, +3 exp for Greenskin spear infantry, bow infantry and chariot units.
Karak Eight Peaks: Beast Lairz, -20% cost, +3 exp for Boar, Wolf and Spider Rider units.
Black Iron Mine: Black Orc Forge, -20% cost, +3 exp for Big ‘Uns, and Black Orc units.
Goblin Workshop and Goblin Tinkerer Bench
You won’t have access to start researching until your Goblin Tinkerer Bench is built at a level 3 or higher settlement. Getting started is very important and since you only need a Goblin Tinkerer Bench to research you have the option to build it away from your capital so you can focus on army unit buildings. This will give you a head start on researching at the cost of gold. Note in the tree that you will have to upgrade it at a capital type city to continue past Big Lever. Any research you have done will stay if you decide to demolish your Bench and rebuild it elsewhere.
For me I believe Arachnark Spiders are key to winning the early mid game. They are unstoppable vs any unit and you can get them early if you plan ahead. This requires a level 4 captial and the research complete in a Goblin Workshop, however most of the research can be done by building a Tinkerer Bench early on.
Dwarf Power
The hardest matchup for Greenskins are the dwarves especially since their units are far superior to yours early on. Without numbers or late game units you will always be at a disadvantage.
How to counter
Early on Using Orc Boyz or Goblins as your front line with Trolls units being behind them. This will give you enough time to circle your Orc Boar boyz to take out the enemy siege and archer units. You will need two Boars vs 1 range unit.
Try and avoid using any range unit unless it has poison attacks. The lack of armor piercing is devastating to your damage, but the posion debuff will buy assist your front line from routing.
It never made sense to me but Trolls are more of coward than a goblin so the general tactic is to engage them after the battle begins. Their armor piercing attacks are your main damage vs dwarf armor. They are also very fast and you should flank them if there are no enemy archers in range.
Your Lord always has to engage the enemy Lord. Make sure there is at least one Troll unit assisting with your Lord.
Legendary vs Other Difficulties
The section is designed to point out differences in Legendary vs other so you can alter the turn by turn section to maximise your early game gains.
Boss Tents: Check your obedience negative due to difficulty level. In Legendary it’s -8, however in VH it’s only -4. This means you build less Boss Tents and focus on gold generation earlier.
This chain reaction means you won’t need to demolish your Musta Fieldz at Black Crag and instead you can upgrade it sooner to gain better units.
Chaos is another large impact due to how soon it will arrive. This gives you more time to level up your Heroes/Lords and other buildings to counteract the Chaos corruption.
Rate the Guide
if you enjoy the guide please take moment and rate it! <3