
Overview
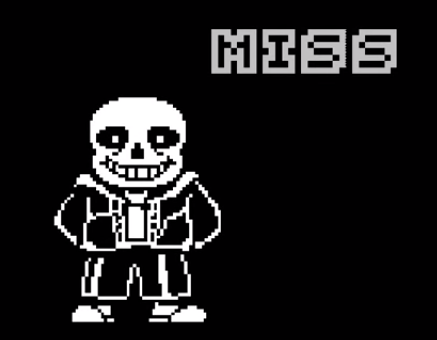
Having trouble with the Sans battle? Well if you are, this WIP guide is for you!
Introduction
Having a bad time? Let’s get into info you can use for the Sans battle at the end of the No Mercy run! And just to clarify, Spoiler Alert if you have not learned about this battle yet. So, without further ado, here we go, hope it helps!
Battle Mechanic Changes
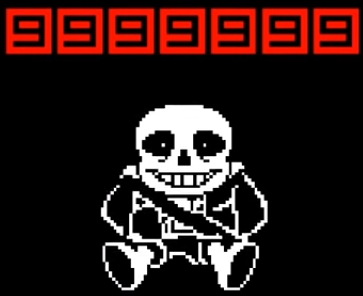
If you do take this dangerous path, your final *cough* REAL *cough* battle will be with none other than the skeleton comedian himself, Sans. If you have not already noticed, Sans’ battle changes many mechanics of the battle system, so it’s best to familiarise yourself with these so you can keep them in mind and be aware of them. So let’s get into them. Note: Also be aware that you have to attack to progress in the battle.
Dodging Attacks
Sans doesn’t just “Stand around and take it”, He may only have 1 defence point, which makes him a 1-hit KO, but unlike the other monsters of the underground, he dodges your attacks (until his last turn of course). So try as you will, but Sans will dodge each time, making it so you have to simply survive until you can land a hit on him.
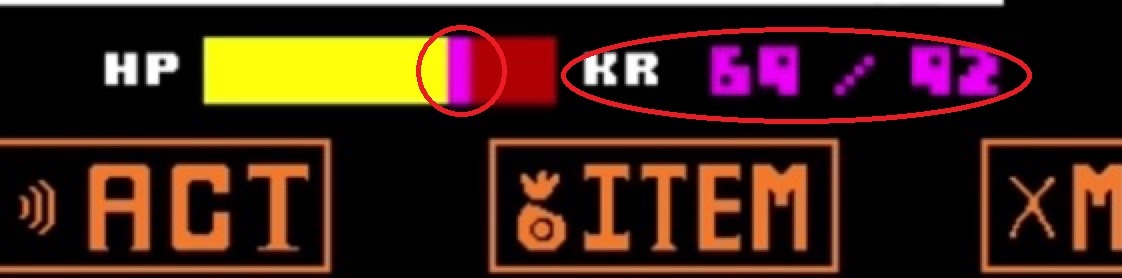
No Invincibility Frames (Rolling HP Bar)

Karma Retribution
Blinks (Time Skips)

Attacks Outside of His Turn
Extra Turns After Using Items, Missing Attacks, etc.
Gearing up
Now that you (hopefully) have the changed mechanics in your head, It’s time to gear up!
These are my recommendations:
Weapon
Burnt Pan’s the weapon to use. Yes, there are stronger weapons out there, but Sans only has 1 defence point, so really I believe any weapon will 1-hit him. The difference is that the burnt pan makes healing items heal 4 extra hp. It’s not much, but it’s something. This is just my recommendation, so you don’t have to use it, and you can survive without it, but remember, +4 hp.
Location: Hotland, northeast (kind of up and right) of Alphys’ lab
Armor
The Locket was my choice. I’m not sure if it makes a difference from other armor pieces due to the 0 Inv frames though.
Location: New Home, in Asriel and Chara’s room
EDIT: Empty Gun is most probably the better choice, because it gets through the attack the fastest, so the Karma Retribution is dealt with in the most efficient way.
Location: Bratty and Catty’s shop, in the right alley to MTT Resort (You steal it)
(Credit to PieBathBob for telling me the strategy in the comments, thanks)
Items
(The hp heals are without the burnt pan)
Snowman Piece(x3) – 45 hp each
Location: Snowy Forest, talk to the snowman 3 times
Instant Noodles – 90 hp (because they’re better dry.)
Location: Alphys’ lab, in the fridge
Butterscotch Pie – All hp
Location: Home (In the ruins), In your room, after you go to sleep it’ll be on the floor
Face Steak – 60 hp
Location: MTT Hotel restraunt
Legendary Hero – 40 hp
Location: MTT Hotel restraunt
Sea Tea – 10 hp (Increases speed which makes Sans’ Gaster blaster circle, his second to last damaging attack, alot easier, in my opinion. I highly recommend for first-timers.)
Location: Waterfall, Gerson’s shop
If you already used some of these, don’t freak out, you can still get the sea tea, and if you used any of the other ones, you can just replace them with Legendary Heroes (which you can also still get).
Welp, on to the next section!
Attack Order
Time to finally get into the actual battle!
Below I list the order of every attack for your convenience:
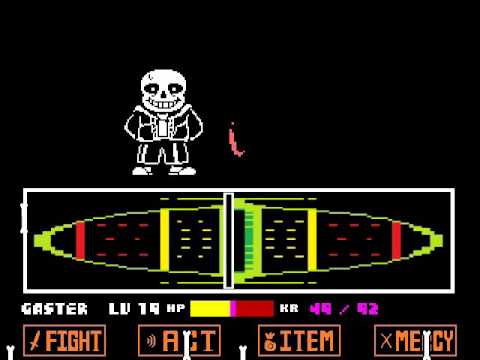
1. Bones up, squiggly line surrounded by bones, 4 Gaster blaster sequences
2. Bone jumps (Tall bones coming from the top, small ones from the bottom, both in sync)
3. Tall blue bone then short bone, x3 from the right, then x3 from the left
4. Bone jumps of different sizes
5. Platform jumps over bones
6. More platform jumps over bones
7. 3 layers of moving platforms with bones coming along too
8. Moving platform with moving bone jumps
9. 3 layers of moving platforms with Gaster blasters shooting horizontal
10. Moving platform with harder moving bone jumps
11. Bone jumps, like 2
12. Tall bones from the top going left, short bones from the bottom going right (No spaces in between)
13. Bone jumps of different sizes, like 4
14. Sans “spares” you, chance to use healing items, if you spare him he betray kills you (The attack isn’t escapable), and you get a “Game Over” screen where Sans says “geeettttttt dunked on!!! if we’re really friends… you won’t come back.” while dogsong plays, if you attack, the battle progresses.
15. Like I talked about, this is one of those Blink attacks, so if you pressed the fight button, be prepared for constantly changing attacks!
16. Gaster blasters (skinny) aiming for and shooting at you
17. Another Blink attack like 15, once again, prepare!
18. Sans forces you to a side of the box (multiple times), changing your gravity and kind of controls, than he rises bones out of that same wall, so for example, if he forces to the right, you press left to jump left before he hits you, so basically you just need to press the opposite arrow to which direction he forces you to. (Or you can hold down all the arrows, that works too)
19. Same as 18, a bit harder
20. Gaster blasters (normal size) aiming for and shooting at you
21. Horizontal bones going up on one side and down on another side with no space in the middle (The bones have vertical spaces between them though of course). I recommend a circular motion to avoid them.
22. Another Blink attack like 15 and 17, prepare (again)!
23. Same as 18 and 19, but even harder! (Don’t die now! He’s soon to use his “special attack” and his next turn will be the last, so if you need to, heal up, and use that sea tea if you haven’t yet! You’re almost done!)
*His FINAL turn and handful of attacks comes next! Sea tea and high hp recommended! It’s time!
24. Starts with force-to-wal-then-bones, Horizontal bones going up one side down on the other, Sans sends you falling to the left, obstacle bones, force up-bones when you hit the bottom, (hold left for that) then a blink attack where there are only force up-bones (I think you automatically start with the changed gravity), be aware that some of them come up from MULTIPLE SIDES, so you have to press 2 arrows to avoid them, after the final blink you’ll have to jump a single set of force up-bones, then (this is where the sea tea is a big help) Gaster blasters circle around you, forcing you to go in a similar circular movement. Sans Slams you against the walls rapidly (This is unavoidable), but it can’t bring you below 1 hp (you can’t die from it). Sans is extremely tired. Time for his special attack…
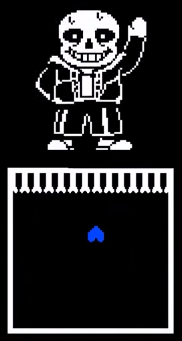
25. His special attack (in the same turn as the last attack by the way) is… Nothing! So you run through a bit of dialogue, so really all you have to do is wait. Eventually after the talking, Sans will fall asleep (You’ll know when he does because “ZZZ”s come out of him). Press against the left side of the box. You will be able to push it. When you are all the way to the left, push it down, to the fight box. Press Z on the fight box, then… you miss. “heh, didja really think you’d be able-” … b u t y o u h i t a g a i n : ] . Sans is one hit KO’d. You go through some dialogue (like “don’t say I didn’t warn you”), and you hear him turn to dust when he walks off the screen. You level up to LV 20. Congrats! You beat Sans! Great job, now don’t let me hold you back, your ending awaits!
Sans’ Dialogue
There can be different variations of things Sans says, but here’s a link to a page of the Undertale wiki. It lists out all the dialogue in the battle: [link]
Videos of the Battle (To be completed)
These are videos of me fighting Sans. I find studying the moves very helpful, and it might help you guys a bit more if I put some visuals of the battle. So here they are! (Now I’m not any No-hitter, but I hope that it helps) 🙂
No Commentary Battle
Thank you all
Ok, so I go on Steam and I look at the guide list to see that my guide is actually easily findable. It may just be because I created it, but I also saw that this guide has reached nearly 500 unique views already! Seriously, I made this on the 20th I believe, and now it’s probably gonna get 500 by tomorrow, and I don’t even think I’m done with the guide yet! 100 views per day is AMAZING, especially since this is my first guide and I wasn’t really popularly known for anything Undertale related like this, so I’d like to thank every one of you for taking the time out of your day to check out my guide and give it a chance. I did want this guide to be noticed, but I don’t think I was expecting it to happen this fast! So thank you all for checking and following the production of my guide. I will possibly make edits and add more sections in the future, but now, as I said, thank you all.
Edit: I literally continuously reloaded the page for this moment! We’ve hit the 500 views! Thank you all so much! I have decided to put a milestone list in this same section to keep track of every major milestone this guide makes, and at this pace there will soon be more than just a “500 views” in there 😉
Milestones
500 views already! Amazing!
1,000 views! Thank you all for clicking on to this guide! (Sorry I’m late the computer I had steam installed on isn’t currently turning on properly)
This guide is now on the top of the 3rd (out of 8) page of the Top Rated of All Time section! Seeing how the guide is relatively still new, that’s cool! Edit: 2nd page now :D!
4 Stars is definitely not bad! Thank you so much for liking the guide, I don’t think I’ve gotten any hardcore hate about the guide, so thanks for liking it guys!
Top of the Most Popular section?! Now this might just be because I’m the author of it, once again, but I’m not sure if that’s true or not. But wow! True or not, thank you guys for getting this guide where it is! None of this would be possible without you all!
1,500 views! Woah! Thanks for so many views so fast guys!
2,000 unique views! Heheh, I should be inactive more! Just kidding, thanks guys!
2,500 views! You guys are awesome!
3,000 views! Literally I don’t even know what to say, thanks guys 🙂
3,500 views AND 50 favorites? Wow, I made this guide quite a bit ago and it’s still growing, thanks so much guys 😉
4,000 views and 75 favorites! Thanks to every single one of you for taking a look at my guide! 😀