
Overview
This guide will hopefully help people who don’t know how to install Black Mesa & Improved HL1 Xen Mod Support
Getting the InstallSourceMods script
Download InstallSourceMods.bat from here:
[link]
Right click on “Raw” on the right side and click “Save Linked Content”:

Installing Black Mesa & Improved HL1 Xen
Double click the script where ever you installed it to.
You should get a screen like this:
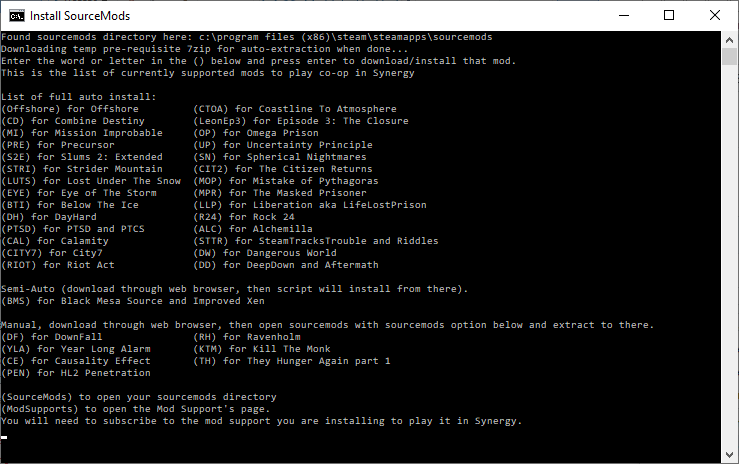
bms
and press enter.
You will get a screen like this:

If everything went well, it should start installing Black Mesa.
If you get the message:
“Something went wrong with the download, possibly an interrupted connection while downloading.
Or the file was downloaded with a different name or in a different directory.
Press any key to restart script…”
and you know that it is downloaded, try moving the download to your downloads directory, or to where the script is being run.
You can also try one of the other download options.
Download Black Mesa and Improved Xen from one of the other options.
If you are able to open the archive, you can enter:
sourcemods
at the first prompt of the script and it will open your sourcemods directory where you can extract Black Mesa manually if you need to.
Just make sure that when it is extracted that the name of the directory is “BMS” or it might not be detected by Synergy.
For extracting Xen, you only need to extract the directory “xen” from the archive and leave the rest.
You will also need the scripts fix to run it in Synergy It is automatically installed through the InstallSourceMods.bat script, if you already have Black Mesa installed, you can run the prompt again and it will ask if you want to apply the scripts fix.
If you want to do it manually, you can get it from here:
[link]
Download that, then rename the scripts directory sourcemodsBMSscripts to something else like scriptsbak, then extract bmscripts.zip to sourcemodsBMSscripts in its place.
Getting the support files
If you are using InstallSourcemods.bat script, the support files will automatically install. So you can skip this section.
If you want to do it manually:
Subscribe to the Workshop Addon:
[link]
Once it has finished downloading, make sure you follow the instructions to get it to be used in Synergy.
Just subscribing will not work!
To find where your workshop directory is. Right click on Synergy on Steam and select Properties:
and Browse Local Files:


and you should see a bunch of directories with numbers for names. These are Workshop ID’s.
You need to right click 1817140991 and click “Copy”

Then right click in the blank space of the folder and click Paste


Installing the server
You will need to forward the port 27015 TCP/UDP in order to host a server.
Get the Syndsinstall27015.bat script from here:
[link]
Download it the same as the InstallSourceMods.bat script, by right clicking “Raw”
Save as ending in .bat so Syndsinstall27015.bat then move the script to where you want the server to be installed and run it by double clicking it. You should get a screen like this:

If you don’t have SteamCMD, enter:
s
and it will download/install to where you are running the script.

i
To perform the first install. Then press enter again to select the regular branch.
Now enter your username which will be passed to SteamCMD.
If you already have Synergy installed on your system, it will now take a few moments to copy over some static larger files so you don’t have to download as much again for the server. It will then download the SteamCMD updates to current version. It may take a few minutes.
Once it has finished updating, you will get this screen:

It should give a “Logged in OK” message and it will start downloading the Synergy dedicated server.
If any errors occur, you will need to restart the script and make sure you have the right username/password entered.
If it is installed you will get the prompt to edit your server config prompt:


Then press enter again to select regular and you should see this:

ssr SynSaveRestore
hd HealthDisplay
synsweps Synergy Scripted Weapons
syndev SynFixes Dev
Once all those are installed, you can then go back to start with B
At this point, you need to install the workshop addon, you can do this in the imsp prompt:

Now you should have all the support files/plugins you need to run a Black Mesa in Synergy server.
Just enter R at the start prompt and enter to select regular branch, and you should be able to use:
changelevel bms bm_c0a0a
in the server console to change to Black Mesa.