
Overview
This Guide focuses on workflow, setup and implementation for Blend Layers within CryEngine 3 EaaS. This Guide assumes you have a basic understanding of asset creation, Shader setup, UV mapping and texture creation for assets specific to the standards of within the Games Industry as well as basic knowledge and navigation within Maya and CryEngine
Part 1: Overview & CGFX Shader Preparation
What is a Blend Layer?
A blend layer allows the mixture of a second texture set. In conjunction with a vertex alphas applied to the mesh and a bending map in the material it can allow the artist unlimited non-repetitive detail which is key when trying to hide noticeable tiling as well as adding details such as dirt, wear tear, paint, moss etc.
Why should I use one?
If you’re working on large areas that need to make use of a tiling texture any small differences in the texture can begin to stand out as tiling occurs. A blend layer will eliminate most if not all of those tiling issues, however blend layers are not just for hiding tiling issues they also help add variation and detail to the texture surface which is almost always recommended if it cannot be done through a single texture.
All Information related to Blend Layers can be found here:
CryEngine Documentation[docs.cryengine.com]
Setting up the CGFX Shader:
- You’ll need to download the CGFX Shader Here[www.cryengine.com]
Then place it somewhere on your PC you’ll remember and is easy to navigate to for later use - Open Maya and navigate to the Plugin Manager under
Window -> Settings/Preferences -> Plug-in Manager and tick both Loaded and Auto Load for cgfxshader.mll
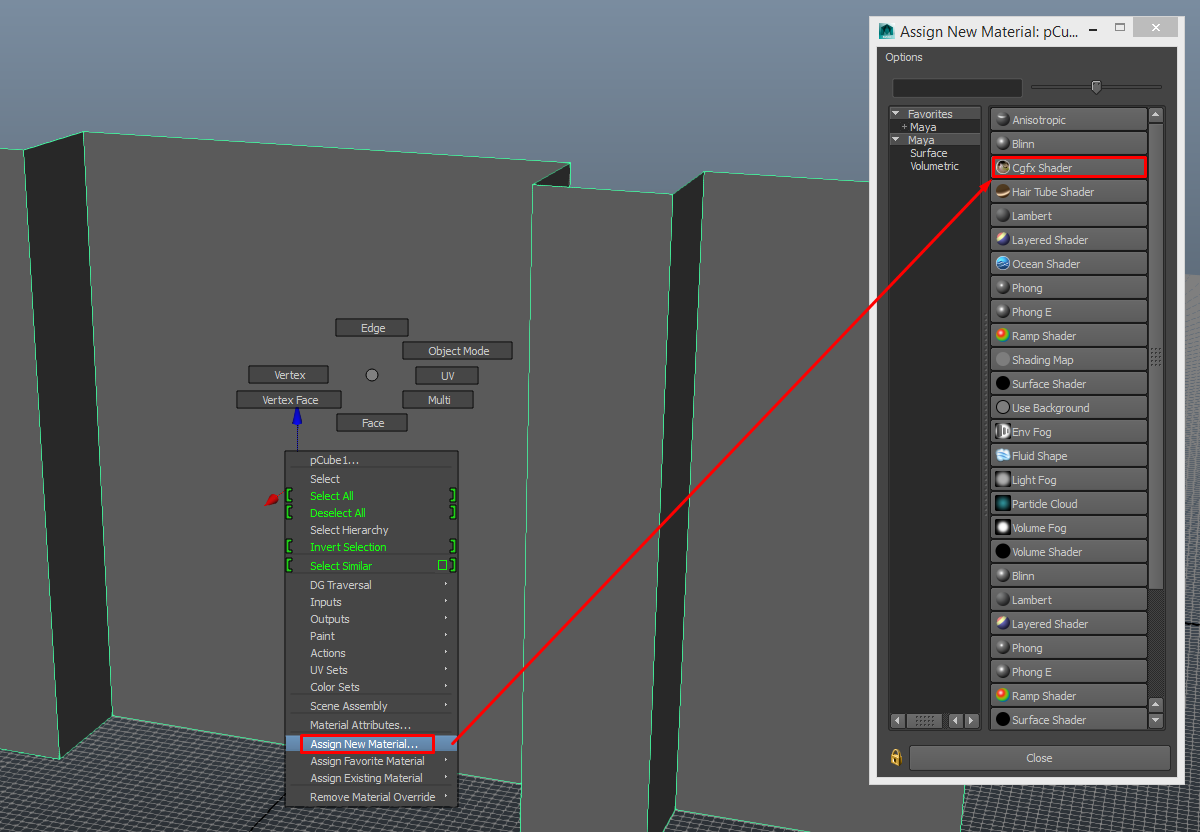
- Now we need to apply the CGFX Shader to the model, right click, hold on the model and go to Assign New Material… Select Cgfx Shader from the new window popup.
Your model should appear pinkish now with the shader applied
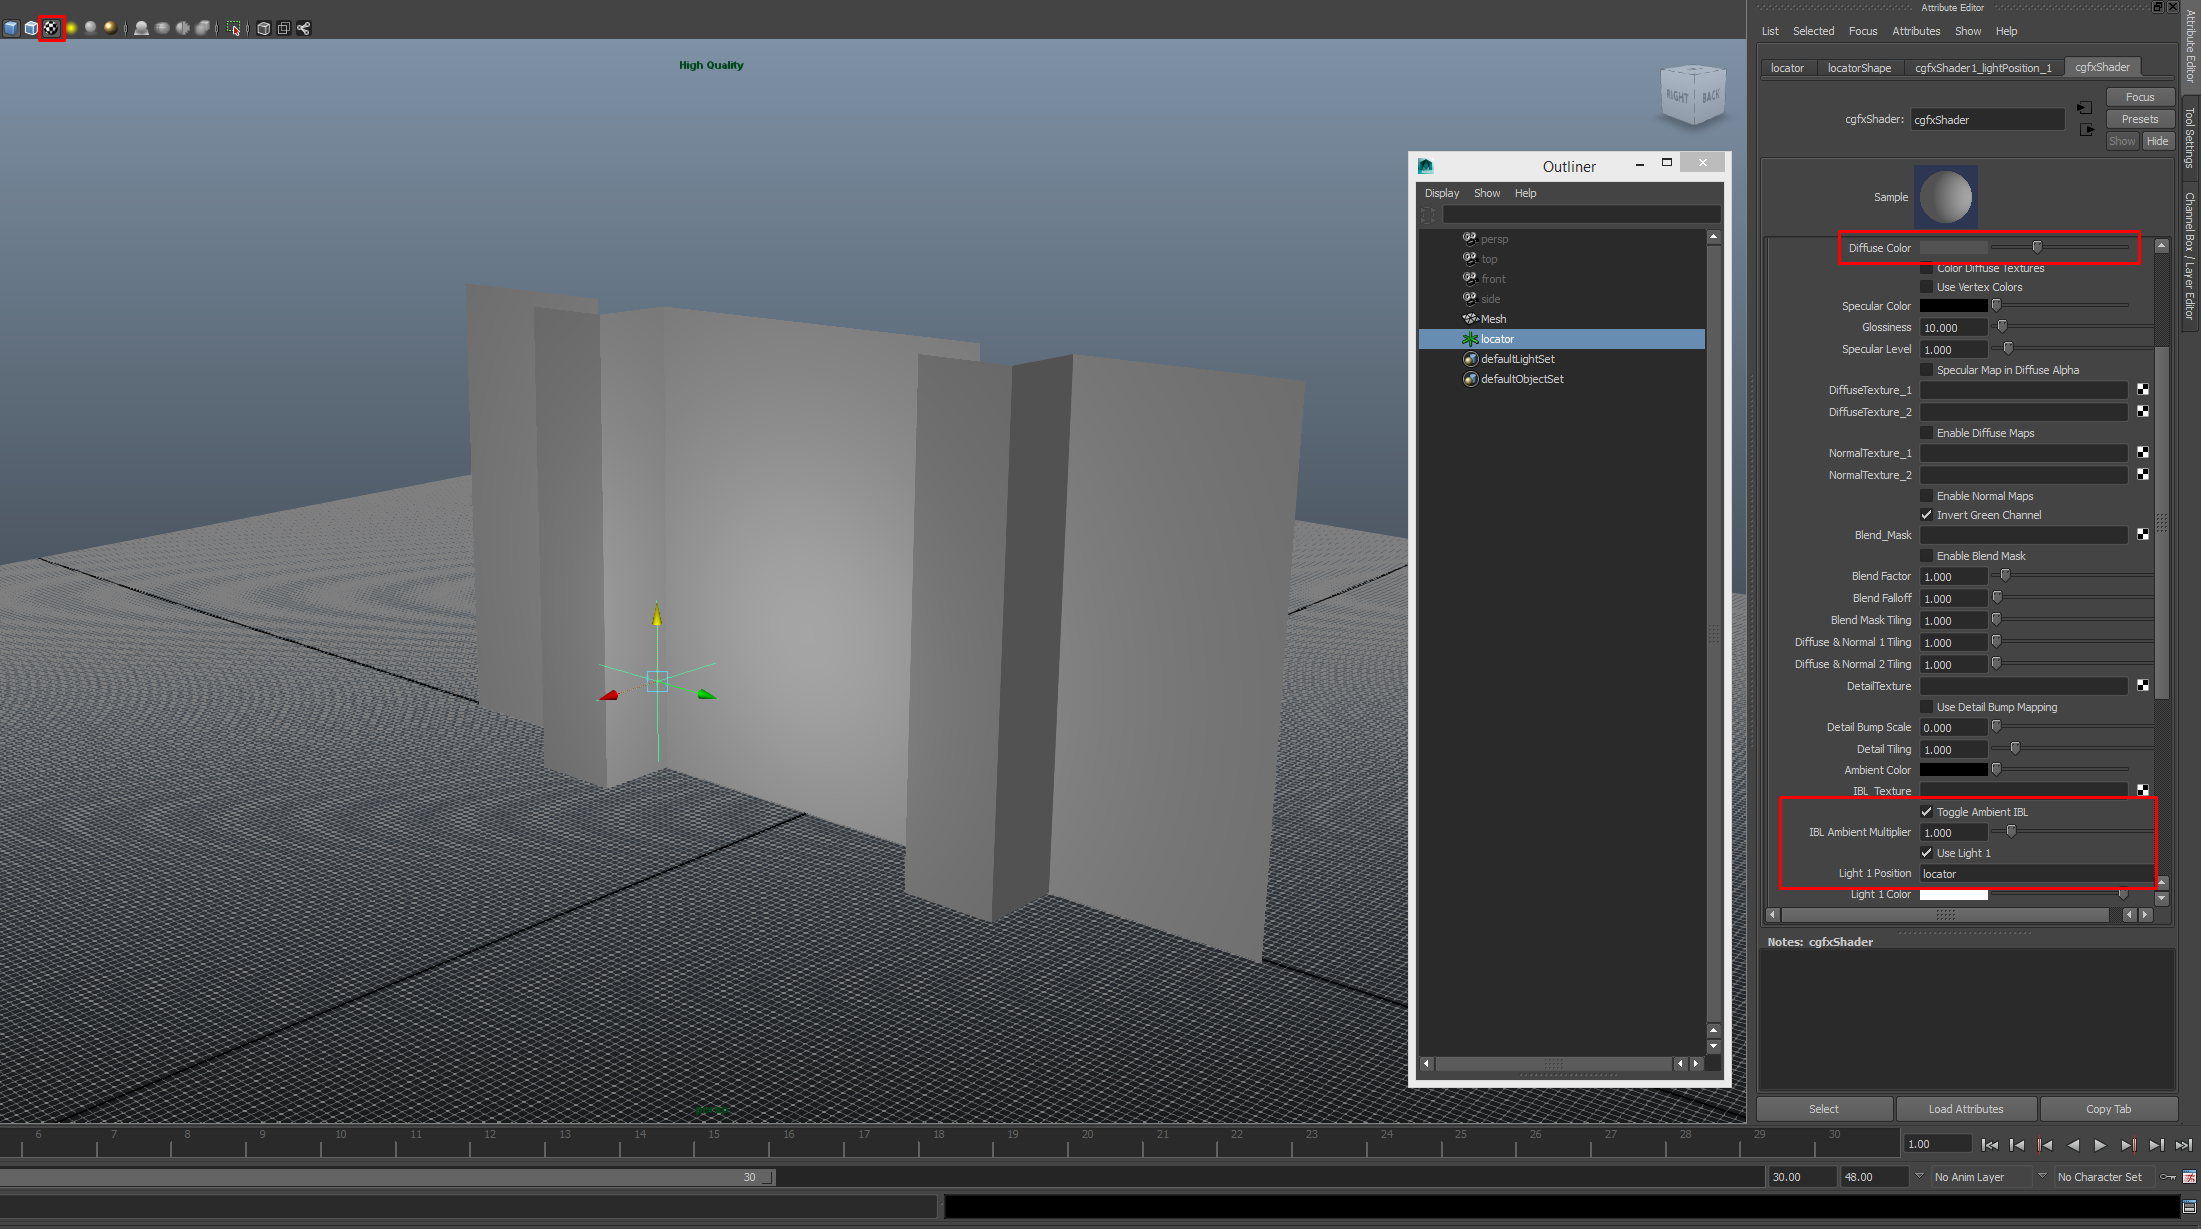
NOTE: Remember to delete your mesh History regularly and make sure you have Textured enabled (shortcut is 6 on keyboard) - Navigate to the shader in the Attributes Editor (You can get to this by right clicking on the model and selecting Material Attributes if you’re not already there) then click the folder icon to open the browser. Browse to the file you downloaded, I left it as the original name and put it in my documents folder for easy navigation, then select it.
- To see our shader we want to create a locator and attach it to our IBL Lighting. To do this go to Create -> Locator. Name it how you like then copy paste the name into Light 1 Position in the cgfx Shader. Now tick Toggle Ambient IBL and Use Light 1 and adjust up your Diffuse Color a bit to suit your liking

All Information related to the Maya CGFX Shader can be found here:
Maya CGFX Blending Shader[www.cryengine.com]
Part 2: CGFX Shader & Alpha Blending Setup
Now that our Shader is ready to go we need our 2 textures we want to blend together, typically this is a base texture and something you want to blend with it.
For the purposes of this guide we are using Brick and Paint.

- Connecting your diffuse textures: to the DiffuseTexture_1 and DiffuseTexture_2 slots and tick Enable Diffuse Maps.
It will automatically show the 2nd texture (your blend texture) as your Alpha mask will be set to black by default. - Setup New Color Set: To do so go to Color -> Color Set Editor -> New
Make sure its set to RGBA as we need the Alpha for the Blending. Go to your CGFX Shader, right click vertcol and select color:colorset
- Mesh Setup: Now we need to setup our model to be ready for Alpha Blending. This is simple just add a few edge loops evenly across the model but add to many as your polycount can get out of control quickly. Just remember that each point (vertices) is where you paint so you need enough for the painting to work well.
- Painting: For this we use the Vertex Color Tool, to open this go to Color -> Paint Vertex Color Tool. You can open the Tool settings by double clicking the Icon on the left if it didn’t already. Adjust your brush size and adjust your Alpha Value.
0, 1 = Complete White/ Black will allow you to add or remove hard values
0.5 = grey so painting between this value will allow you to add or remove softly


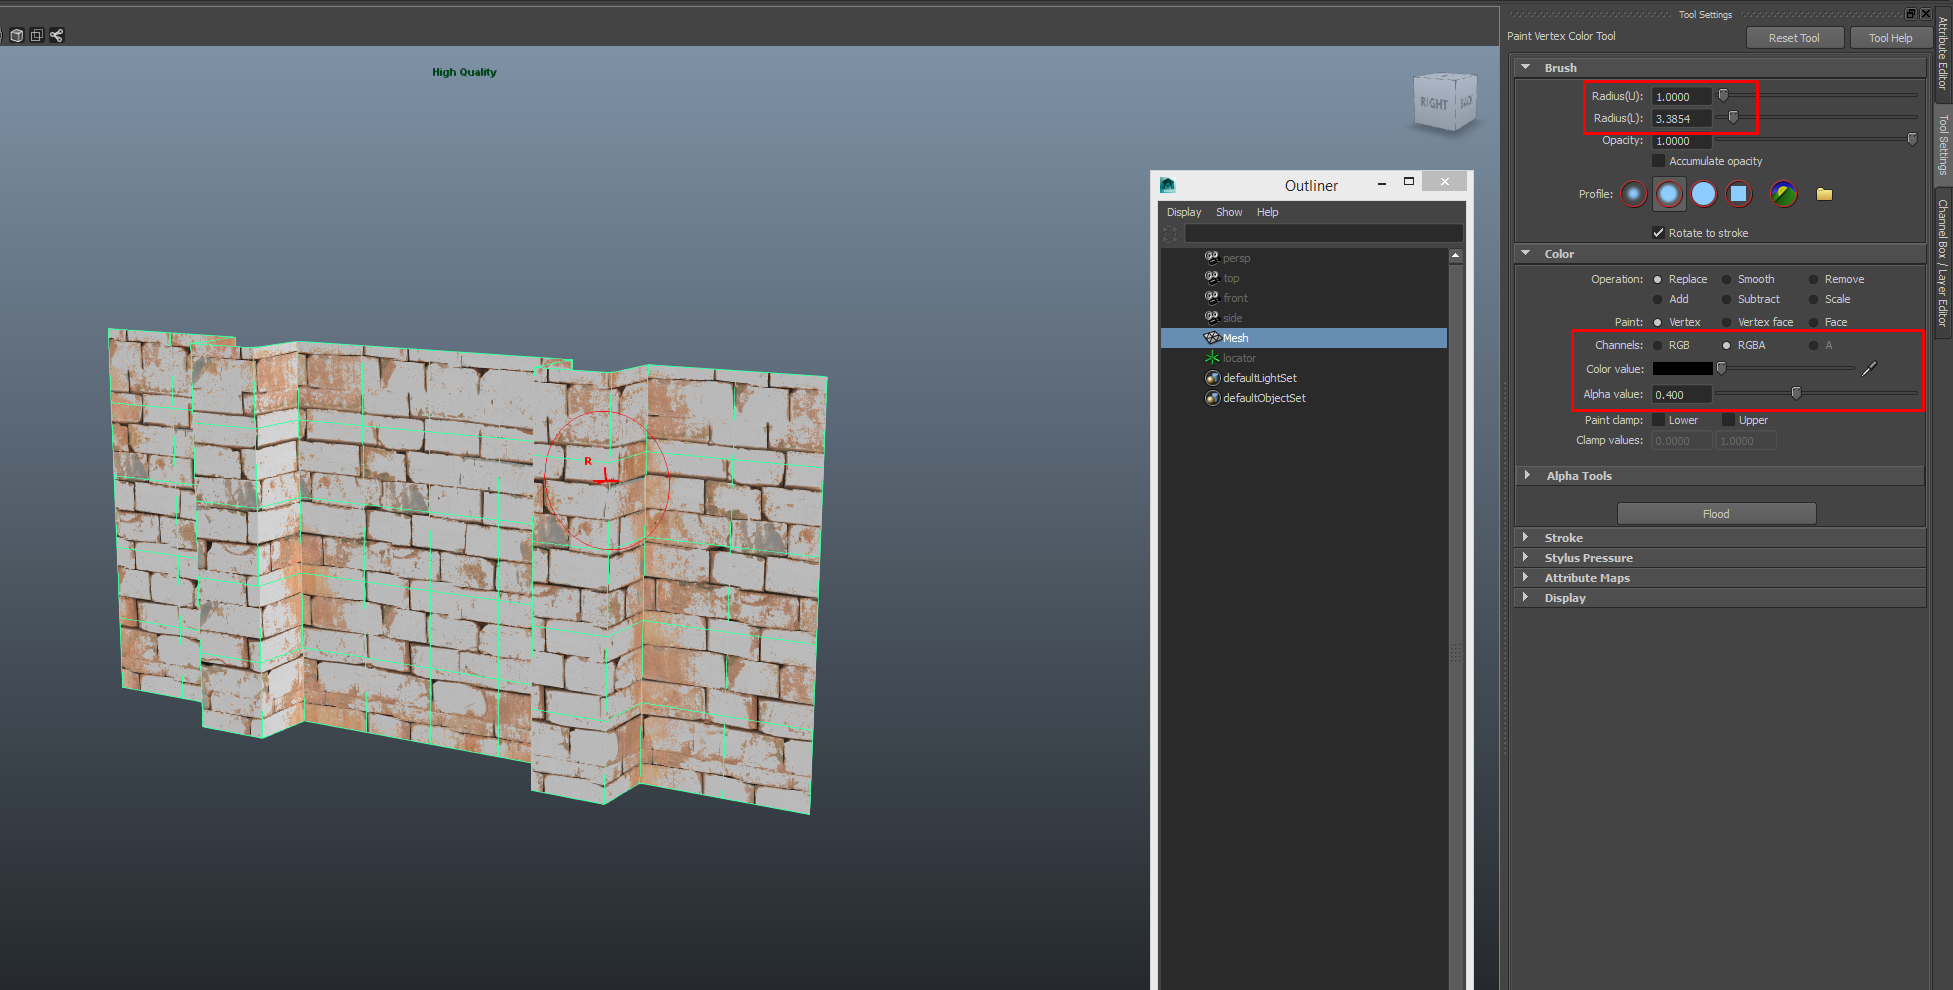
Now if you apply a standard phong mat you’ll be able to see the vertex blend in effect, now export to CryEngine like normal

Part 3: CryEngine Setup
Once you’ve exported your mesh you’ll also need to copy both of your textures over as well as all the typical ones like ddna and spec. I used my diffuse as a blend map when I setup the Alpha blend in Maya so I used the same in CryEngine. It’s also fine to create your own blend map which should look similar to a height map since they act effectively the same and only use Black through White values.
- BlendLayer: First find your material, expand Shader Generation Params and enable Blendlayer
- Textures Explained: I’ll touch over the different textures I used and why
Diffuse: Brick diffuse
Specular: Typical Brick Specular Map
Bump Map: Typical Brick ddna Map
Blending Map: I used the Brick diffuse for this since it had the correct levels I needed for this type of surface
Second Diffuse: Paint Diffuse
Second Bump Map: For best results you can use your first ddna map as it will make the blend layer follow the depth of the surface which in this case we want
- Blend Factor: This adjusts how much your blend layer covers the mesh and the Blend Falloff adjusts the hardness or softness of the affected area allowing for a diverse amount of differing effects.
If all goes to plan then your Asset should look something like this
I hope you found this guide helpful and good luck!
– Carl, Artist@Miscreated


